Welcome to this comprehensive guide on how to use Microsoft PowerPoint effectively, brought to you by Kevin Stratvert. Whether you’re preparing for a business meeting, teaching a class, or presentation-service-maximizing-impact” target=”_blank”>sharing your ideas with the world, PowerPoint is an essential tool that enables you to create professional, engaging, and visually appealing presentations. In this tutorial, we’ll walk through everything from getting started with PowerPoint, creating slides, applying themes, adding animations, to sharing and presenting like a pro.
By the end of this article, you’ll have a solid understanding of how to navigate PowerPoint’s interface, utilize its powerful features, and craft presentations that captivate your audience and clearly convey your message. Let’s dive in!
Table of Contents
- Getting Started with Microsoft PowerPoint
- Saving Your Presentation: Start Smart
- Creating and Organizing Slides
- Enhancing Your Presentation Design
- Adding and Formatting Content
- Animating Your Presentation
- Inserting Charts and Shapes
- Speaker Notes and Collaboration Features
- Presenting and Recording Your Slide Show
- Conclusion: PowerPoint as Your Presentation Partner
- Frequently Asked Questions (FAQ)
Getting Started with Microsoft PowerPoint
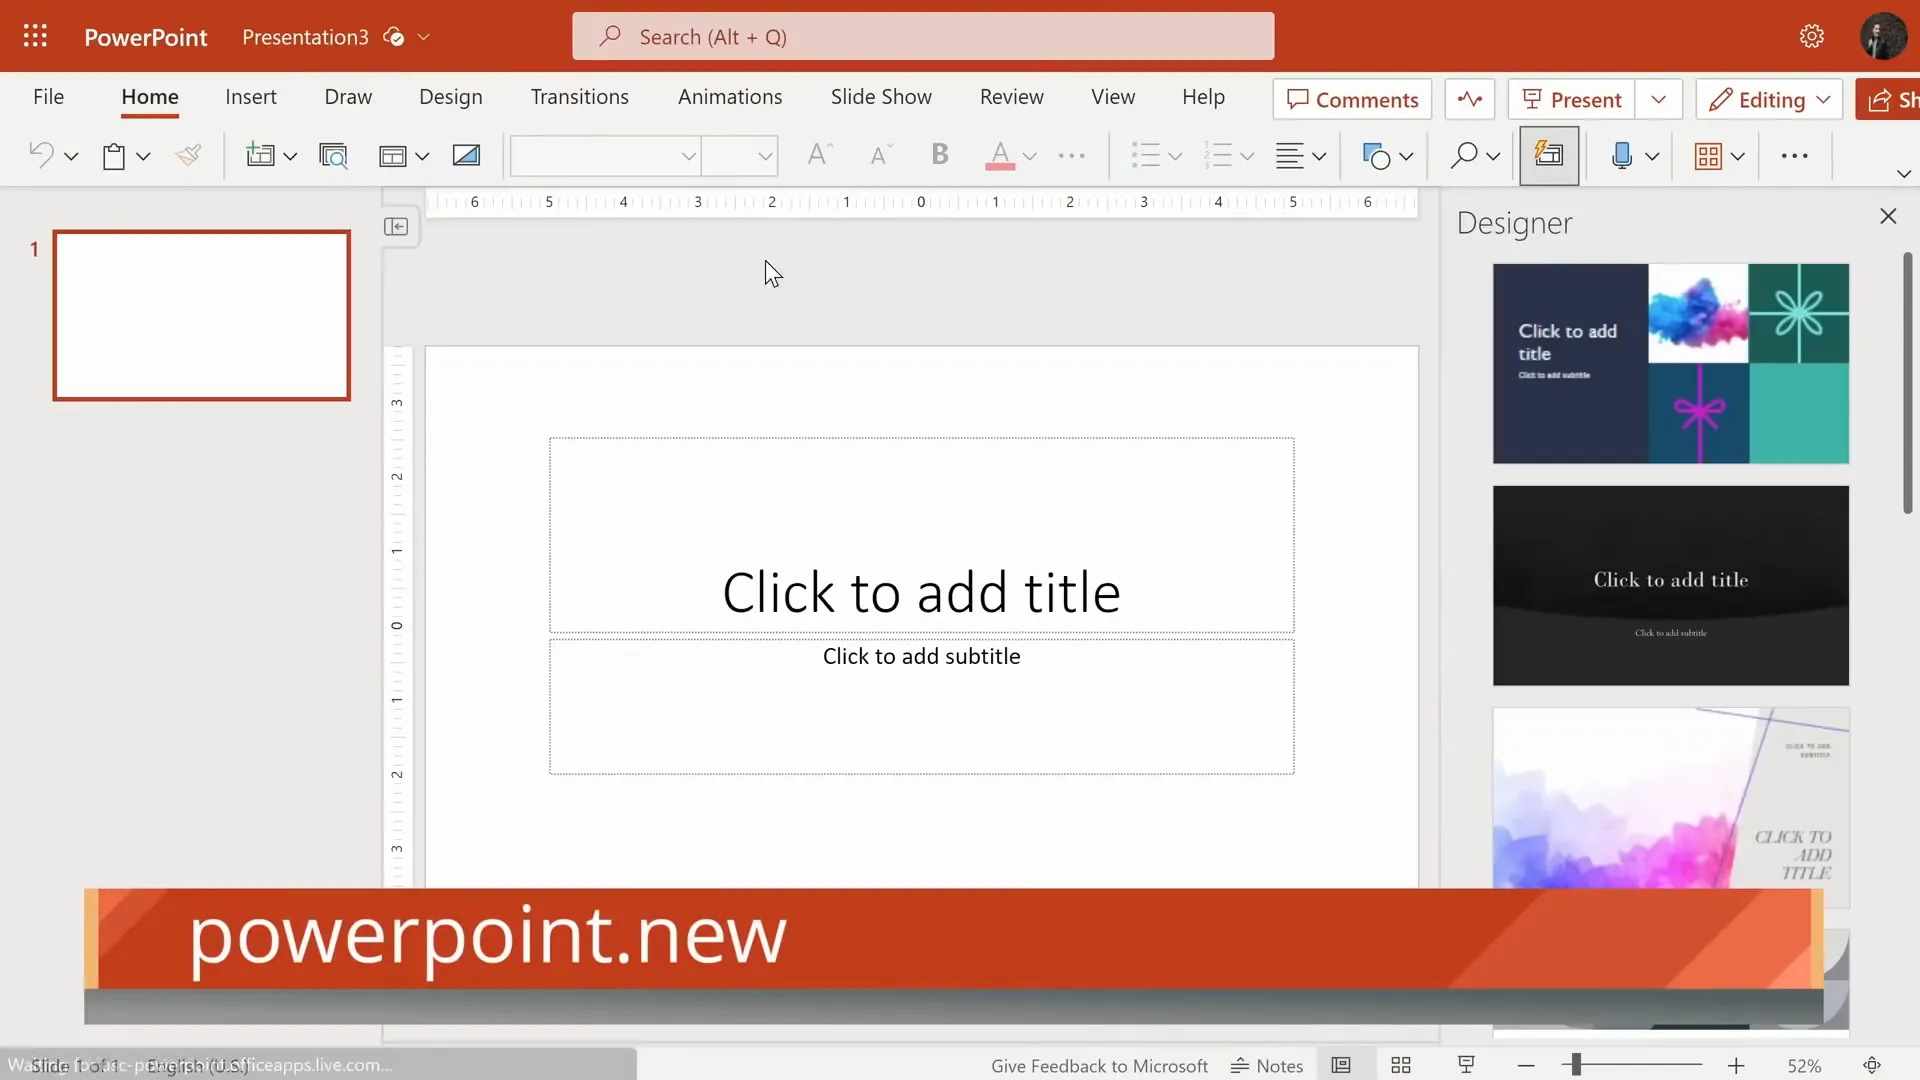
If you’re new to PowerPoint, the first step is to acquire the software. Fortunately, Microsoft offers a free web version of PowerPoint that you can use directly in your browser without any installation. Simply go to PowerPoint.New, and you’ll be dropped into a blank presentation, ready to start creating.
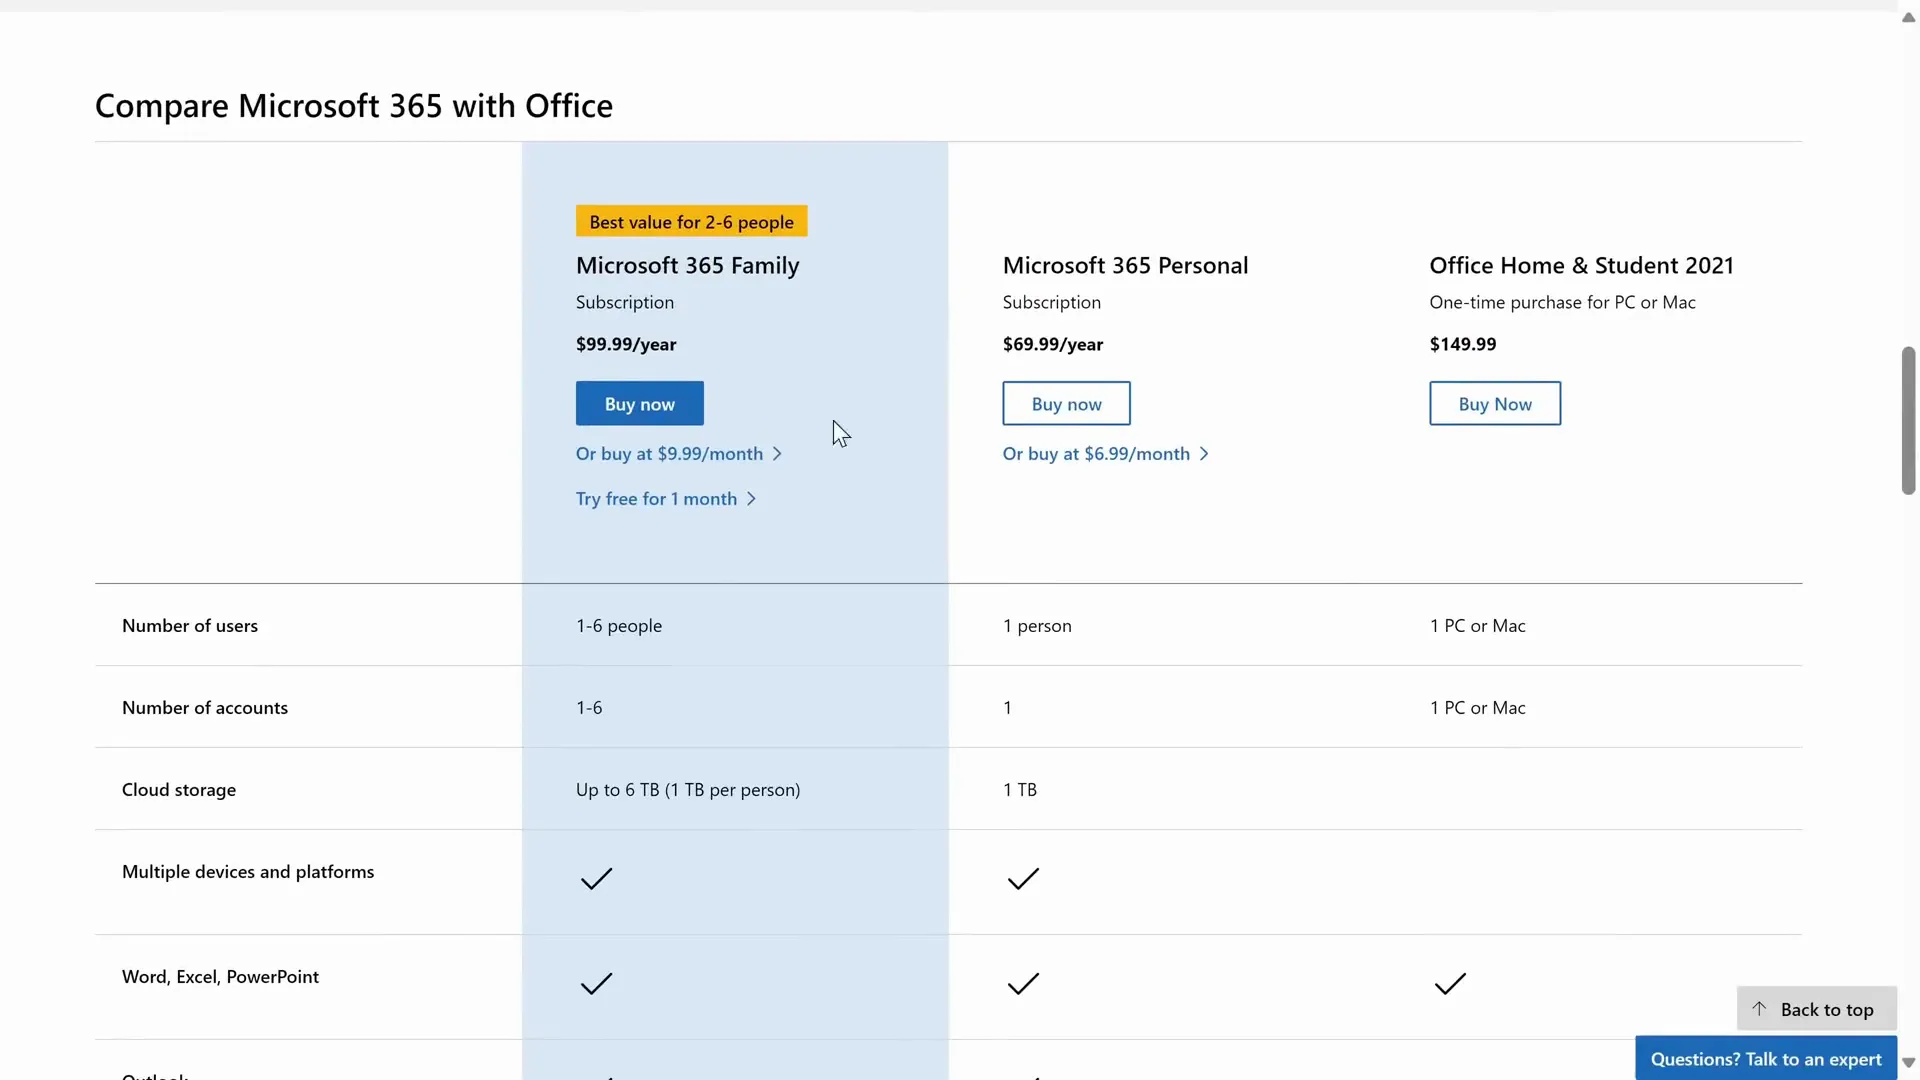
For those who prefer using the desktop app with more advanced features, you can visit the official Microsoft 365 website to get the full PowerPoint application. On this page, you’ll find various subscription options that include PowerPoint along with other Office apps.
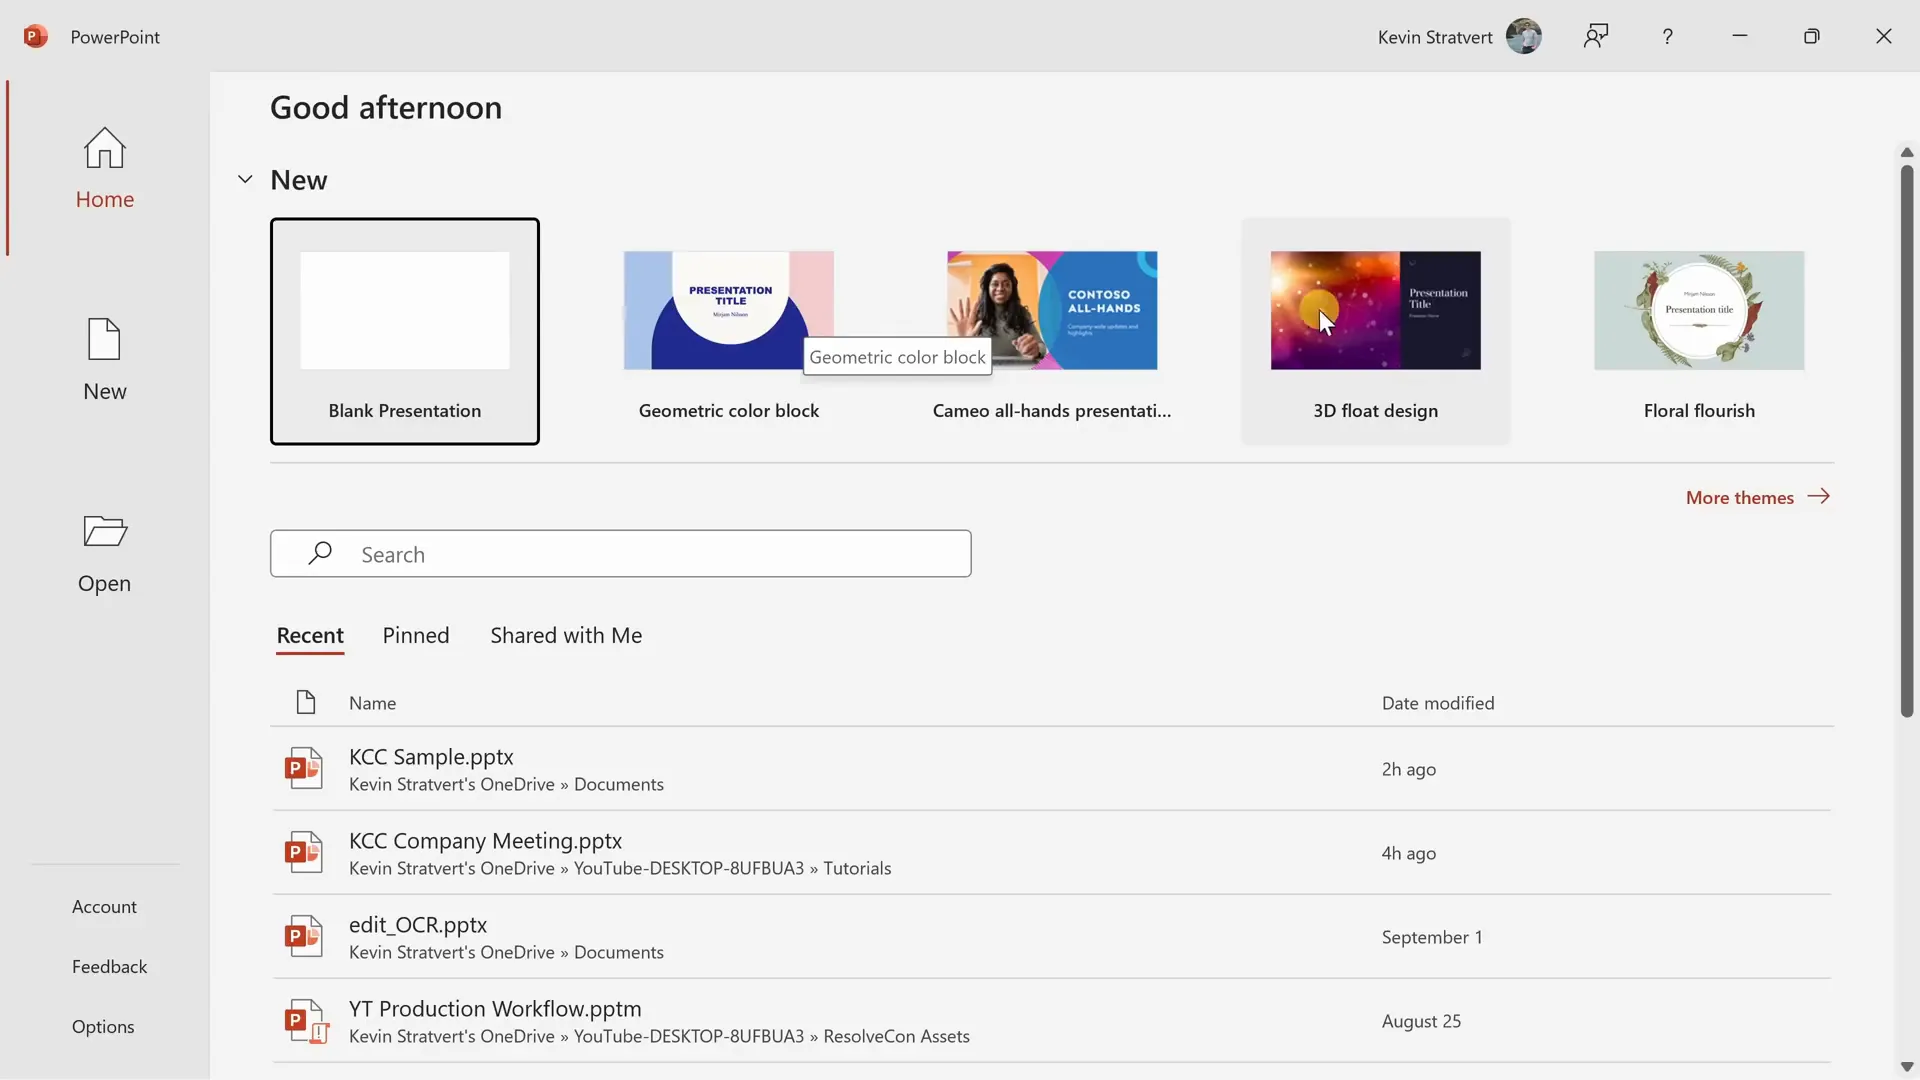
Exploring the Home Screen
When you launch PowerPoint, the home screen is your starting point. Here, you can:
- Create a blank presentation
- Browse through a variety of themes and templates
- Access recent presentations quickly
- Search for existing presentations
It’s a good idea to explore the themes available on the home screen or by clicking “New” on the left sidebar. Themes are pre-designed slide sets that help you maintain a consistent and professional look throughout your presentation.
Saving Your Presentation: Start Smart
Before you dive into slide creation, it’s crucial to save your work early. Click the floppy disk icon in the top left corner or press Ctrl + S to open the save dialog. Give your presentation a descriptive name, such as Kevin Cookie Company All Hands, and choose where to save it. Saving your file to OneDrive (Microsoft’s cloud storage) is highly recommended because:
- Your work automatically saves as you go
- You can access previous versions of your presentation
- It’s easy to share and collaborate with others

Creating and Organizing Slides
Adding New Slides
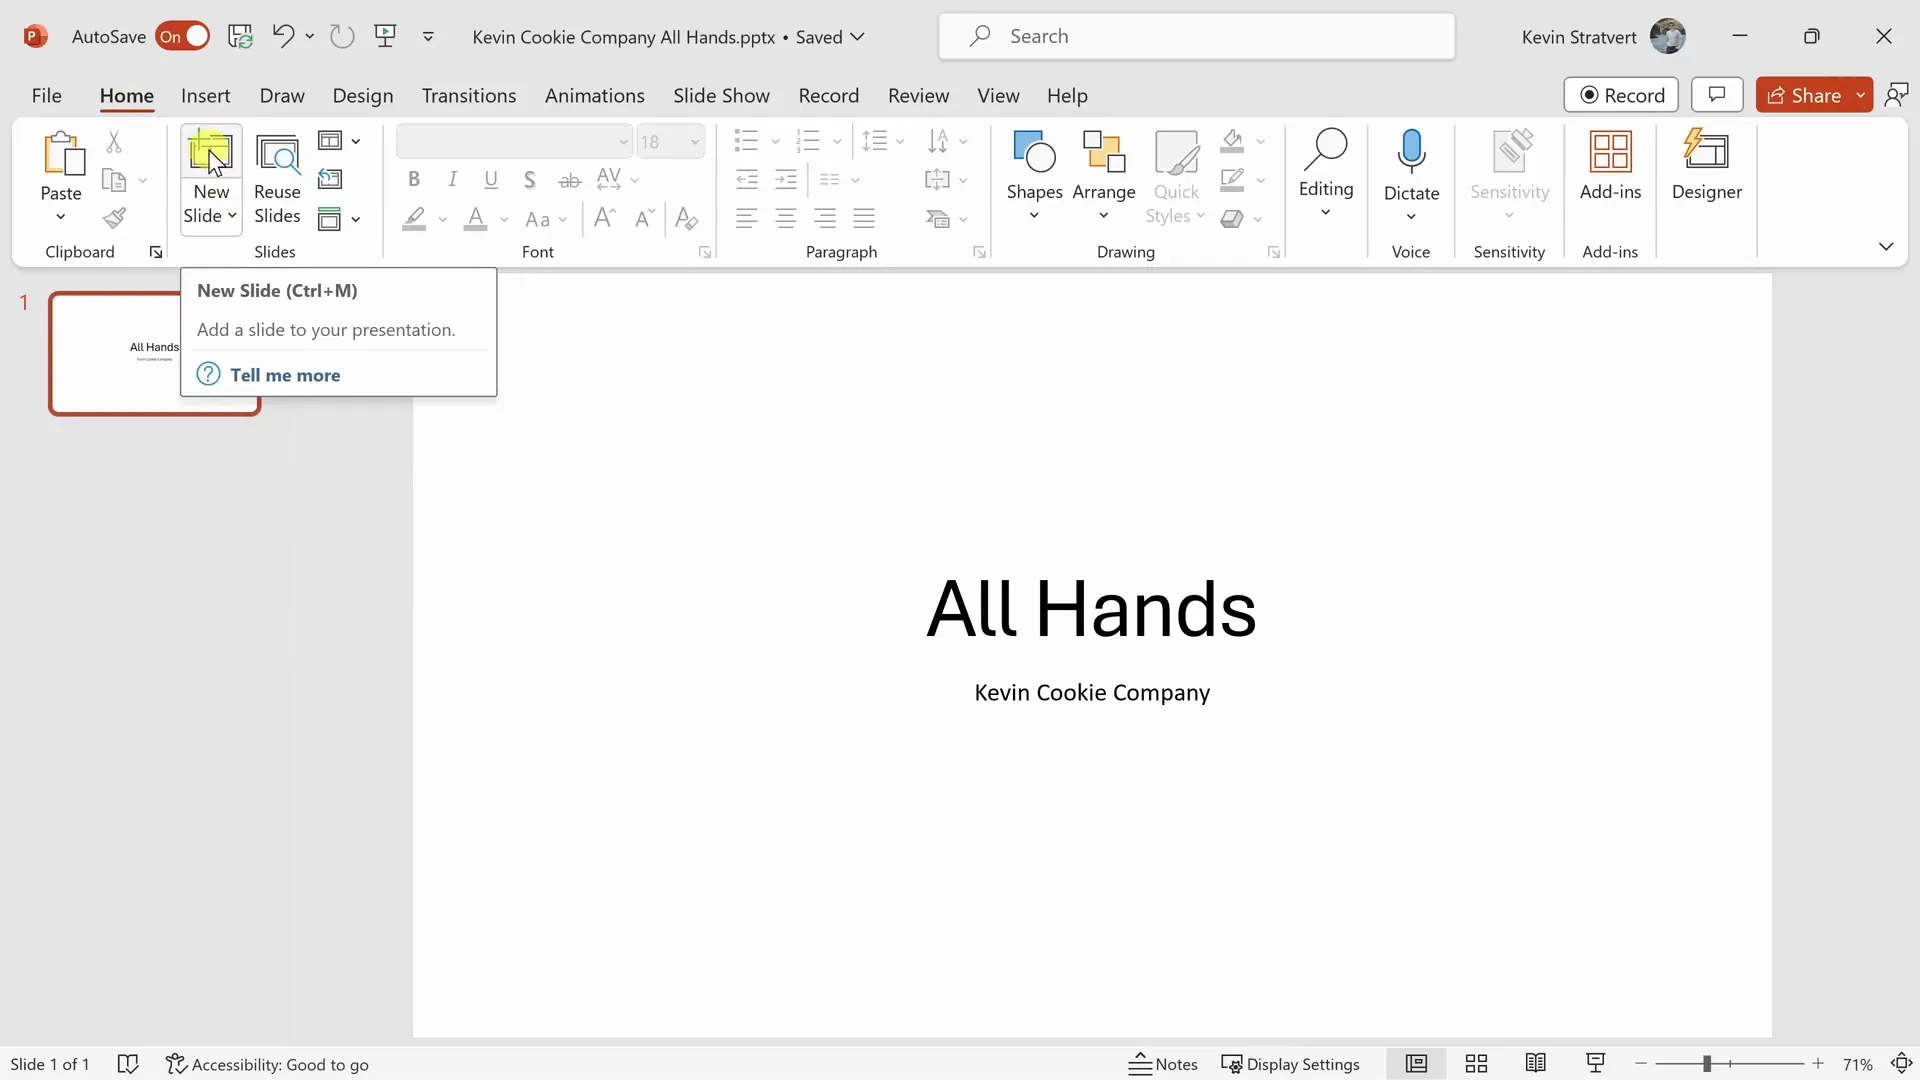
With your presentation saved, you’re ready to add content. PowerPoint starts you off with one slide, but presentations usually require multiple slides to cover your material. To add a new slide, go to the home tab and click New Slide. You can also use the shortcut Ctrl + M or simply press Enter when the slide pane is focused.
Choosing and Changing Slide Layouts
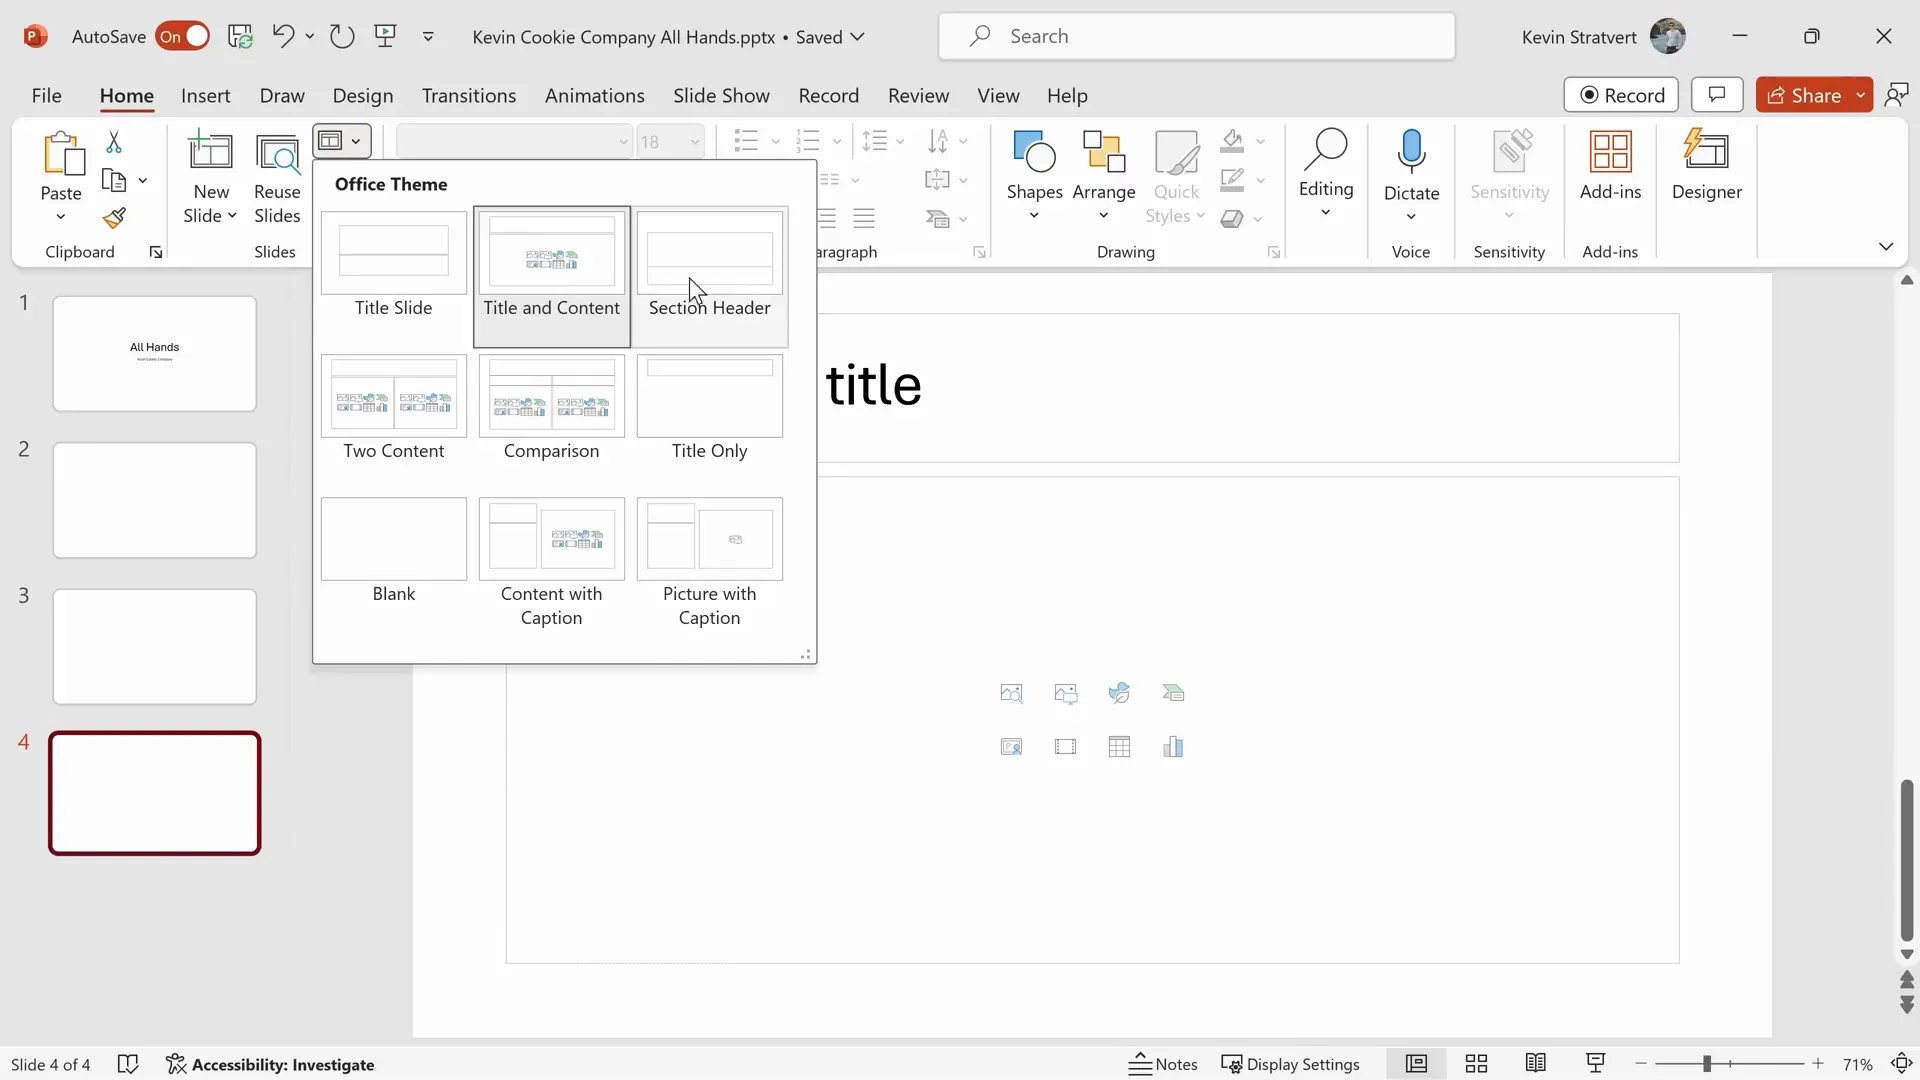
Slides can have different layouts depending on the content you want to include, such as a title slide, section header, or content with bullet points. When you add a new slide, you can pick a layout from a dropdown menu. You can also change the layout of an existing slide retroactively by selecting the slide and choosing a different layout.
Building an Outline and Navigating Slides
Start by outlining your presentation with the main topics you want to cover. For example, you might want to include slides about customer feedback, opening a new factory, revenue numbers, and a thank-you slide. You can easily add slides between existing ones by selecting a slide and pressing Enter or by right-clicking and choosing to insert a new slide.
To navigate through your slides, use the up and down arrow keys or click on slides in the left pane. PowerPoint also offers a slide sorter view, which displays all your slides as thumbnails, making it easy to rearrange them by dragging and dropping.

Deleting Unwanted Slides
If you decide that a slide no longer fits your presentation, right-click on it and choose Delete Slide, or simply select the slide and press the Delete key.
Enhancing Your Presentation Design
Applying Themes and Variants
To avoid a bland presentation, applying a theme instantly upgrades your slides with coordinated colors, fonts, and backgrounds. Navigate to the Design tab and hover over themes to preview them. You can also explore the full theme gallery to find one that suits your content. For example, if your company uses organic ingredients, a theme named “Organic” might be perfect.
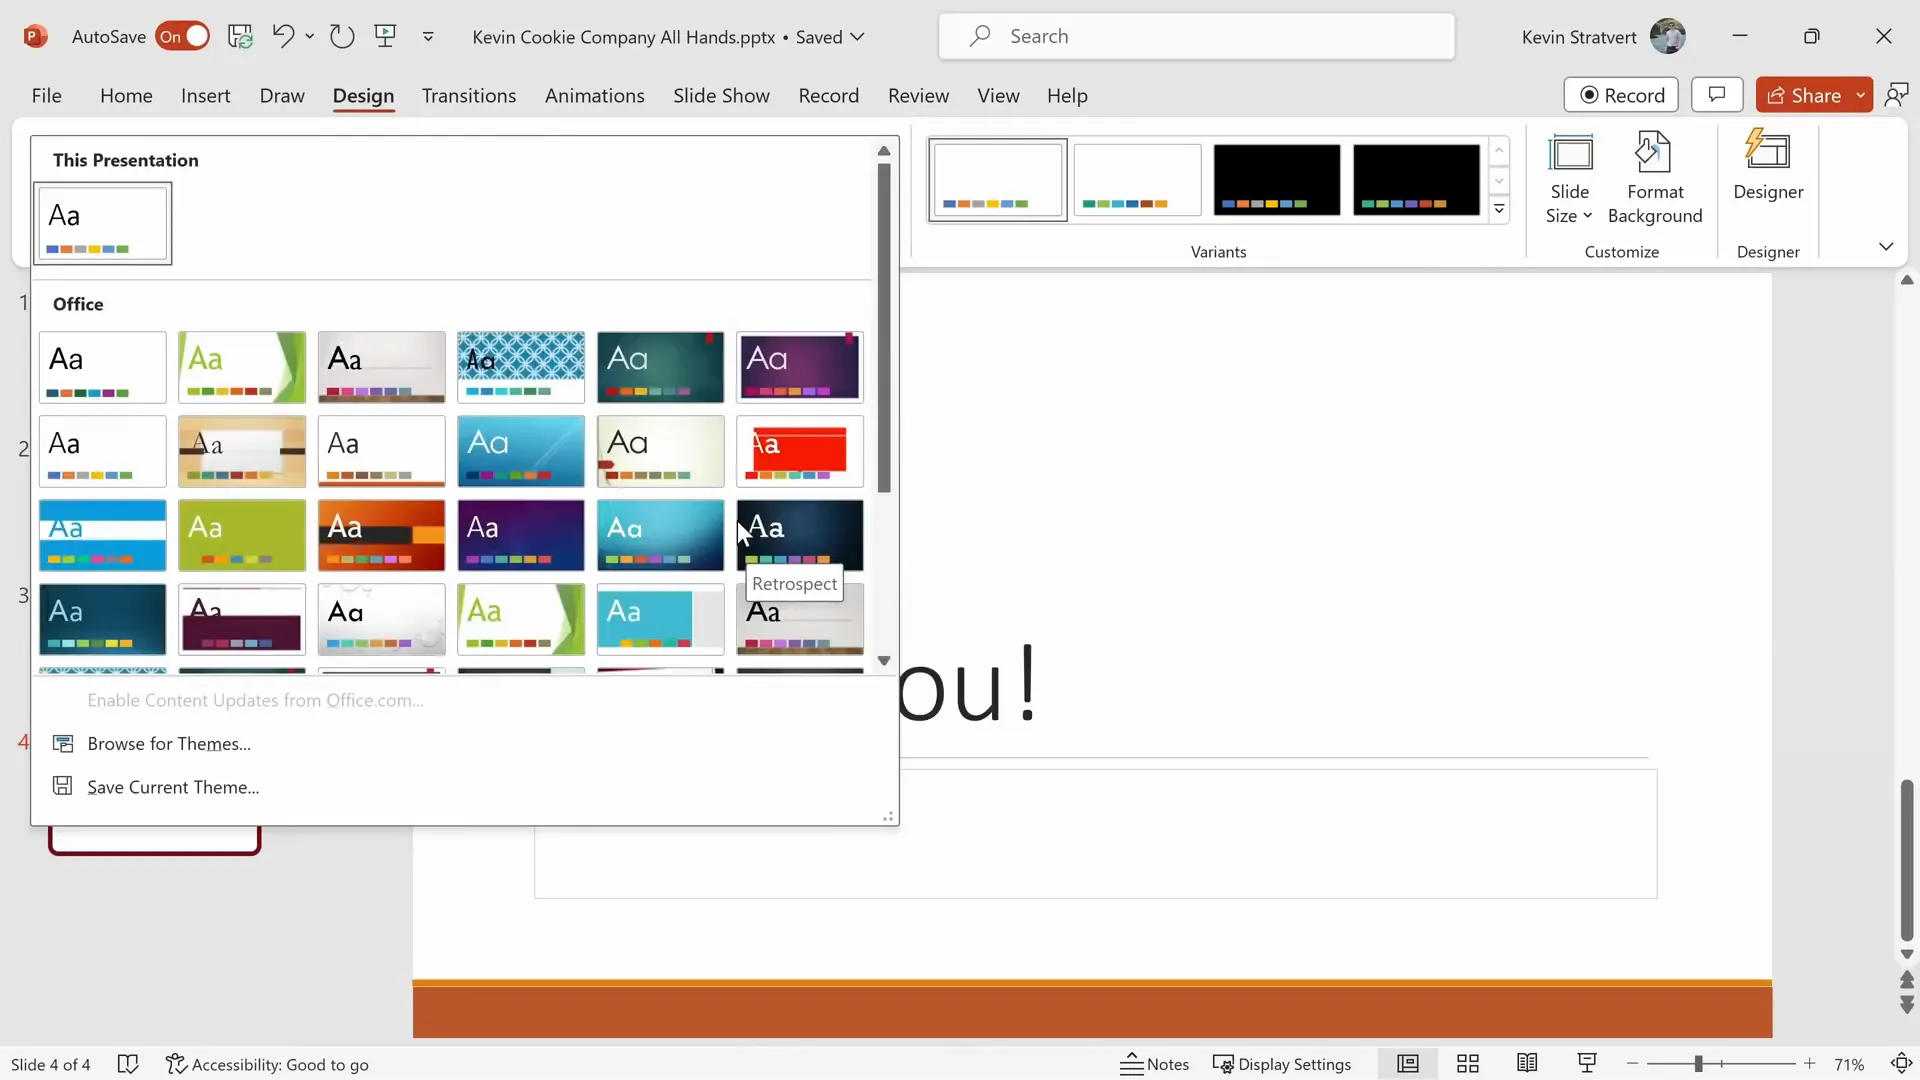
Once a theme is selected, you can choose a variant, which tweaks the color scheme or background style to better fit your style or branding.
Using PowerPoint Designer for Smart Suggestions
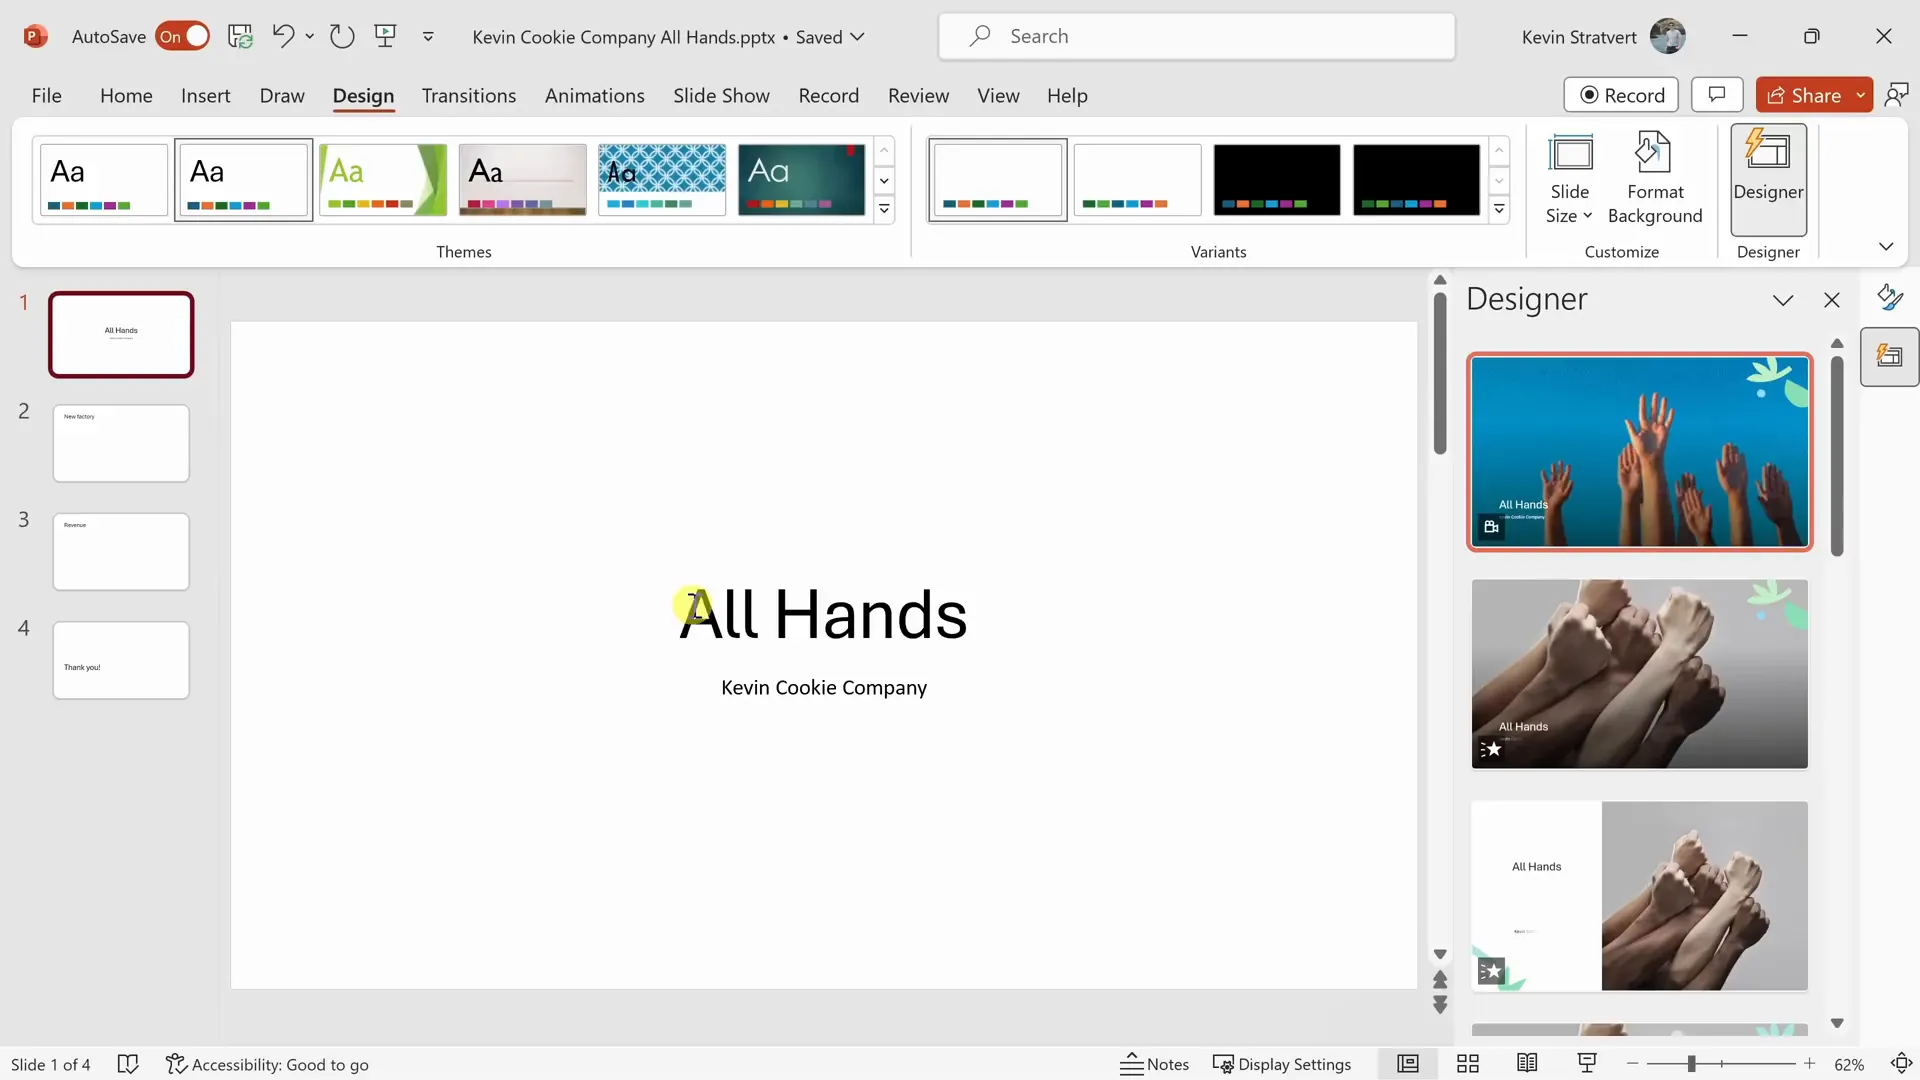
One of PowerPoint’s standout features is Designer, which automatically suggests slide designs based on your content. Select a slide and click the Designer button in the top right corner. It will analyze your text and offer creative layout options, such as incorporating relevant graphics or arranging text for visual impact.
Creating Custom Themes with Slide Master
If you want full control over the look and feel of your presentation, use the Slide Master feature under the View tab. The Slide Master lets you edit the root slide and its layouts, customizing colors, fonts, backgrounds, and even adding logos or images that appear on every slide.
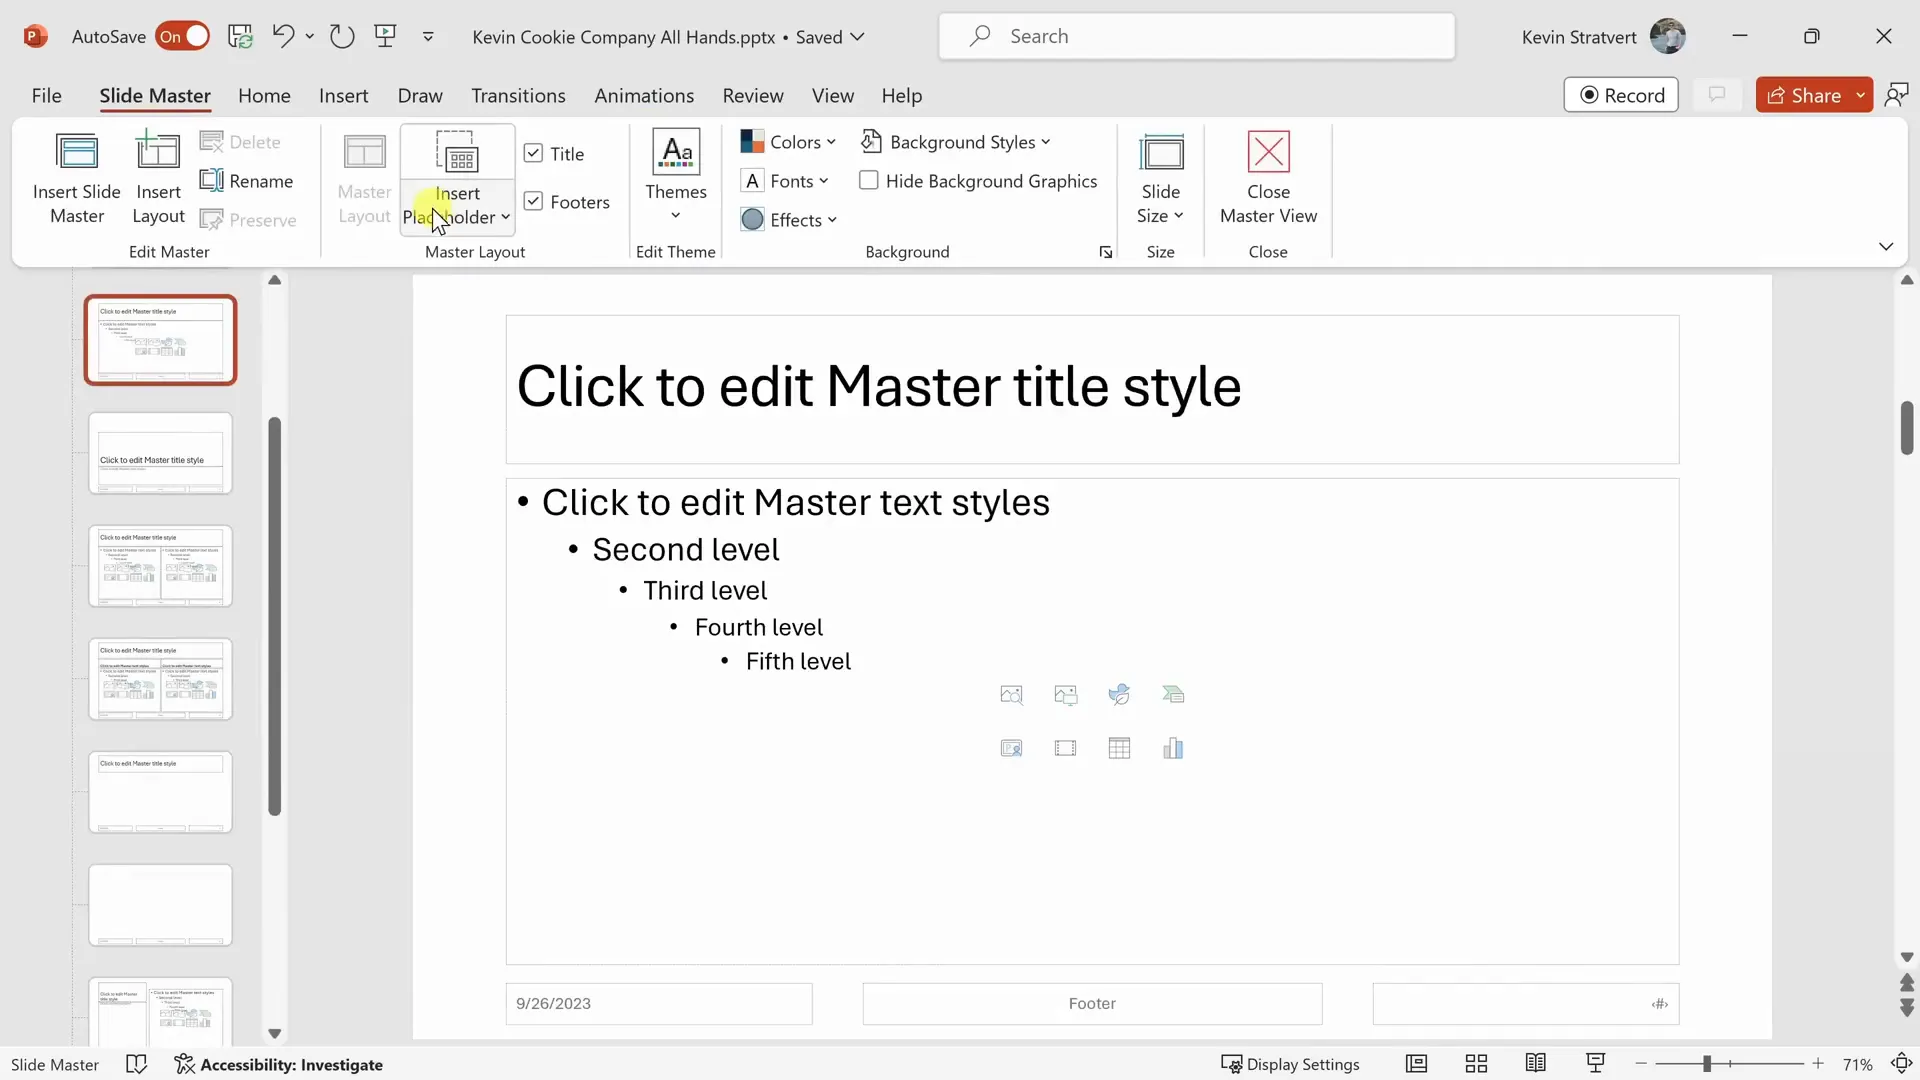
For example, adding your company logo to the master slide ensures it appears consistently throughout your presentation without needing to add it on each slide individually.
Adding and Formatting Content
Using SmartArt to Visualize Information
Instead of dense bullet points, SmartArt transforms your text into dynamic visuals like lists, processes, and hierarchies. Highlight your text, go to the Home tab, and select the SmartArt icon. Browse the options and pick one that visually represents your information.

Once inserted, you can customize colors and styles to match your branding.
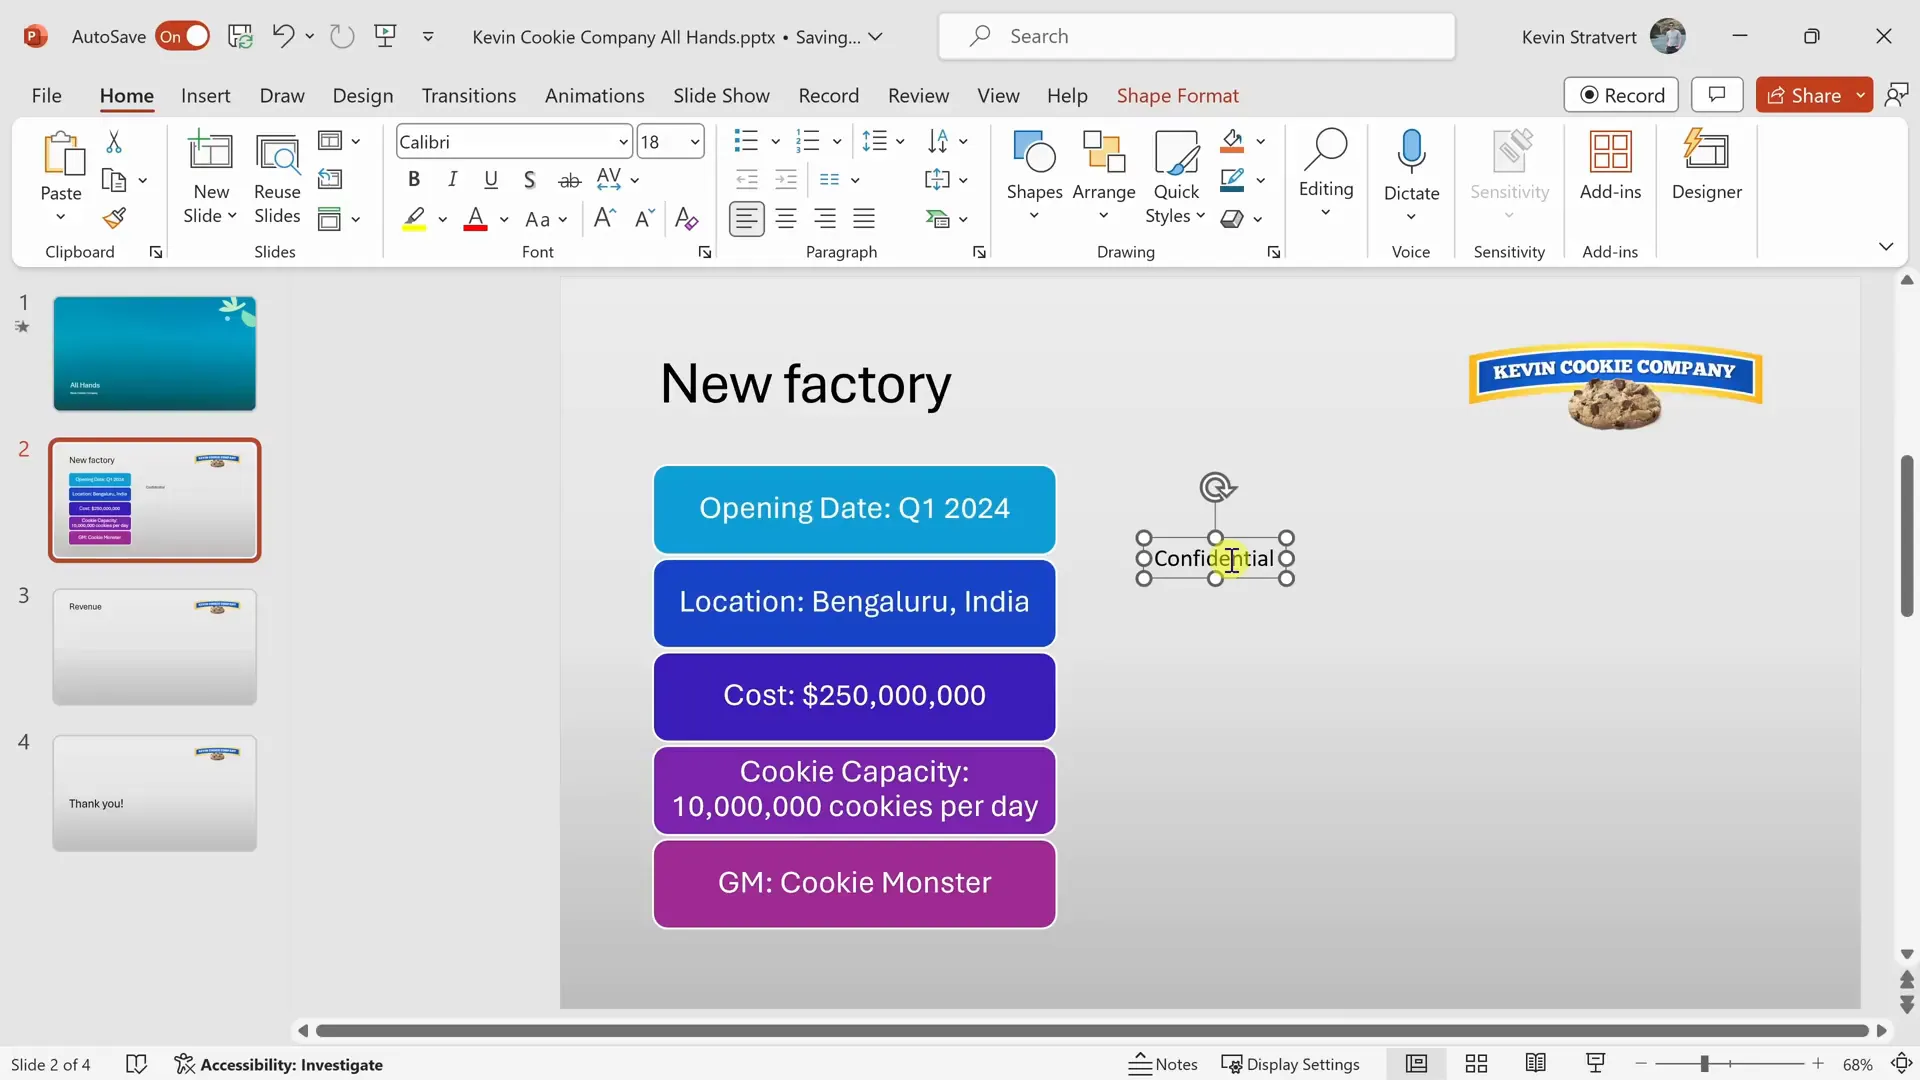
Inserting and Customizing Text
For additional text outside of predefined placeholders, use the Text Box tool found under the Insert tab. Click anywhere on your slide to add a box and type your text. Customize font style, size, and color from the Home tab.
For emphasis or a touch of humor, try different fonts. For example, using Comic Sans for a “Confidential” stamp can add personality while still getting the message across. Adjust transparency and rotate text to overlay it subtly on slides.
Inserting and Formatting Images
Images make presentations more engaging. Use the Insert tab to add pictures from your device, stock images, or even online sources. After inserting, use the Picture Format tab to crop, resize, apply effects, and add styles.
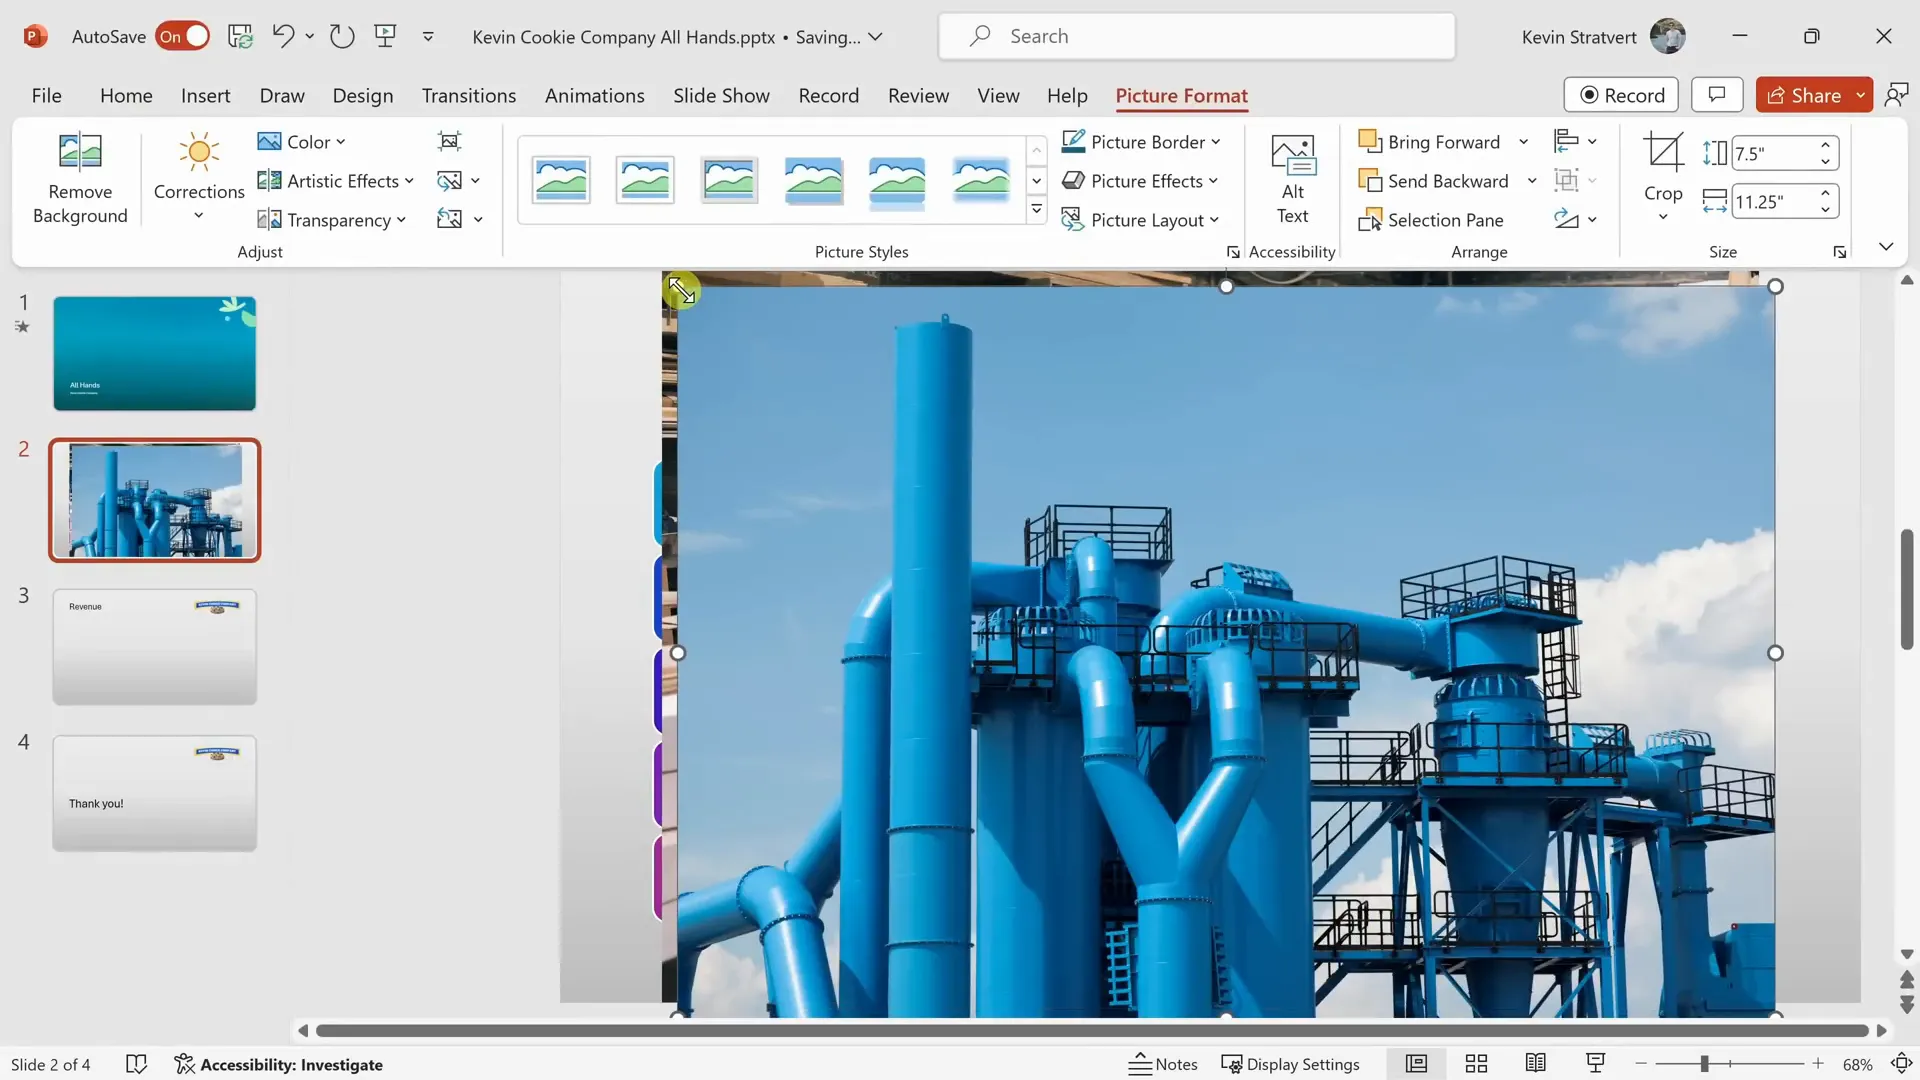
If you want a polished look, use Designer again on image-heavy slides. Designer can suggest layouts that integrate pictures seamlessly for a professional finish.
Managing Layers and Object Order
Sometimes, text or images overlap in ways that make content hard to see. Right-click on objects to bring them to the front or send them backward. The Selection Pane (found in the Shape Format tab) shows a list of all objects on a slide, allowing you to reorder, hide, or show items easily.

Animating Your Presentation
Adding Animations to Objects
Animations help guide your audience’s attention. Select an object, go to the Animations tab, and choose from effects like fade, fly-in, or zoom. To create a smooth narrative flow, set animations to appear one by one on clicks rather than all at once.


Look for the star icon beside slides in the slide pane to identify slides with animations.
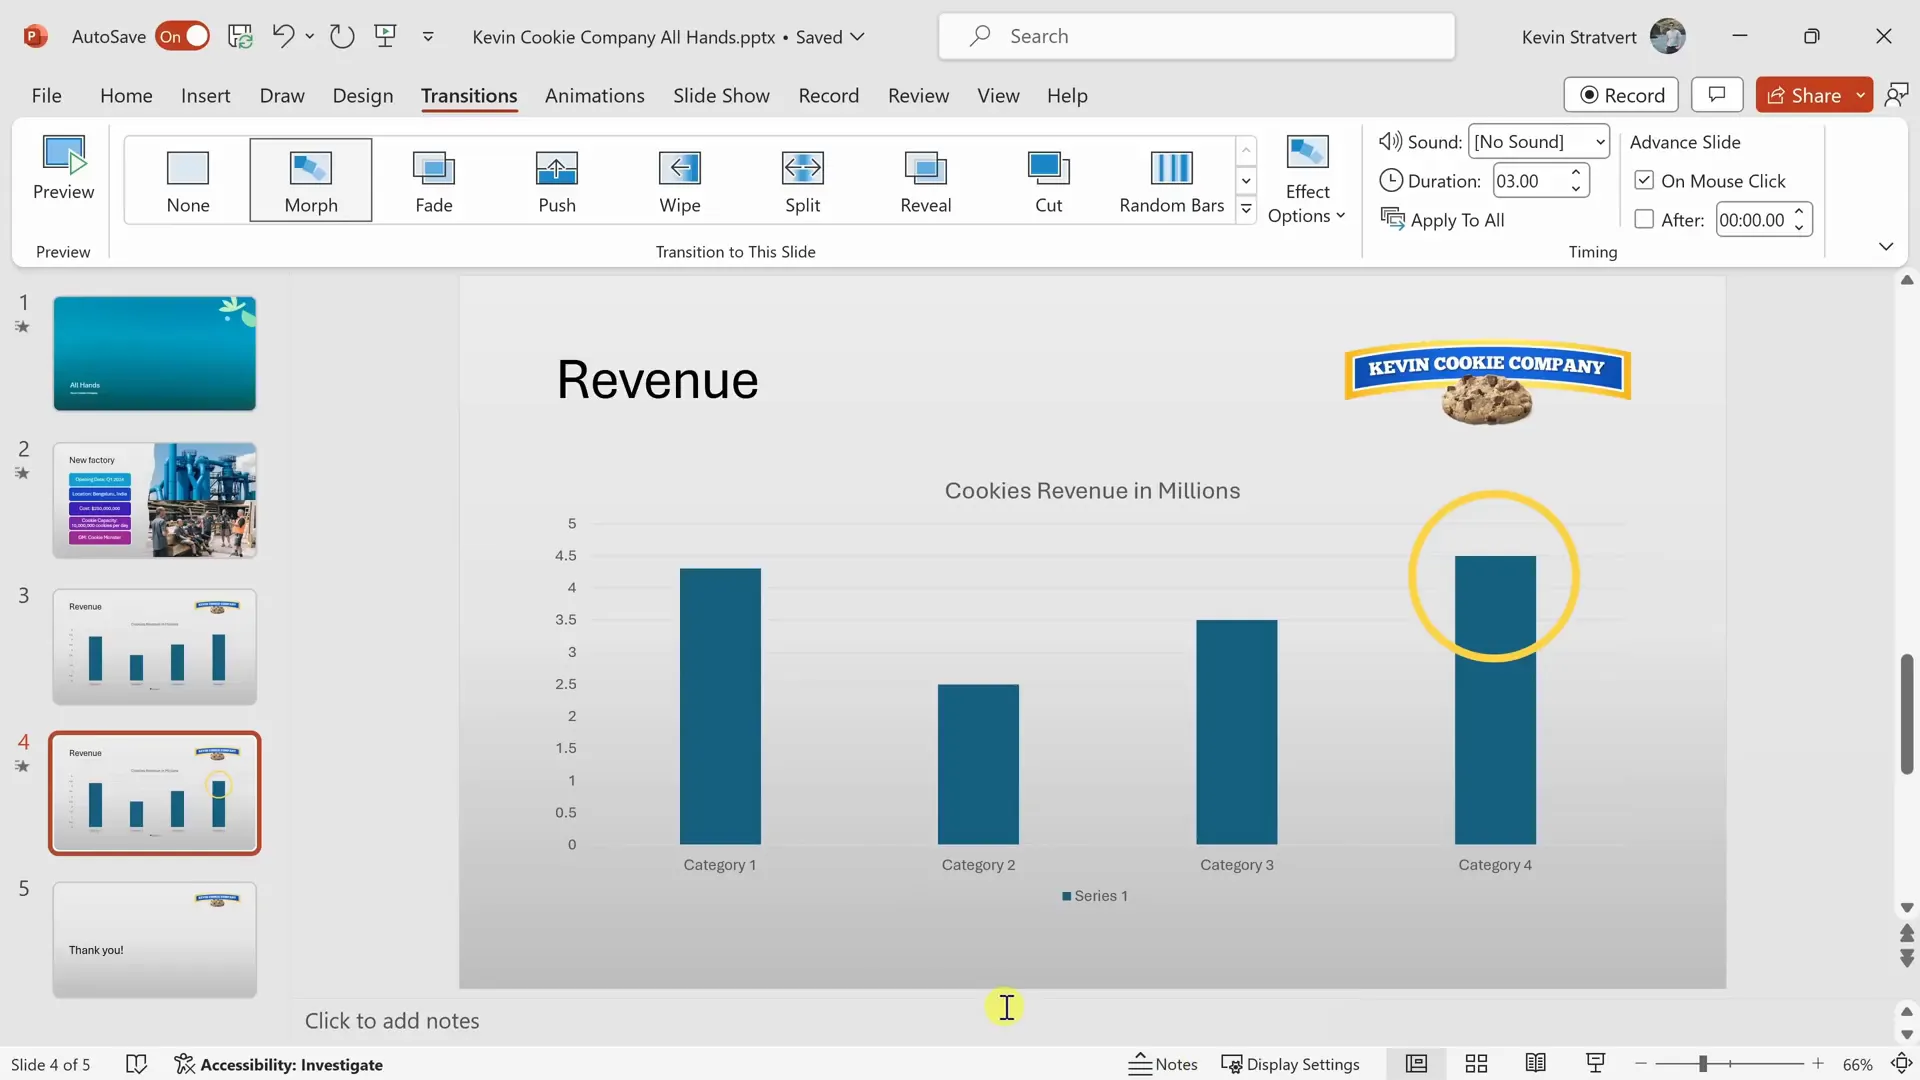
Using the Morph Transition for Visual Impact
The Morph transition creates seamless movement between slides, great for zoom effects or object transformations. To use Morph, duplicate a slide, then change the size or position of objects on the second slide. Apply the Morph transition to the second slide, and PowerPoint will animate the changes smoothly.
Inserting Charts and Shapes
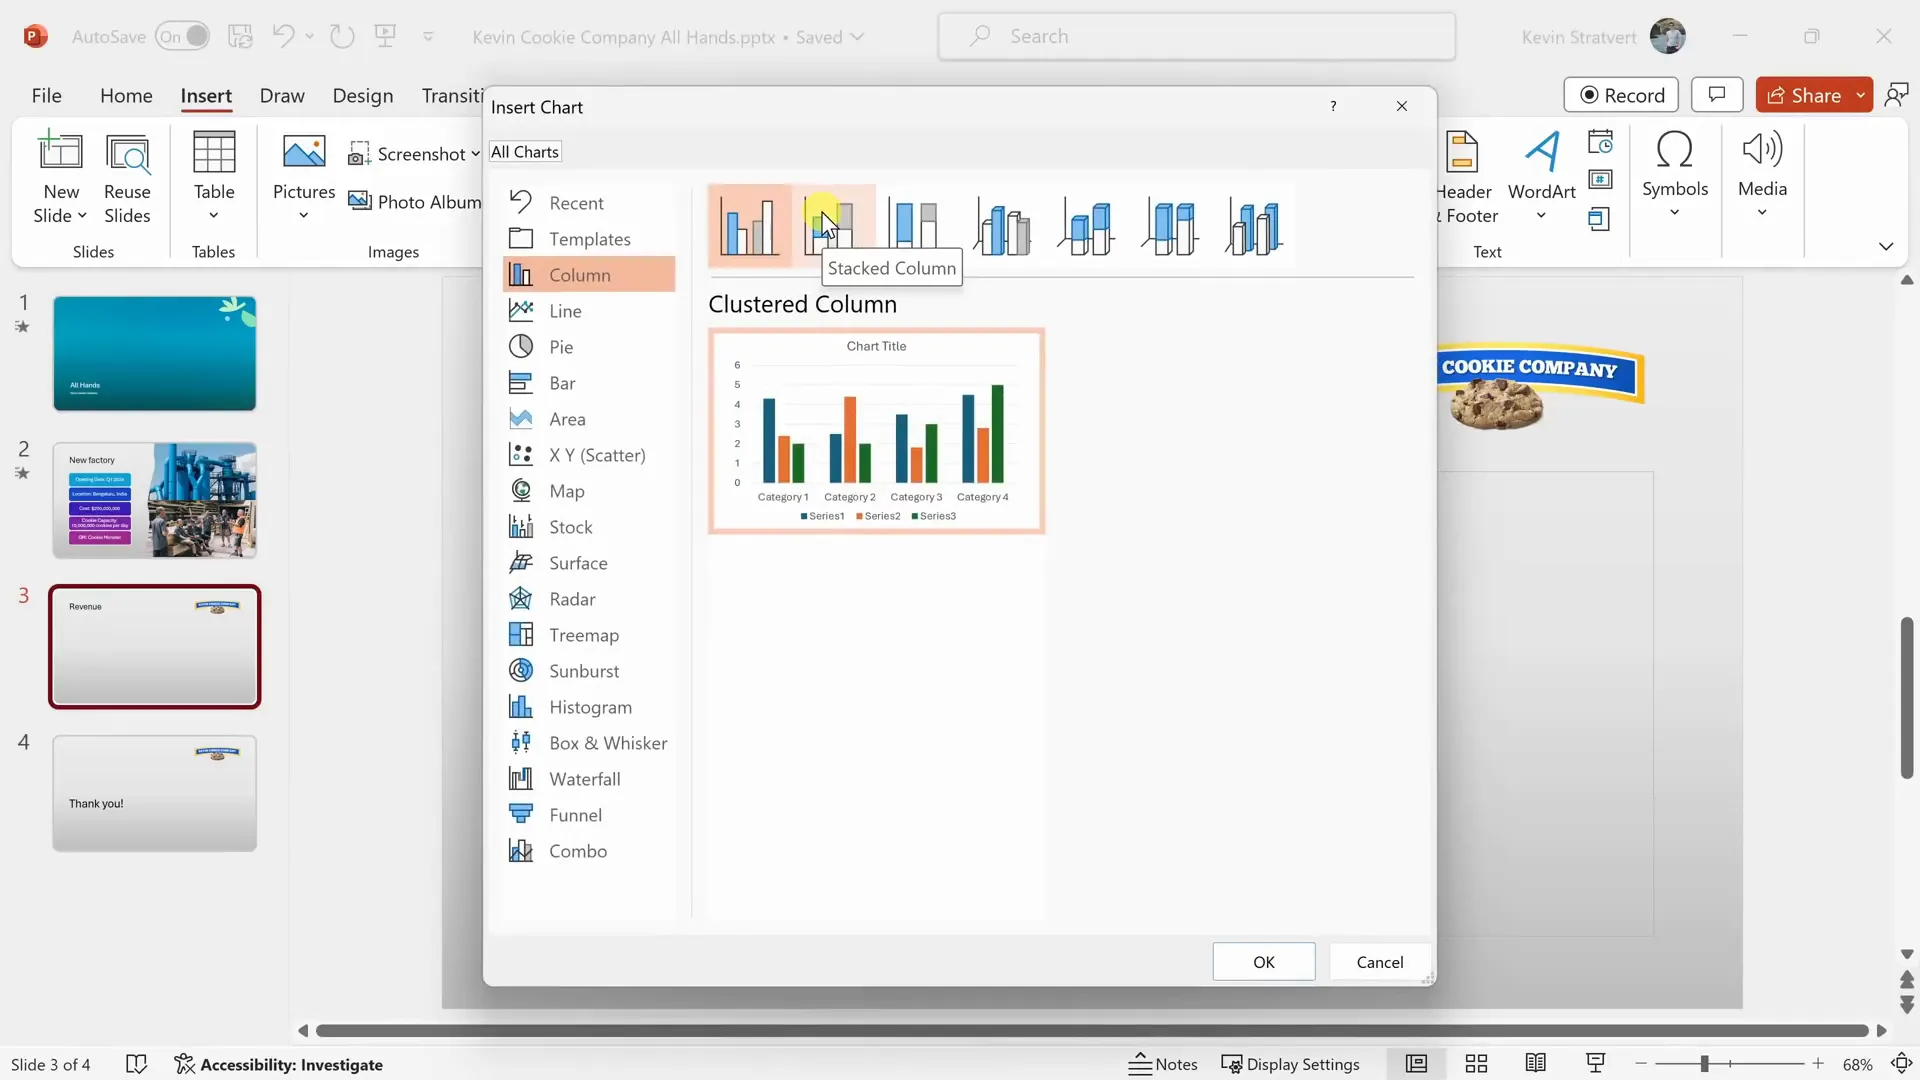
Adding Charts for Data Visualization
PowerPoint lets you insert charts directly, similar to Excel. Go to Insert > Chart, pick the chart type (column, line, pie, etc.), and customize your data in the embedded Excel window. Charts help make numerical data understandable and visually appealing.
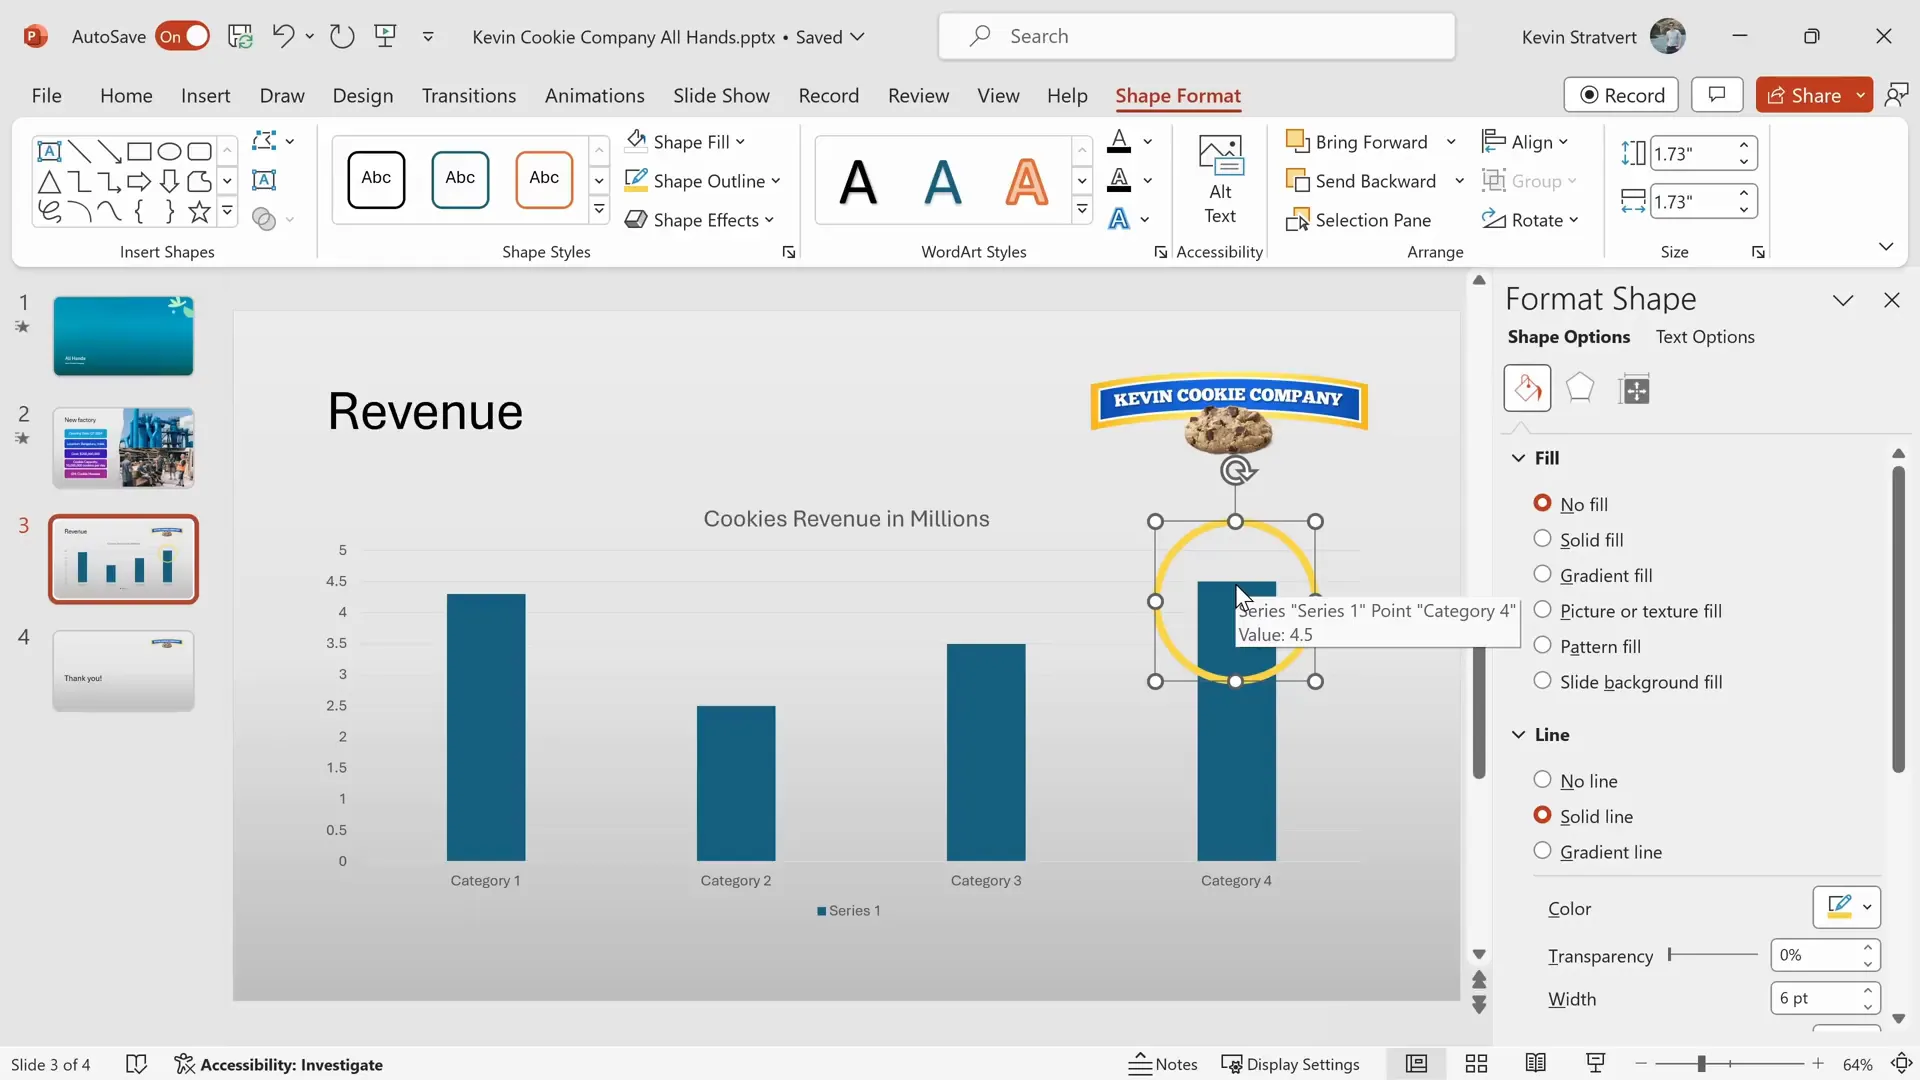
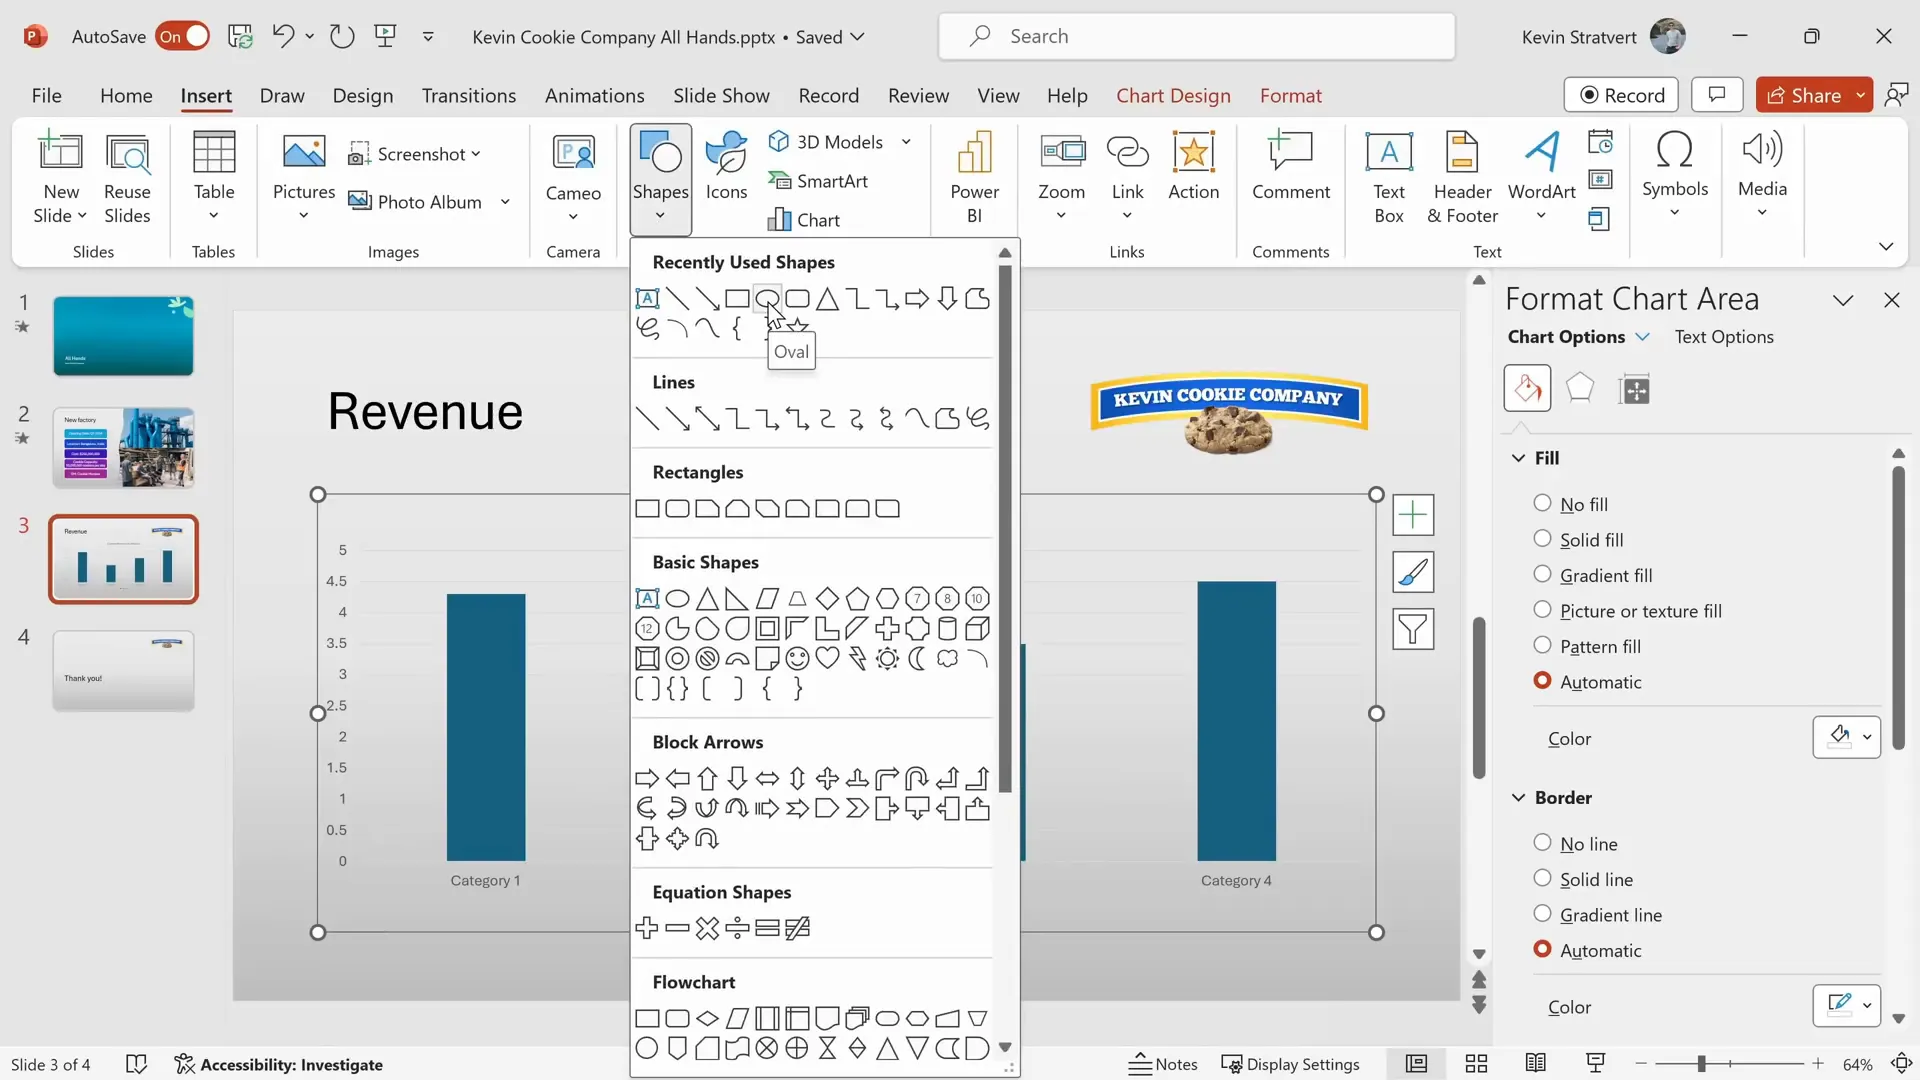
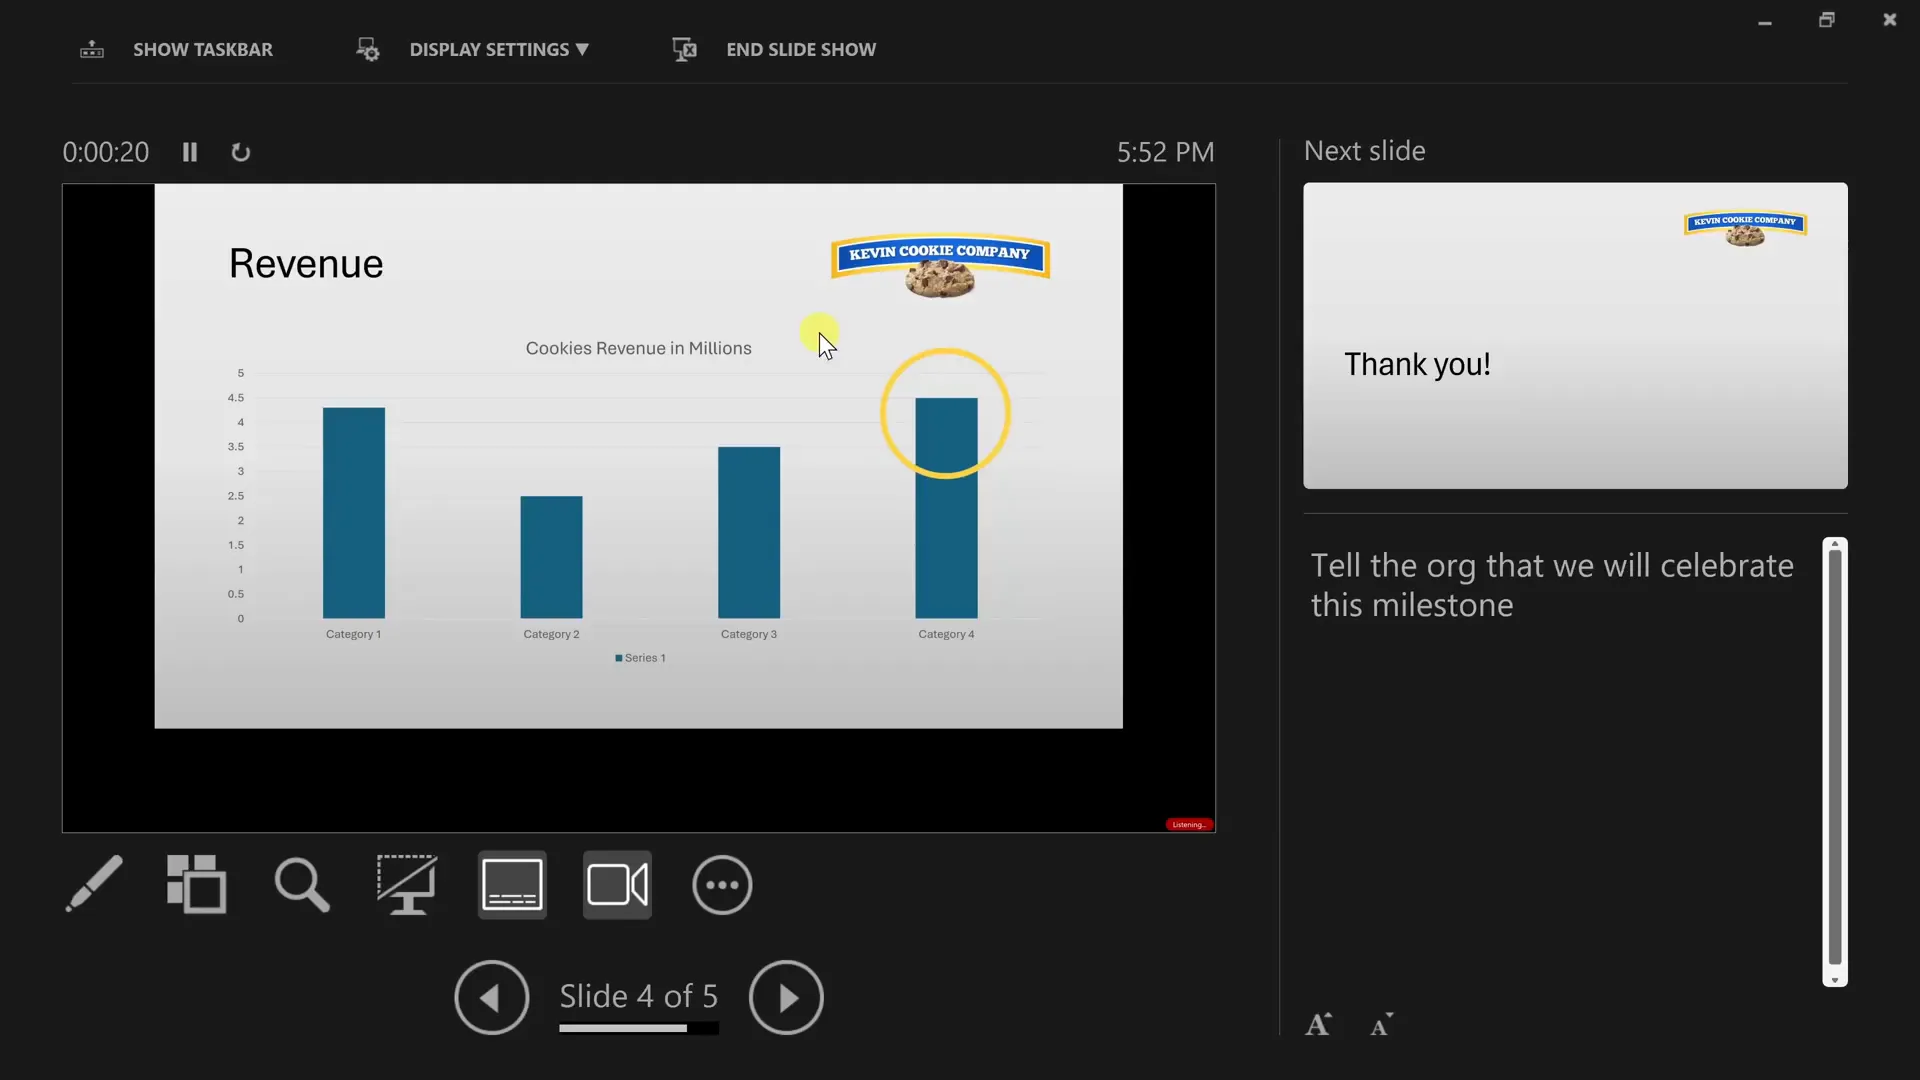
Using Shapes to Highlight Content
Shapes like circles, arrows, or rectangles can emphasize key points. Insert a shape from the Insert tab, and use formatting options to adjust fill, outline, and size. For example, drawing a circle around a record revenue figure can draw attention effectively.
Speaker Notes and Collaboration Features
Adding Speaker Notes
Speaker notes are your private reminders or cues during a presentation. Toggle the notes pane at the bottom of the PowerPoint window and type your notes. You can zoom in or out on notes for easier reading and use them to rehearse your speech.
Sharing and Collaborating on Presentations
PowerPoint makes it easy to collaborate. Click the Share button and invite teammates via email. You can set permissions for editing or viewing. You can also insert comments on slides to discuss changes or ideas, and even tag colleagues to get their attention.

Presenting and Recording Your Slide Show
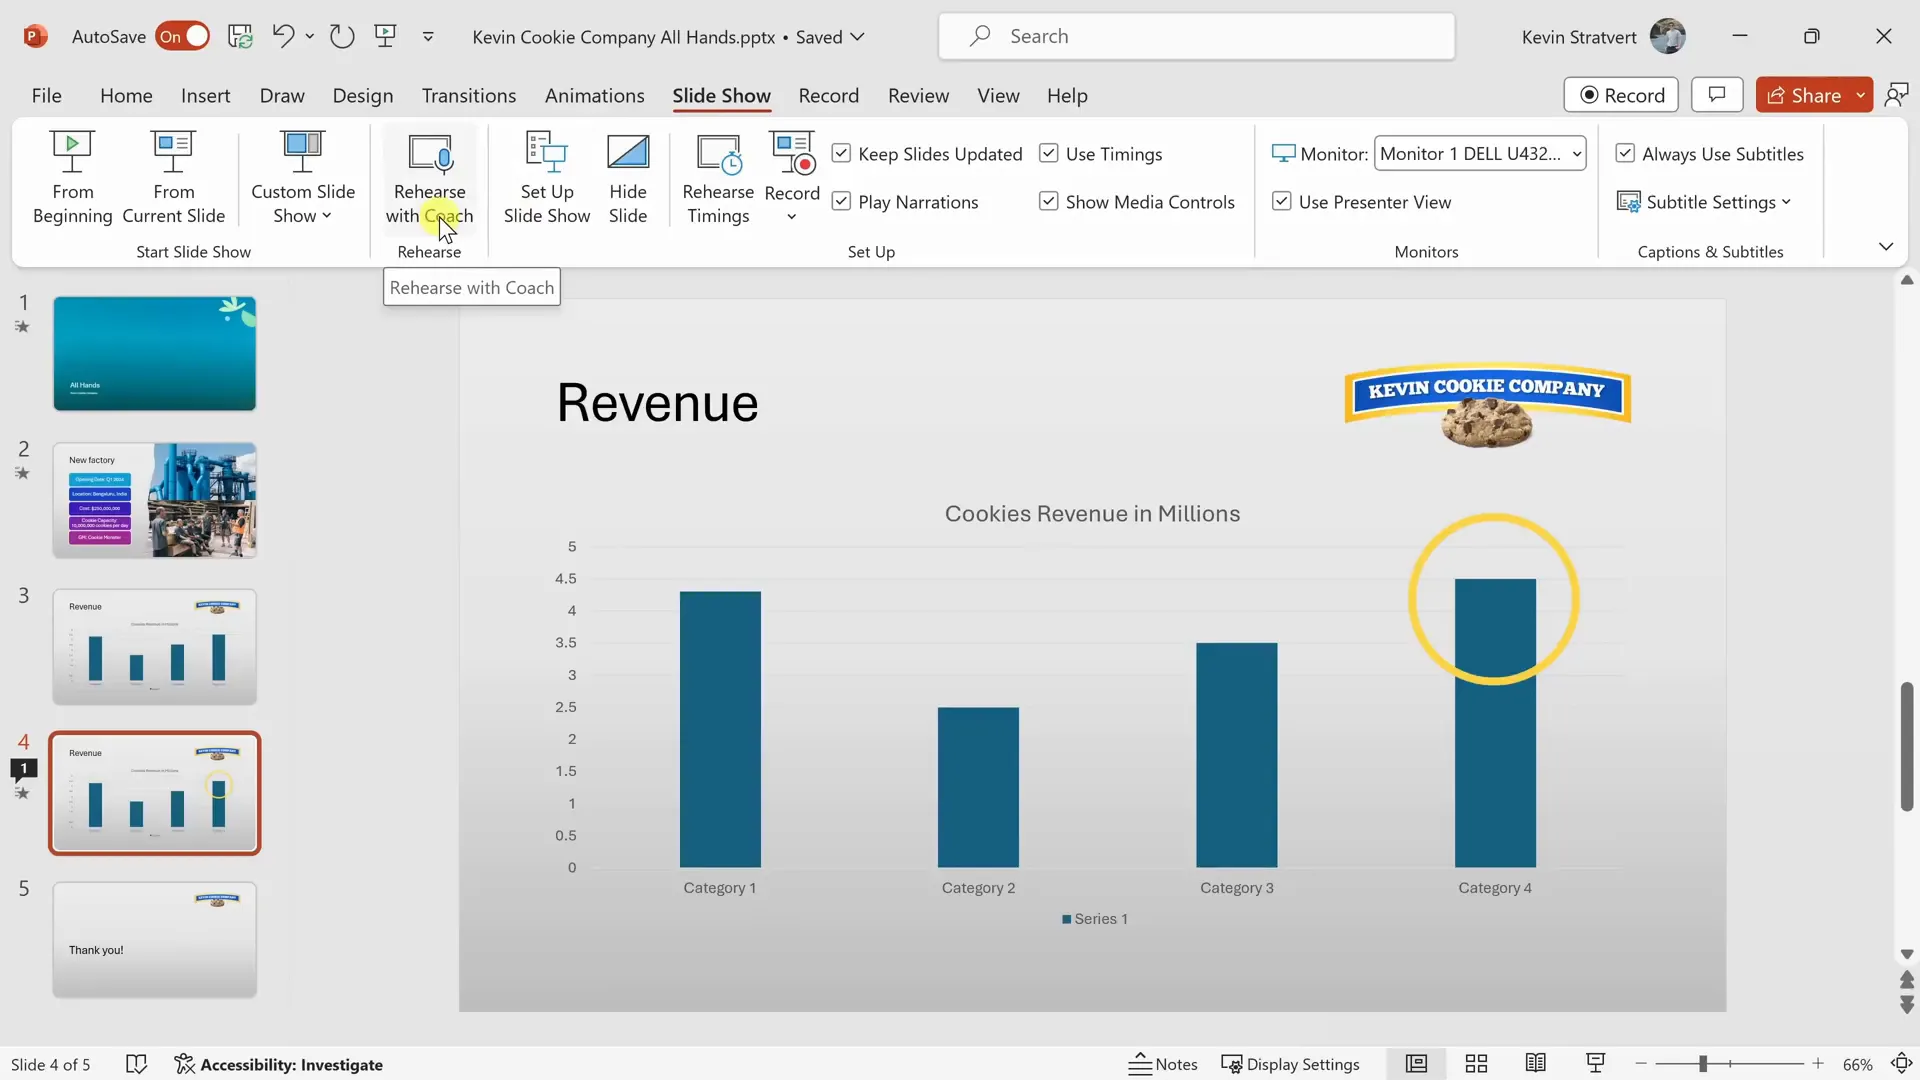
Rehearsing and Presenting Slides
Before the big day, use the Rehearse with Coach feature to practice your delivery. It provides feedback on pacing, filler words, and more, helping you polish your presentation.
Start your slideshow from the beginning by pressing F5 or from the current slide. Use mouse controls or keyboard shortcuts to navigate. You can activate a laser pointer or other tools to highlight parts of your slide during the presentation.

Using Presenter View
If you have multiple monitors, Presenter View shows your current slide, upcoming slide, and notes on your screen while your audience sees only the slide content. This setup helps you stay organized and confident.
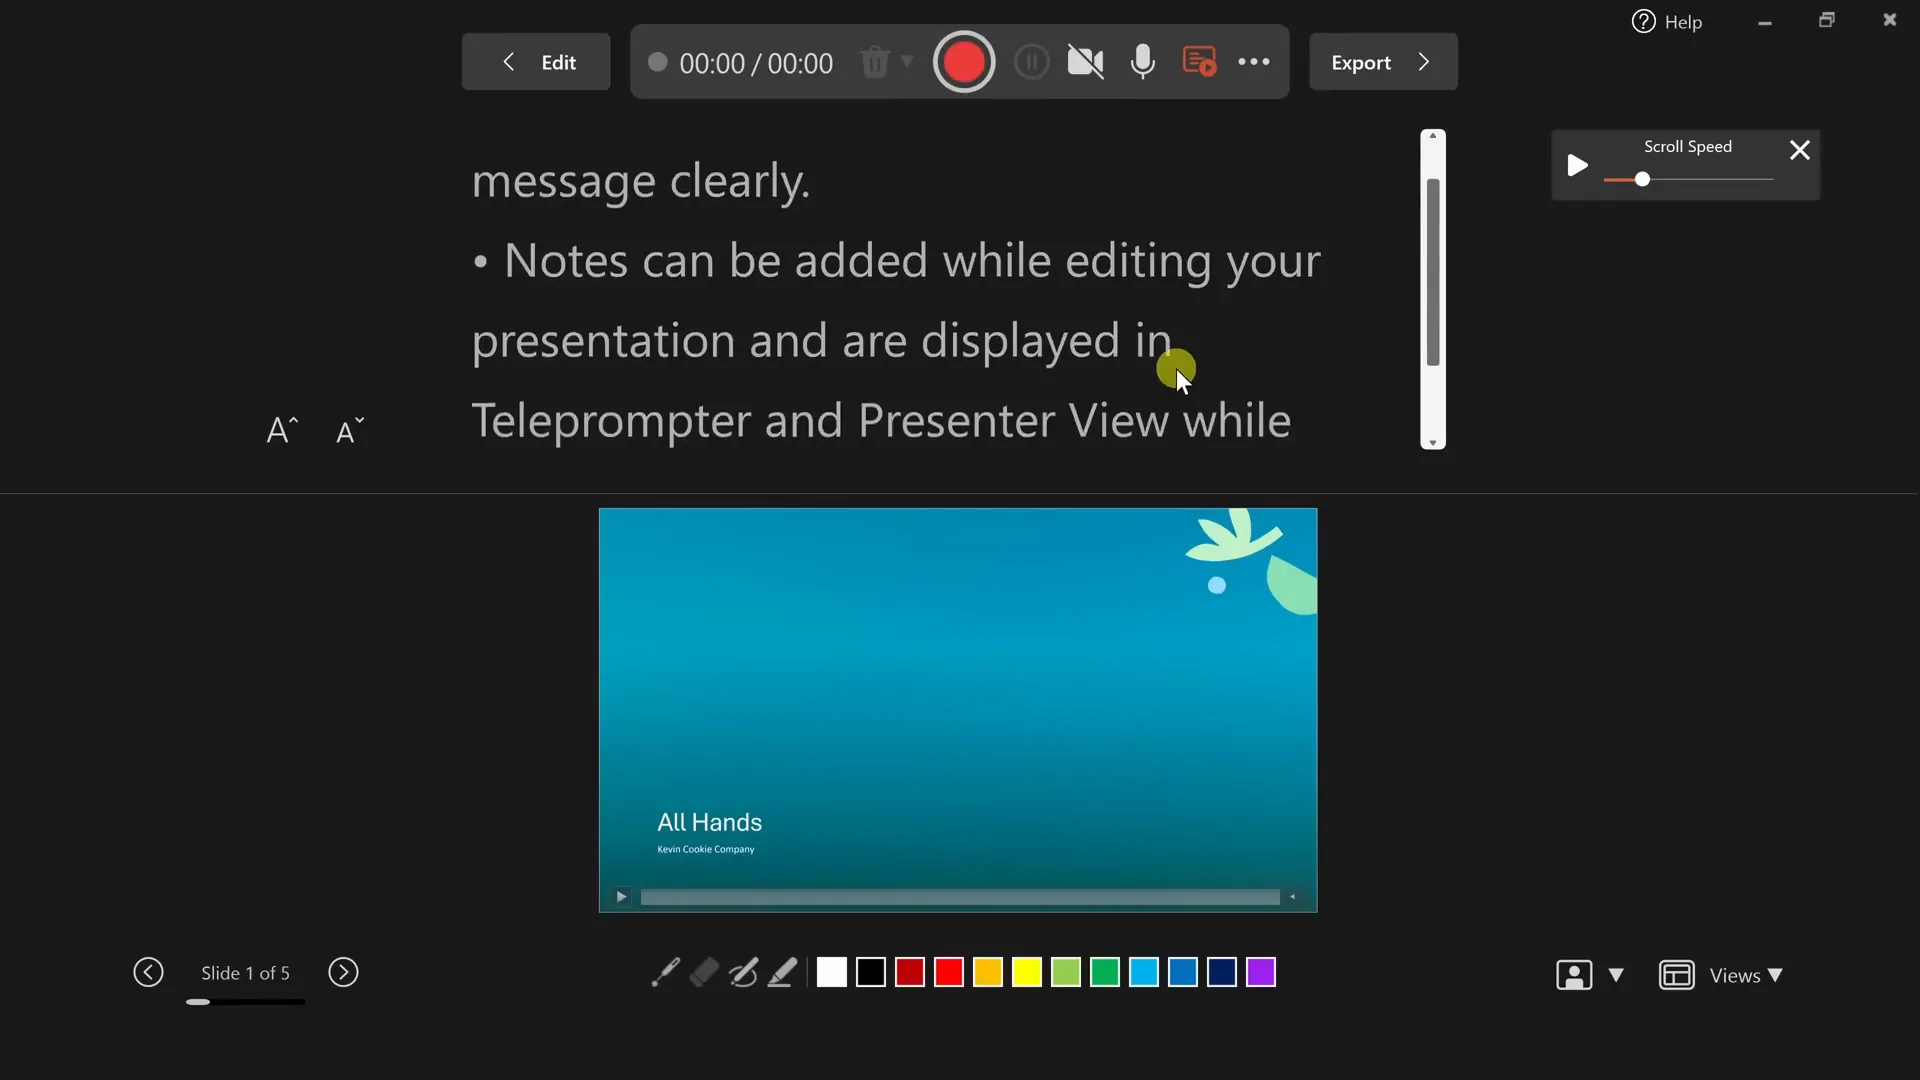
Recording Your Presentation
PowerPoint also allows you to record your presentation along with your narration and annotations. Click the Record tab and start recording from the beginning or current slide. You’ll see your notes and annotation tools during recording. When finished, export your presentation as an MP4 video to share online or for on-demand viewing.
Conclusion: PowerPoint as Your Presentation Partner
Microsoft PowerPoint is a versatile and powerful tool that can elevate your presentations from simple slide decks to compelling stories. By following these steps, you’ll be able to create professional presentations efficiently and effectively, using themes, layouts, animations, charts, and collaboration features.
Remember, your slides are there to support and enhance your message, not to overshadow you. Use PowerPoint to complement your presentation skills and engage your audience with clarity and style.
For ongoing learning and advanced techniques, explore more tutorials and practice regularly. With dedication, you’ll master PowerPoint and impress any audience.
Frequently Asked Questions (FAQ)
Q1: Can I use PowerPoint for free?
Yes, Microsoft offers a free web-based version of PowerPoint accessible at PowerPoint.New. This version runs in your browser and includes many core features suitable for most presentations.
Q2: What is the best way to save and share my presentations?
Saving your presentation to OneDrive (Microsoft’s cloud storage) is recommended. It enables automatic saving, version history, and easy sharing with collaborators via email or links.
Q3: How do I make my slides visually appealing?
Utilize PowerPoint’s themes, variants, and Designer feature to apply coordinated colors, fonts, and layouts. Incorporate SmartArt, images, charts, and animations to make your content engaging.
Q4: What is Slide Master and why should I use it?
Slide Master lets you customize the overall look of your presentation by editing the root slide and layouts. Changes here apply universally, saving time and ensuring consistent design across slides.
Q5: How can I rehearse my presentation effectively?
Use the “Rehearse with Coach” feature to practice your timing, pacing, and delivery. It provides real-time feedback and a summary report to help you improve.
Q6: Is it possible to record my presentation with narration?
Yes, PowerPoint allows you to record your slideshow with voice narration and annotations. After recording, you can export it as an MP4 video for sharing or playback.
Q7: Can I collaborate with others on the same PowerPoint file?
Absolutely. By sharing your presentation via OneDrive or Microsoft 365, multiple people can view, comment, and edit the file simultaneously, with changes synced in real-time.
Q8: How do animations and transitions enhance my presentation?
Animations bring elements onto the slide one at a time, helping guide the audience’s attention. Transitions like Morph create smooth visual effects between slides, making your presentation more dynamic.
Q9: What are some useful shortcuts for working faster in PowerPoint?
- Ctrl + M: Add a new slide
- Ctrl + S: Save presentation
- F5: Start slideshow from beginning
- Ctrl + Click or Shift + Click: Select multiple slides
Q10: How can I ensure my presentation looks good on different devices?
Use the Design tab to adjust slide size and format backgrounds appropriately. Preview your presentation on different screen sizes and use Presenter View for multi-monitor setups to manage your delivery smoothly.
Check out the full video: PowerPoint Tutorial for Beginners


