
If you’ve ever wanted to create a dynamic, visually appealing timeline in PowerPoint that truly captivates your audience, you’re in the right place. Today, we will dive deep into how to build an impressive animated morph timeline using PowerPoint’s powerful Morph transition. This tutorial will walk you through every step, from setting up your slides to adding smooth animations and interactive hyperlinks, ensuring your timeline not only looks professional but also functions seamlessly.
This guide is inspired by a viewer’s request for more detailed instructions on creating morph animated timelines. So, whether you’re a PowerPoint novice or looking to sharpen your skills, this comprehensive tutorial will equip you with the tips and tricks you need to create stunning animated timelines that tell your story with style and clarity.
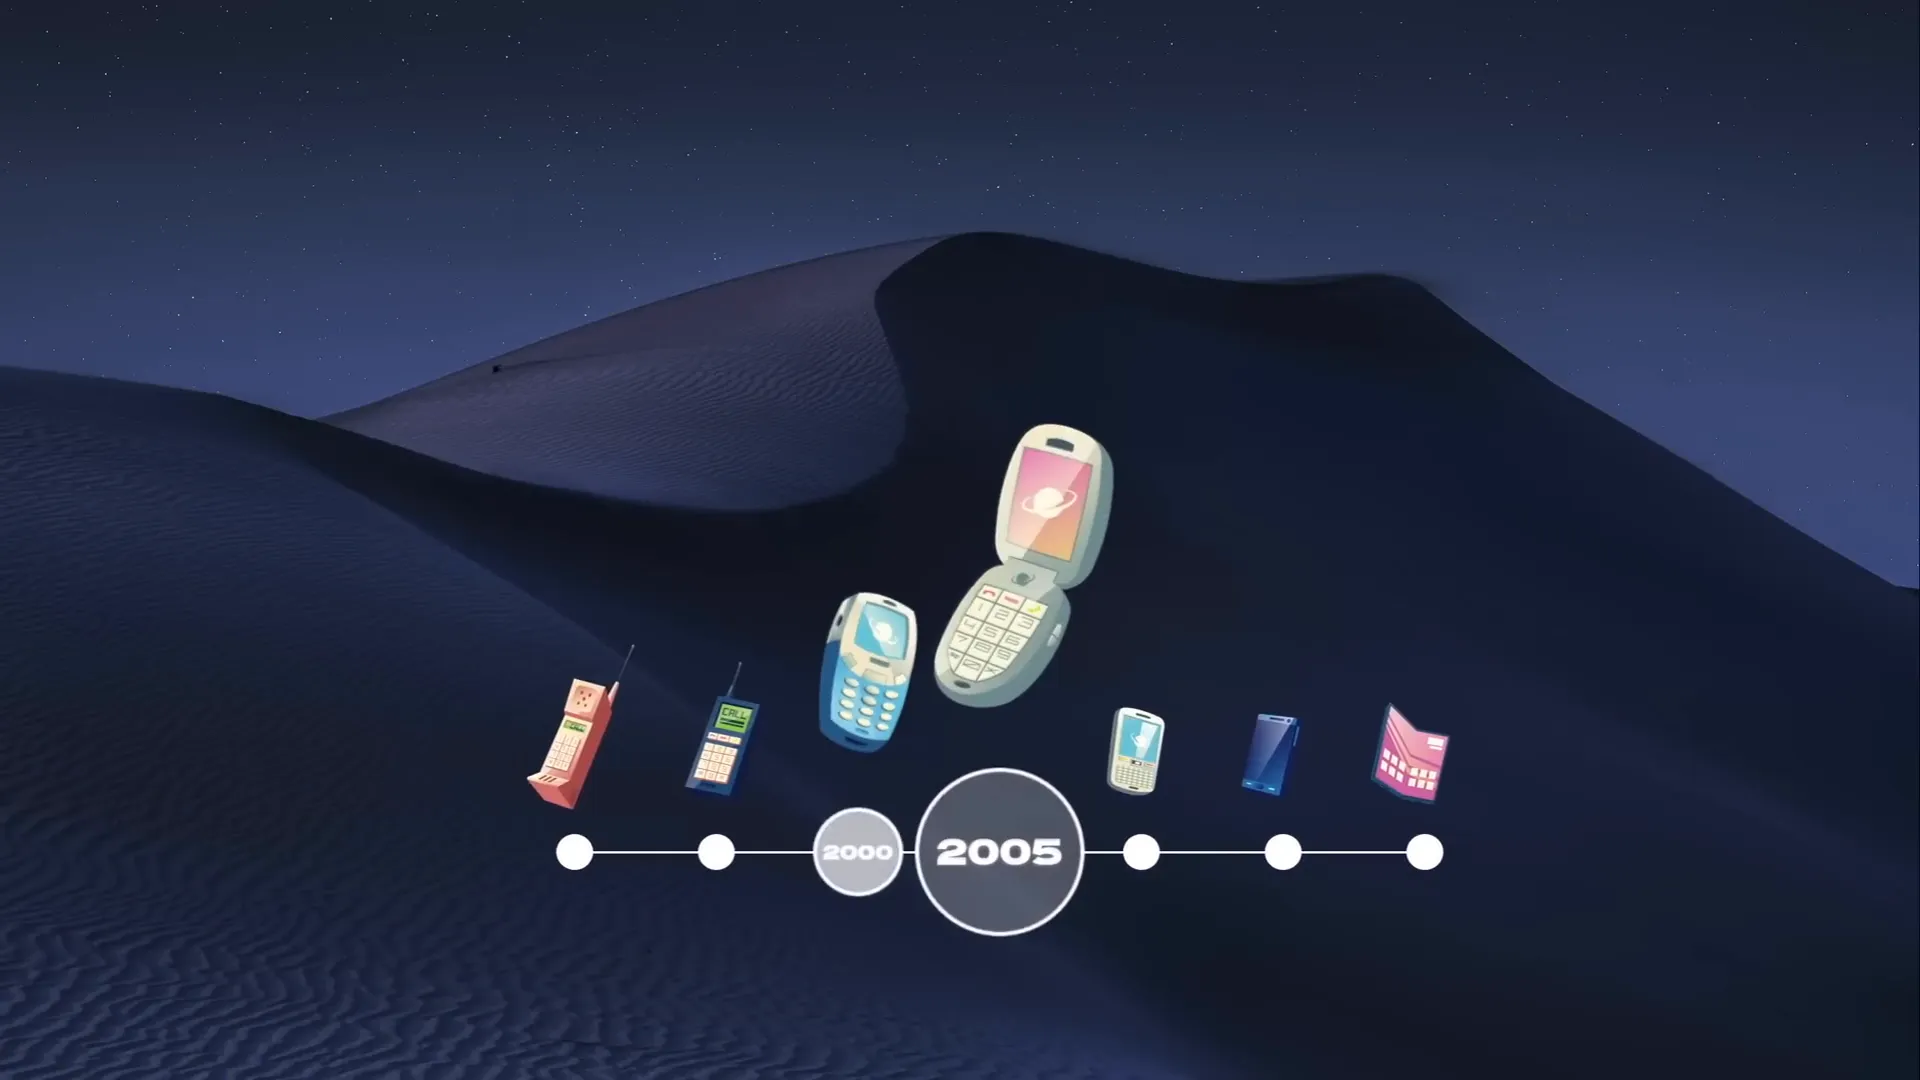
Table of Contents
- Why Use Morph Transition for Timelines?
- Getting Started: Preparing Your PowerPoint Workspace
- Drawing the Timeline Base: Line and Circles
- Adding Years to Your Timeline
- Setting Up the Morph Transition
- Animating the Timeline: Copying and Shifting Circles
- Highlighting the Current Year with Enlarged Circles
- Adding Visual Interest: Phone Illustrations Along the Timeline
- Creating Interactive Navigation with Hyperlinks
- Final Thoughts: Bringing Your Timeline to Life with PowerPoint Morph
- Resources and Tools Used
- Frequently Asked Questions (FAQ)
- Conclusion
Why Use Morph Transition for Timelines?
PowerPoint‘s Morph transition is a game-changer when it comes to creating smooth animations between slides without the need for complex motion paths or custom animations. It automatically animates the movement, resizing, and color changes of objects between slides, making it perfect for timelines where elements need to shift positions or highlight changes over time.
Using Morph, you can create an engaging timeline that flows naturally, capturing the viewer’s attention as years, events, or milestones slide across the screen. Plus, with some clever design tricks, you can add illustrations, text, and interactive elements that elevate your presentation to the next level.
Getting Started: Preparing Your PowerPoint Workspace
Let’s begin by setting up a clean workspace in PowerPoint to build our timeline.
- Start with a blank slide: Open PowerPoint and insert a new slide. Make sure to set the slide layout to Blank to remove any default text placeholders. This gives you a clean canvas to work on.
- Activate slide guides: To help with precise alignment, enable the slide guides. This will help you find the center of the slide and keep your elements balanced as you build your timeline.
- Insert a background image: Instead of inserting a full-screen image directly, paste a background photo using the fill options. This is important because later, when we add circles with background fills, this method ensures the fills will work correctly.
For the background image, I usually source beautiful, high-quality photos from Unsplash. In this tutorial, I used a specific photo linked in the resources section below.
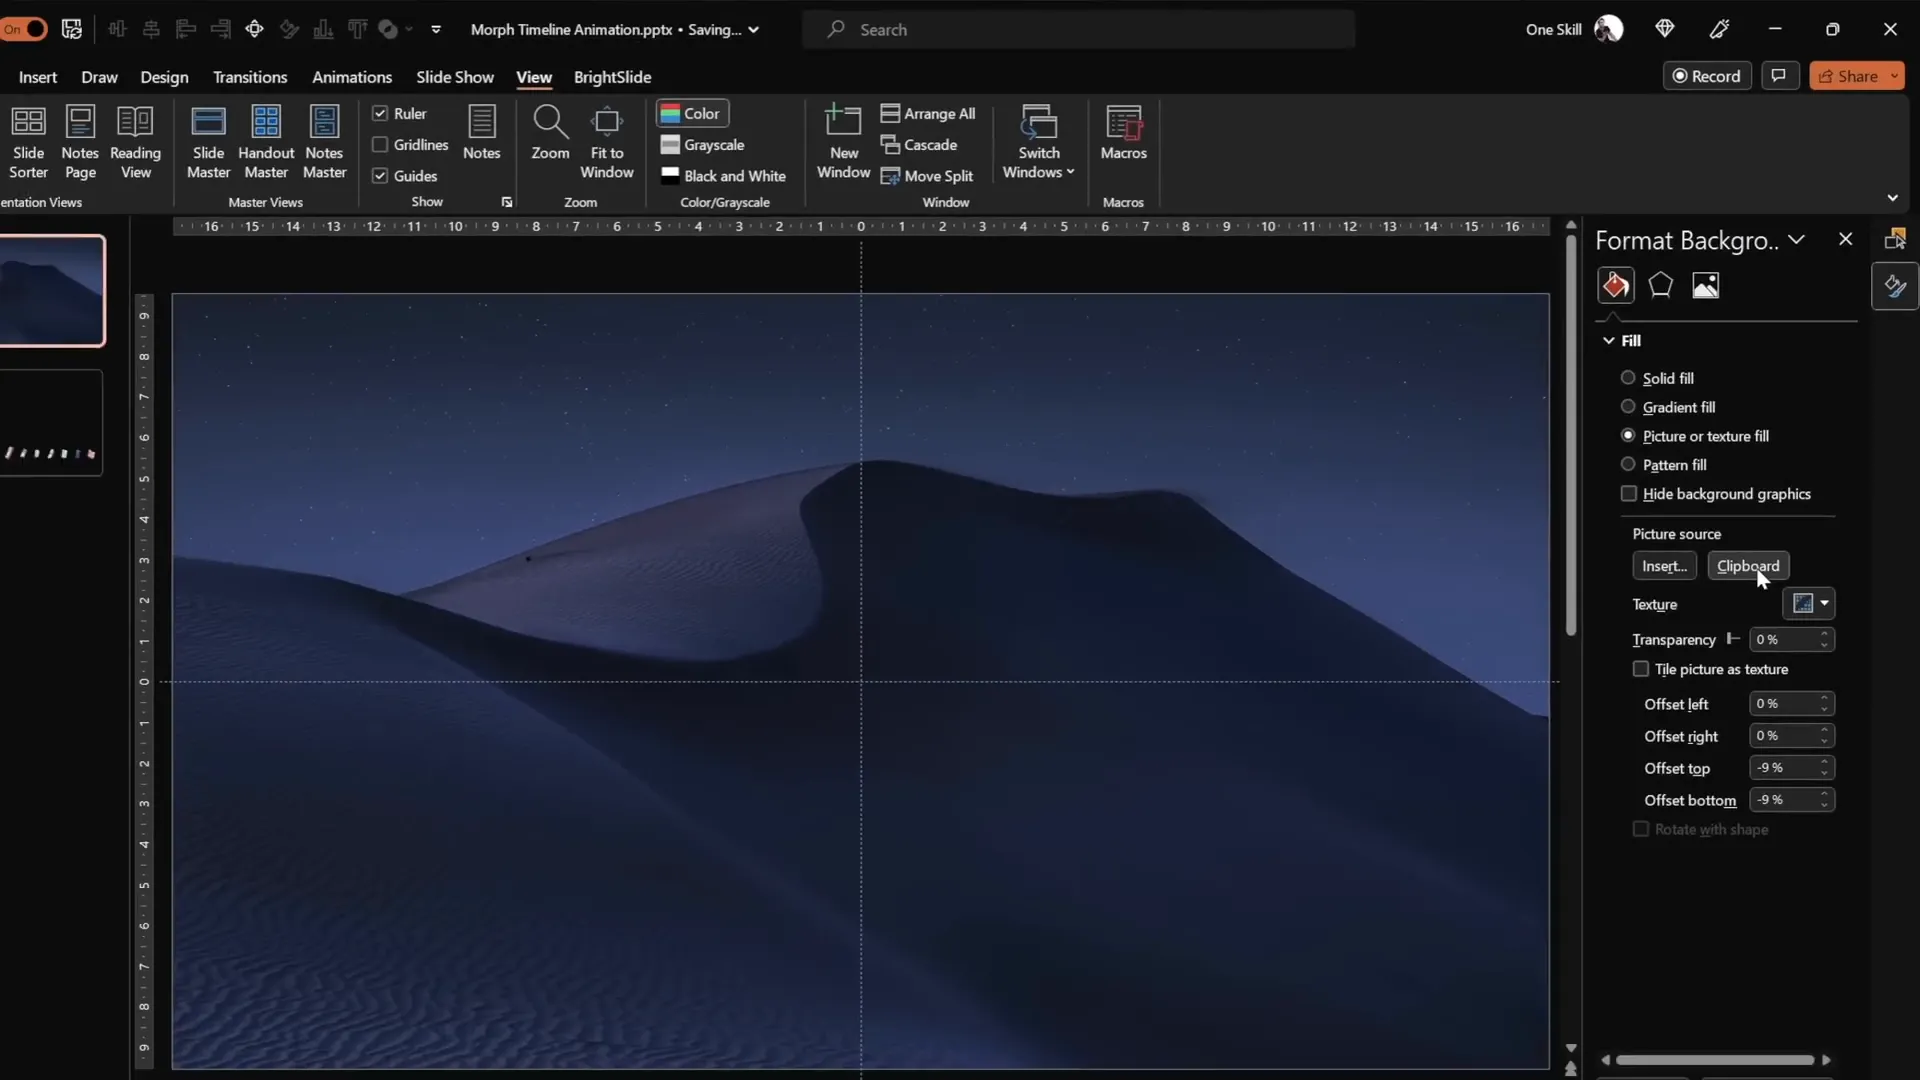
Why Paste the Background Image Using Fill Options?
This technique allows you to use the slide background fill feature for shapes like circles later in the design. If you simply insert the image as a picture on the slide, the fill options won’t work properly, which limits your creative possibilities when styling timeline elements.
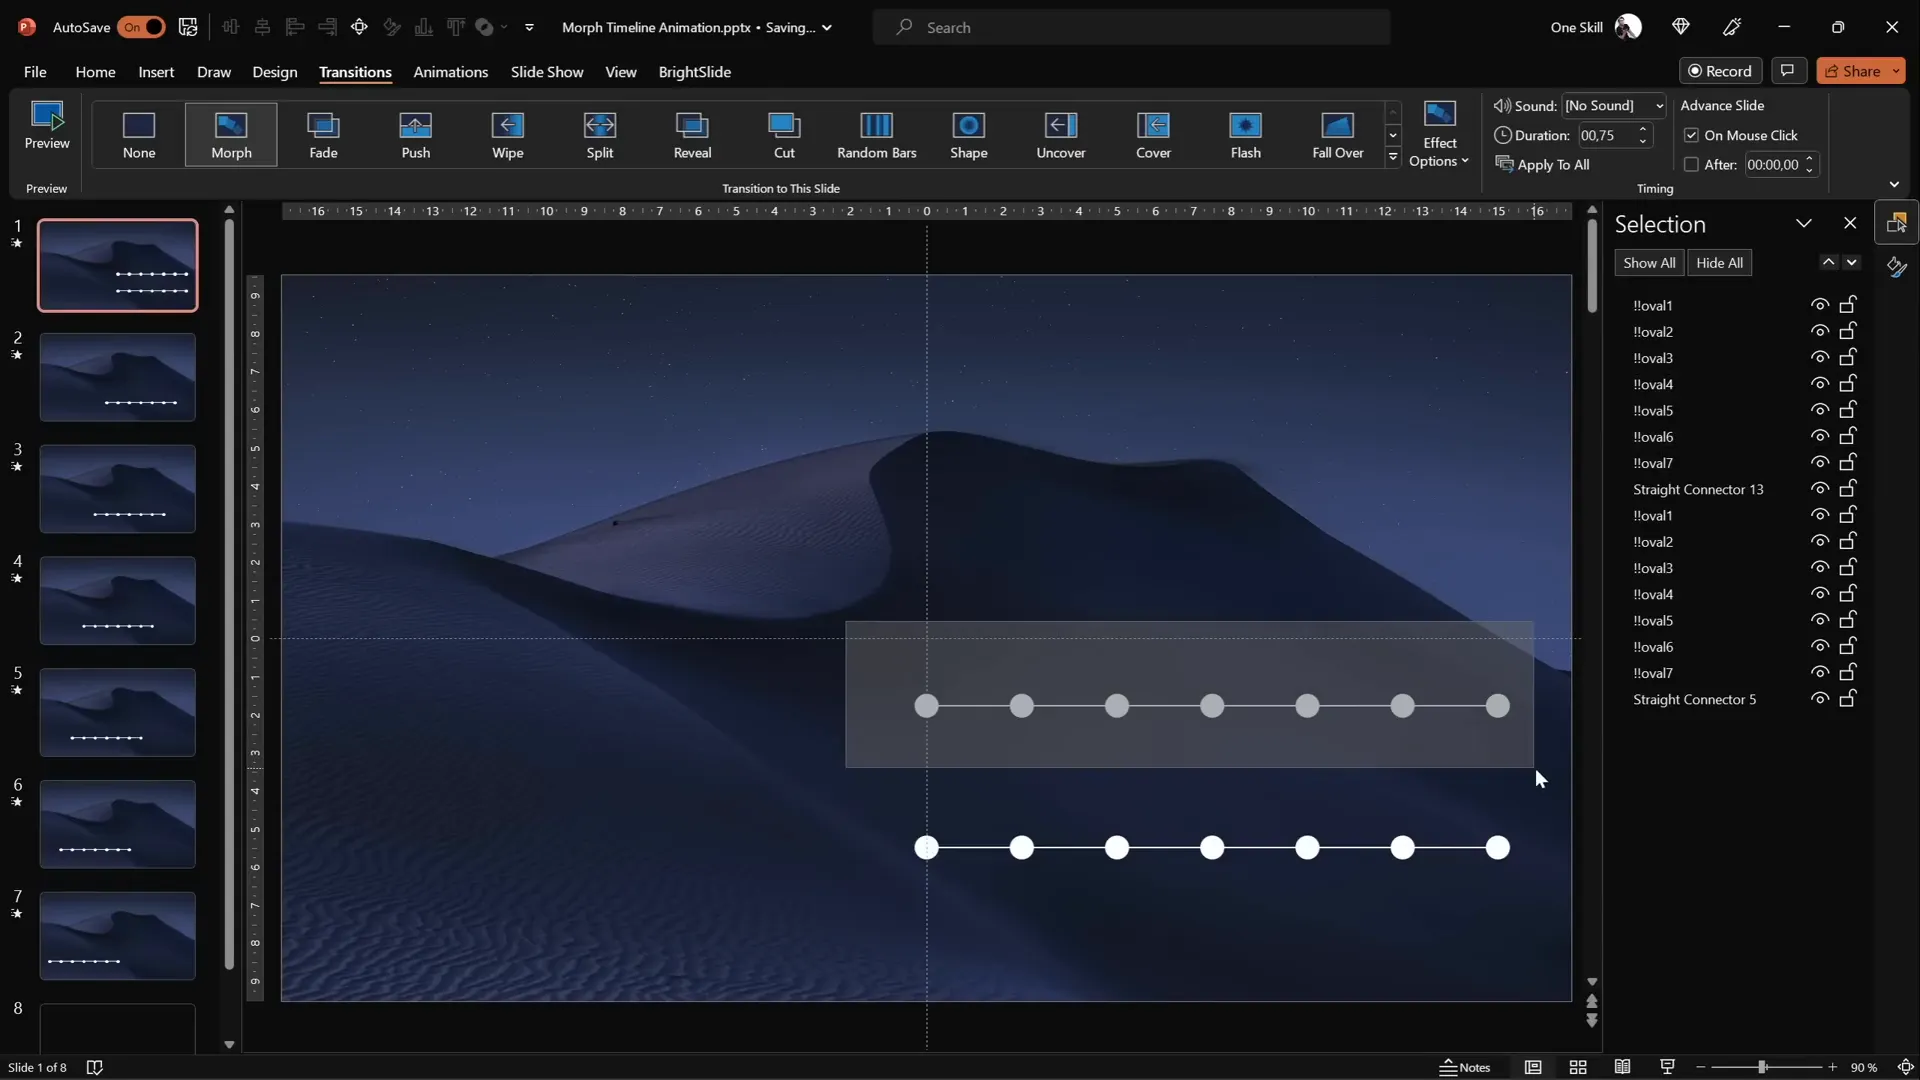
Drawing the Timeline Base: Line and Circles
With the background set, it’s time to create the foundation of our timeline: a horizontal line and evenly spaced circles representing different years or milestones.
- Insert a horizontal line: Use the line tool to draw a straight line near the bottom right corner of your slide. Holding the
Shiftkey while drawing ensures the line is perfectly horizontal. - Set the line length and thickness: I chose a length of 15 centimeters and a line width of 1 point for a clean, minimal look.
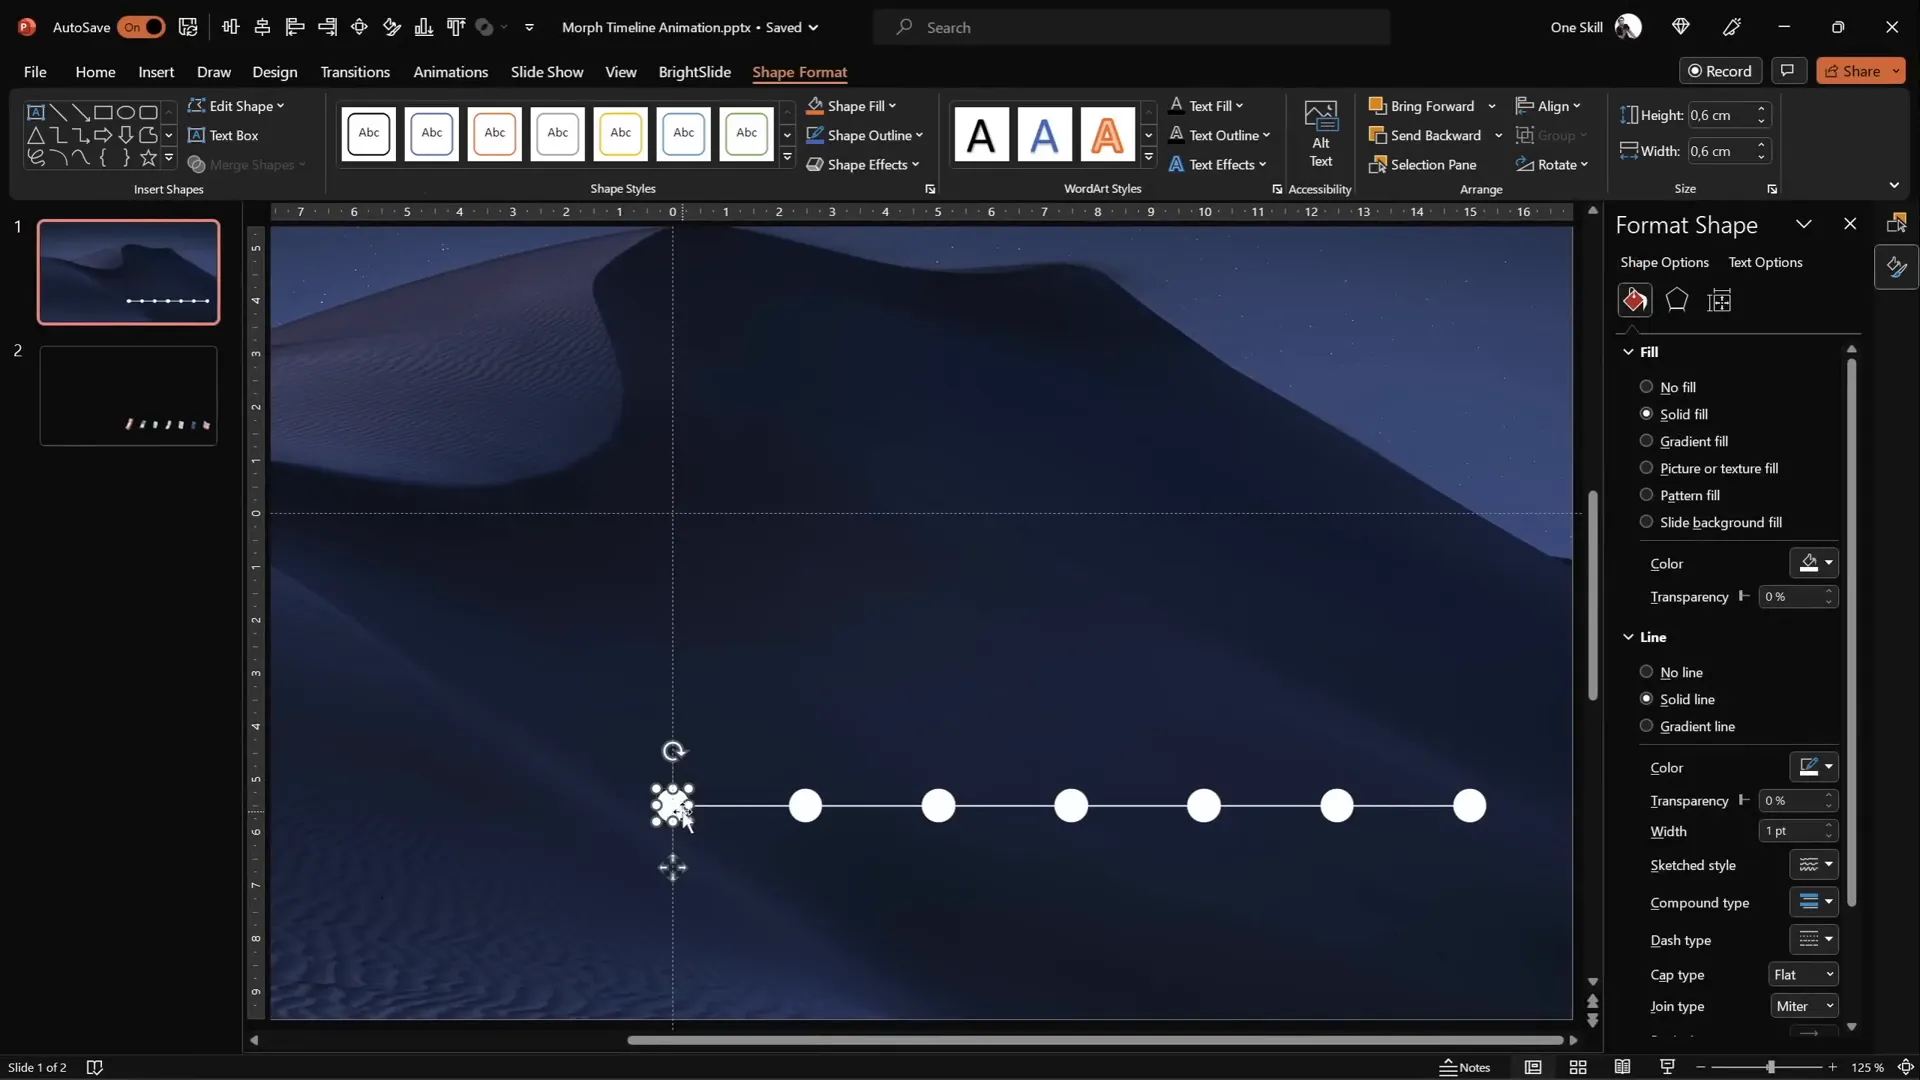
- Create the timeline circles: Draw a perfect circle by holding
Shiftwhile using the oval shape tool. I used circles with a diameter of 0.6 centimeters, but feel free to adjust the size to your liking. - Duplicate and position the circles: Place the first circle on the left side of the line. Then, using
Ctrl + Shift, drag to duplicate the circle to the right side of the line. Repeat this until you have seven circles in total. - Distribute circles evenly: Select all circles, go to the align options, and choose Distribute Horizontally to space them evenly along the line.
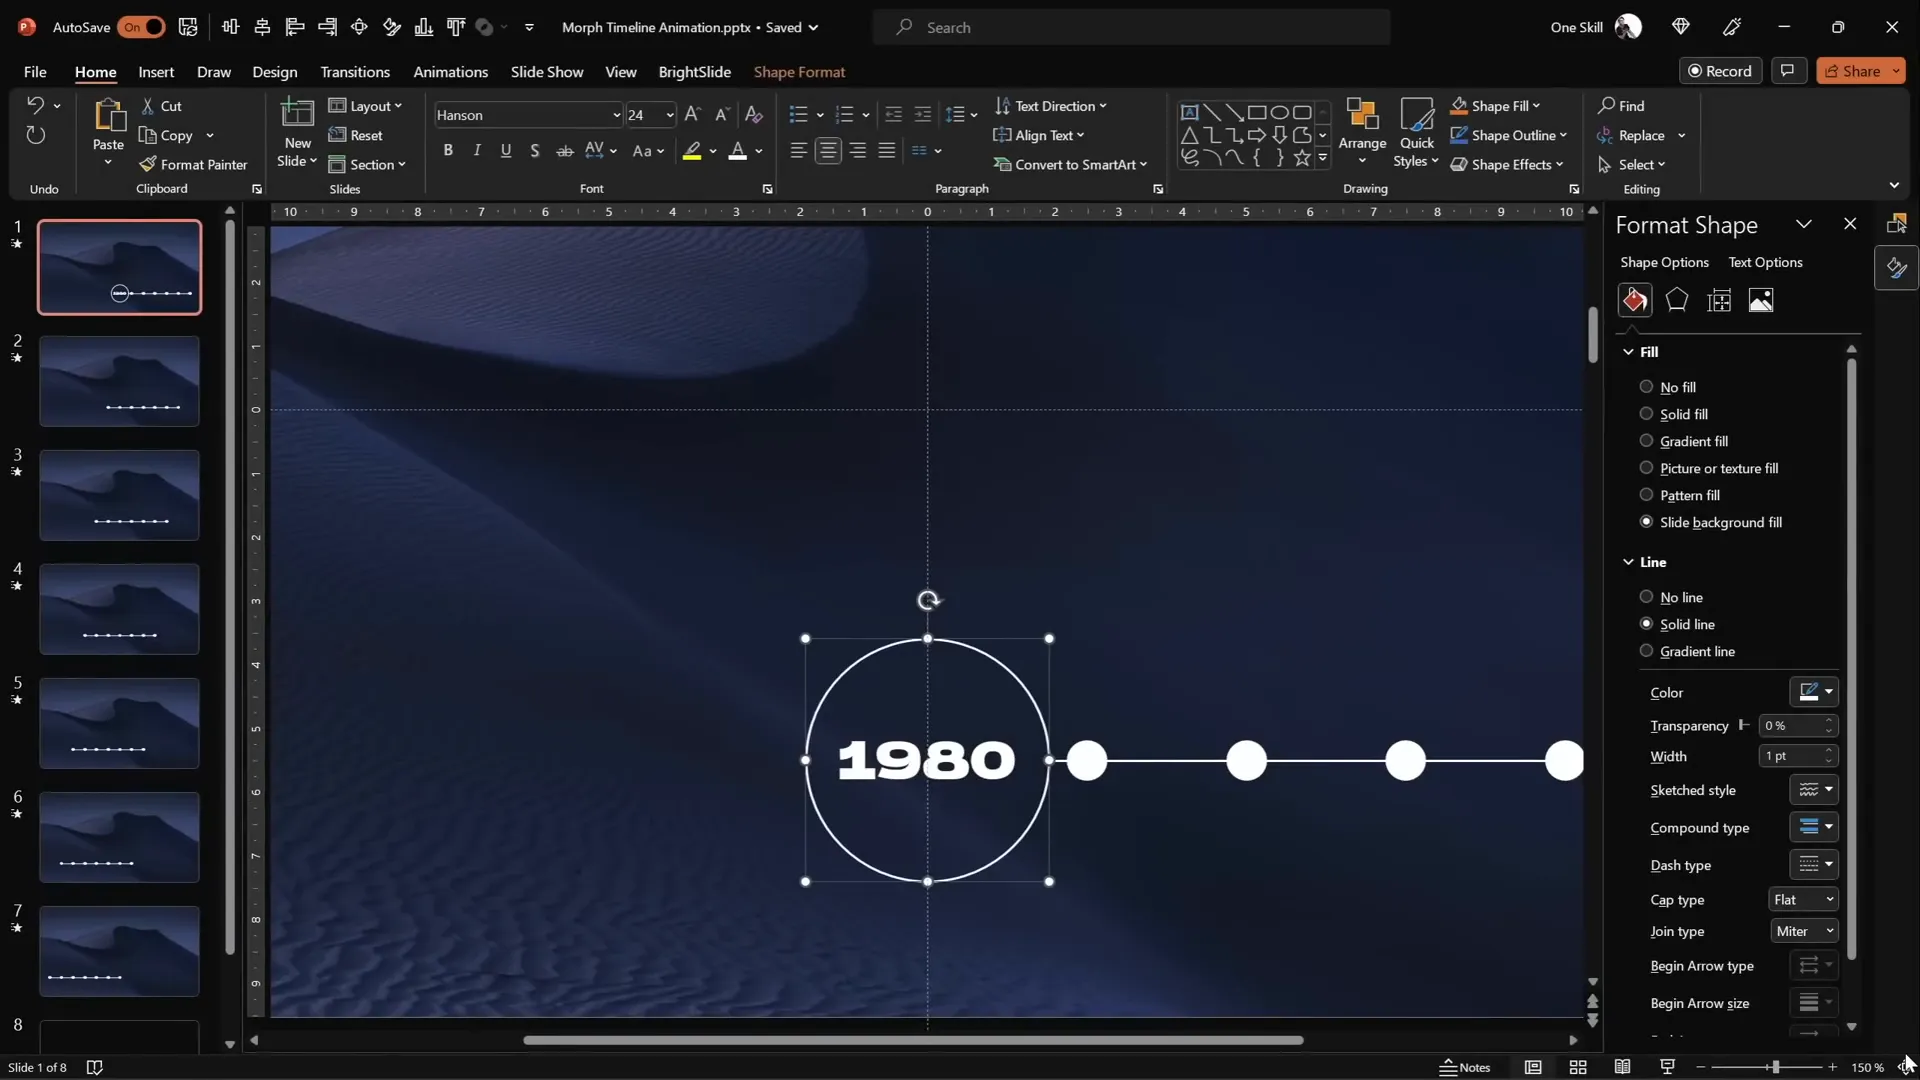
Adding Years to Your Timeline
Now that we have the timeline structure, it’s time to label each circle with a year, representing a key point in your timeline.
- Insert text boxes into each circle: Zoom in and type the years inside each bubble. For this example, I used years starting from 1980 to 2020.
- Set the font style and size: I chose the Hanson font with a small size of 5 points for initial typing to fit inside the circles.
- Change text color to black initially: This helps you see the text clearly while typing.
- After typing, change the text color to white: This will make the text invisible temporarily, setting the stage for the Morph animation to reveal it dynamically.
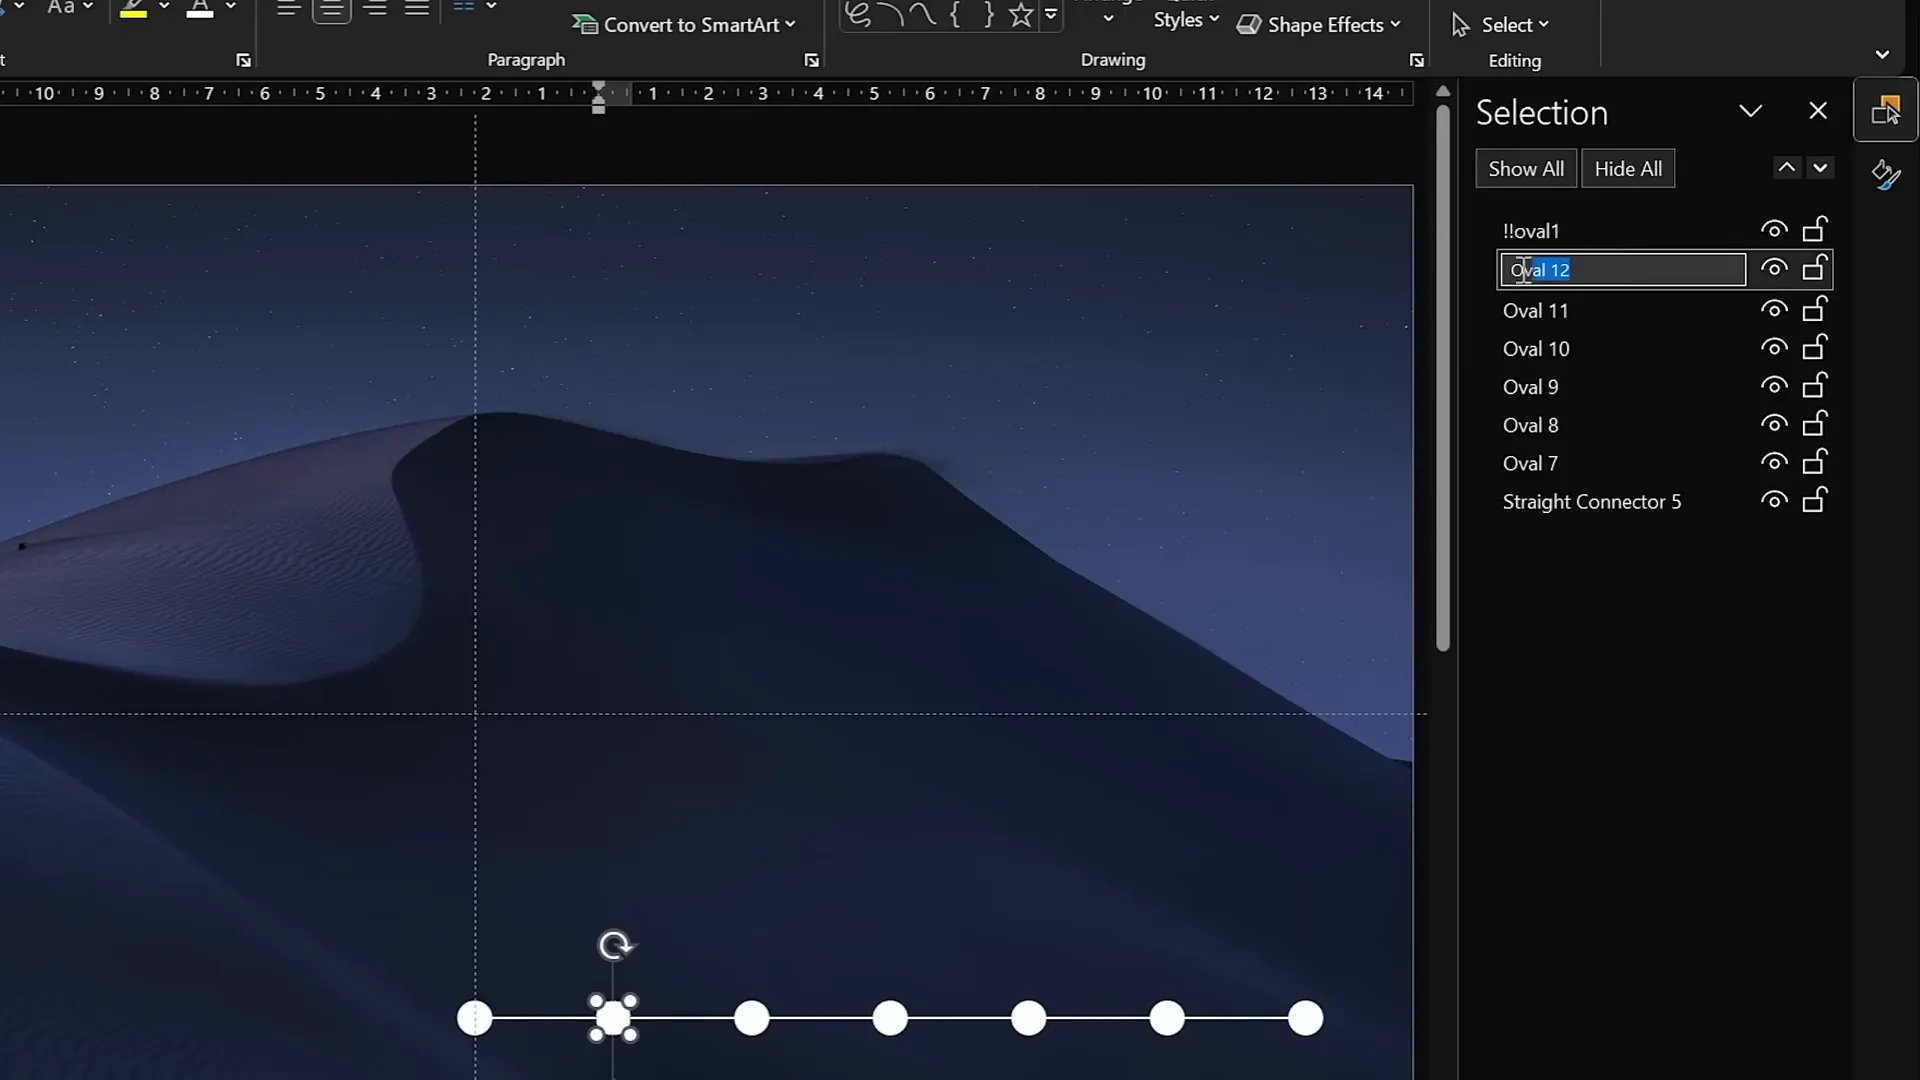
Proper naming of objects is crucial for Morph to work correctly.
Naming Your Circles for Morph Magic
In the selection pane, rename each circle with a consistent naming convention, such as !!oval1, !!oval2, and so on. The double exclamation marks at the beginning ensure that these shapes are grouped at the top of the selection pane, making them easier to manage.
Setting Up the Morph Transition
With your timeline objects ready, it’s time to bring them to life using the Morph transition.
- Set the slide transition to Morph: Go to the Transitions tab and select Morph for the slide transition.
- Adjust transition duration: For a smooth yet fast animation, I recommend setting the duration to 0.75 seconds.
Now, to create the animation effect of the timeline moving, we’ll create multiple slides where the timeline shifts incrementally.
Animating the Timeline: Copying and Shifting Circles
To simulate the timeline moving from right to left, follow these steps:
- Duplicate the slide with your timeline: Create a copy of the slide you just designed.
- Shift the circles left: On the duplicated slide, select all the circles and the line and move them one step to the left.
- Repeat this process: Continue duplicating the last slide and moving the timeline elements one step left each time, until all circles have shifted all the way left.
- Use the original circles as guides: Keep a copy of the original circles at the top temporarily to help you align the moving circles precisely.
- Delete the original circles: Once the moving circles are aligned, remove the original guide circles.
Play the slide show to preview the Morph transition. You should see the circles smoothly moving left along the timeline line.
Highlighting the Current Year with Enlarged Circles
To emphasize the active year in your timeline, enlarge the corresponding circle and make the year text visible. Here’s how:
- On each slide, select the circle for the current year: Grab a corner handle and resize the circle larger while holding
Ctrl + Shiftto resize from the center proportionally. - Modify the fill color: Change the circle’s fill to a light background color to make it stand out and hide any overlapping lines behind it.
- Increase text font size: Make the year inside the circle larger (I used size 24) to ensure it’s clearly visible.
- Copy the style: Use
Ctrl + Shift + Cto copy the style from the enlarged circle, then paste it (Ctrl + Shift + V) onto the corresponding circle on the next slide to maintain consistency.
Repeat this process for each slide so that the active year is always highlighted, creating a smooth transition that draws viewer attention.
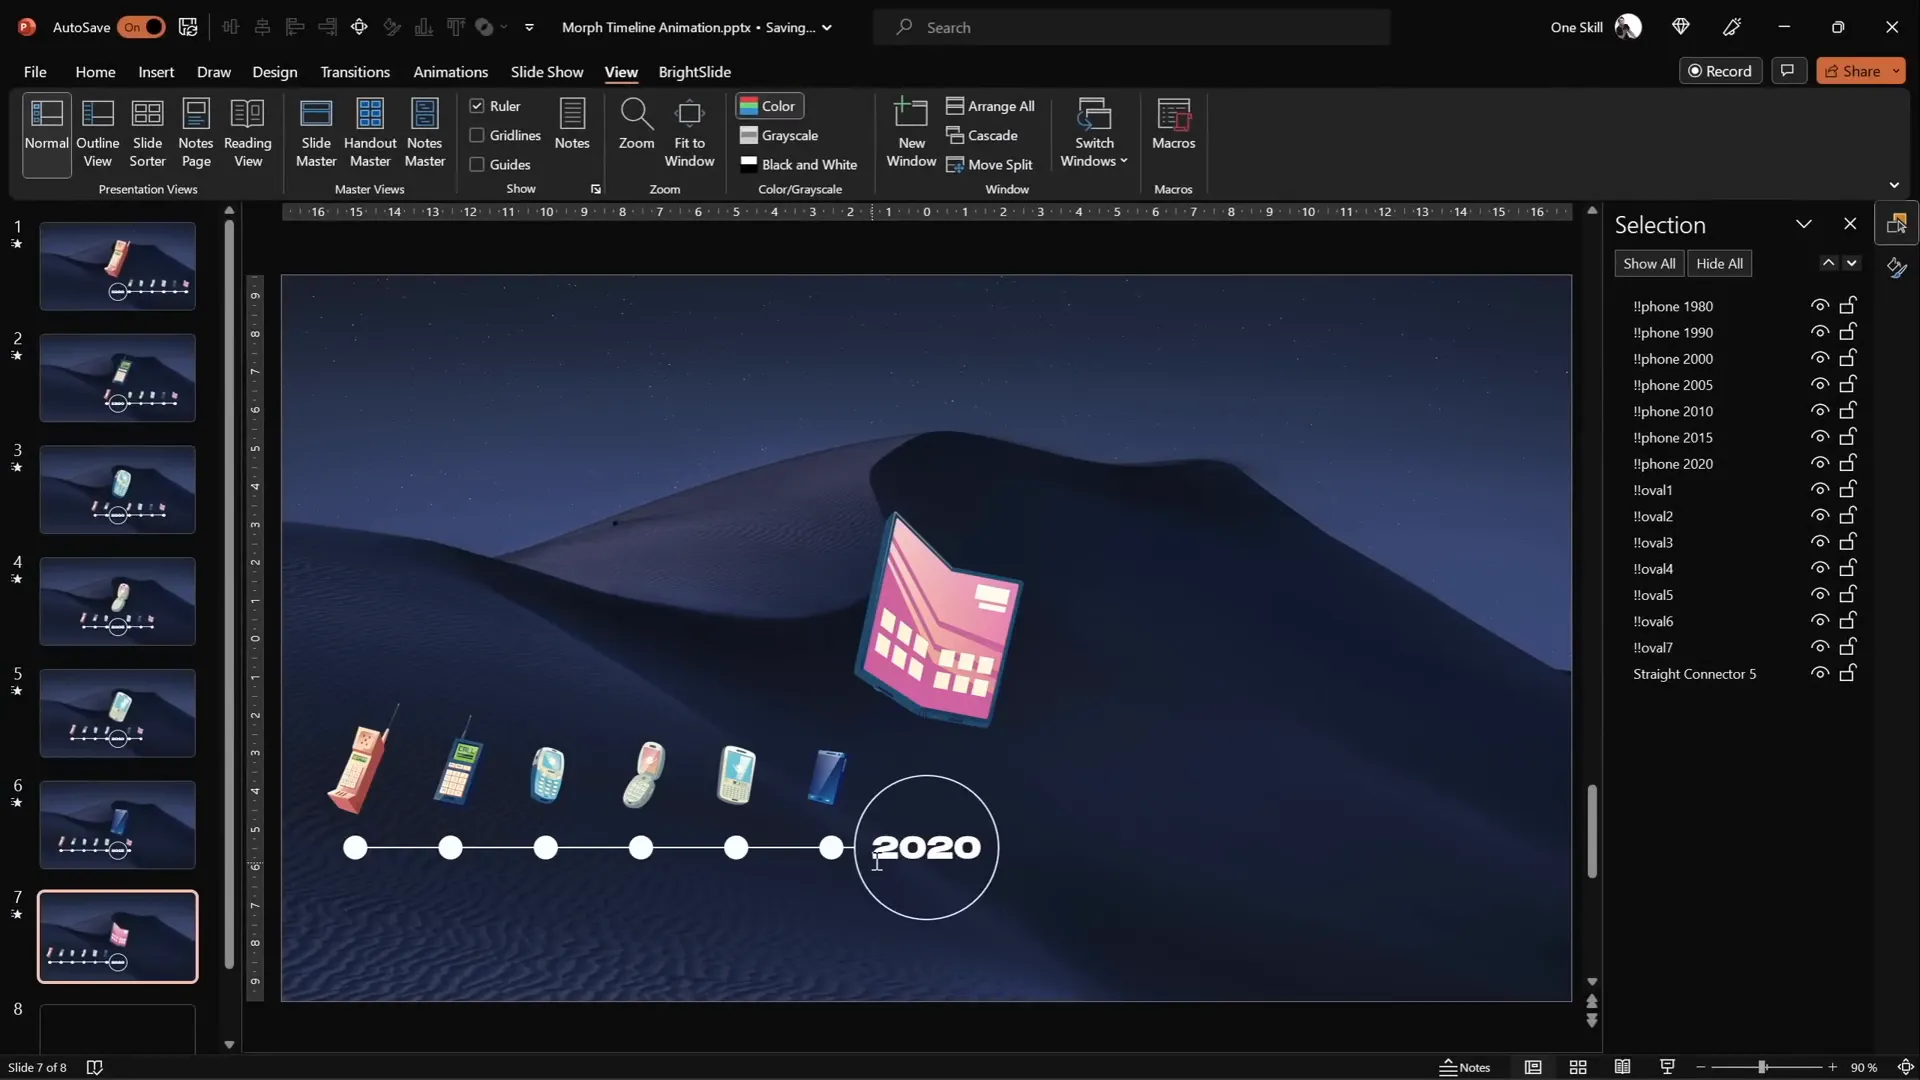
Adding Visual Interest: Phone Illustrations Along the Timeline
To make the timeline even more engaging, add thematic illustrations that relate to the timeline content. In this example, we’ll use phone illustrations representing different eras of mobile phone evolution.
- Collect phone illustrations: I sourced a set of phone illustrations from Freepik, linked below.
- Name the illustrations: In the selection pane, name each phone with a consistent naming convention starting with double exclamation marks and the corresponding year, e.g.,
!!phone1980. - Paste the phones onto each slide: Place the illustrations above the timeline line on each slide.
- Resize and rotate: Adjust each phone’s size and orientation to create a dynamic, visually pleasing effect.
- Move phones left with the timeline: On each subsequent slide, move the phones one step to the left along with the circles and line.
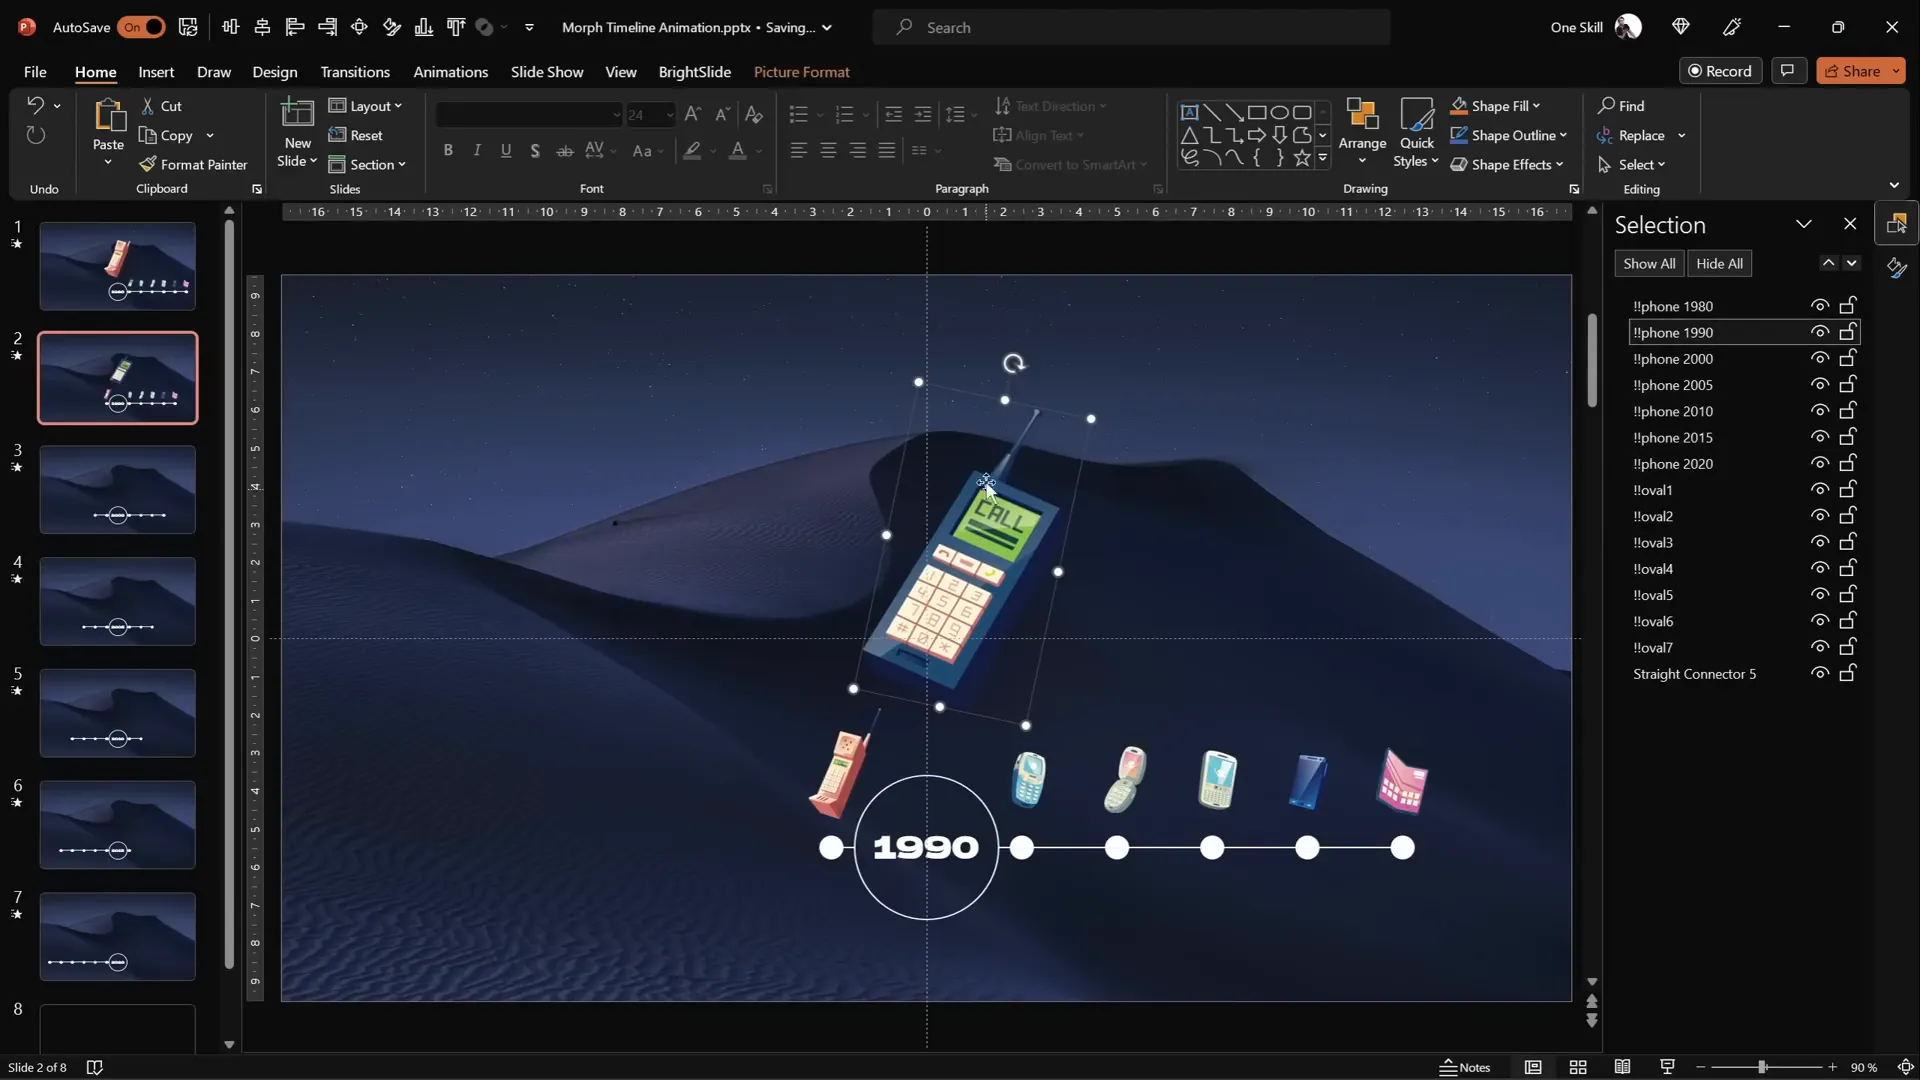
When you run the slide show, you’ll see both the timeline circles and the phone illustrations animate smoothly thanks to the Morph transition. This adds a storytelling element to your timeline, making it more memorable and visually rich.

Creating Interactive Navigation with Hyperlinks
To make your timeline not just animated but interactive, you can add hyperlinks to the circles. This allows viewers to jump between specific points on the timeline quickly.
- Insert hyperlinks on side circles: For example, on the first slide, add a hyperlink on the rightmost circle that jumps to the last slide.
- Add reciprocal links: On the last slide, insert a hyperlink on the leftmost circle that jumps back to the first slide.
- Customize links as needed: Feel free to add hyperlinks to all circles to allow navigation to any timeline point.
Adding these navigation features transforms your timeline into an interactive experience, perfect for presentations where users may want to jump back and forth between milestones.
Final Thoughts: Bringing Your Timeline to Life with PowerPoint Morph
Creating an animated morph timeline in PowerPoint is a fantastic way to visually represent chronological data or progressions in a sleek, engaging format. The Morph transition simplifies what used to require complex animations, making smooth movement and resizing effortless.
By carefully setting up your slides with consistent naming, precise alignment, and thoughtful design elements like background fills and illustrations, you can produce a professional-quality timeline that stands out.
Remember, the key steps include:
- Using blank slides and slide guides for clean setup
- Pasting background images via fill options for flexible design
- Drawing and evenly distributing circles along a timeline line
- Labeling circles with years and renaming for Morph compatibility
- Duplicating slides and shifting elements to create animation
- Enlarging and styling the active year circle for emphasis
- Adding thematic illustrations to enhance storytelling
- Inserting hyperlinks for interactive navigation
With these techniques, your timeline will not only look impressive but also function intuitively, impressing your audience with smooth morphing animations and clickable navigation.
Resources and Tools Used
- Background Photo: Unsplash photo
- Phone Illustrations: Freepik phone illustrations
- Font Used: Hanson font
Frequently Asked Questions (FAQ)
What is the Morph transition in PowerPoint?
The Morph transition is a feature in PowerPoint that animates smooth movement, resizing, and color changes of objects between slides automatically. It simplifies creating polished animations without manually setting motion paths or complex animations.
Why do I need to paste the background image using fill options?
Pasting the background image via fill options allows shapes on top of the slide to use the slide background fill property. This enables effects like circles filled with the background image to blend seamlessly, which is crucial for the morph animation to look consistent.
How many slides do I need for the morph timeline?
You need one slide for each step you want the timeline to move. In this tutorial, seven slides were used to shift the timeline circles step-by-step from right to left, creating the animation effect.
Can I use any shapes instead of circles for the timeline points?
Absolutely! While circles are commonly used for timelines, you can use any shape that fits your design style, such as squares, icons, or custom shapes. Just ensure consistent naming for Morph to work properly.
How do I make the active year stand out in the timeline?
Enlarge the circle for the active year, change its fill color to a light background shade, and increase the font size of the year text inside. This draws viewer attention to the current point in the timeline during the animation.
Is it possible to add interactivity to the timeline?
Yes! You can add hyperlinks to the timeline circles that link to specific slides. This allows users to click on a timeline point and jump directly to that part of the presentation, making your timeline interactive and user-friendly.
Where can I find free illustrations and photos to use in my timeline?
Great resources include Unsplash for free high-quality photos and Freepik for vector illustrations. Always check licensing terms before use.
Conclusion
Creating a captivating animated timeline in PowerPoint is both fun and rewarding. By leveraging the Morph transition, you can transform static timelines into engaging visual stories that effortlessly guide your audience through a sequence of events or milestones.
With this detailed guide, you have all the tools and knowledge to build your own animated morph timeline, customize it with images and interactive elements, and impress your audience with smooth, professional animations.
So grab your PowerPoint, follow the steps, and let your creativity flow! Your next presentation is about to get a major upgrade.
Check out the full video: ANIMATED PowerPoint Morph Timeline ✨ Free Download


