
Hello, friends! If you’ve ever wanted to take your PowerPoint presentations to the next level with cinematic video effects, you’re in the right place. In this comprehensive tutorial, I’ll guide you through creating an epic video effect in PowerPoint where text appears to rise from behind mountains and then disappear behind them again — all within PowerPoint itself. This effect is not only visually impressive but also surprisingly straightforward once you know the secret.
We’ll explore step-by-step how to use two identical video clips with clever masking techniques to create a layered video sandwich effect. I’ll also share tips on precise video cropping using PowerPoint’s freeform tools and a powerful free online editor for perfect masking. Plus, we’ll animate text to fly in letter by letter, zoom, and fly out to create a dynamic and engaging presentation slide.
This tutorial is perfect for anyone looking to add creative video effects to their slides, whether for business presentations, storytelling, or artistic projects. Let’s dive in and unleash the full potential of PowerPoint!
Table of Contents
- Getting Started: Preparing Your PowerPoint Slide and Video
- The Big Secret: Creating the Video Sandwich Effect with Two Layers
- Method #1: Using PowerPoint’s Freeform Shape Tool for Precise Masking
- Method #2: Using Photopea for Perfect Vector Masking
- Synchronizing Video Playback and Layering
- Adding and Animating Text Between the Video Layers
- Bringing It All Together: Final Touches and Fun Extras
- Bonus: Where to Find Resources and More Inspiration
- Frequently Asked Questions (FAQ)
- Conclusion
Getting Started: Preparing Your PowerPoint Slide and Video
First things first, open your PowerPoint application — I’m using PowerPoint Office 365 for this tutorial. Start with a blank new slide to give yourself a clean canvas to build the effect from scratch.
The magic begins with choosing the right video. I recommend using a landscape video with a static foreground like mountains and a dynamic background like a changing sky. This contrast allows us to mask the sky while keeping the mountains intact. For this tutorial, I found a stunning 17-second time-lapse video of mountains and sky on Pexels.com, created by Eberhard.
The video is full HD, which works perfectly for PowerPoint slides. You can trim the video inside PowerPoint if you want it shorter or longer, but 17 seconds is a great length to work with.
Once you have your video file, simply drag and drop it onto your blank slide. Now, center the video perfectly on the slide. To make the video cover the entire slide, grab a corner handle and hold down Control + Shift while resizing from the center. This ensures the video scales proportionally and covers the entire slide area.
Next, crop the top and bottom edges if necessary to match the slide’s aspect ratio exactly. Click Crop to finalize the changes.
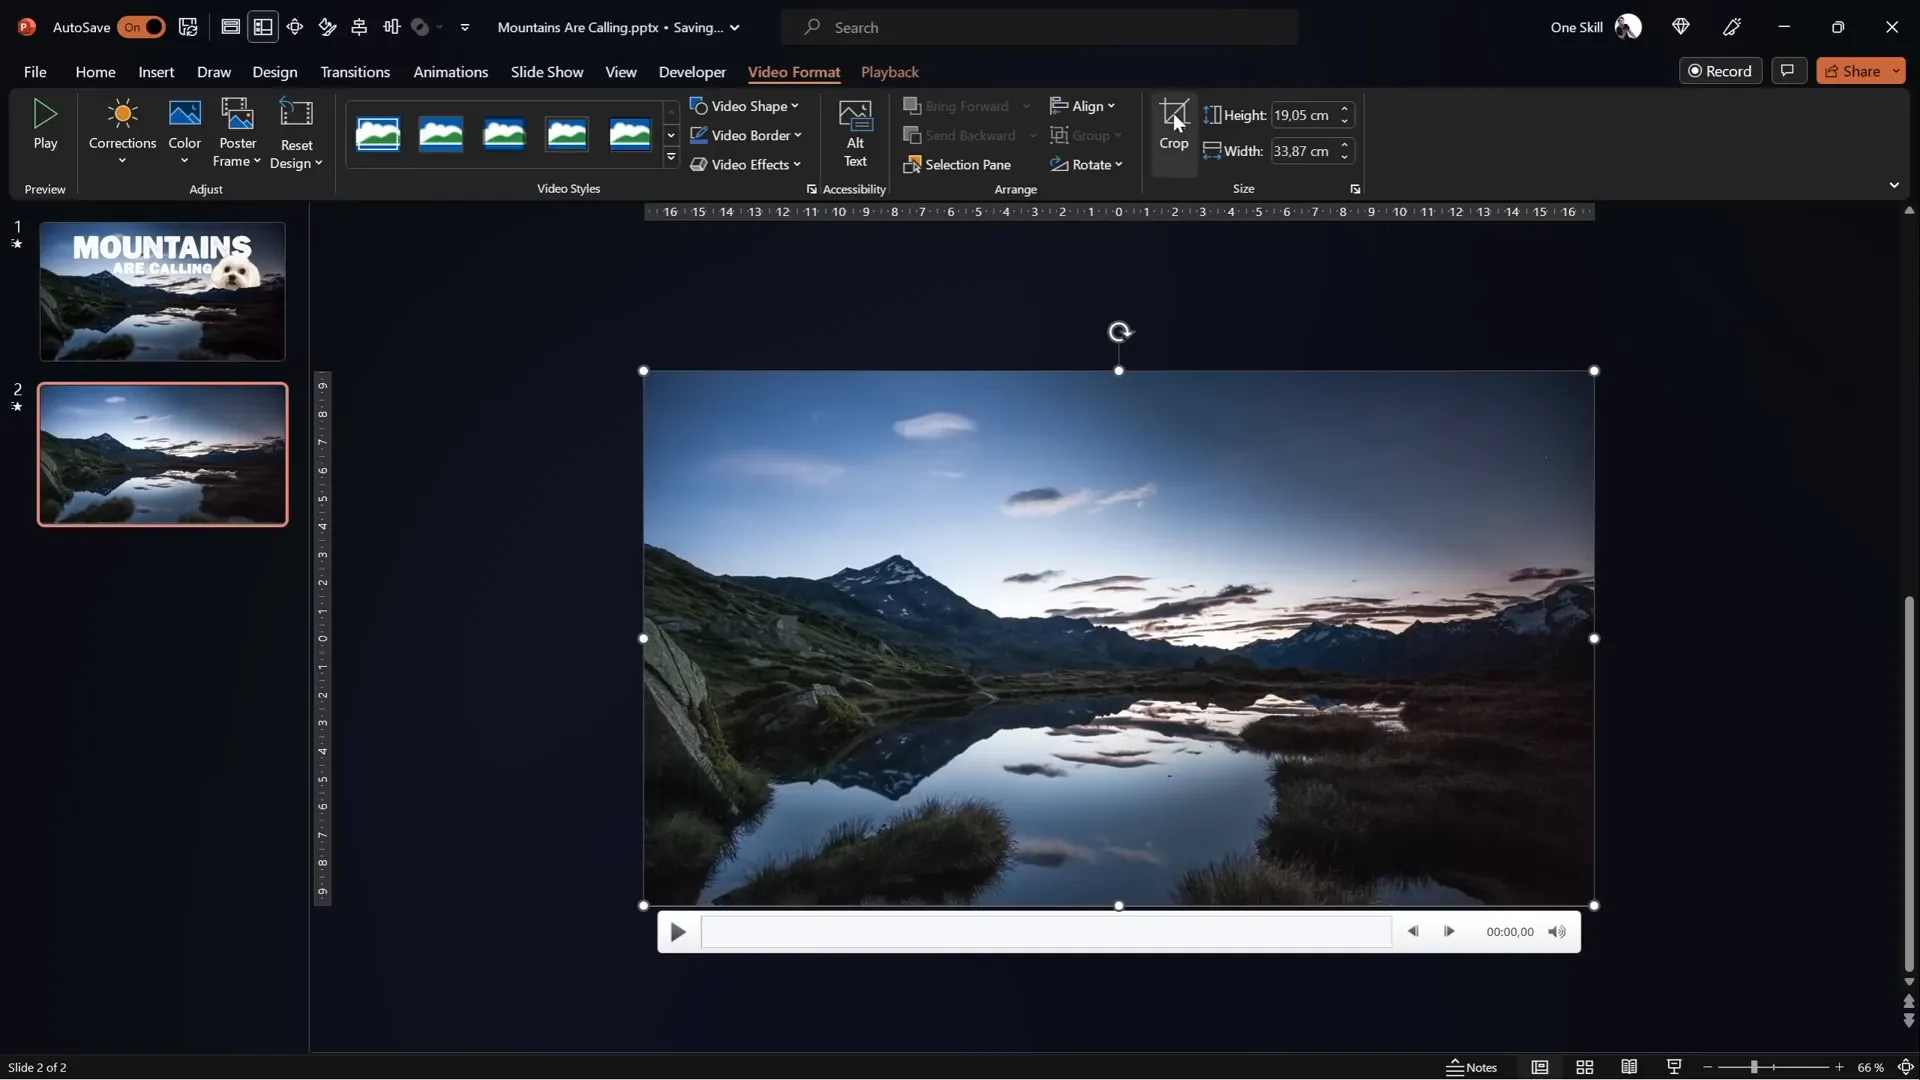
To enhance the readability of the text we’ll add later, darken the video slightly by reducing the brightness by 5%. This subtle darkening will make white text pop beautifully against the video background.
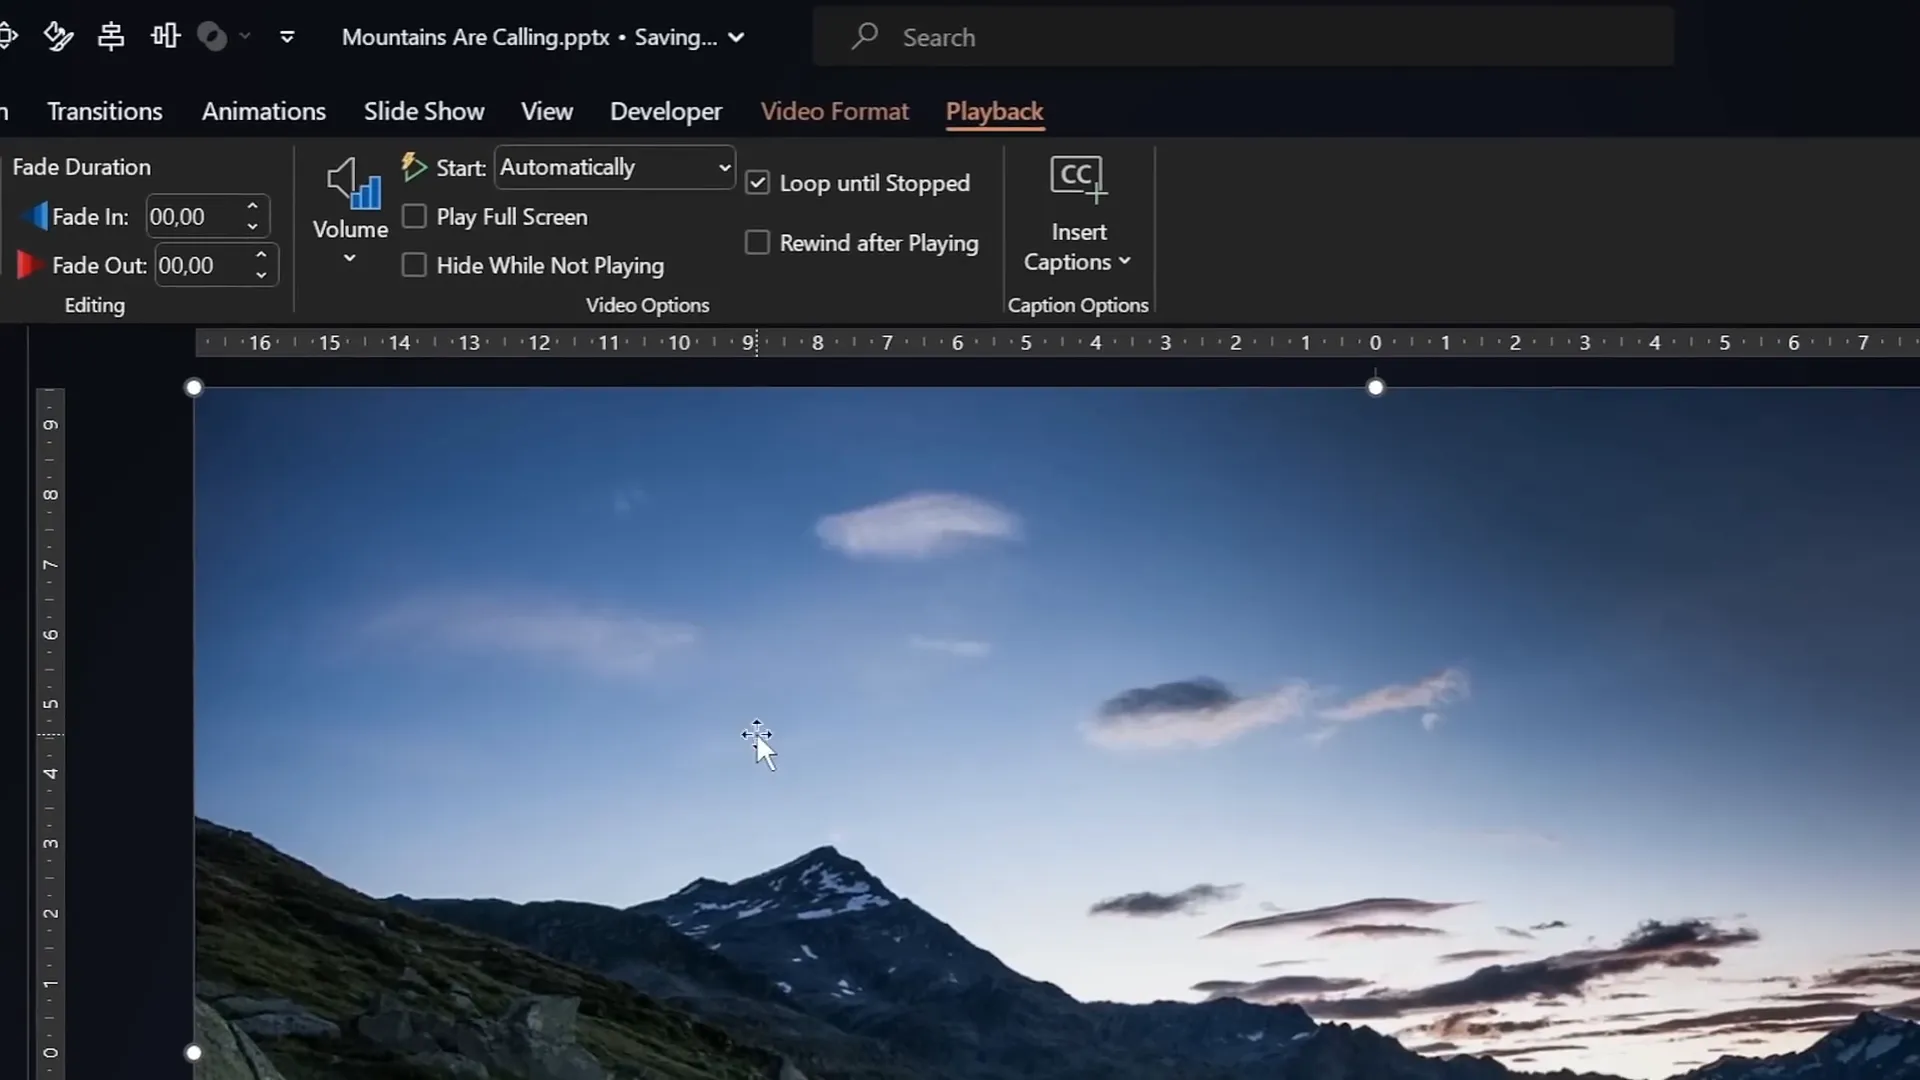
Finally, set the video playback options to Start Automatically and Loop until Stopped. This ensures the video plays seamlessly as soon as the slide appears and loops continuously.
The Big Secret: Creating the Video Sandwich Effect with Two Layers
Here’s the secret sauce that makes this effect possible — using two identical video clips layered on top of each other.
Why two videos? Because we want to isolate the mountains from the sky so that we can insert text or any other objects between those layers. The bottom video acts as the full background (sky + mountains), while the top video shows only the mountains, masking out the sky.
Let me introduce you to my little helper, Mars, my adorable dog, who will appear between the two video layers to demonstrate the layering effect.
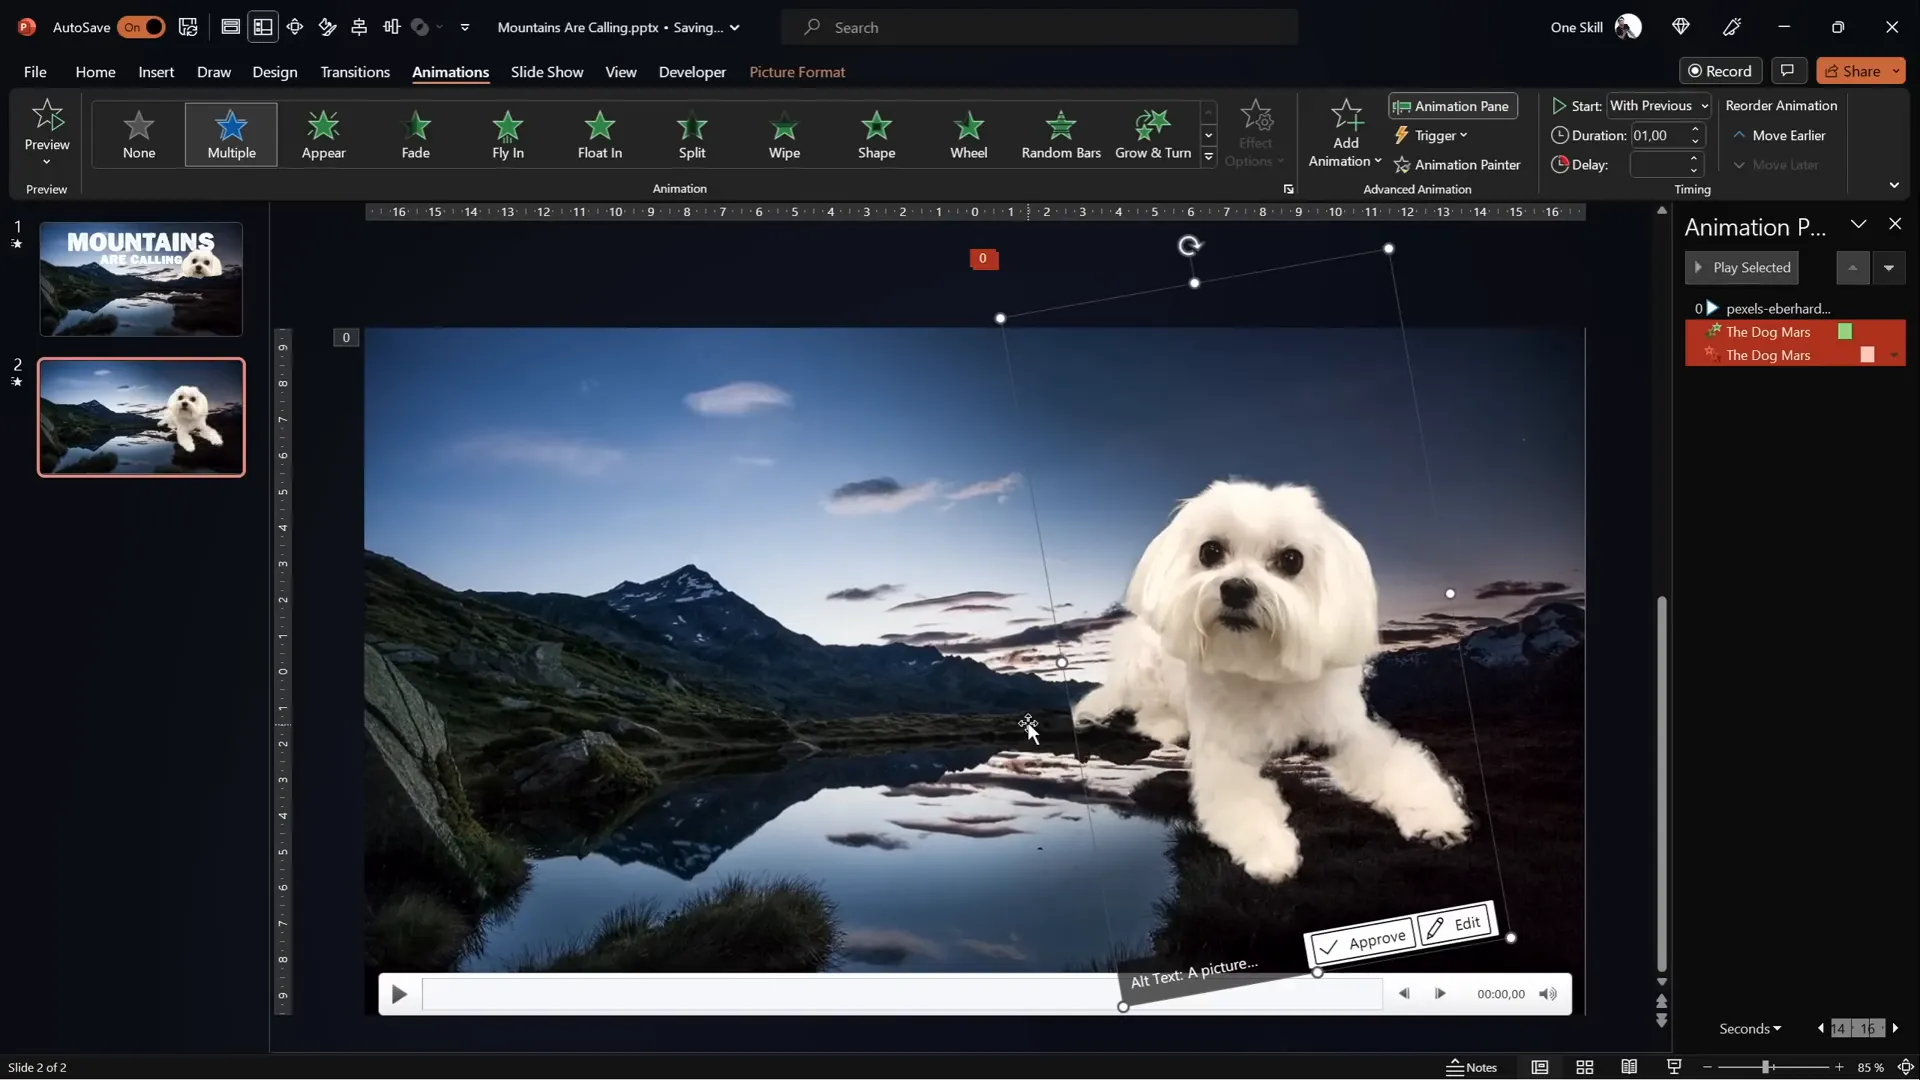
Start by duplicating your video clip so you have two identical videos perfectly aligned on the slide. Rename the bottom video Video Background and the top one Video Front.
Now, the key step is to remove or crop out the sky from the top video so only the mountains remain visible. Initially, you can use the crop tool to simply crop the top portion of the front video. This creates a basic mask where the sky is hidden, allowing whatever is between the two videos (like Mars) to appear between the mountains and sky.
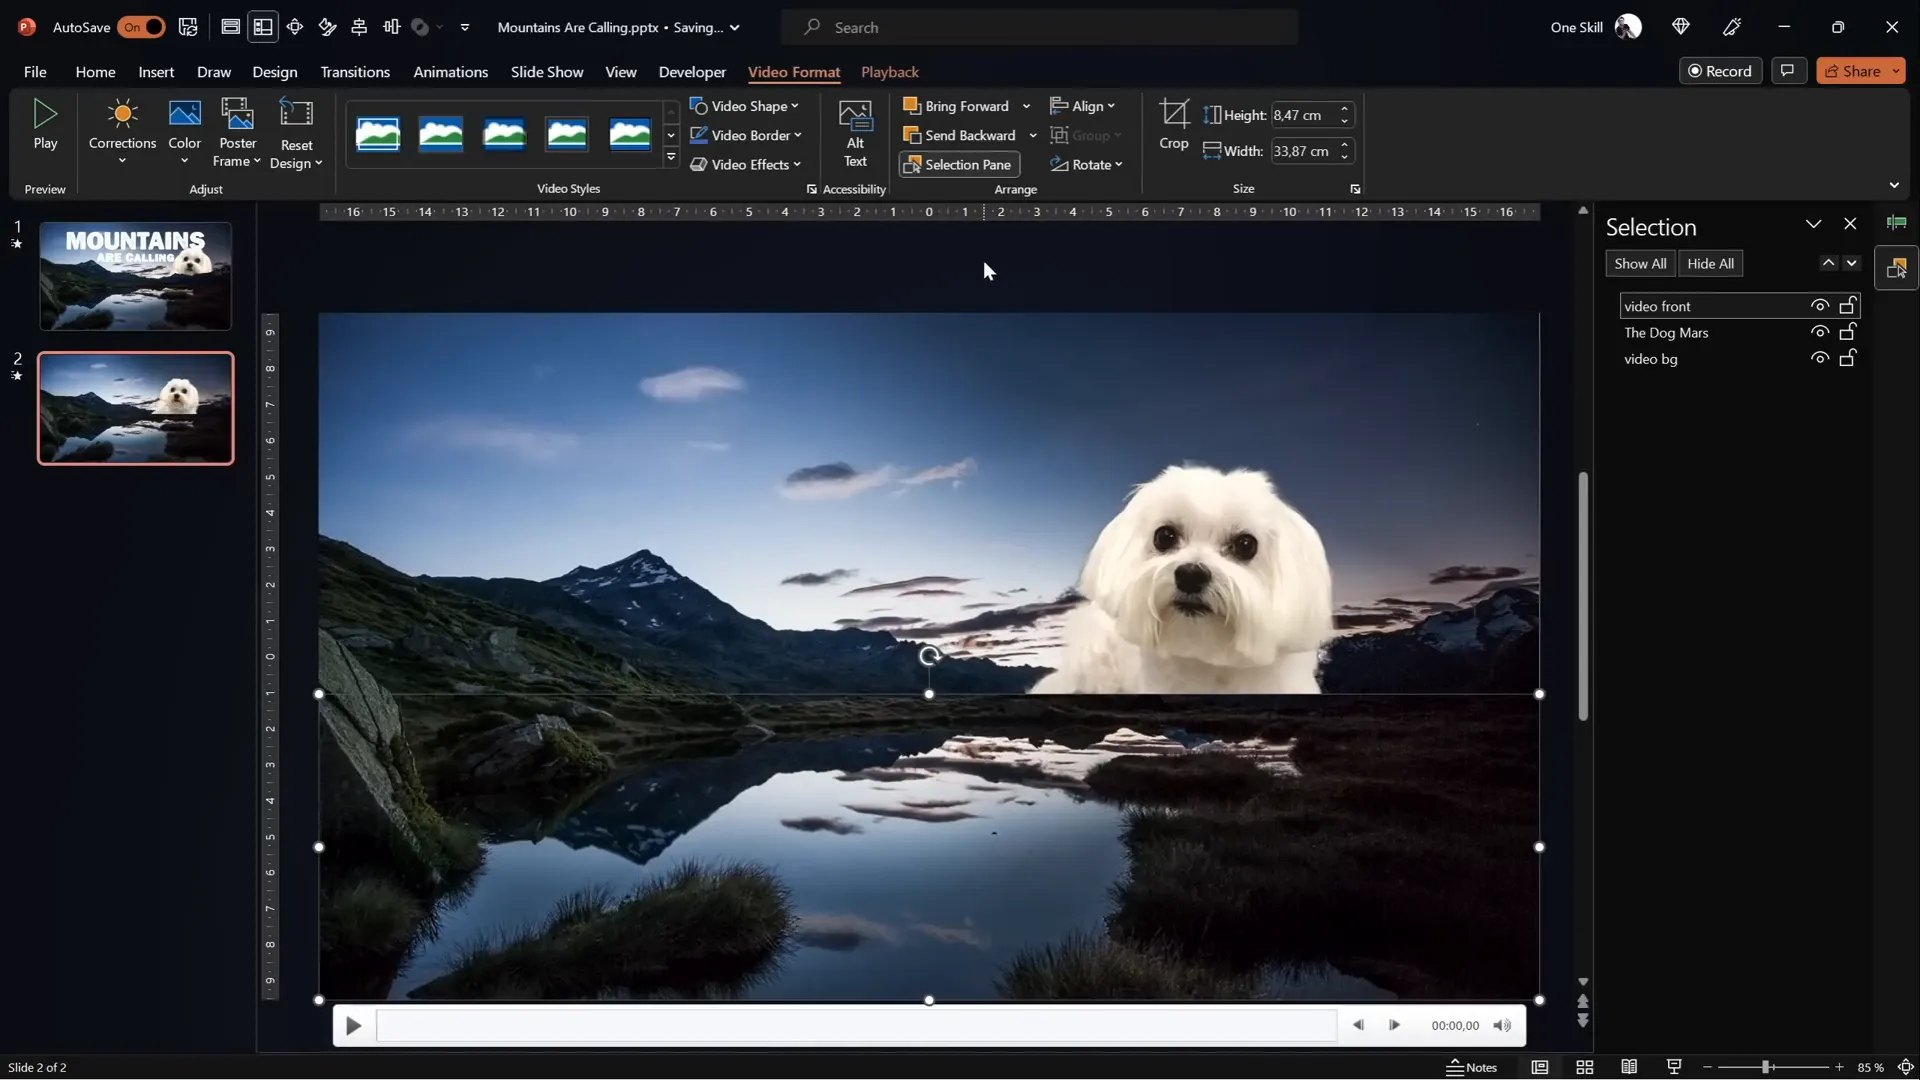
This straightforward cropping gives you a rough video sandwich effect, but it lacks precision because the crop is a straight line cutting across the mountains. To achieve a professional and visually pleasing effect, the crop needs to follow the mountain contours.
Method #1: Using PowerPoint’s Freeform Shape Tool for Precise Masking
PowerPoint’s Freeform Shape tool lets you create custom shapes that follow complex outlines — perfect for tracing the mountain line.
Here’s how to do it:
- Duplicate your background video again to create a fresh Video Front layer.
- Go to Insert > Shapes > Freeform: Shape.
- Click points along the mountain edge carefully to trace the contour as precisely as possible. Zoom in if needed to improve accuracy.
- Connect the last point back to the first to close the shape.
- Select the front video, then hold down Shift and select your custom mountain shape.
- Go to Shape Format > Merge Shapes > Subtract. This will cut out the sky area from the front video, leaving only the mountains visible.
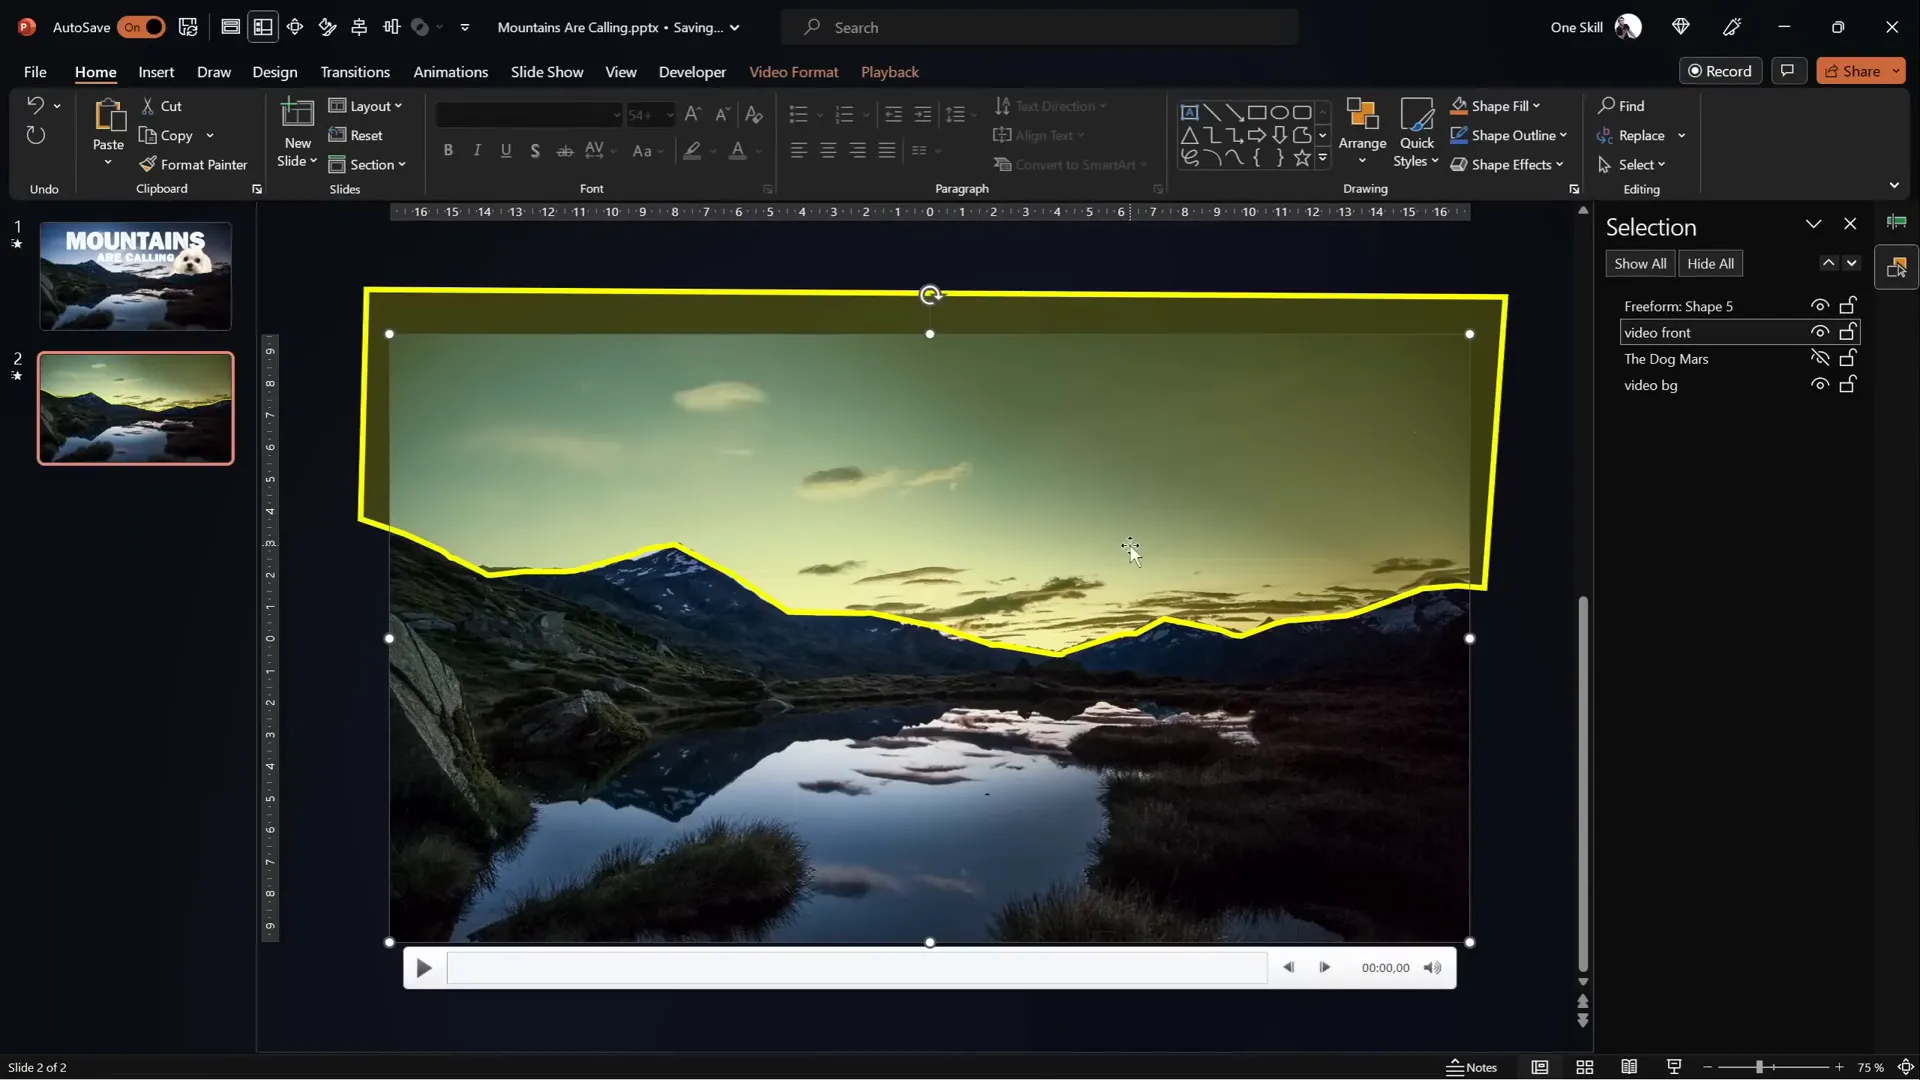
If you don’t see the Merge Shapes button in your toolbar, don’t worry — you can add it to your Quick Access Toolbar. Check out tutorials online for detailed steps, or use the link I provide in the resources section below.
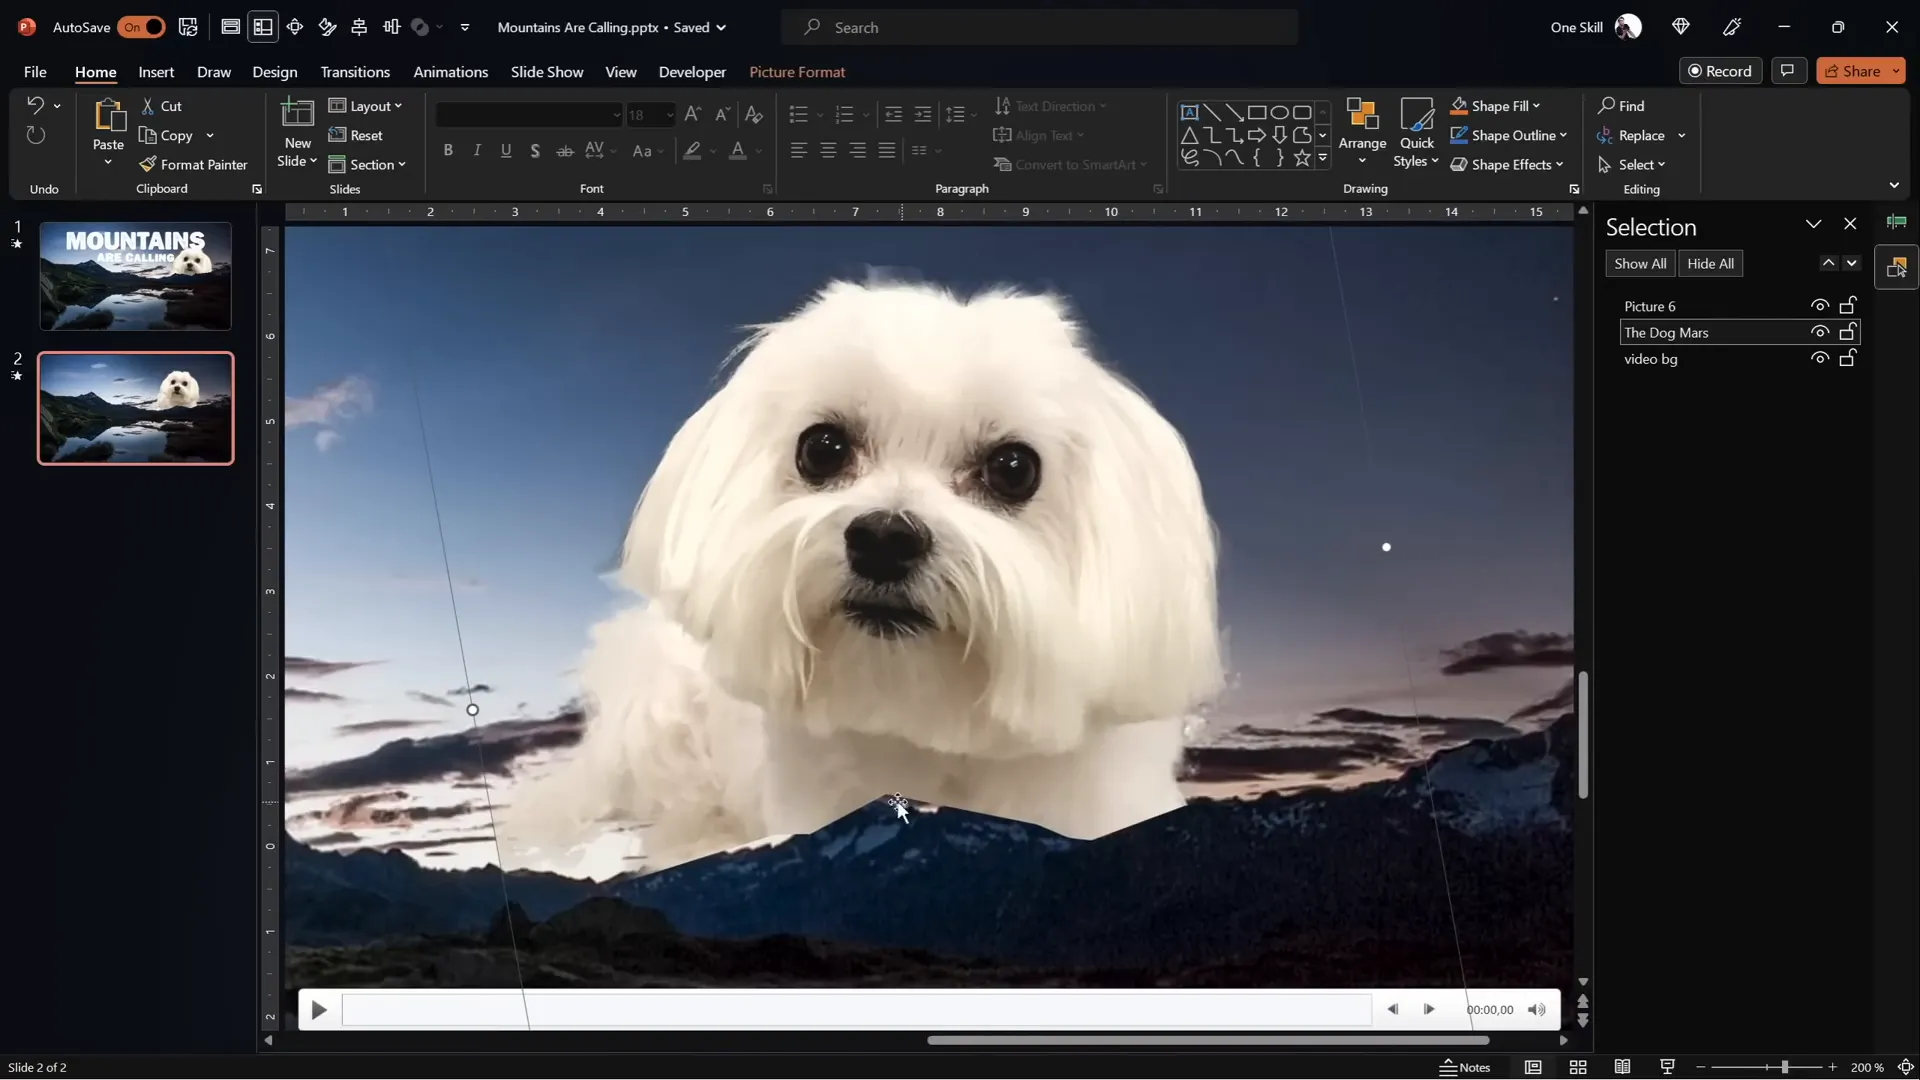
Once done, unhide Mars to see him perfectly sandwiched between the two video layers. This method works well but requires patience and steady hands to follow the mountain line accurately.
Method #2: Using Photopea for Perfect Vector Masking
If you want pixel-perfect precision without manually tracing every mountain peak, an online photo editor like Photopea is your best friend.
Here’s the step-by-step process:
- Copy a screenshot of your video frame in PowerPoint (select the video and press Ctrl + C).
- Open Photopea.com and paste the screenshot (Ctrl + V).
- Use the Quick Selection Brush tool to select the sky area. Adjust brush size with square brackets [ ] for precision.
- Switch to Quick Mask Mode by pressing Q to visualize the selection. Red overlay means unselected — keep clicking to refine.
- If you accidentally select mountain parts, use the Lasso Tool in subtract mode to remove unwanted areas from selection.
- Once the sky is perfectly selected, create a new blank layer and fill the selected sky area with any color (e.g., yellow) using the Bucket Tool.
- Hide the background photo layer, leaving only the colored sky shape visible.
- Go to Image > Vectorize Bitmap to convert the colored sky area into a vector shape. Choose “Photo” mode and enable “Polygon” for smooth edges.
- Export the vector shape as an SVG file.
- Back in PowerPoint, insert the SVG shape onto your slide and convert it to a shape to see the vector points.
- Select the front video and the inserted SVG sky shape, then use Merge Shapes > Subtract to precisely cut out the sky from the front video.
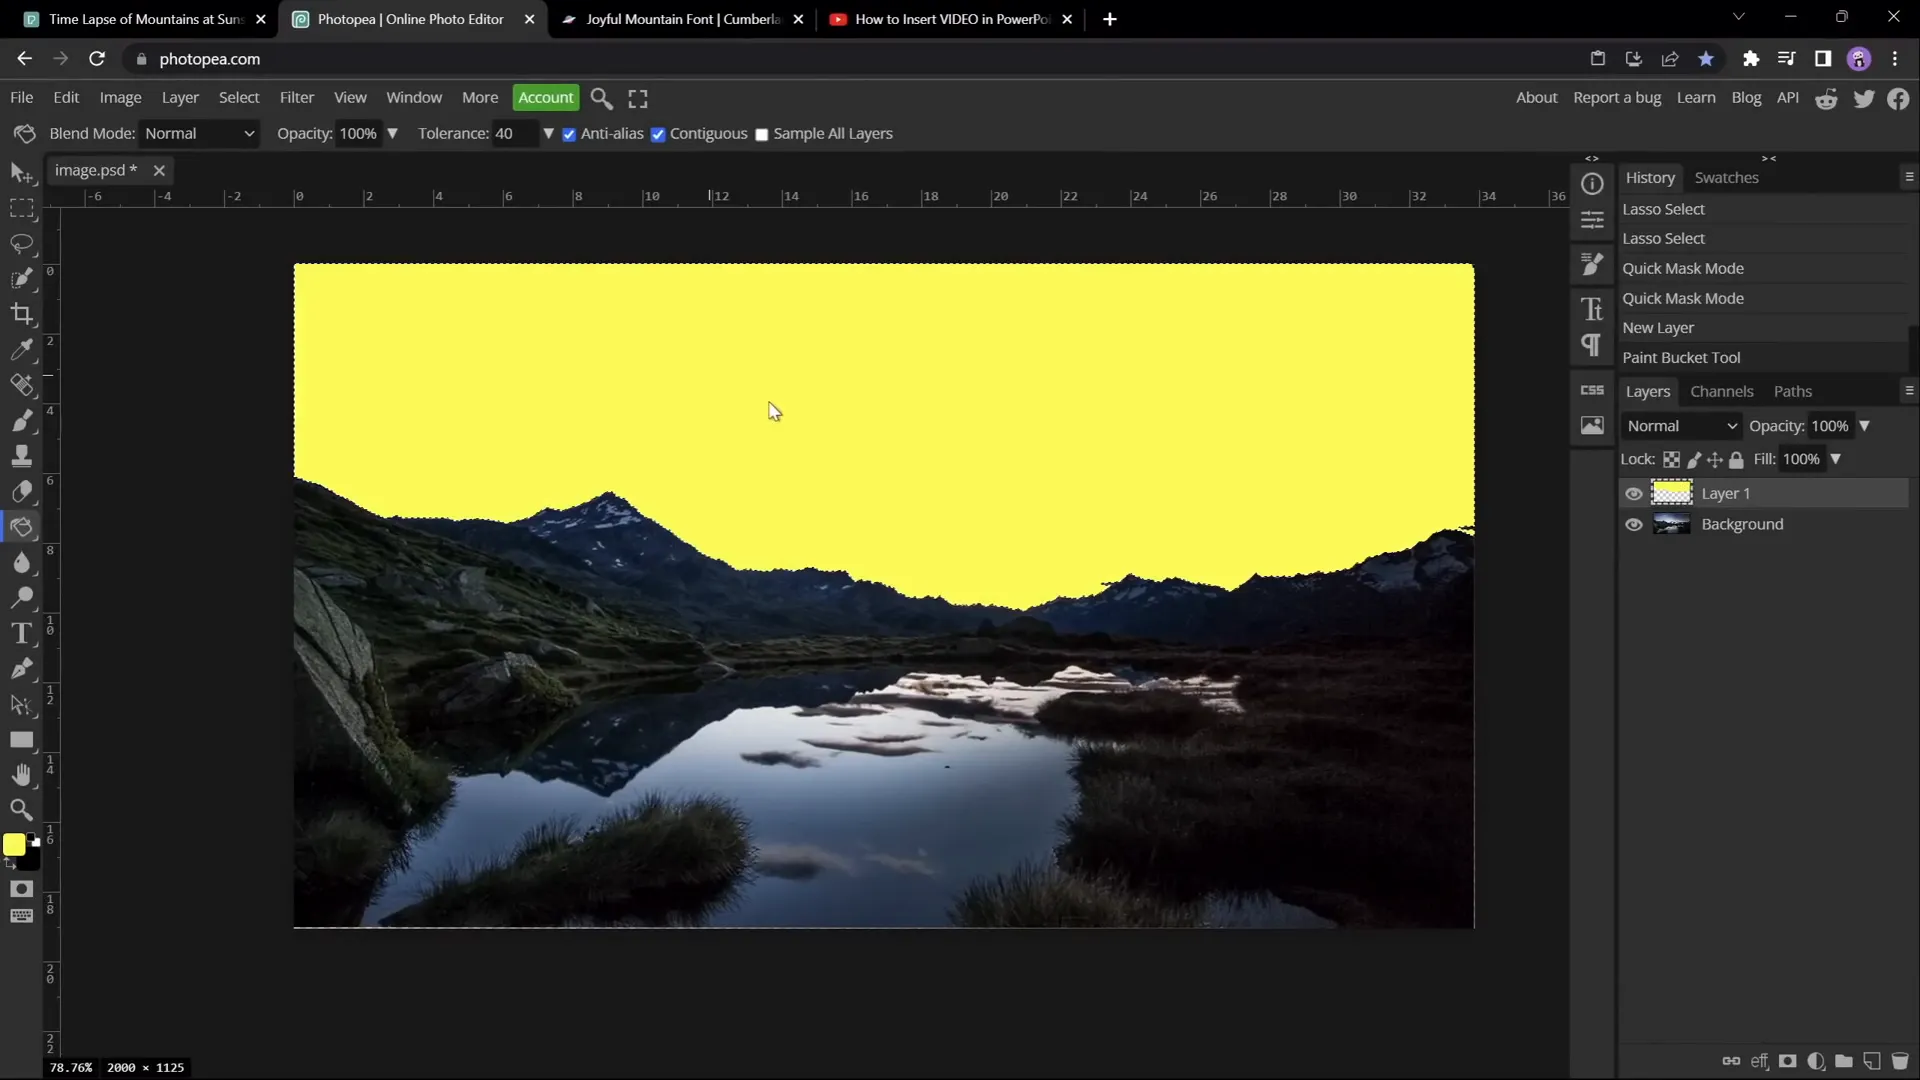
This method yields a perfect mask following the mountain contours exactly, saving you time and improving the visual quality of your final effect.
Synchronizing Video Playback and Layering
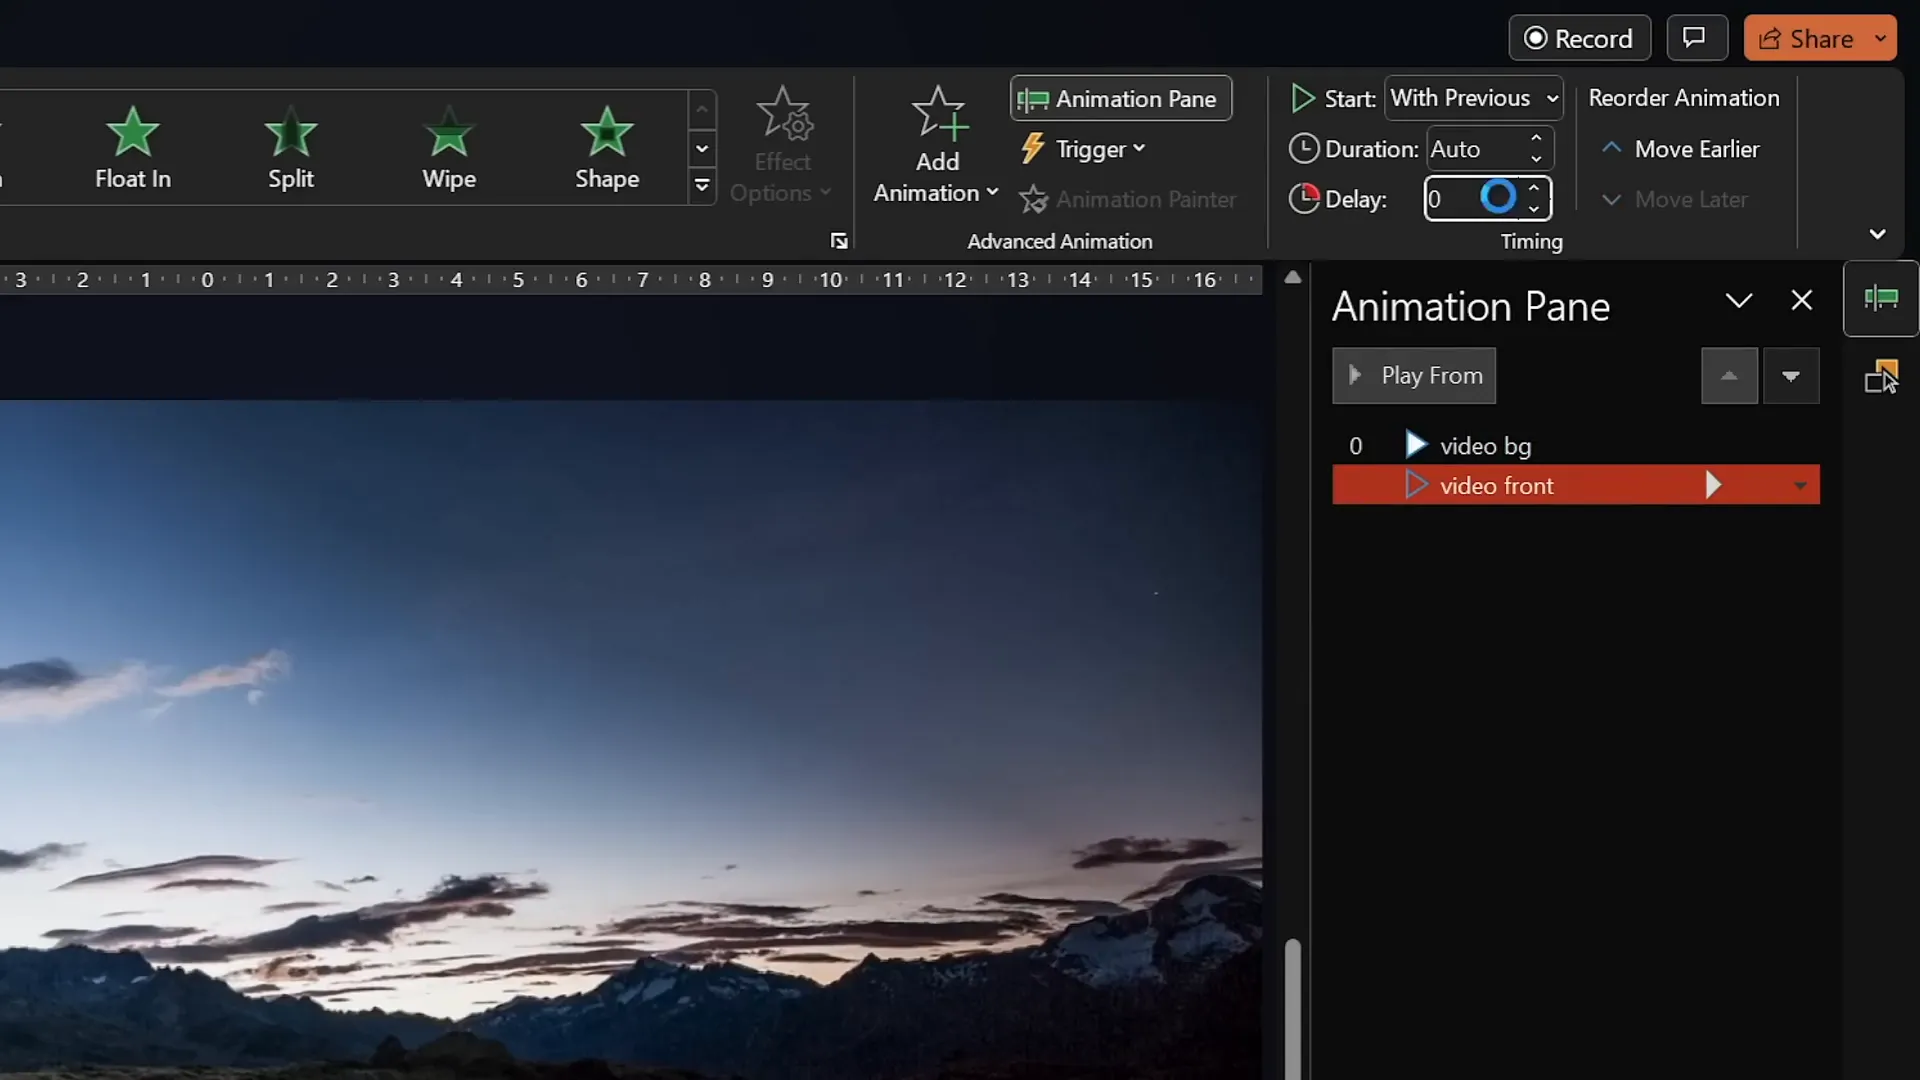
With both video layers prepared, the next step is to ensure they play perfectly in sync. Add a Play Animation to the front video and set it to start With Previous so it begins simultaneously with the background video.
Make sure there are no delays on either video’s animation timeline. This synchronization makes the two videos appear as one seamless clip, with the video sandwich effect hiding the sky on the front layer.
Adding and Animating Text Between the Video Layers
Now for the exciting part — inserting text that appears to rise from behind the mountains!

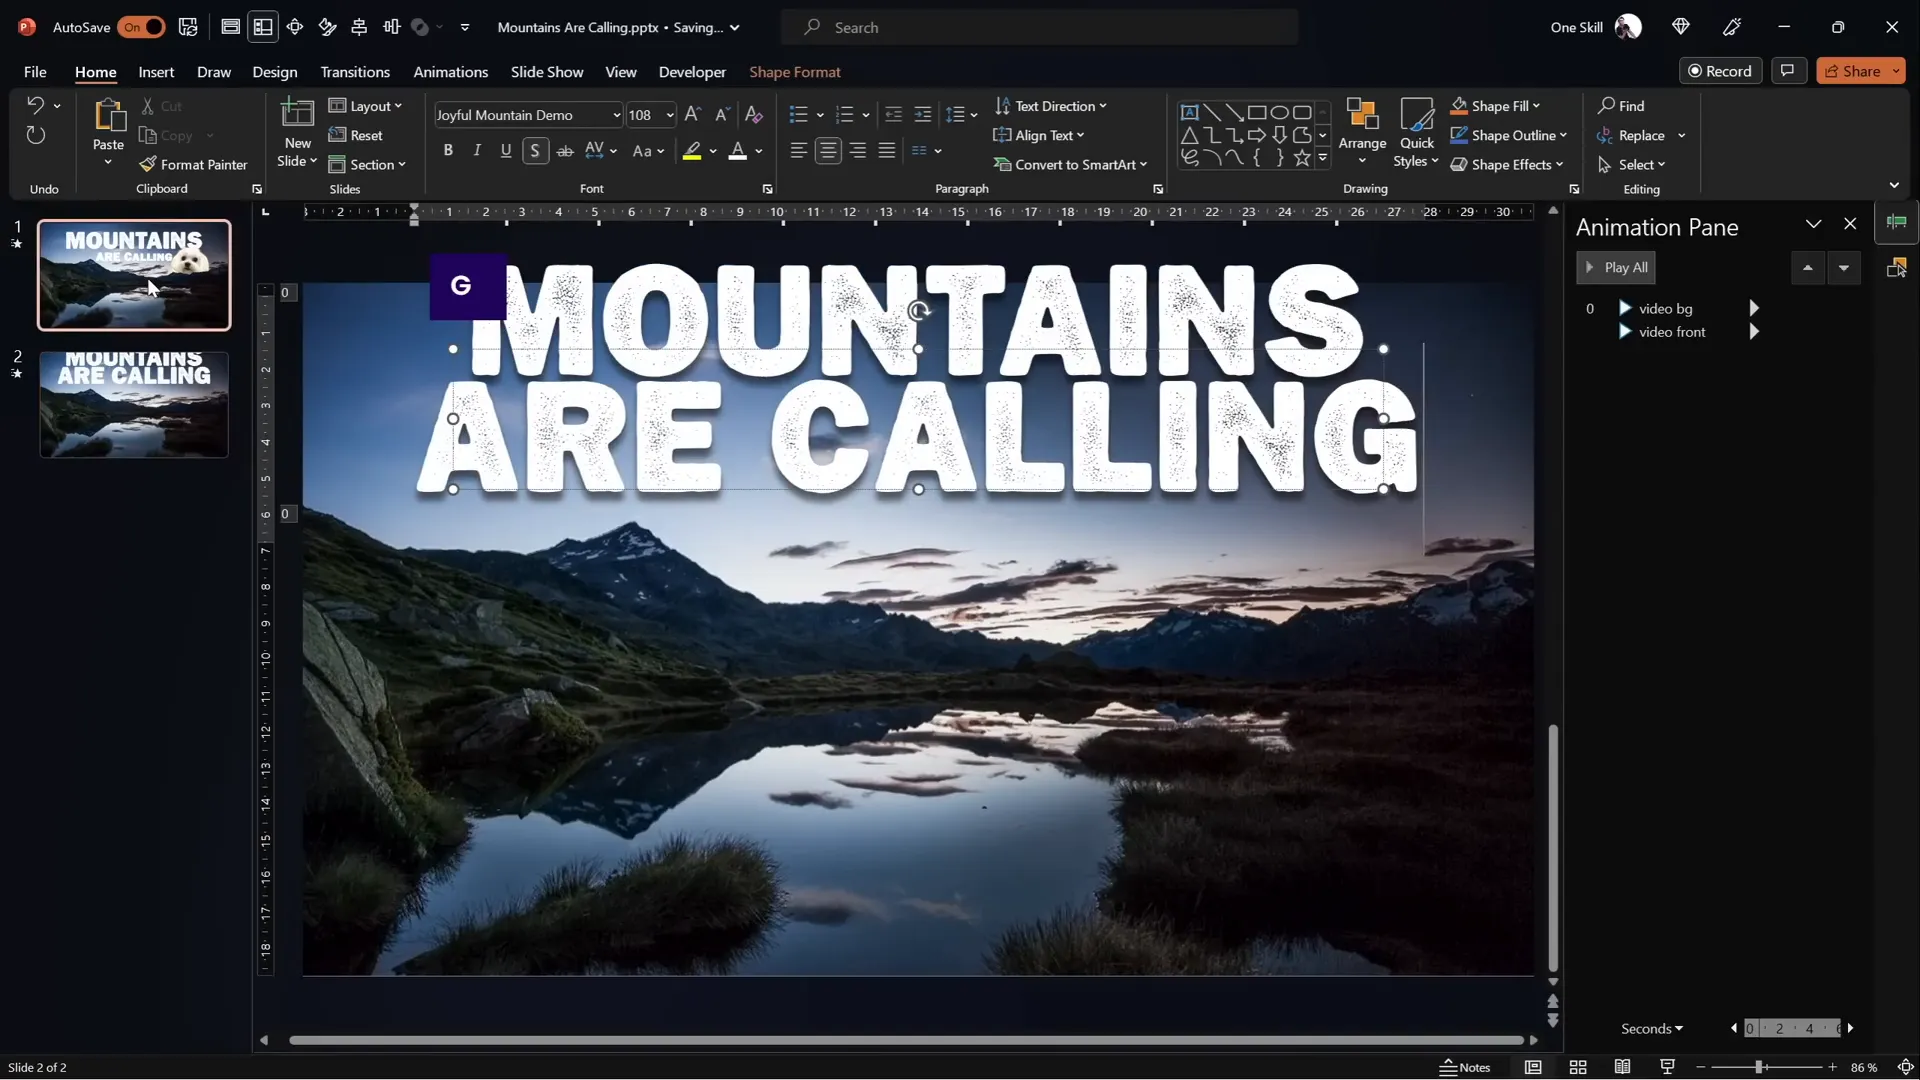
Insert a text box between the two video layers by placing it below the Video Front in the Selection Pane. This positioning ensures the text will be hidden behind the mountains as it moves.
For the font, I’m using Joyful Mountain, a beautiful typeface that complements the mountain theme perfectly.
To save time, you can copy text formatting from another slide using Ctrl + Shift + C and paste it with Ctrl + Shift + V. Add a second line of text with a slightly smaller font size to create visual hierarchy.
Animating Text Entrance
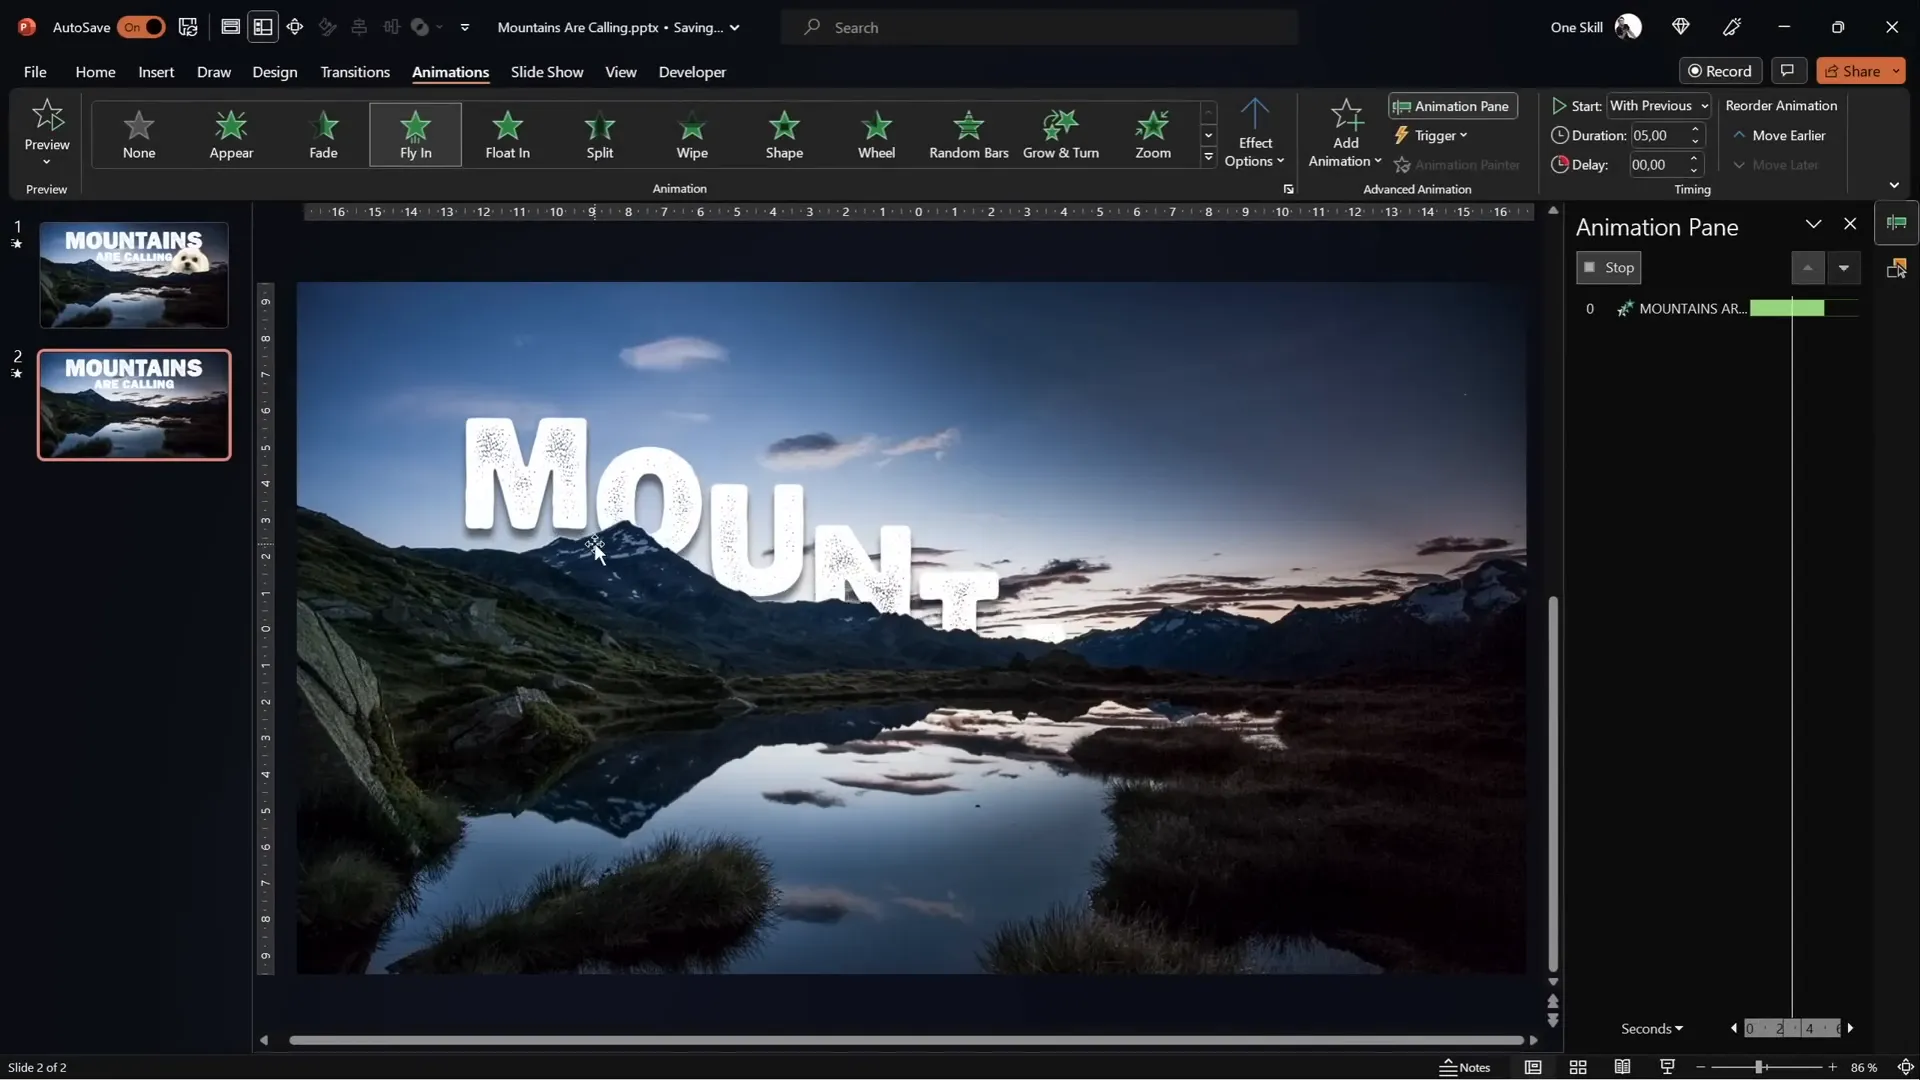
Select your text box and apply a Fly In animation set to start With Previous. Set the duration to 5 seconds and choose Maximum Smooth End in the effect options for a natural acceleration and deceleration.
Make the animation even more dynamic by animating the text by individual letters with a 5% delay between each letter’s entrance. This creates a smooth, flowing effect as the text appears letter by letter.
Adding Zoom Entrance
To add depth, apply a Basic Zoom animation to the same text box at the same time. Again, set it to start With Previous and give it a 5-second duration with a 5% delay between letters.
Now your text flies in and zooms simultaneously, creating an engaging visual entrance that captures attention.
Animating Text Exit
To complete the animation sequence, add exit animations:
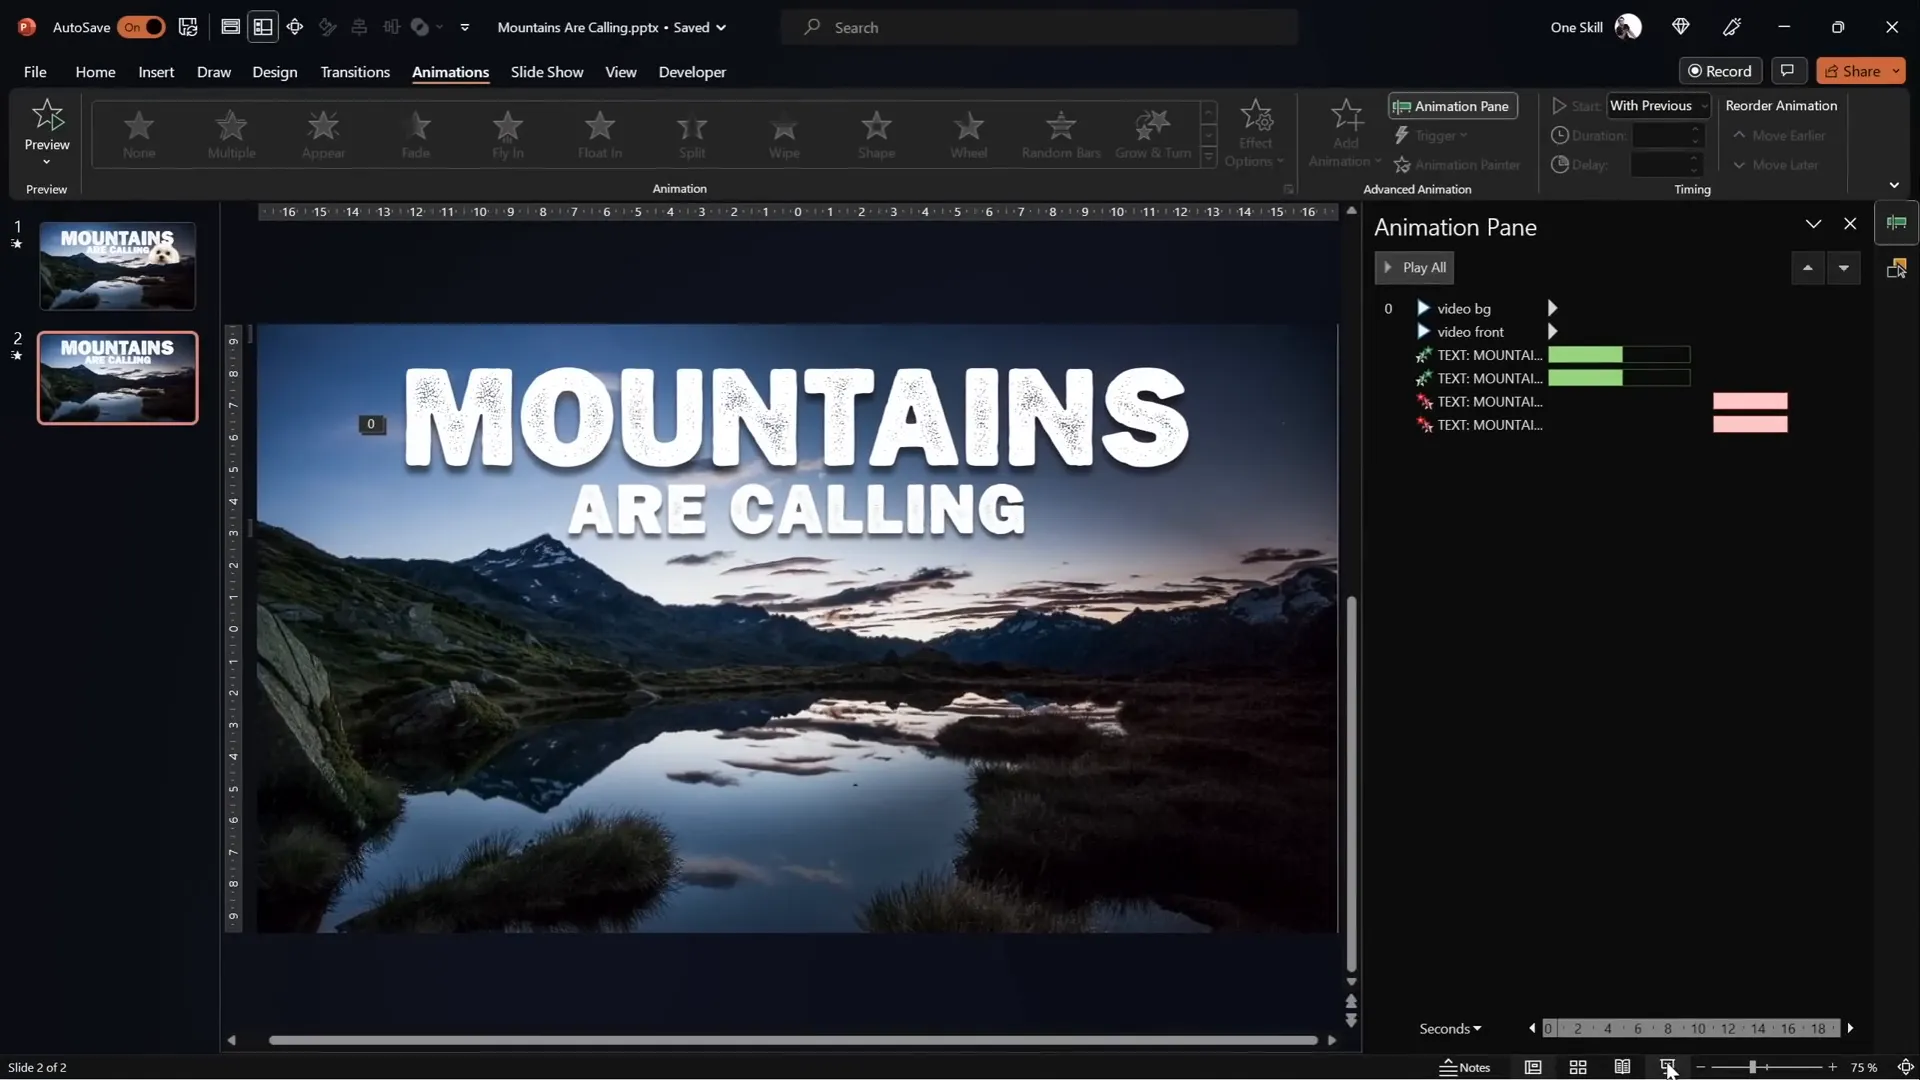
- Fly Out starting With Previous, 5 seconds duration, with Maximum Smooth Start.
- Basic Zoom Out, also starting With Previous, 5 seconds duration.
Add an 11-second delay to the exit animations to allow the text to remain visible for a moment before flying and zooming out of view.
Bringing It All Together: Final Touches and Fun Extras
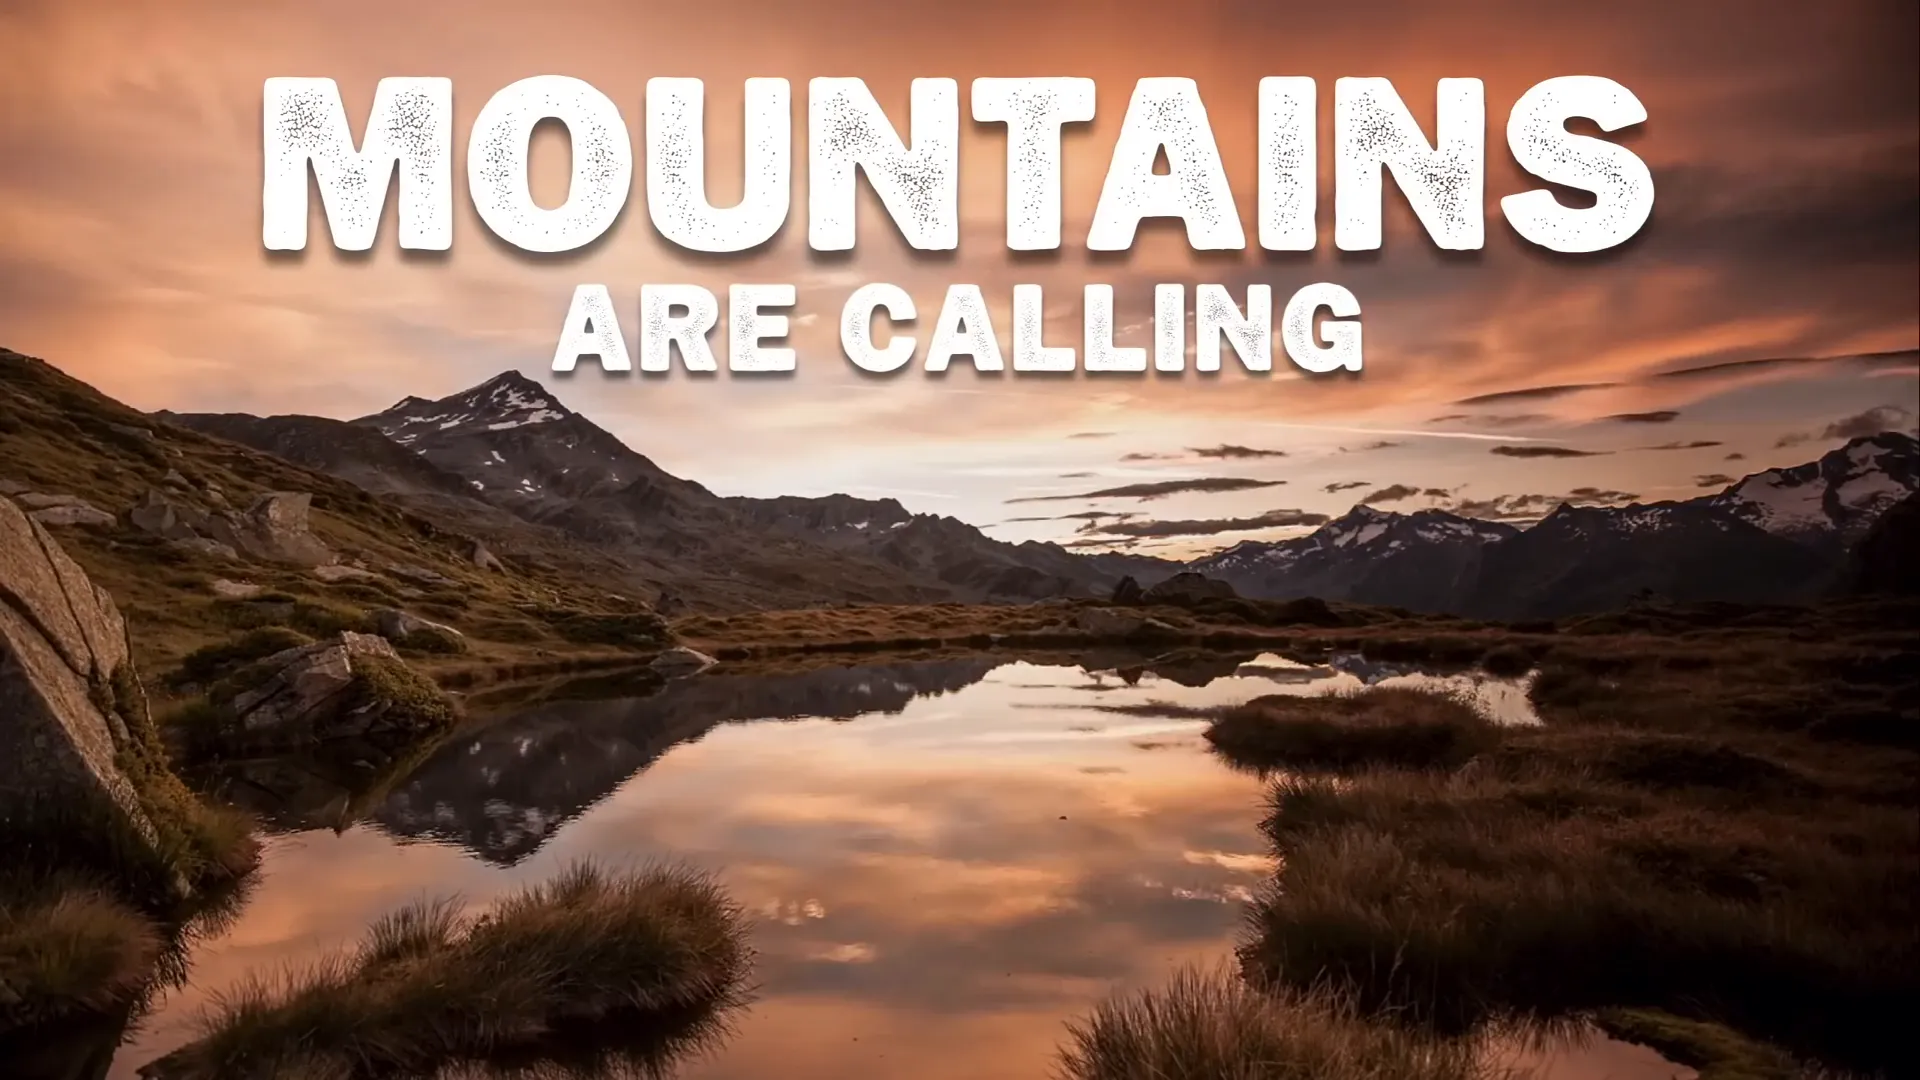
With all animations in place, play your presentation from the current slide to see the full effect:
- The video background and front layers play seamlessly together.
- The text flies in smoothly from behind the mountains, zooms dynamically.
- After a pause, the text flies out and zooms away, disappearing behind the mountains again.
- My dog Mars pops up between the two video layers, adding a fun personal touch.
Adjust animation timings as needed to synchronize perfectly or add your own objects between the layers for creative storytelling.
Bonus: Where to Find Resources and More Inspiration
If you want to explore even more creative ways to use video in PowerPoint, check out my other channel Interstellar PowerPoint where I share ten creative ideas for video cropping and effects. You can find the link in the description.
Also, tutorial slides for this effect are available for download on my Patreon page as a thank you to all my supporters who help me keep creating high-quality PowerPoint tutorials.
For fonts, check out Joyful Mountain on Fontspace, and for stock videos, Pexels offers great free clips like the one used in this tutorial.
Frequently Asked Questions (FAQ)
Can I use any video for this effect?
Yes, but it’s best to use a video with a clear, static foreground (such as mountains or buildings) and a dynamic background (like sky or clouds). This contrast allows for effective masking and layering.
Do I need PowerPoint 365 to do this?
While some features like Merge Shapes and advanced animations work best in PowerPoint 365, you can attempt similar effects in other versions, though with some limitations.
How precise does the masking need to be?
For the best visual effect, precise masking that follows the mountain line is ideal. You can use either the Freeform Shape tool in PowerPoint or create a vector mask in Photopea for perfect accuracy.
Can I insert other objects between the video layers?
Absolutely! You can add images, shapes, or even animated characters between the two video layers to create engaging visual narratives.
Is it possible to use this technique for other types of videos?
Yes! Any video with distinct foreground and background layers can benefit from this two-layer masking technique for creative effects.
Where can I learn more about adding Merge Shapes to my Quick Access Toolbar?
Check out the detailed tutorial linked in the resources. Adding Merge Shapes to your toolbar makes it easier to perform shape operations like subtracting and combining shapes.
Conclusion
This PowerPoint video effect tutorial shows how versatile and powerful PowerPoint can be when you combine video layering, masking, and animation techniques. By using two identical videos and precisely cropping the sky from the top layer, you create a stunning effect where text and objects appear to rise from behind mountains and disappear again. It’s a fantastic way to add cinematic flair to your presentations without needing advanced video editing software.
Whether you’re a business professional, educator, or creative storyteller, mastering this technique will elevate your slide decks and captivate your audience. Try it out, experiment with different videos and fonts, and watch your presentations come alive!
Thank you for joining me on this tutorial journey. Stay happy, stay healthy, and keep creating amazing PowerPoint content!
Check out the full video: EPIC PowerPoint Video Effect Tutorial


