

If you want a polished, professional infographic that looks custom-made and interactive, the 5 Hanging Options Infographic Slide is a perfect addition to your slide deck. In this tutorial I’ll walk you through how I build a 5 Hanging Options Infographic Slide from scratch in PowerPoint — including the rod, the threaded hangers, numbered droplets, reflections, and simple entrance animations so each option appears on click. This article covers every step, shortcut, design decision, and troubleshooting tip you need to recreate and customize this graphic for your own presentations.
Throughout this guide I’ll show the exact sequence I use to create the 5 Hanging Options Infographic Slide, explain why I make each choice, and offer alternatives so you can adapt the design to your brand. I designed this layout to be versatile: use it to present processes, features, agenda points, product highlights, or five-step timelines.
Key takeaway: By following this guide you’ll not only build a visually attractive 5 Hanging Options Infographic Slide, you’ll also learn practical PowerPoint techniques — shape editing, grouping, formatting, reflections, precise alignment, and basic animation — that you can reuse in other designs.
Table of contents
- Why choose the 5 Hanging Options Infographic Slide
- What you’ll need before you start
- Step-by-step build: Create the base droplet shape
- Design the hanger and rod
- Add text, reflections and spacing
- Group, duplicate, color and align the five options
- Animate the 5 Hanging Options Infographic Slide
- Variations and styling tips
- Troubleshooting and common pitfalls
- Advanced ideas and extensions
- FAQ
- Conclusion
Why choose a 5 Hanging Options Infographic Slide?
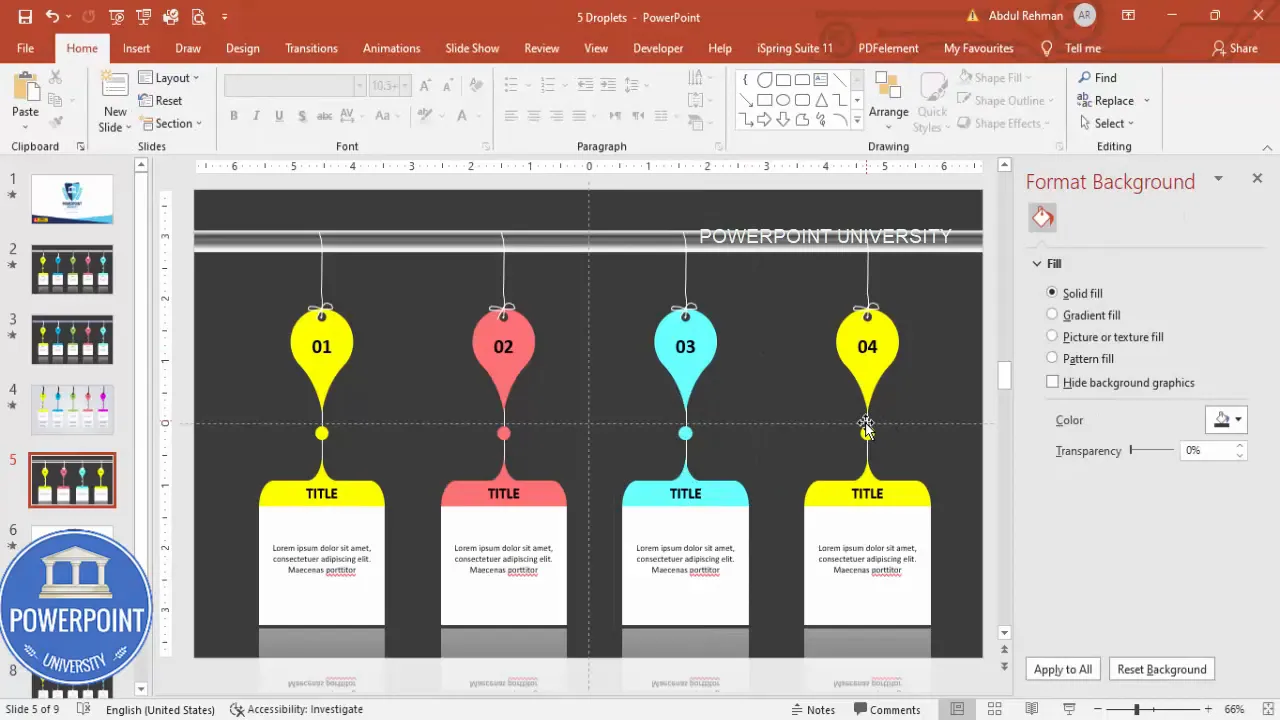
Slides that combine clear hierarchy with visual metaphors are memorable. The 5 Hanging Options Infographic Slide uses a simple hanging metaphor — a rod at the top and five “droplet” or tag-like elements suspended beneath — to communicate a list of five structured items. Because each option can appear on click, it’s ideal for pacing during a presentation.
Benefits of this layout:
- Visual metaphor: The hanger/rod motif creates a strong, unified look that helps the audience associate the five items together.
- Controlled reveal: Animating each option on click lets you control the flow of information and avoid overwhelming the audience.
- Flexible content: Each hanging option supports a number, a short title, and a detailed description, so it’s perfect for feature lists, agenda slides, or processes.
- Easy to customize: Colors, fonts, and sizes are simple to change once the base components are built.
Because the 5 Hanging Options Infographic Slide is modular, once you build one hanging option you can duplicate and tweak it to create the full five-option visual quickly.
What you’ll need before you start
Before we jump into building the 5 Hanging Options Infographic Slide, make sure you have the following:
- Microsoft PowerPoint (desktop app recommended for full shape editing features)
- A blank slide with a dark or light background (I use a dark background in this tutorial)
- Preferred brand fonts and color swatches (optional — defaults work fine)
- Patience for minor adjustments: precise alignment makes this slide look professional
Shortcuts I use in the walkthrough:
- Shift — to constrain proportions (perfect circles/ovals and straight lines)
- Alt + Arrow (left/right) — to rotate shapes by small increments when holding Alt (PowerPoint on Windows)
- Ctrl + G — group selected objects
- View > Guides — enable alignment guides to center elements precisely
Step-by-step build: Create the base droplet shape (option tag)
We’ll start by creating a single hanging tag — the droplet — that will become one of the five options. This is the most important building block. Once you have one droplet ready, you can duplicate and edit it to produce the remaining four.
1. Set up the slide background
Start with a new blank slide and choose a dark color background if you prefer the high-contrast look. Dark backgrounds help the colored droplets and white text pop.
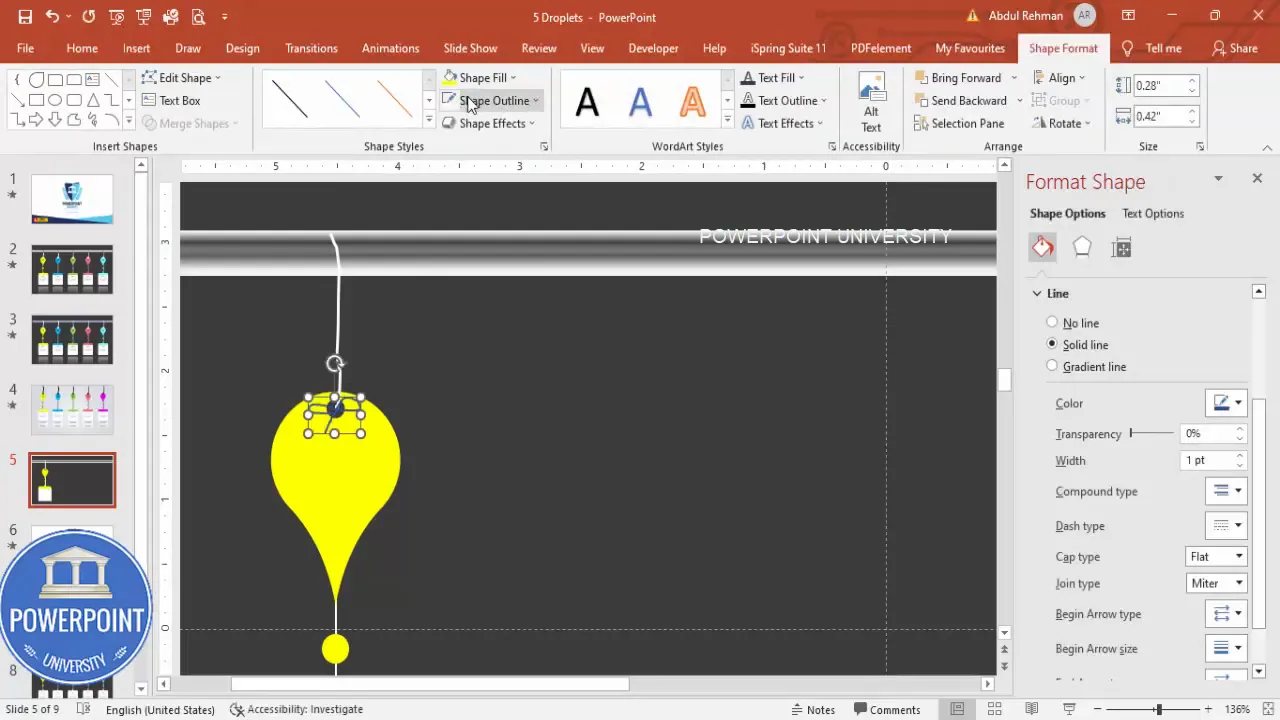
2. Draw the droplet shape
- Go to Insert > Shapes and select the teardrop shape (sometimes called “teardrop” or “drop”).
- Hold Shift to draw a perfectly proportioned droplet so it looks balanced as a hanging tag.
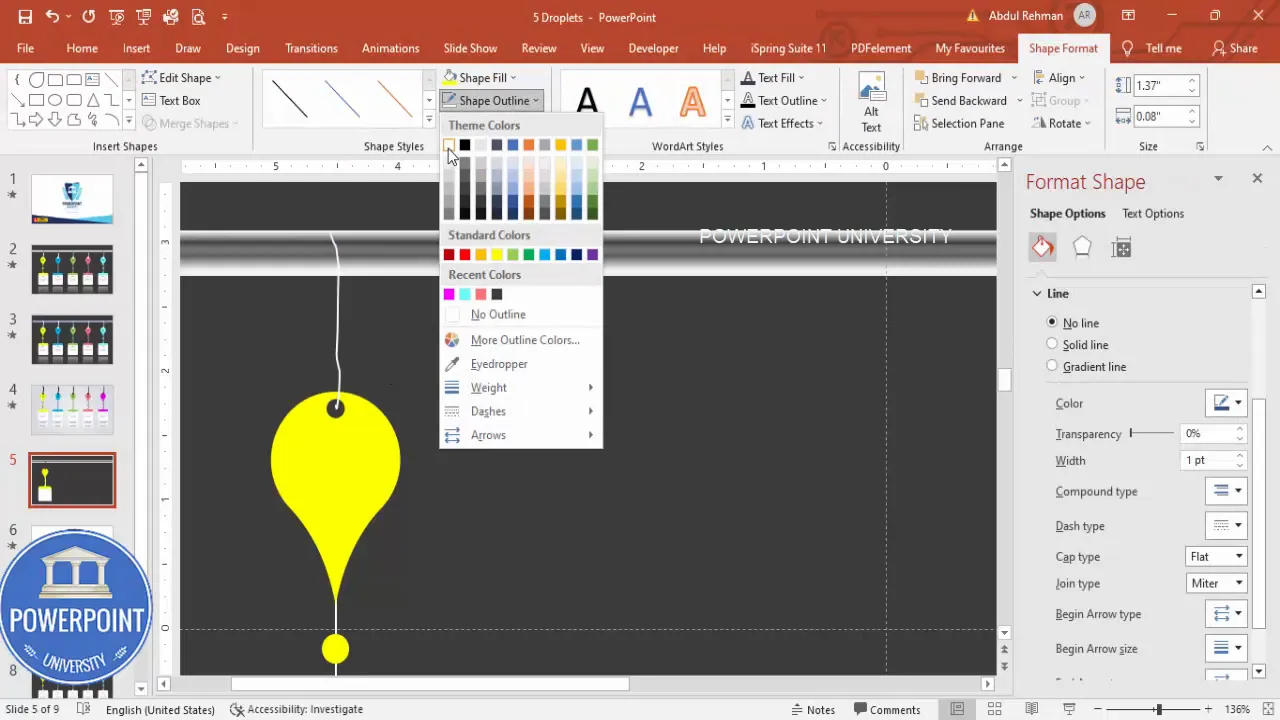
- Set Shape Outline to “No Outline” and choose a fill color. In the example I use a bright yellow for the first droplet.
- Rotate the teardrop slightly so the pointed end faces down — use Alt + Right Arrow to make controlled rotation nudges (if your keyboard and version of PowerPoint support it).
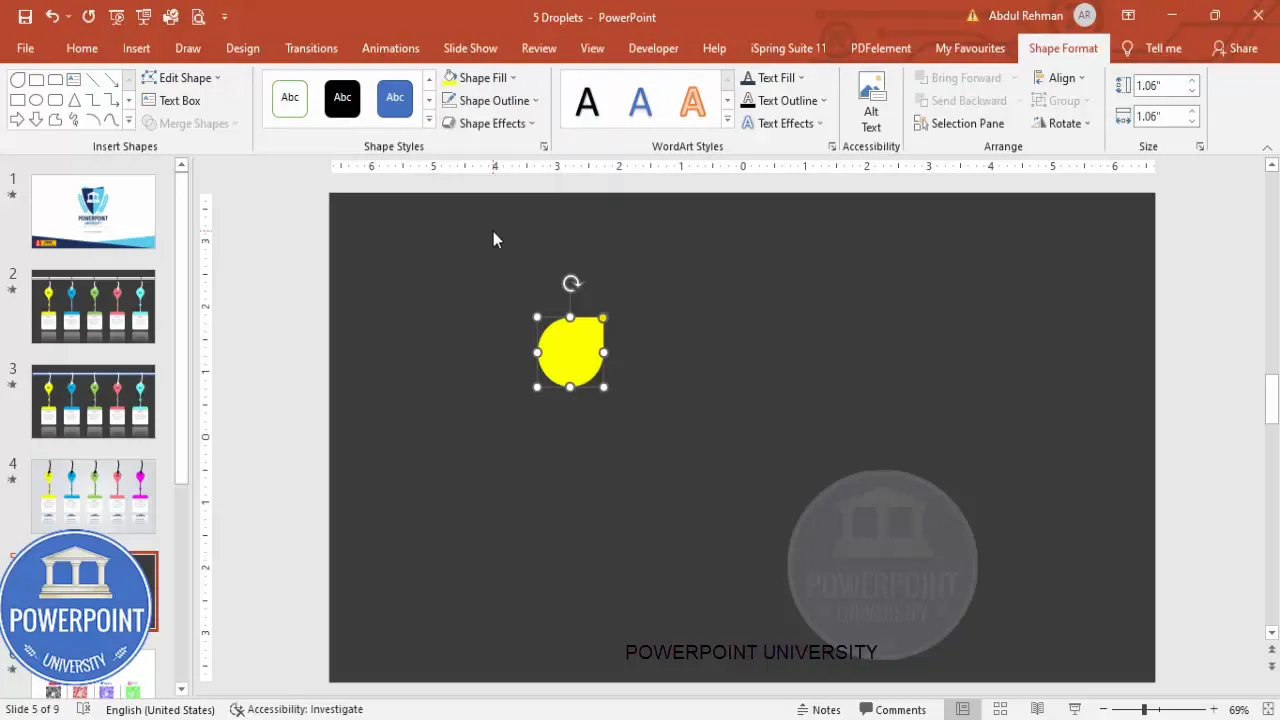
Tip: After you draw the teardrop, look for the orange adjustment point on the shape. Dragging that control changes the droplet’s curvature. Use it to produce a slightly elongated tag shape that reads well with text.
3. Add a decorative finishing brace and flat top
To make the tag look like a crafted pendant, add a brace shape and a small rectangle to simulate a reinforced top area that connects to the thread:
- Insert a brace from Insert > Shapes (left or right brace). Adjust its orange control handles to change the curvature so it hugs the teardrop interior near the top.
- Fill the brace with the same droplet color and remove the outline.
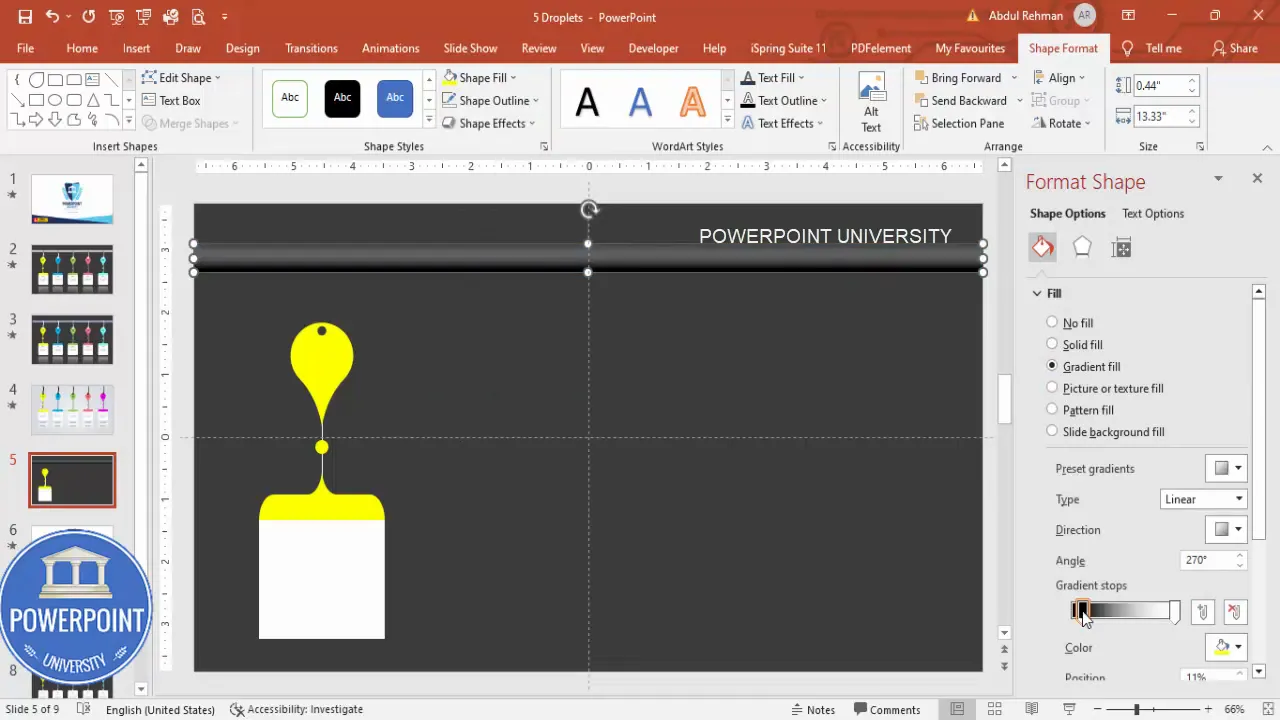
- Insert a narrow rectangle at the top of the droplet to act as an iron rod connection piece or a reinforced cap. Give it a subtle gradient fill so it looks like metal.
Why this helps: The brace and cap make the tag feel tangible; with a gradient cap you produce an illusion of depth and material difference which raises perceived quality.
4. Add a center eyelet (hole) for the thread
- Insert a small oval at the center-top area of the droplet.
- Set the oval’s outline to “No Outline” and fill the oval with the same color as the tag for consistency.
- Select the droplet and the oval, then use Shape Format > Merge Shapes > Subtract to cut out the oval — creating a hole.
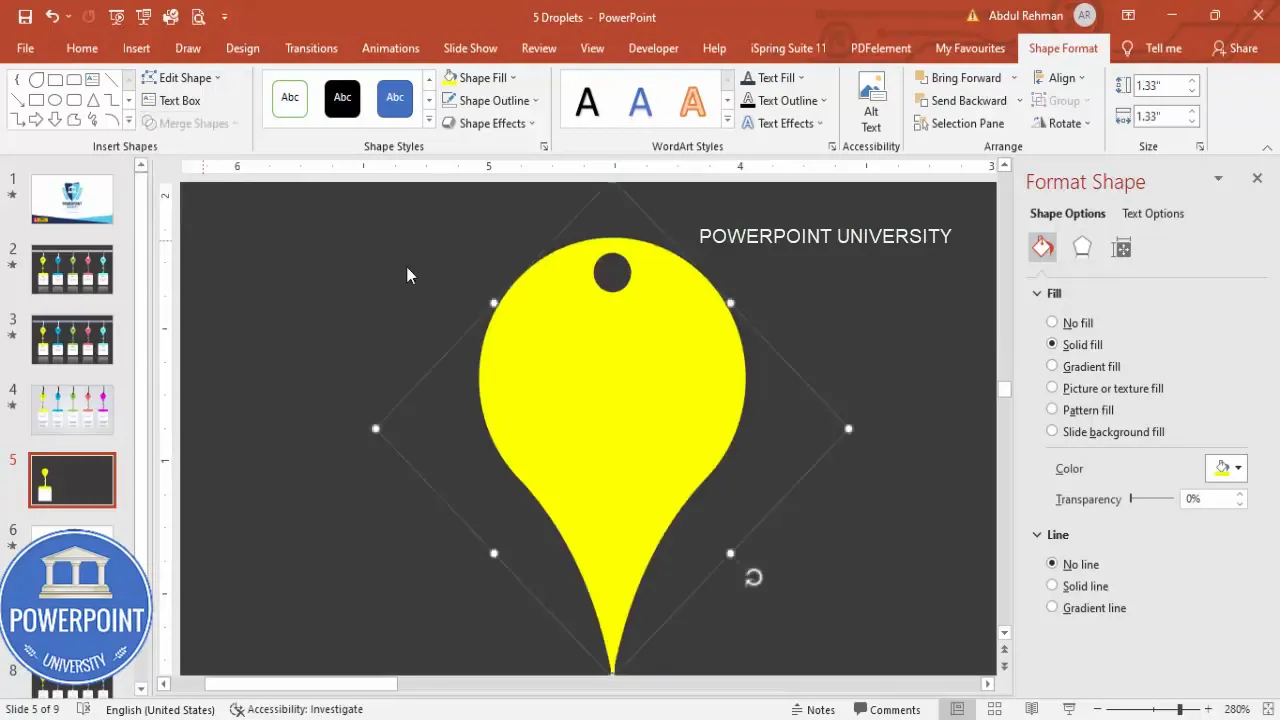
At this point the droplet functions as a single hanging element that looks realistic when threaded.
Design the hanger and rod
The rod and thread complete the visual metaphor. The rod anchors the group at the top of the slide and the thread connects each droplet to the rod.
1. Create the iron rod
- Insert a thin rectangle across the top of the slide. Make it long enough to extend past all five droplets when they’re aligned.
- Choose a gradient fill: a darker tone on the edges and a lighter center to simulate metallic reflection.
- Remove the outline.
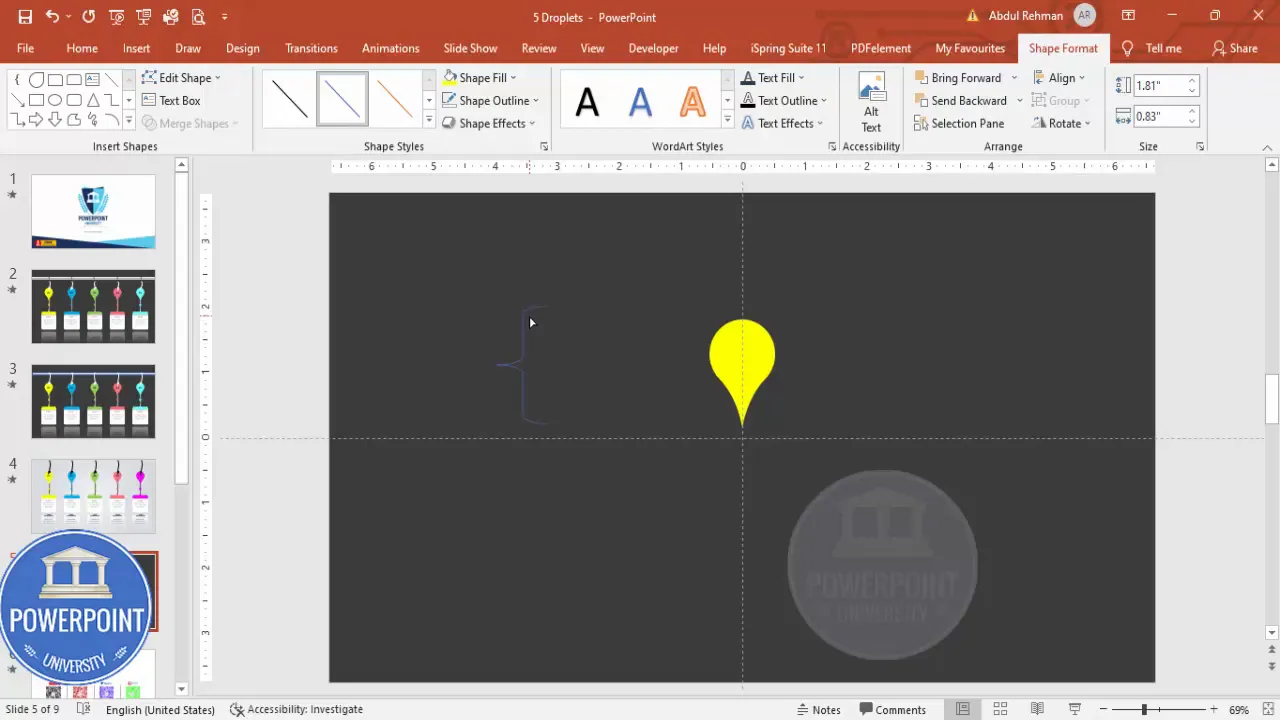
2. Draw the thread using Freeform / Scribble
- Go to Insert > Shapes > Lines and select the Freeform or Scribble tool.
- Draw a slightly irregular, natural-looking thread from the rod down to the droplet eyelet. Keep it subtle — too thick or too wavy looks amateur.
- Set the line color to white (or a light color depending on the background) and increase the line width for visibility.
- Create a small knot or loop near the droplet with another scribble to make the connection read as tied.
Design note: The thread should look hand-tied. Use the scribble tool to add a small knot detail and then position the knot so that it visually overlaps the droplet’s hole. If needed, use Send to Back or Bring to Front to control layering.
Add text, reflections and spacing
With the droplet, cap, and thread created, you can populate the tag with a number, title, and descriptive text. I keep typography simple so the visual shape is the hero.
1. Add the option number
- Insert a text box inside the droplet and type “01” (or “1”).
- Bold the number and center align it vertically and horizontally.
- Pick a readable display font and a size that is large but doesn’t crowd the tag. In my example I used a bold weight so the number reads clearly even from a distance.

2. Add the title and descriptive text
- Insert a second text box below the number for the title. Center align and bold it.
- Insert a third text box for the descriptive copy. Reduce the font size so it fits comfortably under the title and keep it readable — around 10–12 pt depending on the slide size.
- Limit the description to two or three short lines to preserve clarity.
Tip: Use character and line spacing sparingly; avoid crowding the content. If your text feels tight, increase padding by slightly enlarging the droplet or reducing font size.
3. Add reflection effect
To ground the droplet visually and add a subtle dimension, apply a reflection preset:
- Select the grouped droplet (shape + text + brace + cap but not the thread for now).
- Go to Shape Format > Effects > Reflection and choose a preset that gives a soft mirror beneath the droplet.
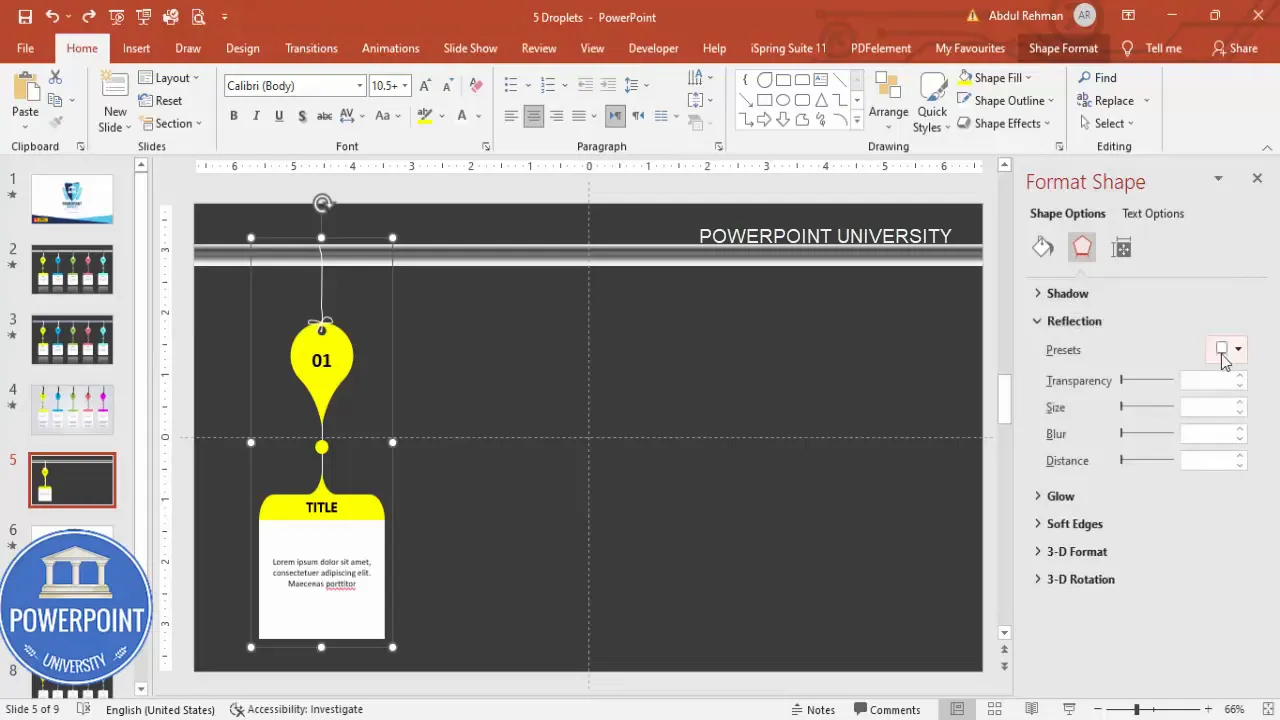
Reflections create a polished, professional look — just keep them subtle so they don’t distract from your content.
Group, duplicate, color and align the five options
Now that a single hanging option is complete, create the remaining four using duplication — this keeps proportions, spacing, and effects consistent.
1. Group the base option
- Select all objects that make up the option (the teardrop, brace, cap, hole, text boxes, and reflection) — exclude the rod and the slide’s main thread if you plan to draw separate threads later.
- Press Ctrl + G to group them into a single object so it’s easy to duplicate and move.
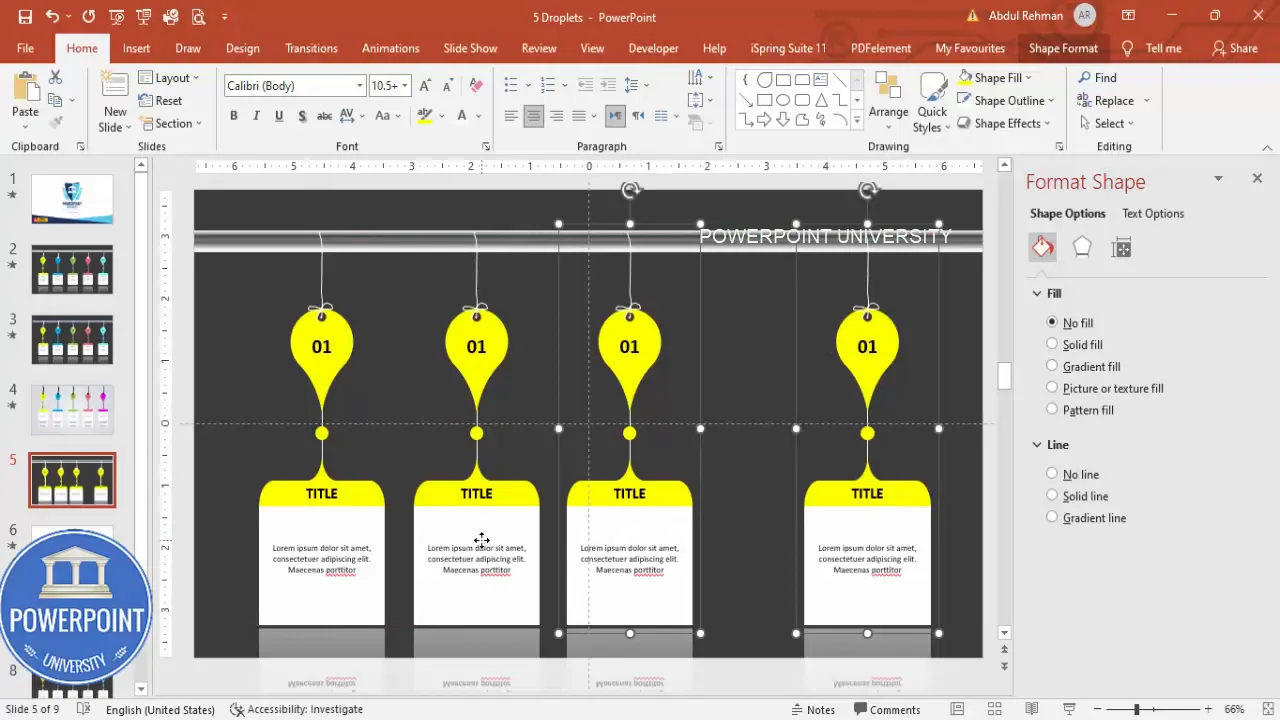
2. Duplicate the grouped option and arrange
- With the grouped object selected, use Ctrl + D (or Ctrl + click + drag while holding Ctrl) to duplicate it multiple times until you have five copies.
- Position the copies horizontally beneath the rod, leaving consistent gaps.
- To distribute spacing evenly: go to Shape Format > Align > Distribute Horizontally.
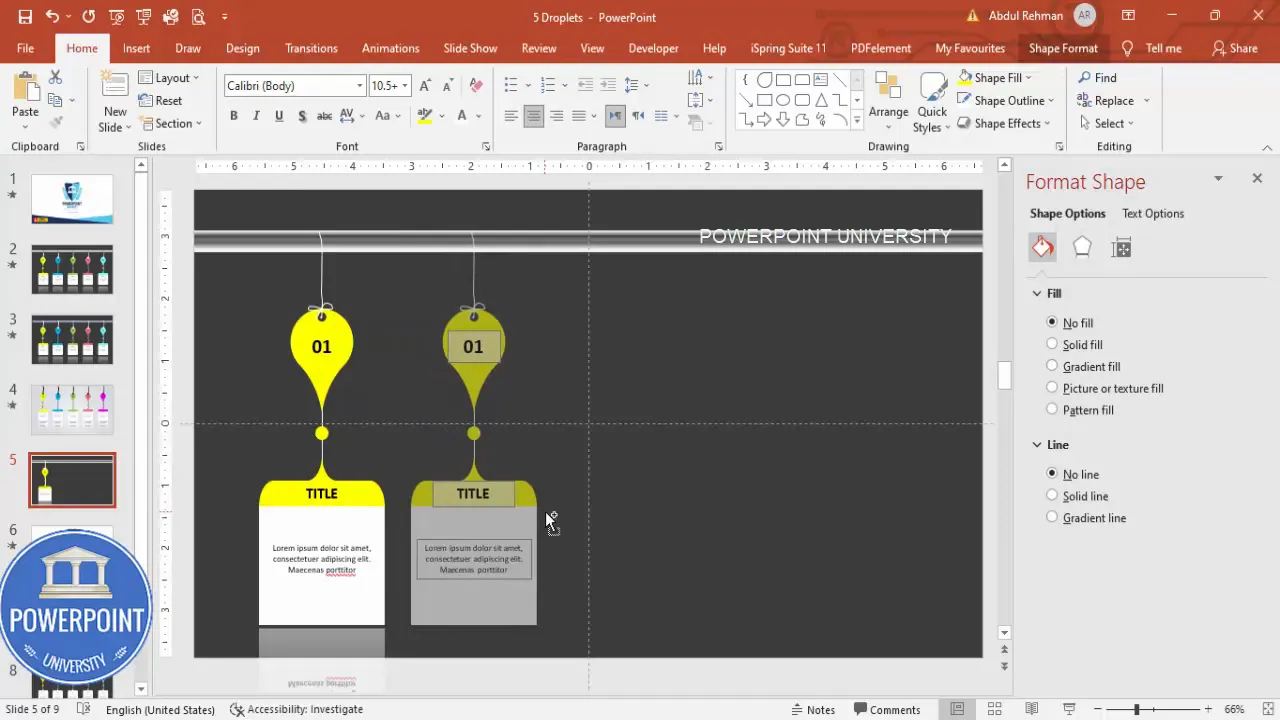
3. Update numbering and color-coding
Change the option number for each copy (02, 03, 04, 05). Use color variations to emphasize grouping or keep them uniform for a consistent visual system.
- Edit the number text box on each copy to increment the option number.
- Select a color palette and apply colors to each droplet: you can use a gradient of hues (e.g., yellow → sky blue → green) or a consistent set (all sky blue, etc.).
- If you update colors, make sure text remains legible — use white or black text where contrast dictates.
Design rule: If you’re using colored droplets, choose an accessible contrast ratio between text and background — aim for WCAG AA as a minimum for legibility.
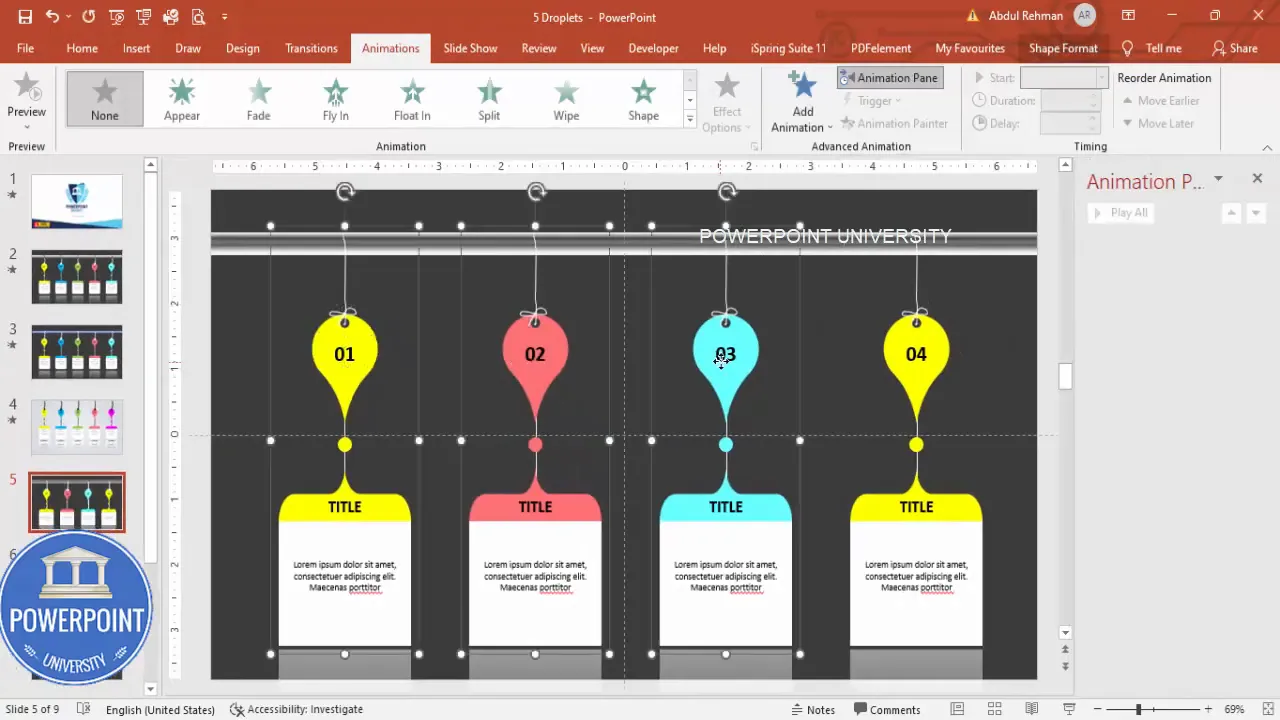
Animate the 5 Hanging Options Infographic Slide
One of the best features of the 5 Hanging Options Infographic Slide is its controlled reveal. Animations make it possible to introduce each option on click so you can narrate each item without overwhelming your audience.
Create Slides in Seconds with ExpertSlides AI |
|
Generate AI Presentations today: |
| TRY NOW! |
1. Open the Animation pane
Go to the Animations tab and open the Animation Pane so you can see and manage timing precisely.
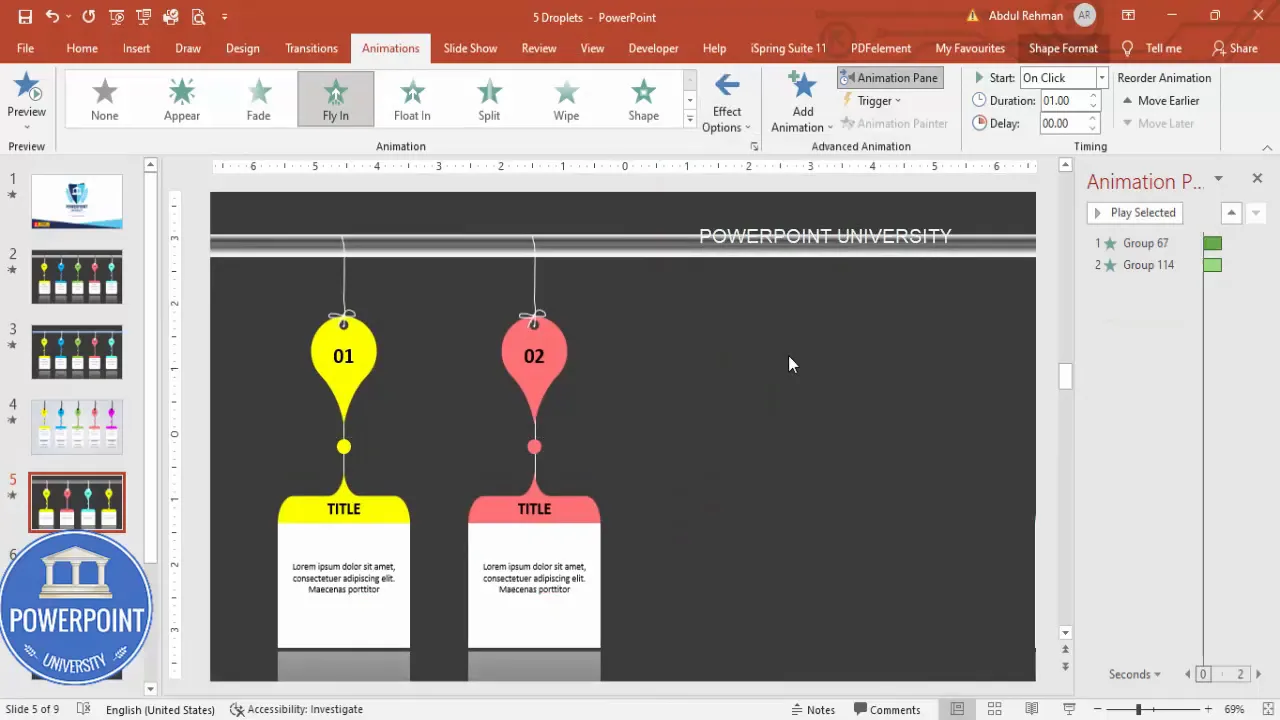
2. Add Fly In animations
- Select the first four options (or all five depending on your flow).
- Choose the “Fly In” animation from Animations.
- In Effect Options, set the direction. For the sequence I used: options 1–4 fly in from left and option 5 from the right for visual balance. Adjust directions as you like.
3. Set timing and triggers
- For each animation, set Start = On Click so each option appears as you click.
- Right-click an animation in the Animation Pane and select Effect Options to fine-tune motion, smooth start/end, and bounce amount.
- Adjust the duration to “Fast” for snappy reveals; longer durations can feel sluggish unless you’re emphasizing motion.
Preview the sequence using Slide Show > From Current Slide or use the Preview button in the Animations ribbon. If you want variation, stagger the timings (Start After Previous with small delays) to create a cascade effect.
Variations and styling tips for the 5 Hanging Options Infographic Slide
Once you have the core structure of the 5 Hanging Options Infographic Slide, explore these variations to better match your message and brand:
Styling and color variations
- Monochrome: Keep all droplets in a single brand color to emphasize uniformity.
- Gradient sequence: Use a subtle hue shift across the five options to indicate progression.
- Accent highlights: Apply a faint outer glow or drop shadow to lift droplets off the background.
Layout alternatives
- Vertical stack: Instead of horizontal distribution, stack droplets vertically along the rod for a timeline-style layout.
- No rod: Remove the rod, leaving the droplets floating with their threads — works for more playful layouts.
- Asymmetric spacing: Vary spacing to highlight a single, important option by larger size or closer proximity to the center.
Animation alternatives
- Fade + Motion: Combine Fade with Motion Paths to create gentle glides into position.
- Staggered pop: Use Grow/Shrink with a slight bounce to create a pop-in effect for emphasis.
- Sequential reveal: Use On Click for each item to pace your narration precisely.
Remember: less is more. Subtle animations and consistent spacing produce the most professional results.
Troubleshooting and common pitfalls
Here are common issues you might encounter when building the 5 Hanging Options Infographic Slide and how to fix them.
Problem: Objects aren’t aligning perfectly
Solution: Turn on View > Guides and Gridlines, or use Align > Align Center and Distribute Horizontally to space items evenly. Group the elements of a single option before distributing to maintain consistent spacing.
Problem: Text is too small or crowded
Solution: Increase the droplet size slightly or reduce the detail text to a single line. For slide decks presented in large rooms, avoid fonts smaller than 18–20 pt for body text.
Problem: Reflection or gradient looks too strong
Solution: Tweak Shape Effects or gradient stops to tone down reflection intensity. Subtlety usually looks better than heavy effects.
Problem: Animation timing feels off
Solution: In the Animation Pane, preview the sequence and adjust duration and delays. Try “Start: On Click” for each element, or use short delays to create natural cascades. Use “Fast” durations for quick slides and “Medium” for deliberate emphasis.
Advanced ideas and extensions
When you’ve mastered the basic 5 Hanging Options Infographic Slide, try these advanced enhancements:
- Clickable actions: Add Action Links to each option so clicking the droplet navigates to a slide with deeper content.
- Interactive reveals: Use triggers to make a droplet reveal only when you click a specific object (e.g., a menu icon).
- Data-driven visuals: Replace the descriptive text with key metrics and add icons to the droplet face to represent category types.
- Export as image or template: Save the grouped five-option layout as an image to reuse in other files or as a PowerPoint template for your team.
These extensions convert the infographic from a static visual to an interactive navigation tool inside your presentation.
Checklist: How to build a polished 5 Hanging Options Infographic Slide (Quick reference)
- Create a new slide and set background color.
- Draw a teardrop shape and rotate to orientation.
- Add brace, cap, and cut out a center eyelet.
- Draw freeform thread and knot from rod to eyelet.
- Insert number, title, and description text boxes; format for legibility.
- Apply subtle reflection preset and gradient to the cap.
- Group the option and duplicate it four times.
- Distribute horizontally and update numbers/colors.
- Apply Fly In animations and set to On Click; fine-tune timing.
- Preview in Slide Show and adjust spacing or text as needed.
FAQ
Q: Can I make a 5 Hanging Options Infographic Slide with shapes other than teardrops?
A: Yes. The method works with any shape — tags, rounded rectangles, circles, or custom shapes. The teardrop gives a distinct hanging look but feel free to experiment; the steps remain the same: create the shape, add a cap and hole, draw a thread, and group.
Q: What size fonts should I use so the slide is readable in presentation mode?
A: For on-screen presentations in a typical meeting room, keep heading/title text at least 18–24 pt, numbers at least 24–36 pt depending on the distance to your audience, and descriptive body text no smaller than 10–14 pt. If you expect remote viewers on small screens, increase sizes accordingly.
Q: Is the 5 Hanging Options Infographic Slide mobile-friendly for remote presentations?
A: The slide will appear on mobile devices, but because droplets contain several text elements, readability can be reduced on small screens. If many viewers will use phones, enlarge the droplet size and font sizes or reduce descriptive text to a single line to maintain legibility.
Q: How do I make a hanging option link to additional details elsewhere in the deck?
A: Right-click the grouped droplet, choose Link or Action, and set it to “Hyperlink to:” a specific slide within the presentation. During the live presentation, clicking the droplet will jump to the detailed slide and you can return using Back or a home button.
Q: Can I create the 5 Hanging Options Infographic Slide on PowerPoint for Mac?
A: Yes. Most features (shapes, grouping, merge shapes, animations) exist in the Mac version as well. Keyboard shortcuts differ slightly — for example, Command replaces Ctrl for grouping and duplicating shortcuts. The Merge Shapes tool is available in recent Mac releases; if you don’t see it, use Shape Combine alternatives or overlay shapes visually.
Q: I misplaced the small orange adjustment point; how do I control teardrop curvature?
A: If you accidentally moved the adjustment handle, select the shape and hover near its edges until the yellow/orange diamond reappears. Dragging that point adjusts the curvature. If you can’t get the shape back, undo steps until it’s restored or recreate the teardrop and adjust carefully.
Common mistakes and how to avoid them
- Overcrowding text: Avoid lengthy paragraphs inside each droplet. Keep each description to two short lines max.
- Poor contrast: Ensure text color contrasts sufficiently with droplet color; switch to white or near-white on colorful tags.
- Heavy effects: Avoid strong drop shadows and saturated reflections — subtlety reads as professional.
- Inconsistent spacing: Group each option before distributing horizontally to keep visual rhythm consistent.
Final notes and wrap-up
The 5 Hanging Options Infographic Slide is a flexible, visually engaging way to present five related items. By building one polished hanging option, grouping it, and duplicating smartly, you save time and maintain design consistency. The combination of a subtle metallic rod, natural scribble thread, and reflected droplets creates a believable physical metaphor that is visually engaging and easy to narrate during delivery.
If you follow the step-by-step instructions in this guide, you’ll have a fully functional and animated 5 Hanging Options Infographic Slide ready to use in your presentations. Remember these principles:
- Start with a single, well-crafted component.
- Use grouping and duplication for consistency and speed.
- Test animation pacing and text legibility on the device you’ll use for presenting.
- Keep effects subtle and maintain strong contrast for accessibility.
Now open PowerPoint and build your own 5 Hanging Options Infographic Slide. Customize the colors, tweak the spacing, and match the typography to your brand — you’ll have a unique slide that communicates clearly and looks professional.
Want more design ideas? Try swapping the teardrops for icon-based tags, adding a tiny metric next to each number, or turning the rod into a timeline with date markers. The same building blocks apply, and once you know the technique you’ll find many creative ways to adapt it.
Check out the full video: Create 5 Hanging Options Infographic Slide in PowerPoint. Tutorial No. 981


