
Welcome to a comprehensive guide on designing animated PowerPoint slides that captivate your audience and streamline your presentation navigation. In this tutorial, you will learn how to craft beautiful gradient backgrounds, incorporate stylish text effects, and build an interactive clickable menu using PowerPoint’s advanced features. Whether you’re a seasoned presenter or just starting out, this step-by-step walkthrough will equip you with the skills to elevate your slide designs and add dynamic navigation elements that enhance user experience.
This tutorial is inspired by the expert guidance of One Skill PowerPoint, who demonstrates how to harness the power of Microsoft 365‘s latest features like the Morph transition and SVG editing to build visually stunning and functional presentations.
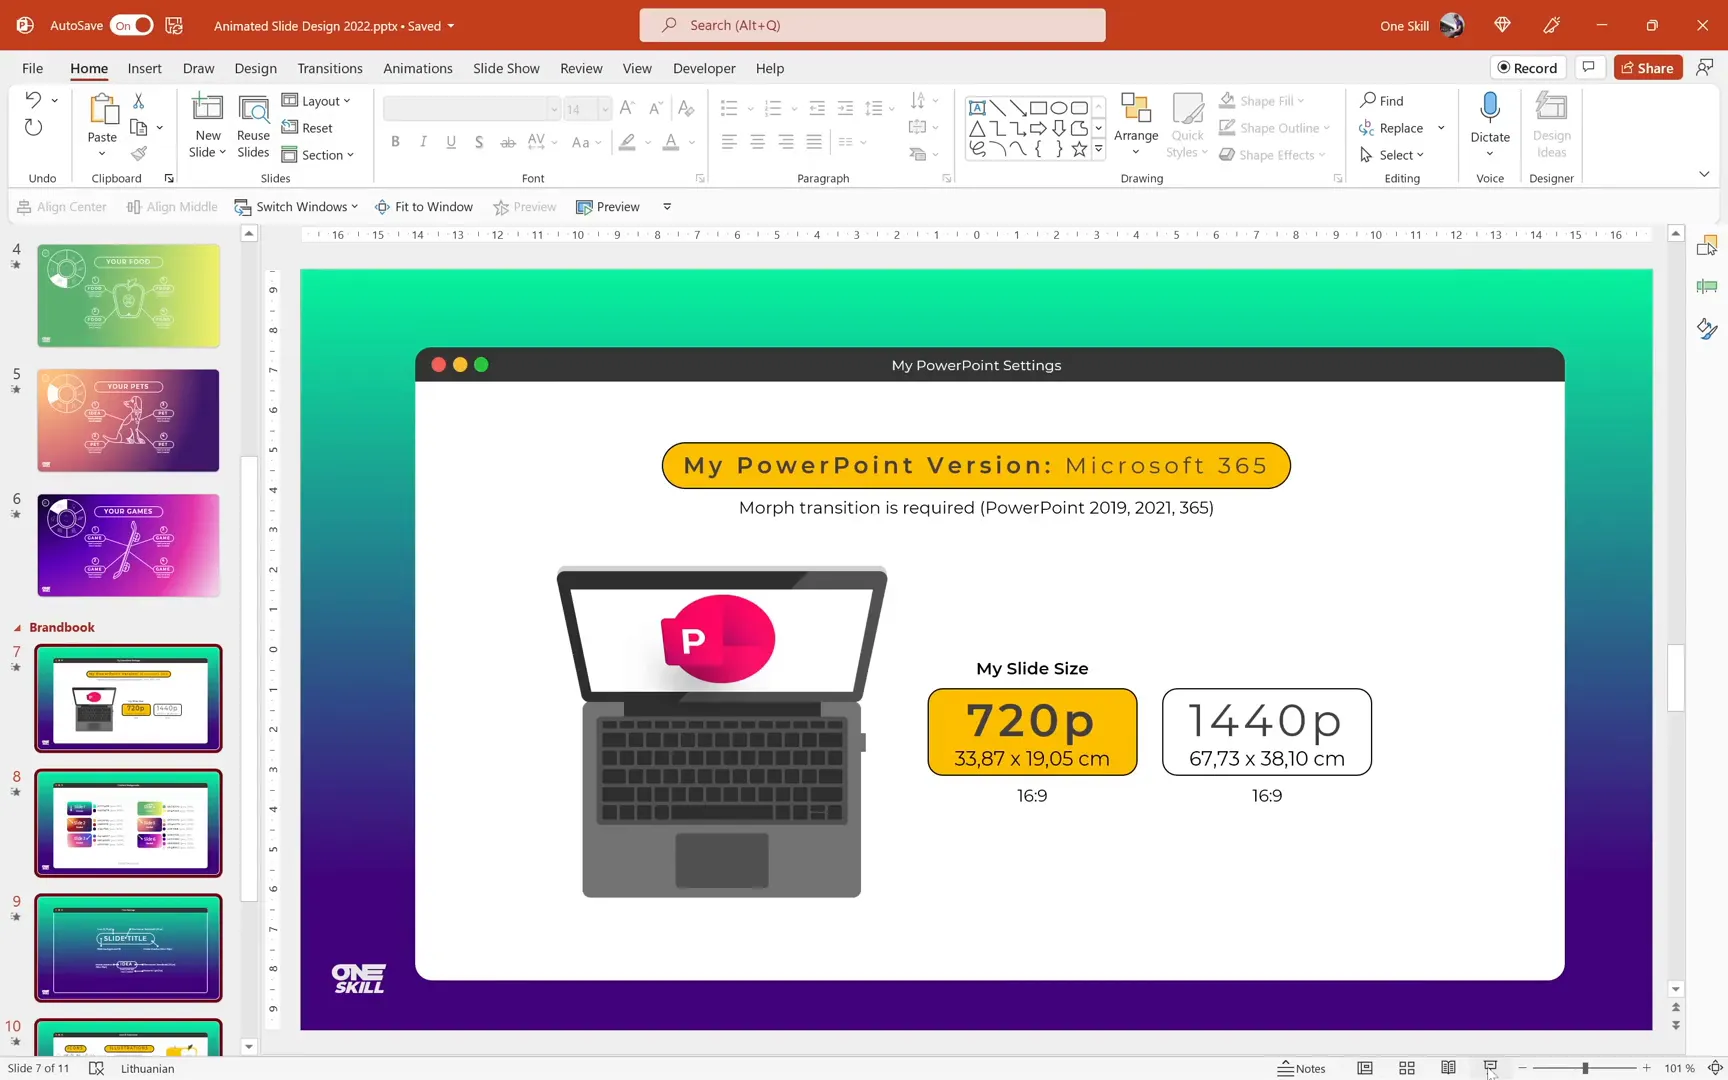
Table of Contents
- Getting Started: Essential Settings and Tools
- Creating Beautiful Gradient Backgrounds
- Designing Slide Content with Stylish Text Boxes and Illustrations
- Creating a Clickable Circular Navigation Menu
- Animating the Navigation Menu
- Replicating Navigation Across Slides and Using Morph Transition
- Conclusion
- Frequently Asked Questions (FAQ)
Getting Started: Essential Settings and Tools
Before diving into the design process, it’s crucial to set up your working environment correctly to leverage PowerPoint’s most powerful features. The tutorial uses Microsoft 365, though versions like PowerPoint 2019 or 2021 also support the essential Morph transition that enables smooth animations between slides.
The Morph transition is a game-changer for creating seamless animations between objects on consecutive slides. It allows you to transform shapes, images, and text dynamically, making your presentations more engaging without complex animation setups.
For slide dimensions, the default widescreen aspect ratio of 16:9 with a 720p resolution (33.87 cm width by 19.05 cm height) is sufficient for most presentations. However, if you want higher resolution for sharper visuals, you can increase the slide size to Quad HD dimensions. This tutorial sticks with the 720p default for simplicity.
Gathering Design Resources
To create consistent and visually appealing slides, it helps to prepare your resources in advance:
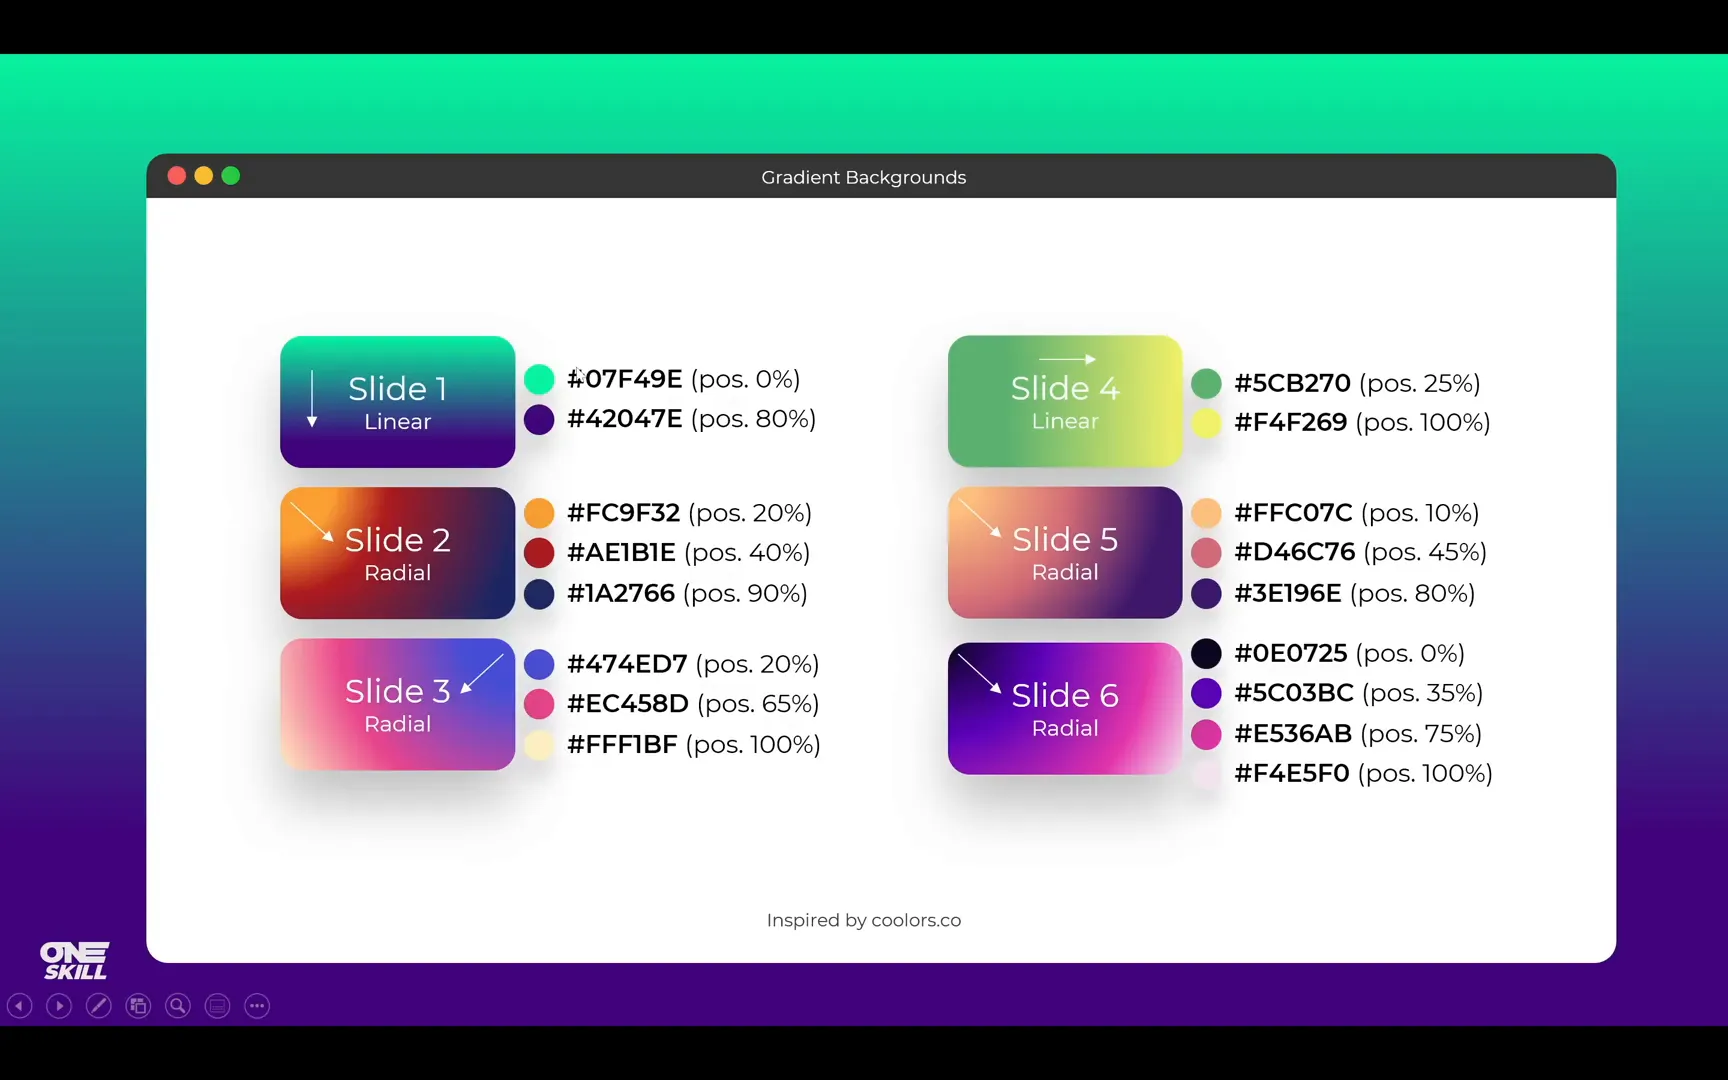
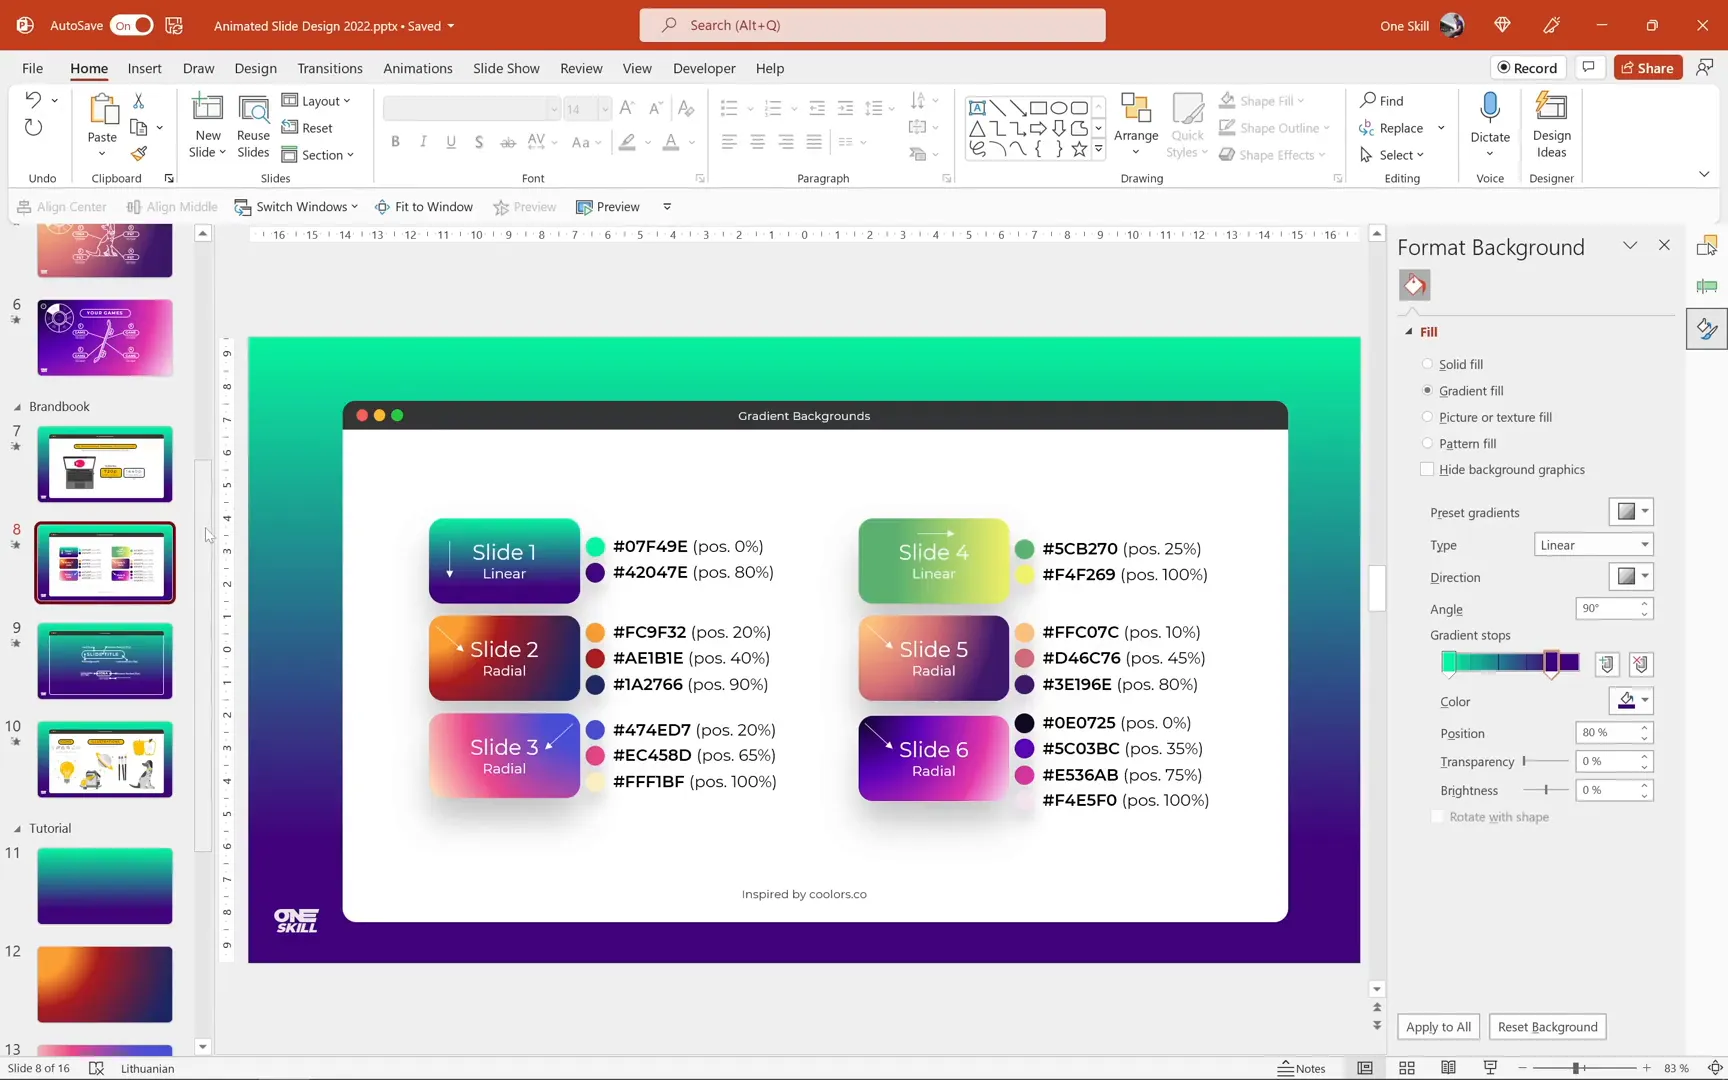
- Gradient Backgrounds: The tutorial uses six unique gradient backgrounds for six slides, complete with exact HEX color codes and gradient stop positions. This ensures color harmony and professional polish.
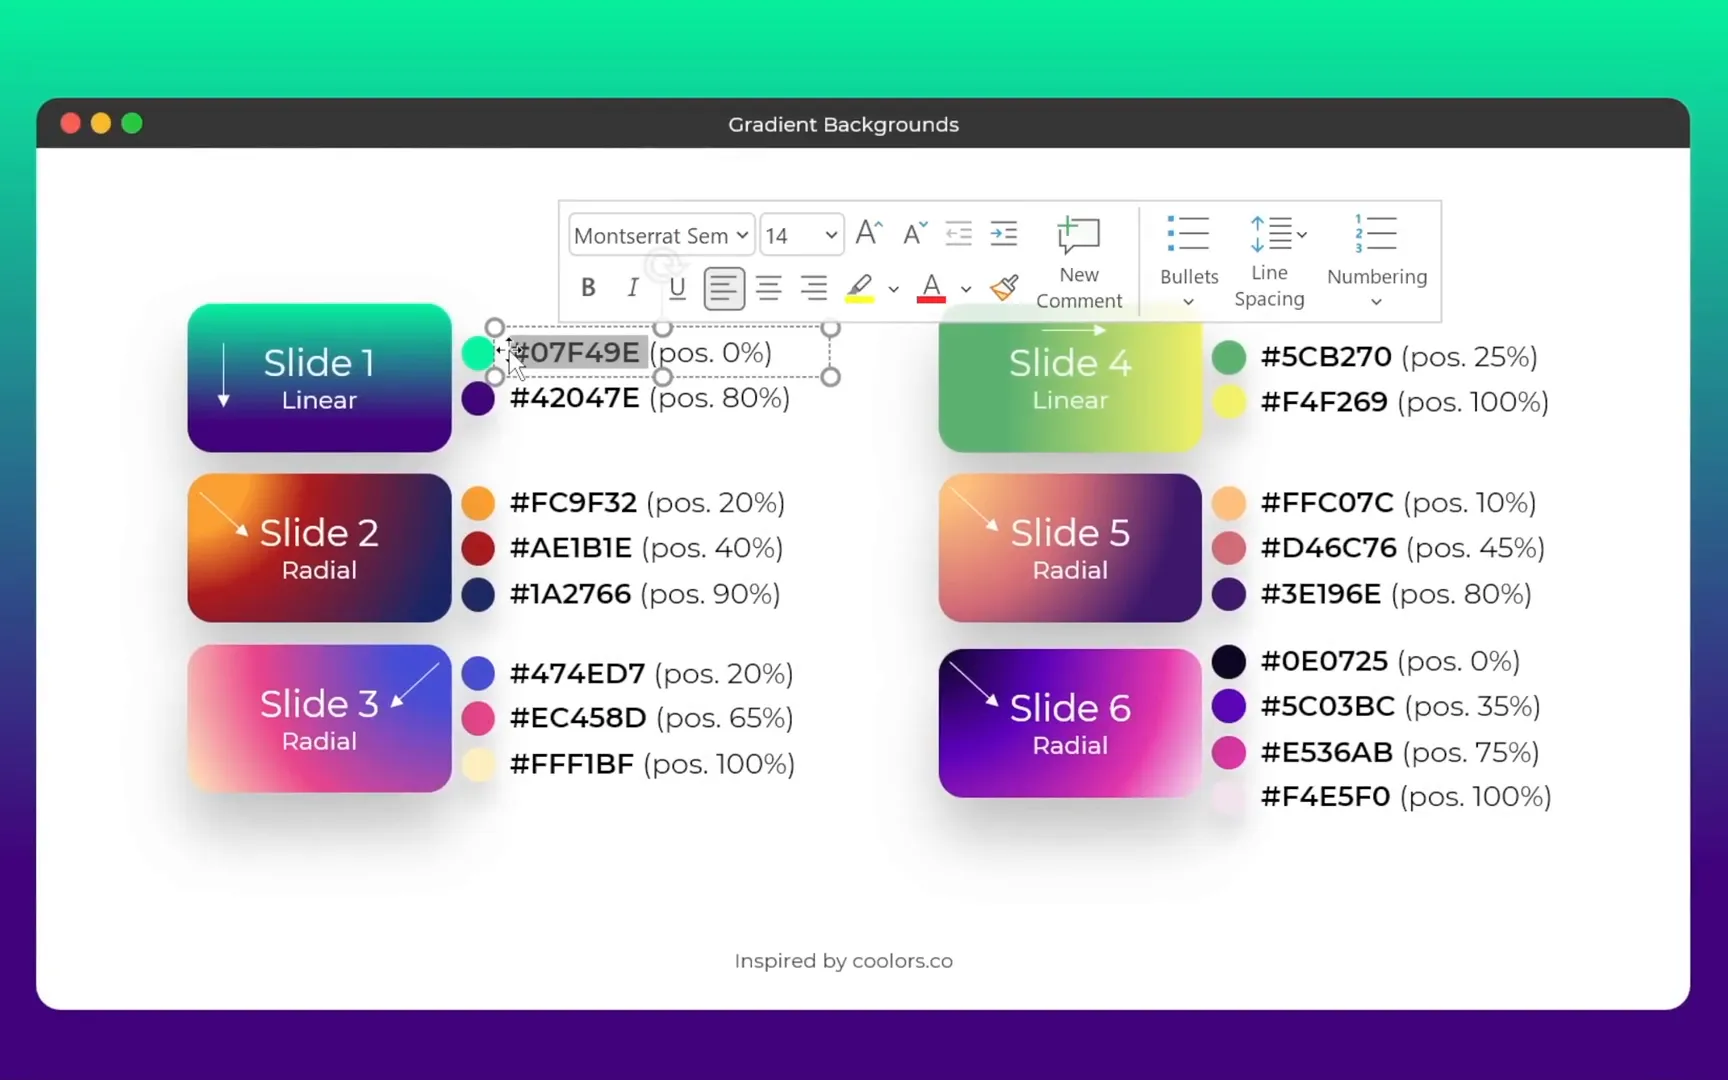
- Fonts: The Montserrat font family is chosen for its modern, clean look. Text boxes will feature rounded corners and a subtle white inside shadow for depth.
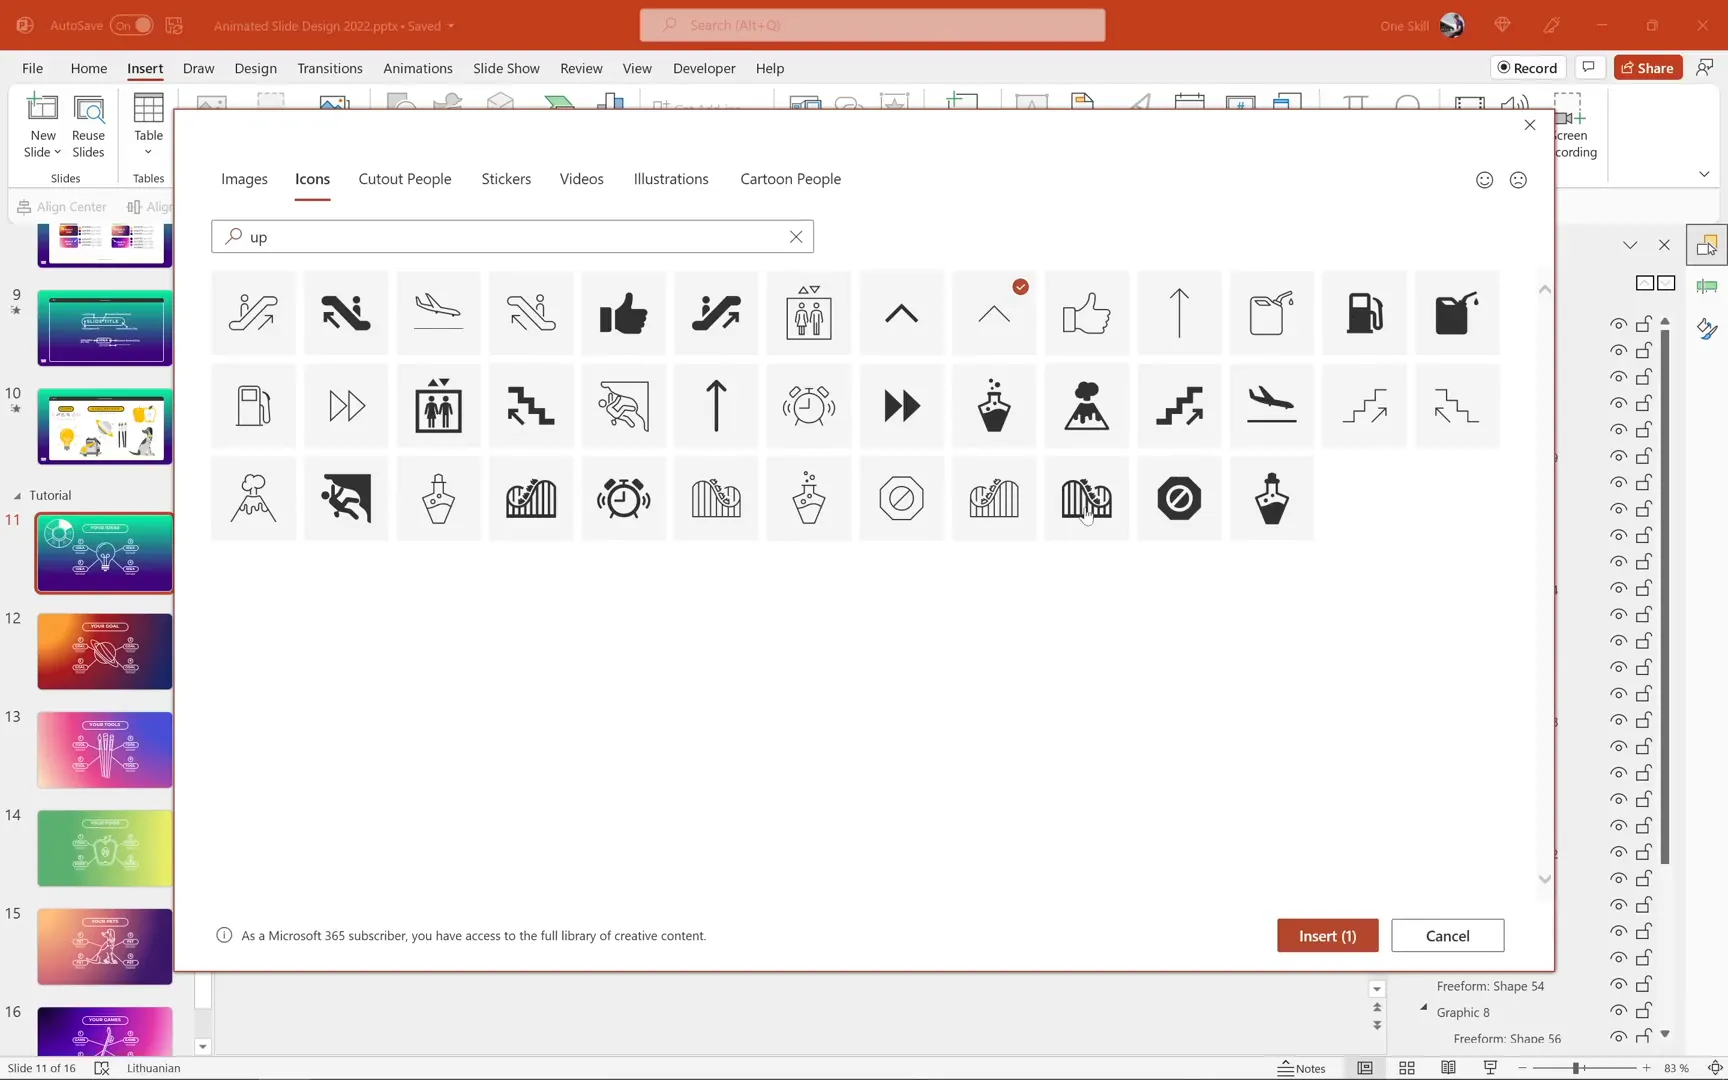
- Icons and Illustrations: Leveraging PowerPoint’s built-in icons and illustrations (available in Microsoft 365), you can access a variety of vector graphics directly within your slides. Alternatively, websites like flaticon.com or freepik.com offer excellent free resources if your PowerPoint version lacks these features.
By organizing these elements in a “brand book” slide within your presentation, you can quickly reference colors, fonts, and icons as you create.
Creating Beautiful Gradient Backgrounds
Let’s start by crafting visually rich gradient backgrounds that set the tone for your slides. Gradients add depth and interest, making your content pop without distracting from your message.
Step 1: Applying a Linear Gradient Background
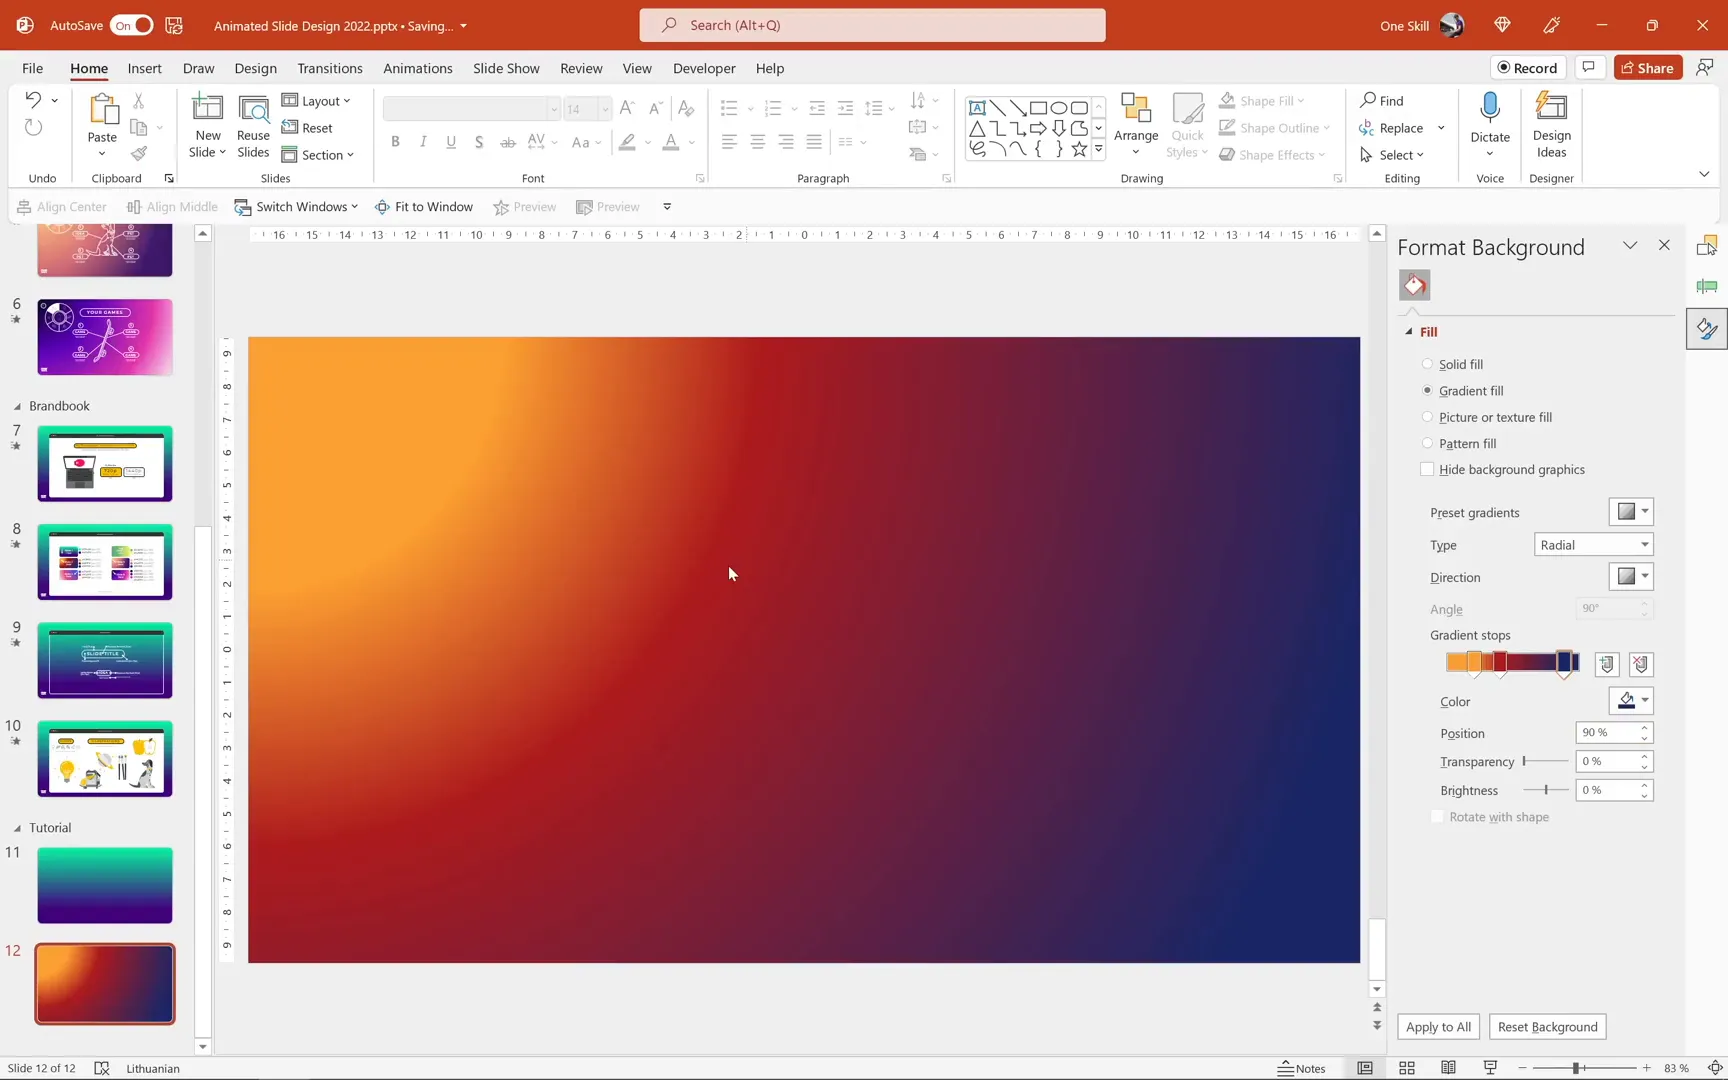
Begin with a blank slide and open the Format Background pane. Instead of a solid fill, choose Gradient fill. PowerPoint often defaults to your previous gradient settings, but we’ll build ours from scratch.
Remove extra gradient stops by selecting the middle ones and dragging them downwards to delete, leaving only two stops. Then, using your brand book, copy the exact HEX codes for the first and second colors and paste them into the gradient stops. Set the gradient type to Linear and choose a top-to-bottom direction. Adjust the position of the second color stop to 80% to give the dark purple color more space on the slide.
Step 2: Applying a Radial Gradient Background
The second slide features a radial gradient with three color stops. Select Gradient fill again, this time using the Radial gradient type. Set the gradient origin to the top-left corner to match the design.
Copy and paste the HEX codes for each color stop from your brand book and set their positions precisely: 20%, 40%, and 90%. This creates a smooth, multi-tone gradient that enhances the slide’s visual appeal.
Step 3: Applying Gradient Backgrounds to Remaining Slides
After creating the first two backgrounds, insert four more blank slides. Use the Format Painter tool to quickly copy and apply the created gradients to these slides, ensuring consistent design throughout your presentation.
Designing Slide Content with Stylish Text Boxes and Illustrations
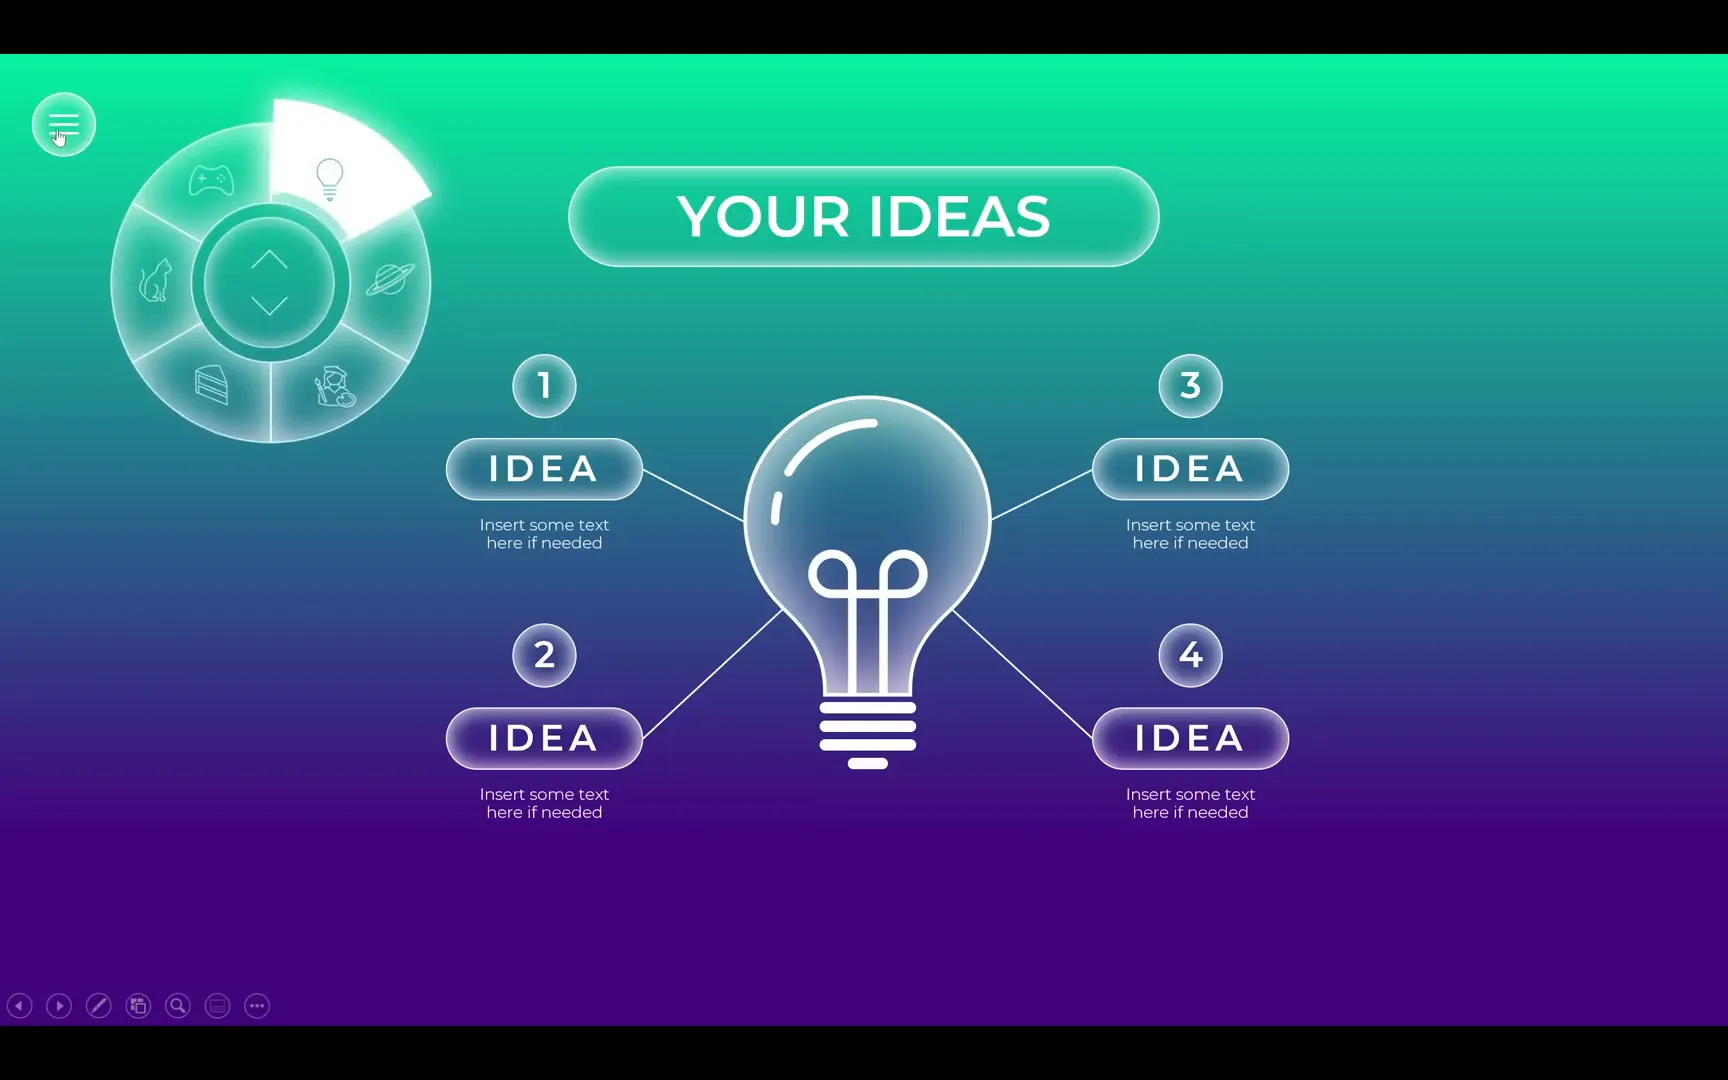
With your backgrounds ready, it’s time to add content. The first slide includes several rounded text boxes and a central light bulb illustration that visually represents ideas and creativity.
Creating Rounded Text Boxes with Inside Shadows
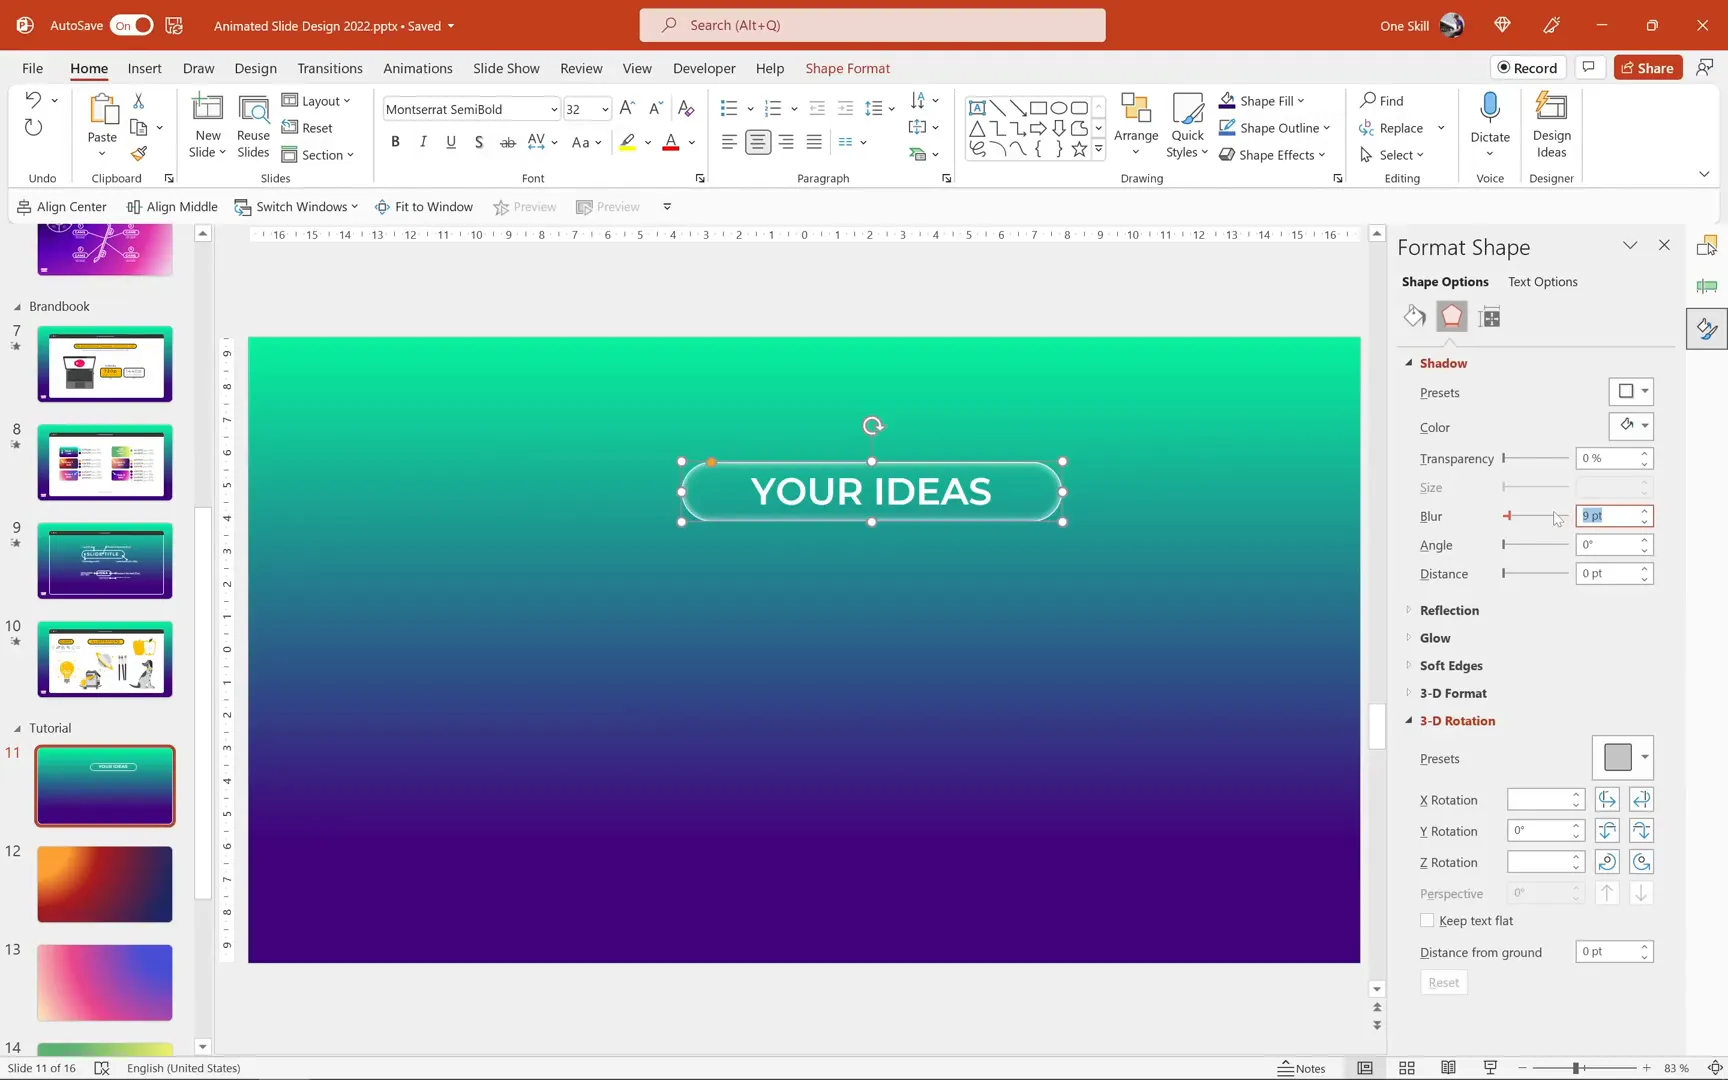
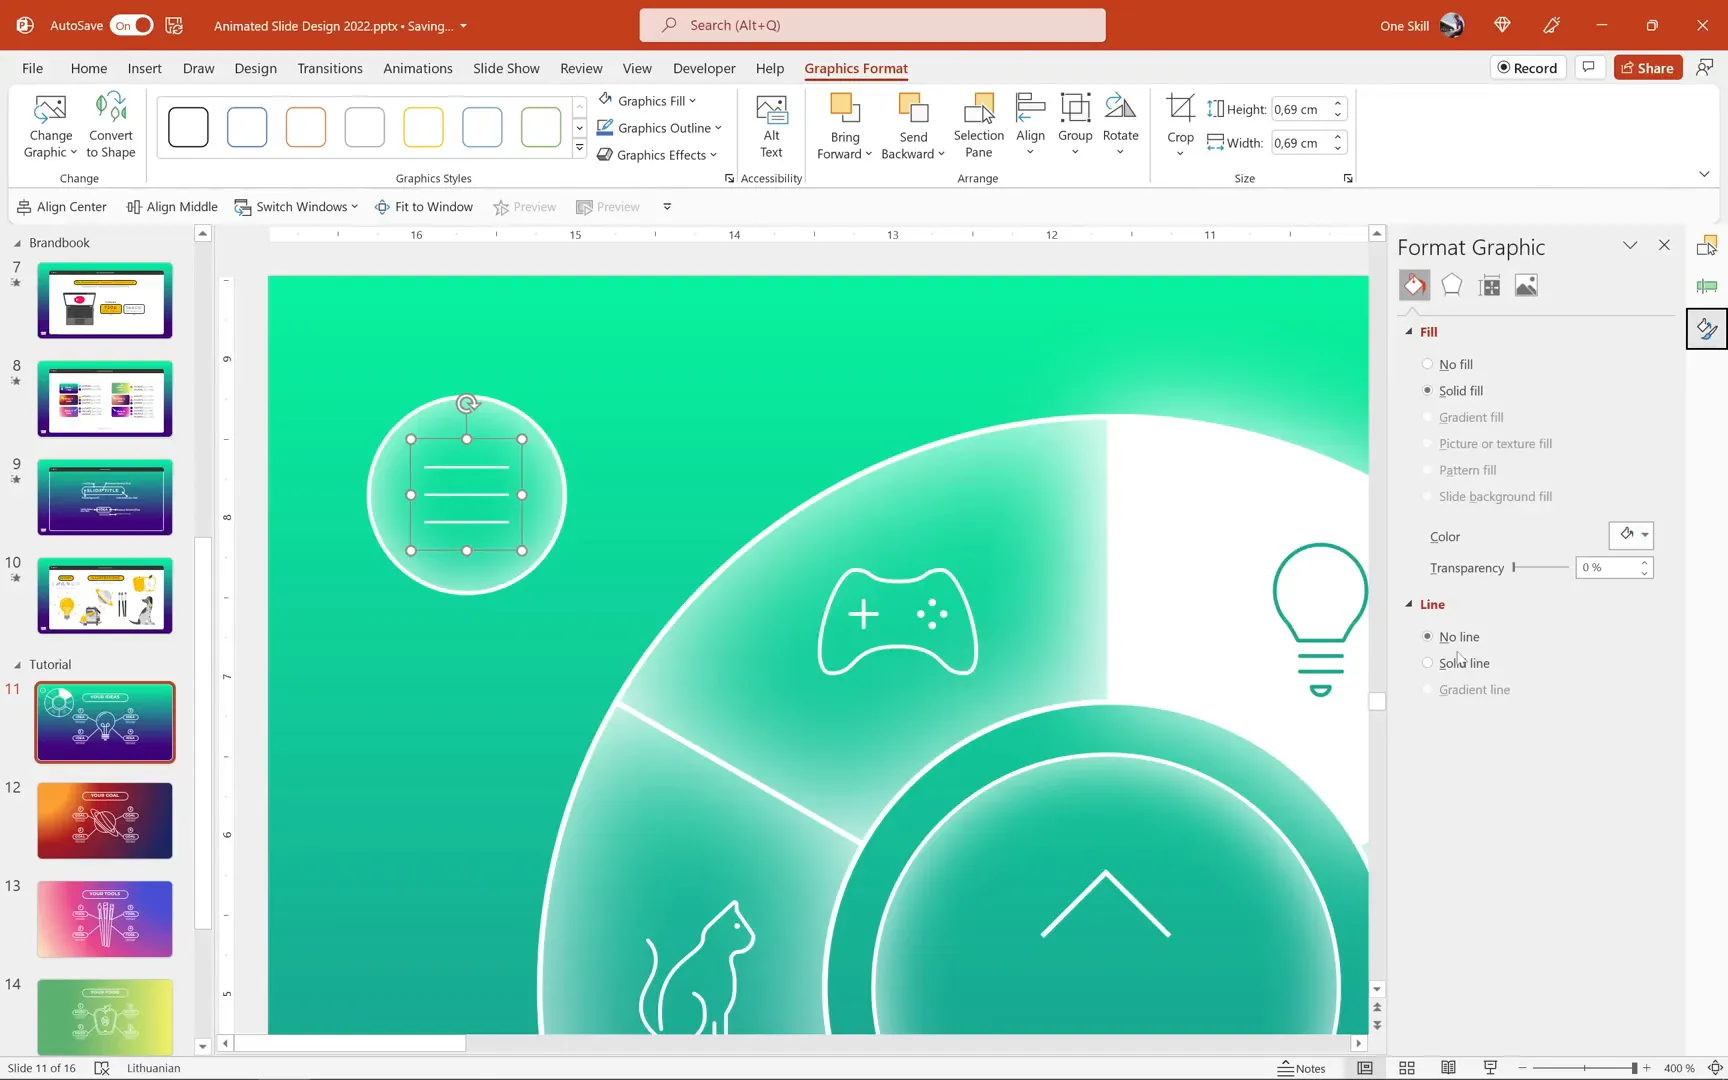
Insert a rounded rectangle shape and adjust the corner radius to make it fully rounded. Apply a white outline with a width of 0.75 points and set the fill to No fill initially.
For the text, use Montserrat Semi Bold at size 32, center-aligned. Type your desired title, such as “Your Ideas,” and resize the text box accordingly.
To add a subtle white inside shadow that creates a soft glow effect, set the fill of the shape to Slide Background Fill. This allows the text box to adapt to the background gradient dynamically. Then, enable the inside shadow effect, set the shadow color to white, and adjust the blur to 15 points for a soft glow.
Duplicating and Positioning Text Elements
Copy and paste the text box group to create multiple content areas on the slide. Adjust font sizes for secondary text as needed, such as Montserrat Light at 9 points for small labels and Semi Bold at 20 points for headings, maintaining the inside white shadow effect for consistency.
Inserting and Customizing Illustrations
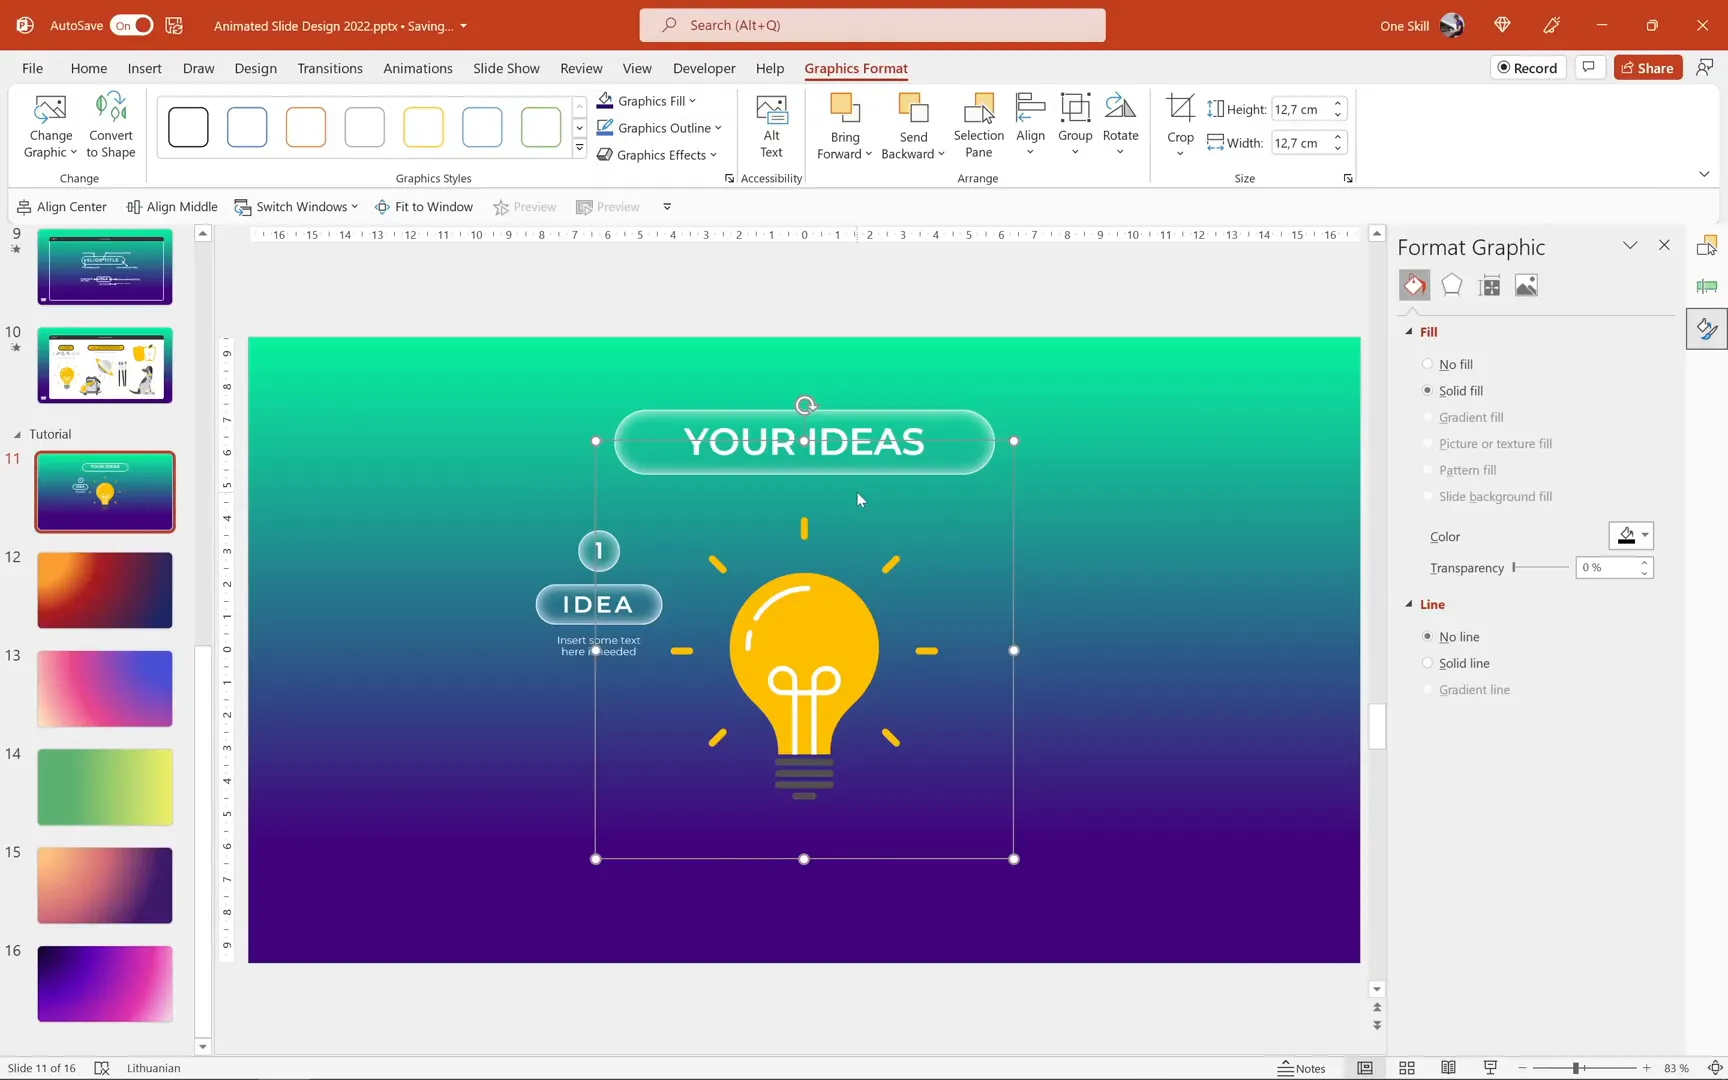
The central light bulb illustration symbolizes ideas and innovation. PowerPoint’s built-in icon library (available in Microsoft 365) provides vector illustrations like this. Insert the light bulb icon, then right-click and choose Ungroup twice to convert it into editable shapes.
Remove unwanted elements like light rays, apply white fills and outlines, and add a white inside shadow with a blur of 55 points to give it a glowing effect. Group the elements back together and position it centrally on the slide.
Connecting Text Boxes to Illustrations with Lines
Use the Line shape tool to draw connecting lines from each text box to the light bulb. Set line color to white and width to 1 point for visibility. Group the entire composition for easy duplication and alignment.
Replicating Content for Other Slides
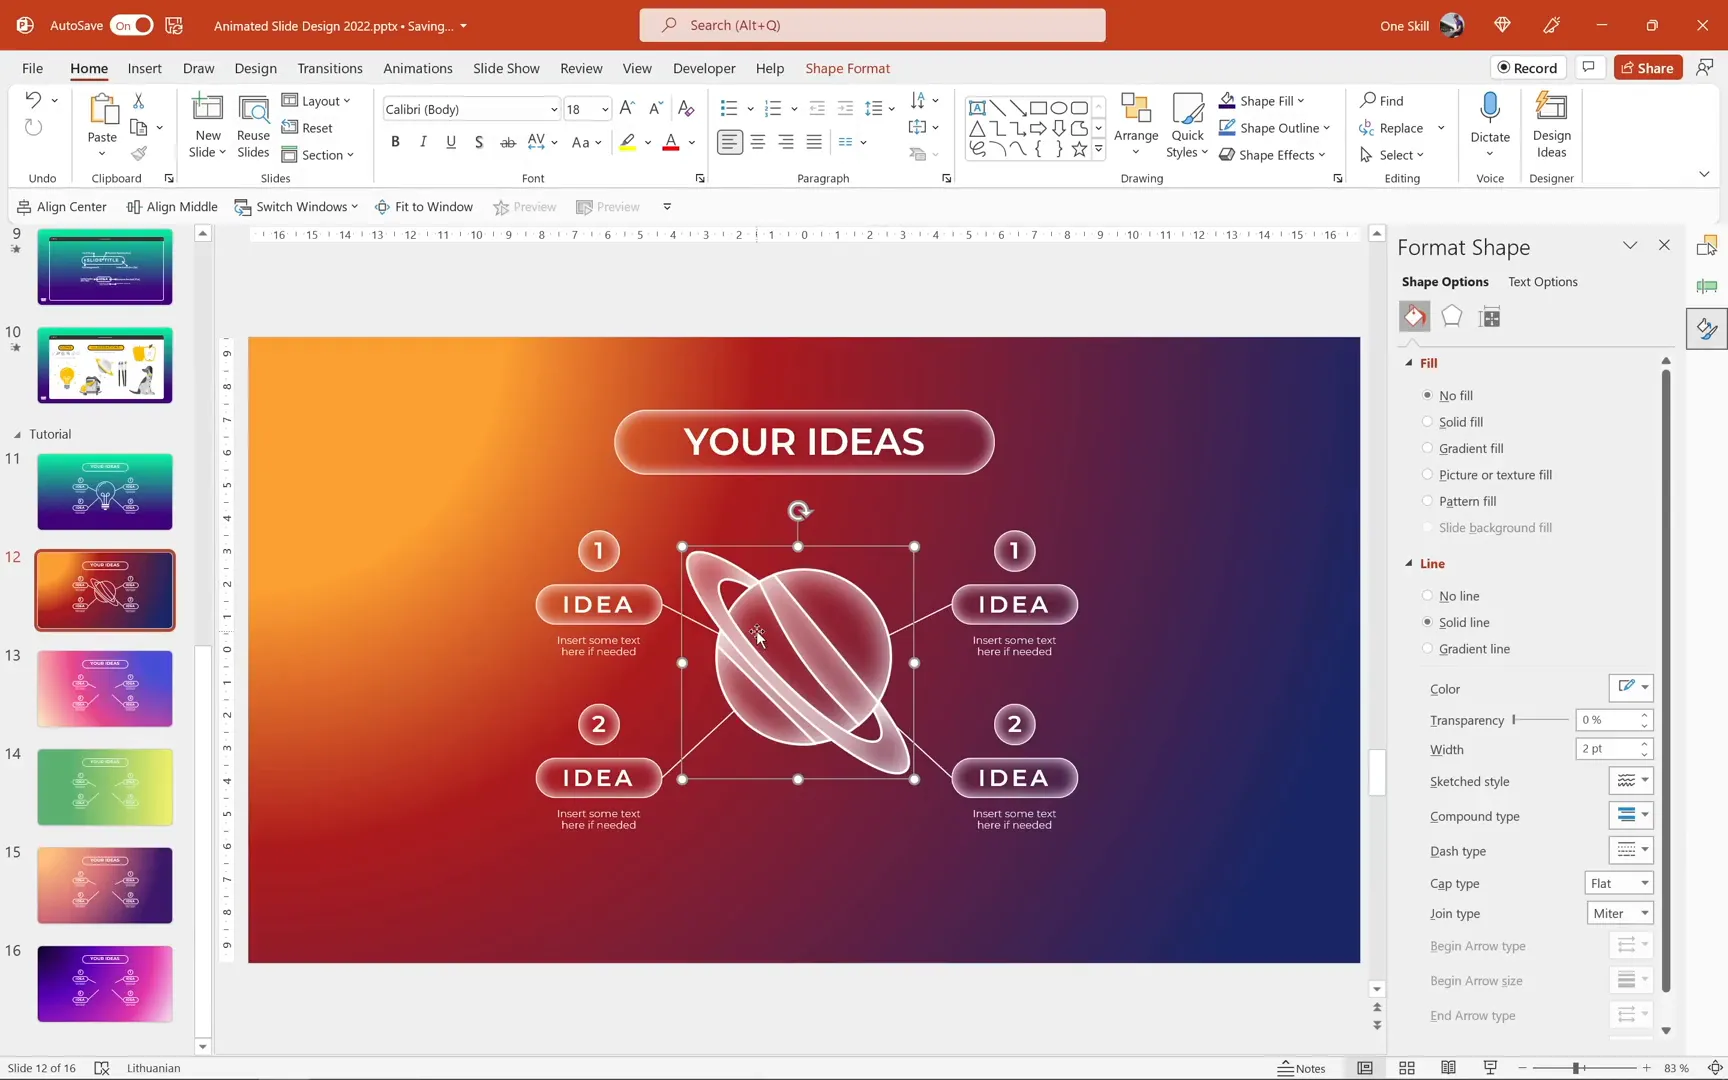
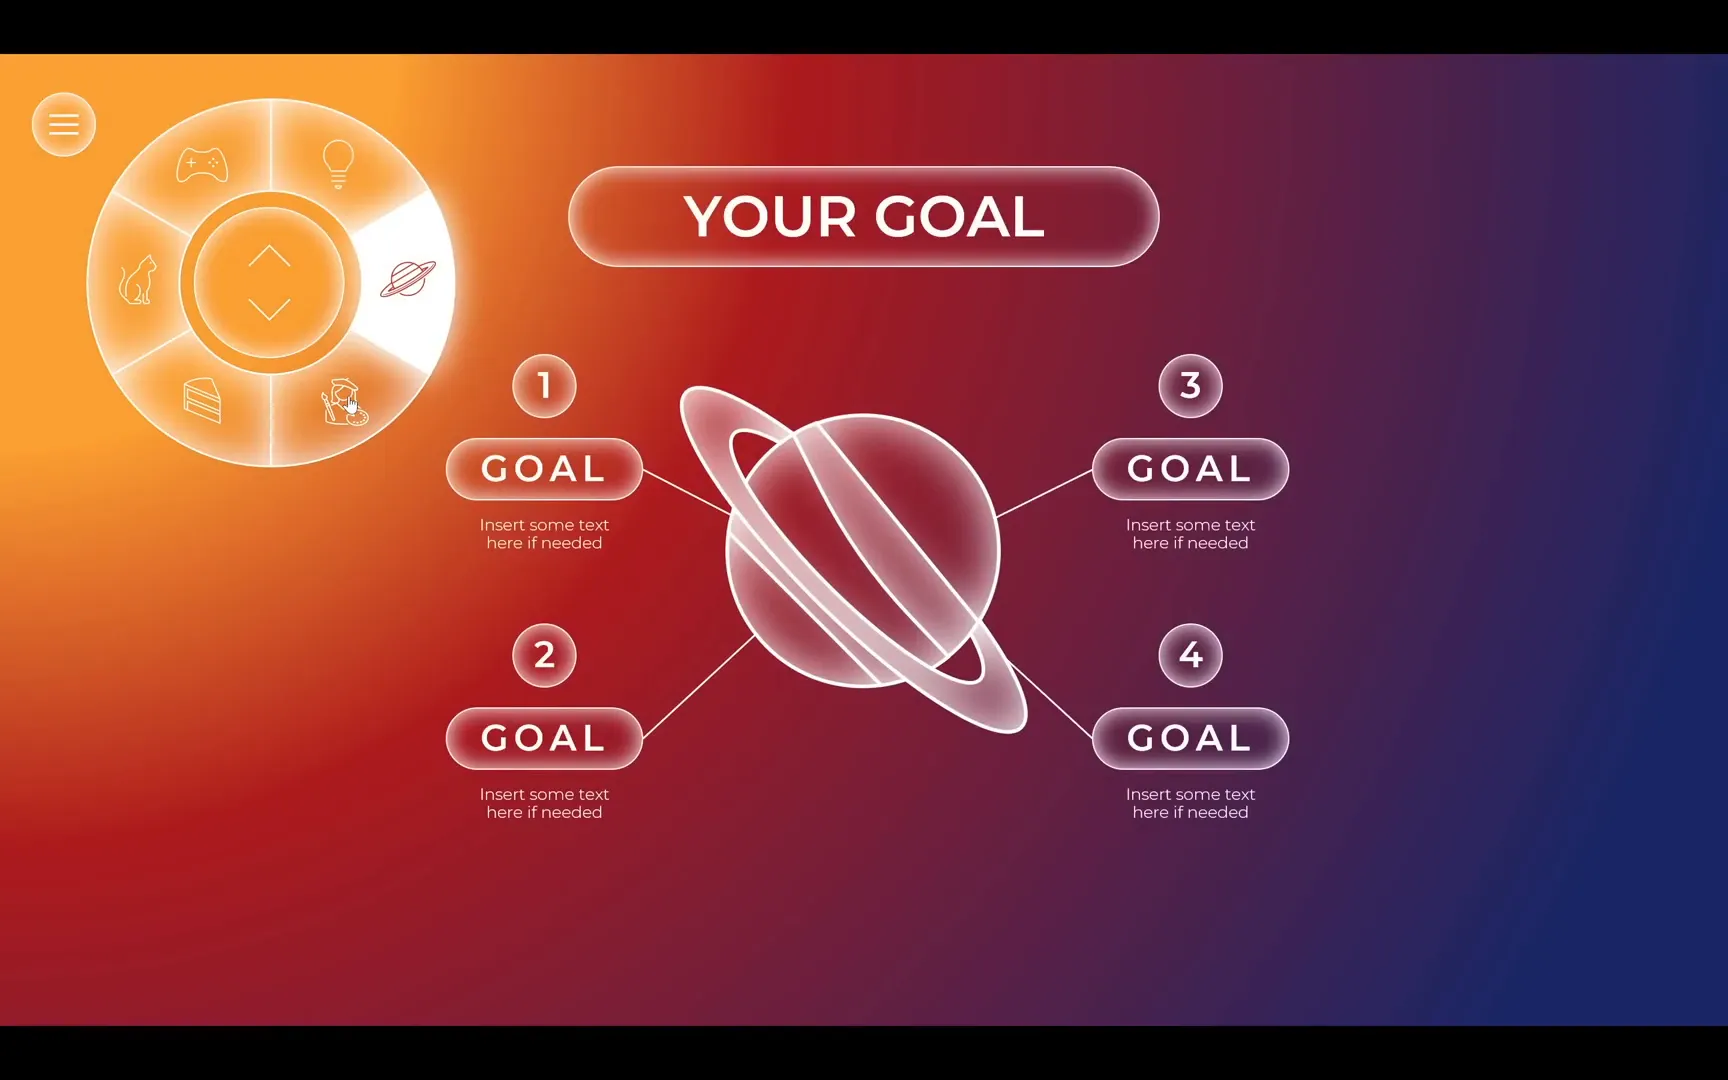
For other slides, copy and paste the text boxes and lines, then update the content and illustrations. For example, use a planet illustration for a slide about goals, or a cat icon for a slide about pets. Edit each illustration similarly by ungrouping, customizing fills and outlines, and adding inside shadows.
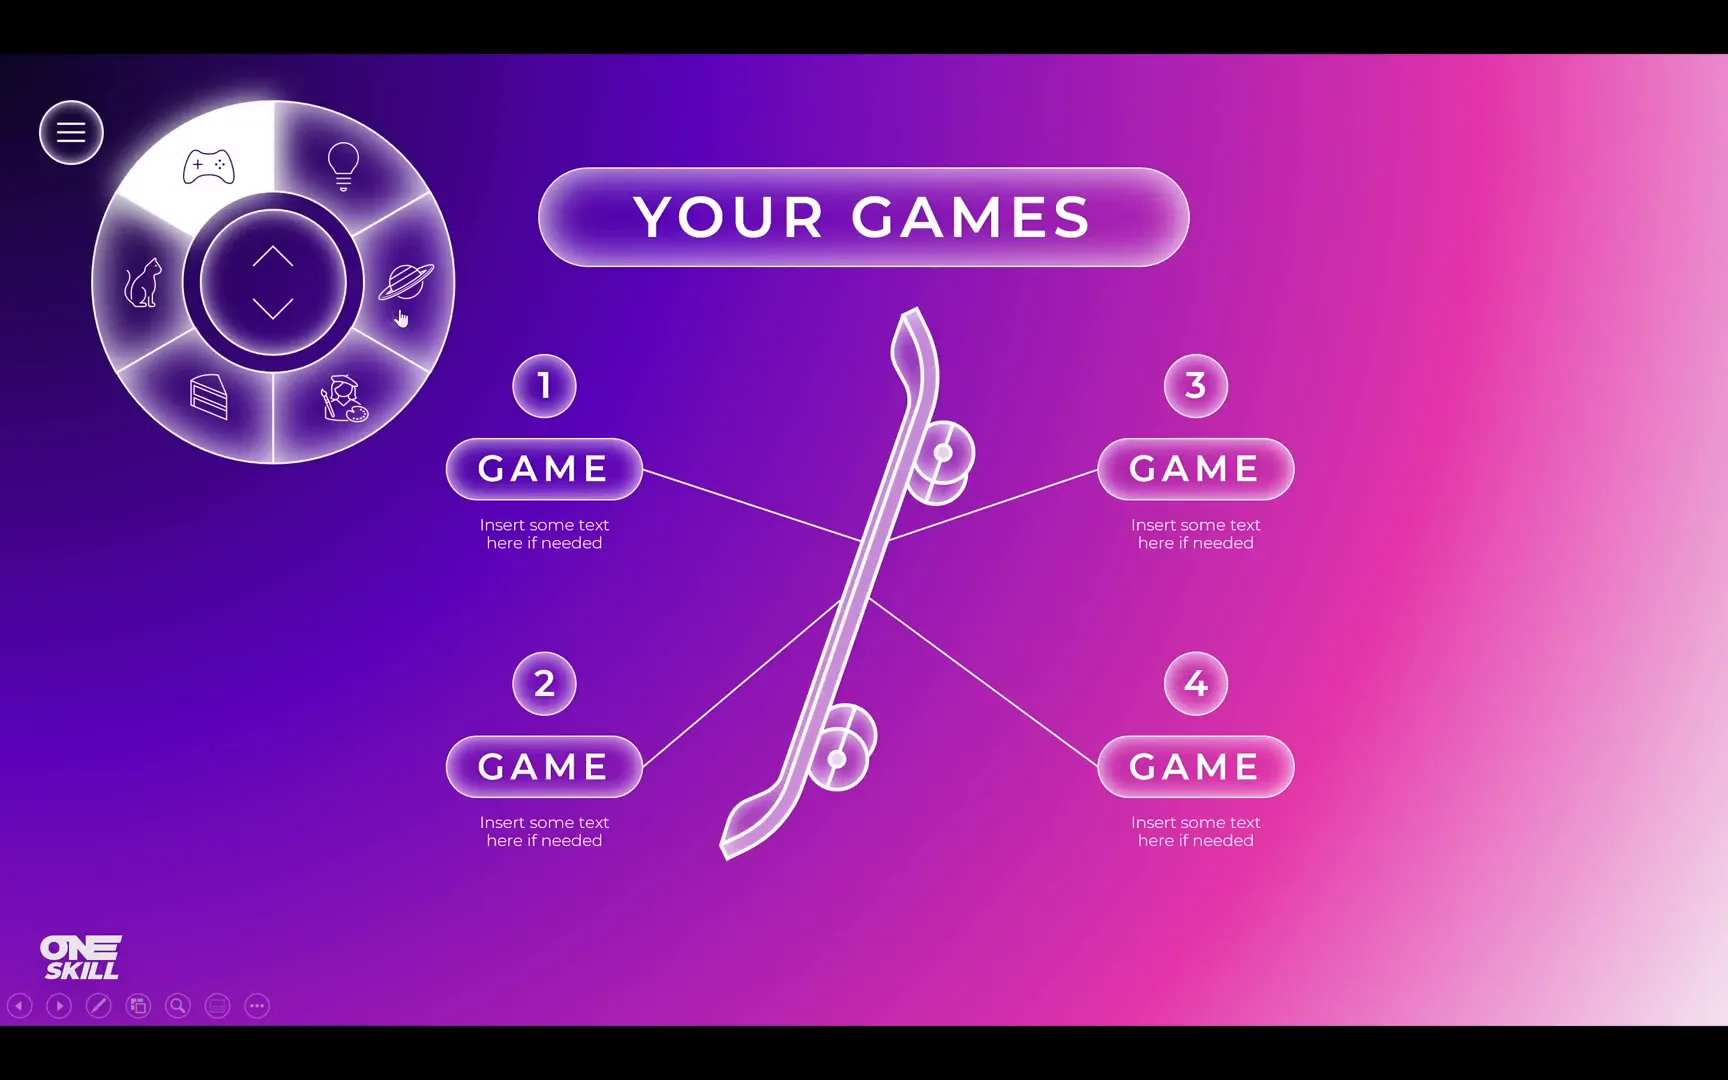
Creating a Clickable Circular Navigation Menu
Now comes the exciting part: building an interactive circular menu (donut chart) on the left side of your slides. This menu allows users to click icons and jump directly to specific slides, making navigation intuitive and visually pleasing.
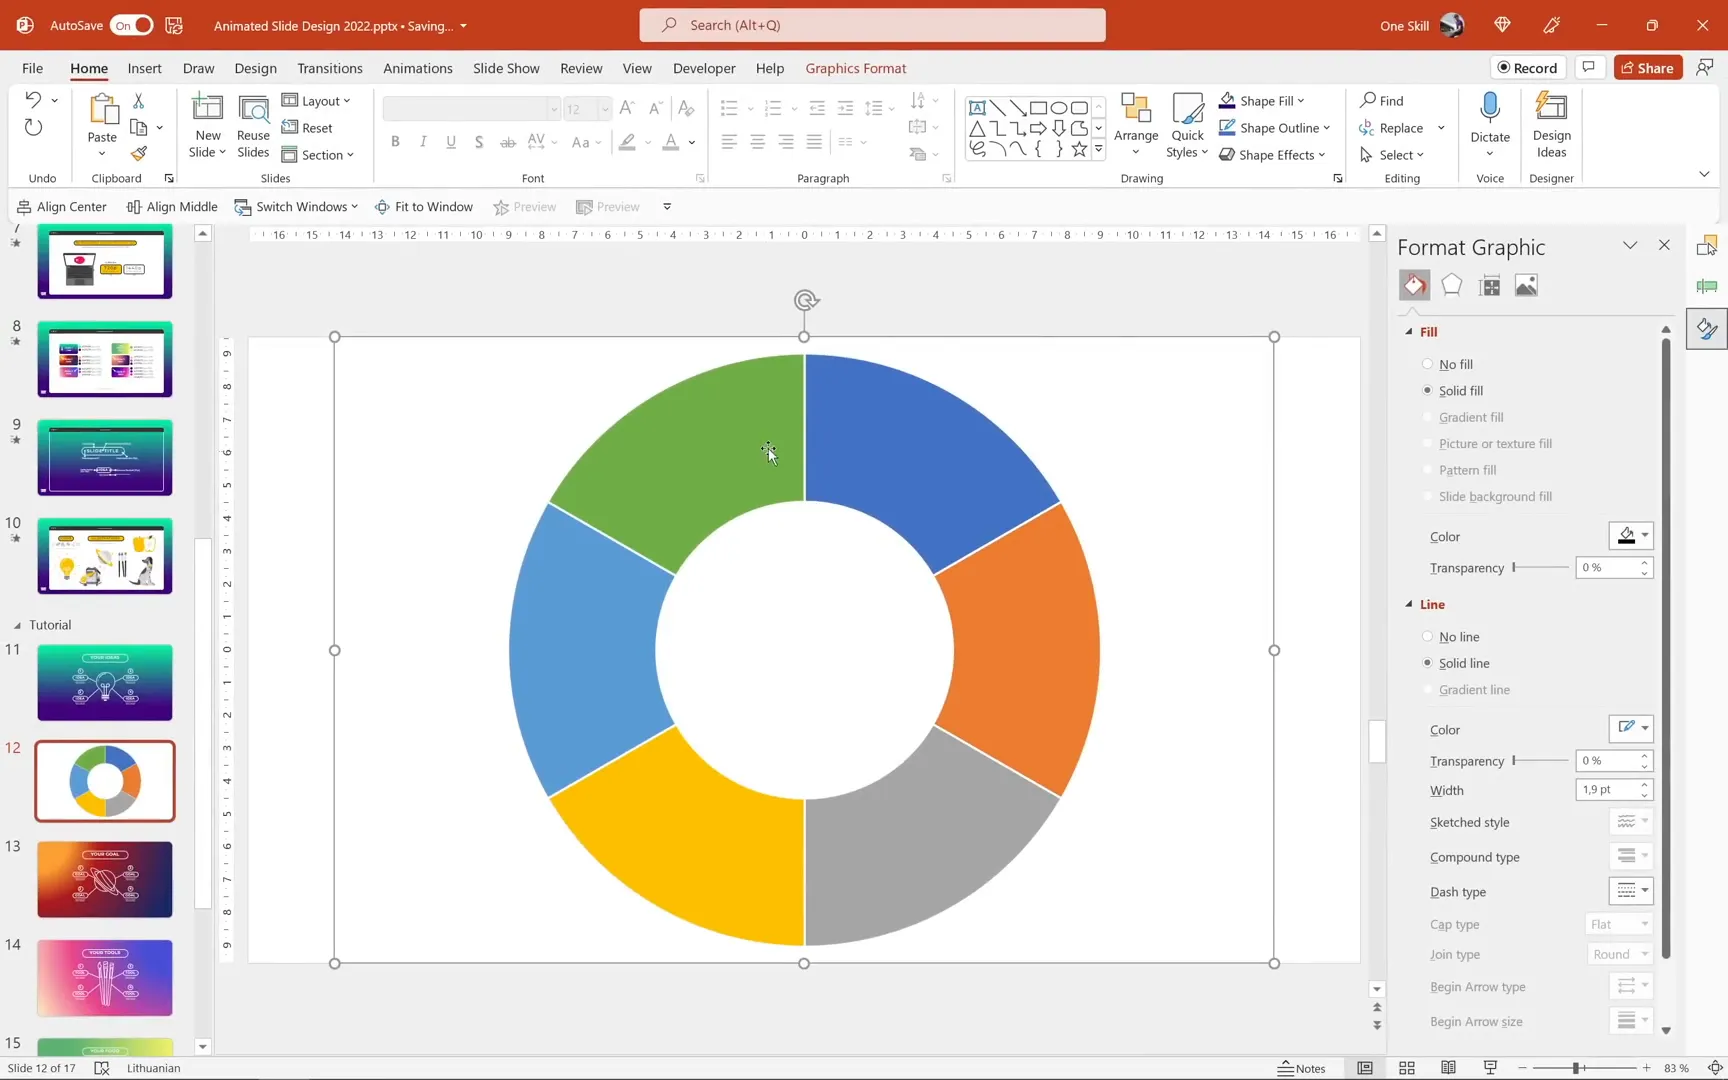
Designing the Donut Chart Menu
Instead of manually drawing the menu, use PowerPoint’s chart tool to insert a donut chart. By entering equal values for six categories, the chart divides the circle into six equal segments.
Remove unnecessary chart elements like legends and labels, then adjust the donut hole size to 50% for a balanced look.
To make the chart editable, cut it, then use Paste Special and select SVG format. Ungroup the pasted SVG multiple times to access individual segments. Apply a solid fill color and add a white inside shadow with 30 points blur to each segment for depth.
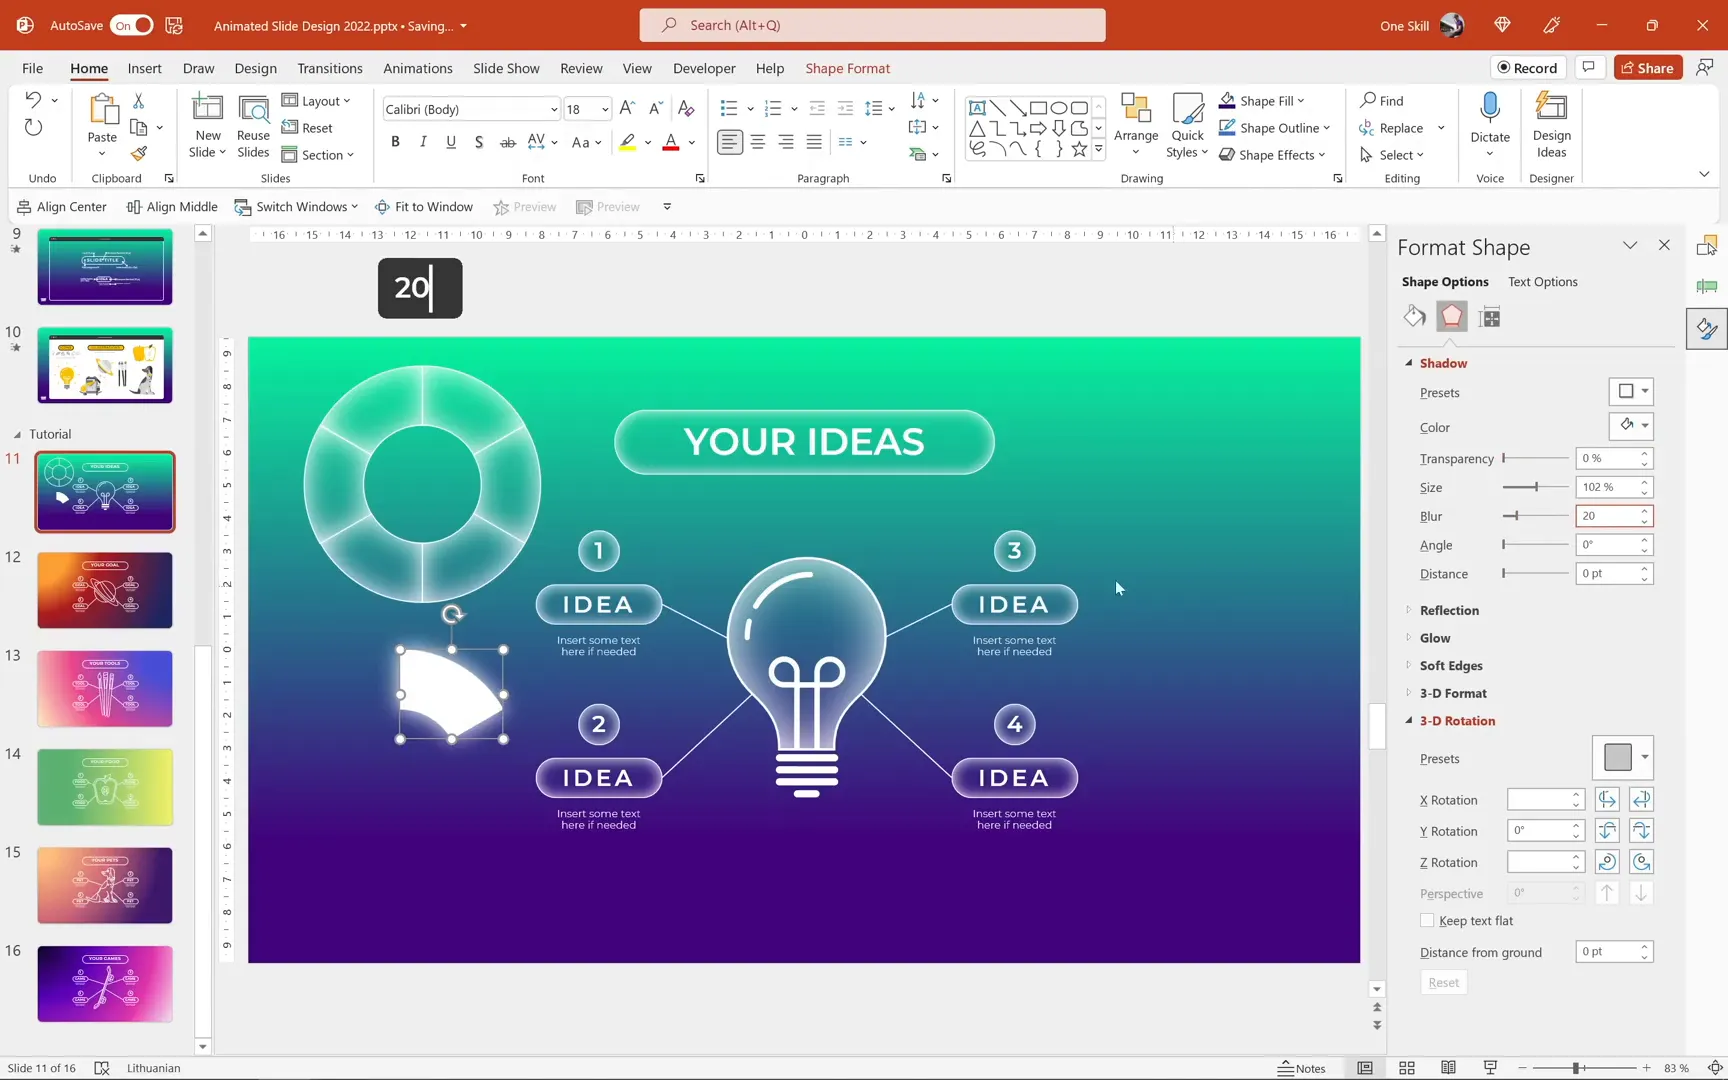
Highlighting the Active Menu Segment
Duplicate the donut chart group and remove fills and outlines from all but one segment, which becomes the active segment. Fill the active segment with white and apply an outside white shadow with a 20-point blur for emphasis.
Group the active segment with transparent segments to maintain shape integrity. Position and rotate the active segment precisely using arrow keys with the Alt modifier for fine control.
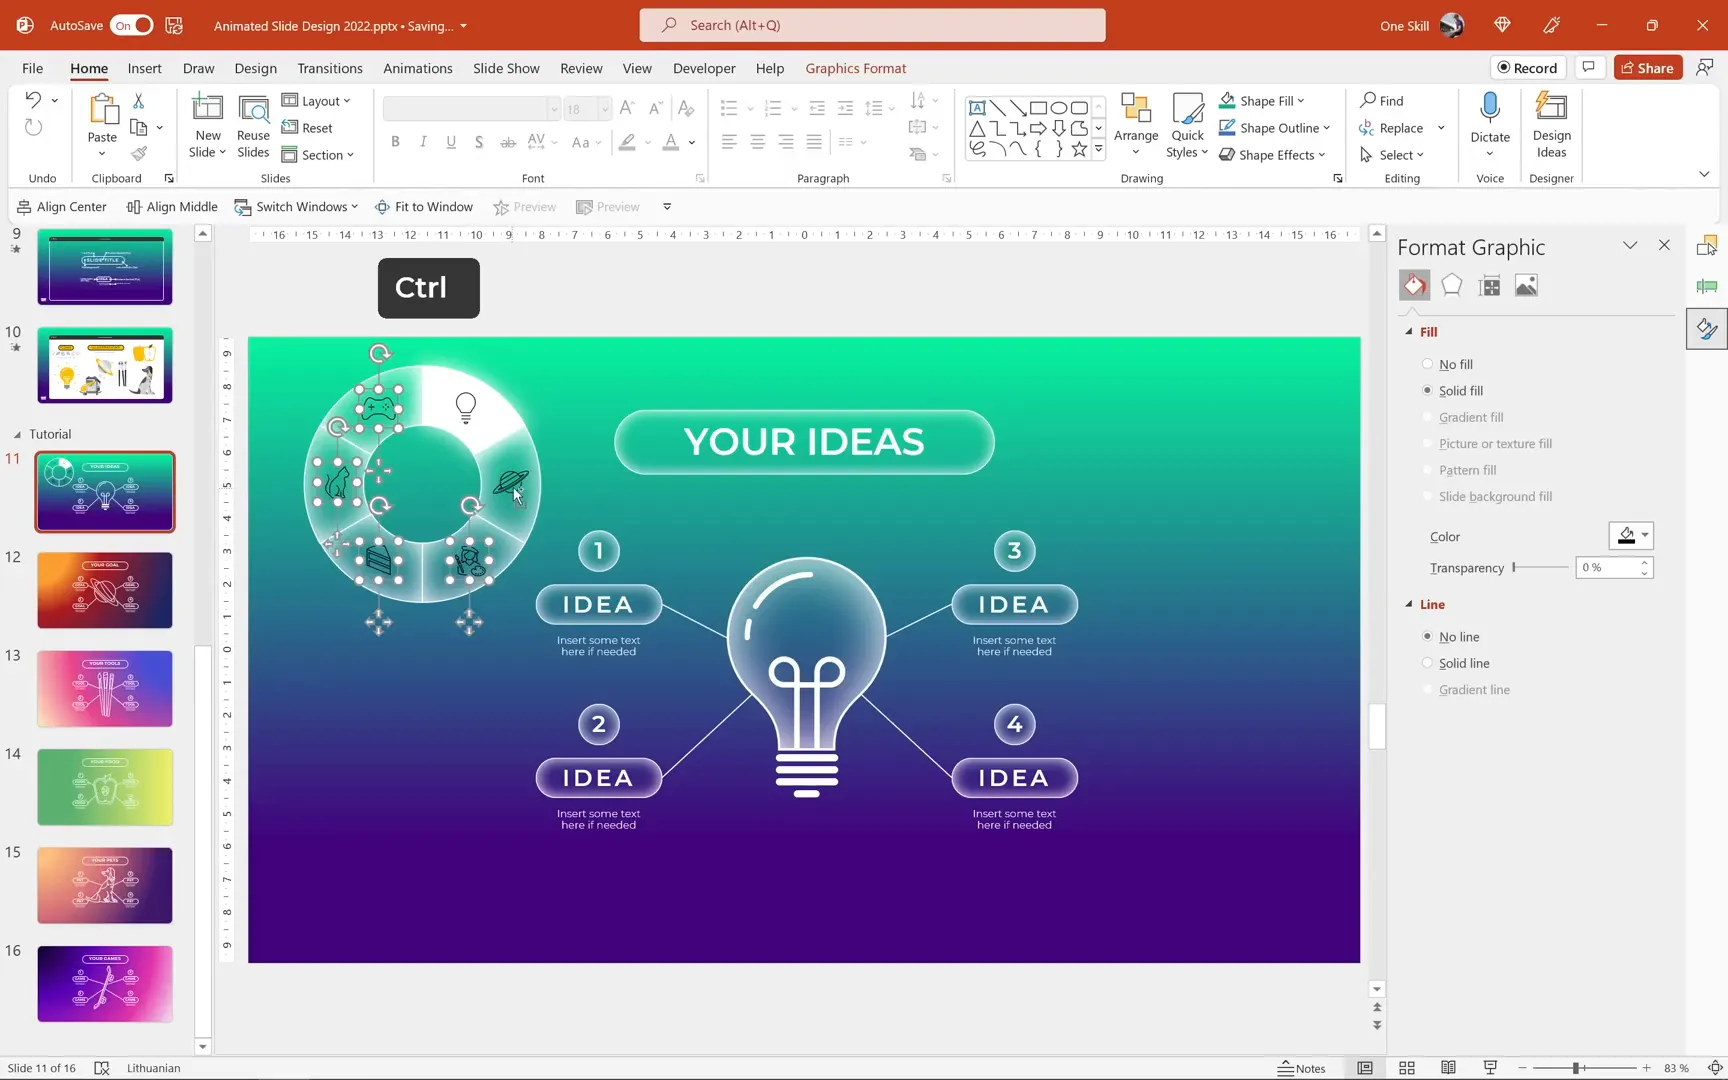
Adding Icons and Hyperlinks to Menu Segments
Insert icons that represent each slide’s theme (e.g., light bulb, planet, food, cat, controller) from PowerPoint’s icon library or external sources. Position each icon centrally within its corresponding menu segment. Use the eyedropper tool to color the active icon distinctively (e.g., green), while others remain white.

Add hyperlinks to each icon by selecting it, then using Insert > Link to link to the corresponding slide within the presentation. This makes the menu clickable and interactive.
Enhancing Navigation with Up and Down Buttons
For additional navigation, include two buttons inside the circular menu: up and down arrows to move to the previous or next slide. Create these buttons using circles and arrow icons, hyperlinking them to the previous and next slides respectively.
Adding a Toggle Menu Button
Create a menu button that toggles the visibility of the circular navigation menu. Use a simple circle with a menu icon inside. This button will later be animated to open and close the navigation menu.
Animating the Navigation Menu
To bring your clickable menu to life, add entrance and exit animations triggered by clicking the menu button.
Entrance Animation
Select all elements of the donut navigation except the menu button (icons, active segment, and segments). Add a Zoom entrance animation with a duration of 0.5 seconds. Set the animation to trigger on clicking the menu button.
Exit Animation
Add a matching Zoom exit animation to the same elements, also triggered by clicking the menu button. For the active segment, replace the zoom animation with a Spin animation for a more dynamic effect.
Animating the Menu Button
Add a subtle Grow/Shrink animation to the menu button itself to give visual feedback on click. Set the button to shrink to 80% size quickly (0.15 seconds) and auto-reverse back to normal size.
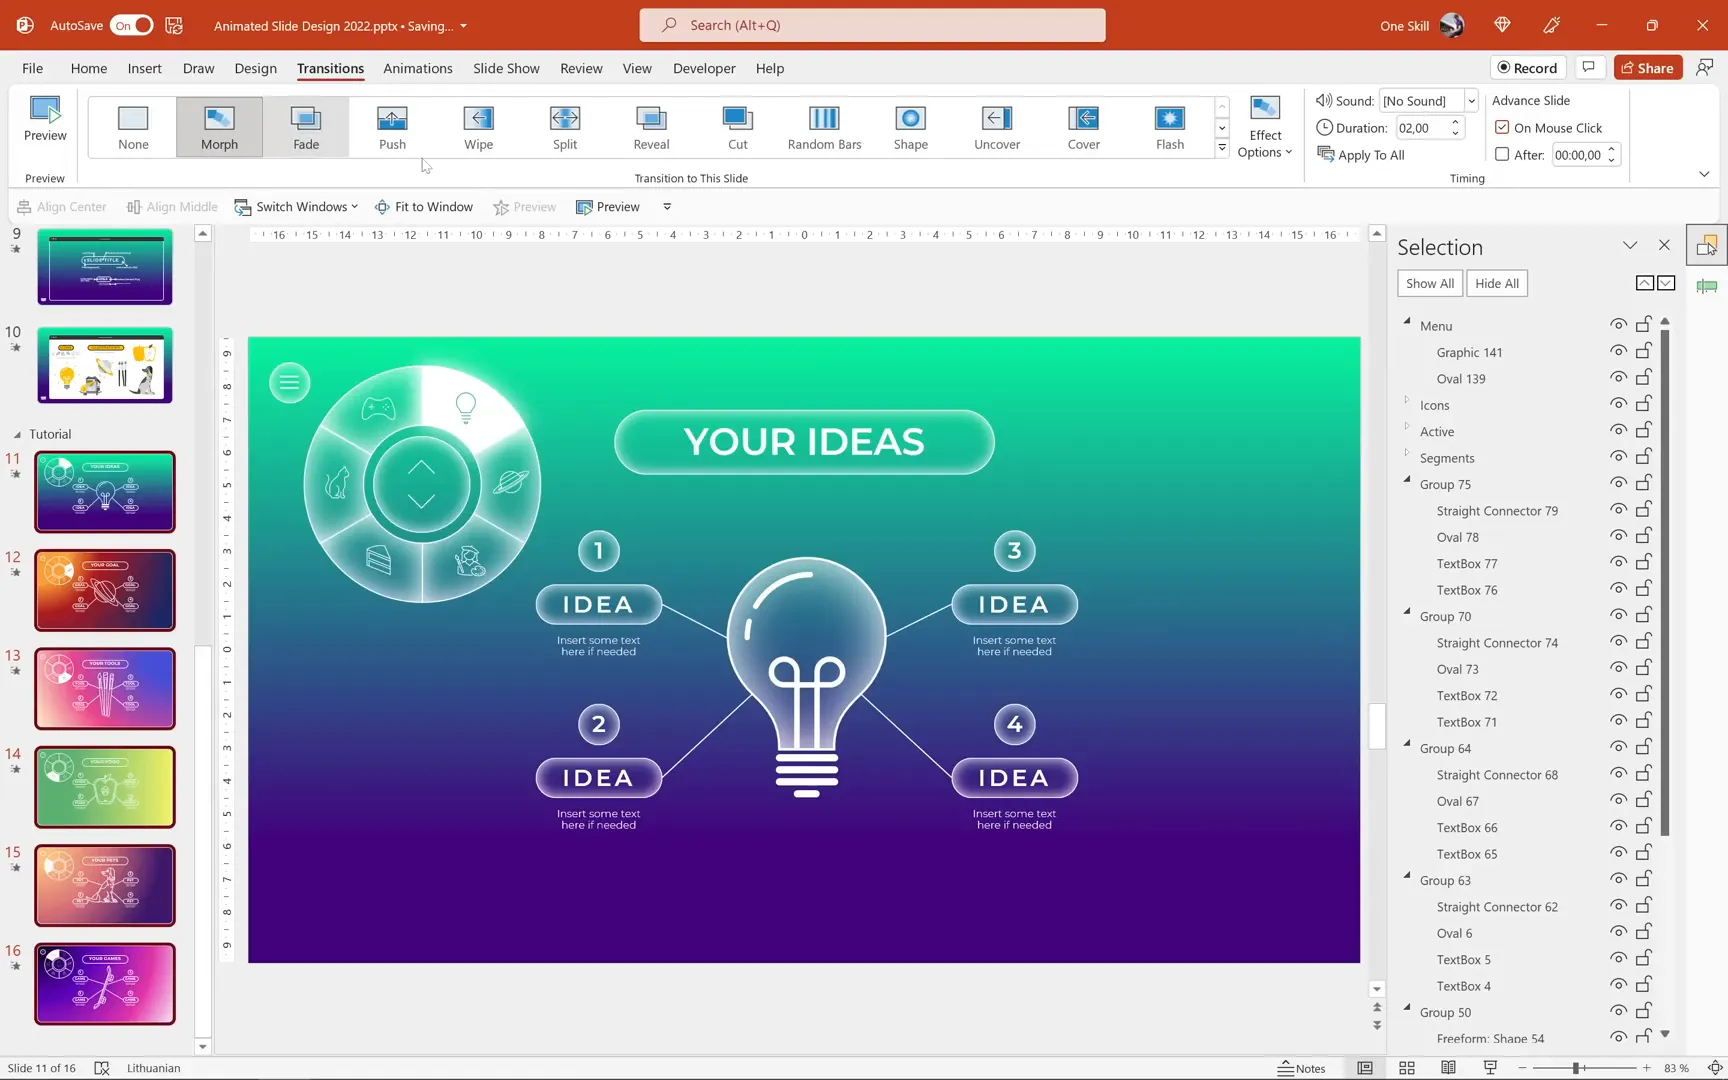
Replicating Navigation Across Slides and Using Morph Transition
Copy the entire navigation menu and paste it onto all other slides. Adjust the active segment’s rotation and icon colors to match the current slide’s theme.
Apply the Morph transition to all slides with navigation. This transition animates the movement of the active segment and morphs illustrations smoothly between slides, creating a polished and professional effect.
Improving Morphing of Illustrations
To make morphing work perfectly for illustrations, rename the groups representing the illustrations on each slide with the same unique identifier prefixed by two exclamation marks (e.g., !!one). This helps PowerPoint recognize which objects correspond to each other across slides for seamless morphing.
Applying this naming convention to all key objects ensures smooth visual transitions.
Setting Up Kiosk Mode for Controlled Navigation
For presentations requiring controlled navigation (e.g., kiosks or self-running presentations), set up the slideshow to browse only in Kiosk mode. This disables random mouse or keyboard clicks and restricts navigation to your clickable menu only, enhancing user experience and preventing accidental slide changes.
Conclusion
By following this tutorial, you now know how to create an animated PowerPoint slide design that combines beautiful gradient backgrounds, stylish text effects, and an interactive clickable circular navigation menu. Utilizing PowerPoint’s Morph transition and SVG editing capabilities, you can build professional presentations that are not only visually engaging but also easy to navigate.
This design approach is perfect for a variety of presentation types, including business pitches, educational materials, and creative portfolios. The clickable menu enhances user control, especially on touch-enabled devices like tablets, making your presentations more accessible and interactive.
Remember to experiment with colors, fonts, and icons to tailor the design to your unique branding or presentation theme. The techniques demonstrated here open up many possibilities for creative slide design and navigation.
Thank you for reading! If you have any questions or want to share your experience with animated slide designs, feel free to leave a comment below.
Frequently Asked Questions (FAQ)
What version of PowerPoint do I need to follow this tutorial?
You need Microsoft PowerPoint 365 or at least PowerPoint 2019 or 2021. These versions support the Morph transition and include built-in icons and illustrations that are essential for this tutorial.
Can I use this navigation menu on non-touch devices?
Yes! The clickable menu works with mouse clicks on any device, but it’s especially convenient for touch devices like tablets where you can navigate using your finger.
How do I customize the colors and fonts used in the slides?
Use the brand book slide as your color and font reference. You can adjust HEX codes for gradients and select fonts from the Montserrat family to maintain the consistent style shown in the tutorial.
Is it possible to add more menu segments for additional slides?
Absolutely. You can add more segments by increasing the number of parts in the donut chart and adjusting values accordingly. Just remember to update icons, hyperlinks, and active segment animations to match your additional slides.
How can I ensure smooth morph animations between slides?
Rename corresponding illustration groups across slides with the same unique name prefixed by two exclamation marks (e.g., !!one). This helps PowerPoint identify matching objects to morph smoothly.
Can I use other fonts or icons instead of Montserrat and PowerPoint icons?
Yes, you can. However, Montserrat and PowerPoint’s built-in icons are recommended for their clean, modern look and ease of use. If you prefer other fonts or icons, ensure they are consistent with your presentation style.
How do I set up kiosk mode for my presentation?
Go to Slide Show > Set Up Slide Show and select Browsed at a kiosk (full screen). This restricts navigation to clickable elements like your menu, disabling random slide changes.
Can I apply these techniques to other presentation software?
These techniques heavily rely on PowerPoint features like Morph transition and SVG editing. While some concepts may transfer to other software, the exact steps and effects may not be replicable elsewhere.
Where can I find additional icons and illustrations if my PowerPoint version lacks them?
Websites such as flaticon.com and freepik.com offer free and premium icons and illustrations you can download and insert as images.
Are the tutorial slides available for download?
Yes, the tutorial slides are available for supporters on Patreon. Check the original source for access and additional resources.
Check out the full video: Animated PowerPoint Slide Design Tutorial 🔥2022🔥


