
Creating visually appealing and dynamic presentations can be a game changer when it comes to capturing your audience’s attention. One of the most effective tools for showcasing events, milestones, or project phases is a timeline slide. In this comprehensive tutorial, I’ll walk you through how to design an animated timeline slide using only PowerPoint. This step-by-step guide will help you build a professional and engaging timeline that can elevate your presentations to the next level.
This tutorial is based on techniques I use regularly, and it covers everything from setting the background to adding animations and transitions. Towards the end, I’ll share an extra tip that wasn’t included in the introduction, so make sure to read through until the end!
Table of Contents
- Getting Started: Setting Up Your Slide
- Creating the Timeline Base: Lines and Shapes
- Inserting Text Boxes for Dates and Descriptions
- Adding Color Variation for Visual Appeal
- Finalizing Text and Adding Additional Details
- Animating the Timeline for Impact
- Streamlining Animation Setup
- Adding a Polished Transition Effect
- Using Your Animated Timeline Template
- Frequently Asked Questions (FAQ)
- Conclusion
Getting Started: Setting Up Your Slide
Before diving into shapes and animations, it’s important to begin with a clean canvas. Start by opening a blank slide in PowerPoint. This gives you full control over the design without interference from pre-existing elements.
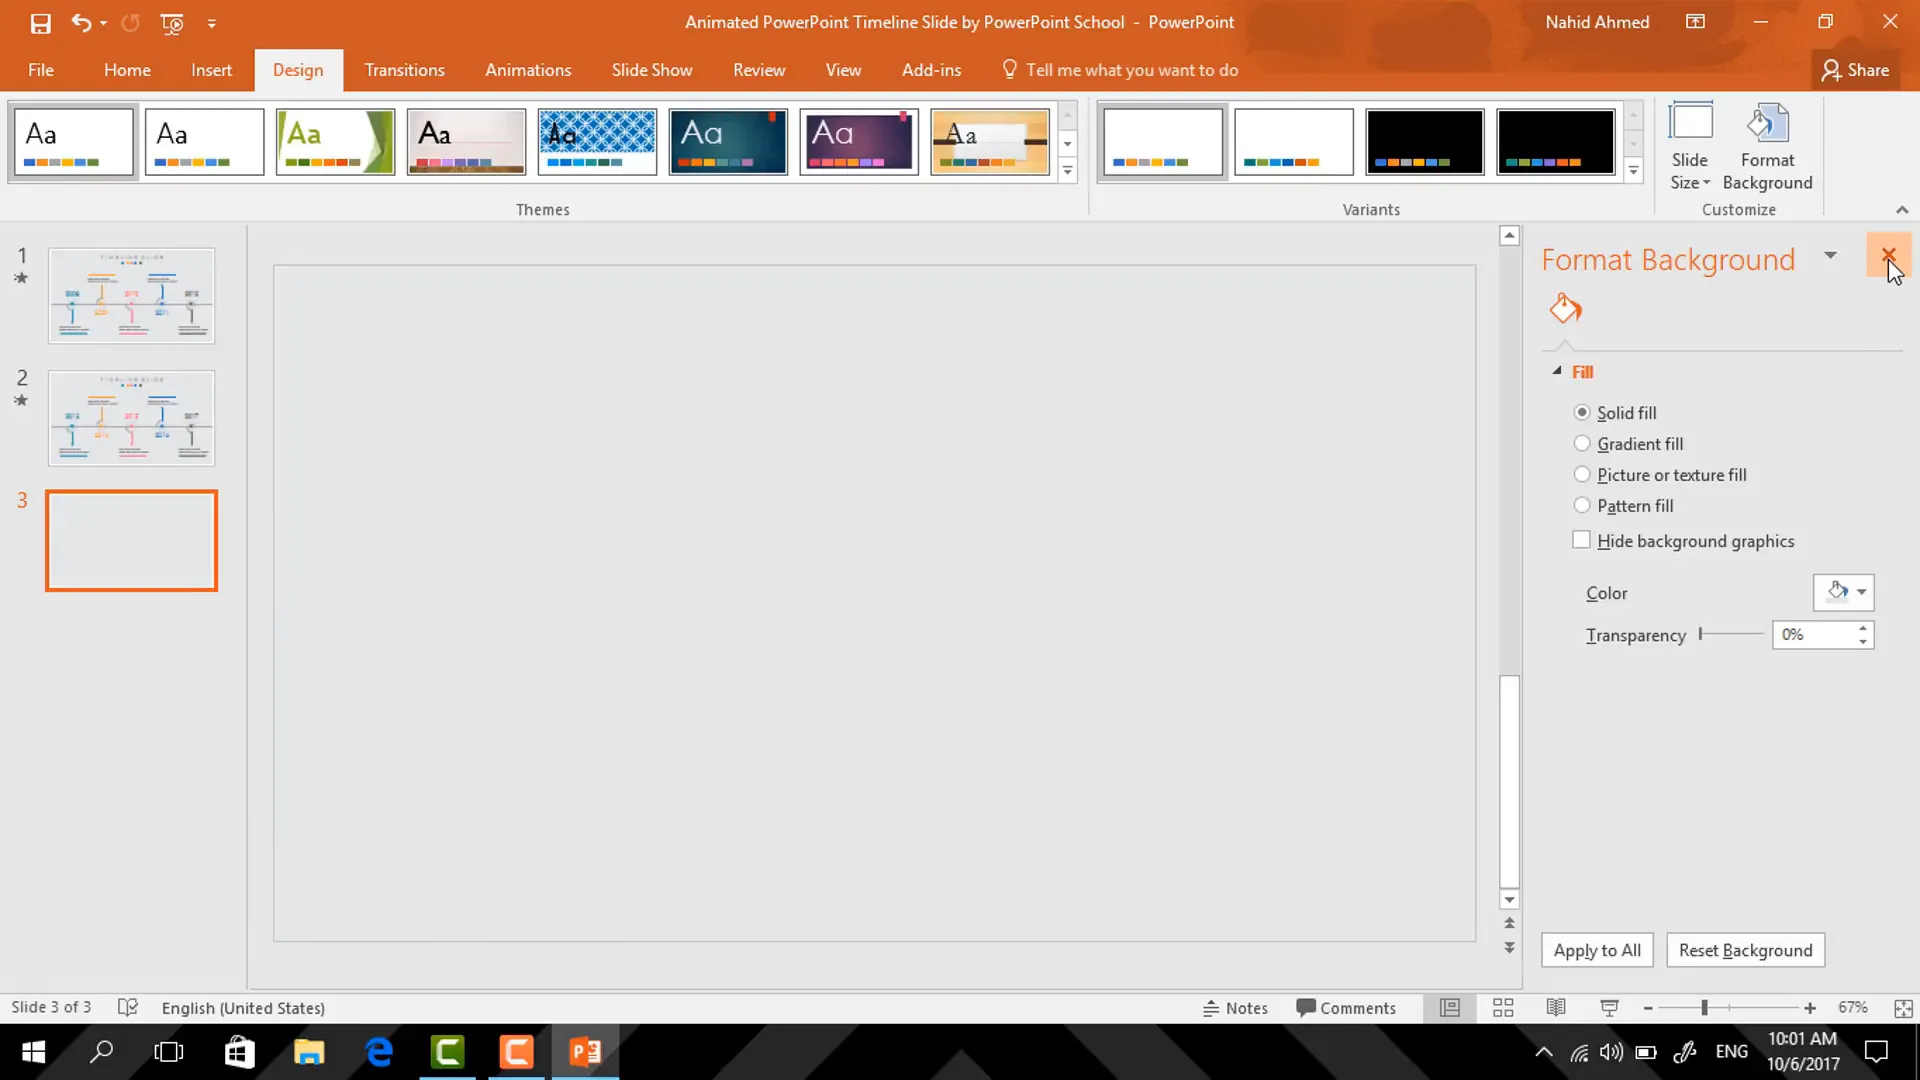
Next, head over to the Design tab, then click on Format Background. Here, choose a background color that complements the overall color scheme you envision for your timeline. In my example, I opted for a subtle, dark background to make the timeline elements pop.
Creating the Timeline Base: Lines and Shapes
The backbone of your timeline is a straight line that represents the flow of time. To create this:
- Go to the Home tab and select the Line shape.
- Hold down the Shift key to ensure the line is perfectly horizontal as you drag it across the slide.
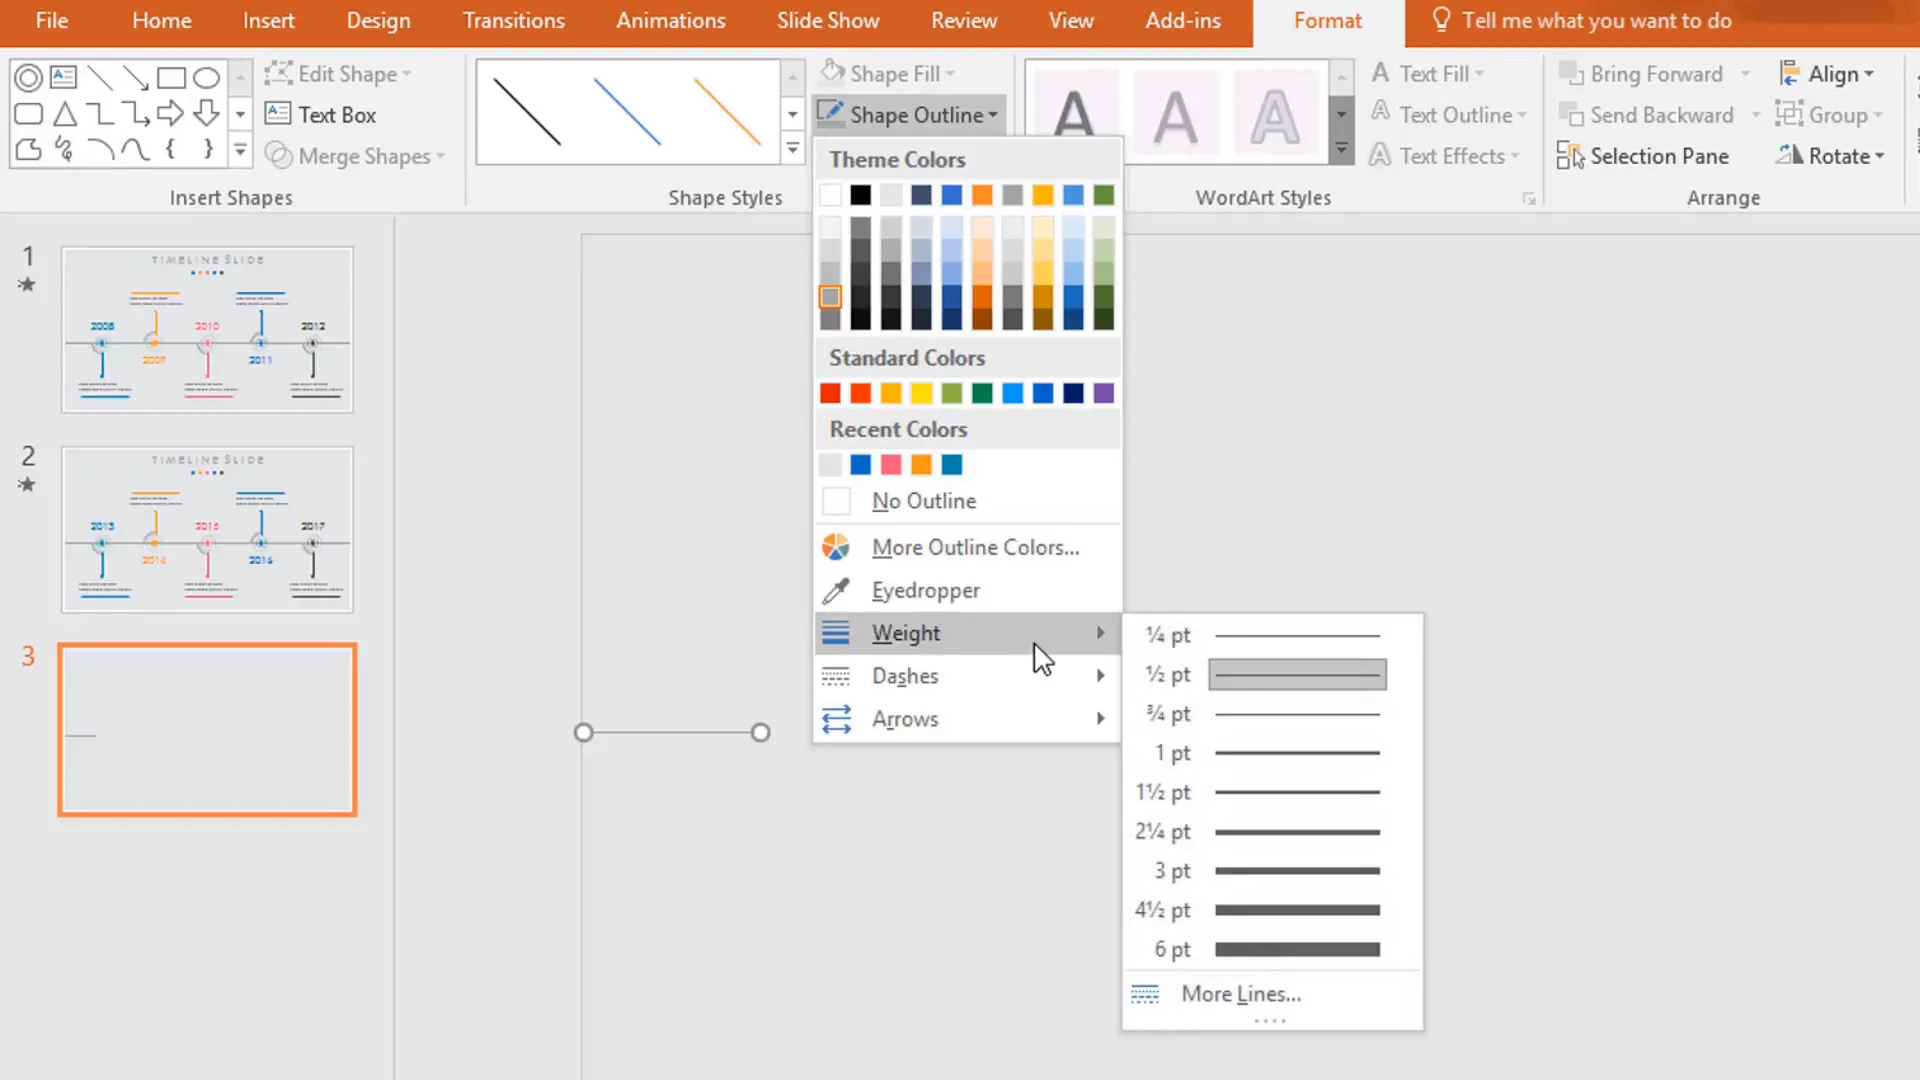
- Once placed, navigate to Format > Shape Outline and pick a lighter color to contrast the dark background—something like a muted white or gray works great.
- Increase the line’s thickness by selecting Shape Outline again and choosing a weight of about 1.5 points.
This line will serve as the timeline’s main axis, so place it centrally and make sure it’s long enough to accommodate your timeline events.
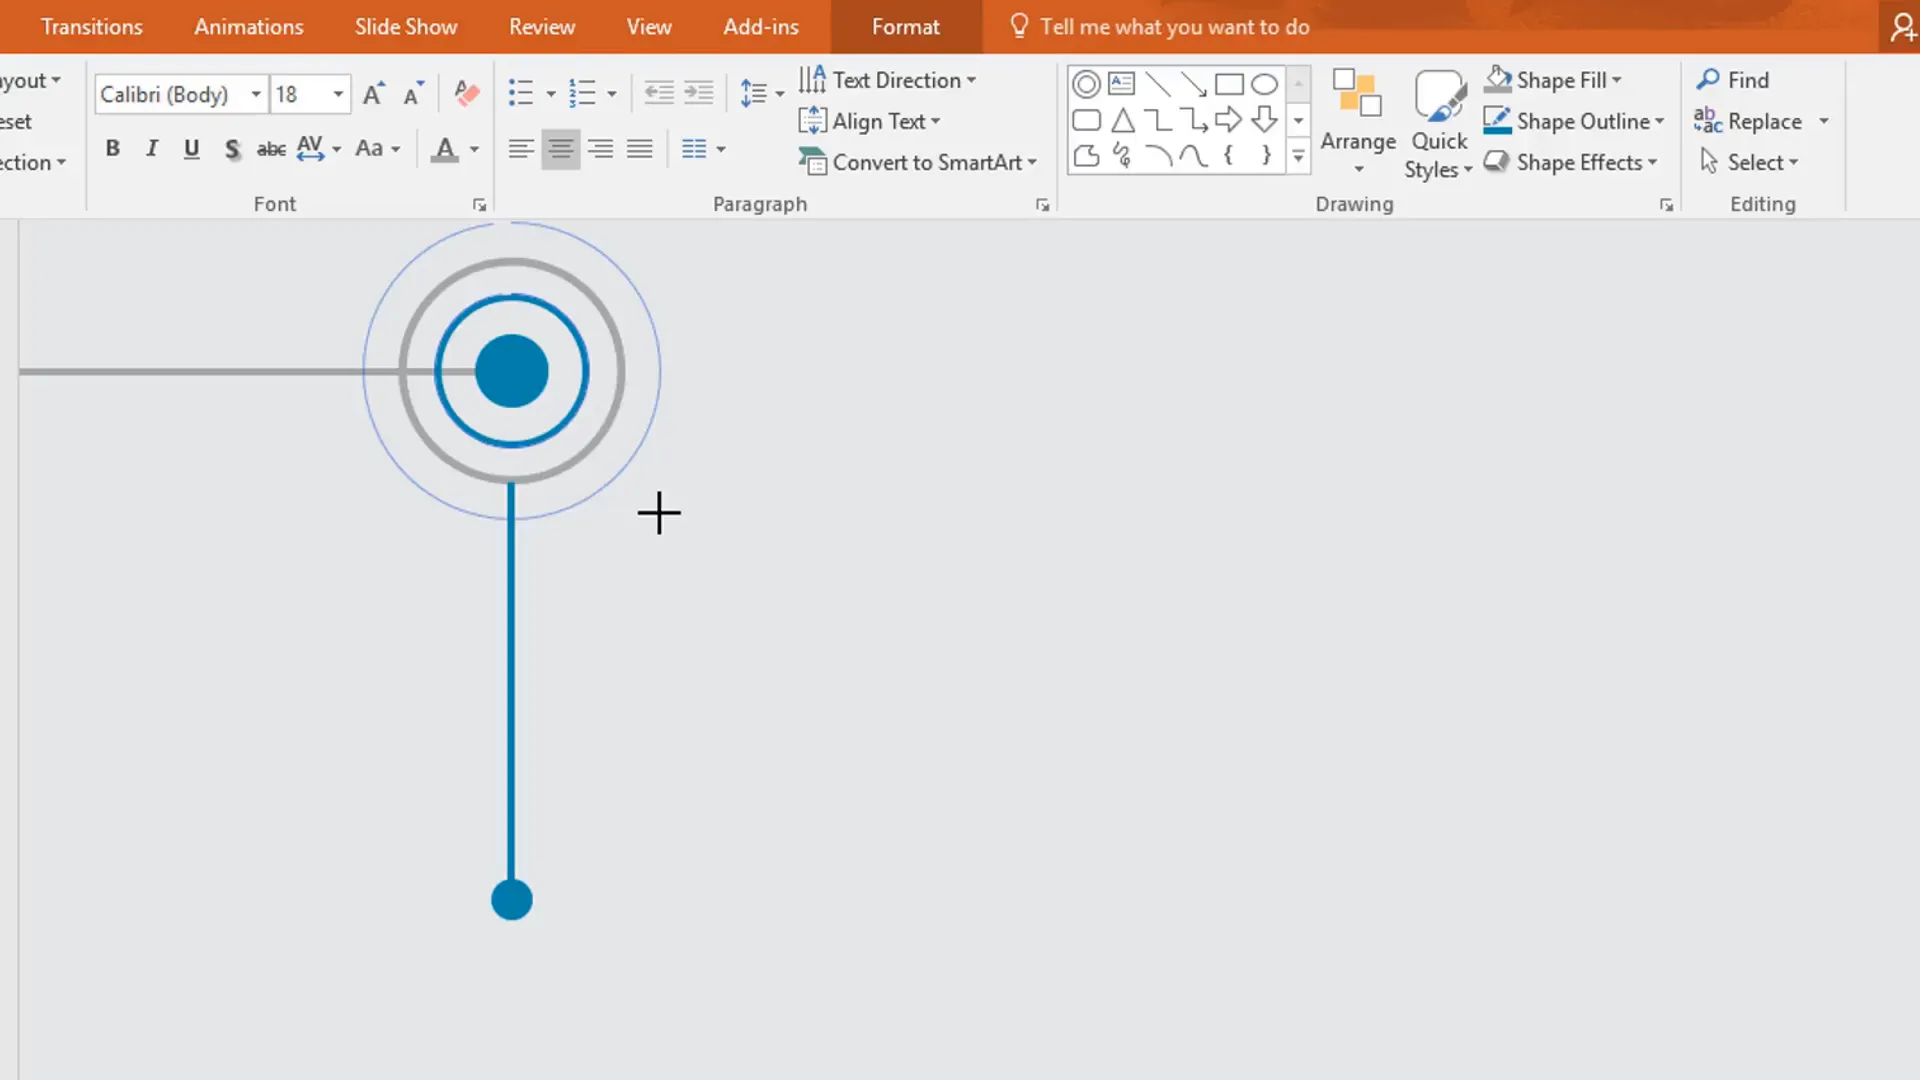
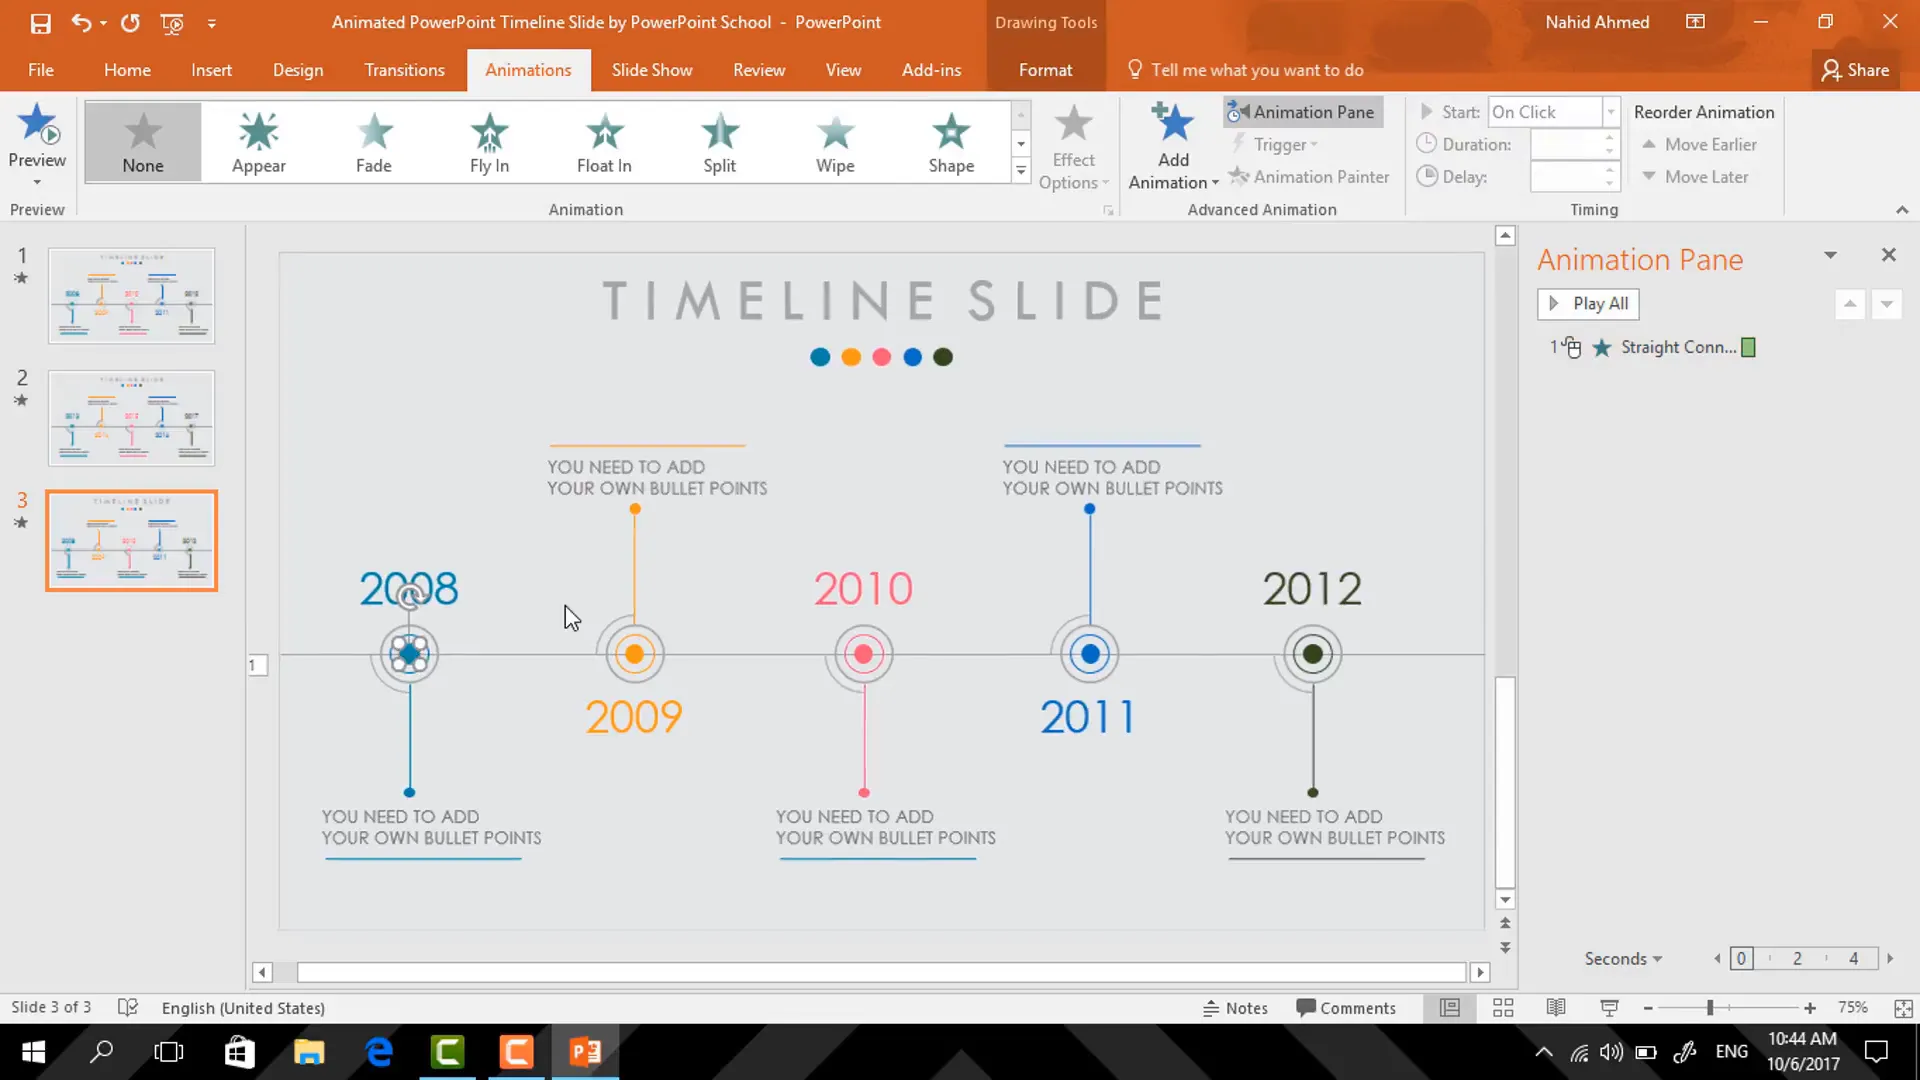
Adding Key Points Using Ovals and Circles
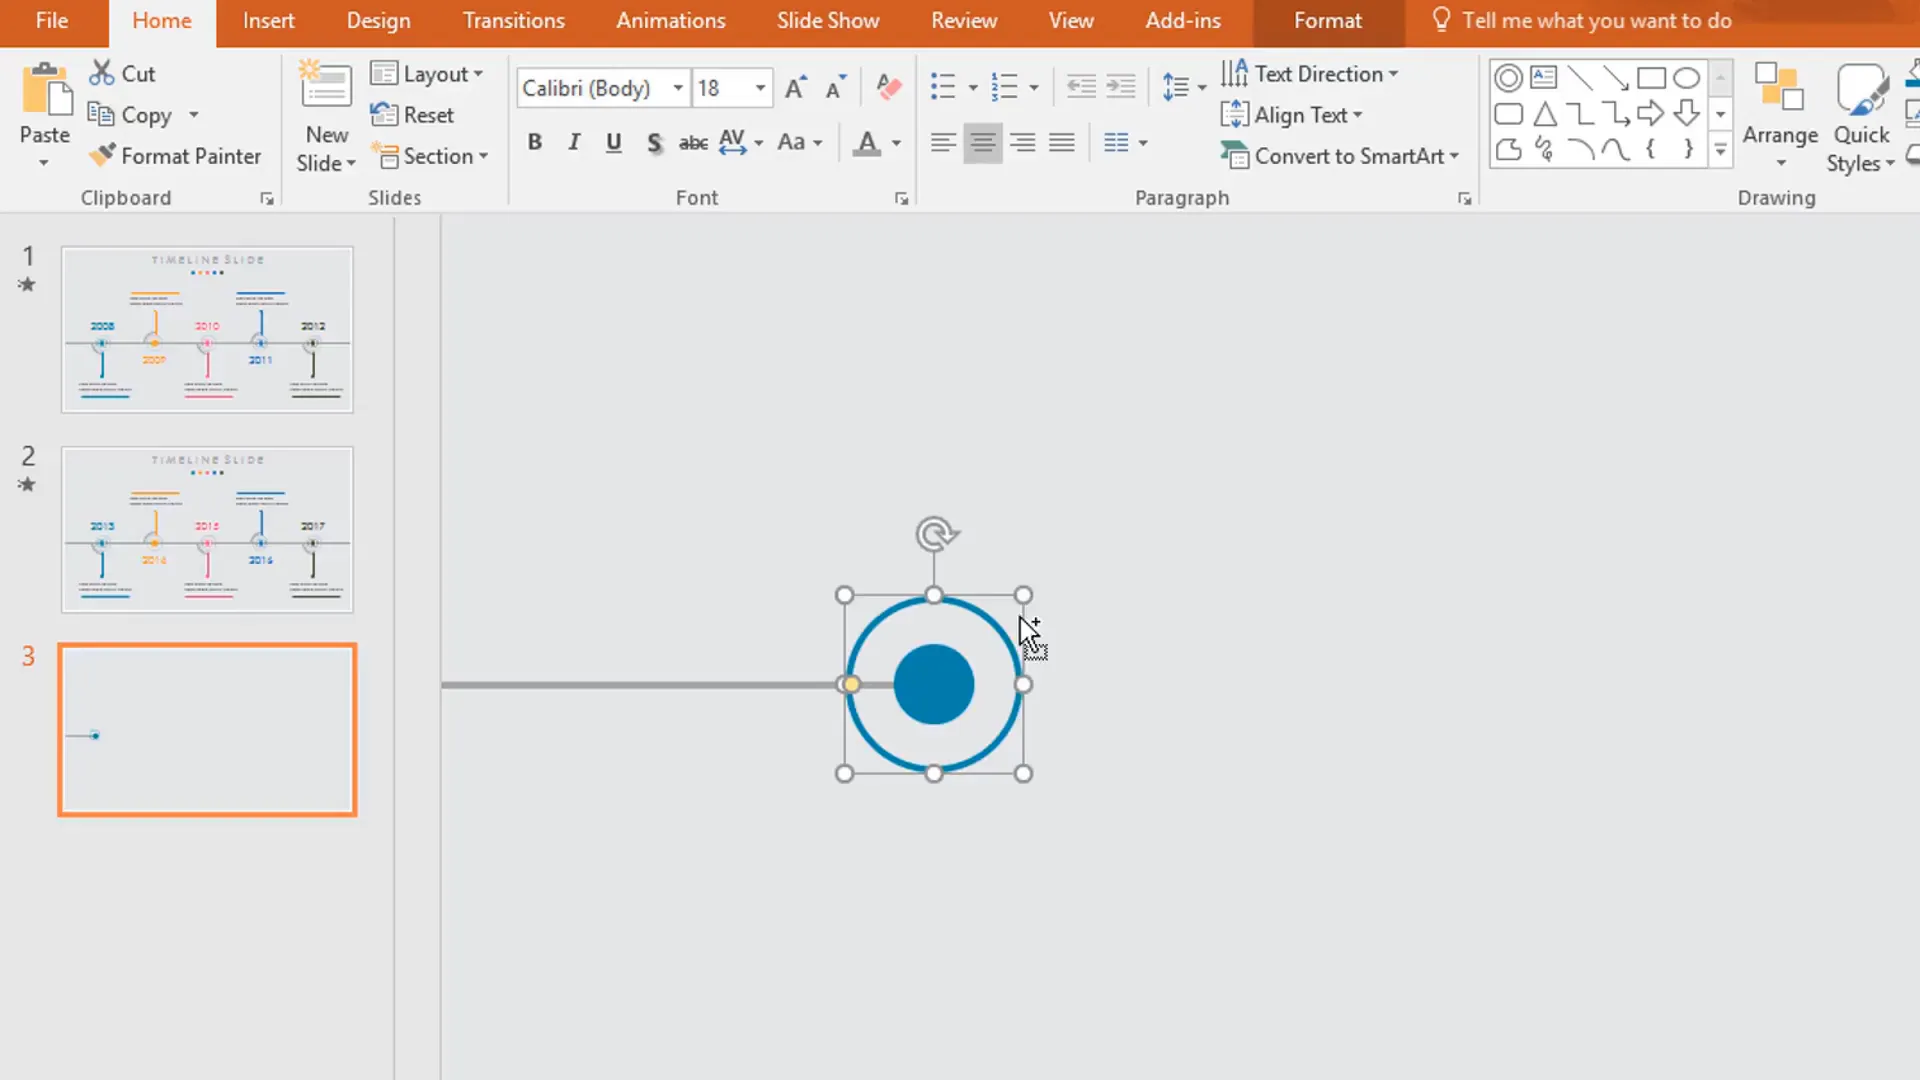
Next, we’ll add markers along the timeline to indicate important dates or milestones. These markers are created using oval and hollow circle shapes.
- Pick the Oval shape from the shapes menu. Hold Ctrl and Shift while dragging to create a perfect small circle.
- Change the fill color of this oval to a shade that complements your timeline’s color palette.
- Set the outline to No Outline to keep it clean.
- Place this oval exactly in the middle of the timeline line you created earlier.
- Now select a Hollow Circle shape and drag it onto the slide. Make it thinner by adjusting the outline weight, and remove the fill color.
- Resize this hollow circle smaller by holding Ctrl and Shift, and place it over the oval shape, aligning them perfectly.
The combination of filled ovals and hollow circles creates a layered effect that makes each timeline point distinct and visually appealing.
Duplicating and Adjusting Shapes for Consistency
To maintain consistency across your timeline, duplicate the shapes you just created and adjust their size or color as needed. For example, you can:
- Duplicate the hollow circle and change its fill color to a darker white to add depth.
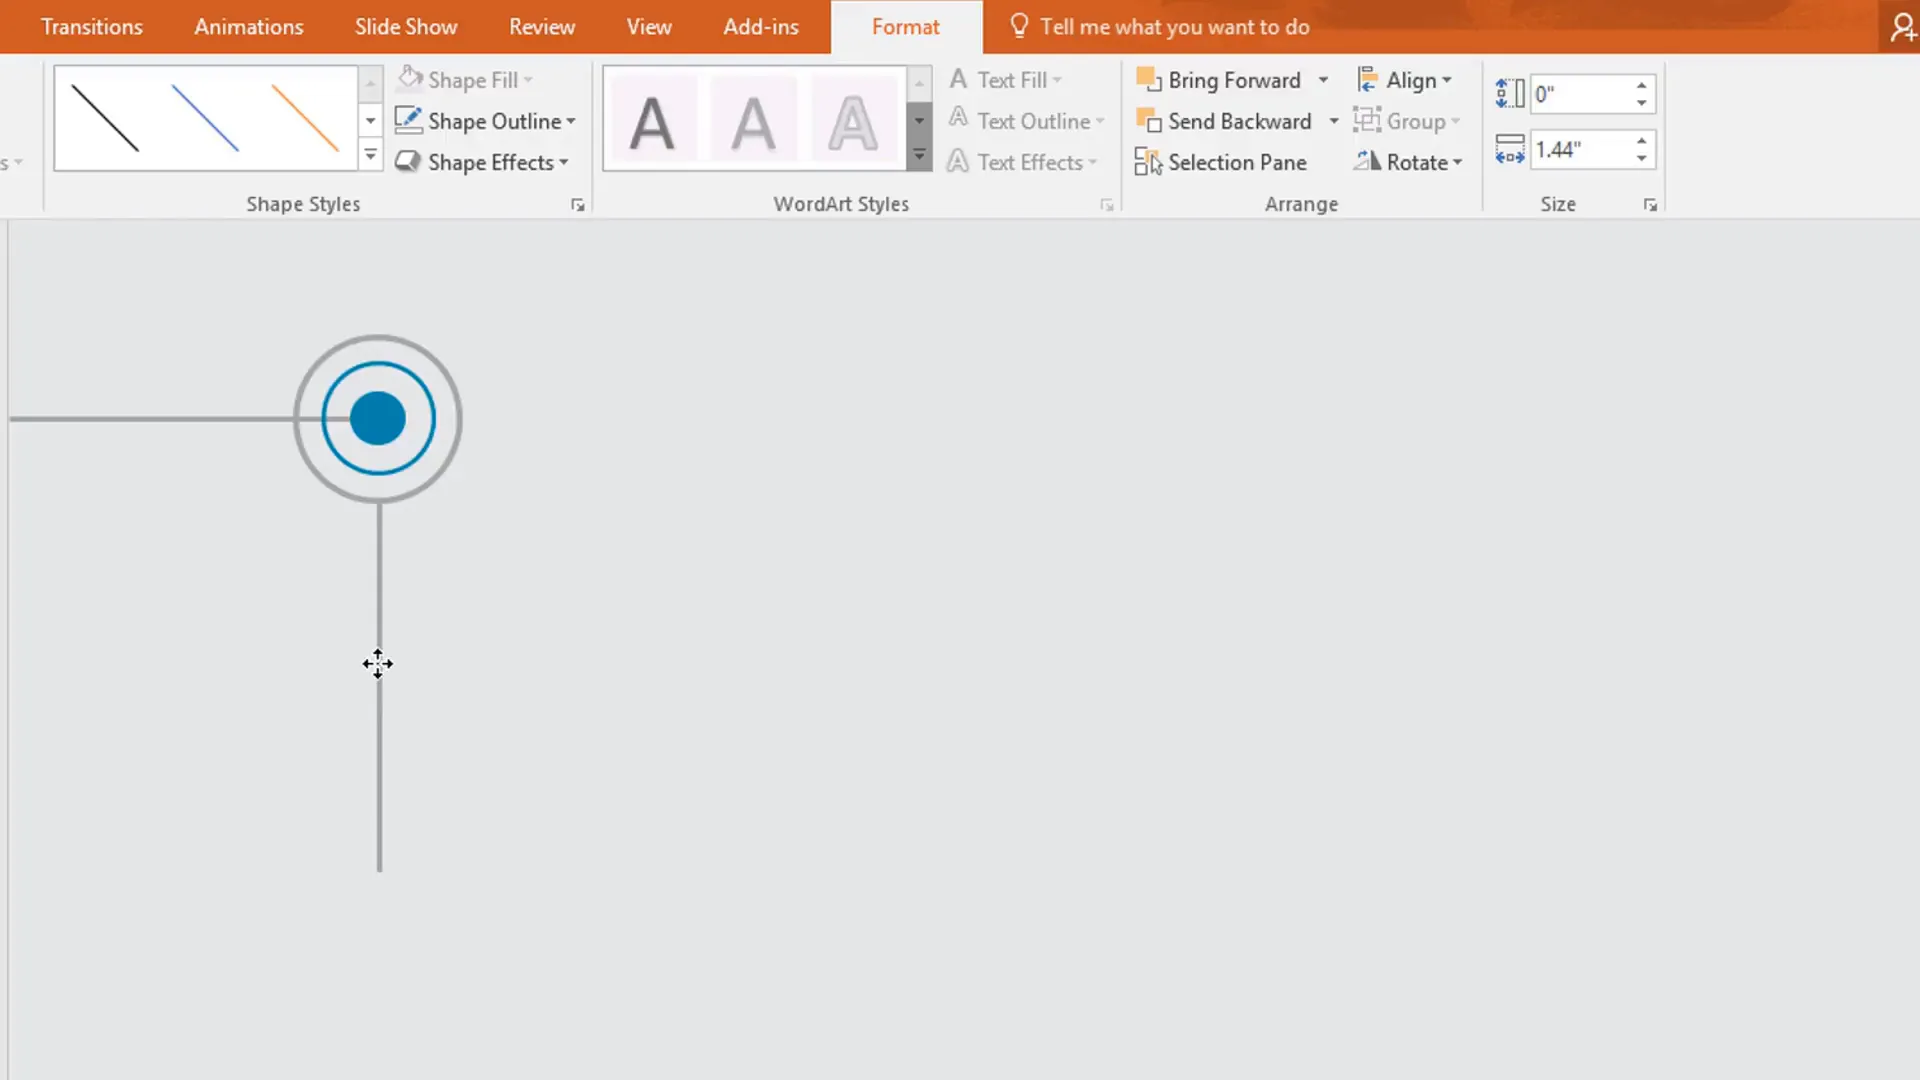
- Duplicate the main timeline line, rotate it 90 degrees, and place it vertically intersecting the hollow circle to create a crosshair effect.
- Resize the vertical line’s height holding the Shift key to keep proportions intact.
- Duplicate the oval shape holding Ctrl and Shift, place it appropriately on the timeline, and resize it smaller to fit design needs.
This process of duplicating and resizing ensures your timeline markers are uniform and professional-looking.
Adding Decorative Elements: Arc Shapes
To add some visual interest and break the monotony of straight lines and circles, you can use Arc shapes:
- Insert an arc shape, hold Ctrl and Shift while dragging to keep the dimensions proportional.
- Adjust the yellow control points on the arc to customize its curvature and size.
- Place the arc near your timeline points to act as a decorative flourish.
- Change the arc’s outline color to match the darker white used elsewhere, increase the weight to 1.5 points, and send it to the back so it doesn’t obstruct other elements.
These arcs add a subtle elegance and help guide the viewer’s eye along the timeline.
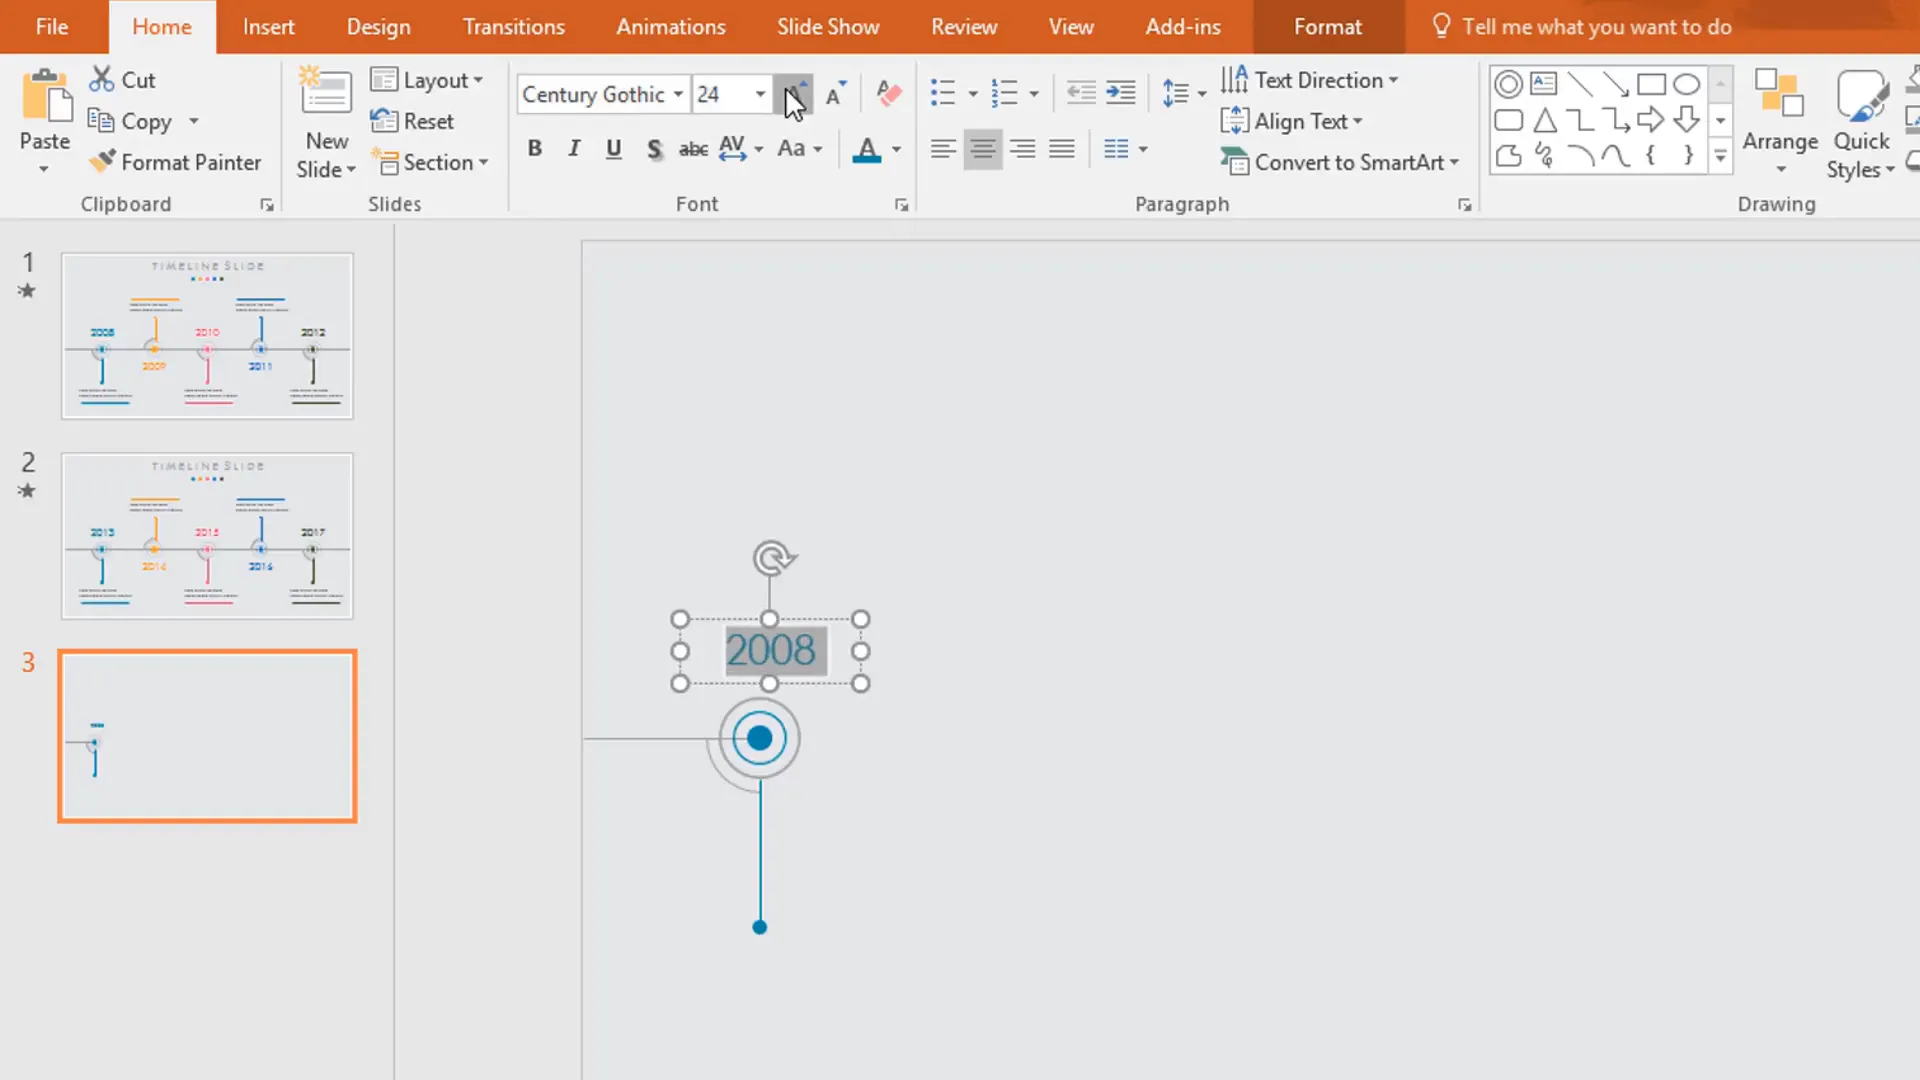
Inserting Text Boxes for Dates and Descriptions
With the timeline’s visual structure in place, it’s time to add textual information such as years and descriptions. Here’s how you can do it:
- Insert a Text Box near each timeline marker.
- Type the relevant year or milestone, for example, “2008.”
- Select the text, change the font to Century Gothic for a clean, modern look, and center the text alignment.
- Adjust the font color to complement the timeline colors, typically a light shade that stands out against the dark background.
- Increase the font size to around 36 points for clear visibility.
- Duplicate the text box holding Ctrl and Shift and drag it downward to create consistent spacing between dates.
- Add additional text boxes for event descriptions, adjusting their size and alignment to keep the slide neat and readable.
Properly formatted text boxes help convey the timeline’s story clearly and professionally.
Organizing Timeline Elements for Structure
Once you have multiple timeline markers and text boxes, it’s important to arrange them systematically:
- Duplicate the main timeline line and rotate it 90 degrees to create vertical dividers or connectors between elements.
- Use the Shift key while resizing or moving elements to maintain alignment.
- Group related shapes and text boxes to make moving and editing easier.
- Duplicate groups of timeline points to extend your timeline horizontally, adjusting spacing as needed.
- Send background elements like lines and arcs to the back so that text and key shapes remain prominent.
This organization ensures that your timeline is balanced and visually coherent throughout.
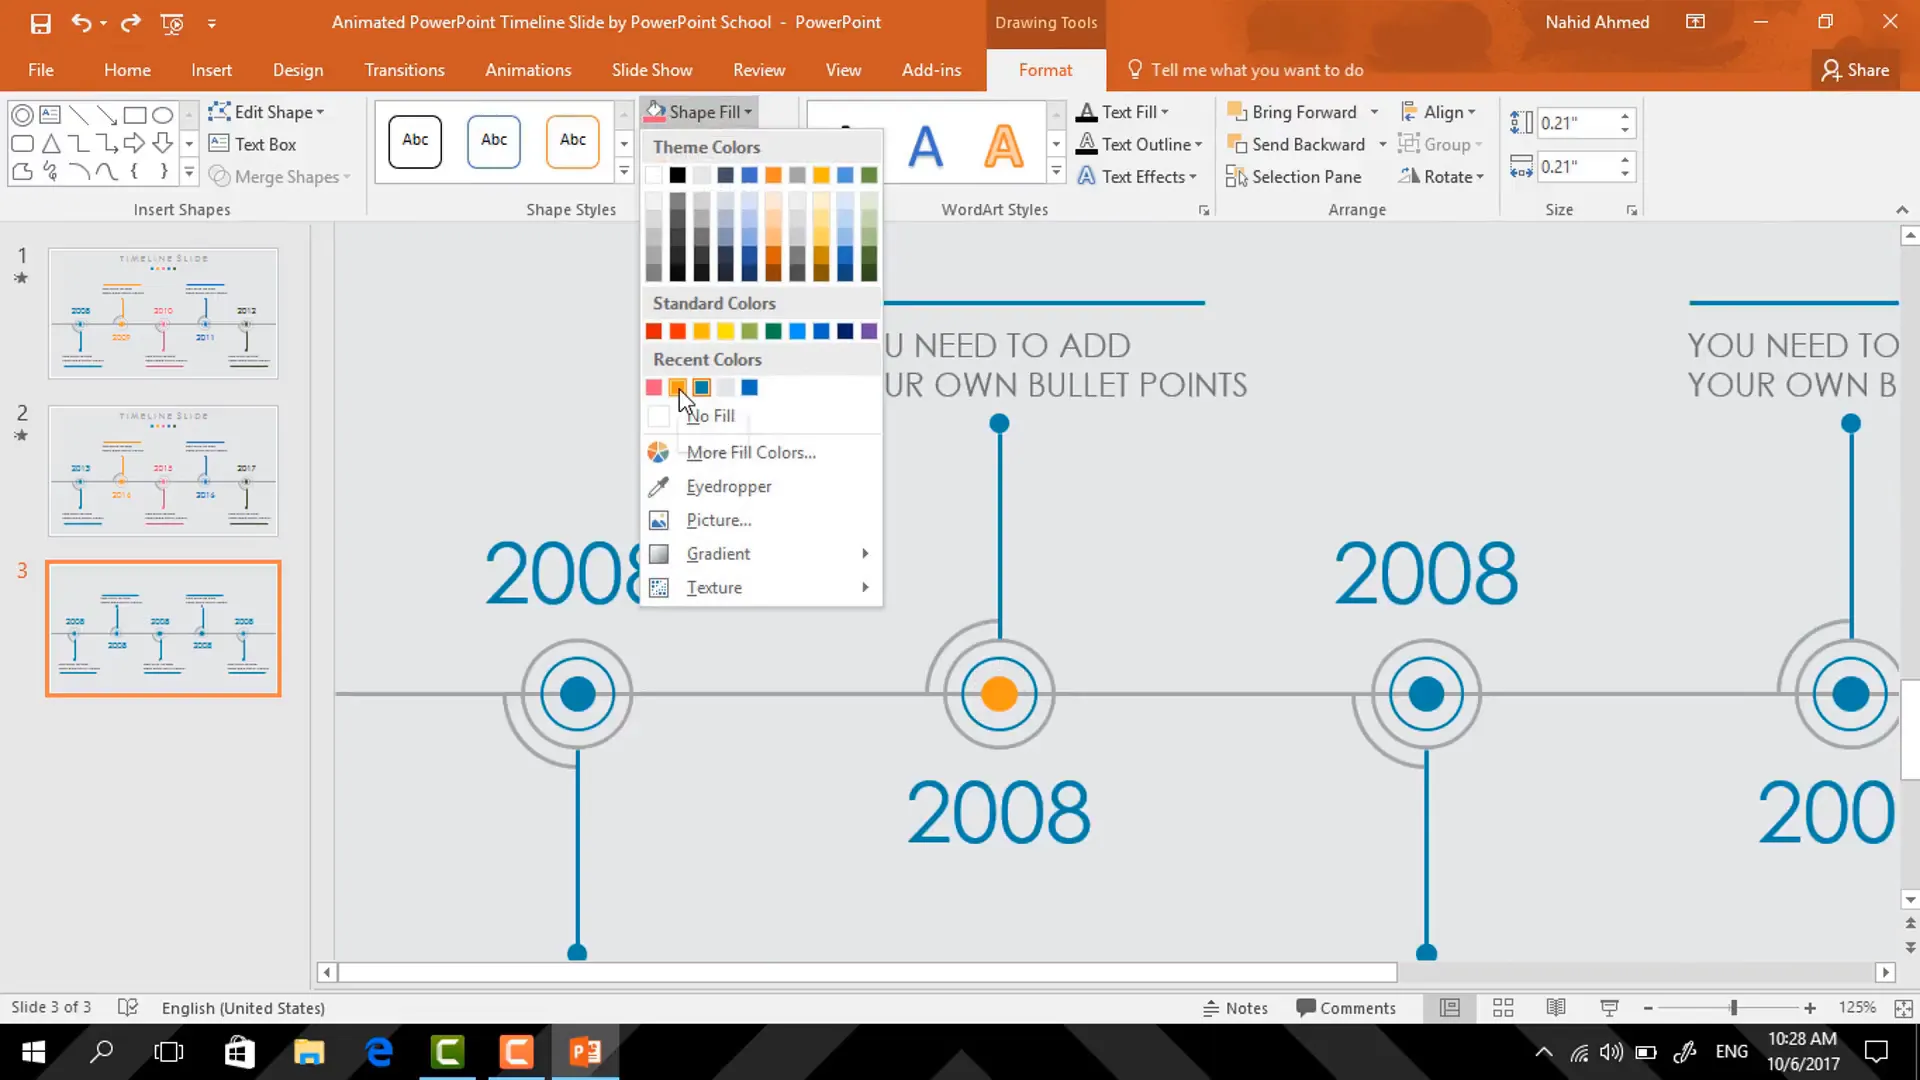
Adding Color Variation for Visual Appeal
To avoid a monotonous look, introduce color variations across your timeline markers and lines. Here’s how:
- Select individual small circles and hollow circles, and change their fill colors to different shades that harmonize with your palette.
- Alternate the colors of straight lines to add subtle contrast and rhythm.
- Change the font color of the year and description text boxes to match or complement the colors of the corresponding markers.
- Be mindful to keep the overall look balanced and not overly busy.
Color variation helps differentiate timeline points and keeps the viewer engaged.
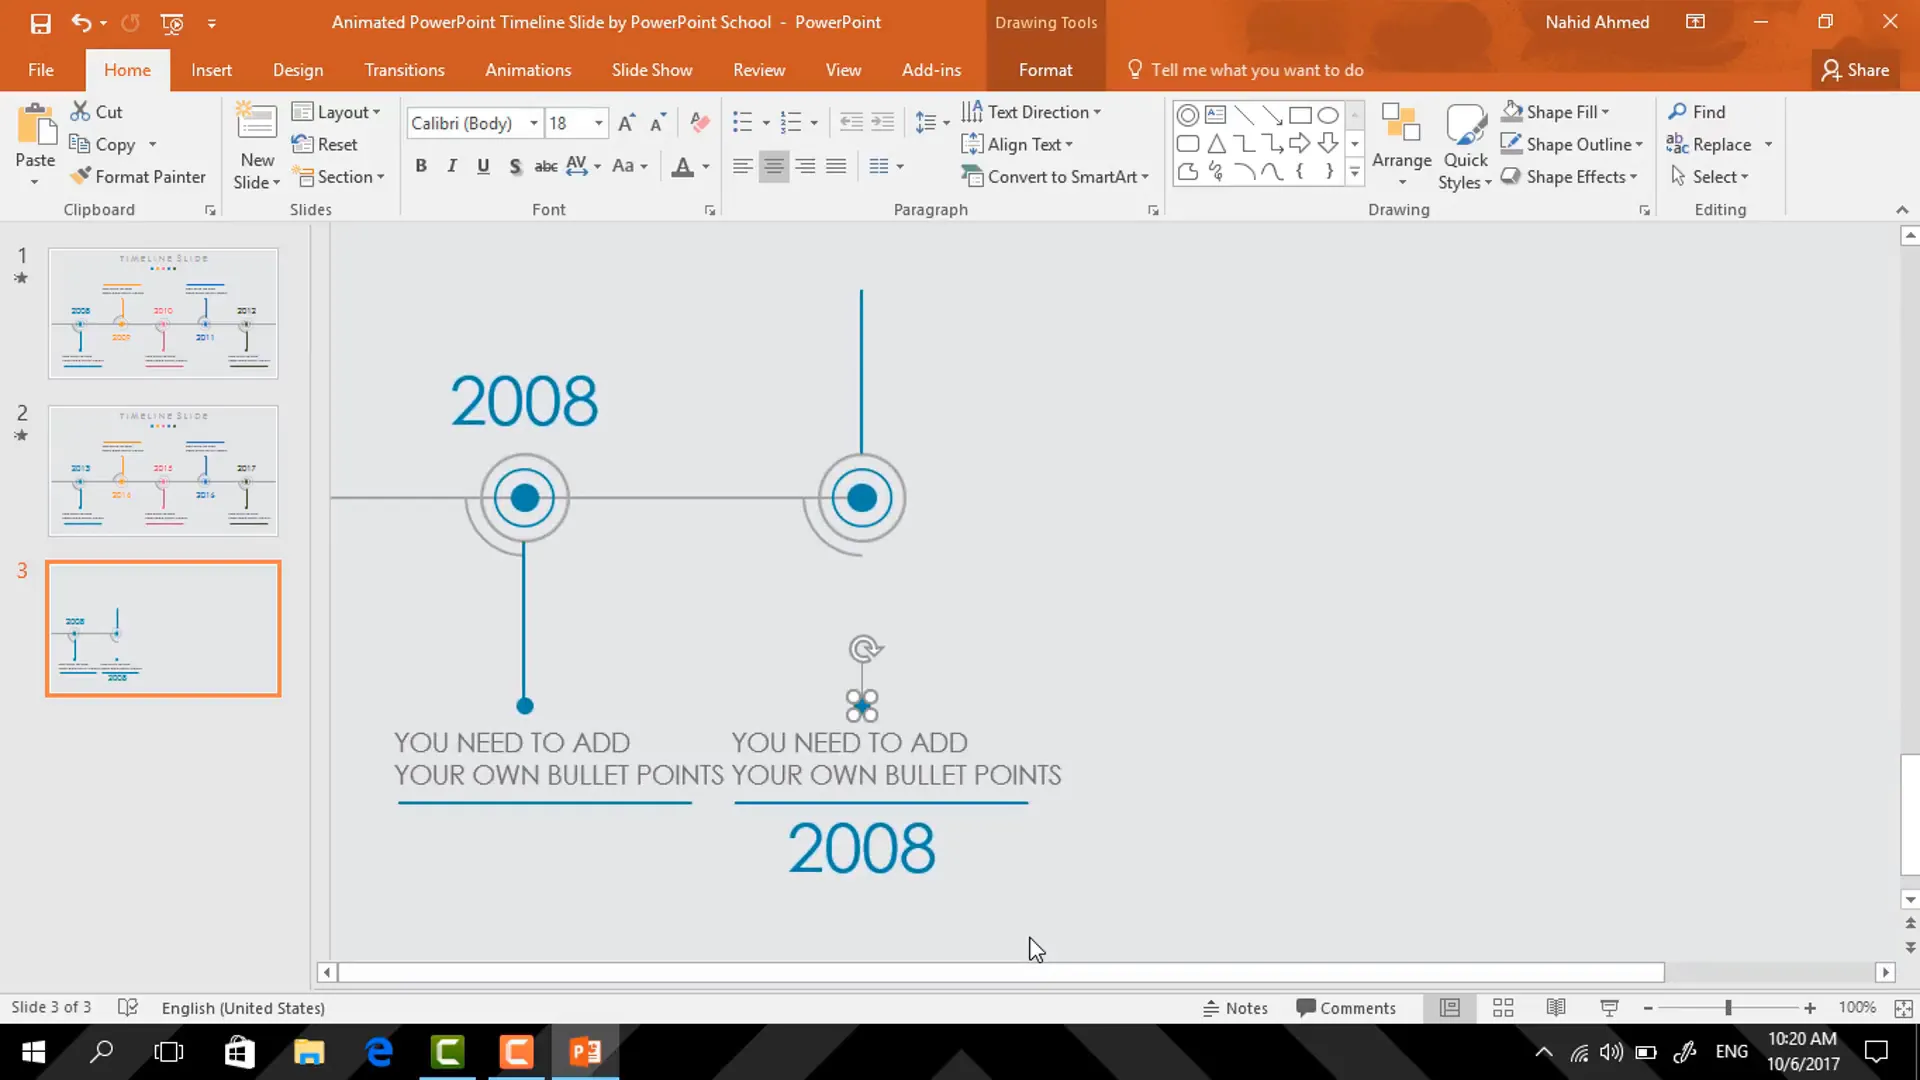
Finalizing Text and Adding Additional Details
After setting the colors, update the text in your timeline to reflect the correct years and event descriptions. To polish the layout:
- Select all text boxes and use the Align Center feature under the Format tab to ensure uniform alignment.
- Adjust the vertical spacing to keep the timeline balanced and readable.
- Add a row of small circles below the timeline to act as a design accent or progress indicators.
- Group these small circles and center them on the slide for a neat finish.
Attention to these small details can significantly enhance the professionalism of your timeline slide.

Animating the Timeline for Impact
One of the most exciting parts of this tutorial is bringing your timeline to life with animations. Here’s a detailed guide on how to animate your timeline elements:

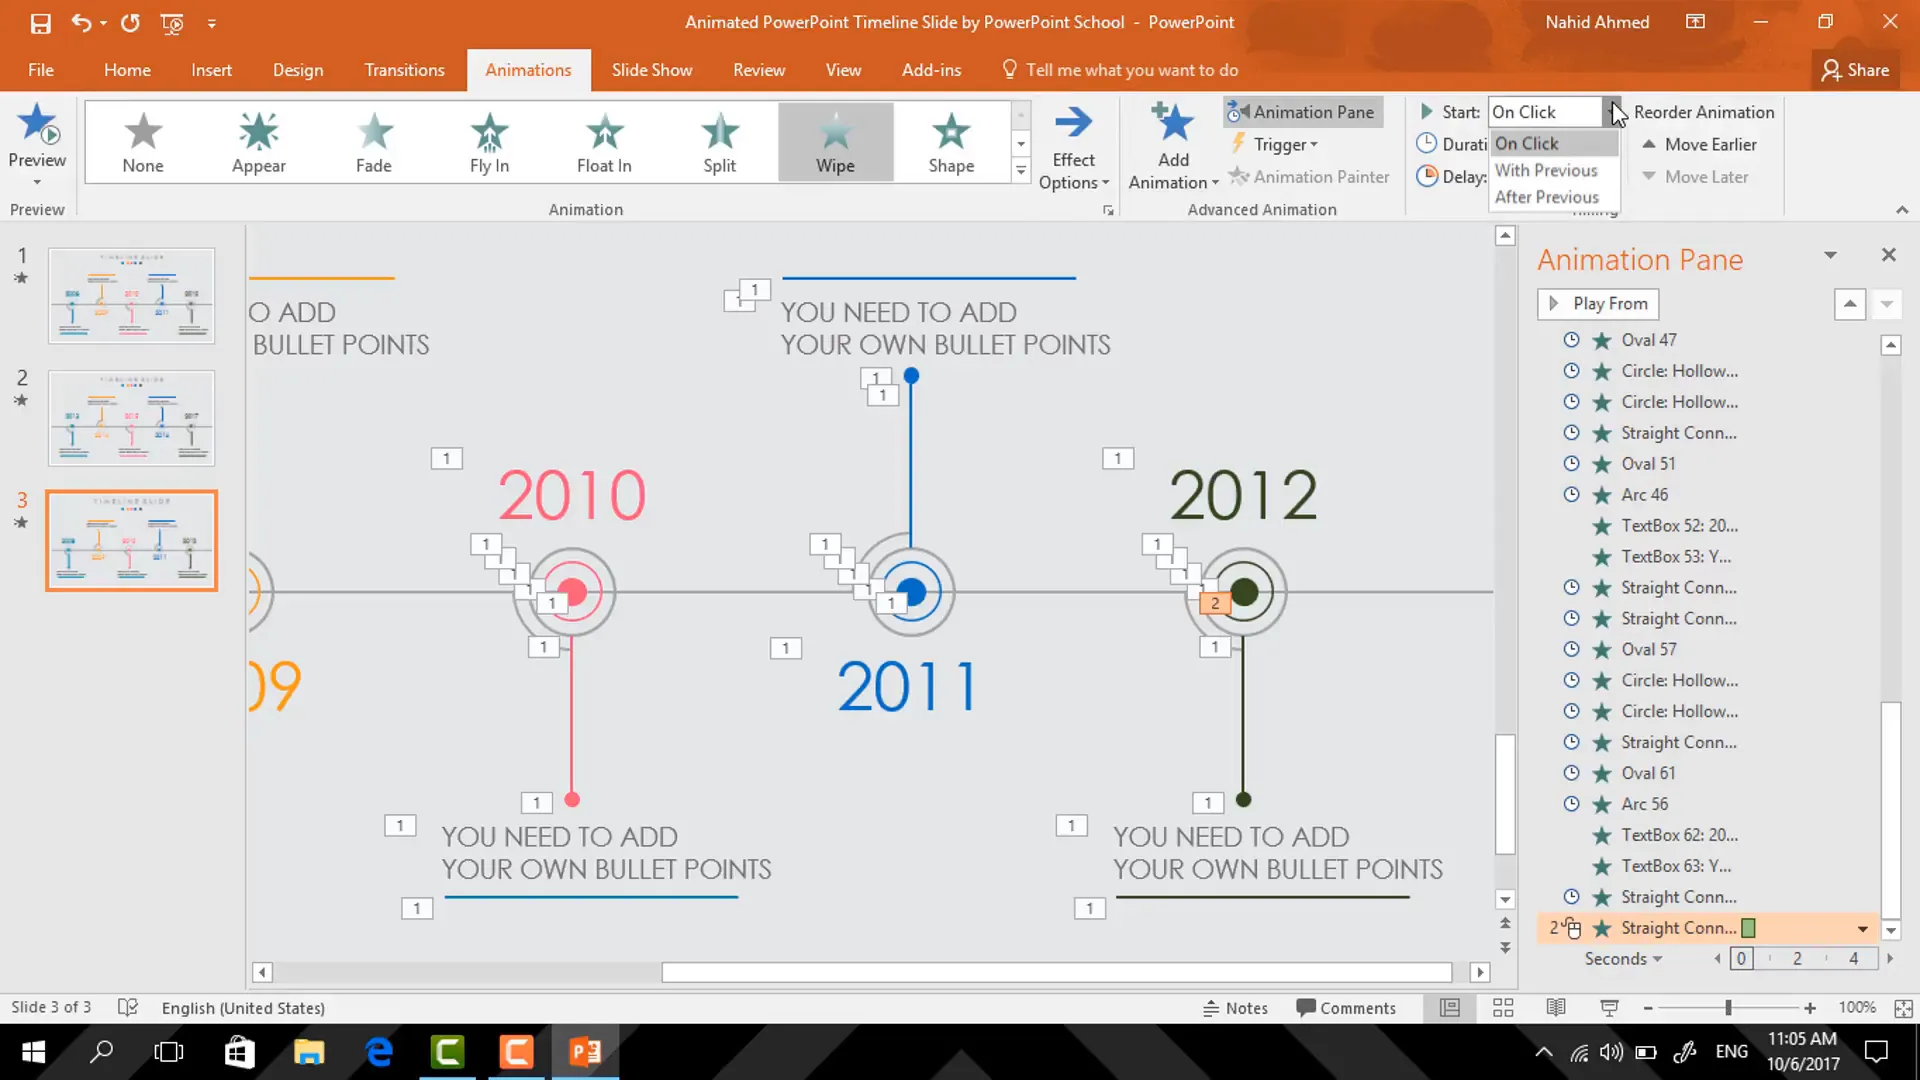
- Select the main horizontal timeline line. Go to the Animations tab, open the Animation Pane to monitor your animations.
- Click Add Animation and choose Wipe. Set the effect to wipe from left and trigger it On Click.
- Next, select the small filled circle marker, add a Zoom animation, and set it to start After Previous.
- Apply the same Zoom animation to the first hollow circle and set to start After Previous.
- Repeat for the second hollow circle with the same settings.
- Select the vertical line intersecting the hollow circle, add a Wipe animation from top, starting After Previous.
- Animate the next small circle and arc shape with Zoom and After Previous start.
- Select the text boxes for years and descriptions, add Float In animations set to float down, starting With Previous, with a duration of 0.5 seconds.
- Continue adding wipe animations for subsequent timeline lines from left, starting after previous animations.
- Repeat these animation sequences for each timeline segment for a smooth, flowing effect.
Animating your timeline elements sequentially creates a captivating storytelling experience that keeps your audience focused and engaged.
Streamlining Animation Setup
Because timelines often have repetitive elements, the animation process involves repeating similar steps multiple times. To save time:
- Duplicate previously animated elements and adjust their positions to extend the timeline.
- Reuse animation settings by copying animations from one element to another using the Animation Painter tool.
- Keep the animation pane open to monitor and fine-tune the sequence and timing of animations.
This approach speeds up the animation creation process while maintaining consistency across your timeline.
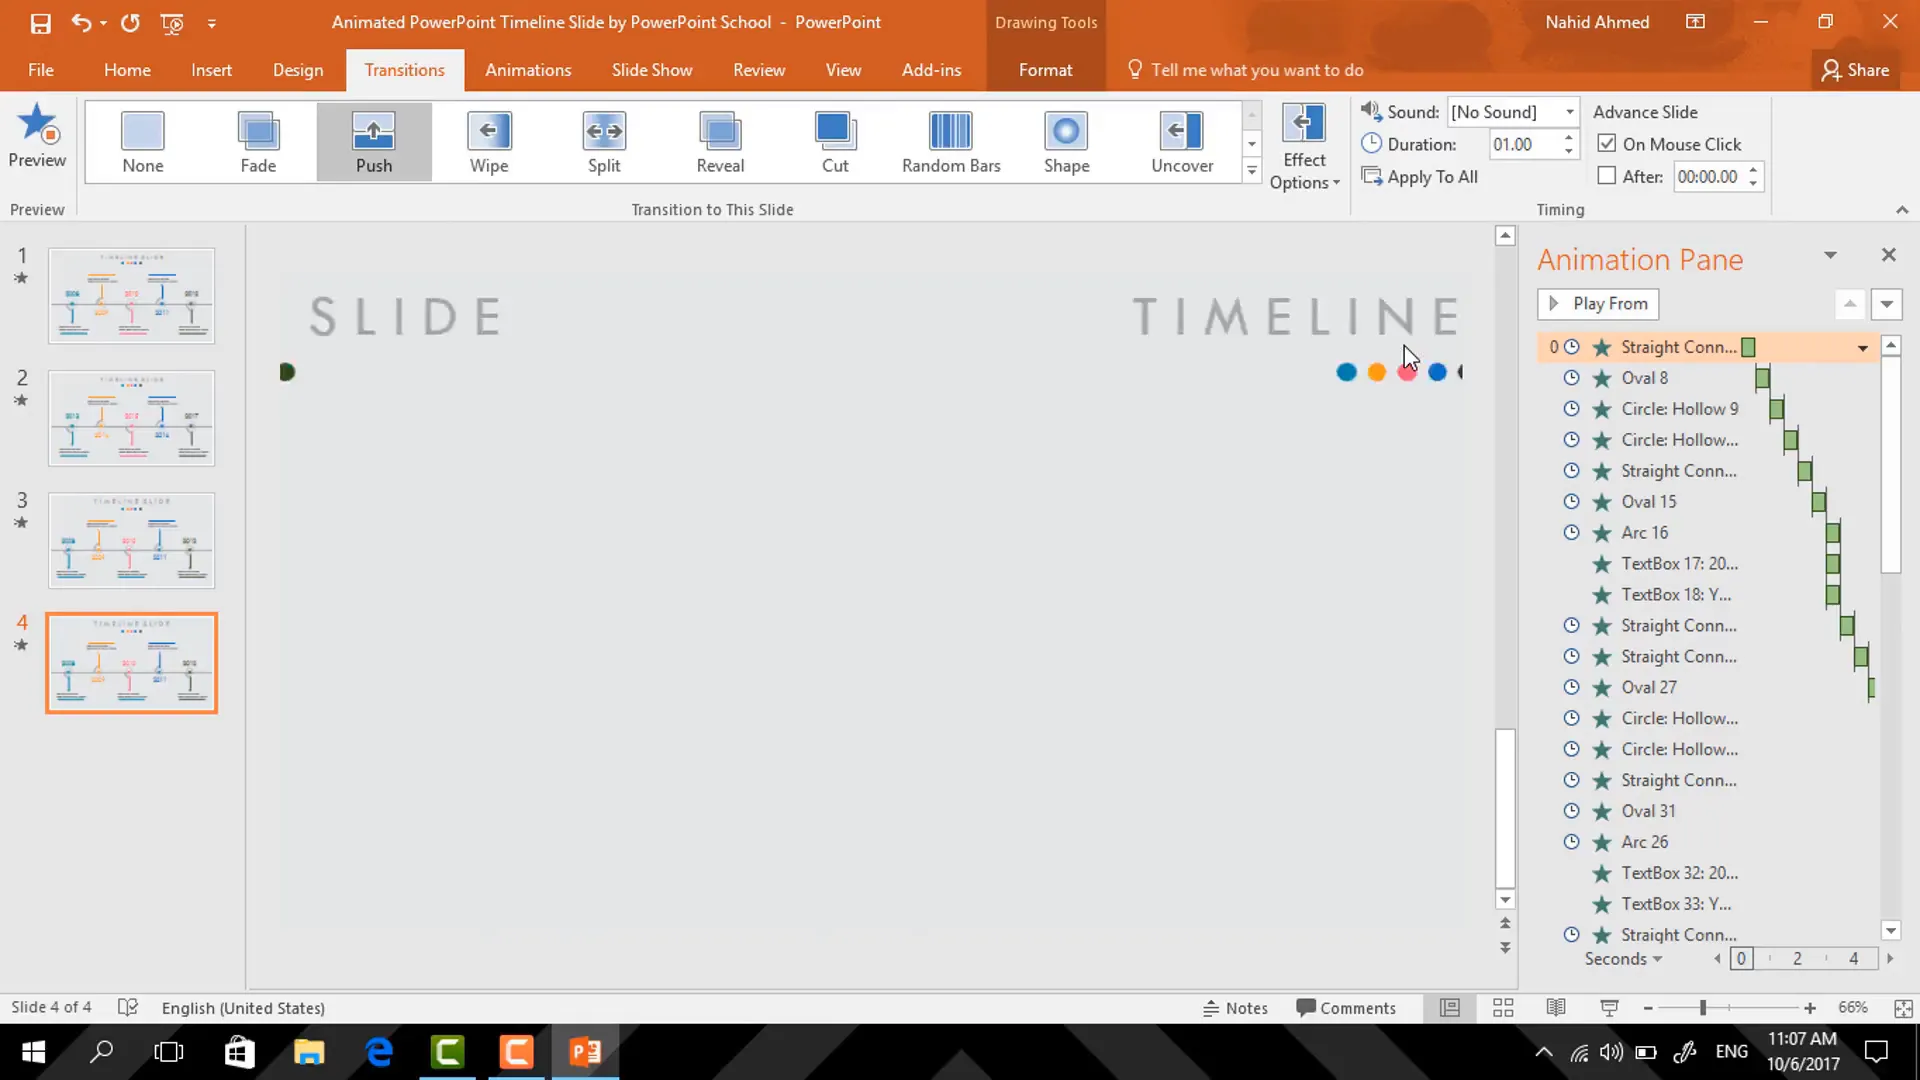
Adding a Polished Transition Effect
To elevate your presentation further, add a smooth transition between slides:
- Duplicate the entire timeline slide using Ctrl + D.
- On the duplicated slide, select the first horizontal timeline line and set its animation to start After Previous.
- Go to the Transitions tab, select Push as the transition effect.
- Change the transition direction to From Right.
This transition creates a dynamic flow when moving between slides, enhancing the overall viewer experience.
Using Your Animated Timeline Template
Now that your animated timeline slide is ready, you can use this template for various types of presentations, such as:
- Project timelines to showcase phases and milestones.
- Historical timelines to display events chronologically.
- Process timelines to illustrate steps in a workflow.
- Personal or company achievements over time.
Feel free to customize colors, fonts, and text to fit your brand or presentation style. The template is versatile and can be adapted to many scenarios.
For those who want a ready-made version, I have provided a downloadable animated timeline template that you can access for free. This can save you time and give you a head start on your projects.
Frequently Asked Questions (FAQ)
Can I create this animated timeline in older versions of PowerPoint?
Yes! This tutorial is designed for PowerPoint 2016, but you can also use PowerPoint 2013 or later versions. Some animation options or interface elements may differ slightly, but the core process remains the same.
What shapes are used in this timeline design?
The timeline is built using straight lines, ovals, hollow circles, and arc shapes. These simple shapes combined creatively form a professional-looking timeline.
Which fonts and colors work best for this timeline?
I recommend using Century Gothic for its clean and modern appearance. For colors, choose a palette with contrasting light and dark shades to ensure readability and visual interest.
How can I customize the animation effects?
You can modify the animation types, duration, and start triggers in the Animation Pane. Feel free to experiment with different effects like Fade, Fly In, or Zoom to suit your presentation style.
Is there a way to speed up the animation setup?
Absolutely. Use the Animation Painter tool to copy animations from one element to another, and duplicate groups of elements to maintain consistency while saving time.
Where can I download the free animated timeline template?
The animated timeline template is available for free download at PowerPoint School’s website. This template is fully editable and ready to use.
Conclusion
Designing an animated timeline slide in PowerPoint is a fantastic way to visually communicate sequences, milestones, and progress in your presentations. By following this tutorial, you can create a polished and engaging timeline using only basic PowerPoint tools—no advanced software needed.
Remember to start with a clean slide, build your timeline using simple shapes, add text for clarity, and bring it all to life with well-timed animations and transitions. Adding color variations and decorative arcs can enhance the visual appeal, while grouping and aligning elements keeps everything neat and professional.
The animation sequence plays a crucial role in storytelling, so take your time to set up smooth transitions and effects that guide your audience through the timeline effortlessly.
Feel free to download the free template I provided to jumpstart your project or to use as a reference. With practice, you’ll be able to customize and create diverse timeline slides tailored to any presentation need.
Happy presenting!
Check out the full video: Animated PowerPoint Timeline Slide Design Tutorial


