
If you’re looking for a captivating way to present timelines in your PowerPoint presentations, then mastering Powerpoint animation effects like the Morph transition is a game-changer. This comprehensive guide will walk you through creating an impressive animated morph timeline that not only looks professional but also engages your audience with smooth, dynamic movement.
Crafted with practical steps and tips, this tutorial helps you unlock the power of PowerPoint’s Morph animation to build a timeline that animates seamlessly, highlighting key dates and events with style. Whether you’re a beginner or looking to deepen your PowerPoint skills, this guide covers everything from setting up your slides to adding interactive hyperlinks, ensuring your timeline is as functional as it is beautiful.
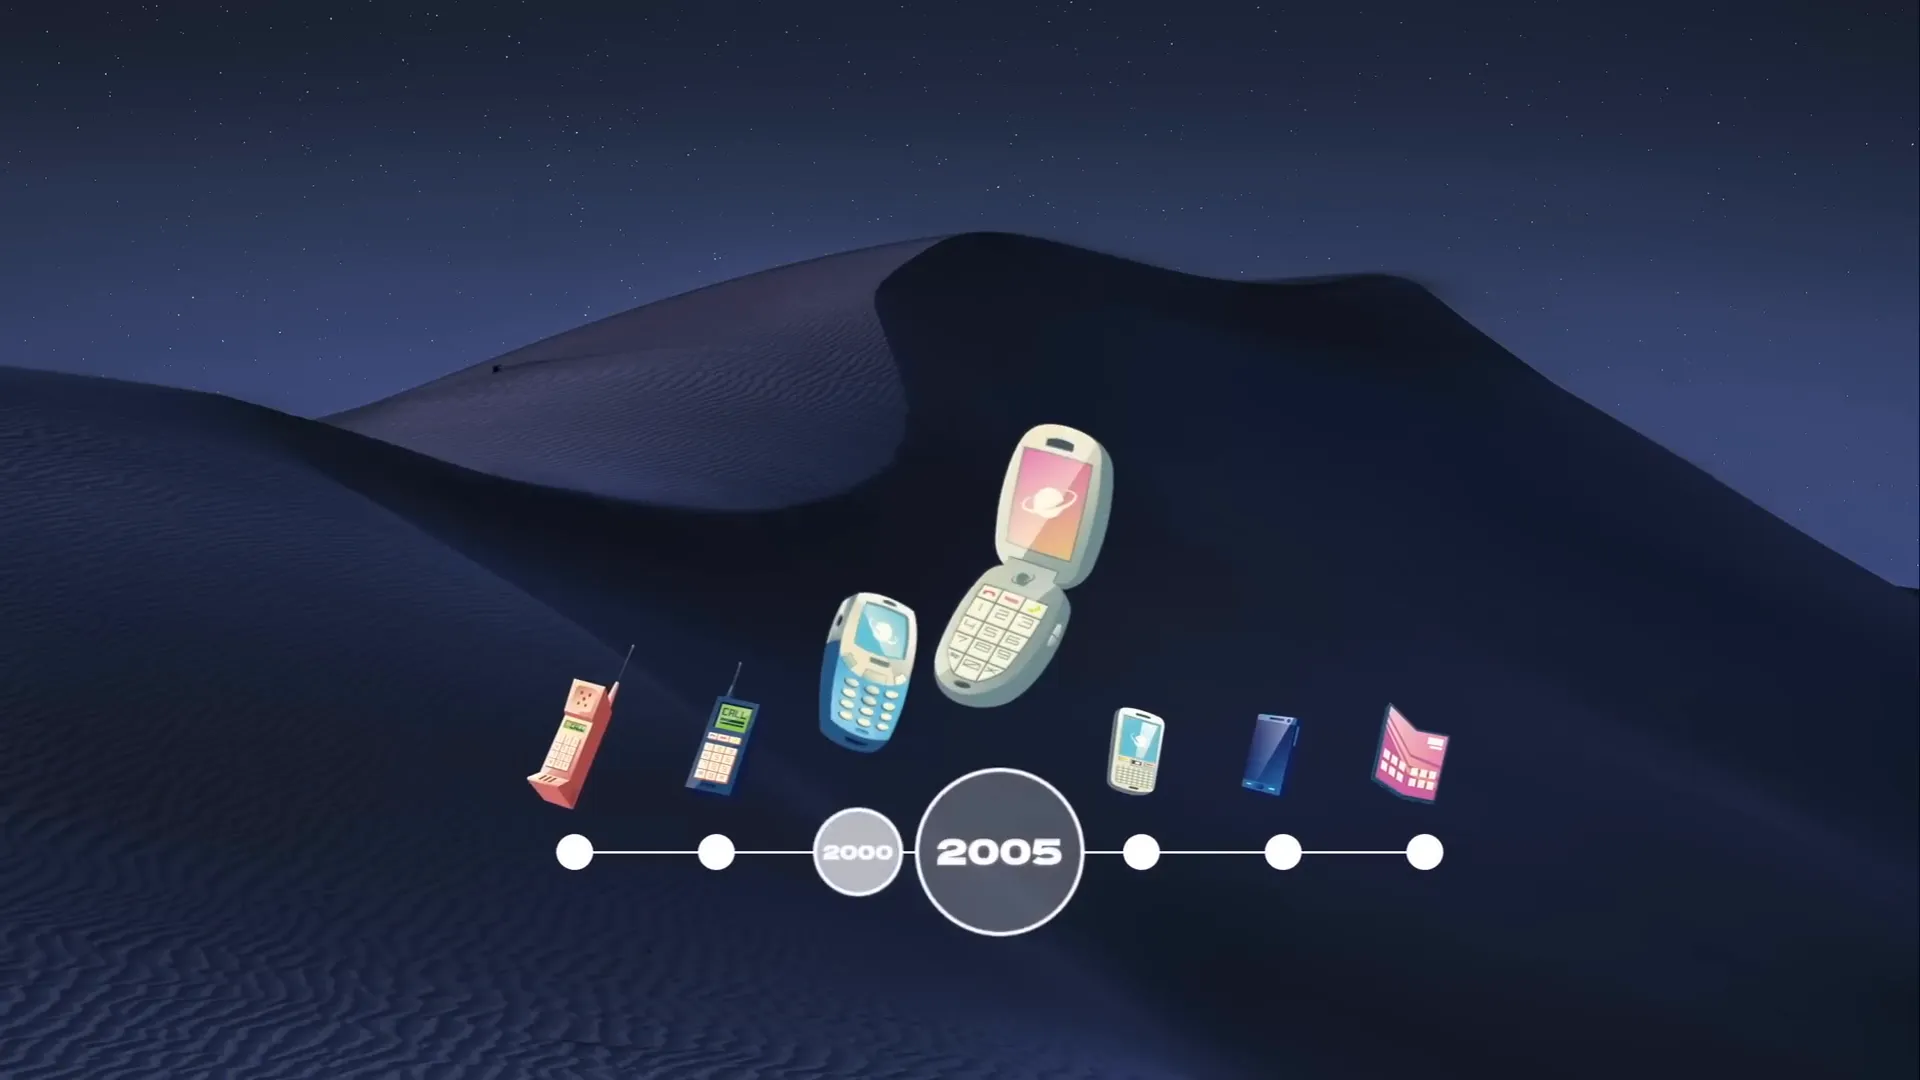
Table of Contents
- Getting Started: Preparing Your Slides
- Designing the Timeline Base: Lines and Circles
- Adding and Styling Text Inside Circles
- Using Morph Transition for Smooth Animation
- Enhancing the Timeline with Illustrations
- Adding Interactivity with Hyperlinks
- Frequently Asked Questions
- Conclusion
Getting Started: Preparing Your Slides
Before diving into animation, it’s essential to start with a clean slate and organize your workspace efficiently.
1. Start with a Blank Slide
Create a new presentation and set your first slide layout to Blank. This removes default placeholders, giving you full creative control.
2. Use Slide Guides for Precision
Activate the slide guide to locate the exact center of your slide. This will help you align elements perfectly as you build your timeline.
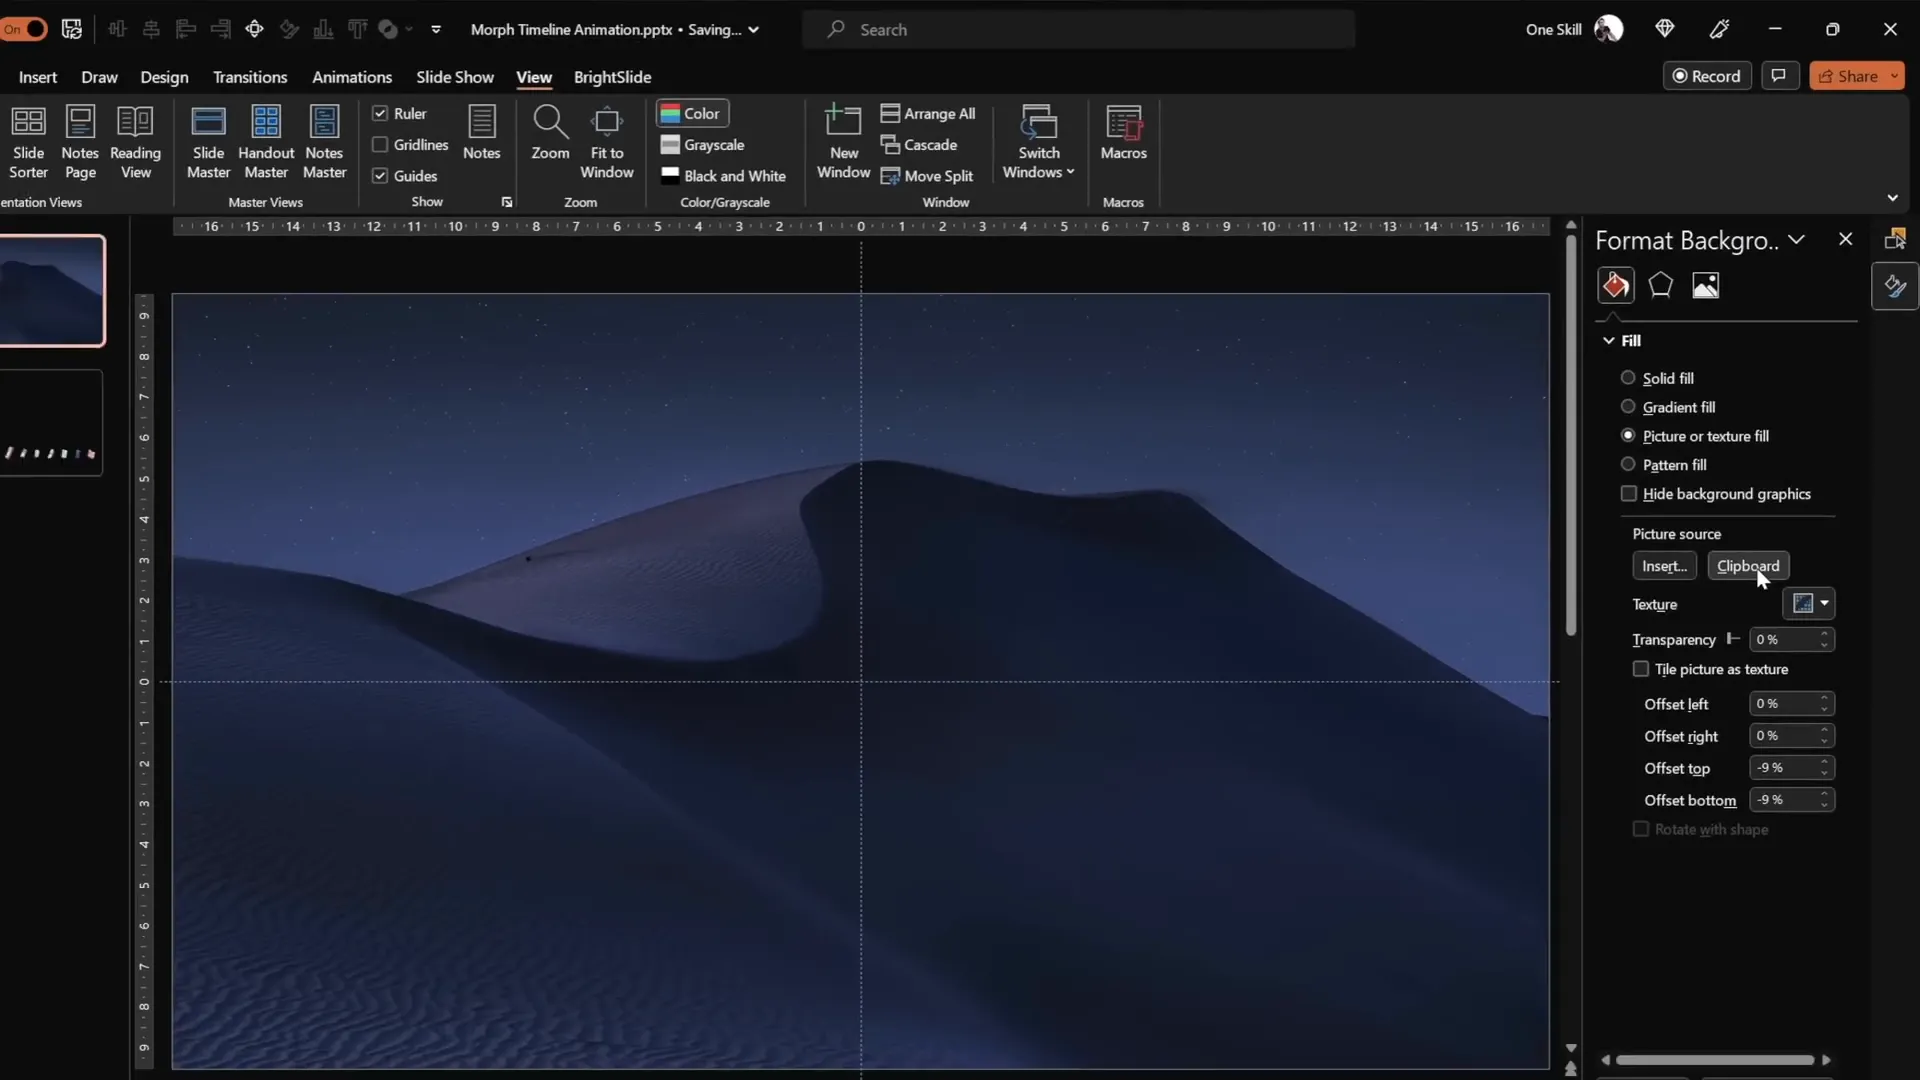
3. Set a Beautiful Background Image
Instead of inserting a full-screen photo as an image, paste a background photo using the Fill Options with the Picture from Clipboard method. This approach lets you later use the slide’s background fill option for other elements, such as circles, ensuring consistent design and smooth animations.
A great source for free, high-quality images is Unsplash. For this timeline, a subtle, elegant background image works best to keep focus on your timeline elements.
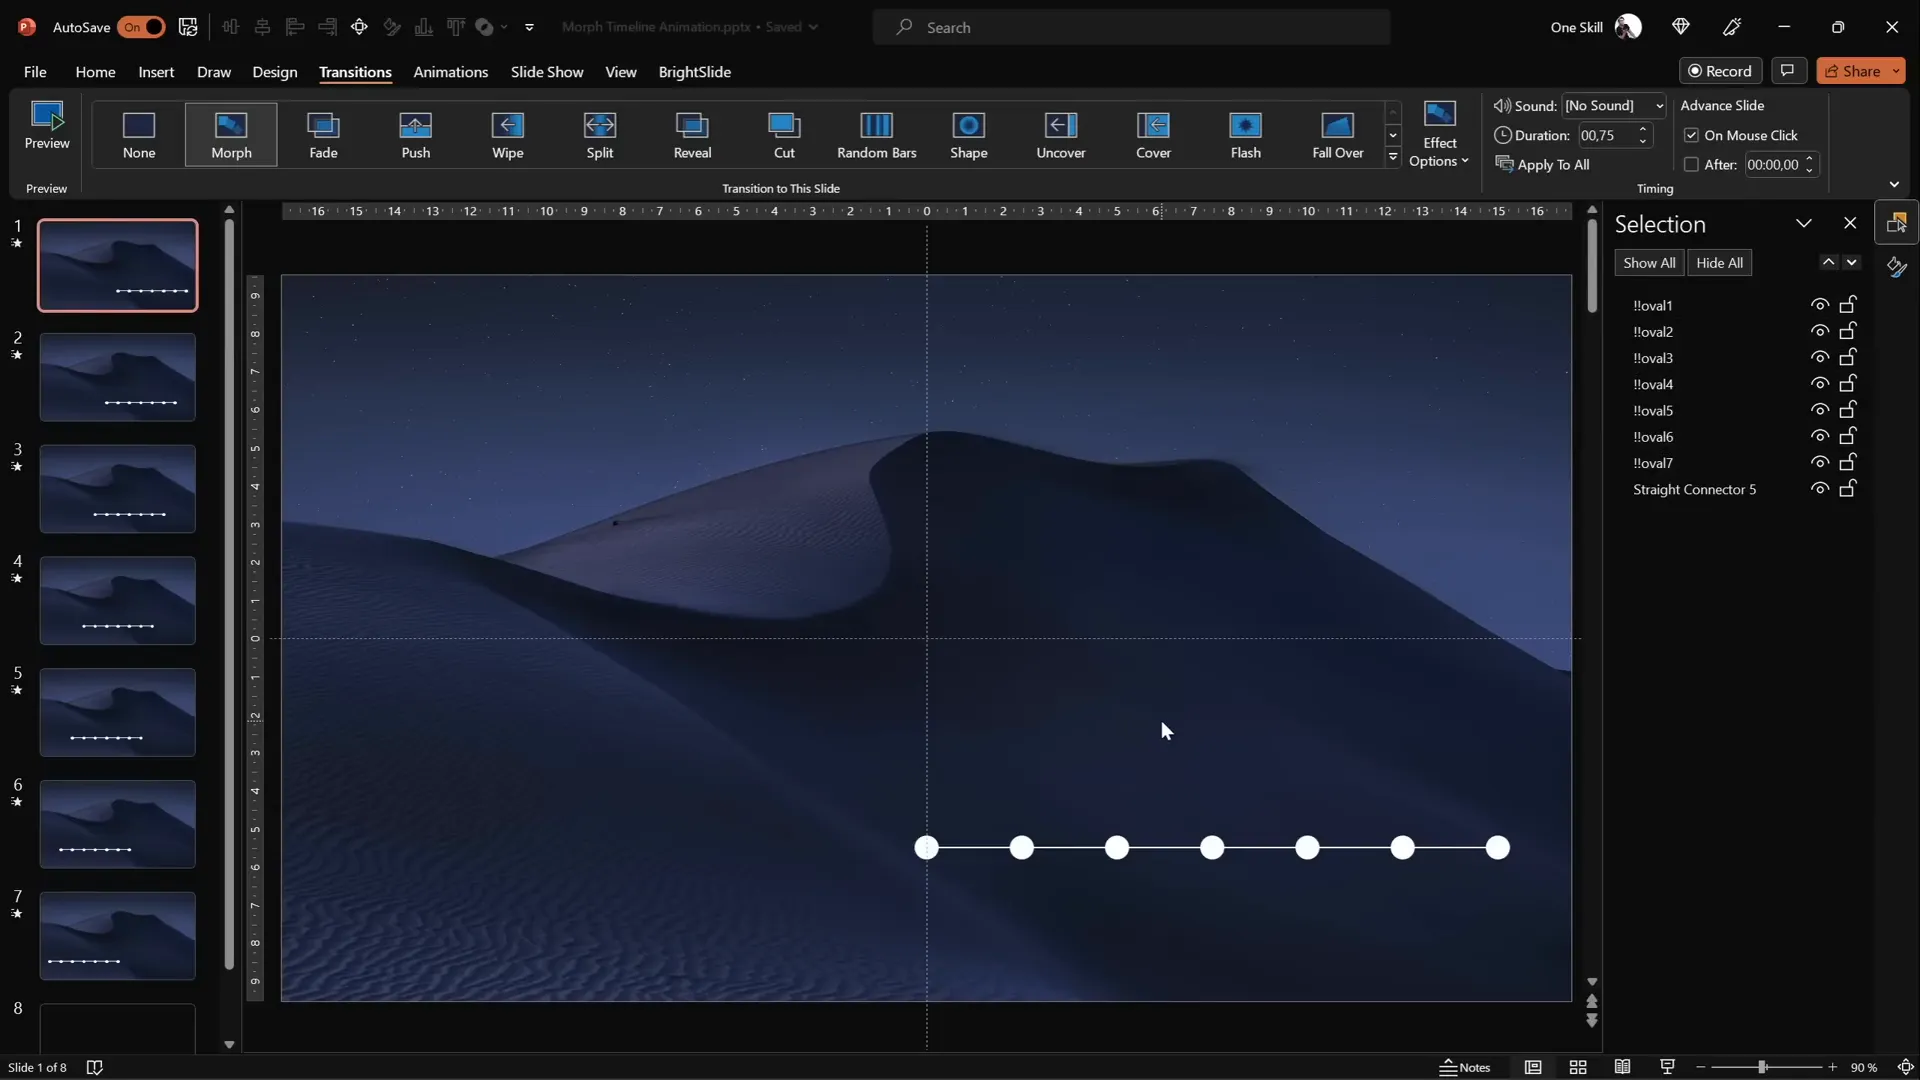
Designing the Timeline Base: Lines and Circles
The timeline’s backbone is a simple horizontal line with circles representing key points in time. Here’s how to create it:
1. Draw the Timeline Line
- Insert a straight line using the Shapes tool.
- Hold down the Shift key while drawing to keep the line perfectly horizontal.
- Position the line starting from the slide’s center towards the bottom right corner.
- Set the line length to 15 centimeters and the line width to 1 point for a sleek look.
2. Create Circles for Timeline Points
- Draw a perfect circle by holding the Shift key while drawing.
- Set the size to 0.6 cm by 0.6 cm, but feel free to adjust based on your preference.
- Place the first circle to the left of the timeline line.
- Use the Ctrl + Shift keys to drag and create a copy of the circle on the right side of the line.
- Repeat the copying process until you have seven circles evenly spaced along the timeline.
- Select all circles, then use the Align tool to distribute them evenly horizontally.

Adding and Styling Text Inside Circles
Each circle should indicate a specific year or milestone. Here’s how to add and style text effectively:
1. Insert Year Labels
- Add text boxes inside each circle.
- Type years sequentially, for example, from 1980 to 2020.
- Use the Hanson font for a modern and clean look.
- Set the font size to 5 points initially for placement, then increase later for visibility.
- Keep the text color black while typing to ensure visibility against the white background.
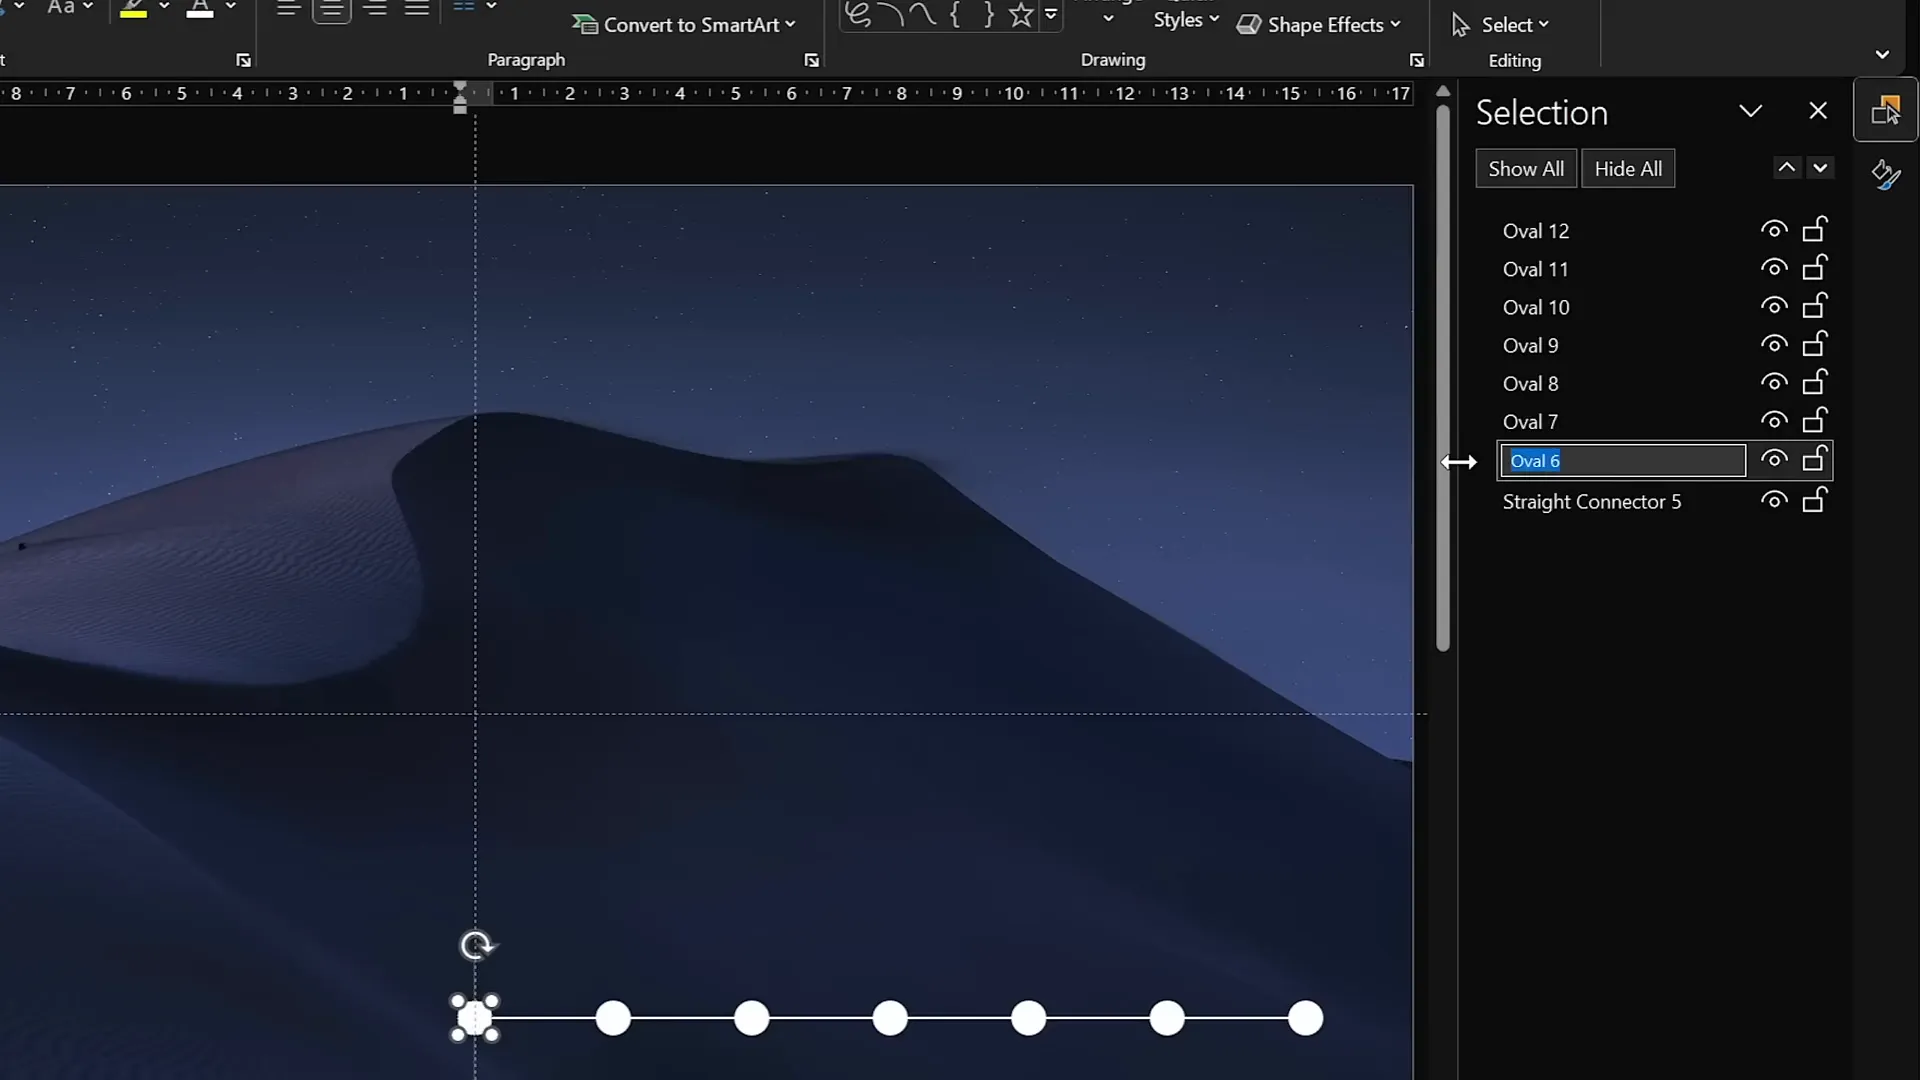
2. Style the Text and Circles
- Once the text is entered, select all text boxes and change their font color to white, making them initially invisible.
- This sets the stage for the Morph animation to reveal the text dynamically.
- Rename each circle object in the Selection Pane with a specific naming convention starting with double exclamation marks (e.g., !!Oval1, !!Oval2) to organize objects efficiently and avoid confusion.
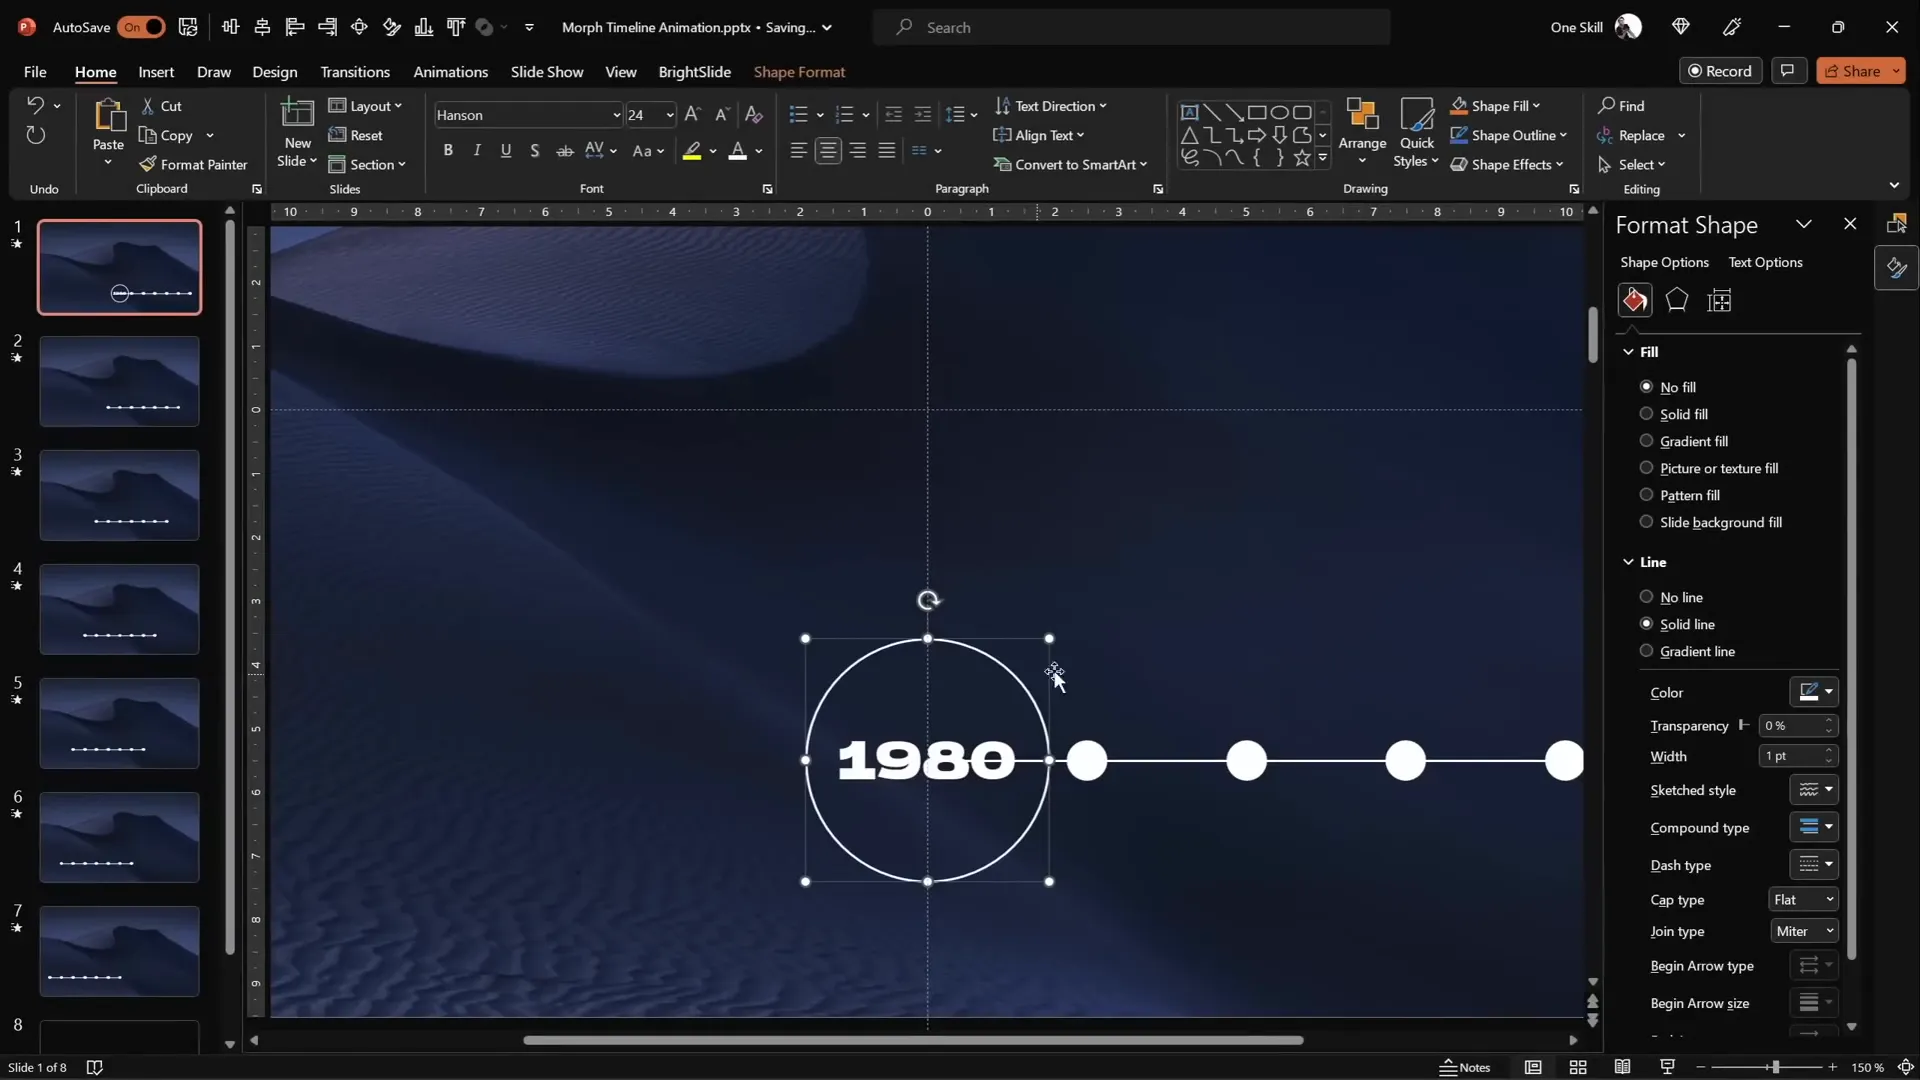
3. Resize Circles for Emphasis
On each slide, resize the circle corresponding to the active year to a larger size to highlight it:
- Select the circle and resize from the center by holding Ctrl + Shift while dragging the corner handle.
- Remove the fill or change it to a light background fill to hide any unwanted lines behind the text.
- Increase the font size of the year inside the circle to 24 points for clear visibility.
- Copy the style of the resized circle using Ctrl + Shift + C and paste it to the corresponding circles on other slides with Ctrl + Shift + V to maintain consistency.
Using Morph Transition for Smooth Animation
The Morph transition is the key to creating smooth, dynamic movement between slides, making your timeline come alive. Here’s how to utilize it effectively:
1. Set Up Slide Transitions
- Make sure the slide transition is set to Move (Morph) for every slide.
- Set the transition duration to 0.75 seconds for a fast but smooth effect.
2. Duplicate and Shift Timeline Elements
- Duplicate your first slide multiple times (six duplicates, for seven total slides).
- On each duplicate slide, select all timeline circles and the line, then move them one step to the left.
- Use the original circles as guides to keep the alignment precise.
- After shifting the circles on all slides, delete the original circles used as guides to avoid clutter.
3. Preview the Morph Animation
Run your slideshow from the beginning, and you’ll notice the timeline circles smoothly slide to the left, highlighting each year in sequence. The Morph transition makes this movement look natural and professional without complex animations.

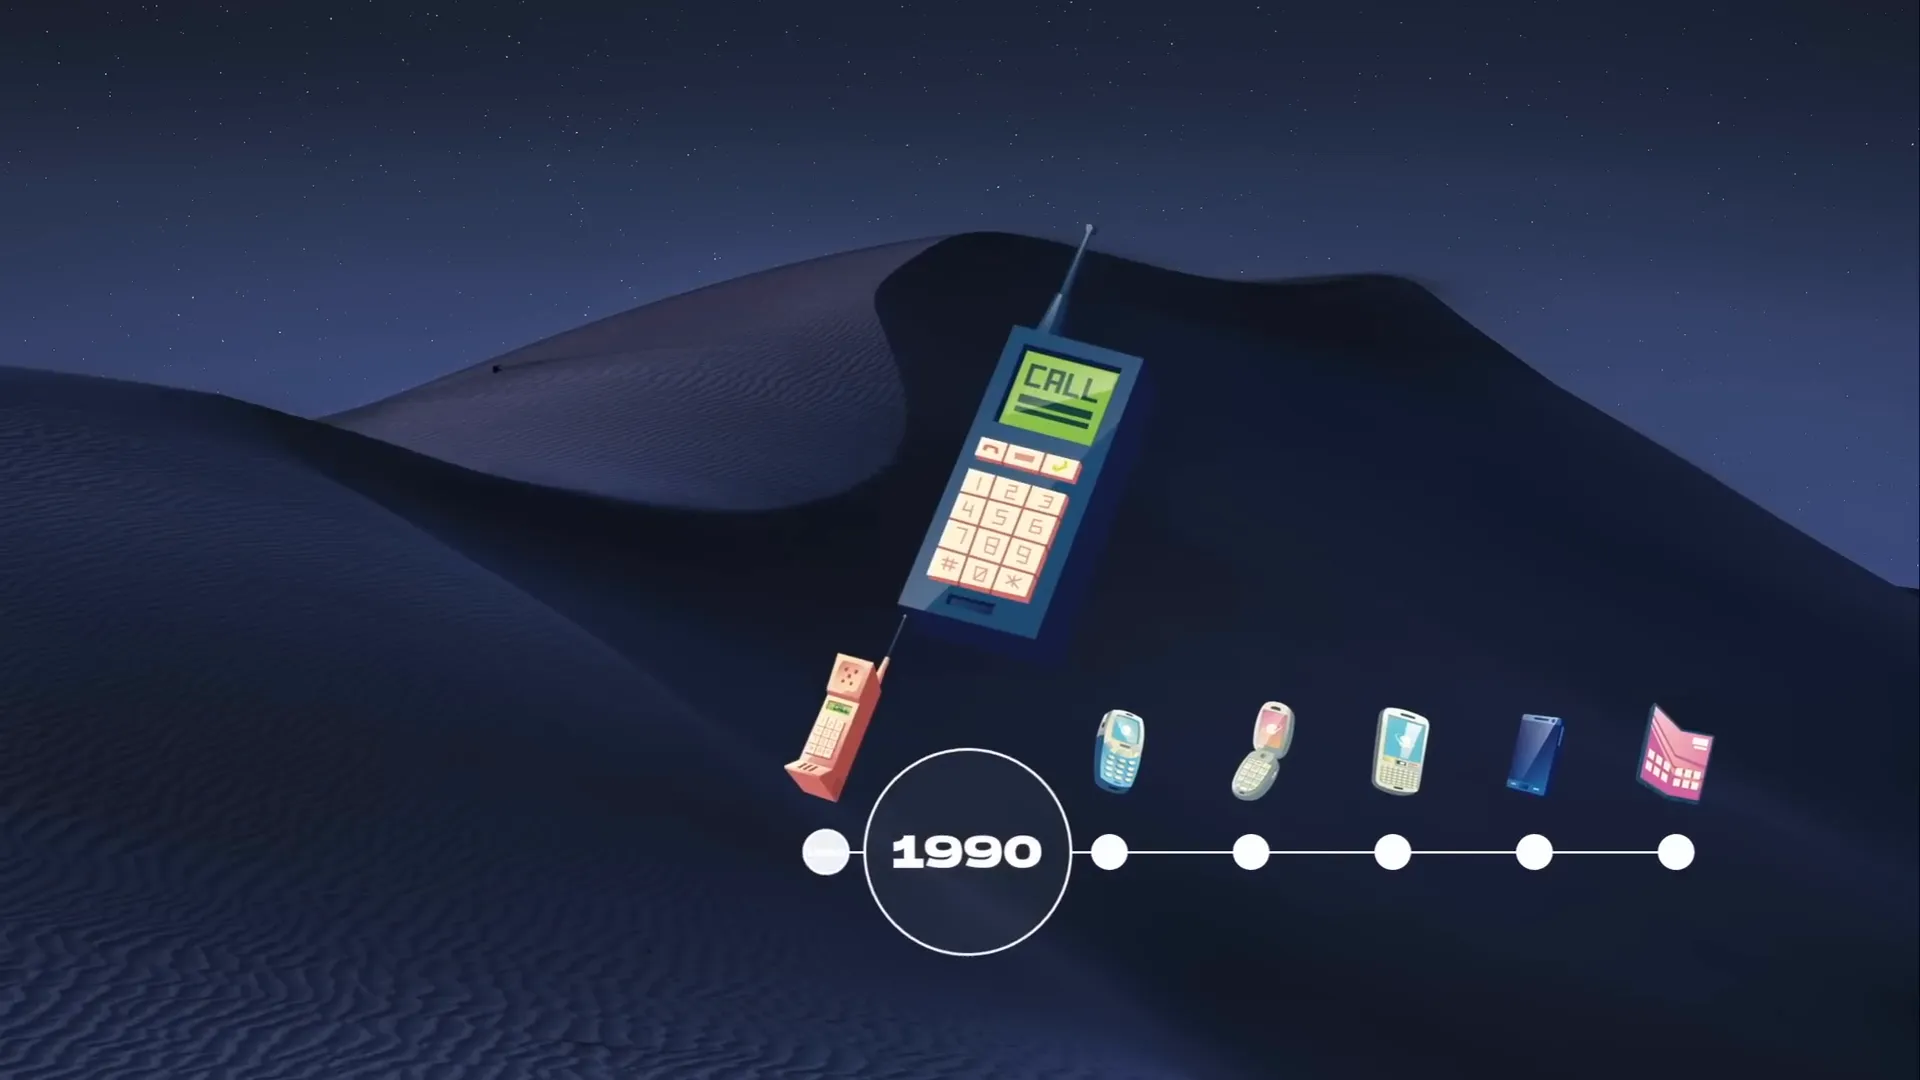
Enhancing the Timeline with Illustrations
Adding thematic illustrations can make your timeline more visually appealing and contextually informative. For example, if your timeline tracks phone technology evolution, adding phone illustrations is perfect.
1. Collect Illustrations
Gather relevant vector images or illustrations. For phone timelines, you can find free phone illustrations from sources like Freepik.
2. Insert and Name Illustrations
- Paste all illustrations on the first slide.
- In the Selection Pane, rename each illustration with double exclamation marks followed by the corresponding year (e.g., !!Phone1980).
3. Position and Style Illustrations
- Place the illustrations just above the timeline for clear visibility.
- Resize and rotate individual illustrations for a dynamic look.
- On each subsequent slide, move all illustrations one step to the left to match the timeline’s progression.

4. Preview the Animated Timeline with Illustrations
Run the slideshow to see both the timeline circles and illustrations animate together smoothly, creating an engaging storytelling flow.

Adding Interactivity with Hyperlinks
To make your timeline more interactive and user-friendly, add hyperlinks that allow quick navigation between key slides.
1. Insert Hyperlinks on Timeline Circles
- Select a circle on the right side of the first slide and add a hyperlink to jump to the last slide.
- On the last slide, select the circle on the left side and add a hyperlink back to the first slide.
- You can extend this by adding hyperlinks to other circles for quick navigation.
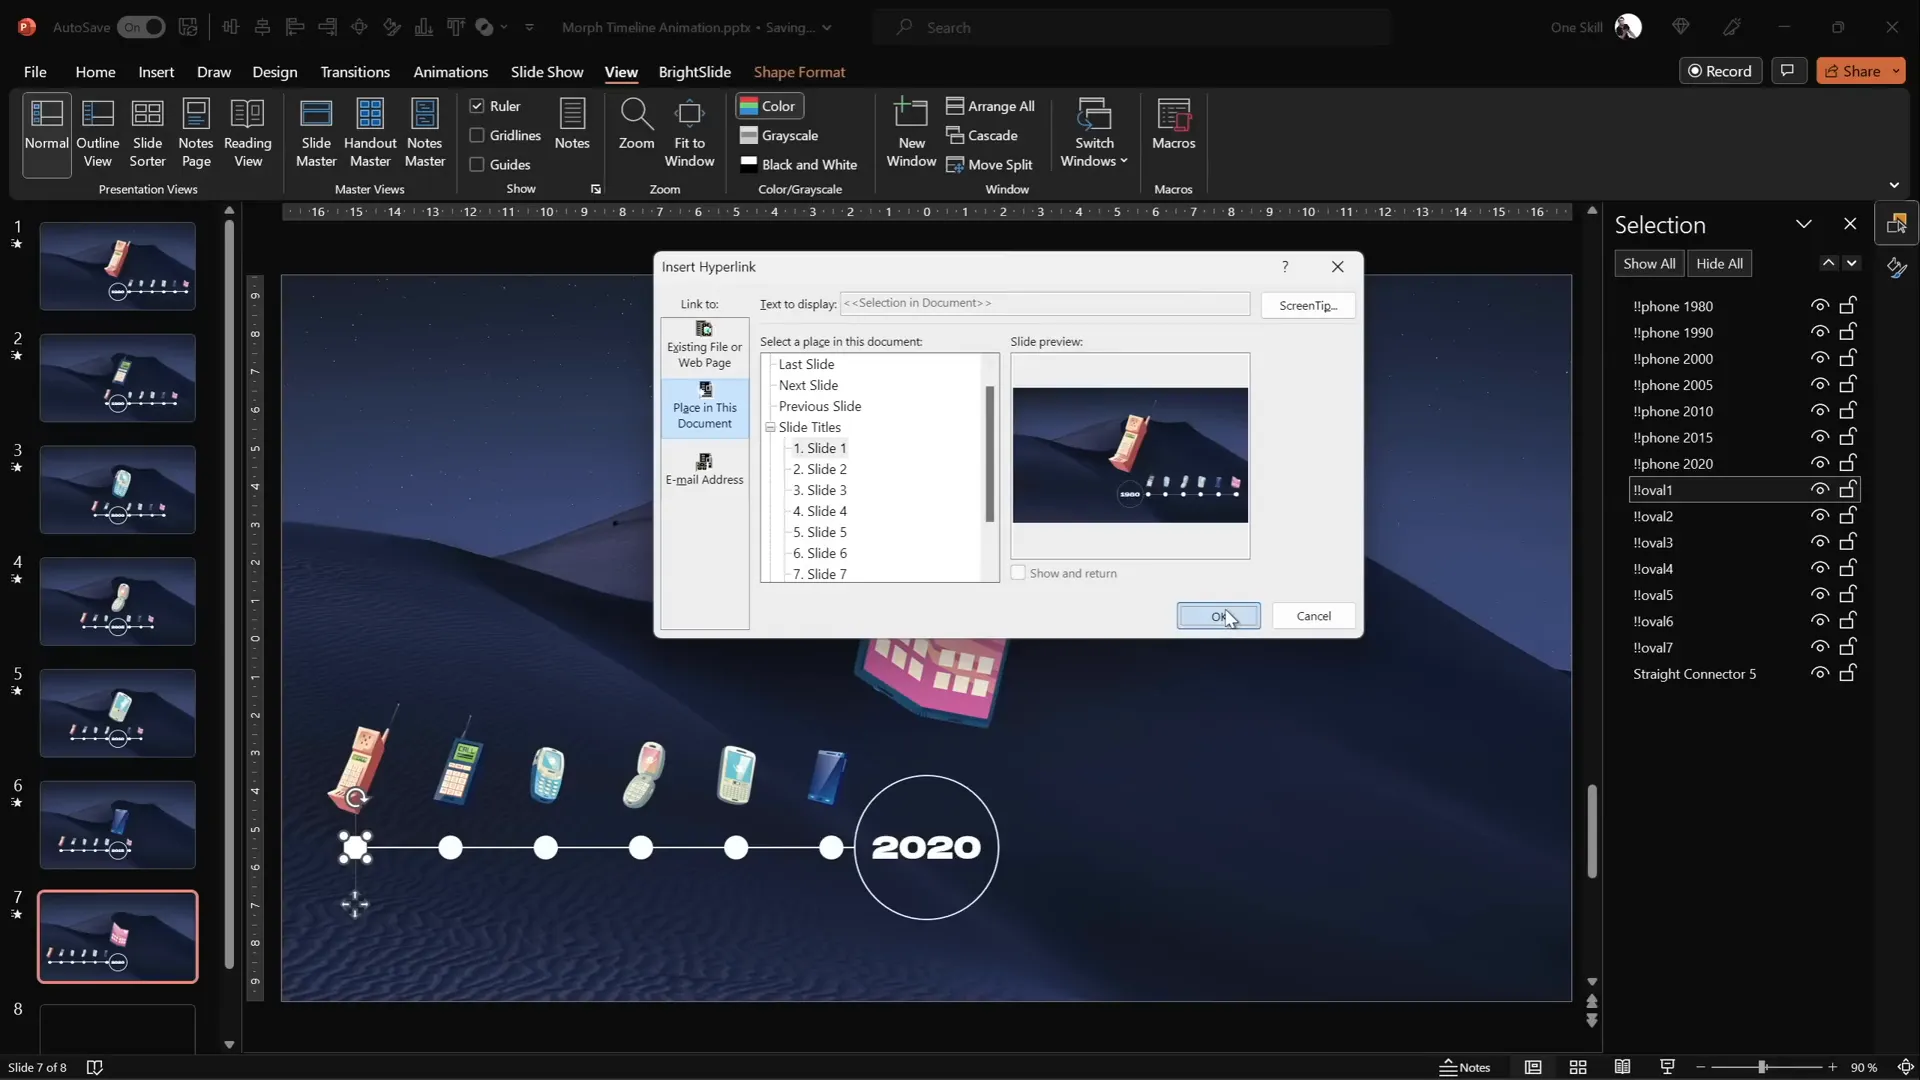
2. How to Add Hyperlinks in PowerPoint
- Select the shape or text box.
- Press Ctrl + K or right-click and select Hyperlink.
- Choose Place in This Document, then select the slide you want to link to.
- Click OK to confirm.
This simple addition can greatly enhance the usability of your presentation, especially during live demos or interactive sessions.
Frequently Asked Questions
What is the Morph transition in PowerPoint?
The Morph transition is a powerful PowerPoint animation effect that creates smooth movement of objects from one slide to another. It automatically animates the position, size, and shape changes of objects, making complex animations easy to create.
Can I use any images as a background for the timeline?
Yes, but for optimal animation results, it’s recommended to paste the background image as a fill rather than inserting it as a standard image. This allows other elements to use the Slide Background Fill option, crucial for seamless Morph animations involving shapes like circles.
How many slides do I need for an animated timeline?
The number of slides depends on the number of timeline points you want to animate. For example, if your timeline has seven points, create seven slides with each slide shifting the timeline elements one step to the left to show progression.
Is it possible to customize the timeline with different shapes?
Absolutely! While this tutorial uses circles, you can use any shape that fits your design aesthetic, such as squares, hexagons, or custom shapes. Just ensure consistent naming and alignment for smooth Morph transitions.
Can I add sound or music to my animated timeline?
Yes, PowerPoint allows you to insert audio clips or background music. However, use sound effects sparingly to keep your presentation professional and focused.
Where can I find free icons or illustrations for my timeline?
Great resources include Freepik, Unsplash, and Flaticon. Always check licensing for commercial use.
Conclusion
Creating an animated morph timeline in PowerPoint is a fantastic way to showcase chronological information with style and clarity. By combining simple shapes, precise alignment, and the Morph transition, you can build a dynamic and visually engaging timeline that captivates your audience.
Don’t forget to enhance your timeline with thematic illustrations and add interactive hyperlinks to boost navigation and user experience. With these Powerpoint animation effects in your toolkit, your presentations will stand out for their professionalism and creativity.
Remember, the key to mastering PowerPoint animations is practice and experimentation. Start with this timeline project, and soon you’ll be creating even more sophisticated animations that elevate your storytelling and communication.
Ready to take your PowerPoint skills to the next level? Explore more tutorials, templates, and tips to continue your learning journey.
Check out the full video: ANIMATED PowerPoint Morph Timeline ✨ Free Download


