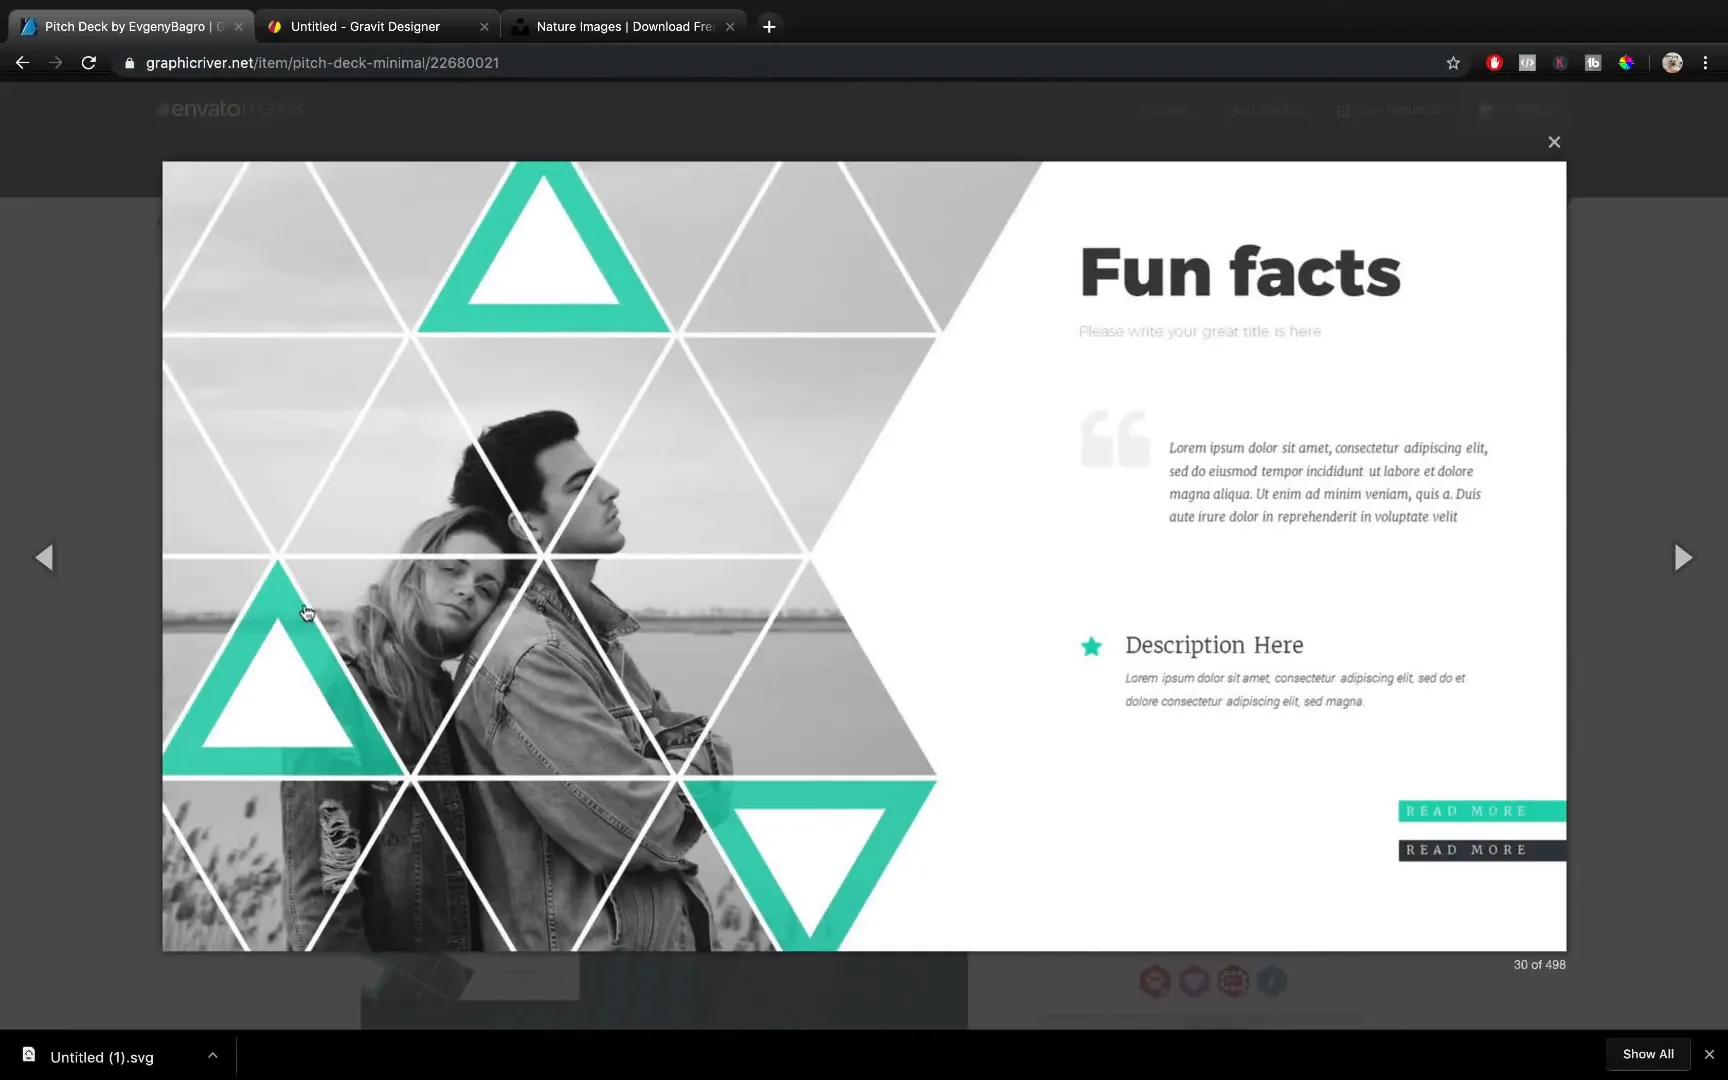
Creating engaging and visually appealing PowerPoint presentations often requires more than just adding images and text. One of the subtle yet powerful design elements that can elevate your slides is a custom picture placeholder. In this article, I will walk you through a detailed, step-by-step tutorial to create a stunning and unique picture placeholder using PowerPoint and a free vector design tool called Gravit Designer. Inspired by the beautiful Pitch Deck PowerPoint template designed by Yevgeny Bagram, this tutorial will unlock new creative possibilities for your presentations.
Whether you are a beginner or an advanced PowerPoint user, this guide will show you how to move beyond standard rectangular or circular image crops and craft intricate, custom shapes that add professional polish to your slides. Let’s dive right in!
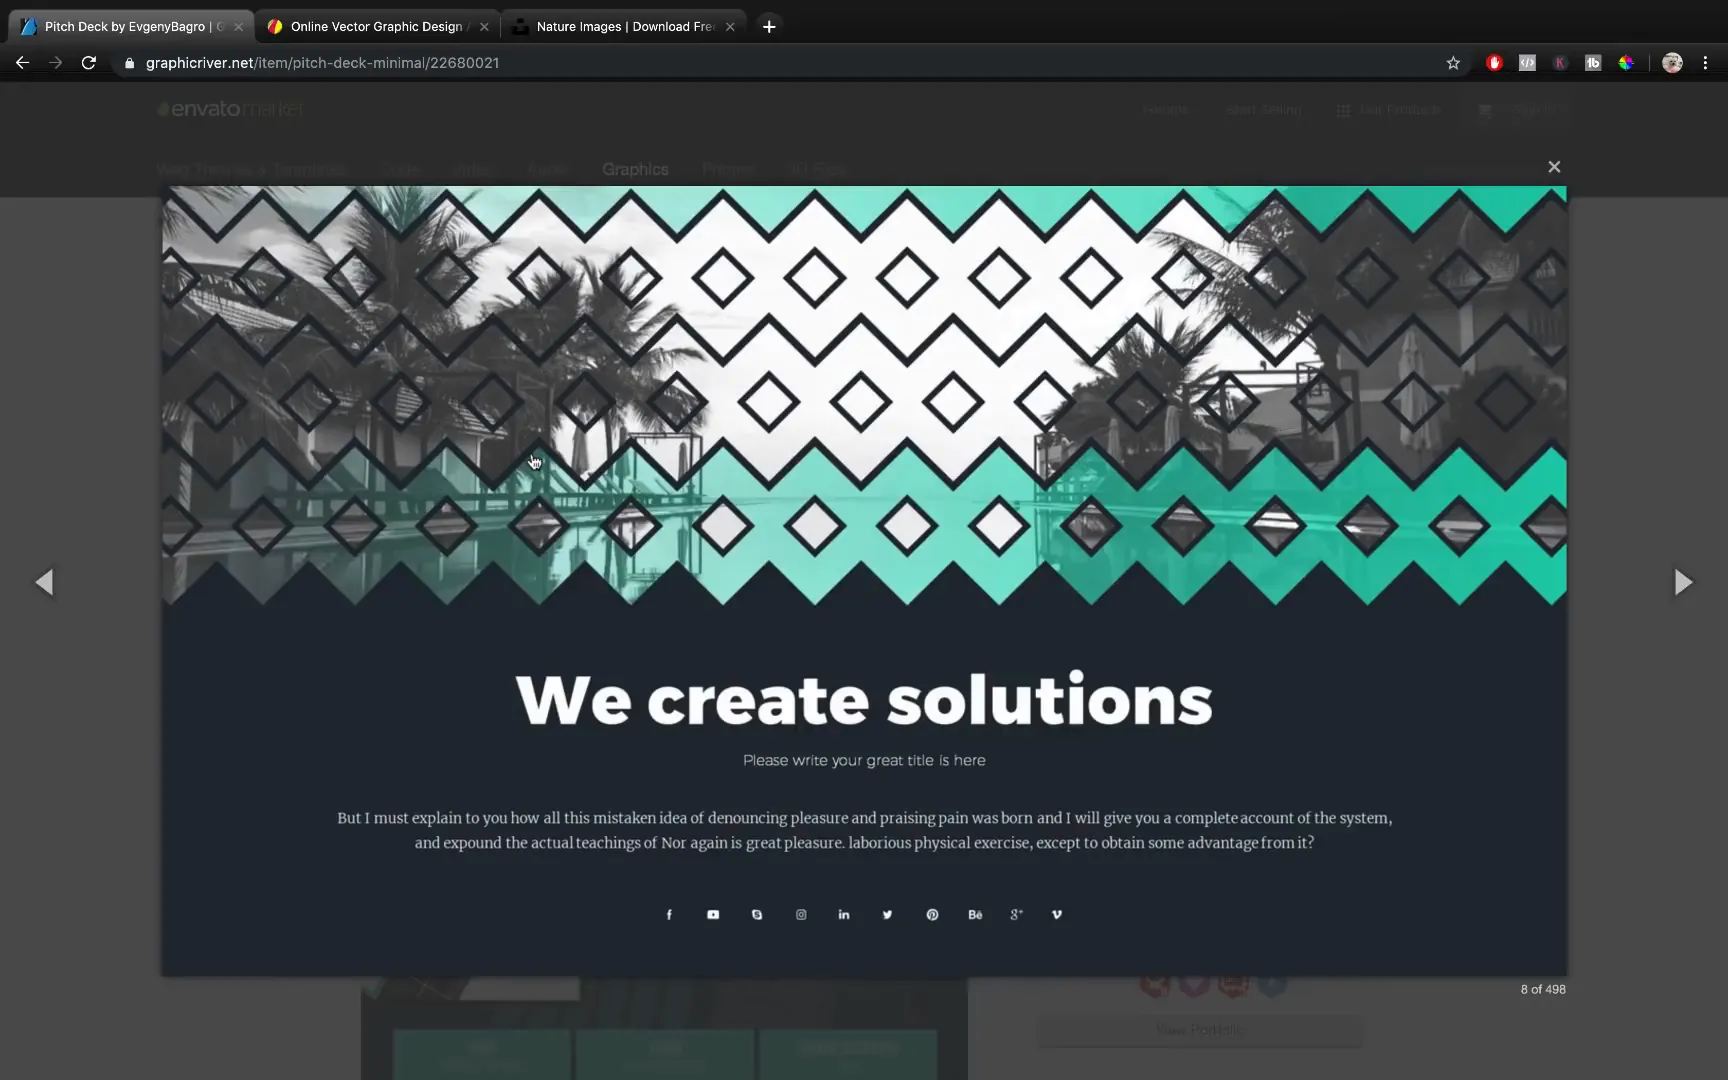
Table of Contents
- Why Custom Picture Placeholders Matter
- Analyzing the Design: The Building Blocks of the Placeholder
- Step 1: Creating Triangles in PowerPoint
- Step 2: The Challenge of Aligning Multiple Rows
- Step 3: Introducing Gravit Designer – A Free Vector Design Tool
- Step 4: Building the Triangle Rows in Gravit Designer
- Step 5: Creating the White Gaps Using Path Modification
- Step 6: Adding Inner Triangles for Detail
- Step 7: Exporting the Design as SVG and Importing into PowerPoint
- Step 8: Refining and Positioning in PowerPoint
- Step 9: Creating the Custom Picture Placeholder in Slide Master
- Step 10: Using and Styling the Placeholder
- Step 11: Adding Colored Triangles with Transparency
- Step 12: Final Touches – Text and Animation
- Tips and Insights on Using Gravit Designer with PowerPoint
- Conclusion: Elevate Your PowerPoint Presentations with Custom Placeholders
- Frequently Asked Questions (FAQ)
Why Custom Picture Placeholders Matter
Typically, picture placeholders in PowerPoint are simple rectangles or circles. While functional, they often lack visual interest. The Pitch Deck template caught my eye because of its innovative use of geometric shapes—specifically rows of triangles arranged in dynamic patterns with subtle gaps and overlays.
These placeholders do more than just hold images; they frame your visuals with style, guiding the viewer’s eye and enhancing your overall message. Custom placeholders can also help maintain consistent design language throughout your presentation, making it look cohesive and polished.
In this tutorial, I’ll show you how to recreate one of these unique placeholders step-by-step, and how you can customize it to suit your needs.
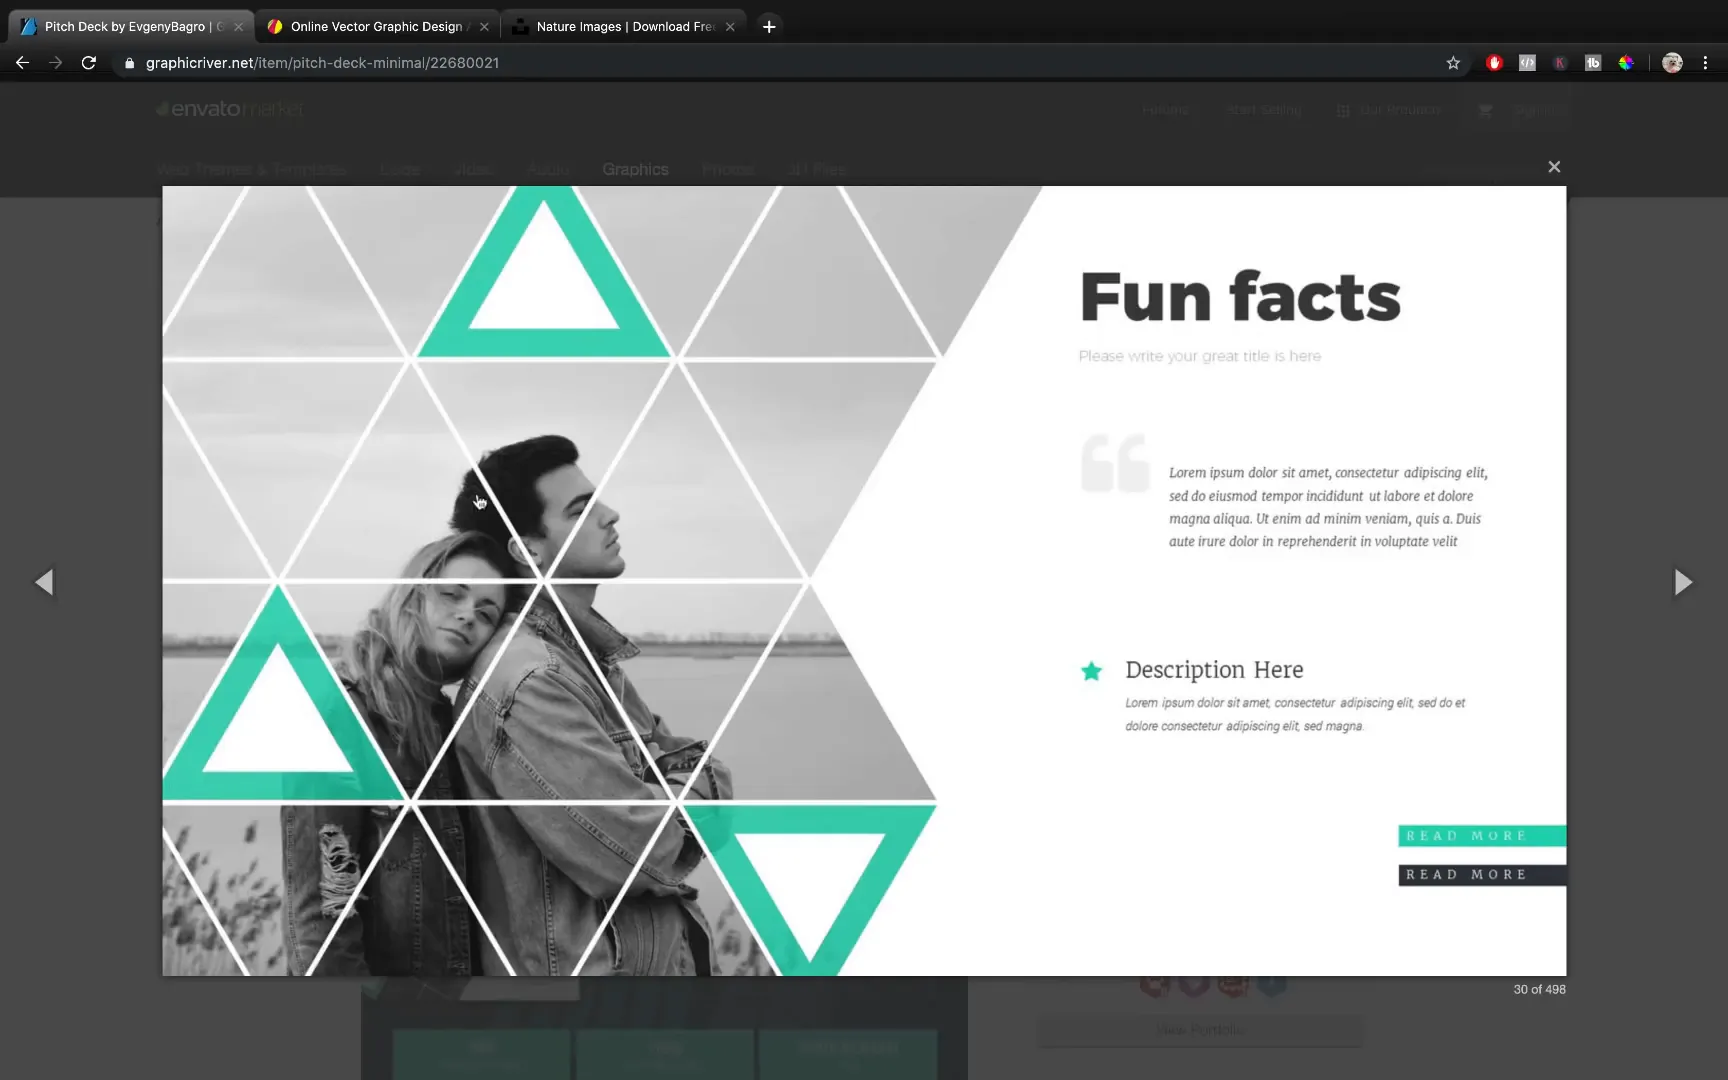
Analyzing the Design: The Building Blocks of the Placeholder
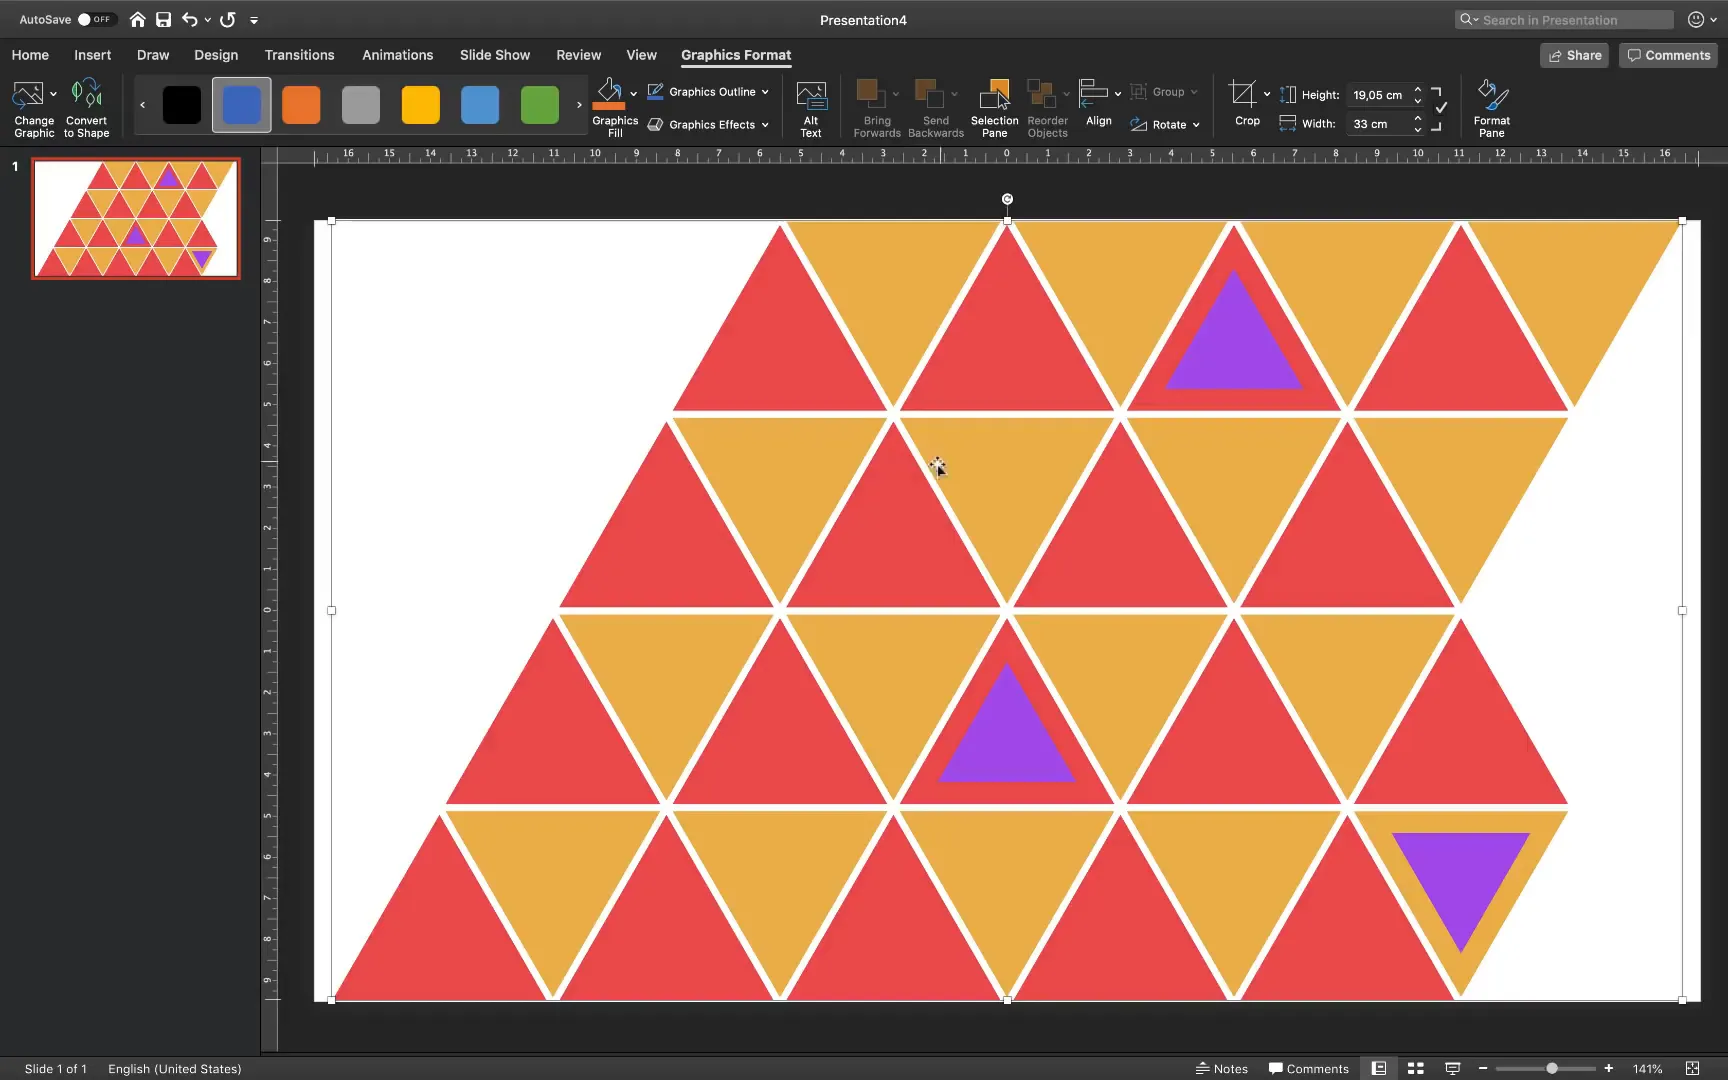
Before jumping into PowerPoint, it’s crucial to understand how the placeholder is constructed. The design consists of four rows of triangles, some flipped upside down. These triangles alternate in color and include smaller triangles nested inside some of them.
The key challenge is to maintain equal white gaps between the triangles, creating a balanced and clean look. While you could simply draw white lines over a shape, this approach is less flexible and less precise. Instead, we aim to create the triangles with exact spacing, making the whole placeholder editable and scalable.
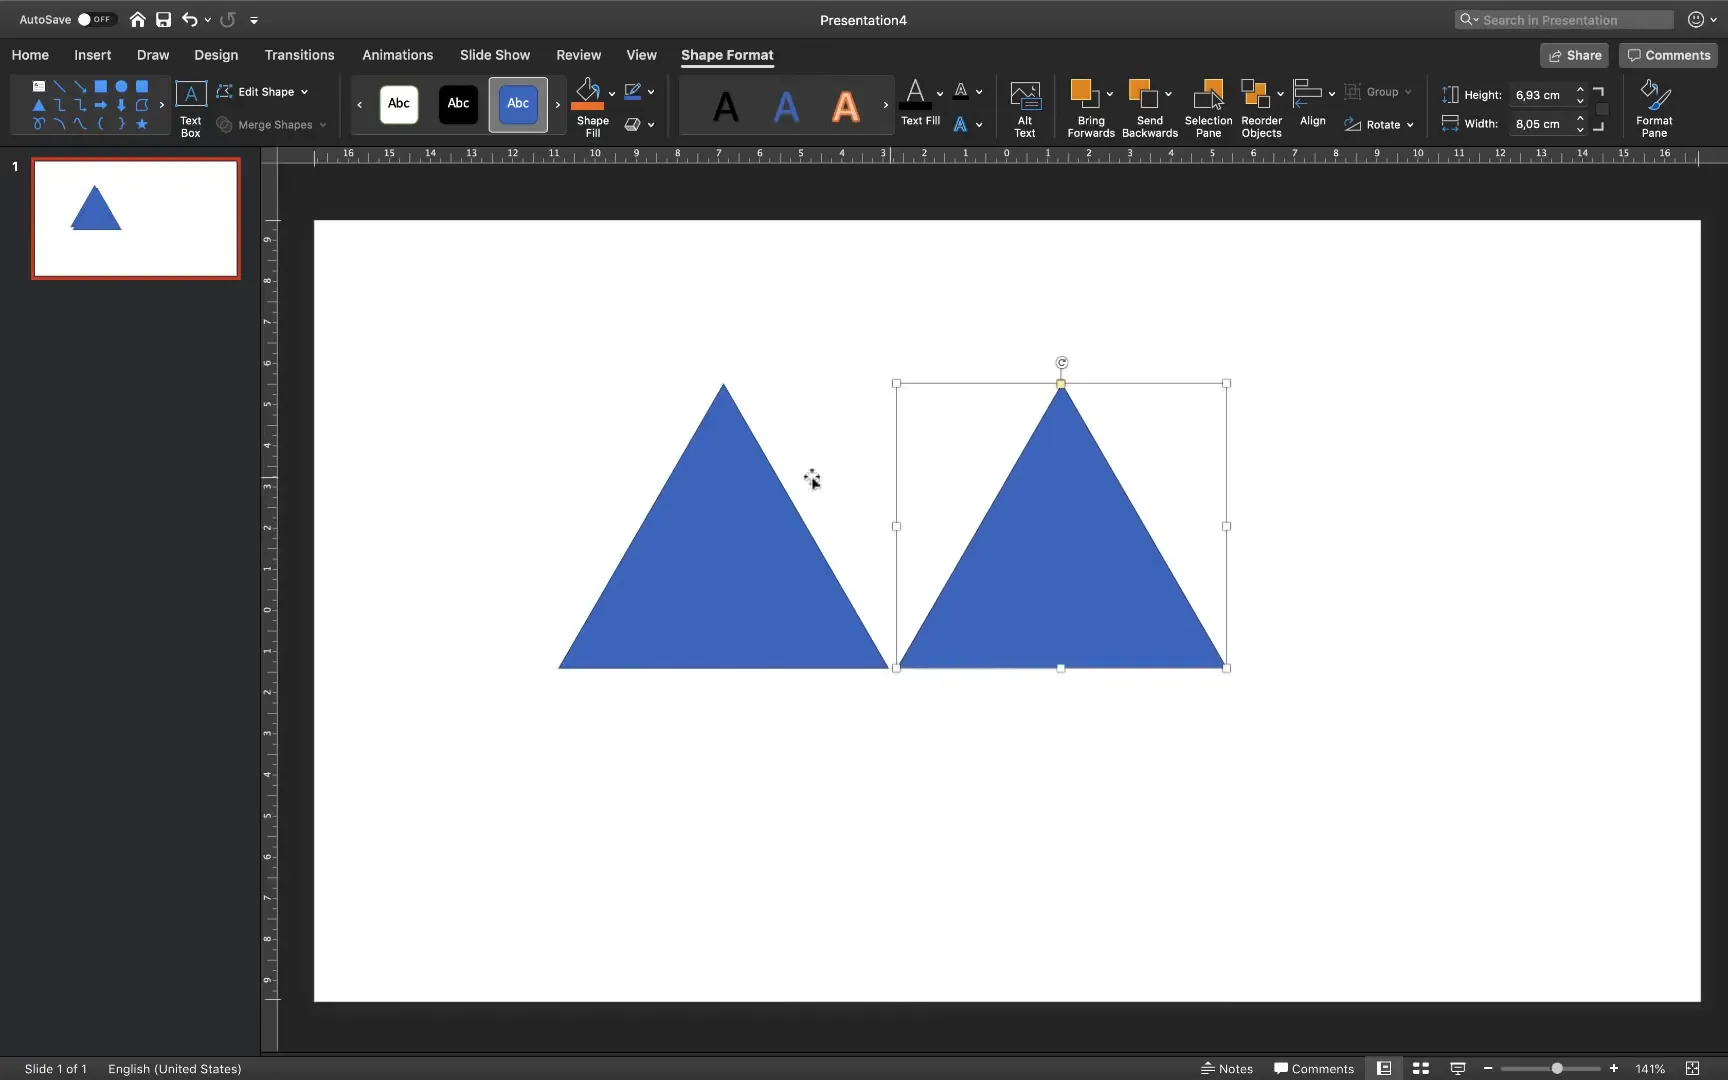
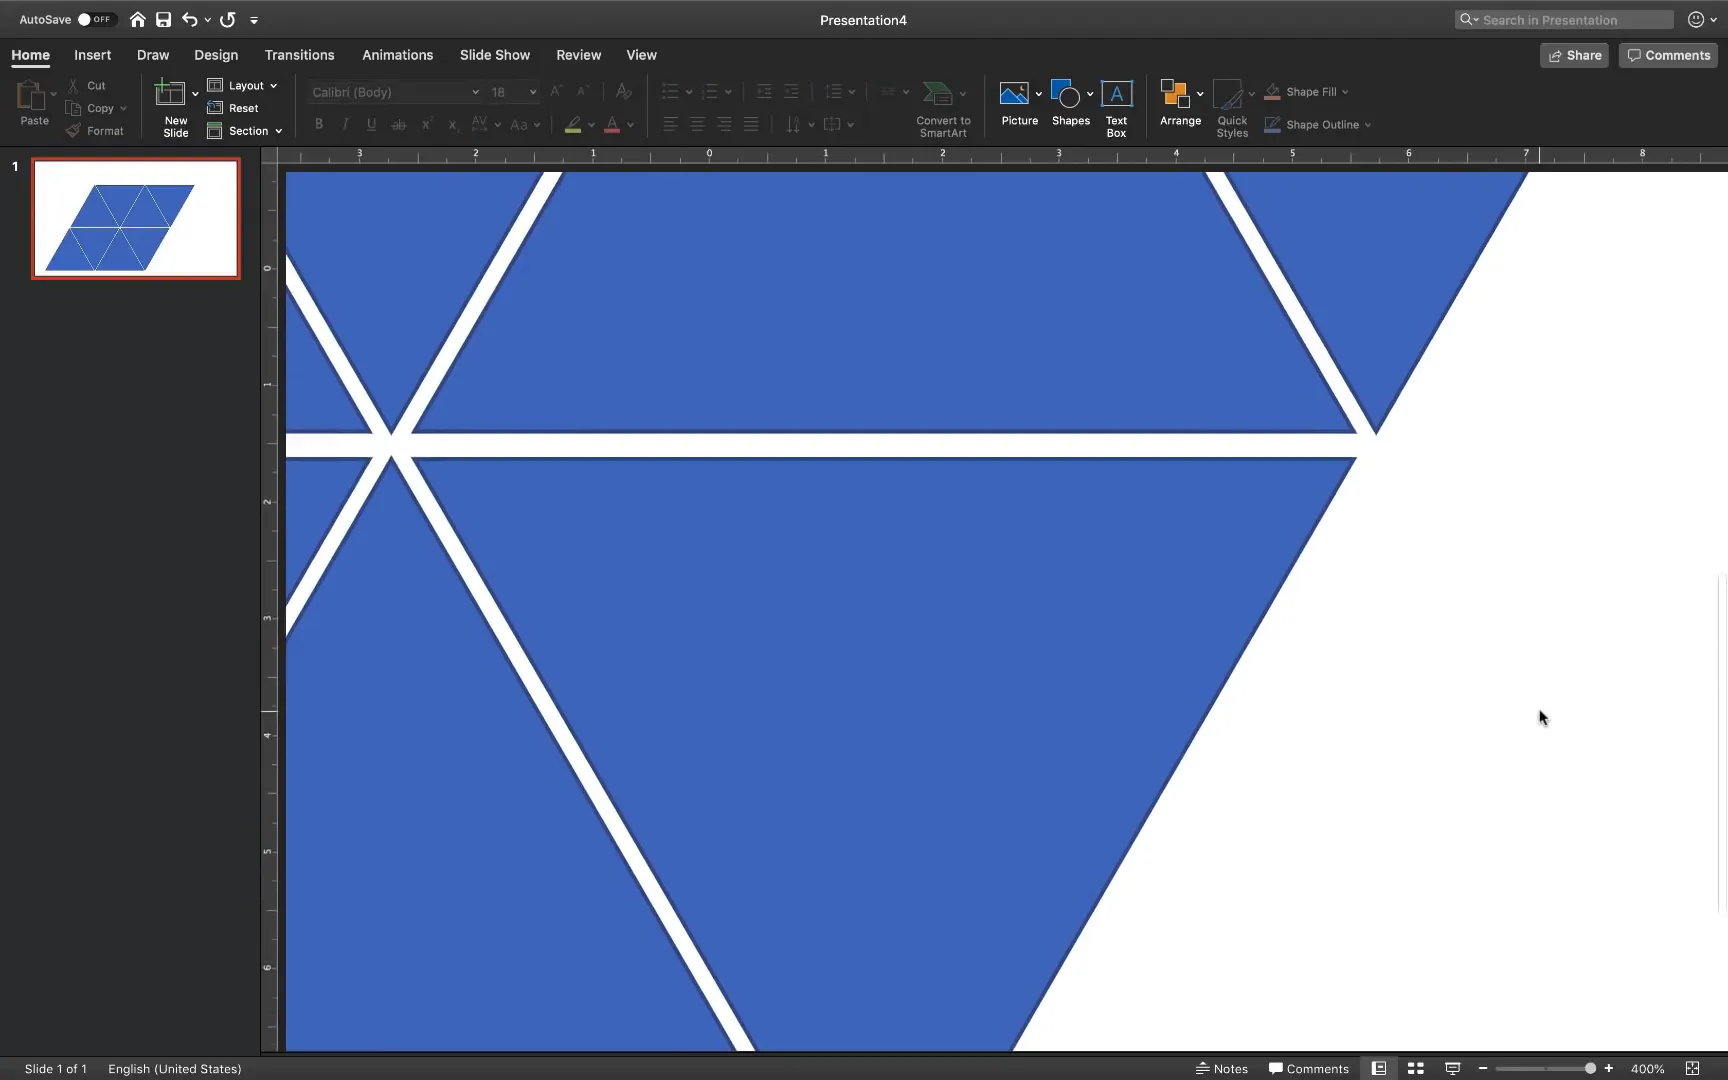
Step 1: Creating Triangles in PowerPoint
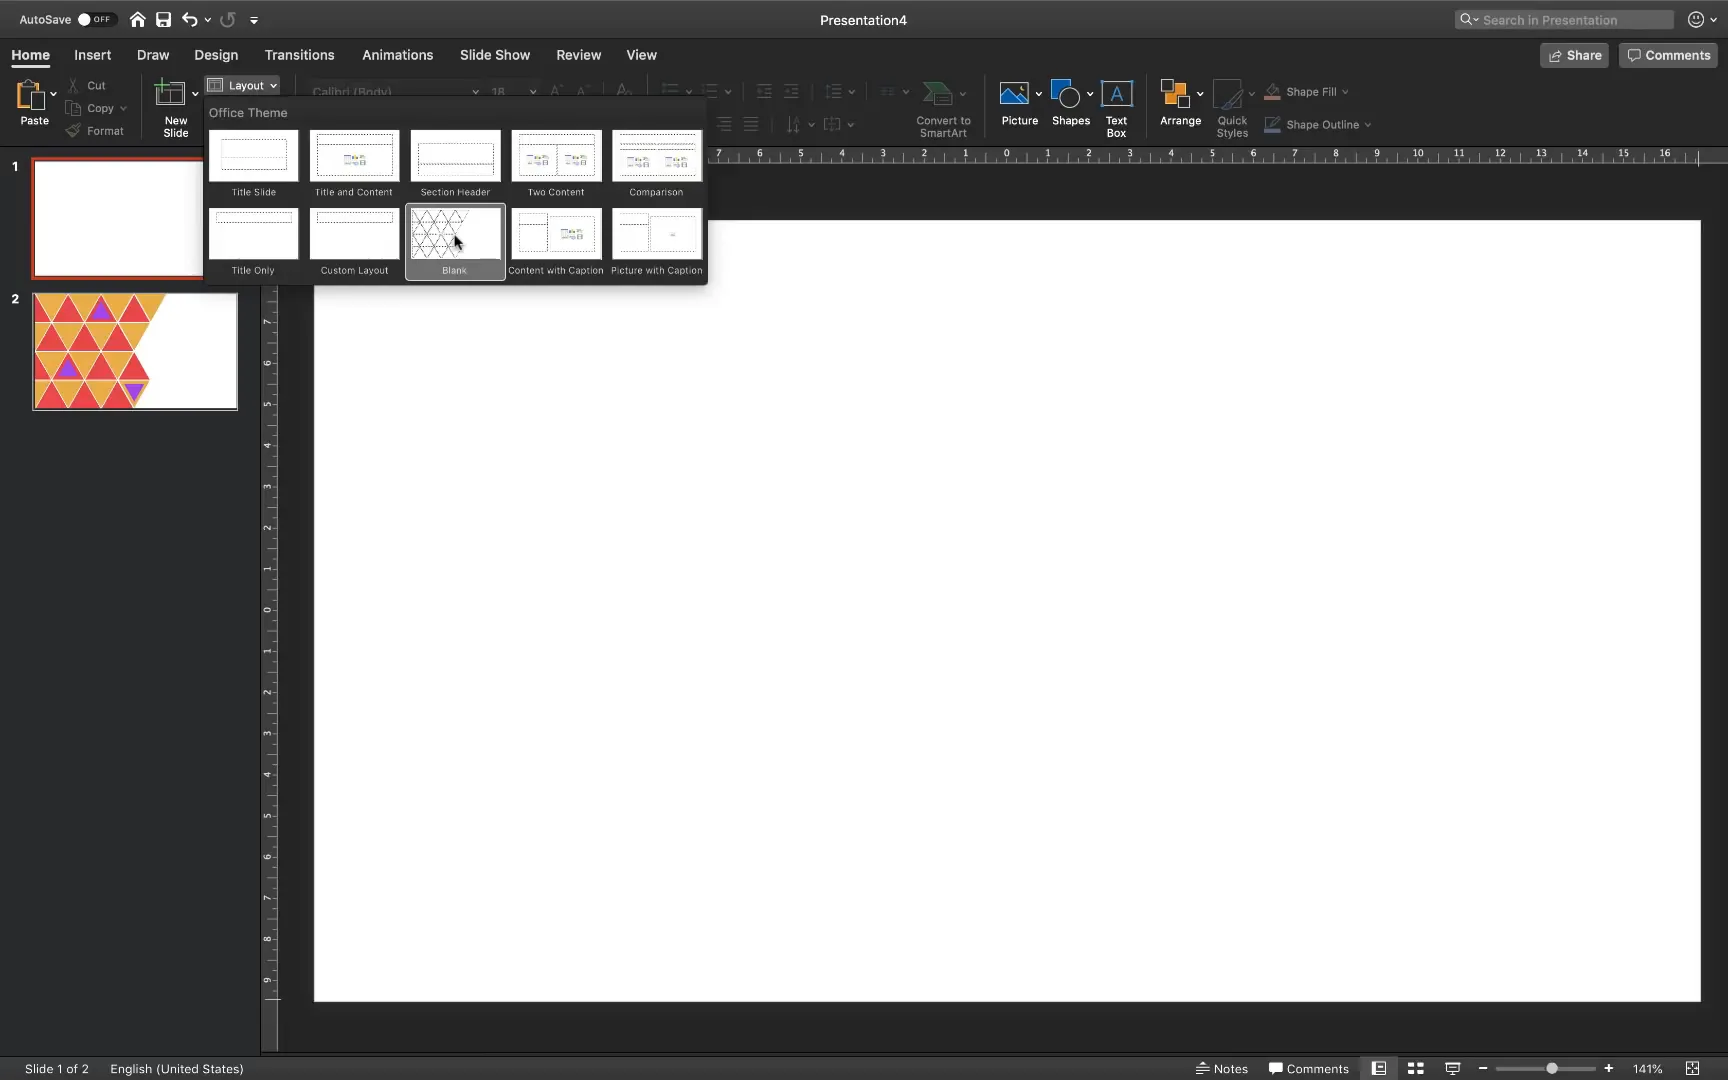
Start by opening a new blank PowerPoint presentation and setting the slide layout to blank for a clean workspace.
To create the triangles:
- Go to Insert > Shapes > Triangle.
- Hold down the Shift key while drawing to ensure a perfect equilateral triangle.
- Duplicate your triangle using Command + D (Mac) or Ctrl + D (Windows).
- Flip the duplicated triangle vertically (Shape Format > Rotate).
- Position the flipped triangle close to the first one, leaving a white gap between them.
- Duplicate and align additional triangles, using PowerPoint’s smart guides to help with positioning.
To ensure equal horizontal spacing, select all triangles, go to Arrange > Align > Distribute Horizontally. This guarantees that gaps are consistent across the row.
Step 2: The Challenge of Aligning Multiple Rows
Duplicating the first row to create the second row introduces alignment challenges. When you copy and move the row down, the horizontal lines of the triangles in the second row often don’t line up perfectly with the diagonal edges of the row above.
This misalignment can make the design look off-balance and unprofessional. While PowerPoint provides some alignment tools, it’s difficult to achieve perfect precision with complex shapes.
Step 3: Introducing Gravit Designer – A Free Vector Design Tool
To overcome PowerPoint’s limitations, I discovered Gravit Designer, a free vector graphic design program. It’s an excellent tool for creating precise shapes and complex designs that can be exported as SVG files and imported into PowerPoint.
Advantages of using Gravit Designer include:
- Precise control over shapes and positioning
- Ability to create and modify vector shapes
- Exporting designs as SVG files for seamless PowerPoint integration
- A free plan that is sufficient for most design needs
You can access Gravit Designer online at https://www.designer.io. Simply sign in with your Google or Facebook account, or create a free account.
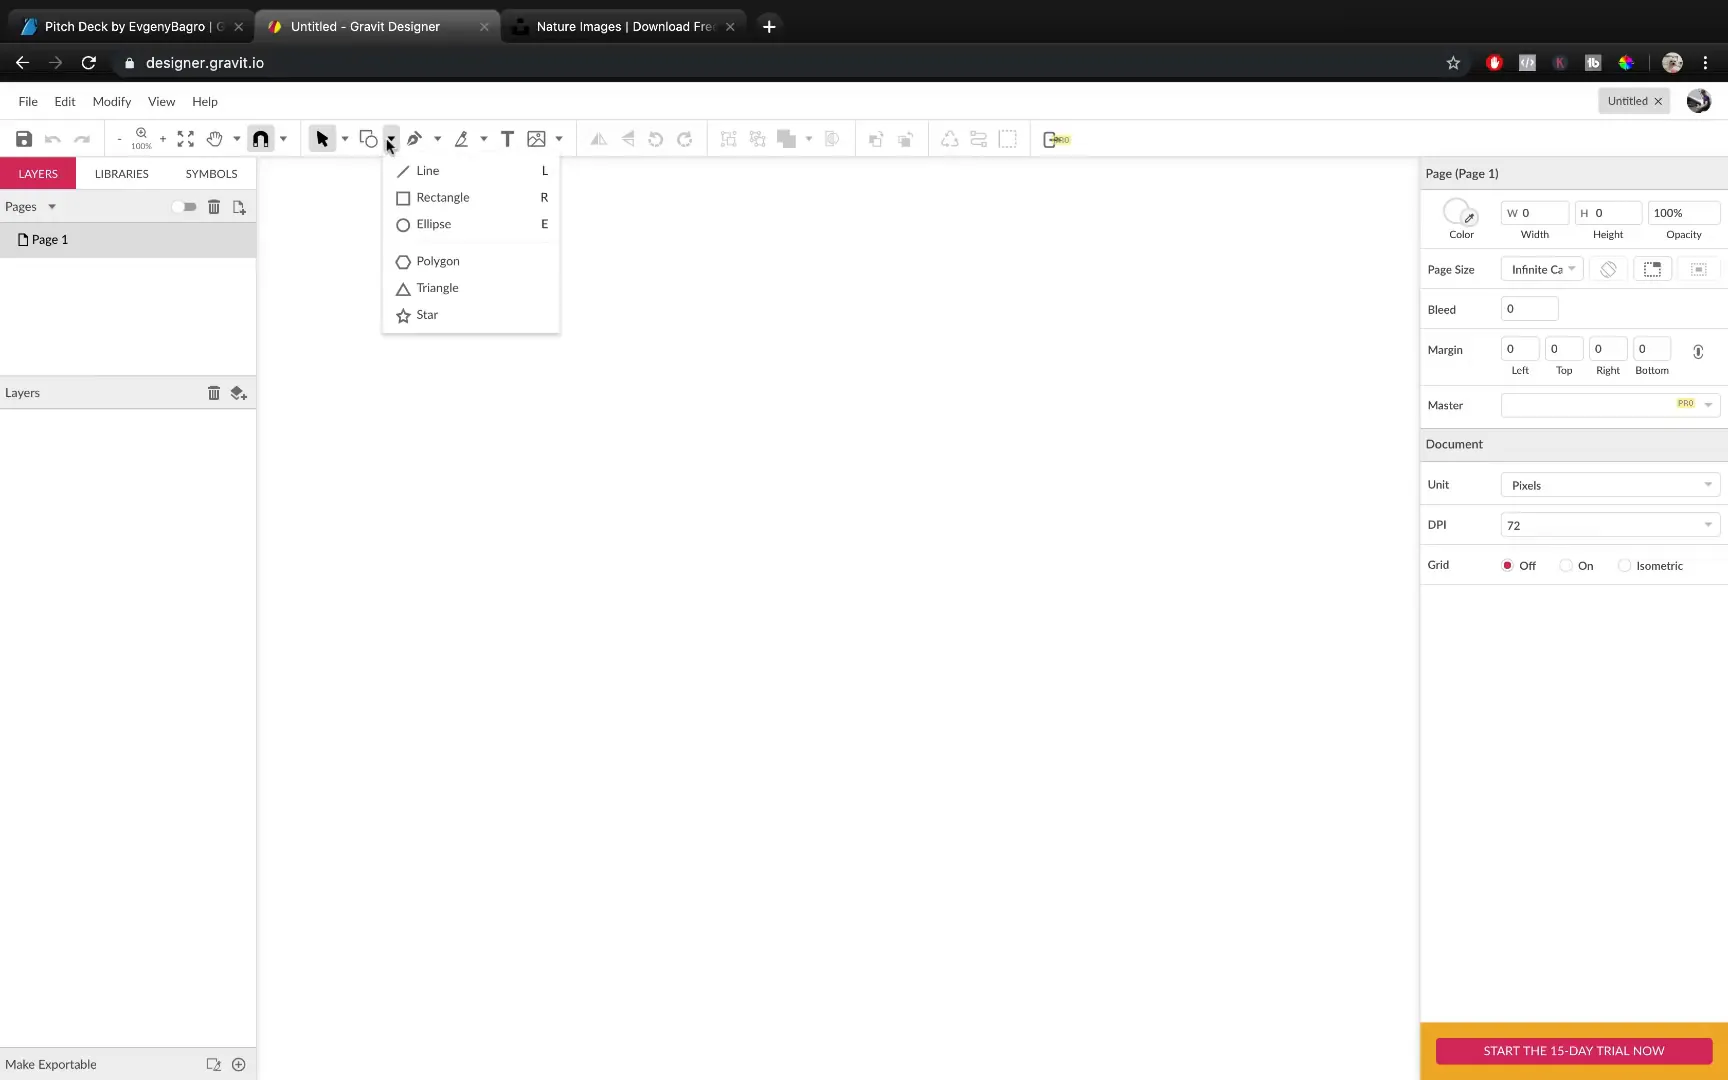
Step 4: Building the Triangle Rows in Gravit Designer
Once inside Gravit Designer:
- Use the Shape tool to draw a perfect triangle (hold Shift while drawing).
- Change its fill color to a visible color like red for easy differentiation.
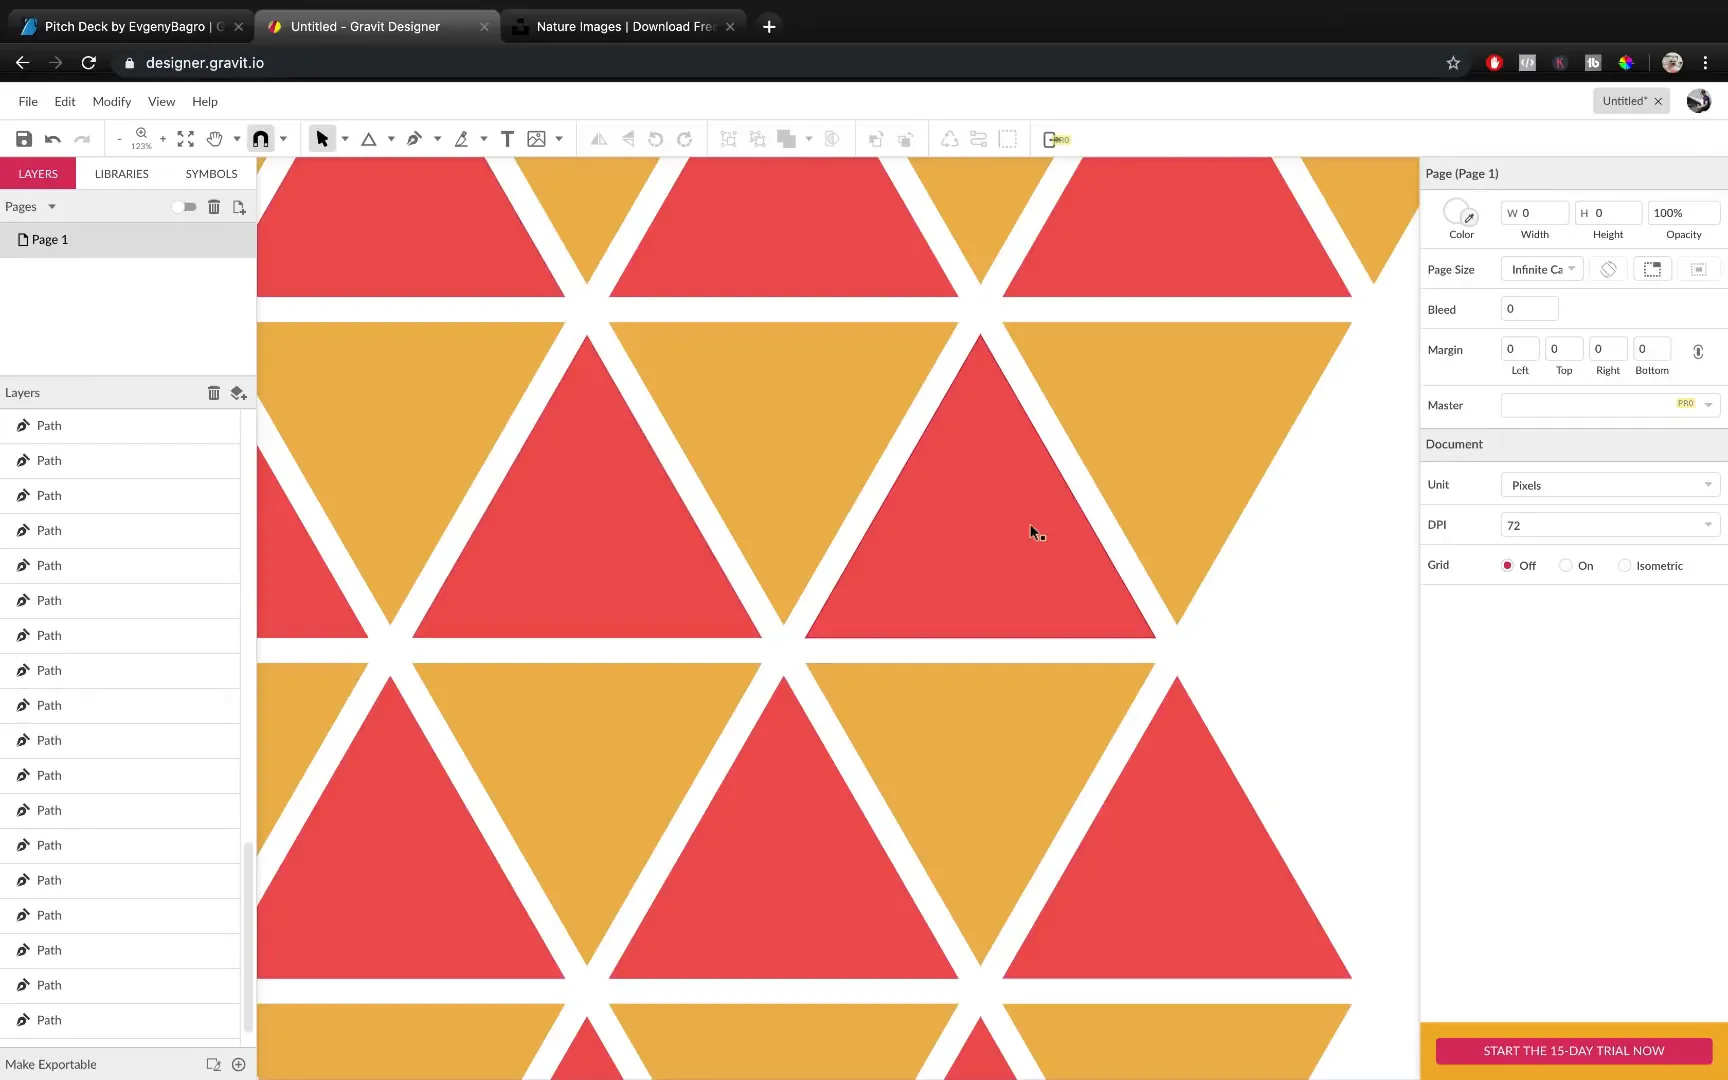
- Duplicate the triangle using Command + D or Ctrl + D, drag it precisely to the right holding Shift to constrain movement horizontally.
- Flip the duplicated triangle vertically to alternate the orientation.
- Repeat duplication and alignment to create the first row of eight triangles, ensuring each snaps perfectly to the previous one.
- Duplicate the entire row and move it downward to create the second row, then nudge it to the left for perfect overlap.
- Repeat for subsequent rows, creating a grid of triangles that perfectly aligns.
Unlike PowerPoint, Gravit Designer’s snapping and alignment features make this process smooth and precise.

Step 5: Creating the White Gaps Using Path Modification
At this stage, all triangles are touching each other without gaps. To create the signature white gaps:
- Select all triangles.
- Go to Modify Path > Expand and Shrink.
- Enter a negative value (e.g., -10) to shrink the shapes uniformly.
This action creates consistent white gaps between all triangles, preserving the overall pattern while adding breathing space.
If the gaps appear too large, undo and try smaller values like -5 for a more subtle effect.
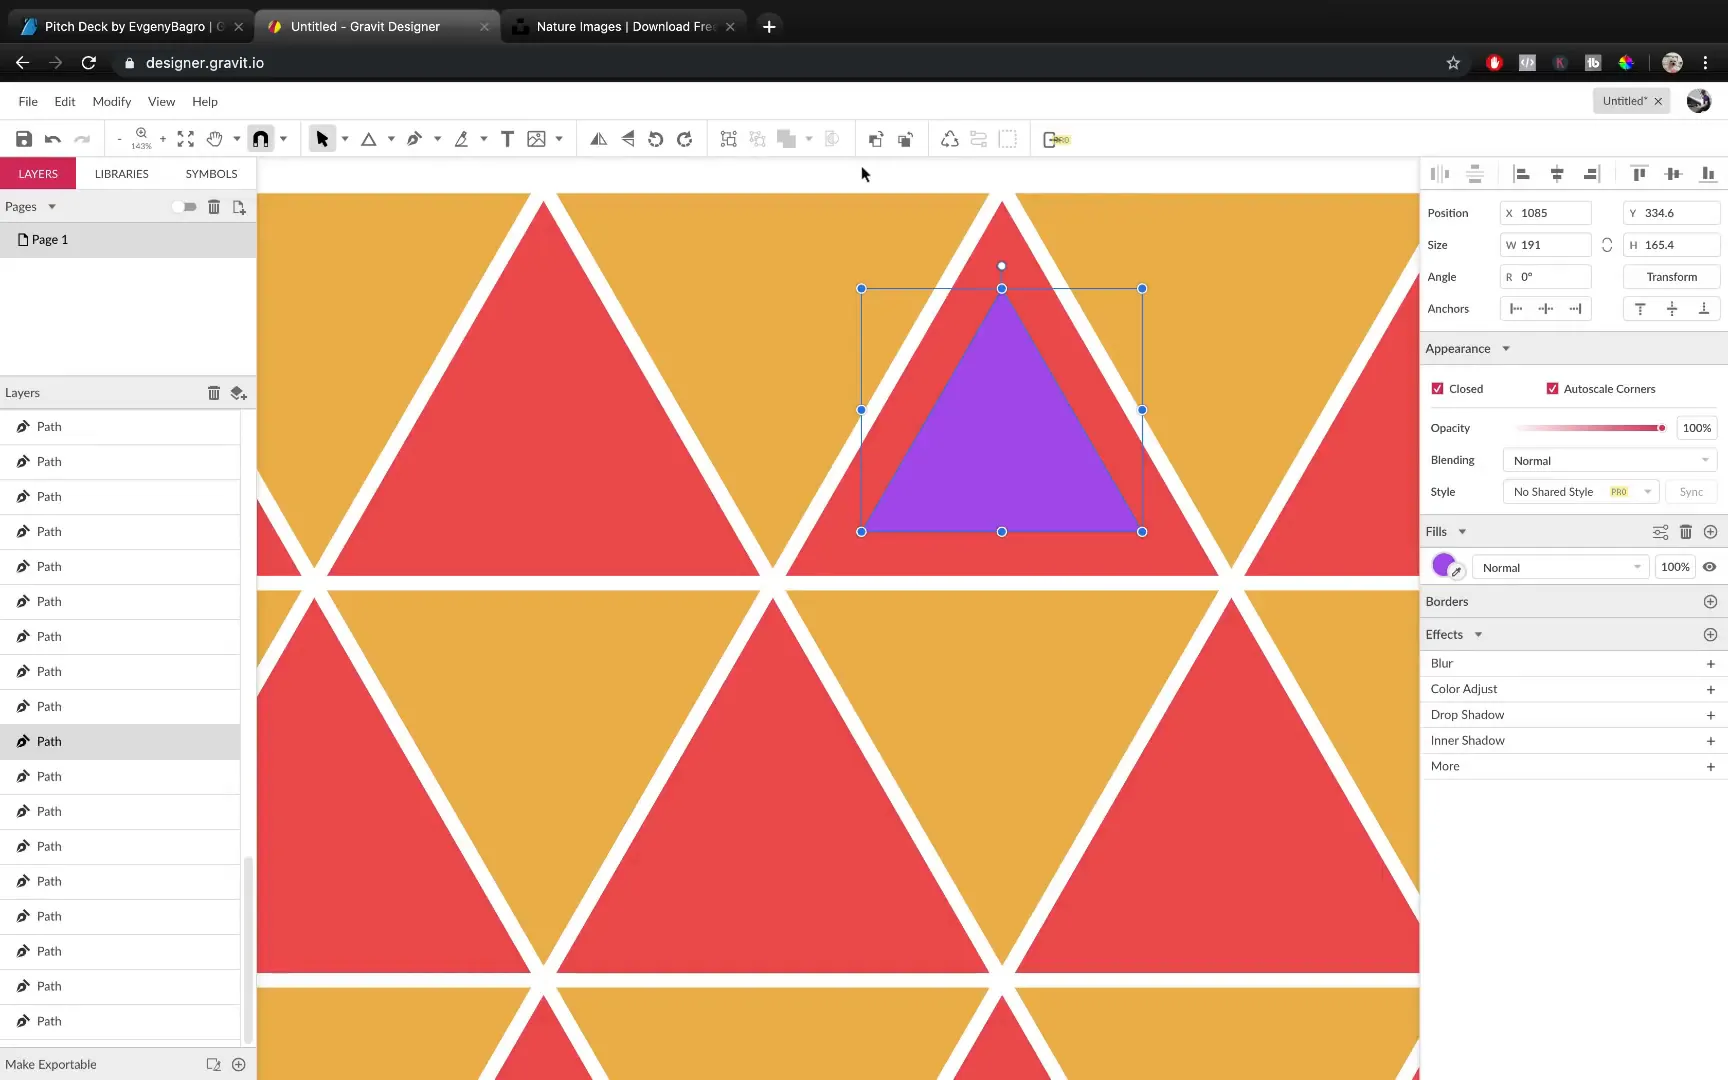
Step 6: Adding Inner Triangles for Detail
In the original design, some triangles contain smaller triangles inside them, adding visual interest.
To replicate this:
- Duplicate a triangle that needs an inner shape.
- Change its color to contrast with the outer triangle.
- Shrink the duplicate further by a larger negative value (e.g., -30) to create a smaller triangle nested inside.
- Repeat for each triangle that requires this detail.
This layering adds depth and complexity to the placeholder design.
Step 7: Exporting the Design as SVG and Importing into PowerPoint
After finishing the design in Gravit Designer:
- Export the entire artwork as an SVG file (Scalable Vector Graphic).
- Open your PowerPoint presentation.
- Go to Insert > Pictures > Picture from File and select the exported SVG file.
- Right-click the inserted SVG and choose Convert to Shape. This converts the vector image into editable PowerPoint shapes.
- You can now ungroup the shapes to edit individual triangles.
Step 8: Refining and Positioning in PowerPoint
Once imported:

- Group all triangles for easier handling.
- Duplicate the slide to keep a backup copy of your design.
- Move and align the placeholder on the slide, ensuring the central triangle aligns with the slide’s edge for balance.
- Ungroup the duplicate and remove smaller inner triangles if needed.
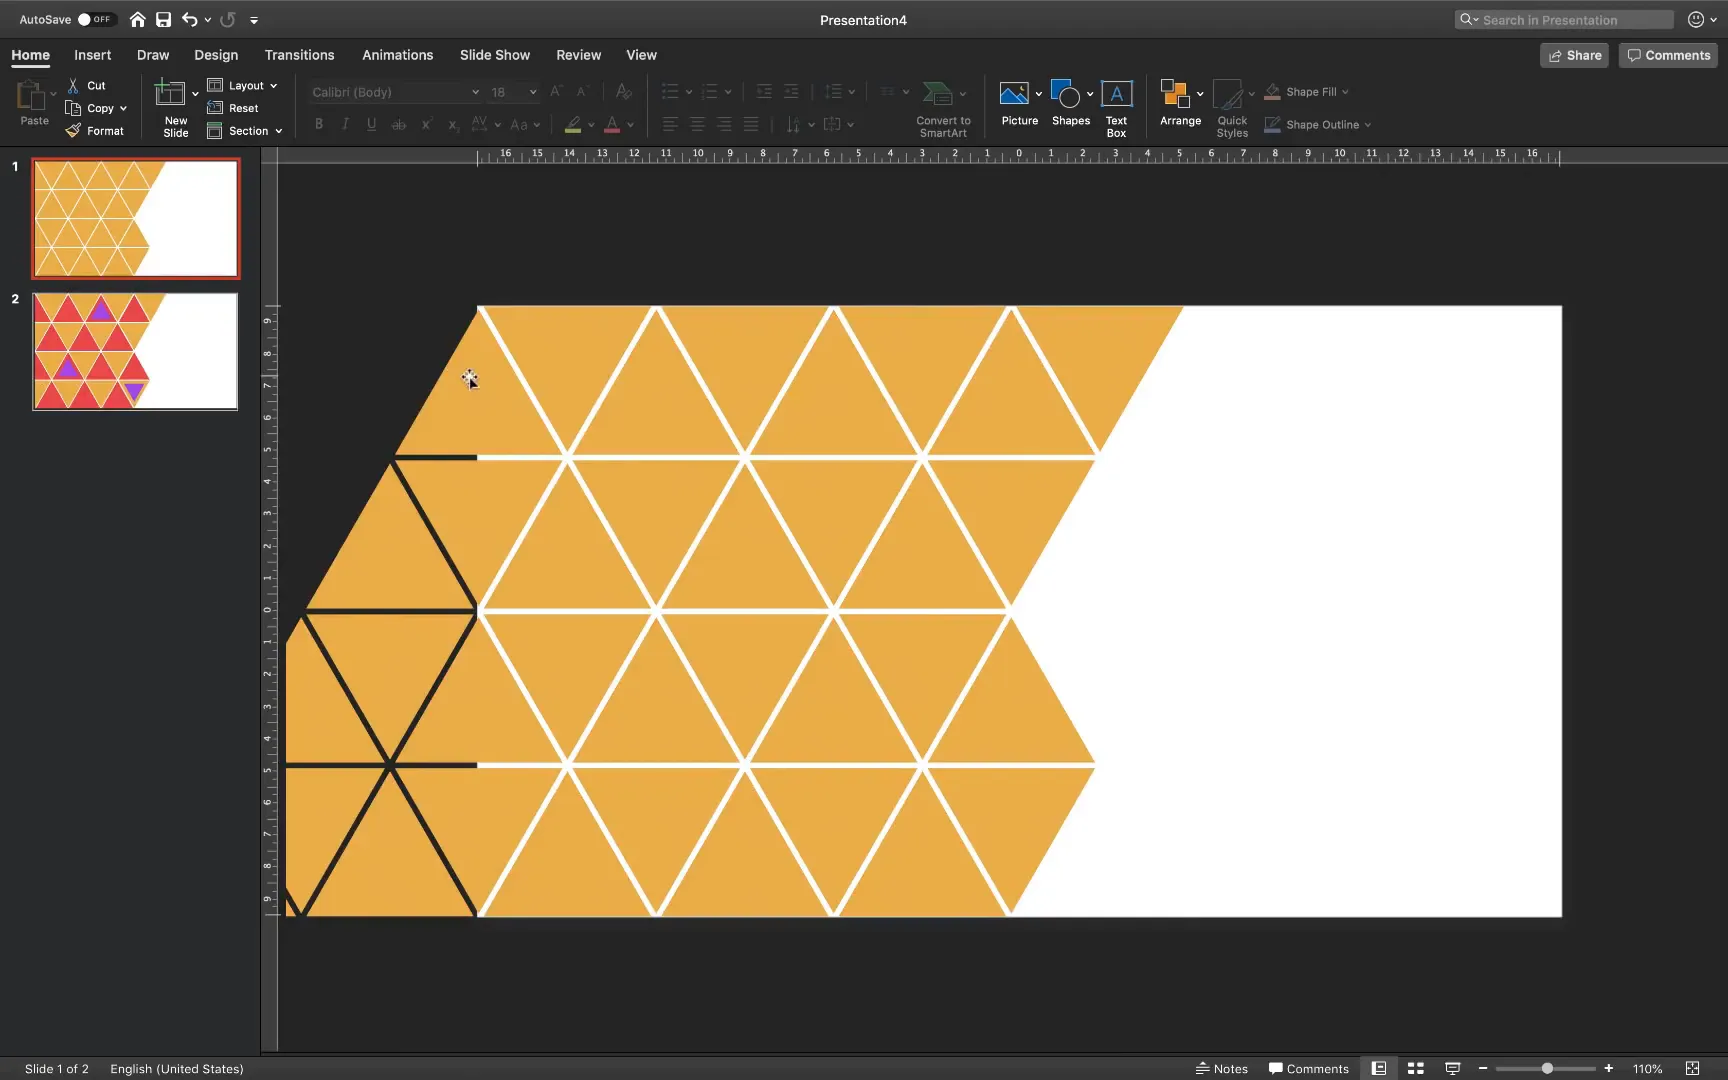
- Use Shape Format > Merge Shapes > Union to combine the triangles into a single shape.
- Insert a large rectangle shape overlapping part of the placeholder and use Merge Shapes > Subtract to trim the shape for a clean edge.
Step 9: Creating the Custom Picture Placeholder in Slide Master
To make this design reusable as a picture placeholder:
- Cut the final shape (Ctrl + X or Command + X).
- Go to View > Slide Master.
- Insert a new layout slide.
- Paste your shape onto the slide master.
- Insert a picture placeholder that covers the entire slide.
- Send the placeholder to the back so the shape is on top.
- Select both the shape and the placeholder, hold Shift, and choose Merge Shapes > Intersect.
This creates a custom-shaped picture placeholder that clips images to the triangle pattern.
Step 10: Using and Styling the Placeholder
Back in normal view:
- Apply your new custom layout to a slide.
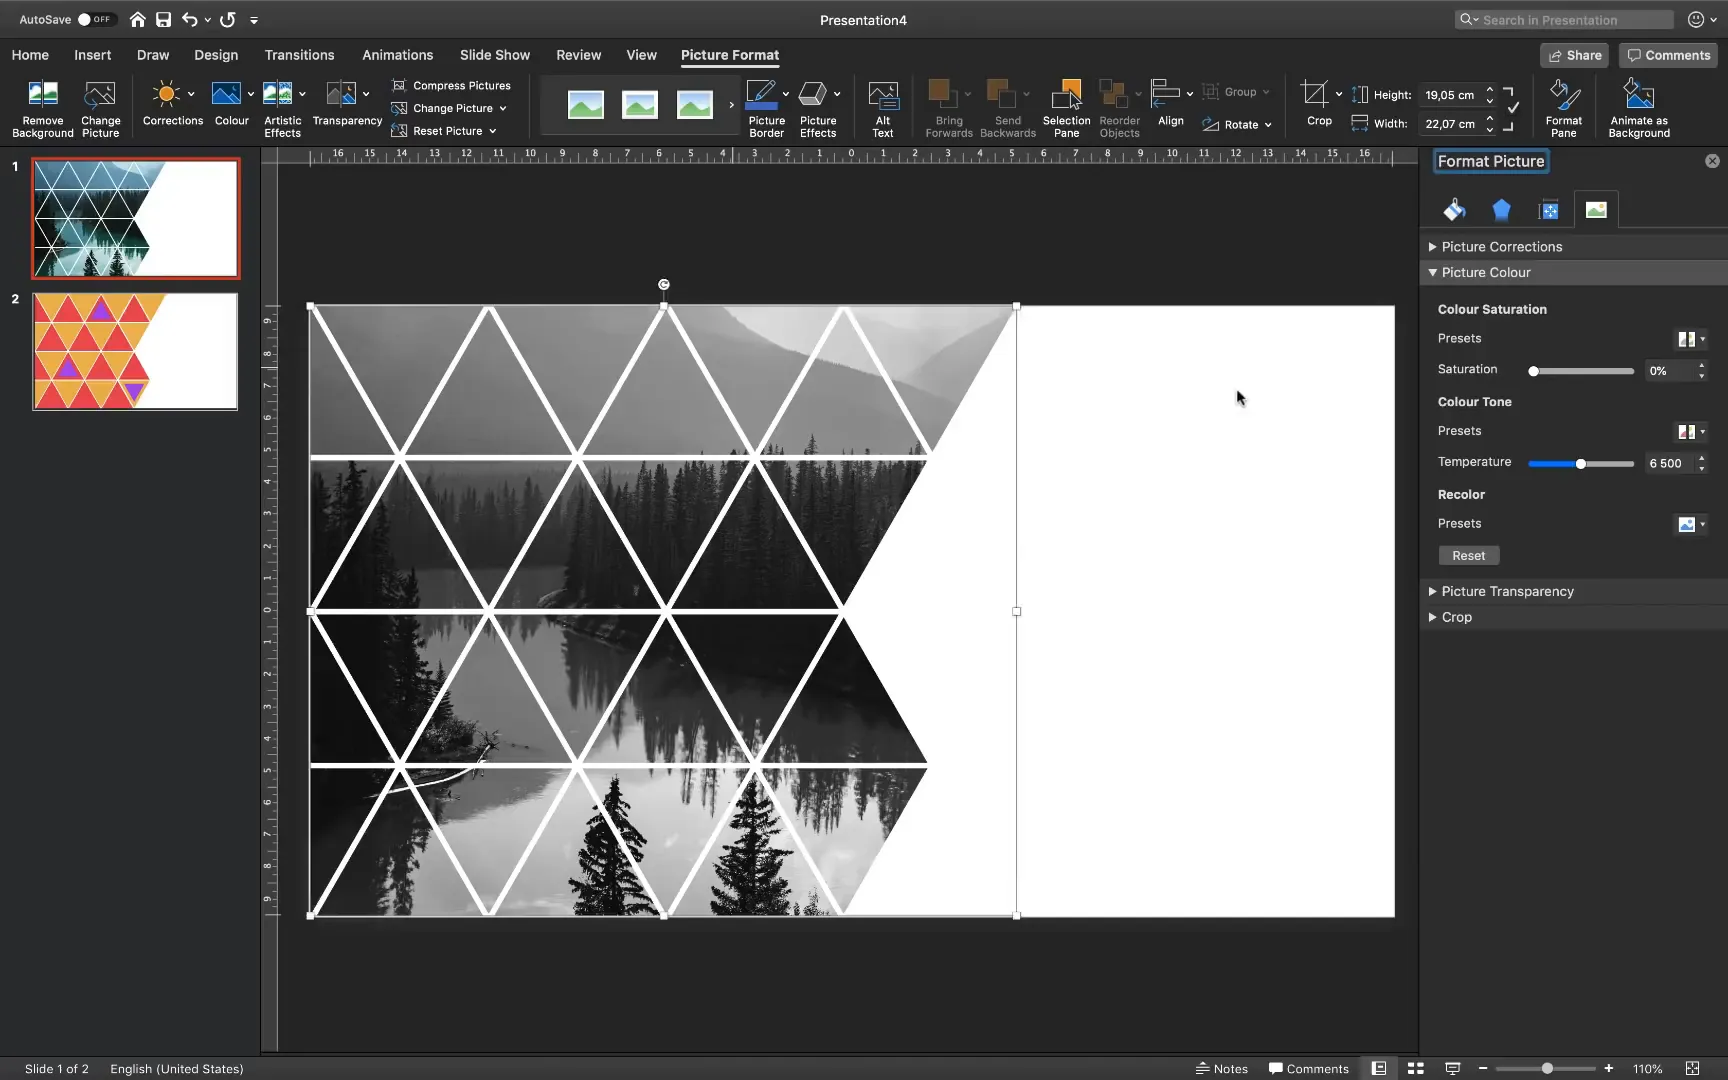
- Click the picture icon to insert any image.
- To match the original style, desaturate the image by setting saturation to zero (Picture Format > Color > Saturation 0%).
- Adjust brightness (+20%) and contrast (+10%) to make the image pop.
Step 11: Adding Colored Triangles with Transparency
To recreate the colored triangles with white inner triangles as in the original design:
- Ungroup the duplicate triangle set from earlier.
- Copy individual triangles and paste them onto the slide with the image placeholder.
- Use the Eyedropper tool to sample the exact green color from the original design.
- Set the fill transparency to about 20% to match the subtle overlay effect.
- Copy and position these colored triangles as accents on top of the image placeholder.
- Copy the white triangles and place them over the colored triangles to create the nested effect.
This layering adds dynamic color highlights while preserving the geometric theme.
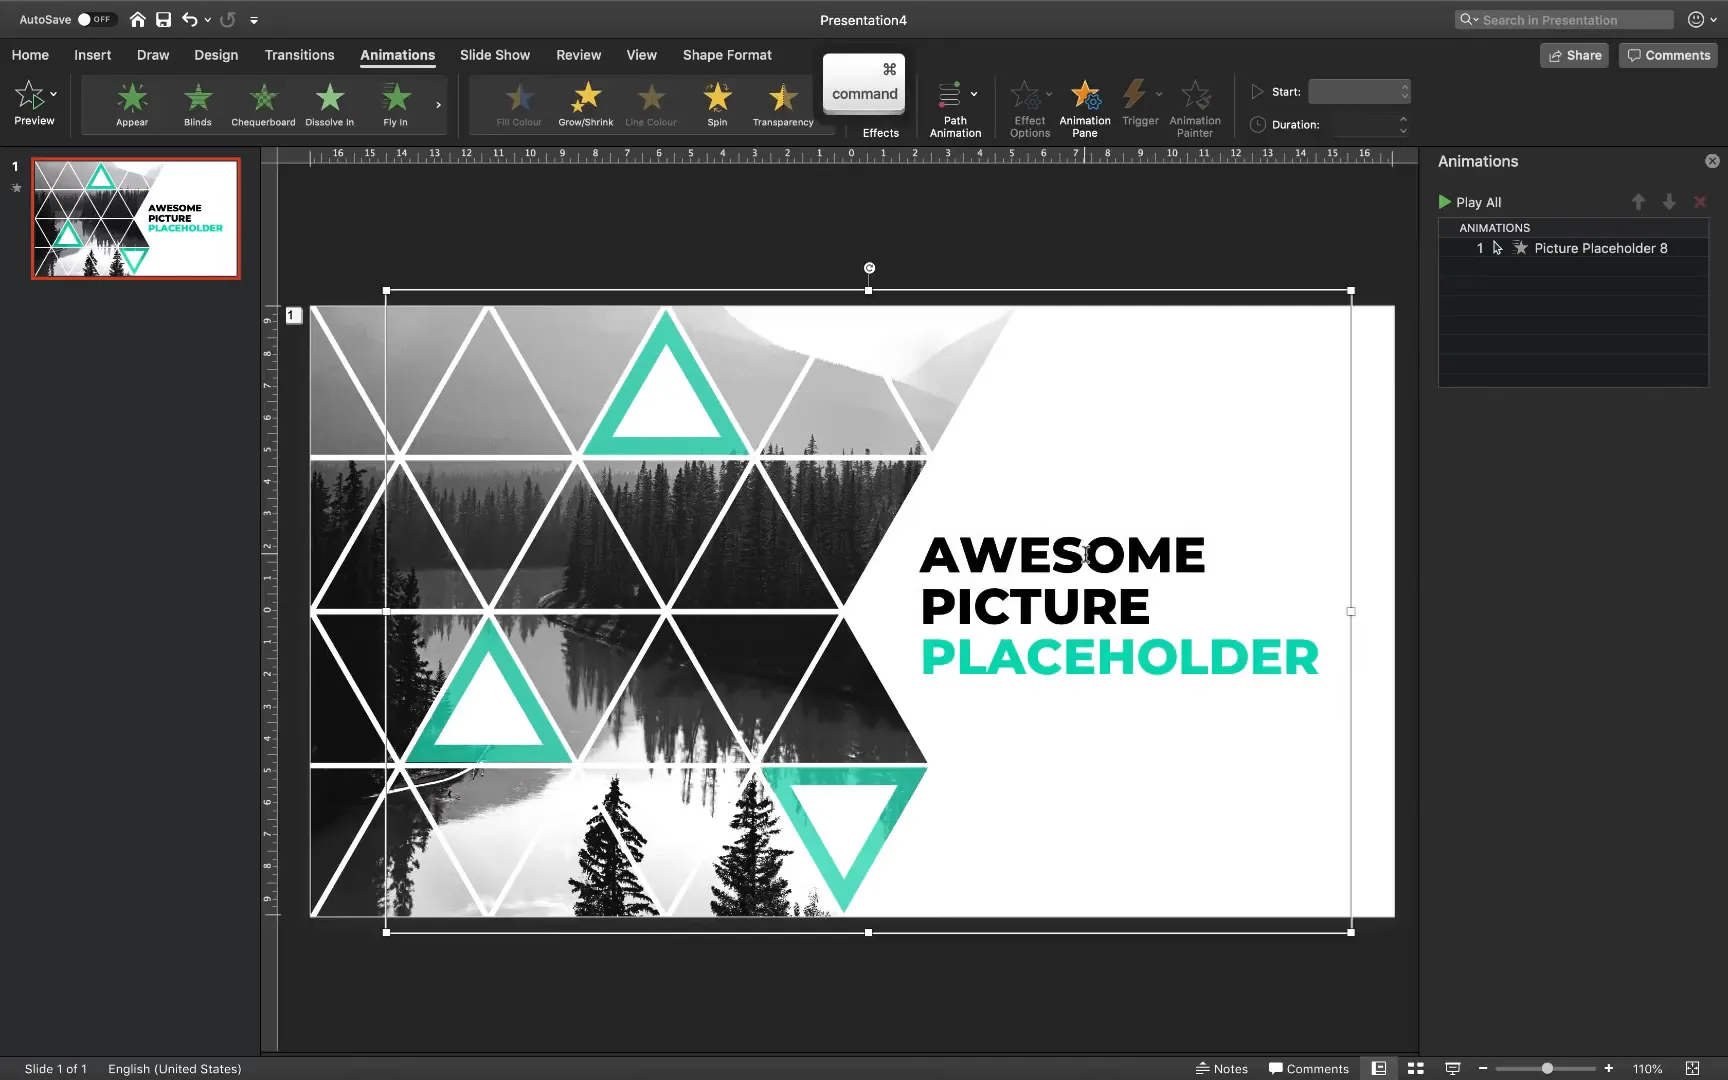
Step 12: Final Touches – Text and Animation
To complete the slide:
- Add text boxes with titles like “Awesome Picture Placeholder”.
- Use the Montserrat font family for a clean, modern look.
- Adjust font size and weight—extra bold works well for emphasis.
- Play with font color to match the green accents for brand consistency.
- Reduce line spacing for a tighter, professional appearance.
For added polish, apply entrance animations:
- Apply a Fly In animation from the left to the picture placeholder.
- Set the animation duration to 2 seconds with a smooth end.
- Group the text and colored triangles, apply a similar Fly In animation from the right, starting with the previous animation for a coordinated effect.
Tips and Insights on Using Gravit Designer with PowerPoint
Gravit Designer opens new avenues for PowerPoint users by enabling the creation of complex vector shapes that are difficult to achieve directly in PowerPoint. Here are some insights and tips for making the most of this workflow:
- Precision: Vector tools allow you to snap objects perfectly, ensuring professional alignment.
- Scalability: SVG graphics maintain quality regardless of resizing, preserving sharpness in presentations.
- Editability: Converting SVGs to PowerPoint shapes lets you customize fills, outlines, and grouping.
- Design Freedom: You can create intricate infographics, icons, and custom placeholders beyond simple geometric shapes.
- Free Plan Sufficiency: The free tier of Gravit Designer is powerful enough for most presentation design needs.
This combination of tools empowers you to elevate your presentations with unique, eye-catching visuals.
Conclusion: Elevate Your PowerPoint Presentations with Custom Placeholders
By following this comprehensive tutorial, you have learned how to design a custom picture placeholder that stands out from the typical rectangular or circular image crops. Using PowerPoint in tandem with Gravit Designer, you can create intricate, professional-looking shapes that enhance your presentation’s visual impact.
This process might seem lengthy at first, but the result is a highly customizable and reusable placeholder that can be adapted for any slide or theme. More importantly, this method introduces you to vector editing tools that can transform how you create graphics for PowerPoint.
Experiment with different shapes, colors, and layering techniques to develop your own unique placeholders and graphical elements. With practice, your presentations will not only convey information effectively but also impress your audience with their design sophistication.
Thank you for exploring this tutorial with me. I hope it inspires you to push the boundaries of PowerPoint design and create presentations that truly shine.
Frequently Asked Questions (FAQ)
1. Do I need to pay for Gravit Designer to follow this tutorial?
No, the free version of Gravit Designer is sufficient for creating and exporting SVG files needed for this tutorial. The free plan offers all the necessary vector editing tools.
2. Can I create custom placeholders directly in PowerPoint without Gravit Designer?
While you can create basic shapes and arrange them in PowerPoint, achieving perfect alignment and complex designs like the triangle grid with equal gaps is challenging. Gravit Designer provides precision and ease for such tasks.
3. What file format should I export from Gravit Designer to use in PowerPoint?
Export your design as an SVG (Scalable Vector Graphic) file. PowerPoint supports importing SVG files and converting them into editable shapes.
4. How do I convert an imported SVG into editable shapes in PowerPoint?
After inserting the SVG file, right-click on it and select Convert to Shape. This allows you to ungroup and edit individual elements.
5. Can I customize the colors and sizes of the placeholder after importing?
Yes. Once converted to shapes, you can change fill colors, outlines, sizes, and even add animations within PowerPoint.
6. Will this method work on all versions of PowerPoint?
This tutorial works best with PowerPoint 2016 and later versions that support SVG import and shape conversion. Older versions may have limited SVG support.
7. How can I ensure my image fits well within the custom placeholder?
Insert your image into the placeholder and adjust its size and position as needed. Use picture formatting options like cropping, brightness, contrast, and saturation to match the design style.
8. Can I create other shapes besides triangles using this method?
Absolutely! Gravit Designer allows you to create any vector shape, which you can export and use as custom placeholders or design elements in PowerPoint.
9. Is it possible to animate the custom placeholder and its elements?
Yes. After grouping elements in PowerPoint, you can apply entrance and exit animations to the placeholder and its components for dynamic presentations.
10. Where can I find more professional PowerPoint templates like the Pitch Deck?
You can explore GraphicRiver and other marketplaces for professionally designed PowerPoint templates, including the Pitch Deck by Yevgeny Bagram.
Check out the full video: PowerPoint Tutorial 🔥Awesome Picture Placeholder 🔥


