
If you’re looking to elevate your presentations with sleek and professional animations, mastering PowerPoint Animation is key. One animation effect that can instantly boost the visual appeal of your slides is the zoom animation. However, have you ever noticed how the default zoom animations in PowerPoint often end abruptly, making your transitions feel jarring and unpolished?
In this comprehensive guide, we’ll walk you through how to create a custom smooth zoom animation in PowerPoint by combining existing animation tools. This technique will help you achieve a seamless zoom effect with a soft, elegant finish that looks professional and engaging. Whether you want to animate logos, slide titles, or any shapes, this tutorial will empower you with the know-how to do it yourself.
Plus, we’ll share tips on how to save time using presets and how to apply these animations efficiently across your slides. Let’s dive in and master the art of smooth zoom animations in PowerPoint!
Table of Contents
- Understanding PowerPoint’s Built-In Zoom Animations
- Why Default Zoom Animations Fall Short
- Creating a Smooth Zoom Animation: Step-by-Step
- Applying the Smooth Zoom Animation Across Your Slides
- Tips to Master PowerPoint Animation
- Frequently Asked Questions
- Conclusion
Understanding PowerPoint’s Built-In Zoom Animations
PowerPoint offers two main zoom animations to introduce text or shapes onto your slides:
- Zoom Animation: This animation combines a fade-in effect followed by a zoom-in. It creates a gradual appearance effect before the object enlarges.
- Basic Zoom Animation: This is a straightforward zoom-in effect without any fading. The object simply scales up in size.
Here’s how these animations typically look:
- The Zoom Animation starts with a fade-in, then zooms in.
- The Basic Zoom Animation immediately zooms in without fading.
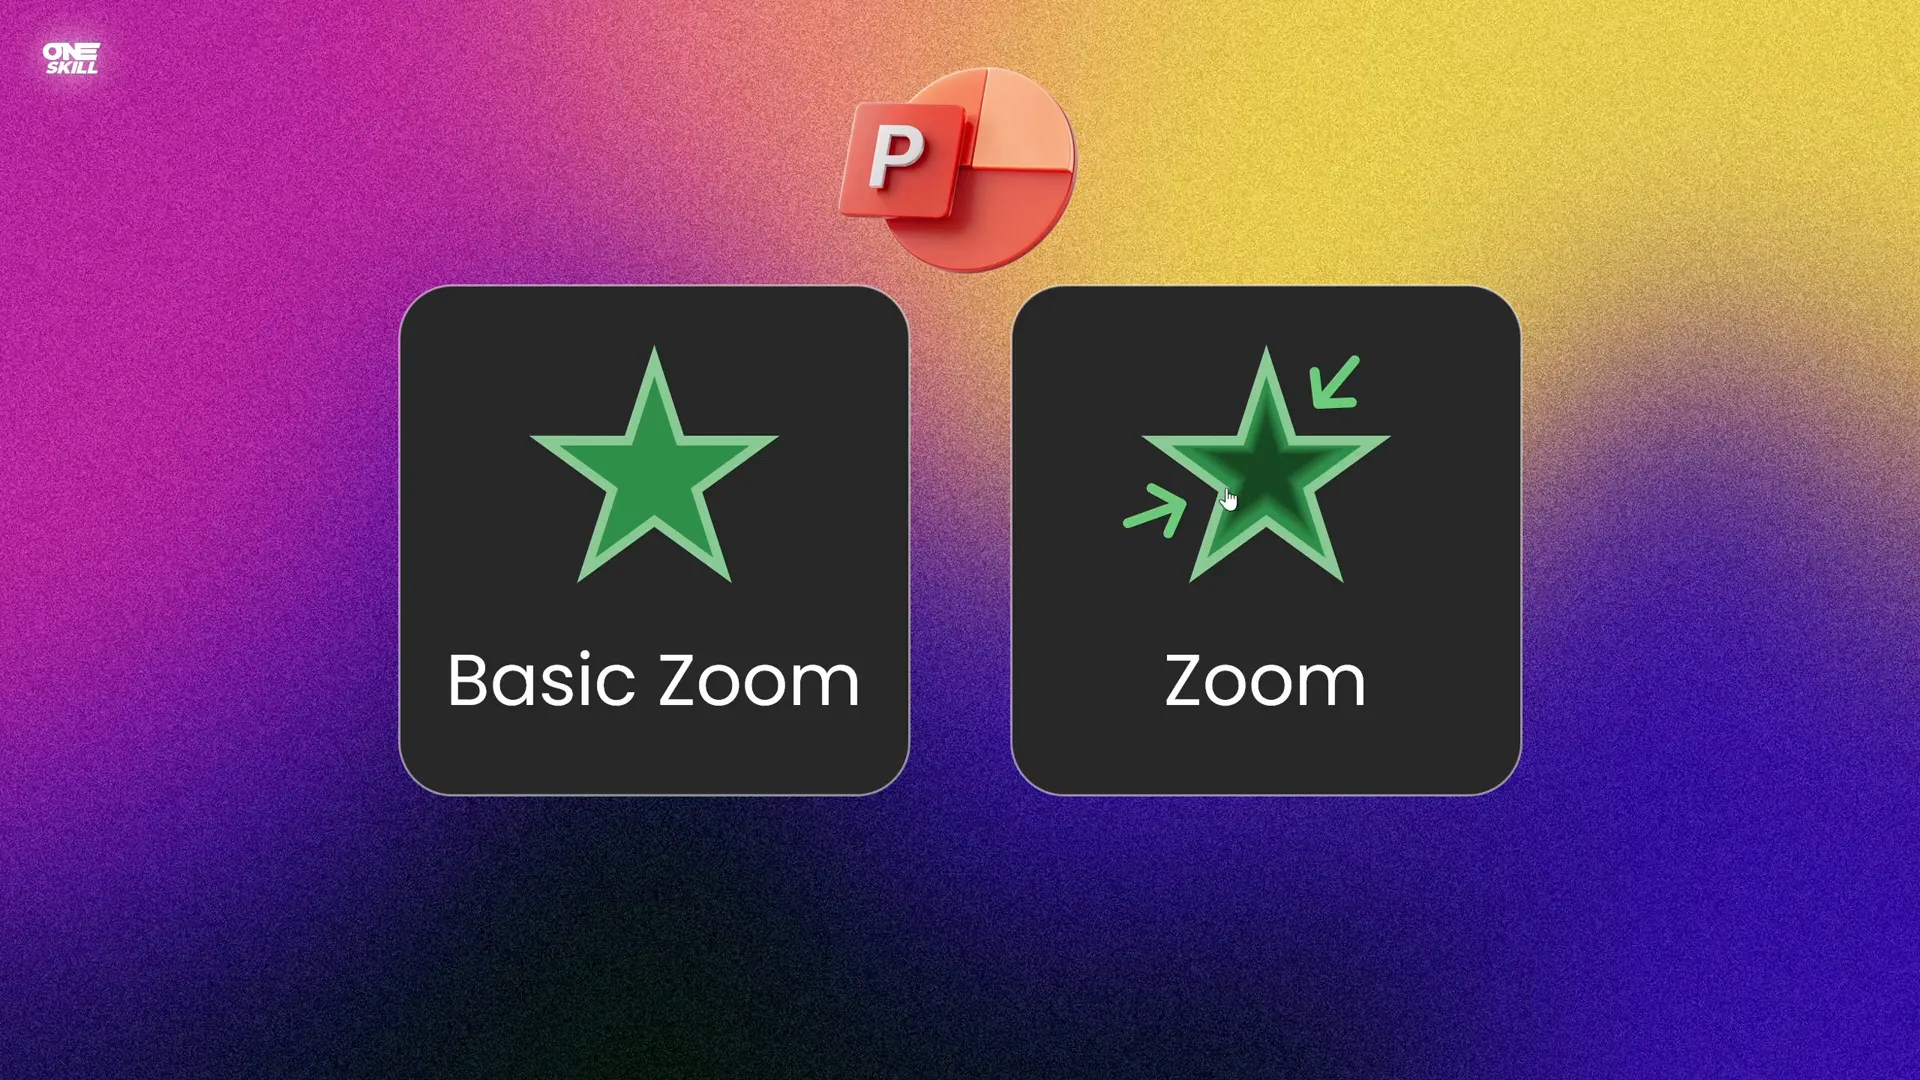
While both animations are visually appealing, they share a common issue — they end rather abruptly, which can be visually jarring.
Why Default Zoom Animations Fall Short
When you apply the default zoom animations in PowerPoint, you’ll notice a “hard landing” effect as the animation finishes. The zoom effect suddenly stops, which can be distracting to your audience and detracts from a polished presentation experience.

This abrupt ending can make your animations feel rushed and unnatural. Ideally, you want your animations to have a smooth end that gently eases the object into its final size, creating a more professional and visually pleasing effect.
Unfortunately, PowerPoint’s built-in zoom animations do not offer a direct option to add a smooth ending.
Creating a Smooth Zoom Animation: Step-by-Step
Good news! You can create your own smooth zoom animation by cleverly combining several existing PowerPoint animations that include a smooth end option. Here’s how:
Step 1: Understand Which Animations Support Smooth End
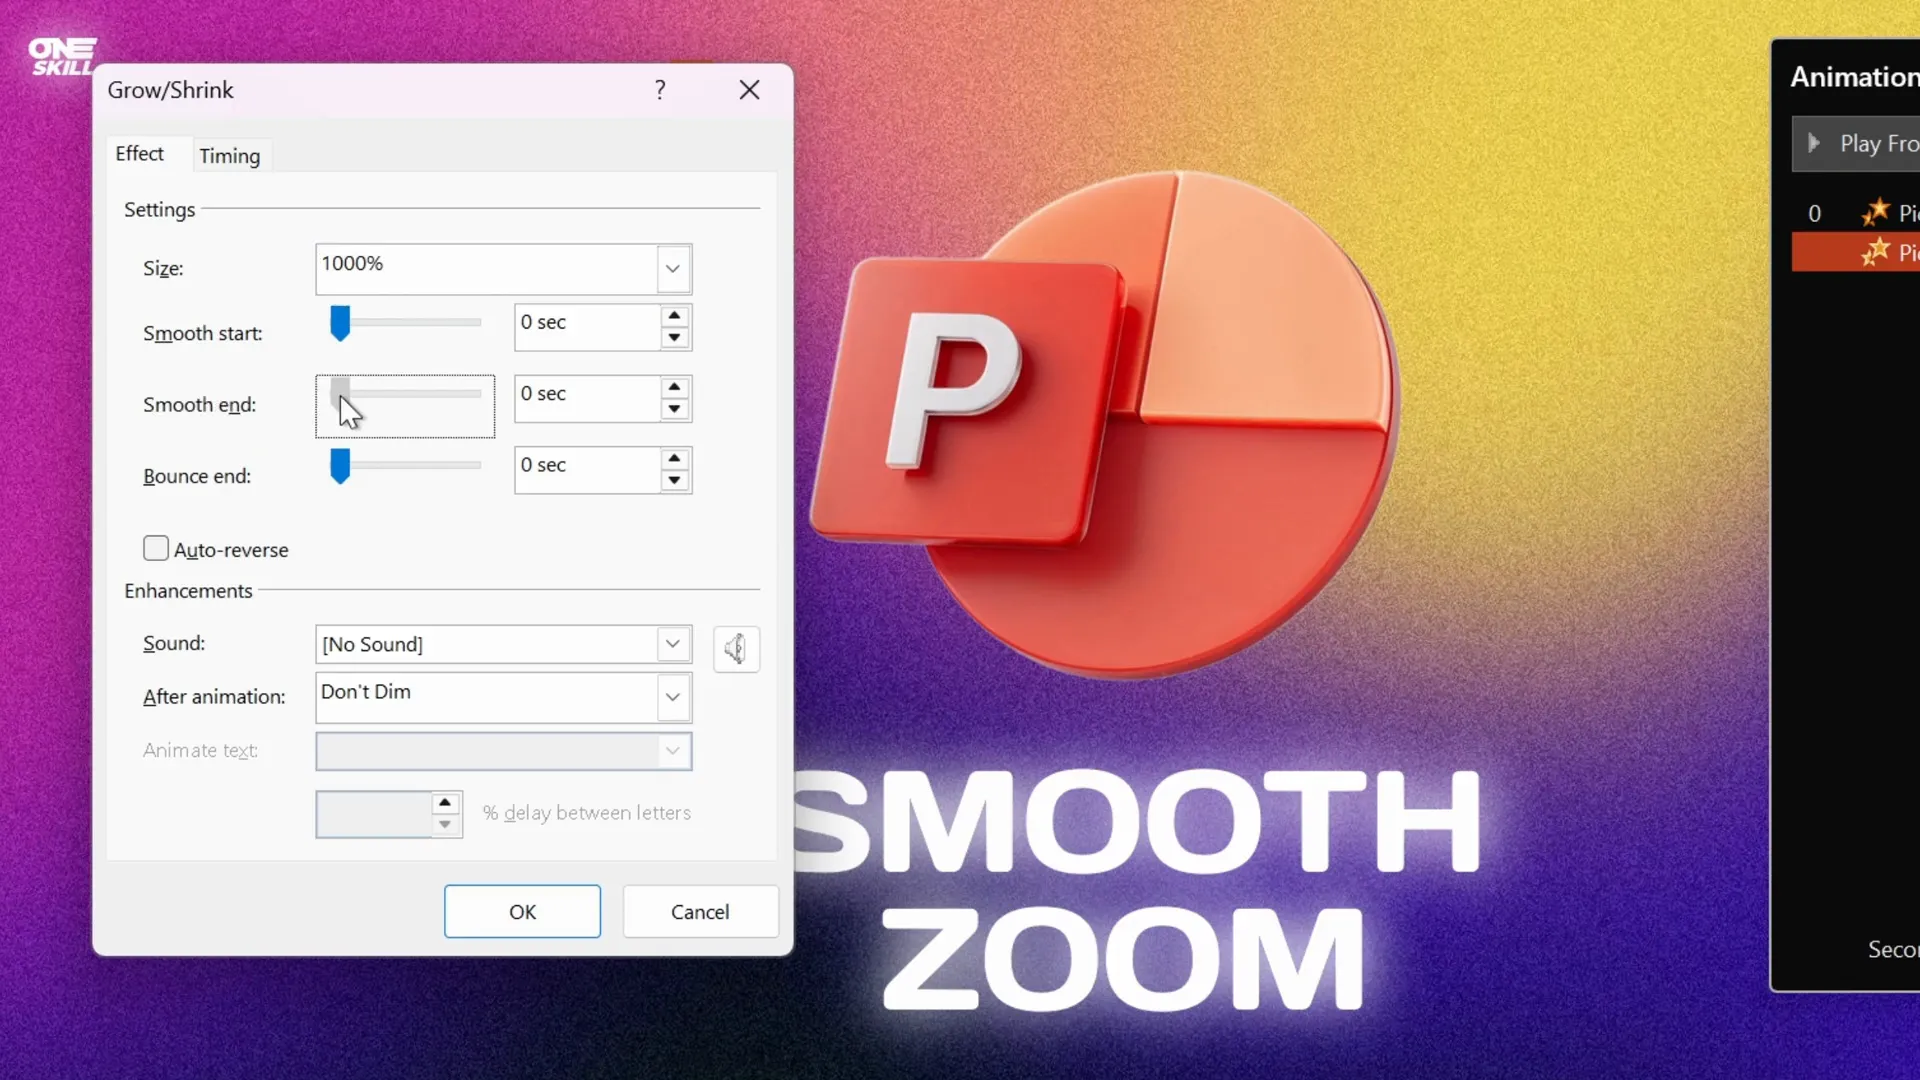
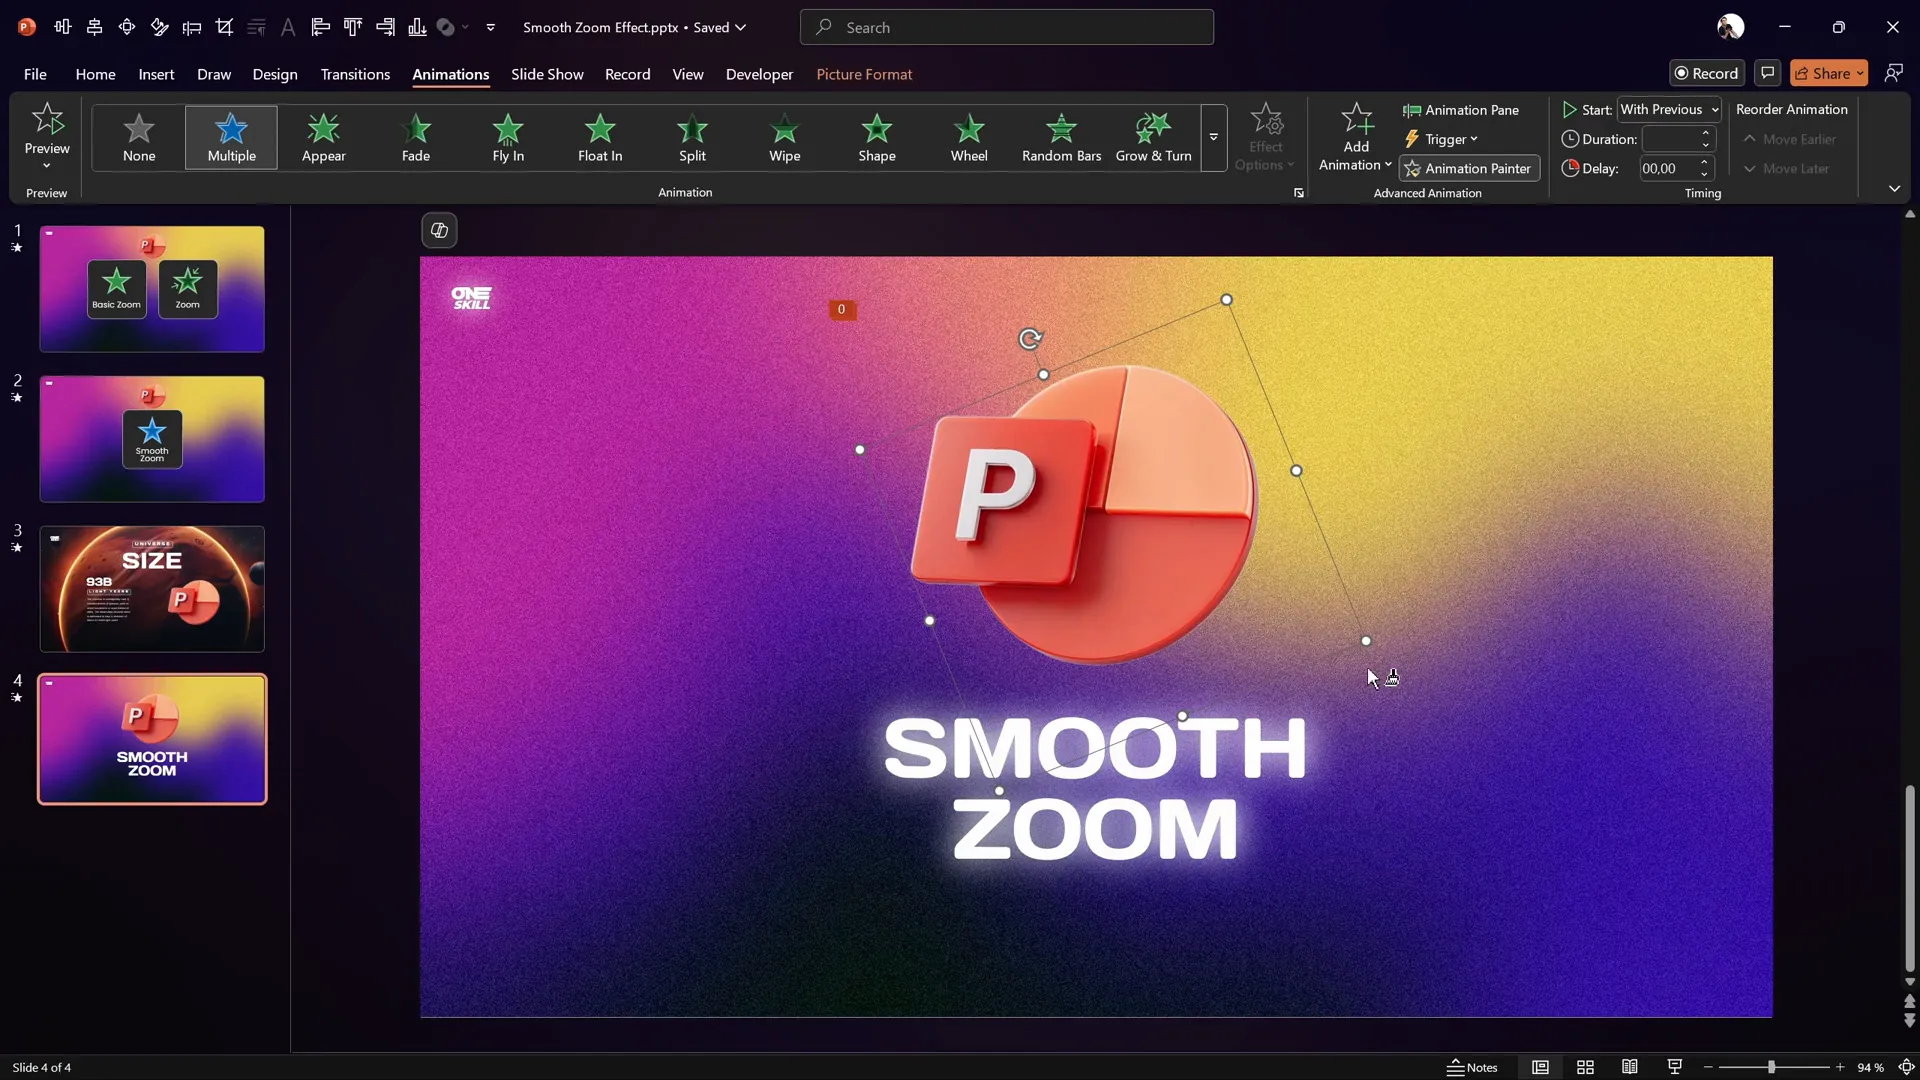
Animations like Fly In, Spin, and Grow/Shrink come with a smooth end slider that allows you to control how gently the animation finishes. For this tutorial, we’ll focus on the Grow/Shrink animation because it perfectly suits zoom effects.
Step 2: Set Up Your Slide and Select Your Object
Choose the object you want to animate — it could be a logo, a title, or any shape on your slide.
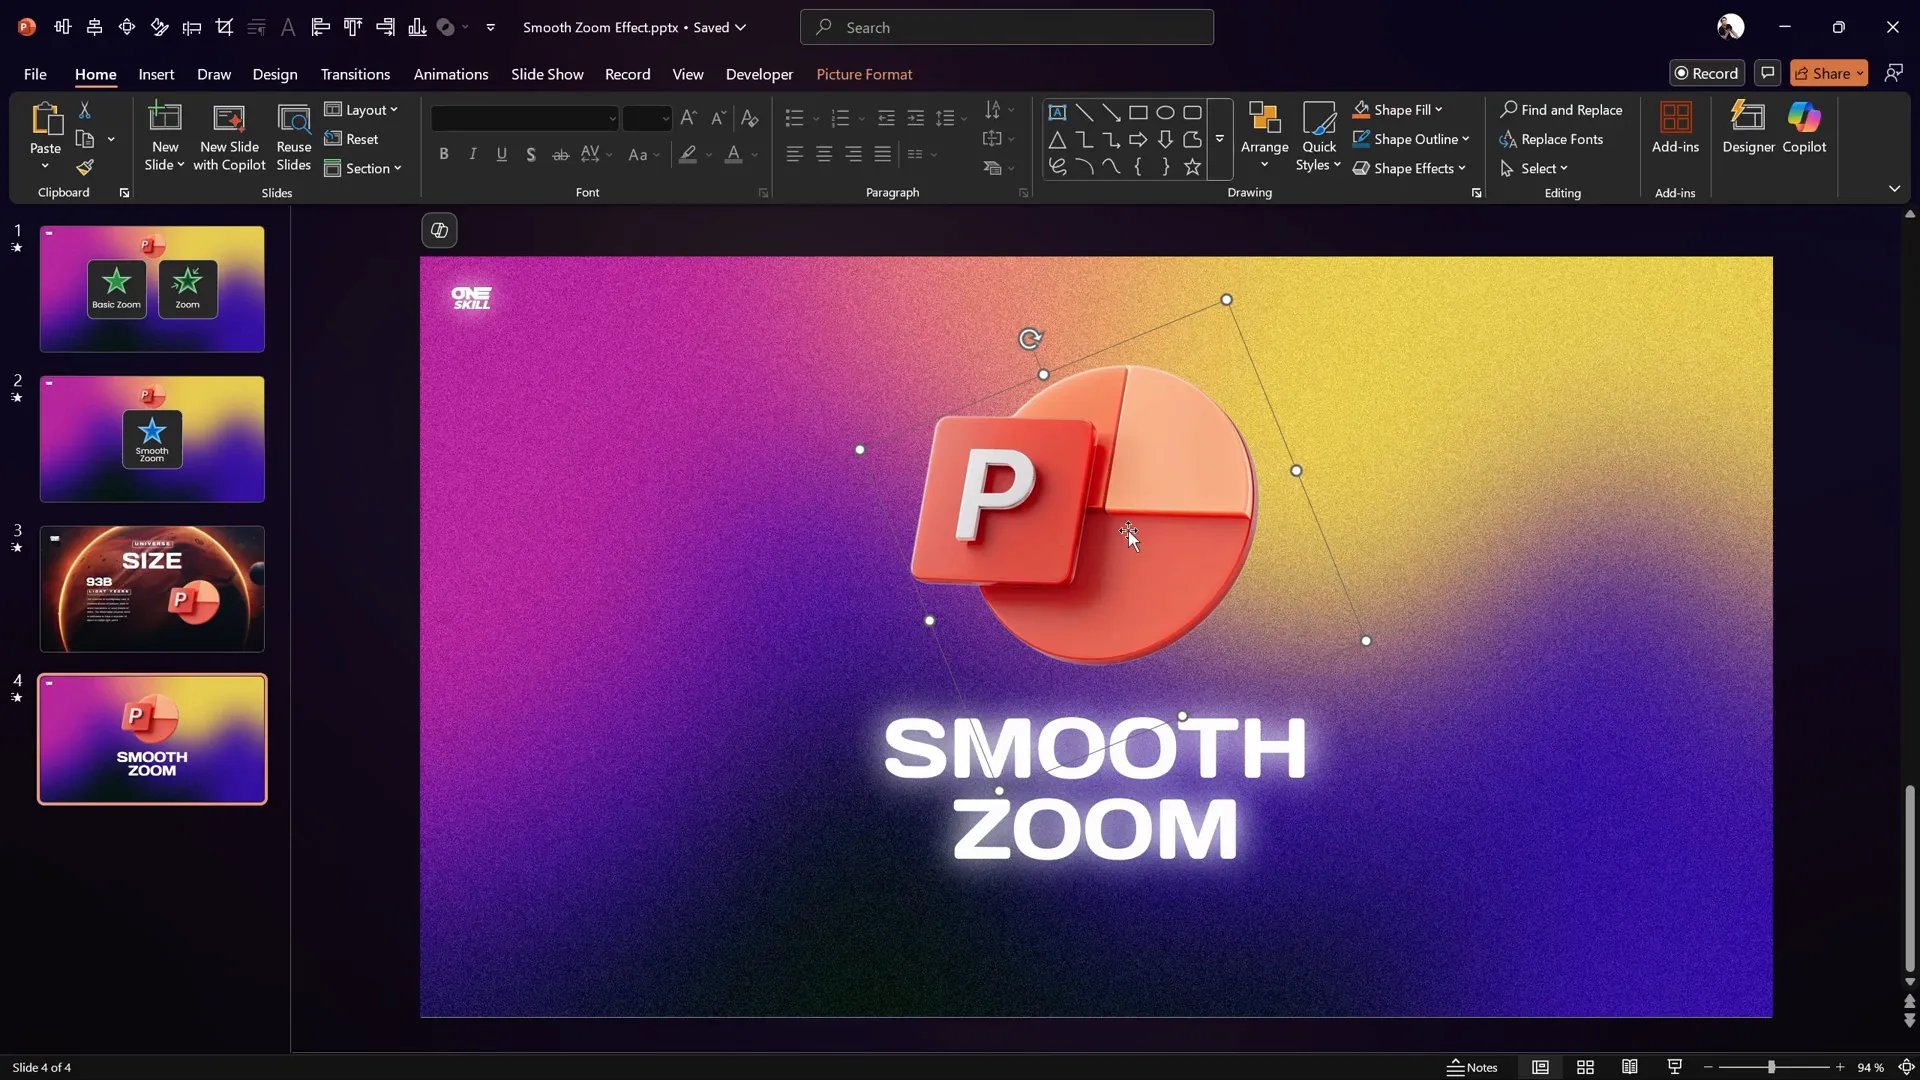
Step 3: Remove Existing Zoom Animations
If your object already has the default zoom animation applied, remove it first to avoid conflicts.
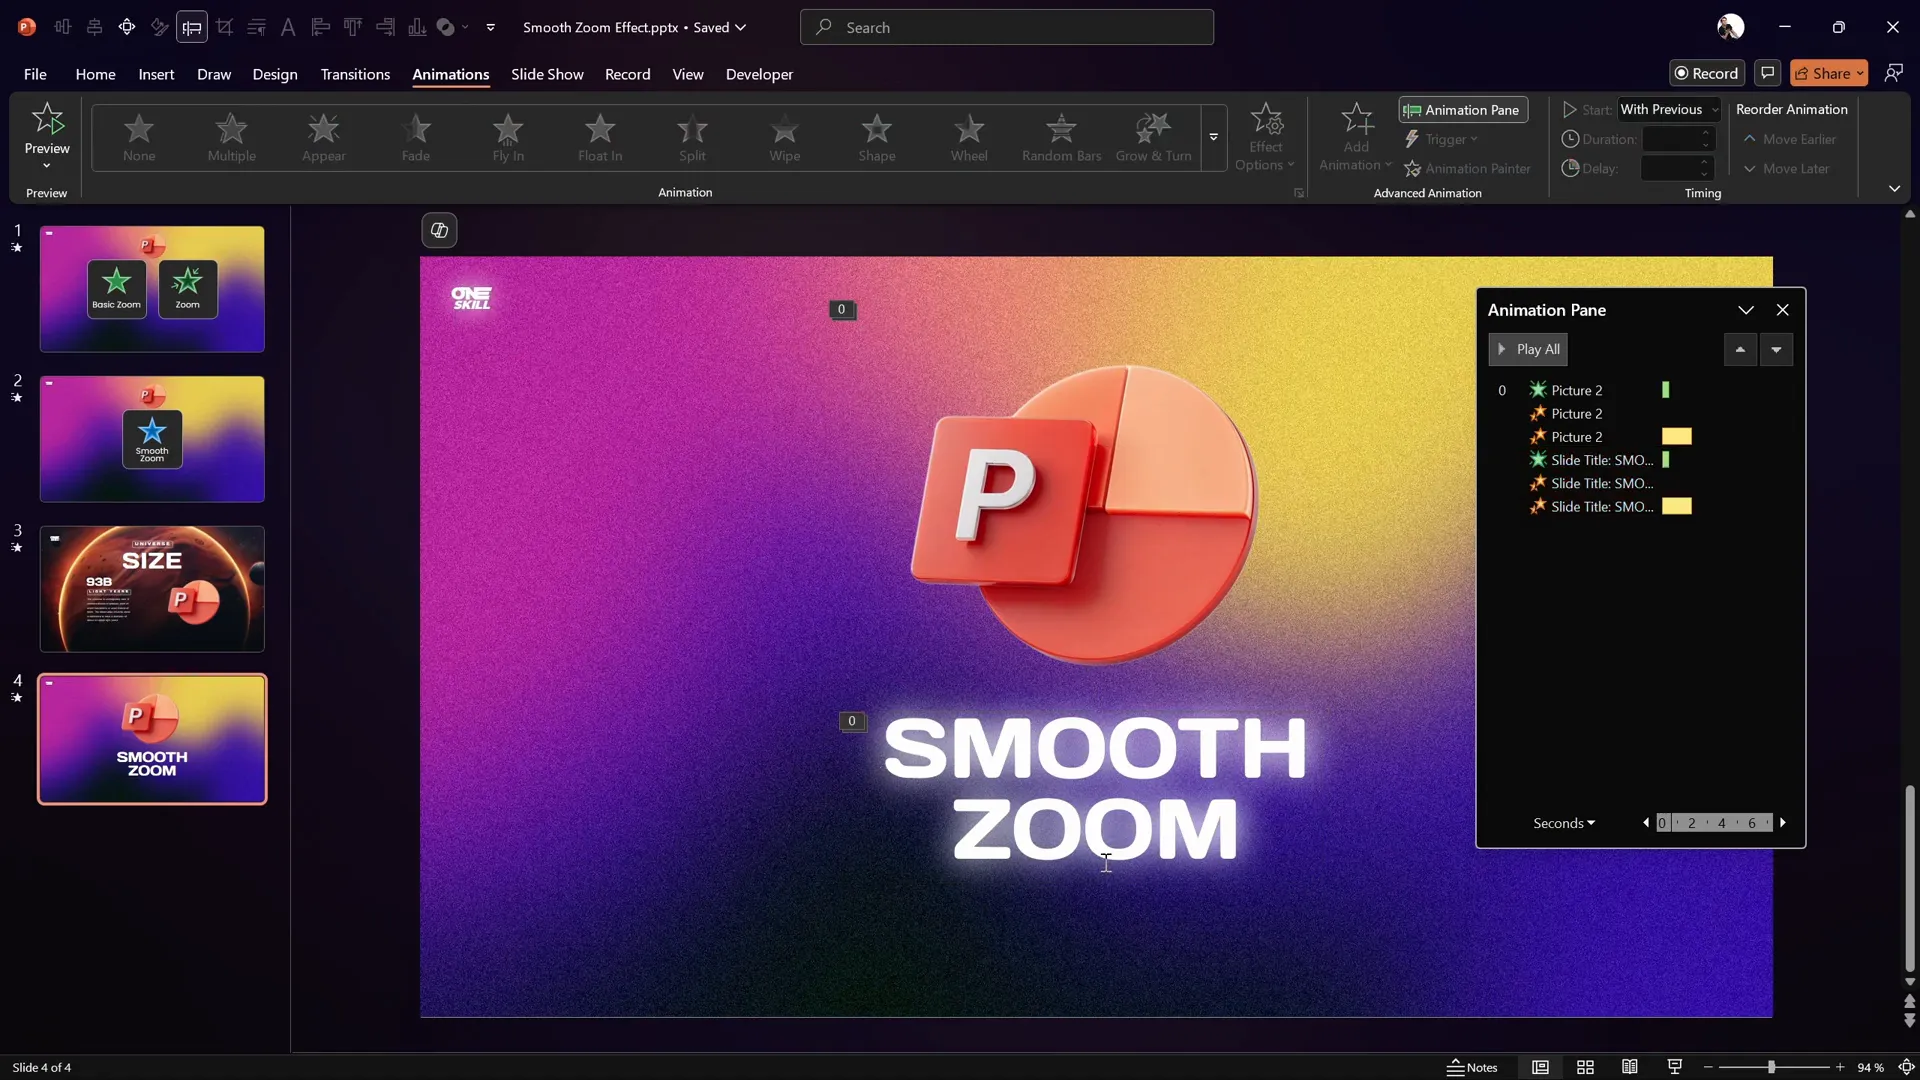
- Open the Animation Pane.
- Select the existing Zoom or Basic Zoom animation.
- Delete the animation.
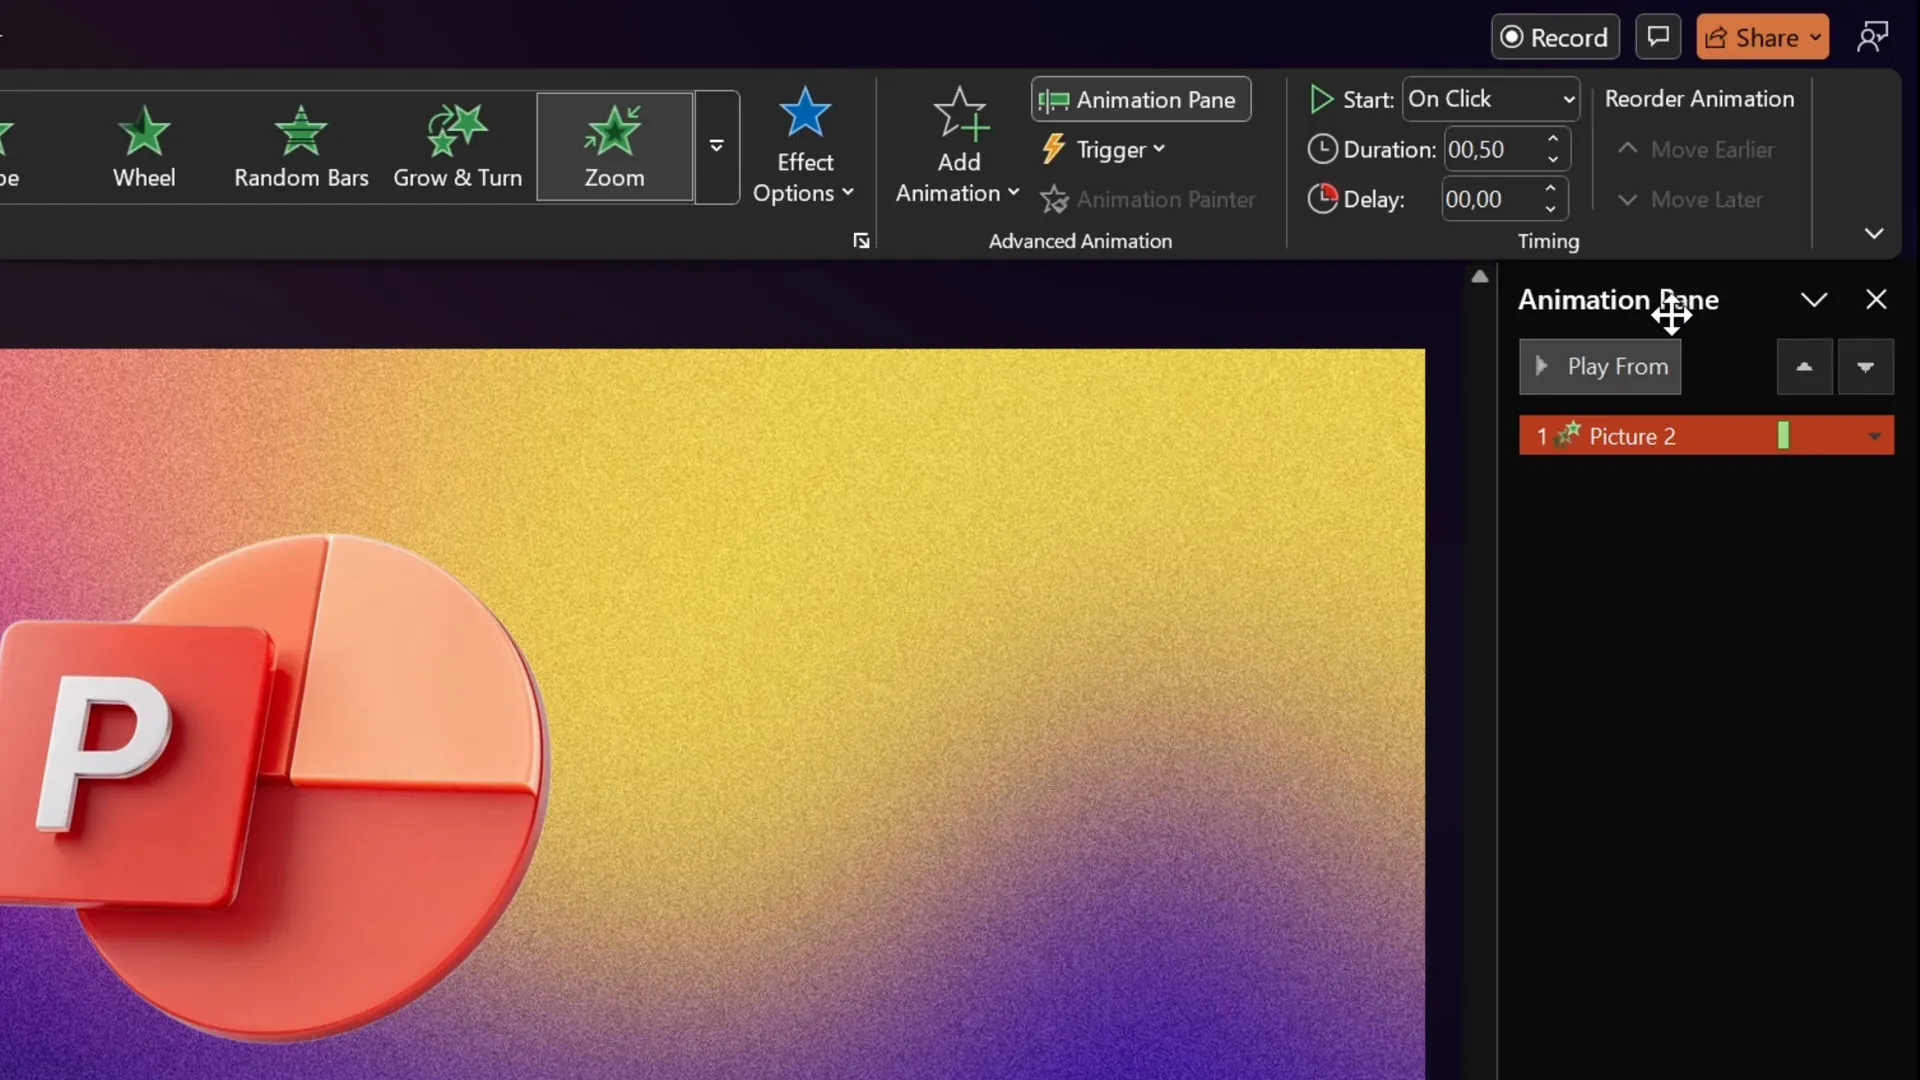
Step 4: Add the First Grow/Shrink Animation to Shrink the Object
- Add a Grow/Shrink animation to your object.
- Set the animation to Start With Previous so it runs automatically.
- Set the duration to the shortest possible, which is 0.01 seconds.
- Open the animation options and set the size to 10% to shrink the object down.
This quick shrink sets the stage for the smooth zoom-in effect.
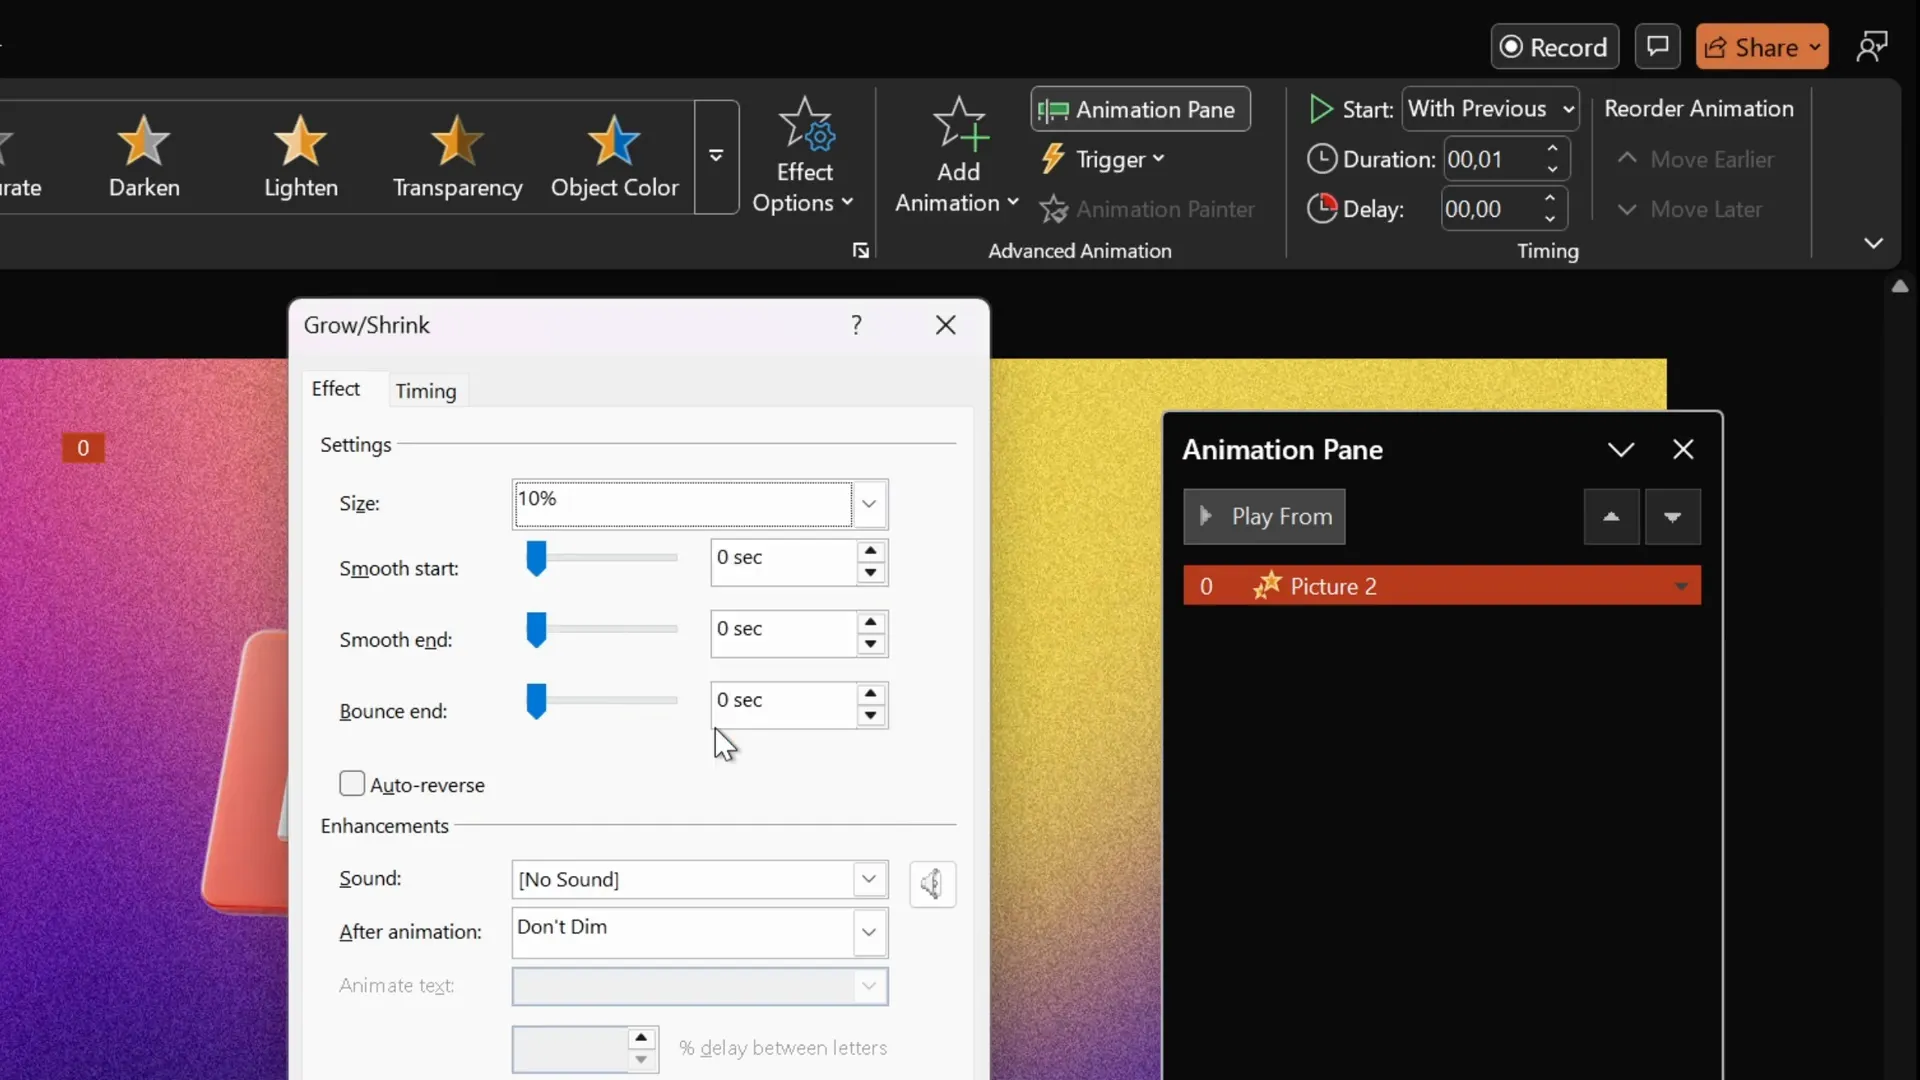
Step 5: Add the Second Grow/Shrink Animation to Grow the Object Back Smoothly
- Add another Grow/Shrink animation.
- Set it to Start With Previous again so it runs right after the first animation.
- Set the duration to 2 seconds for a smooth, gradual zoom.
- Open the animation options and set the size to 1000% to grow the object back to its original size (since it was shrunk to 10%, 1000% restores it).
- Use the Smooth End slider and move it to the maximum (far right) for the smoothest finish.
Step 6: Add a Fade Animation at the Beginning (Optional)
To add a nice fade-in effect before the zoom, follow these steps:
- Select the object again.
- Add a Fade animation.
- Make sure it starts With Previous and set the duration to 0.5 seconds.
- Move the fade animation to the top of the animation list in the Animation Pane, so it starts before the Grow/Shrink animations.

Step 7: Preview Your Smooth Zoom Animation
Run your slide in presentation mode and watch your object fade in and smoothly zoom to its full size with a gentle ending. The result is a professional, polished animation that enhances your presentation.
Summary Table: Key Animation Settings for Smooth Zoom
| Animation | Start | Duration | Size (%) | Smooth End |
|---|---|---|---|---|
| Fade | With Previous | 0.5 sec | N/A | N/A |
| Grow/Shrink (Shrink) | With Previous | 0.01 sec | 10% | N/A |
| Grow/Shrink (Grow) | With Previous | 2 sec | 1000% | Maximum |
Applying the Smooth Zoom Animation Across Your Slides
Once you’ve perfected the smooth zoom animation on one object, you can quickly apply it to other elements on your slides using PowerPoint’s Animation Painter. This tool copies animations from one object and pastes them onto another, saving you time and ensuring consistency.
How to Use the Animation Painter
- Select the object with the smooth zoom animation applied.
- Click the Animation Painter button on the Animations tab.
- Click on the target object (such as slide titles, subtitles, paragraph text, or shapes) to apply the animation.
Repeat as needed for all elements you want to animate with the smooth zoom effect.
Tips to Master PowerPoint Animation
Mastering PowerPoint animation can take your presentations from good to great. Here are some valuable tips to keep in mind:
- Combine Animations Creatively: Don’t limit yourself to single animations. Layering multiple animations, as we did with fade and grow/shrink, creates unique and polished effects.
- Use Smooth End Options: Animations with smooth end sliders (like Grow/Shrink, Spin, Fly In) allow for more natural motion and look more professional.
- Keep Animations Consistent: Use the same animation styles across similar elements to maintain a cohesive look.
- Practice Timing: Adjust animation durations to match the pace of your presentation and avoid rushing effects.
- Save Presets: If you frequently use custom animations, save them as presets or templates to speed up your workflow.
- Use Animation Painter: This handy tool copies and pastes animations quickly across objects, saving time and ensuring uniformity.
If you want to deepen your skills, consider exploring comprehensive courses like the PowerPoint Animation Mastery course, where you can learn step-by-step techniques and insider tips from professionals with over 15 years of experience.
Frequently Asked Questions
What is the difference between PowerPoint’s Zoom and Basic Zoom animations?
The Zoom animation includes a fade-in effect followed by zooming, while the Basic Zoom animation simply zooms in without fading. Both animations lack a smooth end, which can make them feel abrupt.
Why does PowerPoint’s default zoom animation end abruptly?
PowerPoint’s built-in zoom animations do not have a smooth end option, so the animation stops suddenly once it reaches its full size, creating a “hard landing” effect.
How do I create a smooth zoom animation in PowerPoint?
You can create a smooth zoom by combining multiple animations — typically two Grow/Shrink animations (to shrink and then grow the object) with a fade animation at the start. Adjust durations and use the smooth end slider on the second Grow/Shrink animation to achieve a gentle finish.
Can I apply this smooth zoom animation to multiple objects?
Yes! Use PowerPoint’s Animation Painter to copy the smooth zoom animation from one object and apply it to others quickly and easily.
Are there any shortcuts or presets available for smooth zoom animations?
Some creators offer PowerPoint animation packs or presets that include smooth zoom animations and other effects. Check out resources like the PowerPoint Animation Pack for ready-to-use presets to save time.
Conclusion
PowerPoint animations can greatly enhance your presentations, but it’s important to avoid abrupt, jarring effects that distract your audience. The default zoom animations in PowerPoint often end too suddenly, which can undermine your slide’s impact.
By combining multiple Grow/Shrink animations with a fade effect and using the smooth end feature, you can create a custom smooth zoom animation that looks polished and professional. This technique gives you full control over the animation’s timing and finish, allowing your objects to zoom in gracefully with a soft landing.
With the help of PowerPoint’s Animation Painter, you can apply this effect consistently across your slides, saving time and boosting the overall quality of your presentation.
If you want to take your PowerPoint Animation skills even further, consider exploring dedicated courses that teach animation mastery step-by-step. Whether you’re animating logos, titles, or other slide elements, mastering smooth animations will help you deliver more engaging and memorable presentations.
Try out these techniques today and watch how your presentations come alive with smooth, elegant zoom animations!
Happy animating!


