

- Table of contents
- Introduction
- What You Will Create
- Materials and Preparation
- Step 1 — Set Up the Slide and Background Gradient
- Step 2 — Create Layered, Organic Shapes
- Step 3 — Insert Images into Shapes
- Step 4 — Create Frames and Arrange Images
- Step 5 — Add Title and Typography
- Step 6 — Duplicate Slide and Update Images
- Step 7 — Add Clouds and Visual Effects
- Step 8 — Use Morph Transition to Animate
- Tips and Best Practices
- Advanced Variations and Ideas
- Troubleshooting & FAQ
- Conclusion
Introduction
Hi — I’m the creator behind POWERPOINT UNIVERSITY. In this tutorial I’ll walk you, step-by-step, through building a clean, modern digital travel brochure inside PowerPoint. Whether you want to produce a slick single-slide promo or a short animated brochure with a smooth transition between scenes, this workflow gives you a repeatable process to design, populate, and animate a compact travel layout.
This article reproduces and expands on the method I demonstrate in the video tutorial, covering every action and decision so you can follow along without missing details. I’ll also include practical tips, keyboard shortcuts, troubleshooting and creative variations so you can adapt the design to your own travel brand or presentation needs.
What You Will Create
At the end of this tutorial you’ll have a small digital brochure design made of two slides that animate between one another using PowerPoint’s Morph transition. The brochure has:
- A full-slide, gradient background
- Layered, slightly organic white panels that act as image holders
- Three image “cards” placed side-by-side (center, left, right)
- A bottom title banner with stylized typography
- Optional cloud PNGs for depth and atmosphere
- A Morph-based animation that slides images into place to create a subtle, professional motion effect
Why Morph? Because Morph lets you move and resize objects between slides and it automatically creates a smooth movement. It’s ideal for this kind of brochure where you want a calm, cinematic reveal instead of a sudden cut.
Materials and Preparation
Before you start, collect a few things:
- PowerPoint (Version with Morph transition — Office 2016 or later recommended)
- Three or more images for your brochure (mountains, beach, cityscape — choose what fits your theme)
- Optional PNGs with transparent backgrounds (clouds, icons) if you want overlays
- Fonts you’d like to use (I used a casual script font similar to “Hand of Sean” for the title — you can substitute your own)
Notes on images: if you plan to distribute the brochure publicly, ensure you have usage rights for the images. For personal or practice use, you can search and use free stock images or the built-in online pictures tool in PowerPoint.
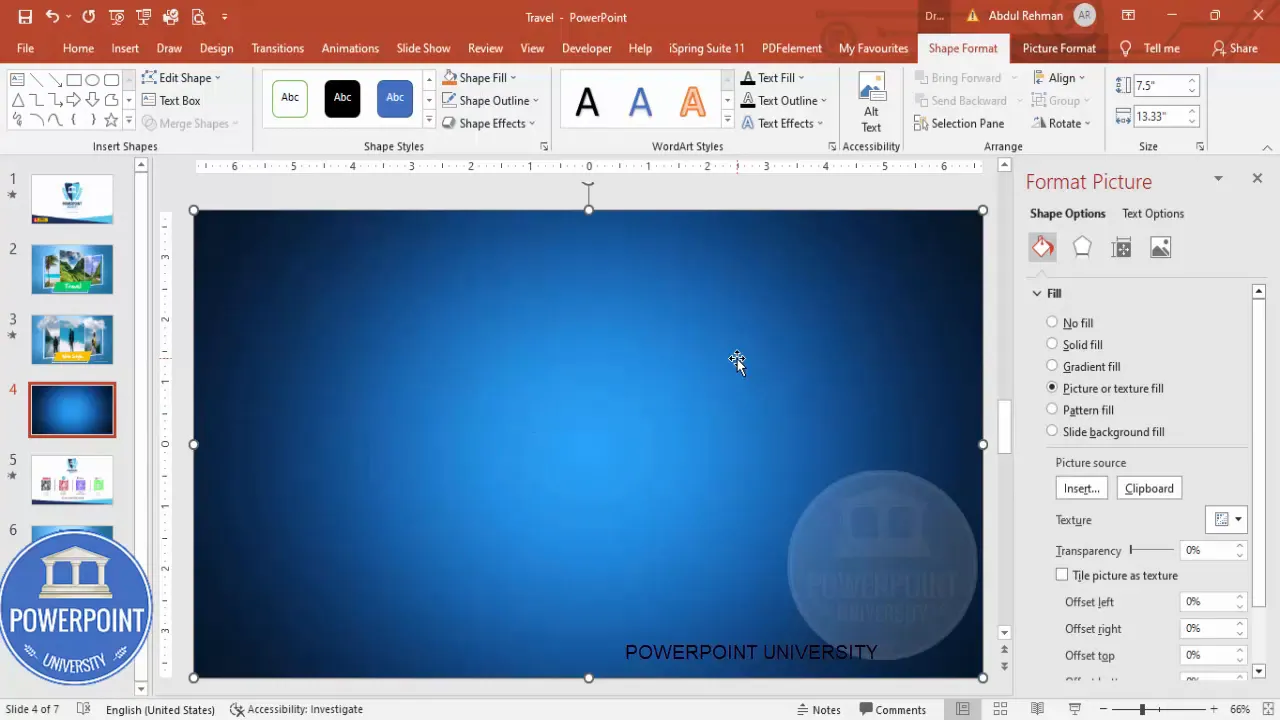
Step 1 — Set Up the Slide and Background Gradient
Start with a blank slide. To create a pleasing backdrop, I recommend a subtle gradient that gives depth without competing with your photos or copy.
- Insert a rectangle that covers the whole slide. This acts as your background layer.
- Right-click the rectangle and choose Format Shape.
- Under Fill, select Picture or texture fill and click Insert → Online Pictures to search for a “blue gradient” or a background image you like.
- Pick a gradient image or subtle texture and insert it. Change the shape outline to No Outline.
Why use an image-based gradient instead of PowerPoint’s built-in gradient? Image gradients give you more organic color blends and are quick if you want a particular aesthetic. However, you can also apply a solid gradient using Format Shape → Gradient Fill if you prefer vector control.
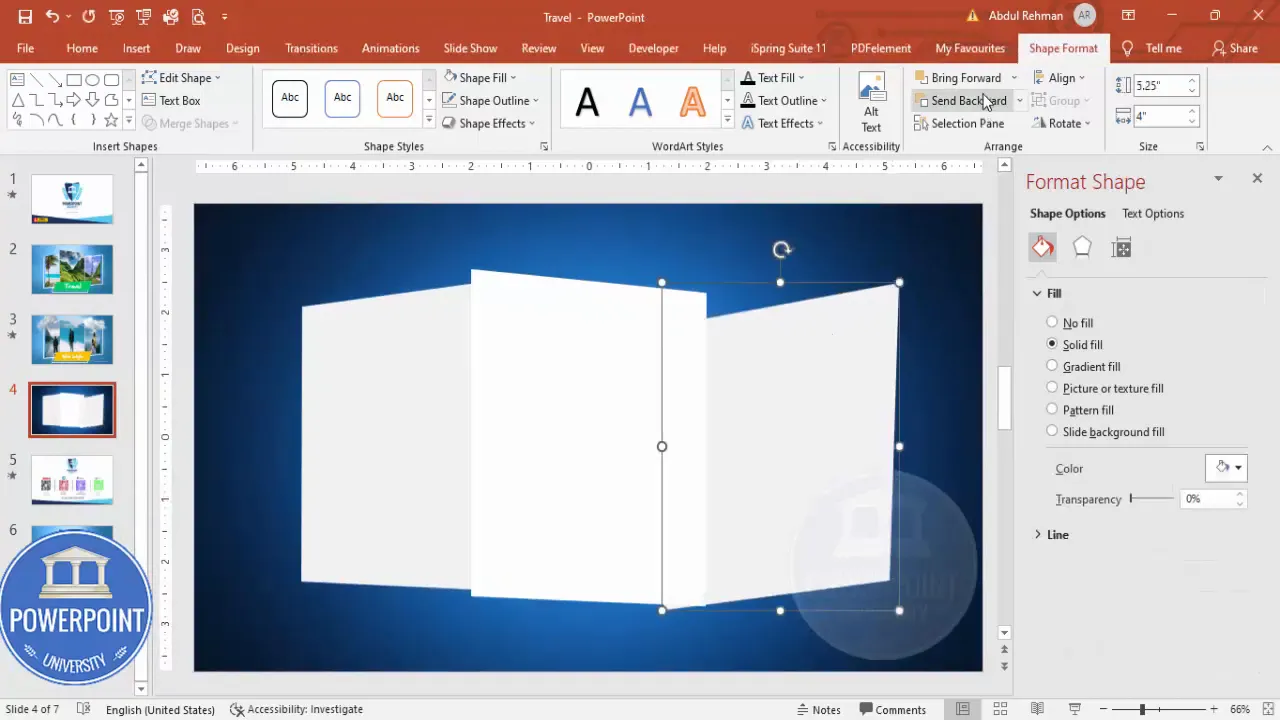
Step 2 — Create Layered, Organic Shapes
Next we’ll create the white panels that will contain the images. Rather than using rigid rectangles, we’ll slightly edit the points to give an organic, asymmetric feel. This is a simple technique that adds personality to your brochure.
- Insert another rectangle centered on the slide but not covering the full height. Set Shape Fill to white and No Outline.
- Right-click the shape and choose Edit Points. You’ll see four points — drag the top or bottom points slightly up or down to create a wave or curve. This makes the top edge a little irregular.
- Duplicate the rectangle twice (Ctrl+D) and change the fill color of each duplicate to create visual layers while you work — you’ll send them backward or forward later.
- For each duplicate, right-click → Edit Points and adjust the points to vary their height and curvature. Then position them slightly offset from each other horizontally and vertically to give depth.
- Finally, add a rectangle at the bottom for your title banner. Adjust its points so it’s not a perfect rectangle; this creates a handmade, stylized look.
Small variations in the points make a big difference. Avoid dramatic, jagged edits; keep the shapes smooth and natural for a modern look.
Step 3 — Insert Images into Shapes
With the panels in place, we’ll place imagery. Instead of inserting images as independent pictures, we’ll fill our shapes so images conform to those panels perfectly.
- Select one of the white shapes.
- Right-click → Format Shape → Fill → Picture or texture fill → Insert → Online Pictures (or From File if your photos are local).
- Search for the photo you want (for my brochure I used mountain views for the center, beach for the left, and eye-catching travel photo for the right). Click Insert.
- Repeat for each of the three main panels.
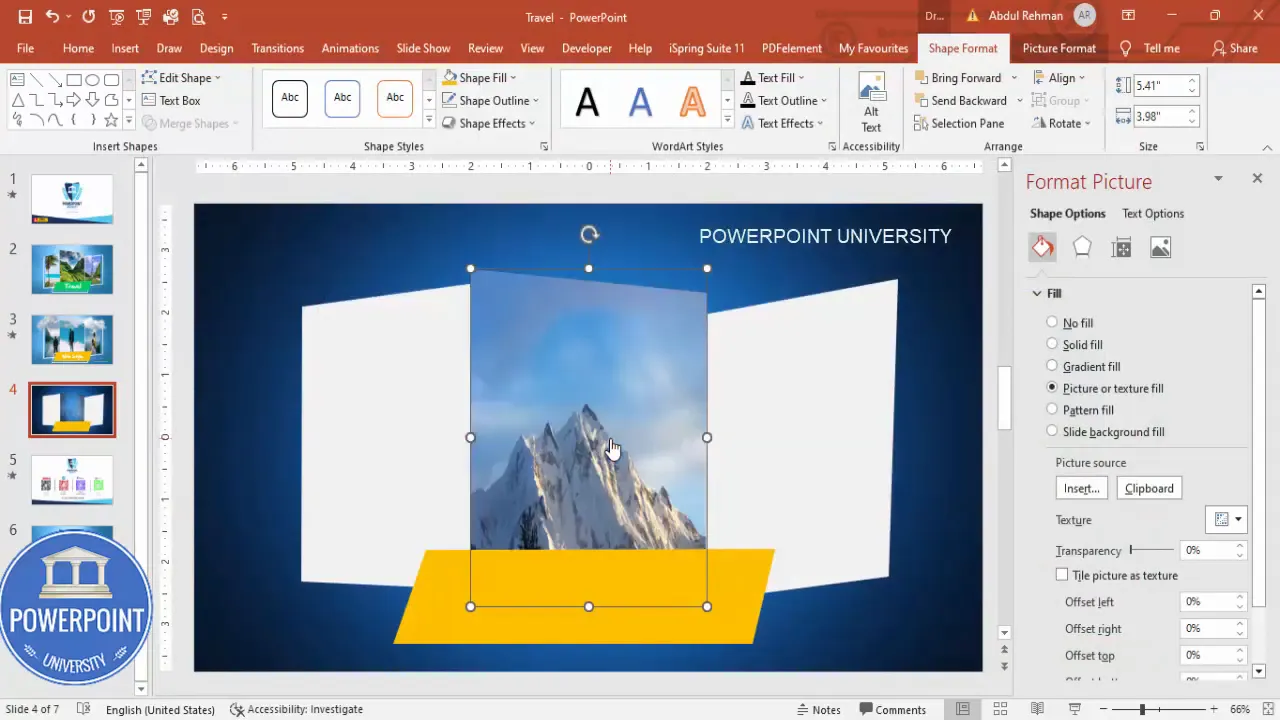
Tip: When using the Picture Fill option, PowerPoint will fit and crop images to the shape. If you need to reposition the crop inside the shape, go to the shape → right-click → Format Shape → click the image icon under Fill options, and adjust Offset X/Y or use Edit → Crop on the image if it’s a separate object.
Step 4 — Create Frames and Arrange Images
To make images pop, add a subtle frame and organize their stacking order so the composition reads left-to-right.
- Duplicate one of your panel shapes and set the duplicate’s Shape Fill to No Fill and Shape Outline to white. This creates a clean border around the image.
- Resize or nudge these border shapes so they sit slightly above the images and add contrast.
- Select individual image shapes and use Send to Back or Bring to Front to place them correctly within the layered composition. Typically, send the main image panels behind the title banner and in front of the background gradient.
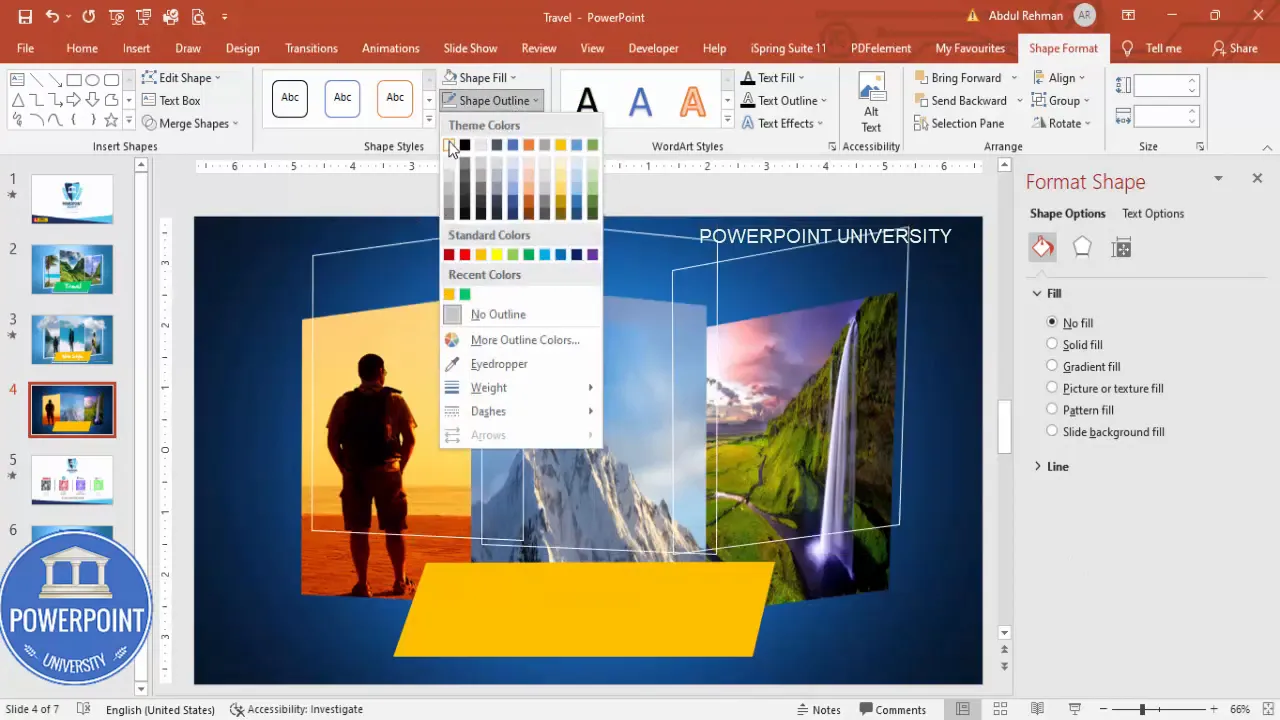
Use alignment tools: select multiple shapes and use Align → Align Middle and Distribute Horizontally so the three image panels are evenly spaced and centered in the slide.
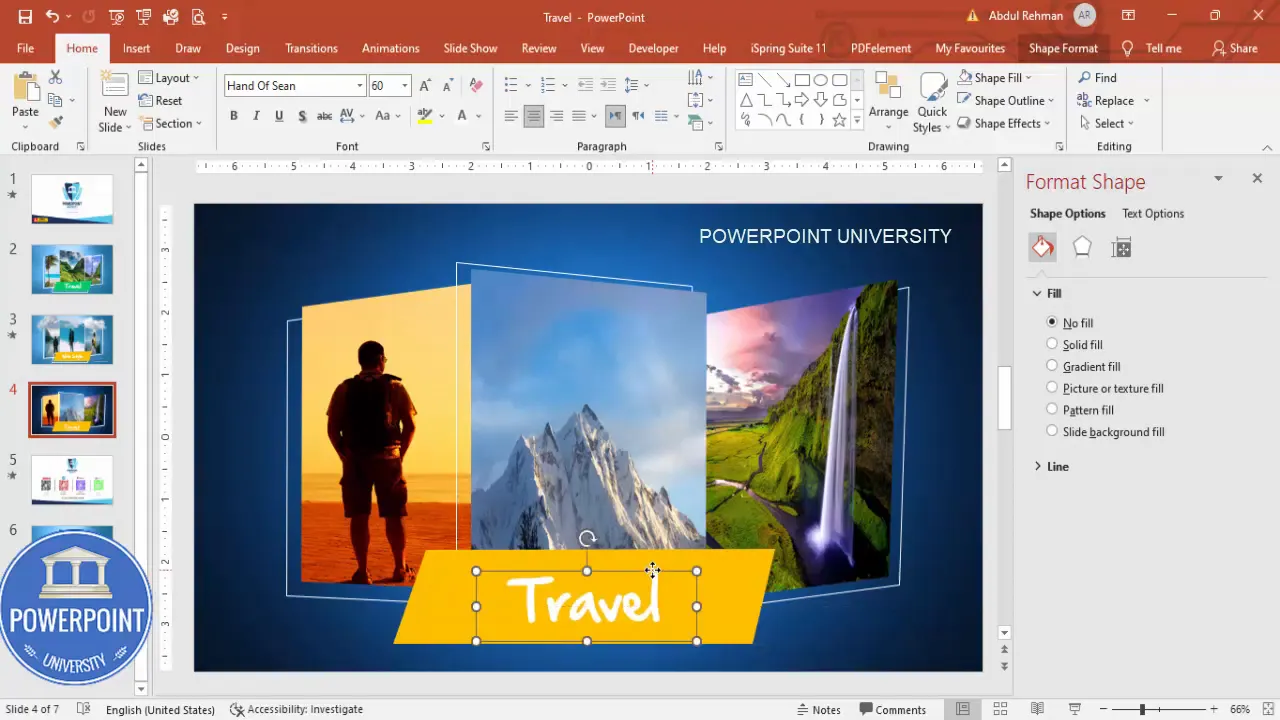
Step 5 — Add Title and Typography
Now that the visual composition is in place, it’s time to add the title. This is the single piece of typography that anchors the design and communicates the brochure’s purpose.
- Insert a text box within the bottom banner.
- Type a short title — I used “Travel” for the first slide and “Travel with Style” for the second.
- Choose a font that matches your brand. For a friendly, travel-themed brochure you can choose a script or hand-drawn font (I used a font similar to “Hand of Sean”). For corporate travel brochures, choose a clean sans-serif.
- Set the font color to white and center-align the text. Increase the font size until it balances with the banner. You can also add a small drop shadow for legibility against lighter areas of the background.
Design tip: Keep body text minimal. The visual focus should be on the images. If you need to add short descriptive copy, use small, concise sentences and place them where they won’t overlap important image areas.
Step 6 — Duplicate Slide and Update Images
To create the motion effect between scenes, duplicate the completed slide and update the images and title. Morph transforms objects that exist on both slides, so the trick is to copy objects and reposition them between the two slides.
- Right-click your first slide in the left panel and choose Duplicate Slide.
- On the duplicated slide, edit the title text to a new phrase (for example, “Travel with Style”). Reduce the font size so it fits in one line if needed.
- Replace the images in each panel: select a panel, Format Shape → Fill → Insert Picture (Online or From File) and choose new imagery (e.g., snow mountains, climbers, or different beach shots).
- If you want dramatic motion, move the image panels off the slide area — Morph will animate them into new positions relative to the original slide.
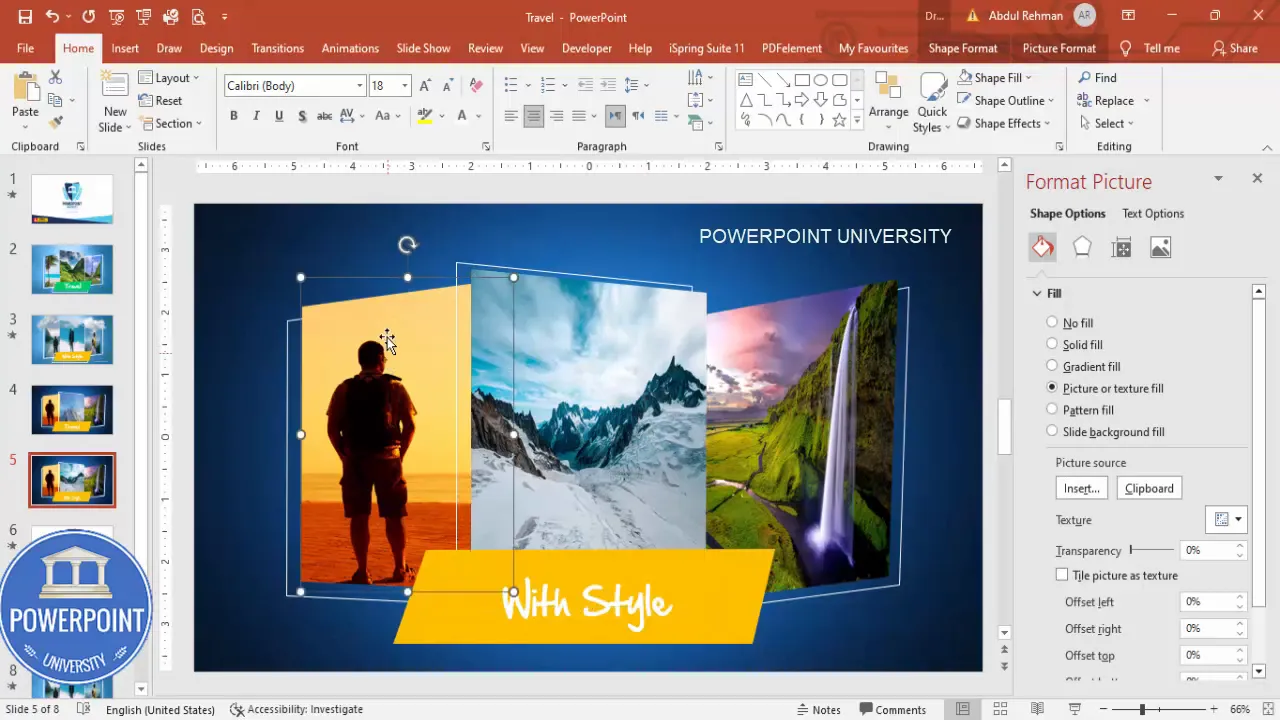
Important: When replacing photos, keep the object (shape) the same. Replace the fill rather than deleting and re-adding a new shape. This preserves the object’s identity for Morph.
Step 7 — Add Clouds and Visual Effects
To add a sense of atmosphere and depth, insert transparent PNG cloud images and position them above or in front of the image panels. These little details elevate a static design into something more cinematic.
- Insert → Pictures → Online Pictures → search “cloud transparent”. Choose PNG clouds with transparent backgrounds so they integrate cleanly.
- Resize clouds while holding the Shift key to constrain proportions and drag them to desired positions. Consider placing one cloud partly in front of the center image and another behind an image panel to suggest depth.
- For subtle blending, select the cloud → Format Picture → Soft Edges and choose a small soft edge to make the clouds blend softly.
- Repeat on both slides but offset cloud positions slightly; Morph will animate those offsets into movement.
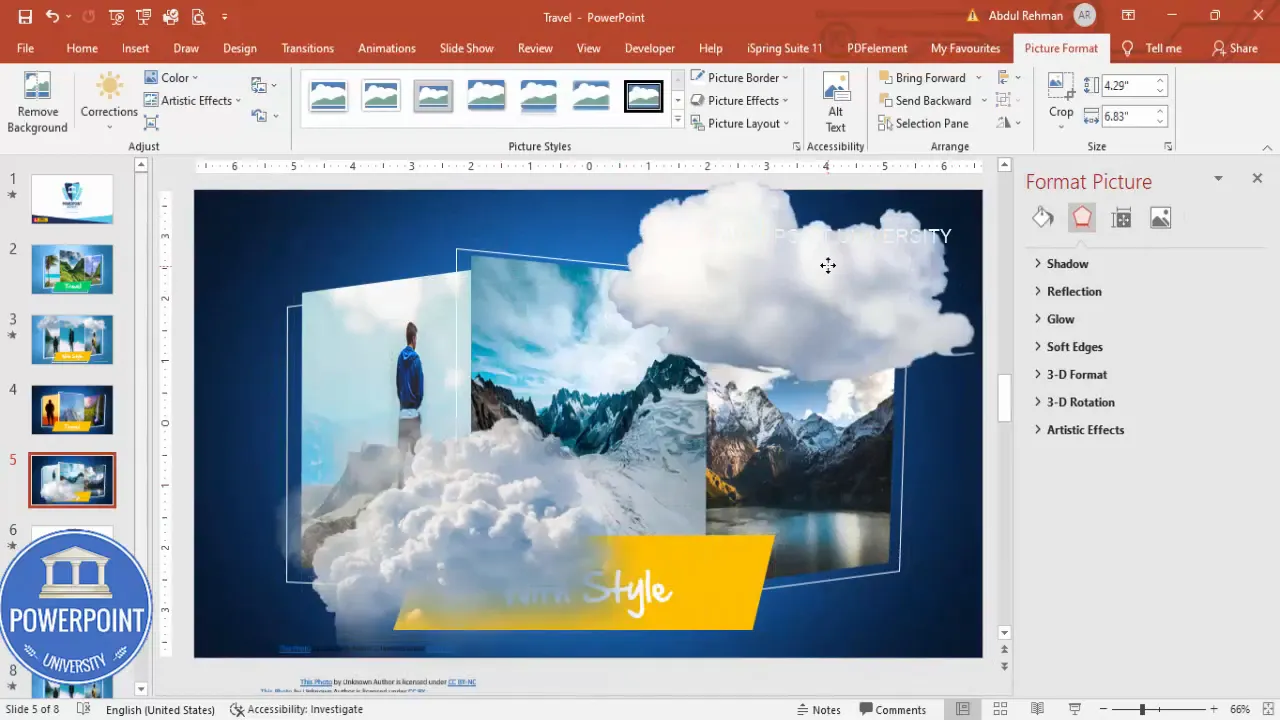
Design note: Use clouds sparingly. Too many overlays can distract from the images. The goal is to create a gentle parallax effect during the Morph transition.
Step 8 — Use Morph Transition to Animate
Now for the animation. The Morph transition is what makes your brochure feel dynamic — images slide and resize smoothly between slides.
- Click the second slide in the left panel.
- Go to the Transitions tab and select Morph.
- Adjust the duration to your taste (I often use 0.75–1.25 seconds for a smooth but not sluggish feel).
- To preview, enter Slideshow mode or click Preview in the Transitions tab and click to advance from slide one to slide two.
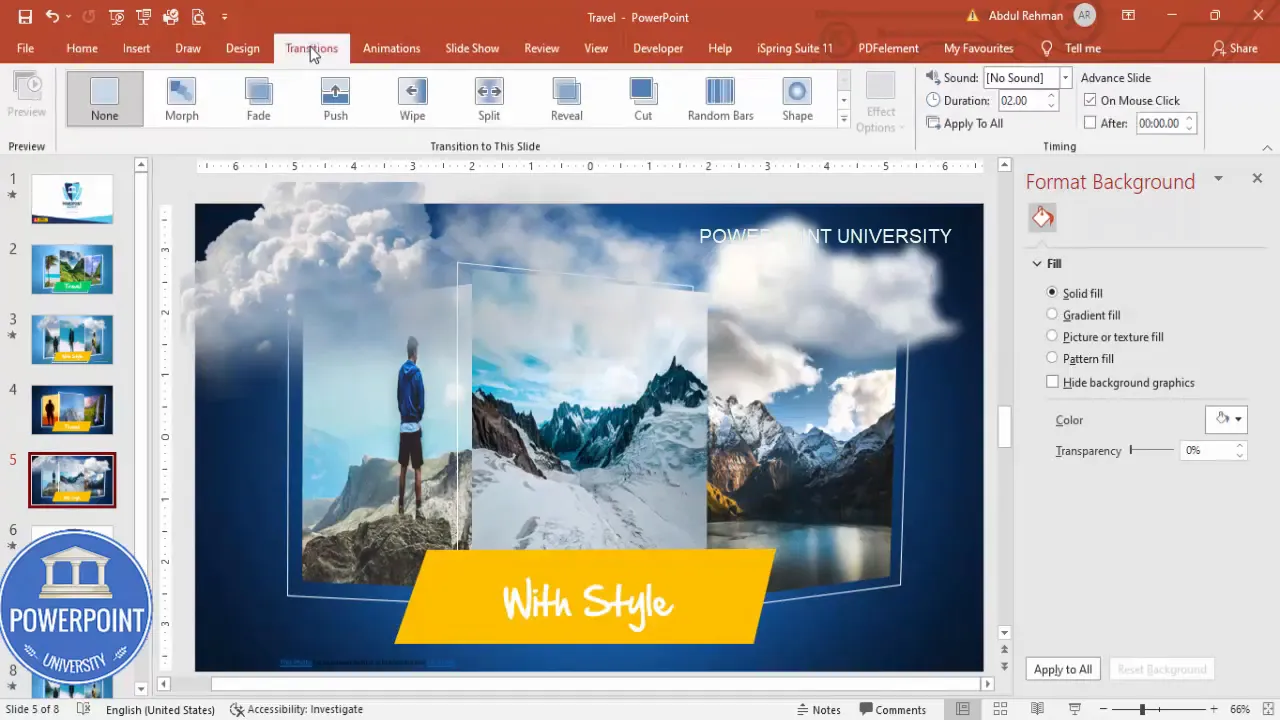
How Morph works here: PowerPoint compares objects on Slide 1 and Slide 2 that have the same name and type. It then interpolates positions, sizes, and certain properties to create the motion. Because we replaced image fills inside the same shapes and modified the positions, Morph animates those changes into a fluid movement.
Create Slides in Seconds with ExpertSlides AI |
|
Generate AI Presentations today: |
| TRY NOW! |

Tips and Best Practices
Below I’ve collected my favorite practical tips and small adjustments you can make to enhance the brochure either visually or in terms of performance.
Image Selection and Fit
- Use images with consistent color palettes or adjust them to match using Picture Format → Color → Recolor options.
- For portrait-oriented images, center the main subject using Format Picture cropping tools so it remains focal inside the shape.
- Prefer high-resolution images to avoid pixelation when scaling. If an image is too large, compress pictures for distribution via File → Compress Pictures (choose reasonable resolution like 150–220 ppi).
Typography
- Limit primary fonts to two: a display font for the title and a neutral sans-serif for any supporting text. This keeps layout cohesive.
- Ensure contrast between text and background; use subtle shadows or a semi-transparent rectangle behind text if the background image interferes with readability.
Layering & Depth
- Vary layer positions (z-order) and add small offsets to create sense of depth.
- Use semi-transparent overlays if you need to mute an image without editing the original photo.
Motion & Timing
- Keep Morph durations short for quick web promos (0.5–0.8s) or longer for cinematic reveals (1–1.5s).
- Don’t animate too many objects at once — the eye needs a focal point. Focus animation on the photos and one or two accent elements like clouds.
Performance
- If the file becomes sluggish, reduce image resolution, or remove unnecessary effects like heavy soft edges.
- Turn off unnecessary slide animations when exporting to video if they cause choppiness — Morph tends to export cleanly but complex effects can slow playback in older systems.
Advanced Variations and Ideas
Once you’ve mastered the basic template, you can expand and customize it in many ways. Here are creative directions to explore:
Multiple Slides to Create a Storyboard
Create a longer digital brochure by repeating the base slide pattern across 4–8 slides. Change images, titles, and subtle color palettes to guide a narrative: “Explore,” “Adventure,” “Relax,” “Book Now”. Use Morph between each slide for continuity.
Interactive Brochure with Hyperlinks
Turn the brochure into a clickable PDF by adding hyperlinks. Add action links to buttons or images that navigate to booking pages, contact info, or additional slides inside the presentation when exported as PDF.
Animated Icons and Microinteractions
After you master Morph, introduce small icon animations — a plane flying across the sky or a location pin pulsing slightly. Create these by duplicating icons across slides and slightly changing positions and sizes for Morph to animate.
Exporting Options
- Export as video (File → Export → Create a Video) if you want a social-media-friendly MP4 with the Morph animation baked in.
- Export as PDF if you prefer a static brochure for email or print. Note: Morph animations will not carry into PDF; use static images for each slide instead.
Troubleshooting & FAQ
Below are the most common questions and problems you may encounter while following this tutorial, together with clear solutions.
FAQ
- Why isn’t Morph animating my objects?
Possible reasons:
- The object on Slide 2 might be a different type (eg. an image vs a shape). Ensure the same shape object exists on both slides and that you replaced the fill rather than inserting a different object.
- The object names don’t match. Rarely necessary to rename, but if you duplicated the slide, objects should inherit the same internal names and morph correctly.
- Morph is not available in your version of PowerPoint. Use Office 2016 or later or an Office 365 subscription to get Morph.
- My images look blurry in presentation mode — why?
Blurriness can be caused by:
- Low-resolution source images — always use high-resolution photos.
- Excessive scaling. If you scale an image up beyond its native resolution the image will blur. Crop and size carefully.
- Presentation display settings: check your display resolution and PowerPoint’s image compression settings under File → Options → Advanced → Image Size and Quality (tick “Do not compress images in file” while designing).
- How do I change the cropping of a picture fill inside a shape?
Go to the shape → Format Shape → Fill → Picture or texture fill → click the inserted picture icon and use the Offset X and Y controls to slide the image inside the shape. Alternatively, extract the image by inserting it as a normal picture, crop it, then use it as the picture fill.
- Can I add more than three images?
Yes. You can add more panels horizontally or stack them vertically. Be mindful of composition and negative space: three images create a clear focal rhythm; adding more requires tighter spacing or a different grid.
- What if I want the image to slide in from off-screen?
On the second slide, move the image shape partially or fully outside the slide boundary. Morph animates the object from the first position to the new one. For off-screen entry, place the object outside the slide on either slide then let Morph bring it in or out.
- Is this accessible for screen readers?
PowerPoint exports to PDF are more screen reader–friendly. If you need full accessibility, add alt text to images (right-click image → Edit Alt Text) and keep textual content readable. Morph animations are visual and do not translate to screen readers, so provide static equivalents or captions.
- How do I credit images I used from online search?
If you use images from an online source, include a small caption or credit line in your slide notes or the bottom of the brochure. If possible, use images under permissive licenses (Creative Commons or your own licensed stock) to avoid legal complications.
- Why does PowerPoint get slow when I add many images?
Large image files consume RAM. Solutions:
- Compress images (File → Compress Pictures) choosing a moderate resolution.
- Reduce the number of slides or effects while designing and reintroduce them for final export.
- Work on smaller image placeholders and replace with high-resolution images just before export.
Conclusion
This flow creates a stylish, modern travel brochure inside PowerPoint using plain shapes, picture fills, and Morph. By building shapes with Edit Points, filling them with pictures, and using Morph to animate between duplicate slides, you can produce a professional motion brochure without Photoshop or After Effects. It’s fast, reproducible and ideal for social promos, slide decks, and short video exports.
Recap of the core steps:
- Create a full-slide background (gradient or texture).
- Build layered shapes and edit points for organic edges.
- Fill shapes with images rather than inserting standard images so Morph recognizes the object identity.
- Duplicate the slide, change fills and positions, insert clouds for depth.
- Apply the Morph transition and fine-tune the timing for a polished reveal.
Remember: small design choices — image alignment, subtle cloud overlays, and careful timing — make a huge difference in perceived quality. Have fun experimenting with different image sets, fonts, and motion styles to make the brochure your own.
If you want to replicate exactly what I showed, I’ve prepared a downloadable PowerPoint template you can use as a starting point. I recommend practicing the steps above using that template so you can focus on content and composition rather than construction details.

Happy designing — and if you create a brochure using these steps, try variations with different themes (adventure travel, luxury resorts, city tours) and let motion help your visuals tell a better story.
Final screenshot: preview of the animated brochure

Check out the full video: How to Create a Digital Brochure in PowerPoint. Tutorial No.: 994


