
Hello, my friends! I’m thrilled to share with you an exciting and completely free course that I created just for you—a super interactive PowerPoint Slide Zoom course. This course is designed to transform the way you create and deliver presentations, making them dynamic, engaging, and memorable. Whether you’re a student, educator, professional, or just someone who loves PowerPoint, this course will elevate your skills to the next level.
In this comprehensive article, I’ll walk you through the entire process of creating this course from scratch using only PowerPoint and a fantastic plugin called iSpring Suite 11. Along the way, I’ll share valuable tips and tricks that you can apply to your own projects, whether you’re building a course for work, school, or personal use.
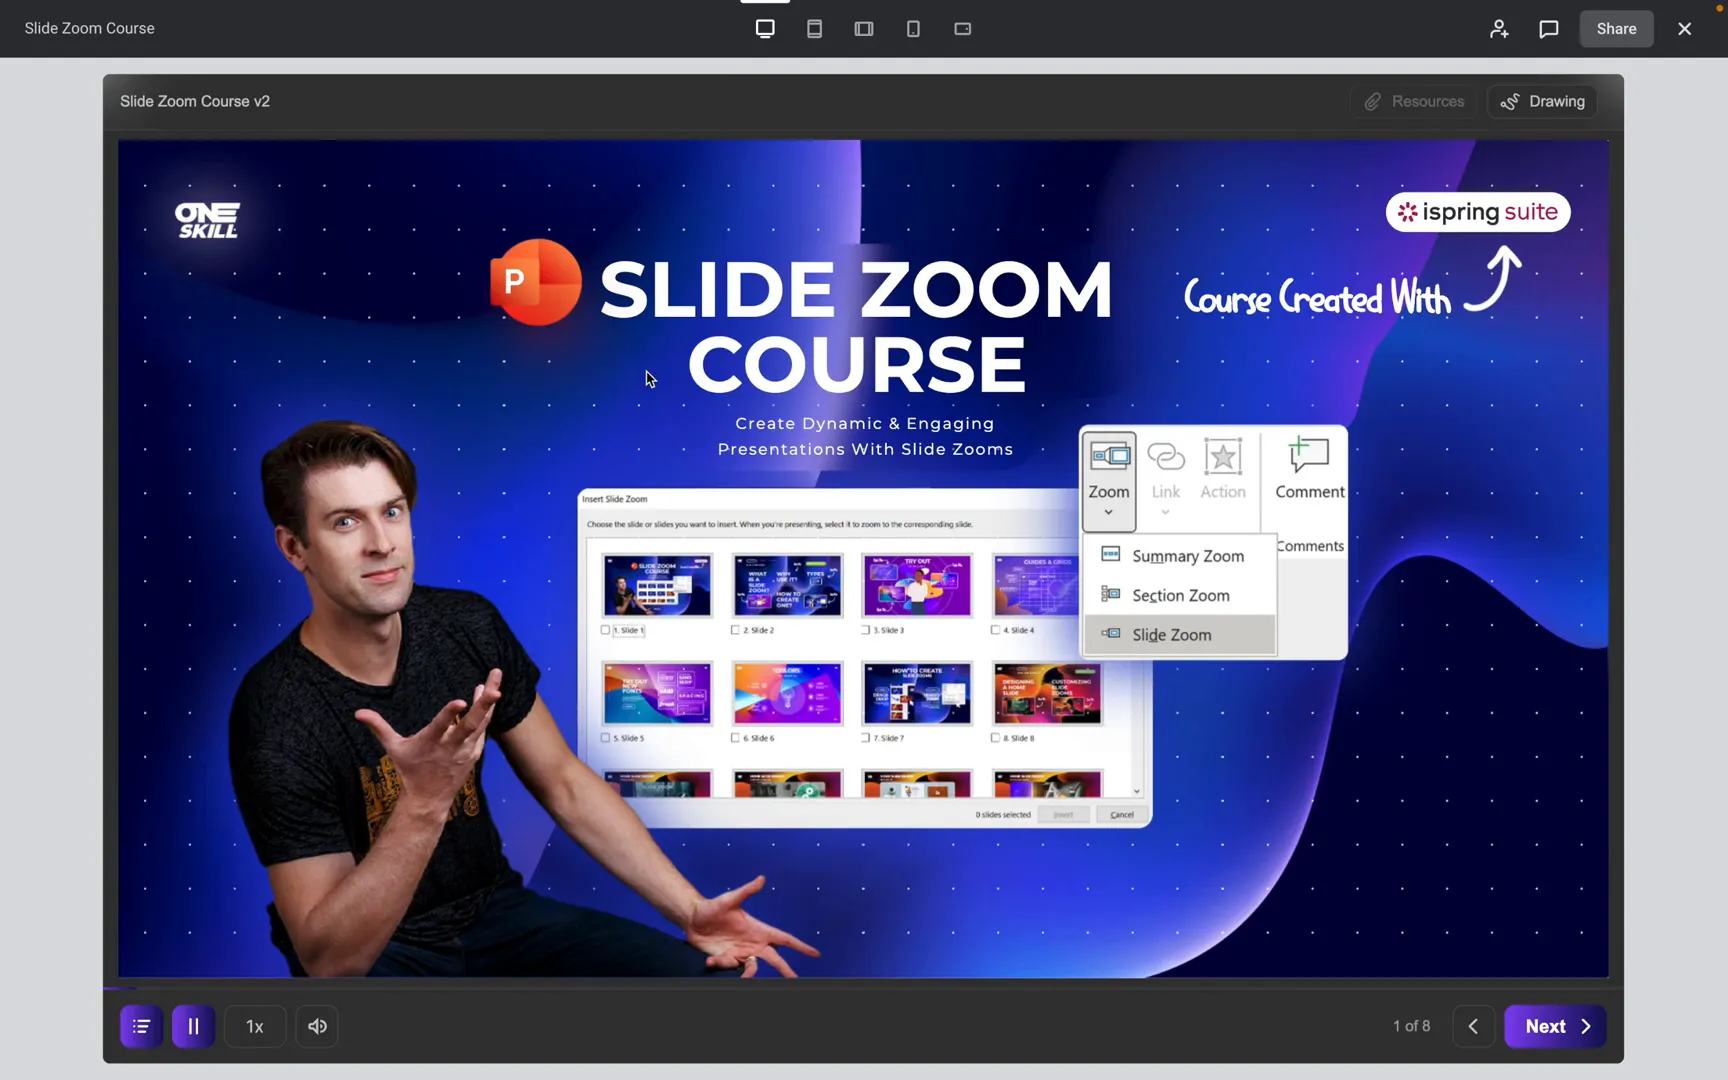
Table of Contents
- Introduction to Slide Zooms: What and Why?
- Creating the Slide Zoom Course Structure
- Adding Voiceovers: Making Your Course Personal and Engaging
- Designing Interactive Lessons and Menus
- Inserting Quizzes: Testing Knowledge the Fun Way
- Role Plays: An Engaging Alternative to Quizzes
- Previewing and Customizing Your Course Player
- Publishing Your Course: Share Your Masterpiece
- Summary and Final Thoughts
- Frequently Asked Questions (FAQ)
Introduction to Slide Zooms: What and Why?
Let’s start with the basics. What exactly is a Slide Zoom? Simply put, slide zooms allow you to create a dynamic navigation experience within your PowerPoint presentation. Instead of moving linearly from slide to slide, slide zooms let you zoom in and out of different parts of your presentation, making it feel more like an interactive course or website.
Imagine having a clickable dashboard where you can jump to any lesson or section you want, then zoom back to the main menu when you’re done. This approach not only makes your presentations more engaging but also helps learners control their own pace and learning path.

Why Use Slide Zooms in Your Presentations?
- Enhanced Engagement: Interactive elements keep your audience interested and involved.
- Improved Navigation: Users can jump between sections easily without following a strict order.
- Professional Appeal: Slide zooms give your presentations a polished, modern look.
- Versatility: Perfect for courses, reports, training materials, and even portfolios.
Once you understand the power of slide zooms, you’ll see endless ways to incorporate them into your work. And the best part? You don’t need advanced software—just Microsoft PowerPoint and iSpring Suite 11.
Creating the Slide Zoom Course Structure
Before diving into slide creation, it’s essential to plan your course structure carefully. For this course, I divided the content into three main chapters:
- Slide Zoom Basics: Learn what slide zooms are and how to insert them.
- Slide Zoom Essentials: Customize your slide zooms to fit your presentation style.
- Slide Zoom Animation: Master animations to make your slide zooms even more dynamic.
Each chapter contains several interactive lessons, combining clickable slide zooms, screen recordings, role plays, and quizzes to provide a rich learning experience.
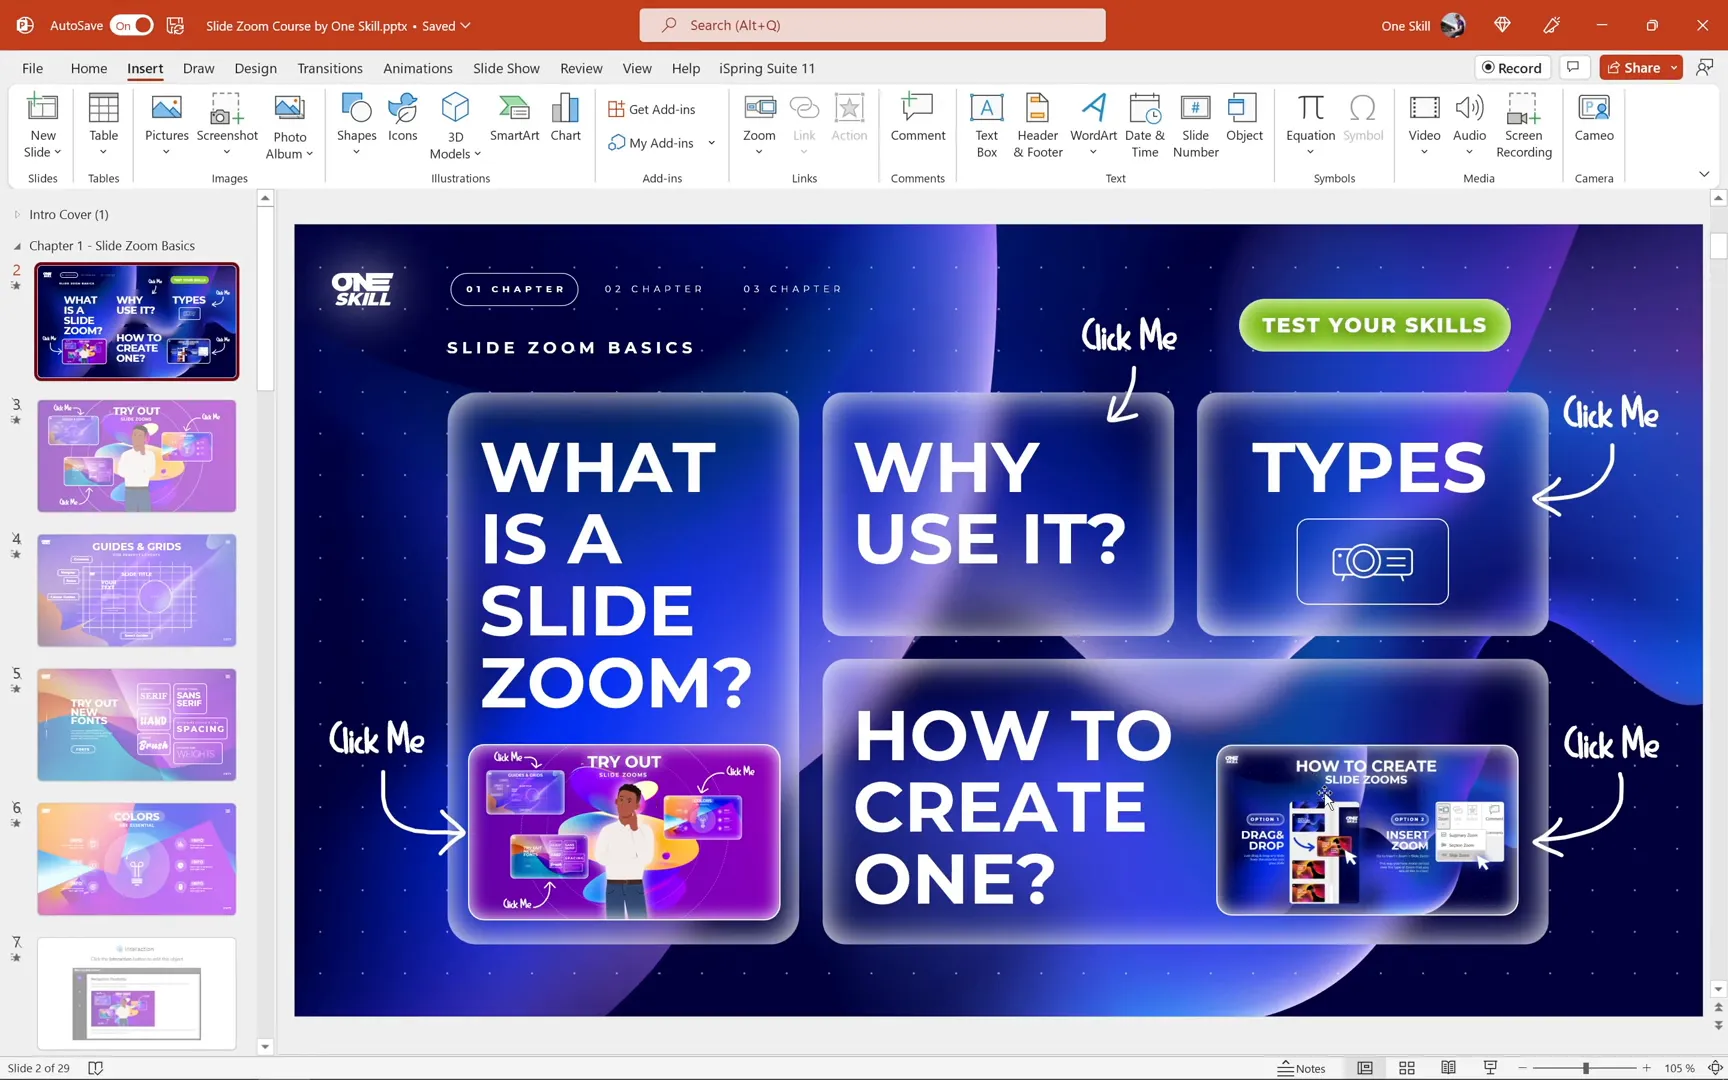
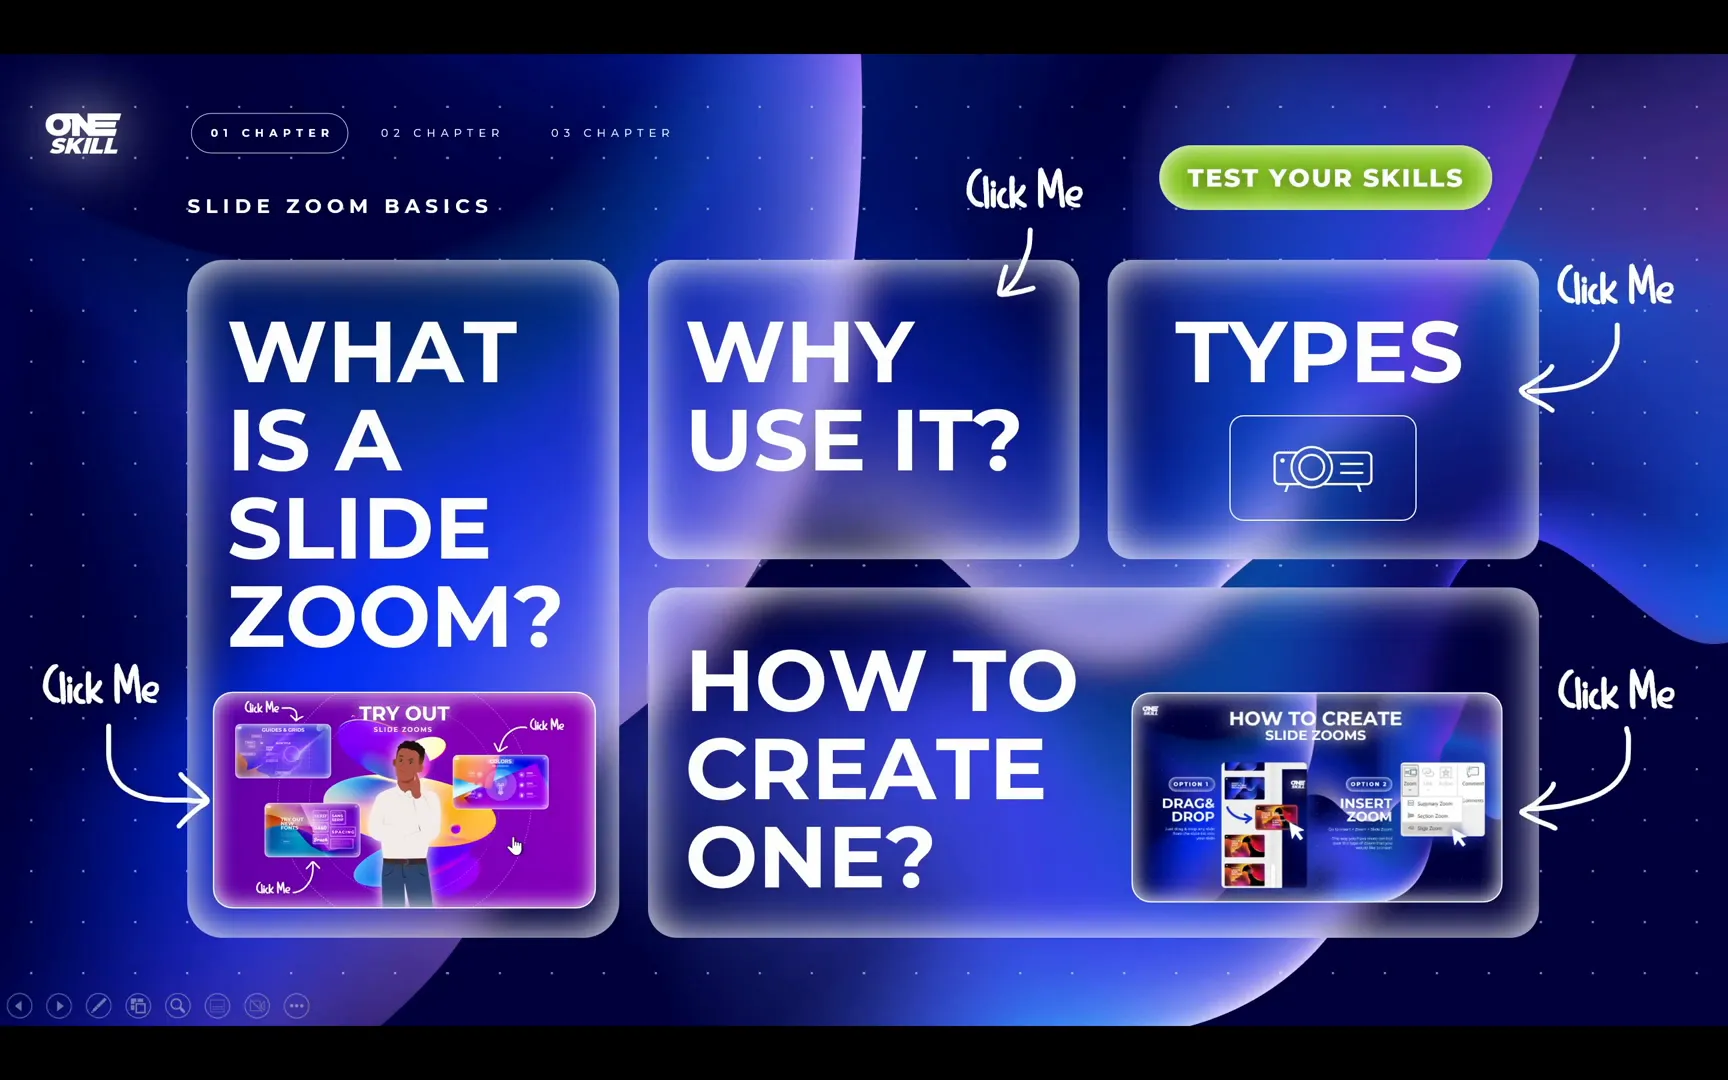
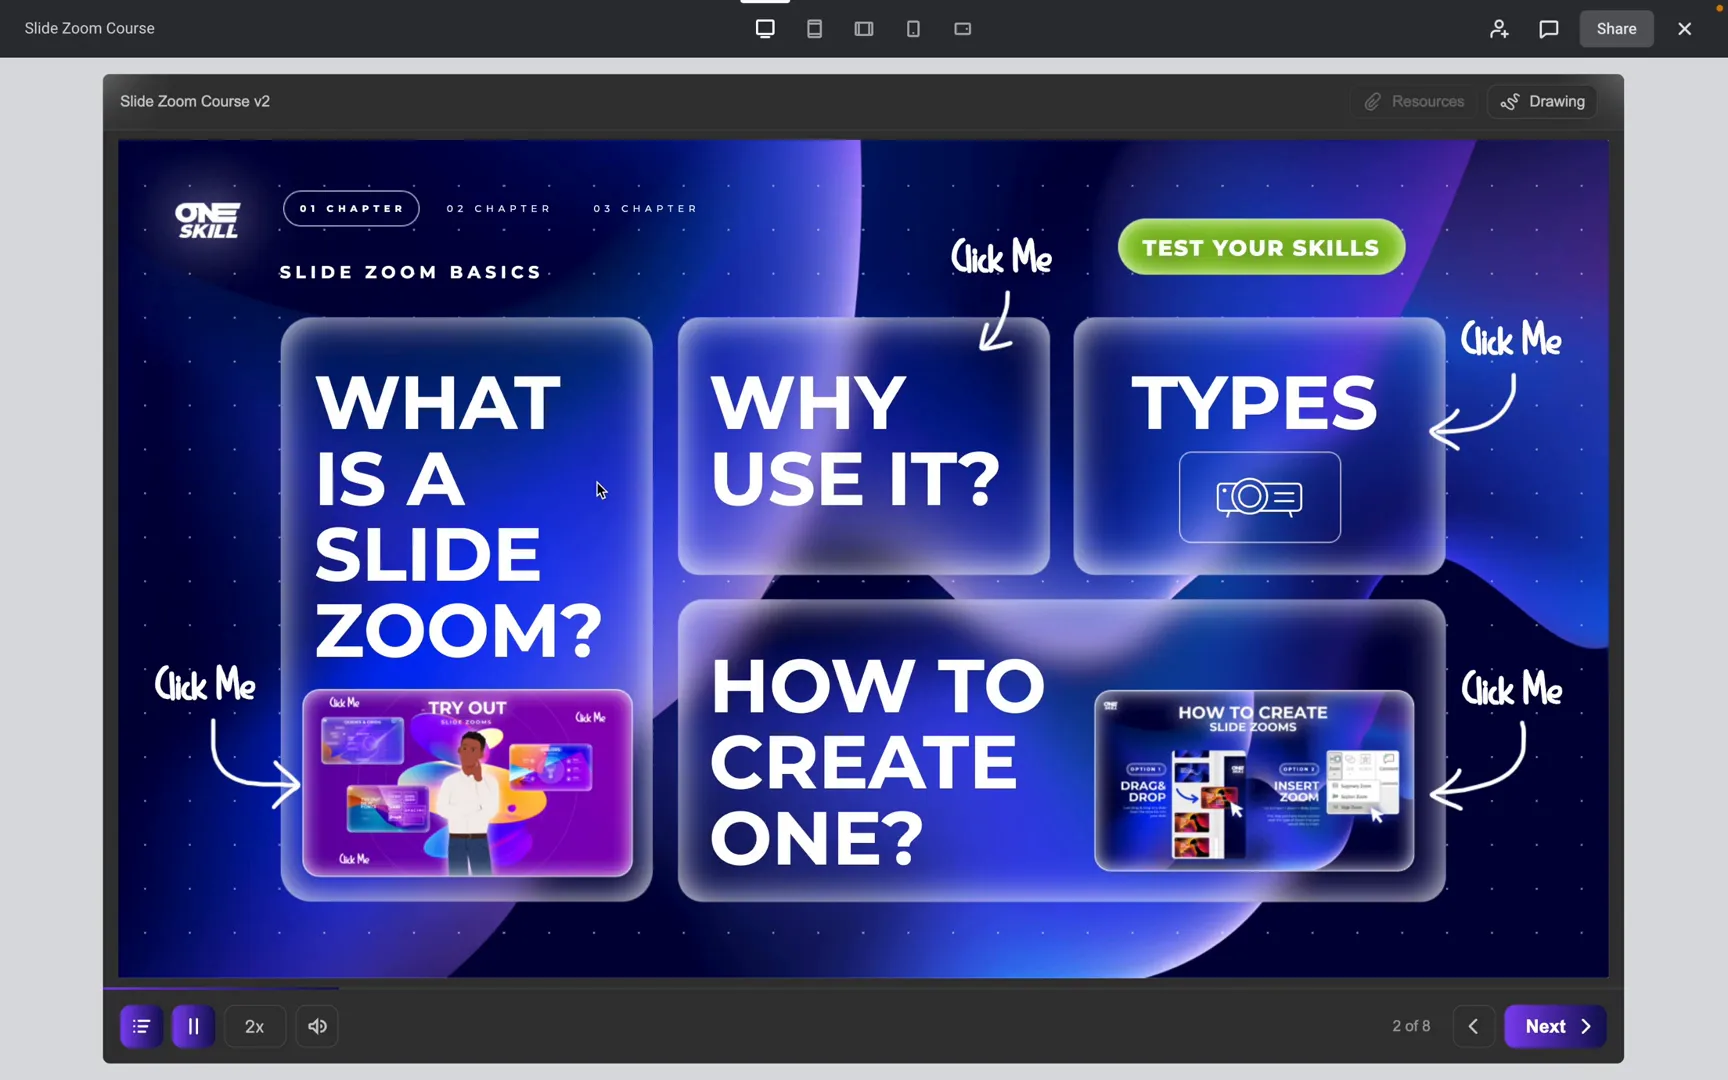
Interactive Clickable Dashboards
An exciting feature of this course is the interactive clickable dashboard. Each chapter’s dashboard itself is made of slide zooms, allowing you to zoom into any lesson you want and then zoom back to the dashboard once you’re done. This structure creates a seamless and intuitive navigation experience, making learning feel natural and enjoyable.
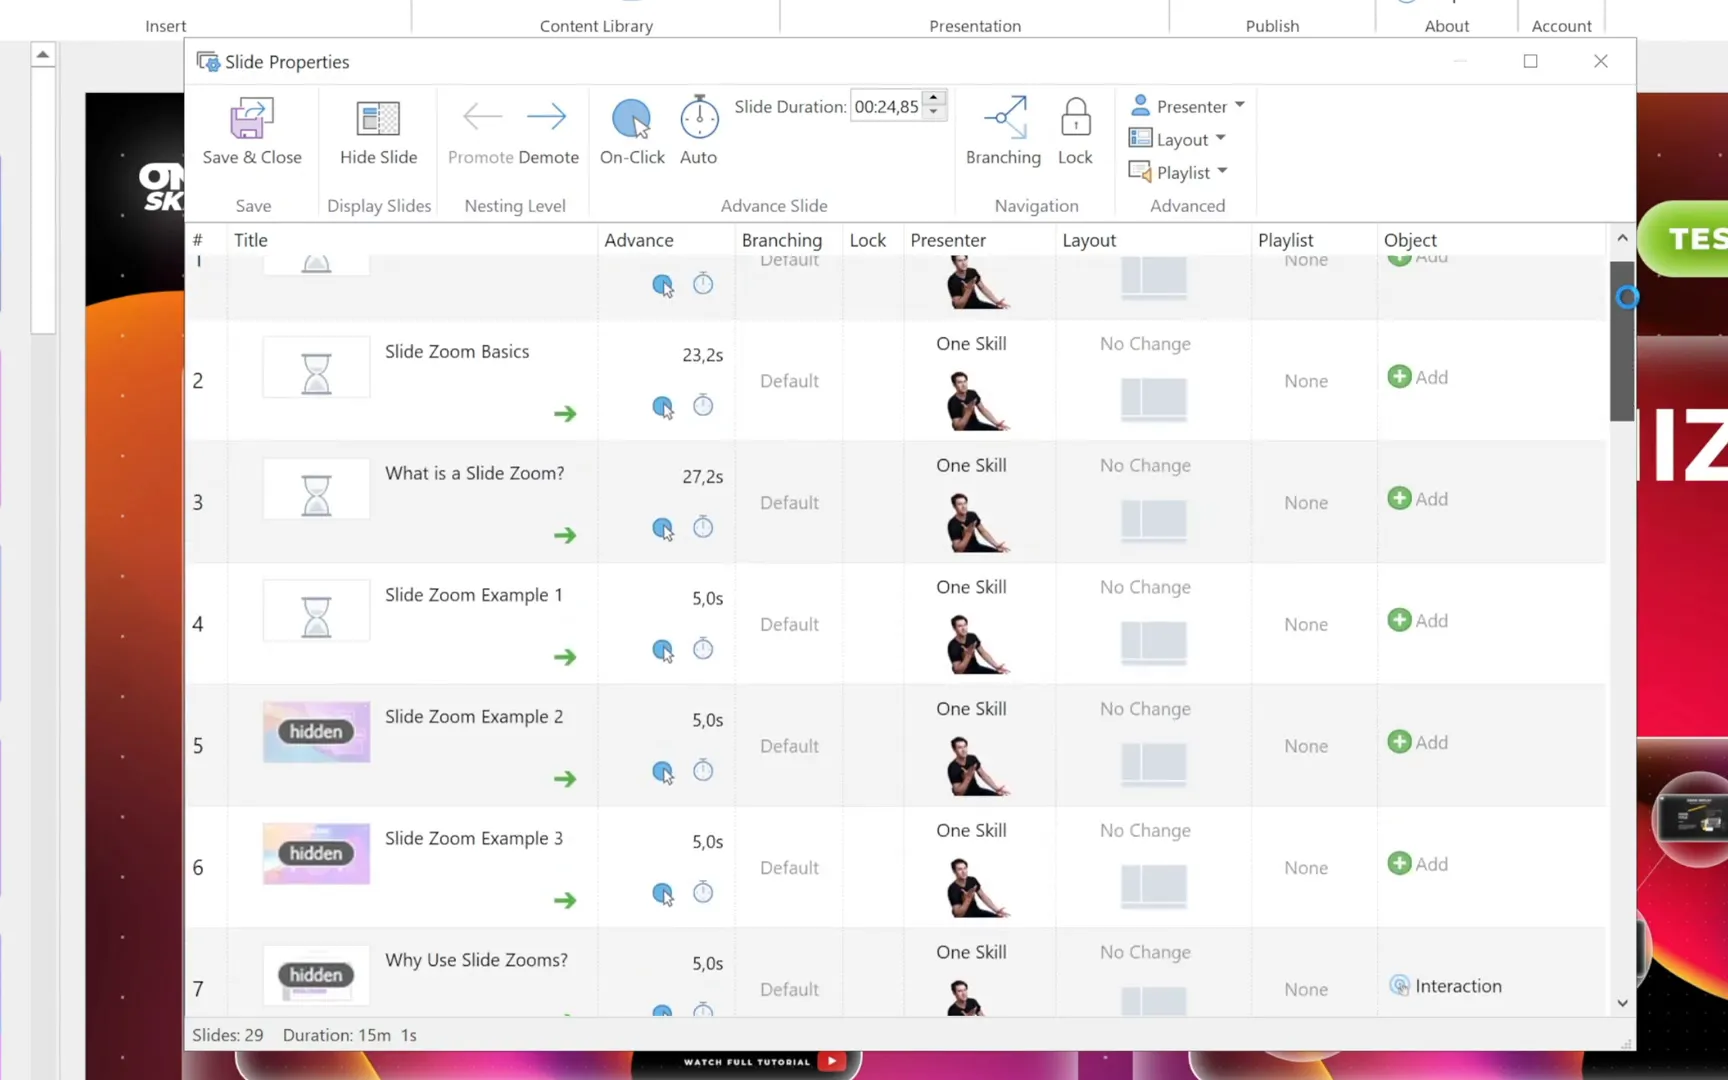
To keep the course player clean and easy to navigate, I decided to keep only the highest-level slides visible—such as chapter dashboards and quizzes. The rest of the slides are hidden and can only be accessed through slide zooms or hyperlinks.
Managing Slide Visibility with Slide Properties
Keeping track of which slides are visible or hidden can be tricky, but iSpring Suite 11 offers a handy feature called Slide Properties. This tool shows you at a glance which slides are hidden, what transition effects are applied, and details about interactive objects or branching settings.
For example, you can set up branching so that if a student fails a quiz, they are automatically taken back to the beginning of the chapter to review the lessons. This kind of smart navigation ensures learners stay on track and truly understand the material.
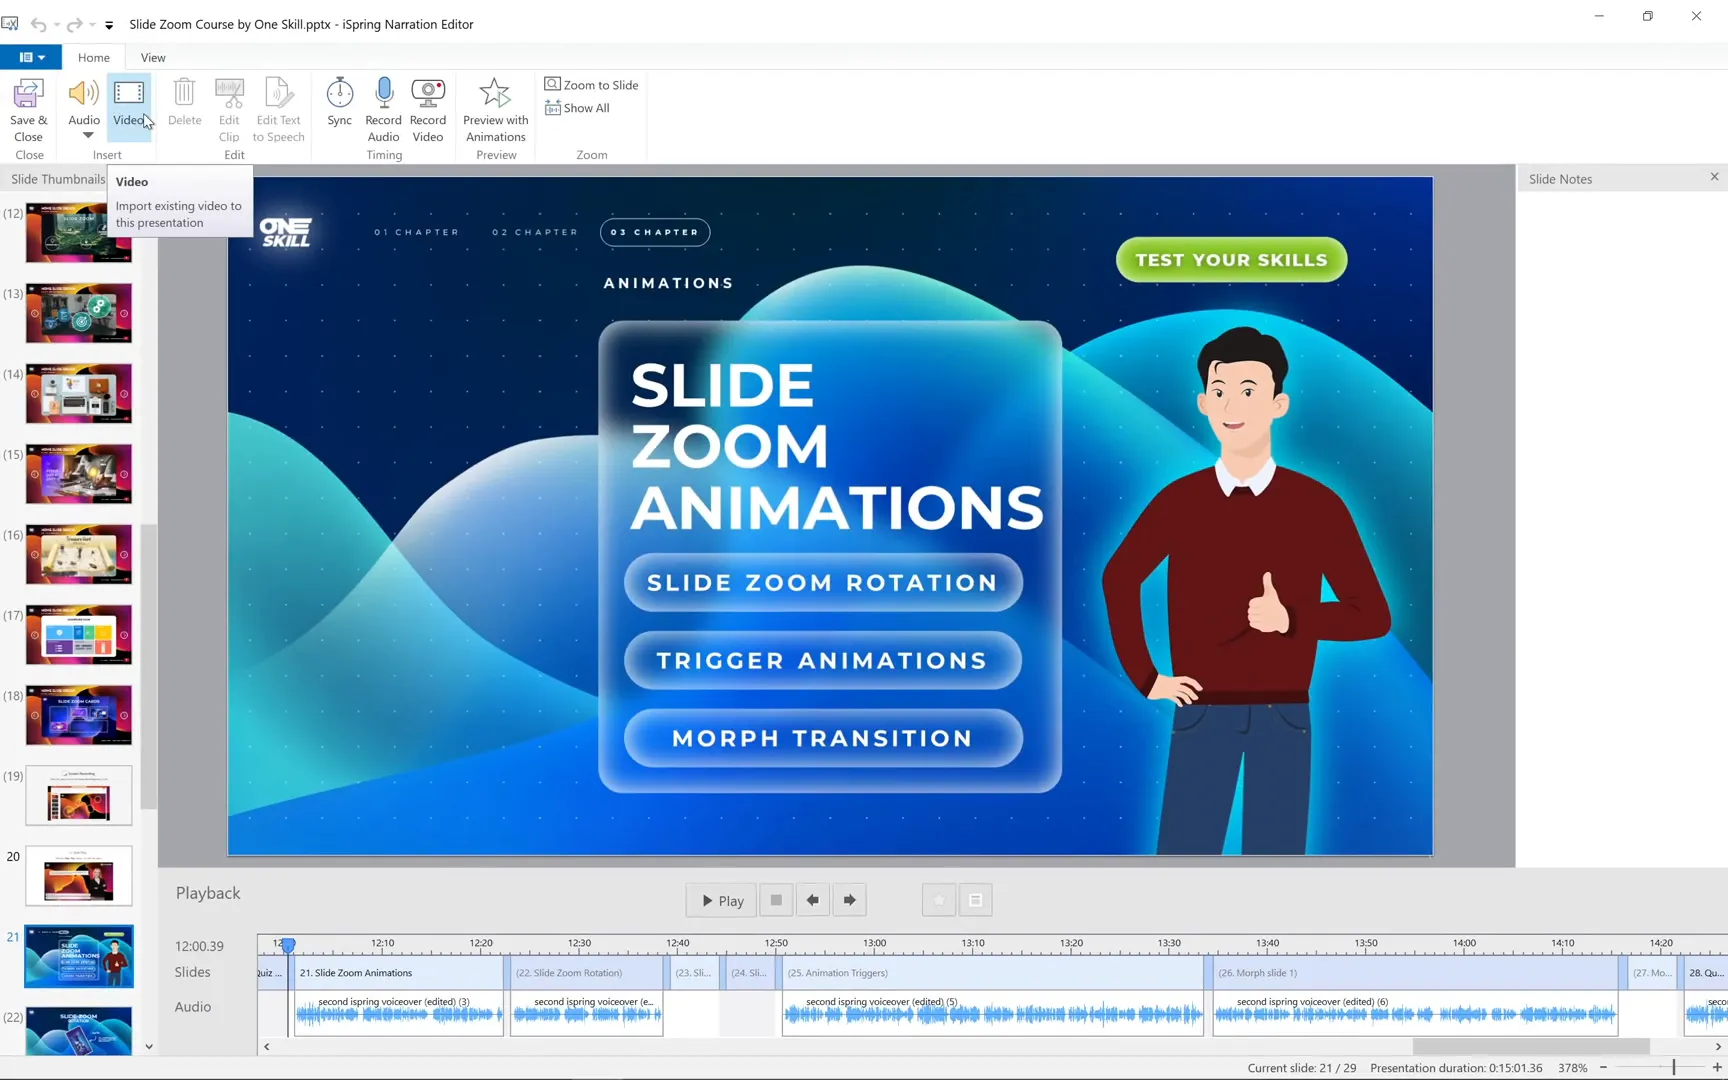
Adding Voiceovers: Making Your Course Personal and Engaging
Voiceovers are a fantastic way to add personality and clarity to your course. In iSpring Suite 11, there’s a tool called Manage Narration that lets you record, edit, and organize voiceovers for all your slides in one place.
While you can record voiceovers slide by slide using the built-in recorder, I prefer to pre-record all narration externally using Audacity, a free and powerful audio editing tool. I then insert one big audio clip into the timeline and slice it up to match each slide’s content perfectly. This method gives me more control over the audio quality and timing.
Designing Interactive Lessons and Menus
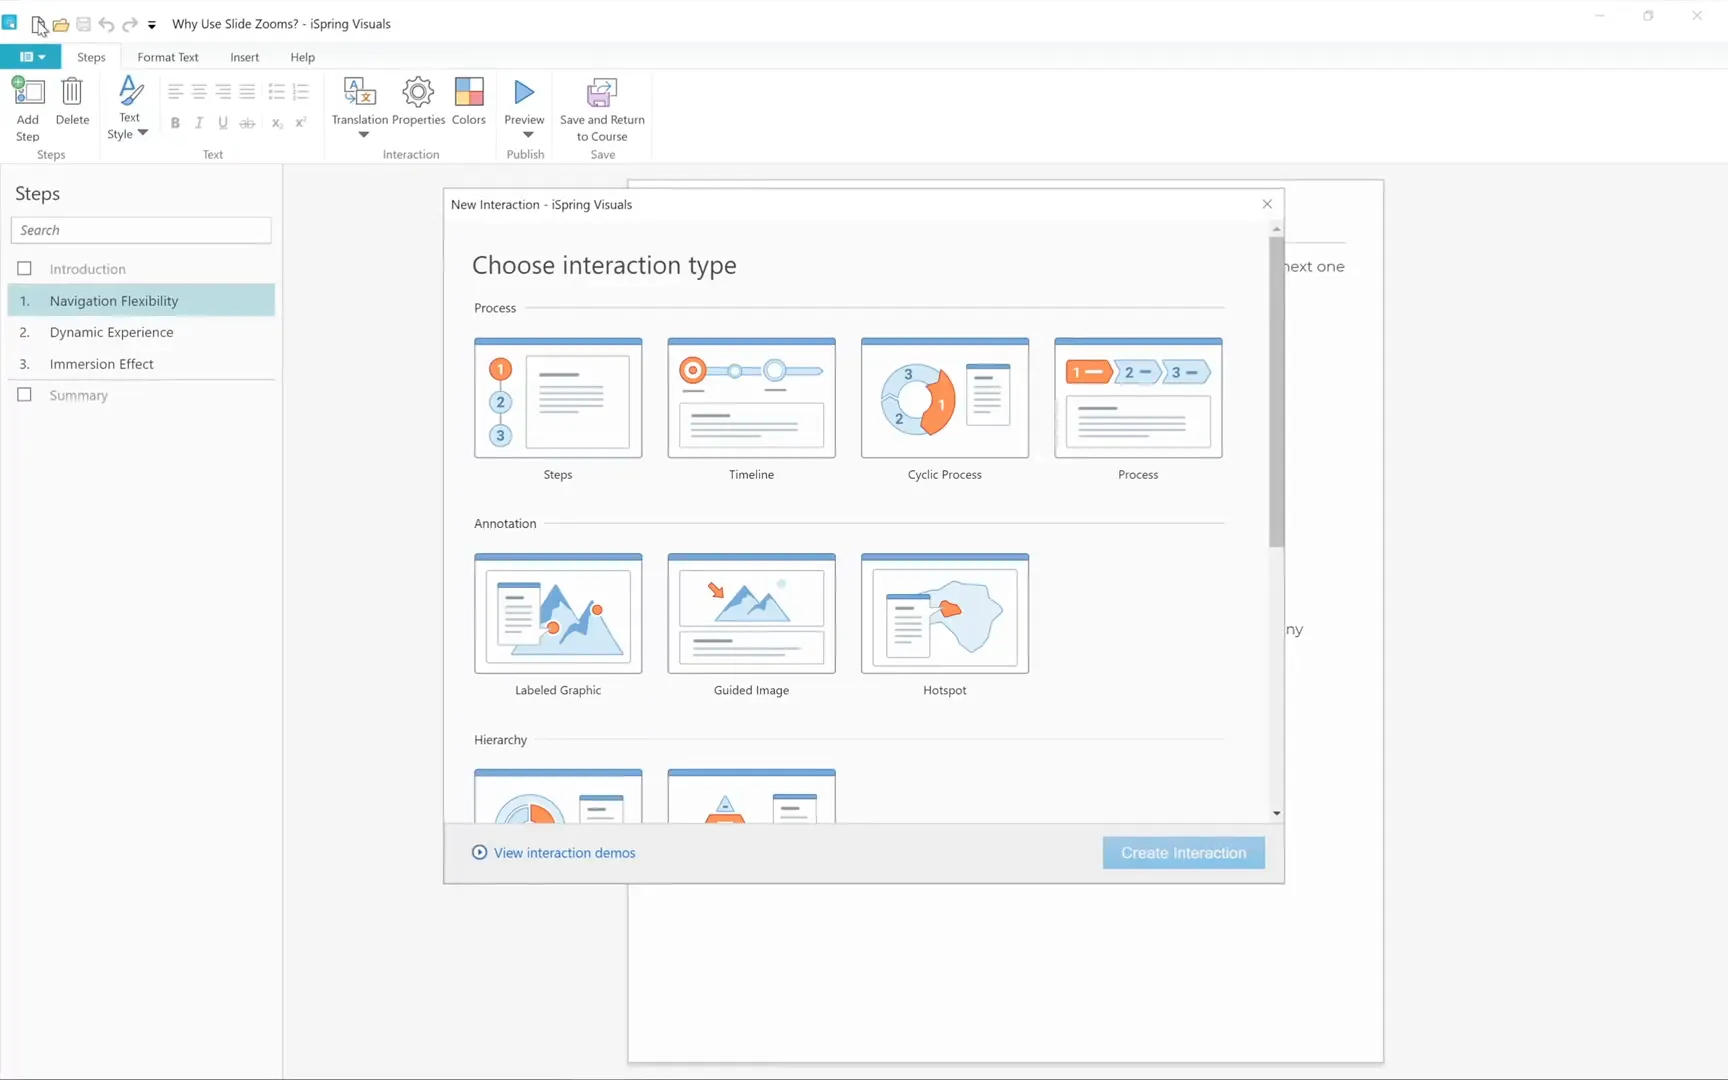
Not all lessons are created equal. To keep learners engaged, I use a variety of formats including clickable slide zooms, screen recordings, interactive menus, and role plays. iSpring Suite 11 offers a powerful Interaction tool that helps you build interactive slides quickly and easily.
You can choose from different interaction types such as:
- Steps
- Process
- Hotspot
- Accordion
- Tabs
In this course, I mainly used the Steps and Tabs interactions because they are straightforward to insert and customize. Trying to create similar interactions using only PowerPoint would take much more time and effort.
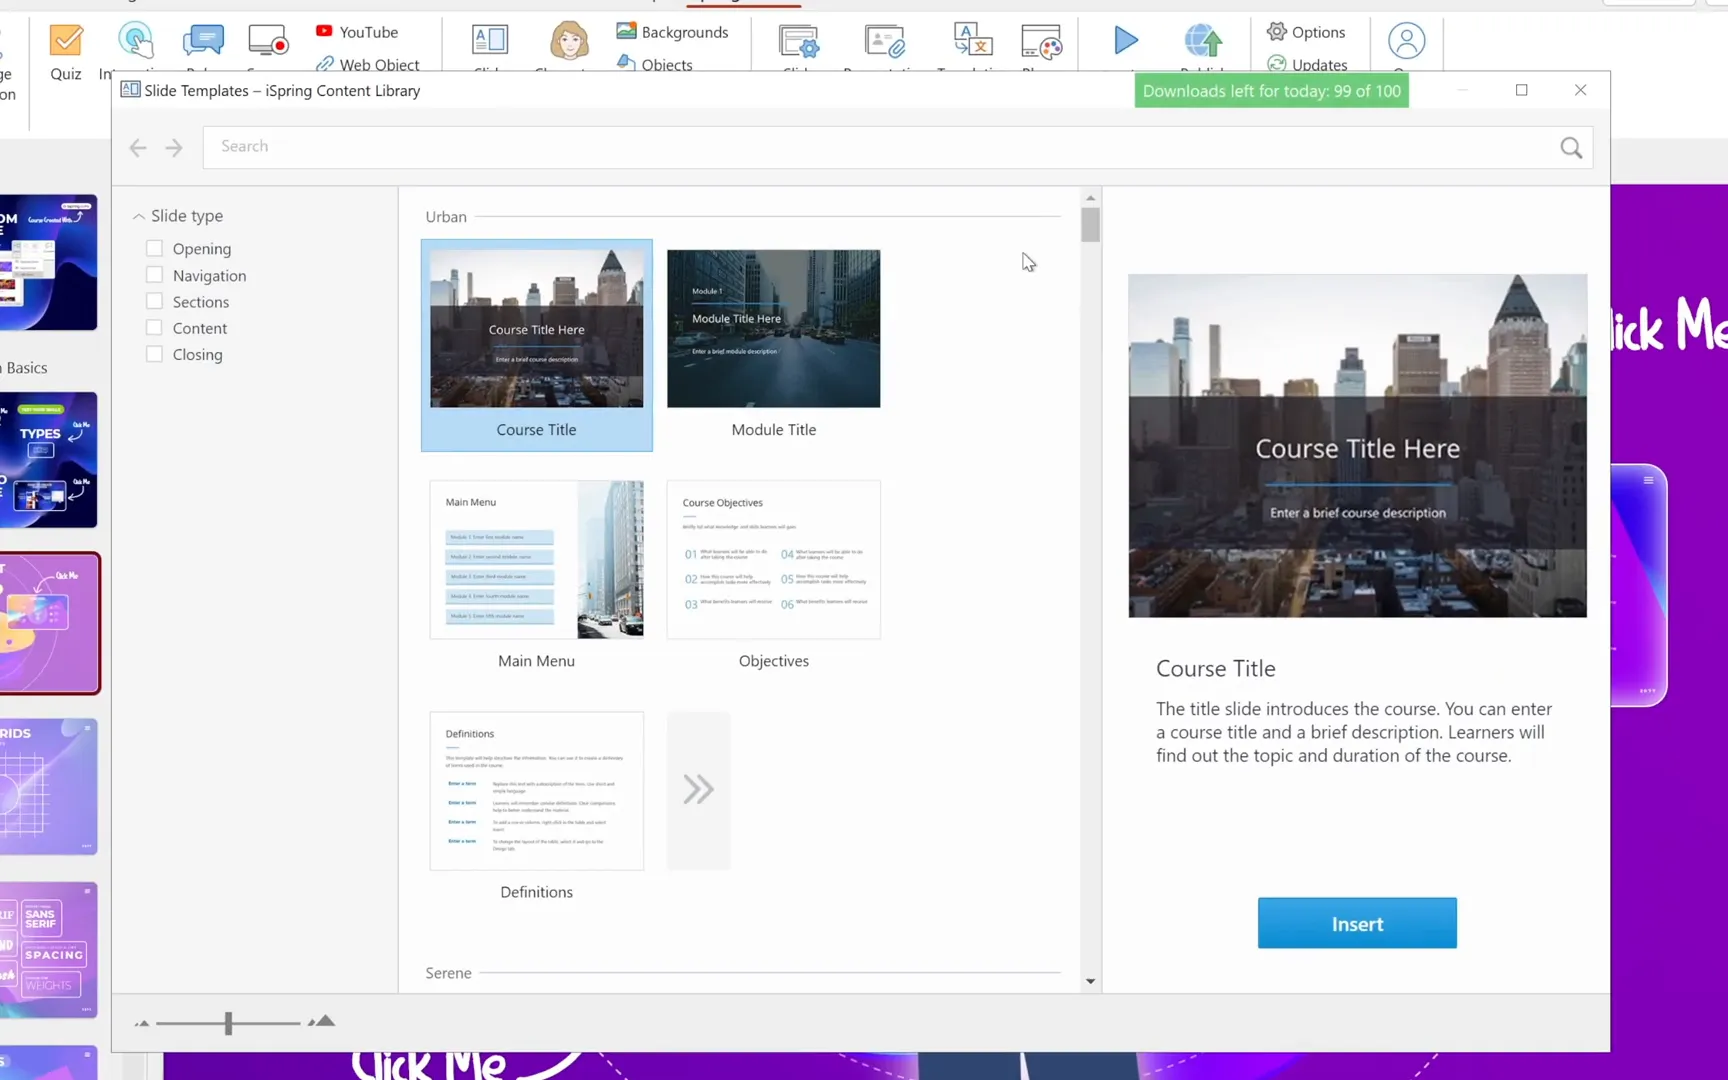
Making Slides More Lively with Characters and Backgrounds
To add a friendly and professional touch to your slides, consider adding characters and backgrounds from the iSpring content library. You can choose from a wide variety of photos and illustrations that fit different themes and styles.
If you are starting from scratch and don’t have slides ready, iSpring also offers a rich collection of slide templates categorized by type, such as opening, navigation, or content slides. These templates are a great way to jumpstart your course design and maintain a consistent look throughout.
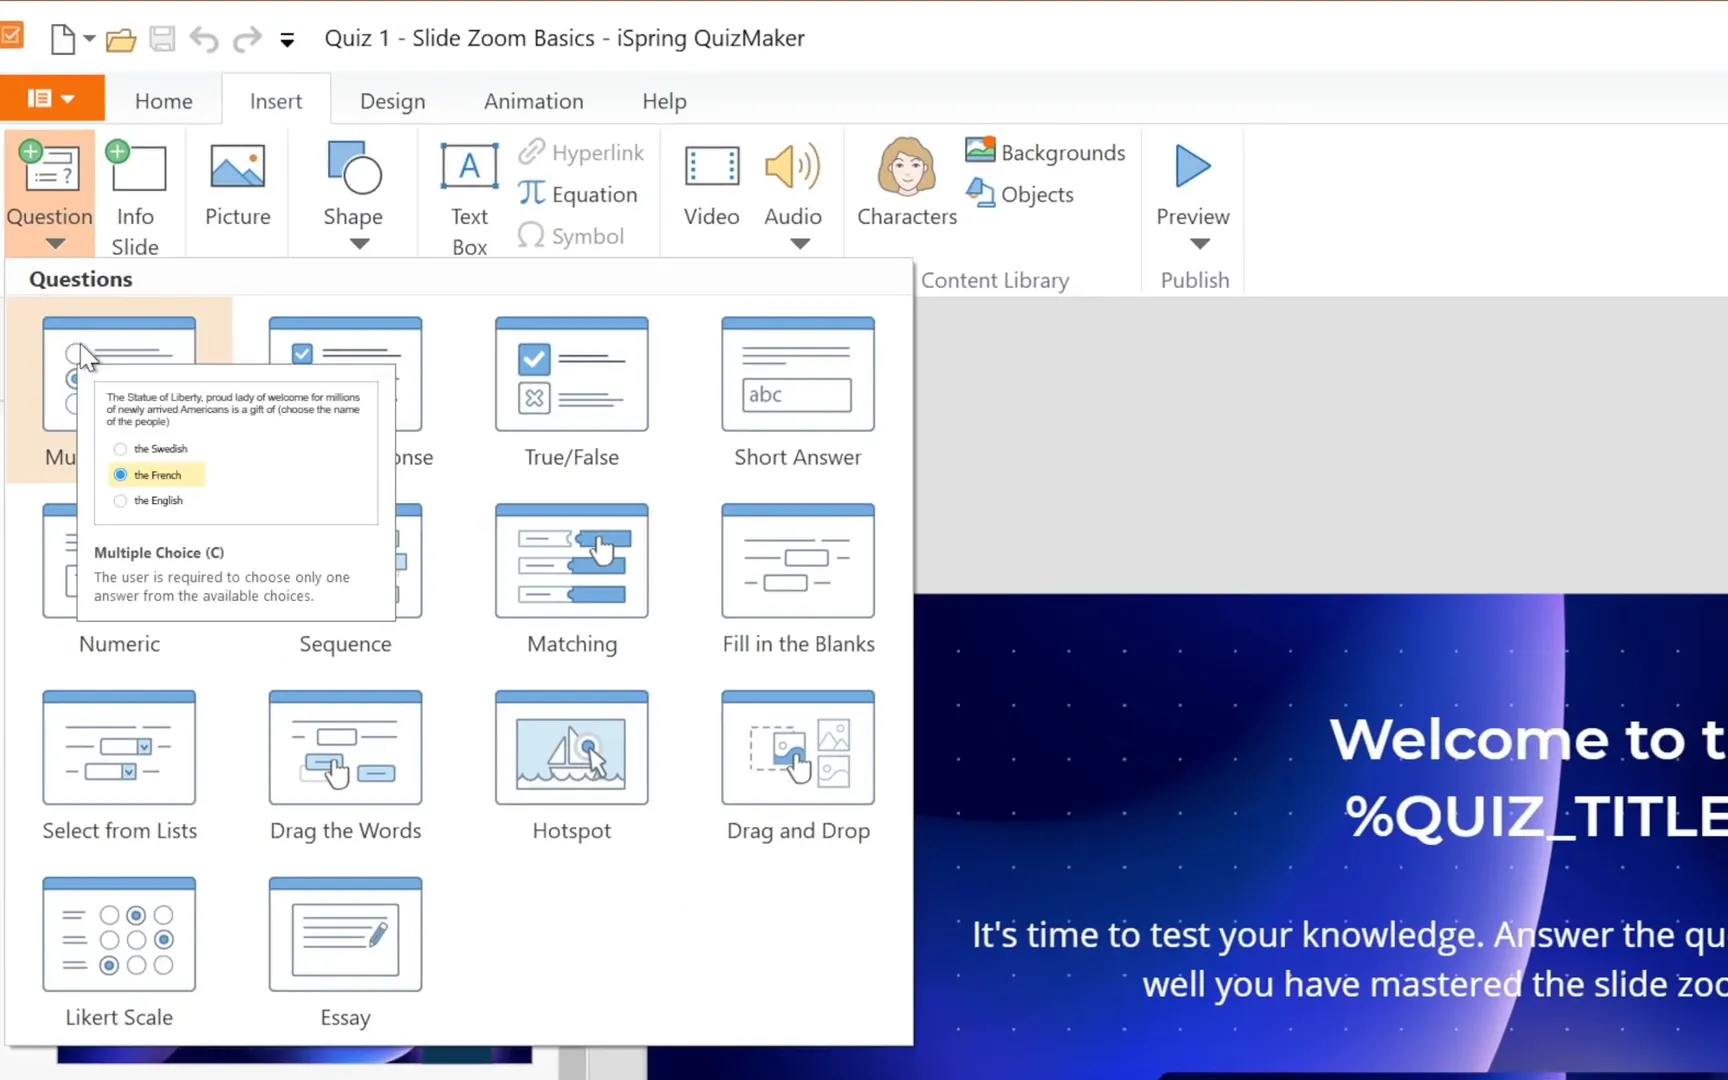
Inserting Quizzes: Testing Knowledge the Fun Way
To help learners reinforce their knowledge, I added a quiz at the end of each chapter. Quizzes are a vital part of any educational course because they help measure understanding and keep learners motivated.
Creating quizzes in iSpring Suite 11 is as simple as adding interactions. You can select from multiple question types, including:
- Multiple choice
- Matching
- Drag and drop
- True or false
- Fill in the blanks
For this course, I decided to grade the quizzes so that you pass only if you score 80% or higher. But don’t worry, you can retry quizzes as many times as needed to master the material.
Role Plays: An Engaging Alternative to Quizzes
After chapter two, I introduced a role play instead of a traditional quiz. Role plays are usually used for training simulations, such as customer service scenarios, but I thought it would be a fun and interactive way to test your knowledge.
Here’s how it works:

- Choose a character and a background for your role play.
- Create multiple scenes where the character asks questions.
- You pick the correct answers from the options provided.
- The character reacts with different emotions based on your answers.
You decide how the role play unfolds by setting the number of questions and possible answers. Plus, you can add voiceovers to your characters using iSpring’s text-to-speech tool, which converts your script into realistic AI-generated voices.
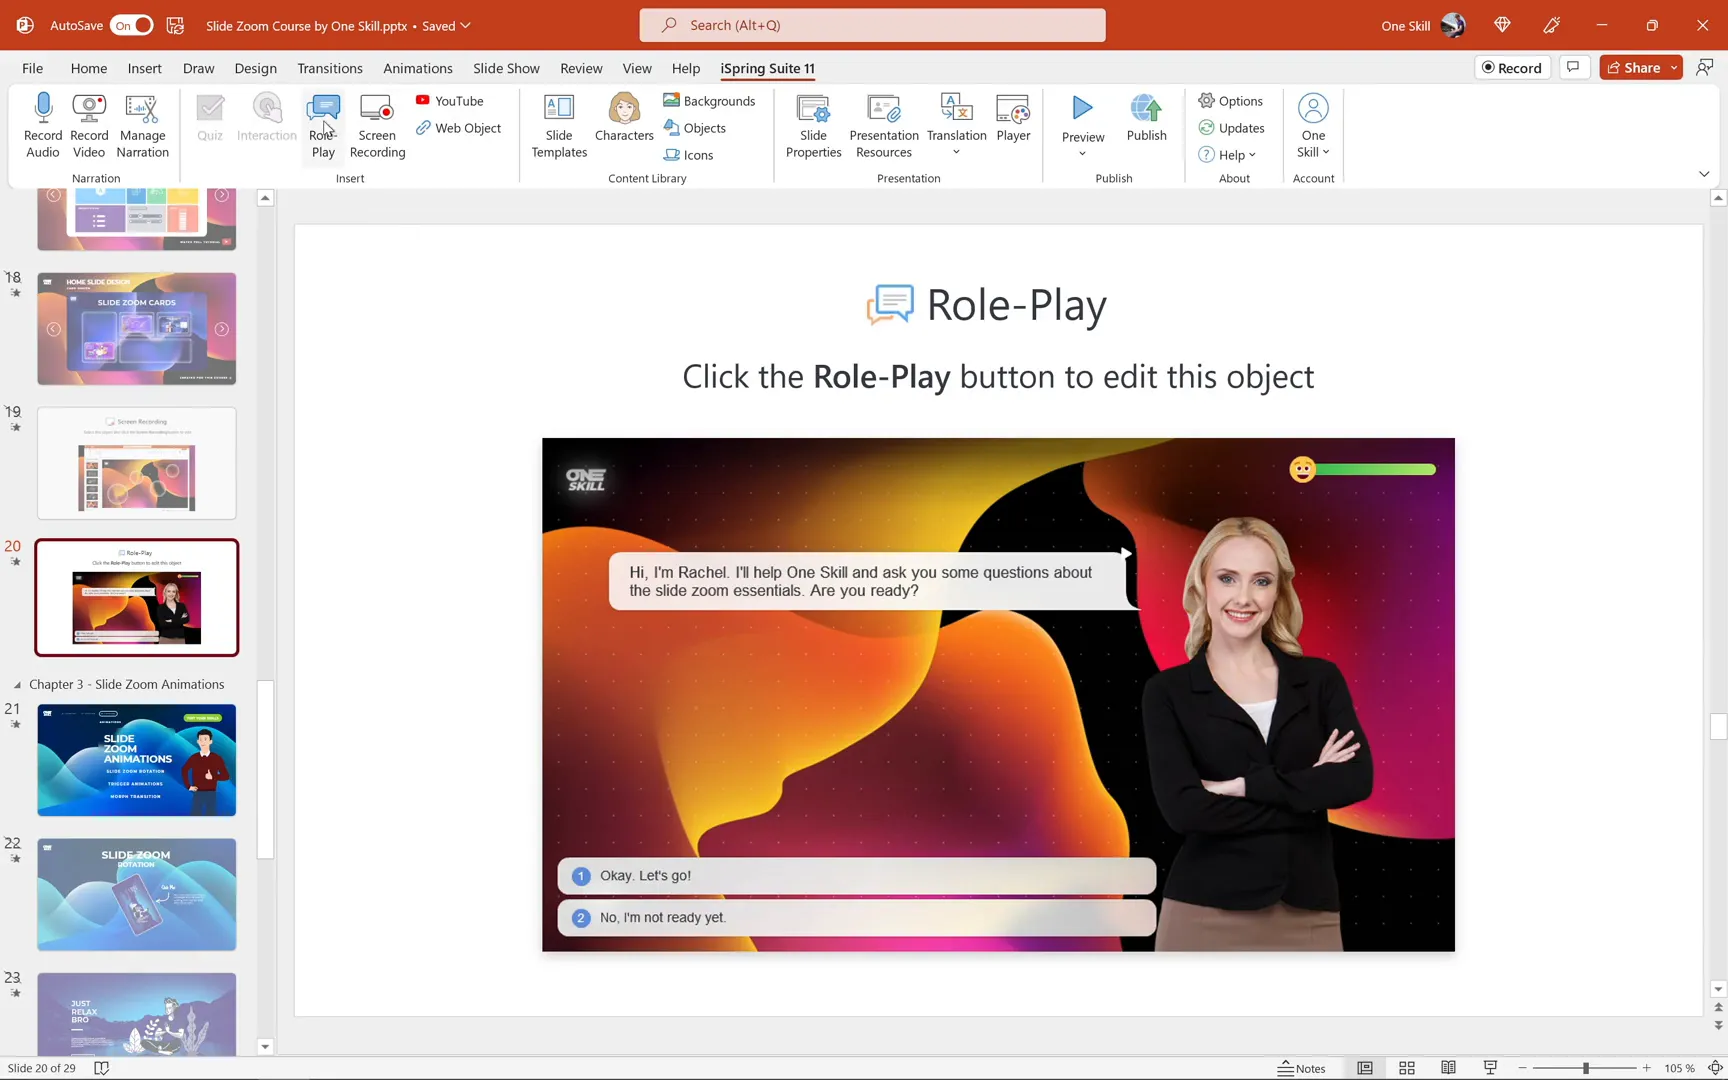
Hi, I’m Rachel. I’ll help one skill and ask you some questions about the slide zoom essentials. Are you ready?
Previewing and Customizing Your Course Player
Once you have your slides, voiceovers, quizzes, and interactions ready, it’s time to preview your course. Simply click the Preview button to see how everything works in the course player.
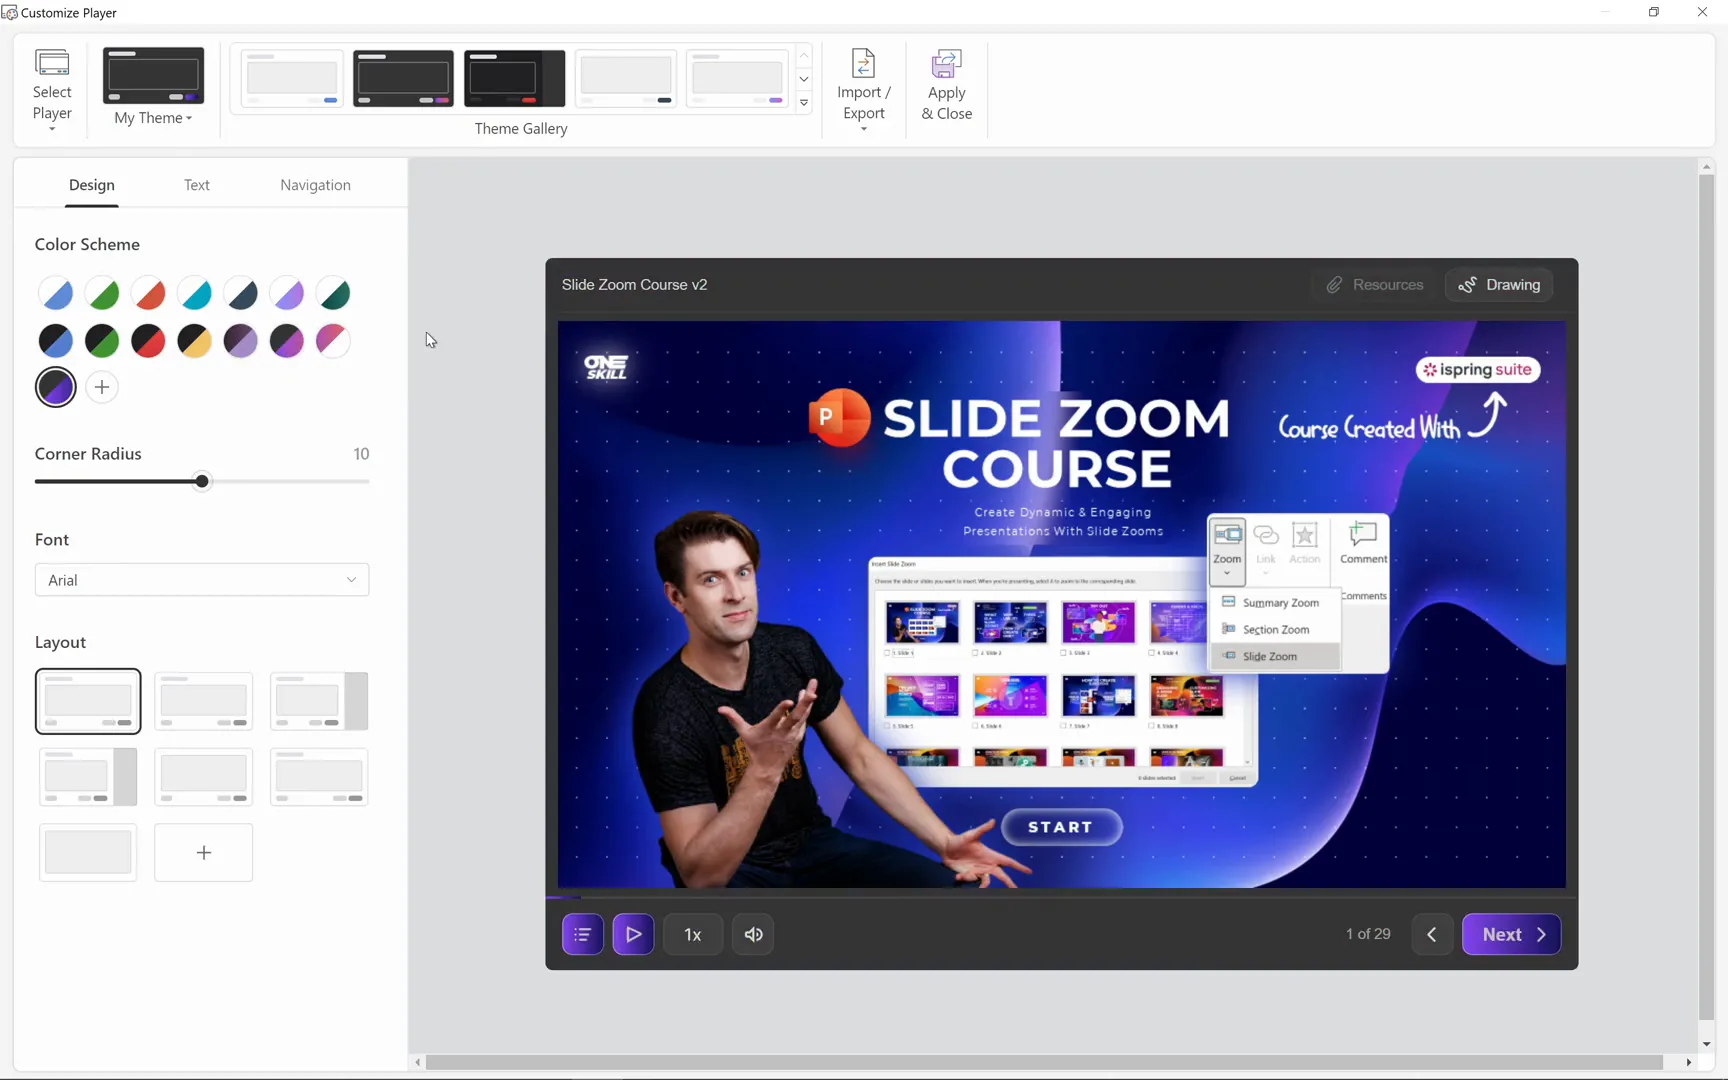
During preview, you might notice things you want to tweak, such as layout, colors, or navigation options. iSpring Suite 11 makes it easy to customize your course player with just a few clicks.
You can choose from different player types, like one optimized for video lectures or a universal player that fits any course style. You can also select your favorite color scheme and customize the layout to match your branding or personal preference.
Publishing Your Course: Share Your Masterpiece
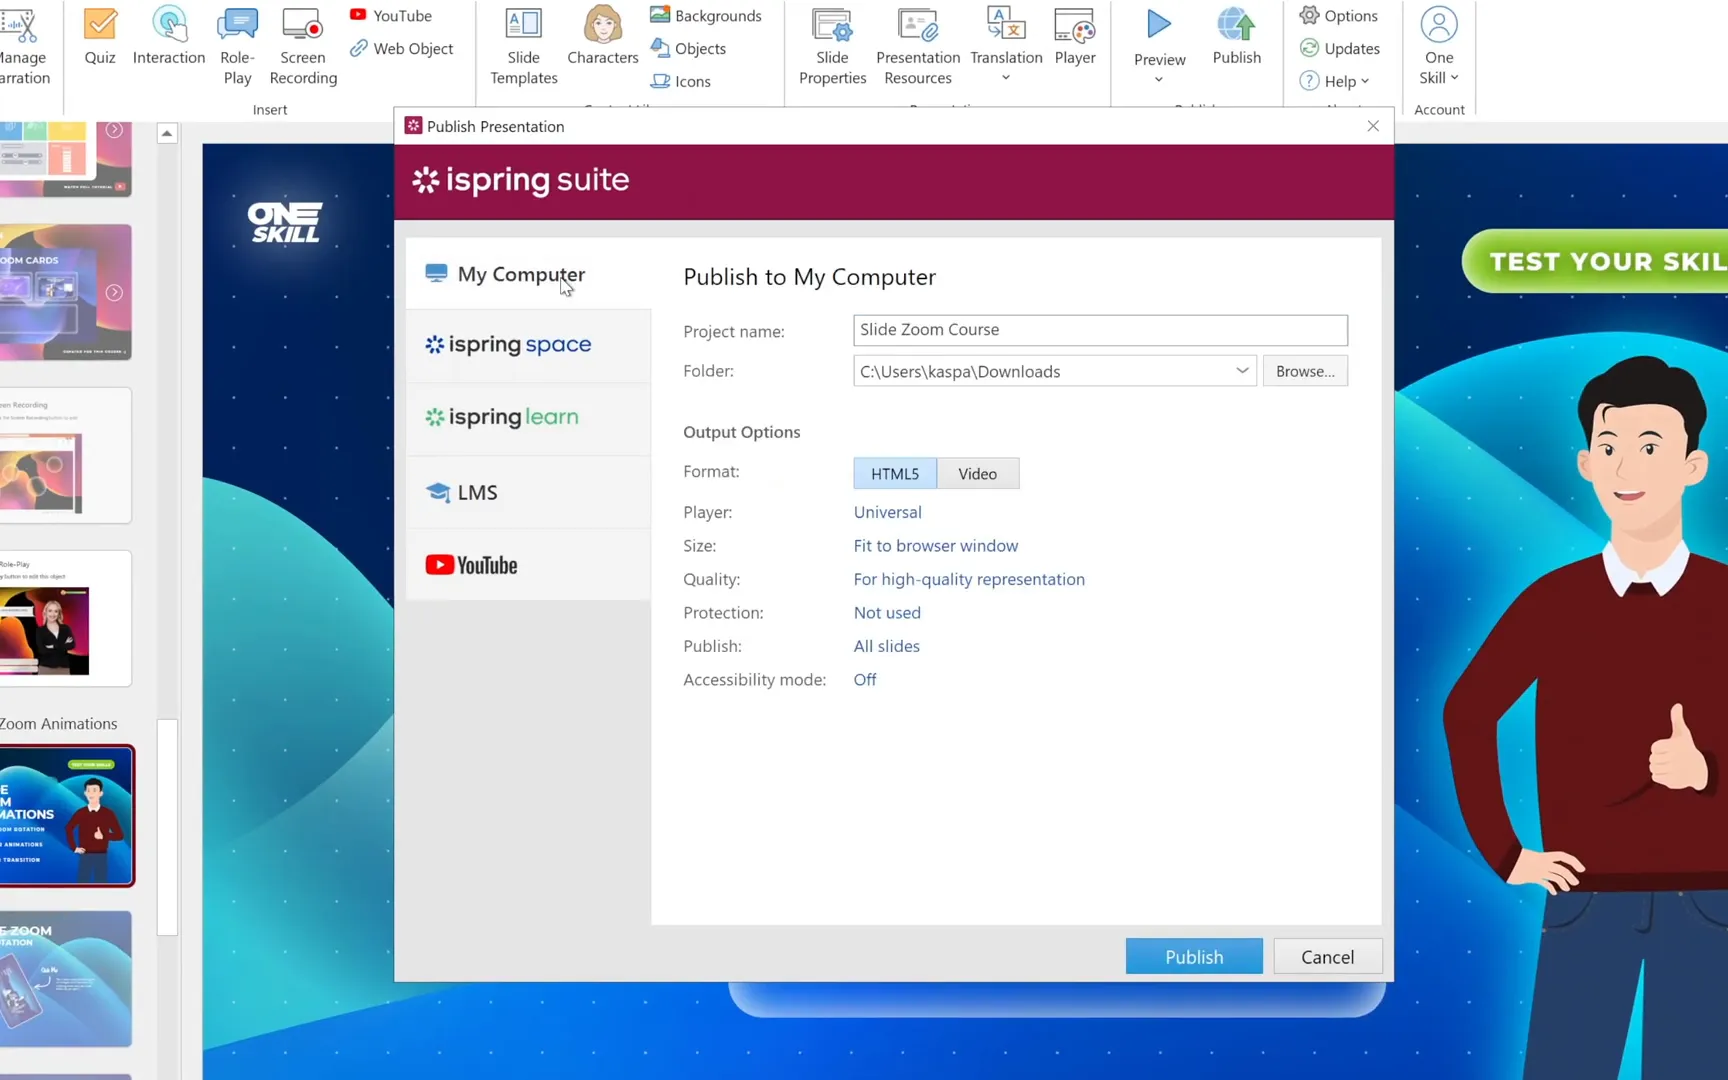
When your course looks perfect and everything works seamlessly, it’s time to publish and share it with the world. iSpring Suite 11 offers several publishing options:
- Publish to your computer: This is a good practice to check that everything works offline before sharing.
- Publish to iSpring Space: iSpring’s cloud service makes it easy to host and share your course online.
- Publish to a Learning Management System (LMS): iSpring integrates with over 150 popular LMS platforms, including its own LMS called iSpring Learn.
- Publish directly to YouTube: Share your course as a video lecture for broader reach.
For this course, I chose to publish to iSpring Space so that I could easily share it with all of you, my dear friends.
Quick Tip: Adjust Playback Speed
When viewing lessons, you can change the playback speed to suit your learning style. Whether you want to slow things down to catch every detail or speed up the pace, the course player lets you control the speed easily.
Summary and Final Thoughts
Creating an interactive and engaging PowerPoint Slide Zoom course is easier than you might think. With the help of iSpring Suite 11 and some thoughtful planning, you can build a professional-quality course that works on any device—desktop, laptop, tablet, or phone—with just an internet connection.
Remember these key takeaways:
- Plan your course structure carefully with clear chapters and interactive dashboards.
- Use slide zooms to create dynamic navigation and engaging learning experiences.
- Leverage iSpring’s tools for voiceovers, interactions, quizzes, and role plays to enrich your content.
- Customize your course player to match your style and branding.
- Publish your course to multiple platforms for easy sharing and access.
I hope this guide inspires you to start creating your own interactive courses with PowerPoint. Whether for education, training, or sharing your knowledge, slide zooms offer a powerful way to captivate your audience.
Stay happy, stay healthy, and happy creating!
Frequently Asked Questions (FAQ)
What is a Slide Zoom in PowerPoint?
A Slide Zoom is an interactive feature in PowerPoint that allows you to zoom into specific slides or sections from a central dashboard or menu, making navigation more dynamic and non-linear.
Do I need special software to create slide zoom courses?
You need Microsoft PowerPoint and a plugin like iSpring Suite 11, which enhances PowerPoint’s capabilities to build interactive courses with quizzes, voiceovers, and more.
Can I use slide zooms on any device?
Yes! The course created with slide zooms works perfectly on desktops, laptops, tablets, and smartphones, as long as you have an internet connection.
How do I add voiceovers to my slides?
You can record voiceovers directly in iSpring Suite 11 or pre-record audio using software like Audacity and then insert and synchronize it with your slides.
What types of quizzes can I add to my course?
iSpring Suite 11 supports multiple question types including multiple choice, matching, drag and drop, fill in the blanks, and true or false, allowing you to create diverse and engaging quizzes.
What is a role play, and how can it be used in courses?
A role play is an interactive simulation where learners engage with characters in different scenarios, answering questions and making decisions. It’s commonly used for training but can also be a fun alternative to quizzes.
How can I publish and share my course?
You can publish your course locally, to the iSpring Space cloud, various LMS platforms, or even directly to YouTube.
Is there a way to customize the look of my course player?
Yes! iSpring Suite 11 lets you customize player types, colors, layouts, and playback options to create a personalized learning environment.
Check out the full video: MOST Interactive PowerPoint Slide Zoom Course ✅ FREE


