

- Table of contents
- Introduction
- Why use a Jigsaw Puzzle Options Slide?
- What the final Jigsaw Puzzle Options Slide does
- Step 1 — Slide setup and background
- Step 2 — Build the jigsaw piece shape
- Step 3 — Duplicate and arrange pieces
- Step 4 — Add icons and group pieces
- Step 5 — Create the explode animation with Morph
- Step 6 — Title bar, spherical bullets and connectors
- Step 7 — Add option titles and descriptions
- Design tips, accessibility and troubleshooting
- Variations and advanced ideas
- FAQ
- Conclusion
Introduction
This tutorial expands on the method I use in my video created for POWERPOINT UNIVERSITY to design a clean, colorful and interactive Jigsaw Puzzle Options Slide for PowerPoint. The jigsaw puzzle options slide is ideal for showing five related items — options, steps, departments, or components — where each piece is visually distinct yet clearly part of a whole. In this guide I’ll walk you through every step: creating a puzzle-shaped piece from basic shapes, combining pieces, adding icons and labels, and animating the slide with the Morph transition so the pieces “explode” apart when clicked.
Throughout this article I will call attention to practical keystrokes, alignment tricks, accessibility considerations, and creative alternatives so you can adapt the jigsaw puzzle options slide to your brand. If you prefer to follow along visually, screenshots from the original demonstration are included at relevant steps.
Keyphrase: This guide focuses specifically on how to build a functional and stylish Jigsaw Puzzle Options Slide that you can reuse and customize for meetings, training, pitch decks, and infographics.
Why use a Jigsaw Puzzle Options Slide?
The Jigsaw Puzzle Options Slide is a versatile infographic device that conveys relationships among five items in a compact, memorable way. Here are the top reasons to use a jigsaw puzzle options slide in your presentation:
- Visual storytelling: The interlocking pieces visually communicate that the items belong together or complete a single system.
- Clarity: Each option becomes an easy scan for audiences because you use color, icons and short labels.
- Engagement: Adding a simple animation (like a piece movement) creates a dynamic moment that re-focuses attention.
- Modularity: You can reuse the same slide with different icon sets, colors or copy to cover a range of topics.
- Space efficiency: Five items in one graphic save slides while remaining readable.
Because this tutorial focuses on a five-piece arrangement, it’s optimized for lists with five related options. However, the techniques used — editing points, merging, union/subtract operations, and Morph transitions — are applicable if you want a four-piece, six-piece or other variations.
What the final Jigsaw Puzzle Options Slide does
The completed jigsaw puzzle options slide described here delivers a polished user experience:
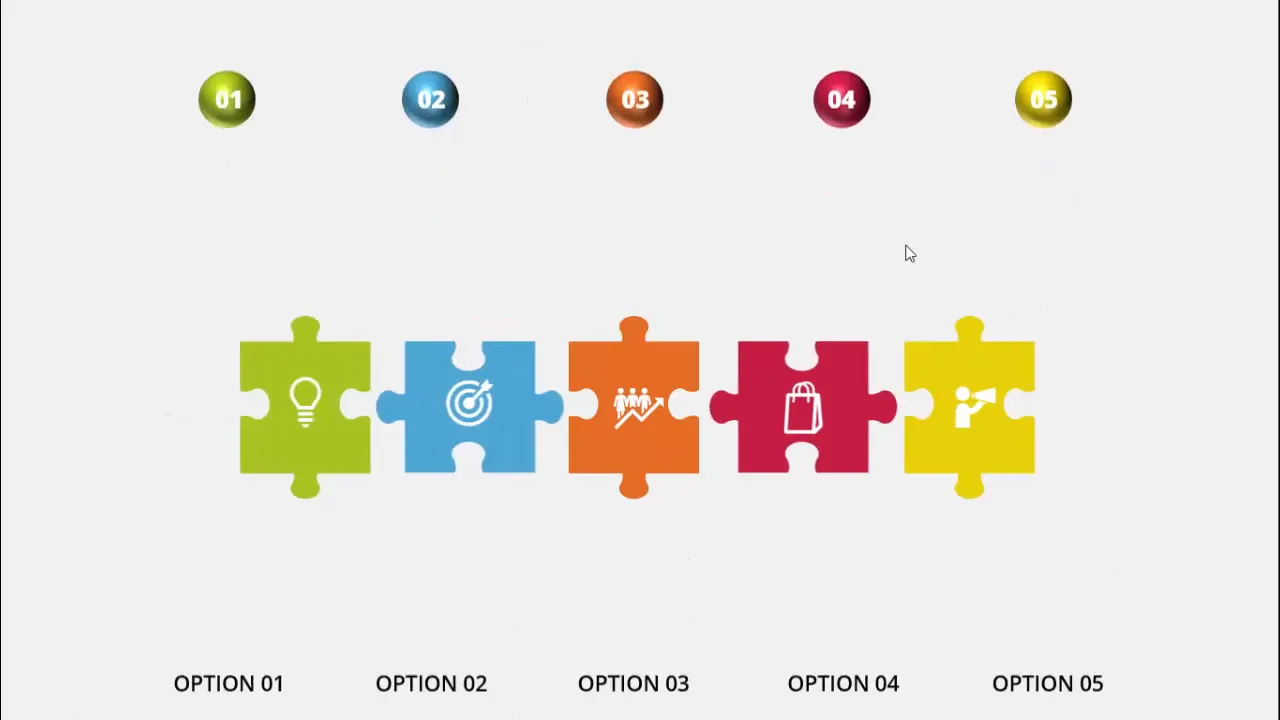
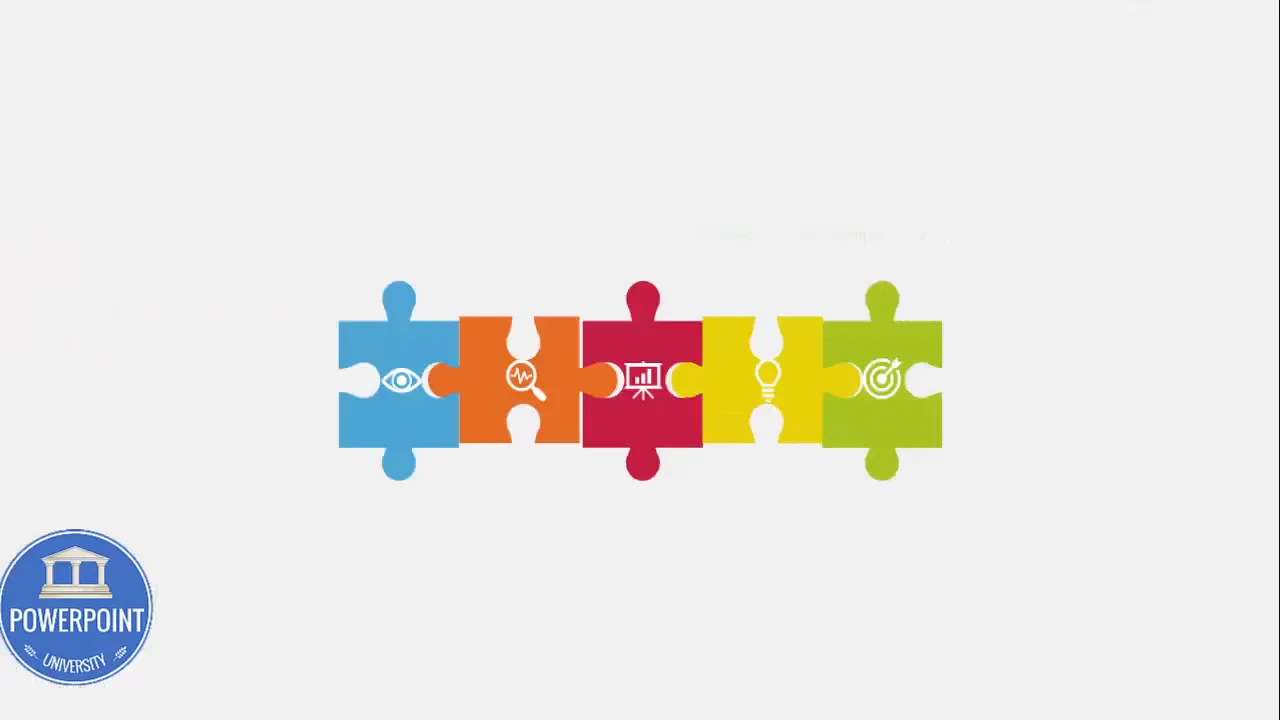
- A single slide contains five interlocked, colorful pieces with white icons centered on them.
- Clicking the slide triggers a Morph transition that separates the pieces outward to reveal the associated option details below a title area.
- Each piece links visually (via connector lines) to a colored spherical marker and descriptive text where you can write the option name and a short detail sentence.
This behavior is ideal for narrating one option at a time: click to explode the puzzle, pause, talk about an item, then click again to reverse or move to the next slide.
Step 1 — Slide setup and background
Start by creating a blank slide and setting a subtle background color to make the colored pieces stand out. The recommended approach is a light gray that provides contrast without overpowering the content.
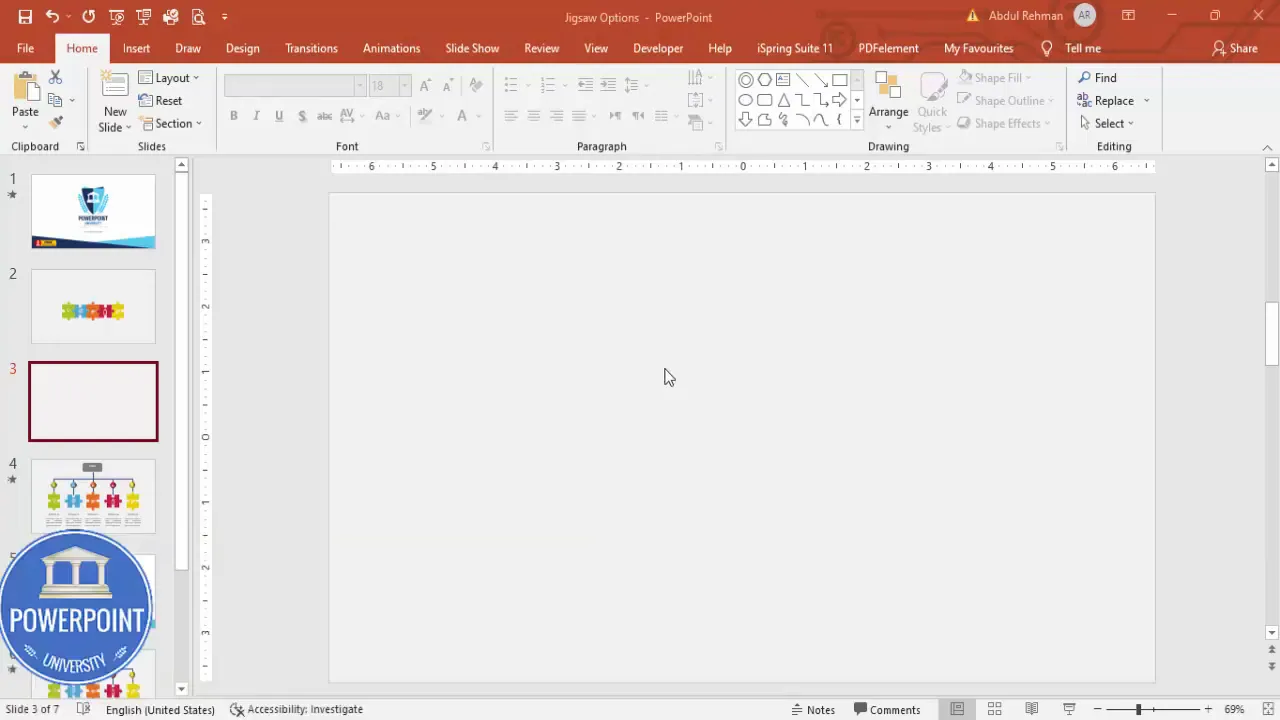
- Insert a new blank slide in your PowerPoint file.
- Right-click the slide background (or use Format Background) and choose a soft light gray color. Avoid pure white to keep a gentle contrast with white icons.
- Optionally set the layout to “Blank” so you have full control of placement.
Having a neutral background helps the five-color palette of your jigsaw puzzle options slide pop, and it remains professional for business presentations.
Step 2 — Build the jigsaw piece shape
The jigsaw puzzle piece is constructed from a rectangle and an oval using PowerPoint’s Edit Points and Merge Shapes tools. This lets you make an attractive interlocking tab without importing external vector assets.
Detailed steps:
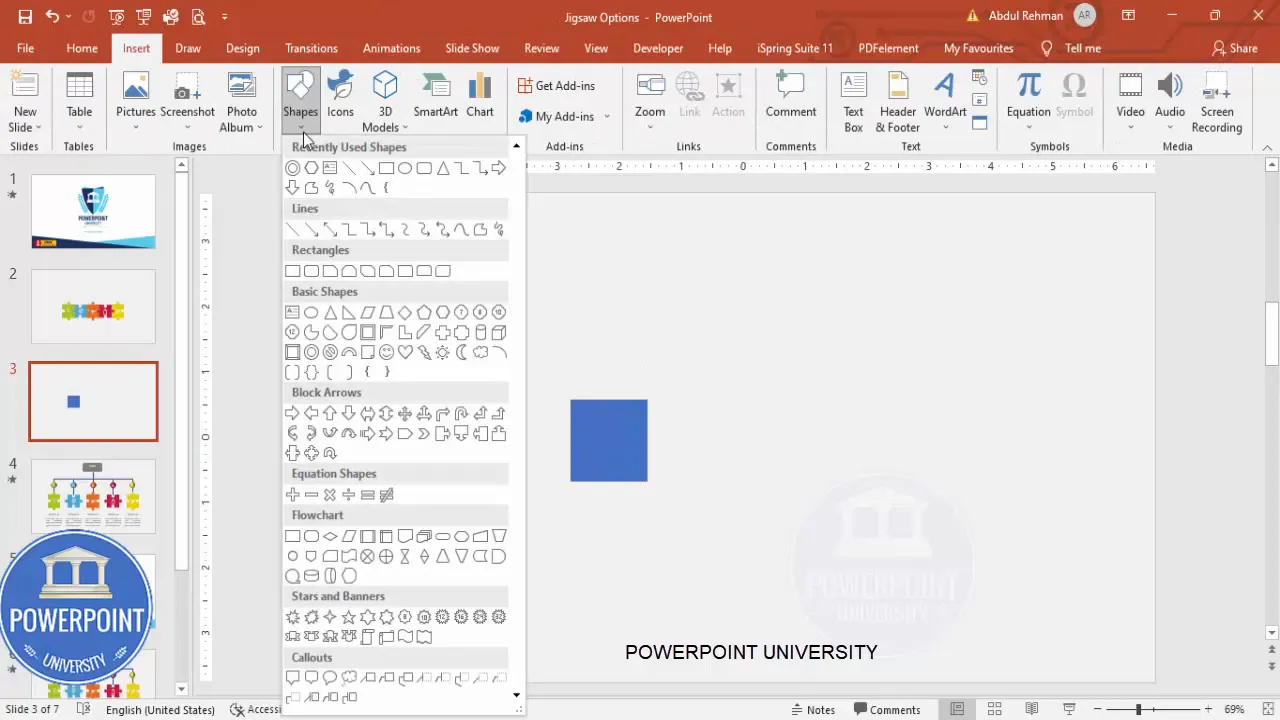
- Go to Insert > Shapes and choose the Rectangle.
- Click on the slide to insert a rectangle and then go to Shape Format to set the size. In the demonstration, the rectangle is set to 1.25″ height and 1.25″ width. You can scale proportionally for different slide sizes.
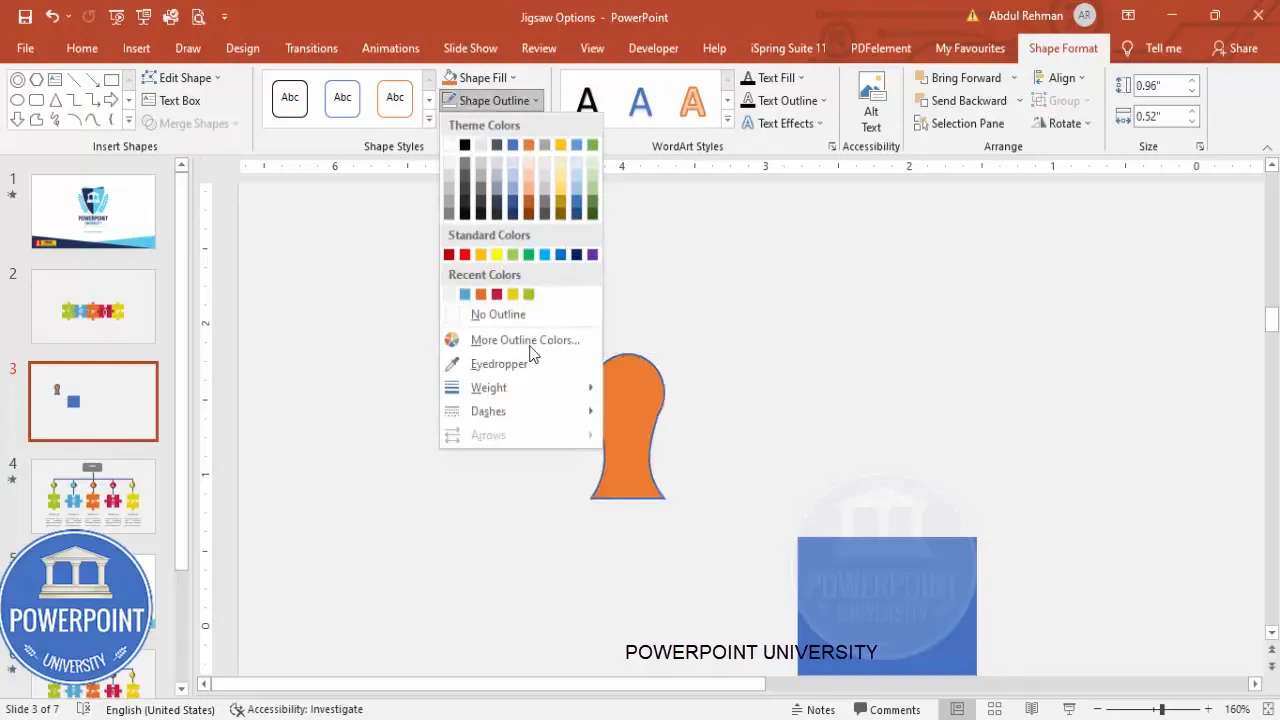
- Remove the shape outline: Shape Outline > No Outline.
- Insert a second rectangle that will be used as the base for editing the piece or an oval shape to create the tab (Insert > Shapes > Oval).
- With the rectangle selected, right-click and choose Edit Points. Drag the relevant edit point inward at the bottom and from the top to shape a concave/convex look for the tab area. Repeat these edits for the other shape until the shapes visually overlap where you want the tab to appear.
Once you have the two shapes positioned to create the tab:
- Select both shapes (click + Shift), go to Shape Format > Merge Shapes > Union. This will combine the two shapes into one single shape — your jigsaw piece base.
- Ensure the new shape has No Outline.
Why use Edit Points and Merge Shapes?
Using Edit Points gives you high control over curvature and where the tab sits. Merge Shapes > Union combines shapes into one object that behaves like a normal shape for rotation, duplication and color fills. This approach avoids complex external SVG editing and keeps everything editable within PowerPoint.
Step 3 — Duplicate and arrange pieces
With one jigsaw piece made, create copies, rotate them appropriately, and subtract overlapping portions to form five interlocking pieces that collectively make a circular jigsaw layout.
- Select the jigsaw piece. Reduce its size slightly so you can arrange multiple pieces around a center point.
- Position one piece exactly at the top center. Hold Ctrl+Shift and drag to constrain movement while duplicating and rotating.
- Use Ctrl+D to duplicate, and rotate duplicates using either the rotation handle or keyboard methods. In the demonstration I used Alt + Right Arrow to rotate incrementally while positioning shapes. Place one piece on the right, left, and both diagonals until you have five pieces arranged around a central meeting point.
- To create a seamless interlock, you can use Merge Shapes operations (Union and Subtract) selectively: select the top and bottom pieces and use Merge Shapes > Union to combine where needed, and Merge Shapes > Subtract to cut tabs out of neighbor pieces so edges interlock cleanly.
Notes and troubleshooting:
- If a subtract operation removes more than expected, Undo (Ctrl+Z) and re-evaluate the order of selection: subtract takes the topmost selected shape and cuts it from the bottom shape. Select in the correct order.
- If shapes accidentally become multiple separate objects you don’t want, delete extras and re-create from the base piece; this is faster than trying to repair complex merge results.
- Keep the original piece off to the side in case you need to recreate. I hold Ctrl+Shift and drag a copy aside so I always have a clean source.
At this point you should have five distinct shapes that visually form a circular puzzle. Assign five distinct colors to the pieces to differentiate options. Use consistent hue intensity and ensure adequate contrast with white icons (we’ll add icons next).
Step 4 — Add icons and group pieces
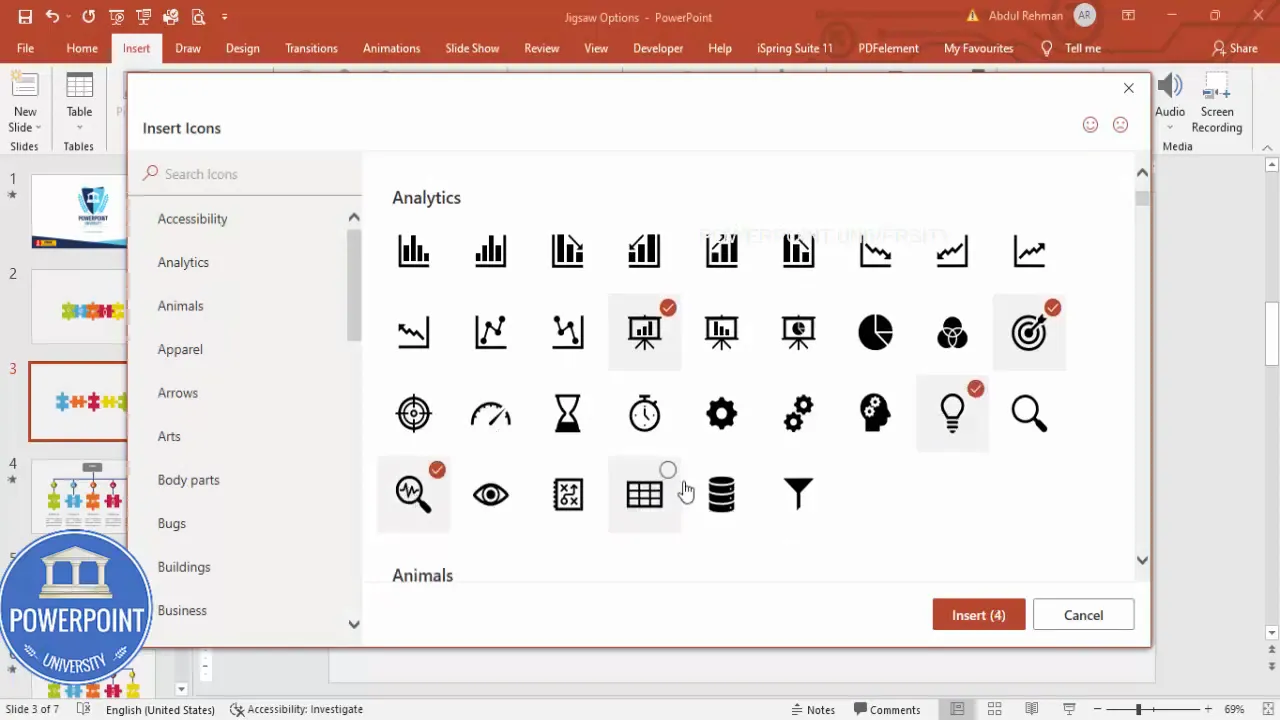
Icons provide quick visual cues. PowerPoint has an Insert > Icons library for scalable vector icons that match the built-in look and allow recoloring.
- Go to Insert > Icons and pick five icons that represent your options. Aim for simple, recognizable symbols.
- Insert the icons and reduce their size to fit comfortably on each piece; in the demo the icons are about 2.5 (units) in size. Change icon color to white for the best contrast.
- Place each icon in the center of a piece. Use Ctrl + G to group each icon with its corresponding piece for easier movement (select the icon and the piece and Group).
Grouping each piece with its icon makes the later animation simple: you can move or edit the grouped object as one unit without disturbing internal alignment.
Step 5 — Create the explode animation with Morph
The Morph transition is the most elegant way to animate pieces separating. It works by detecting object differences between two slides and animating the positions, rotations and sizes between them.
How to create a smooth separation using Morph:
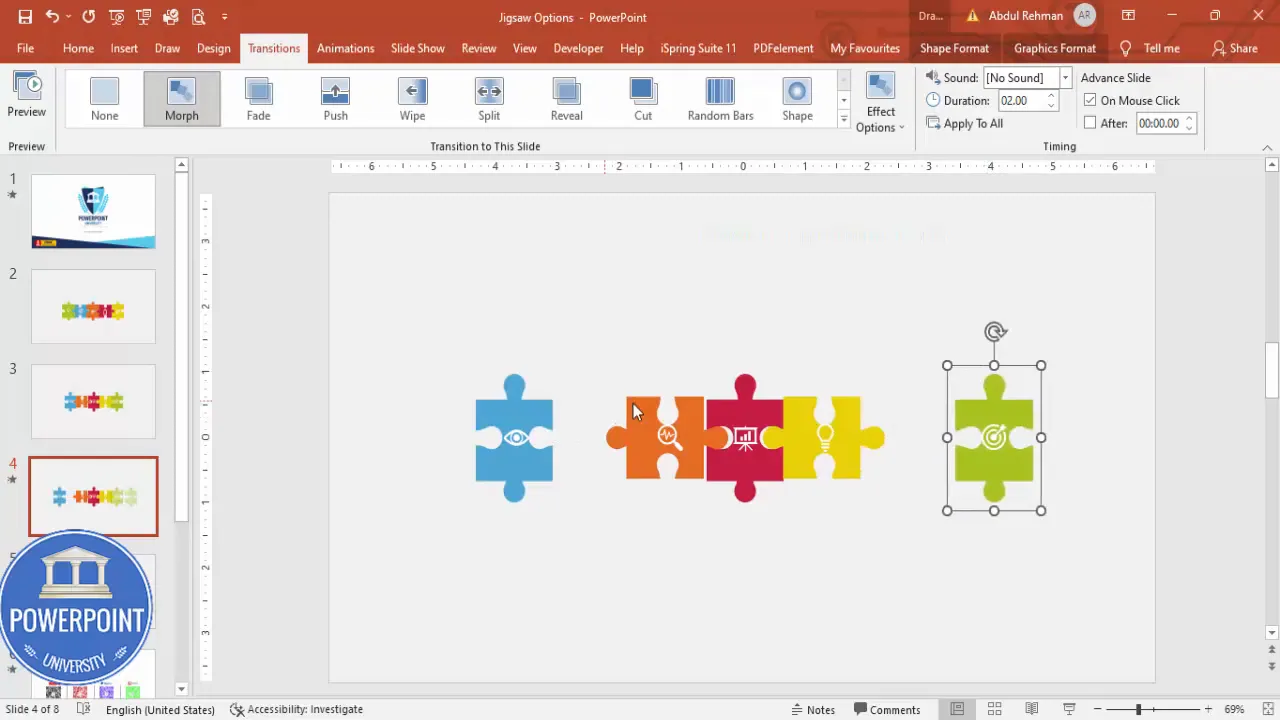
- Duplicate the puzzle slide (Right-click slide in the thumbnail pane > Duplicate Slide).
- Select the duplicate slide, go to Transitions and choose Morph.
- On the duplicate slide, move the grouped pieces outward — one by one — so they appear to “explode” from the center. Drag them a moderate distance so they stay on the slide but create space for the option details below.
- Adjust the transition duration in the Transitions pane; the video demo used 1 second for a snappy effect.
When you run the slideshow, the Morph transition will animate the grouped pieces from their starting positions on the first slide to the new positions on the second slide, giving the “explosion” effect without having to build complex timelines or triggers.
If you want the pieces to move in a particular sequence (e.g., one at a time), you can create multiple duplicate slides each with a slightly different set of pieces moved. Clicking through each slide creates a staged reveal. The Morph transition will animate between each step.
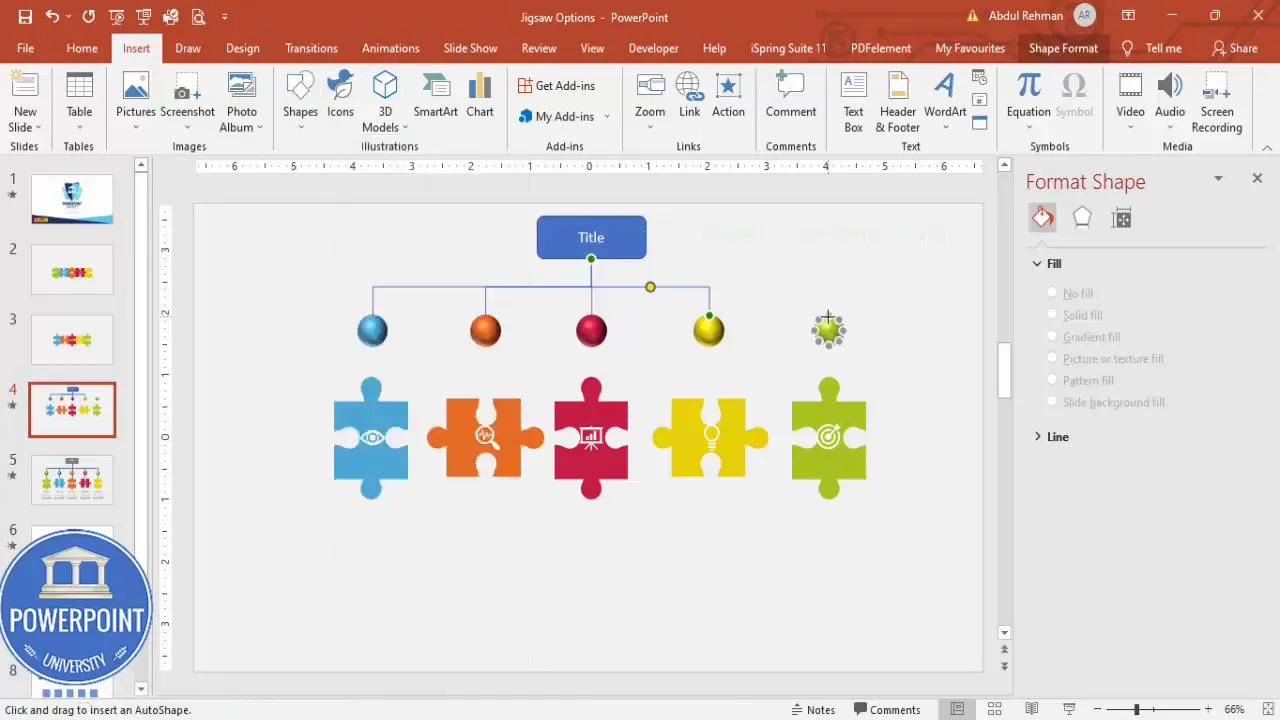
Step 6 — Title bar, spherical bullets and connectors
With the pieces separated on the Morph duplicate, add the descriptive elements: a title area at the top, spherical color markers (bullets) above the puzzle, and connector lines that point from each marker to a corresponding puzzle piece.
Create Slides in Seconds with ExpertSlides AI |
|
Generate AI Presentations today: |
| TRY NOW! |
- Create a rectangle at the top as a title bar. Use a subtle fill (white or very light gray) and add a text box for the main slide title.
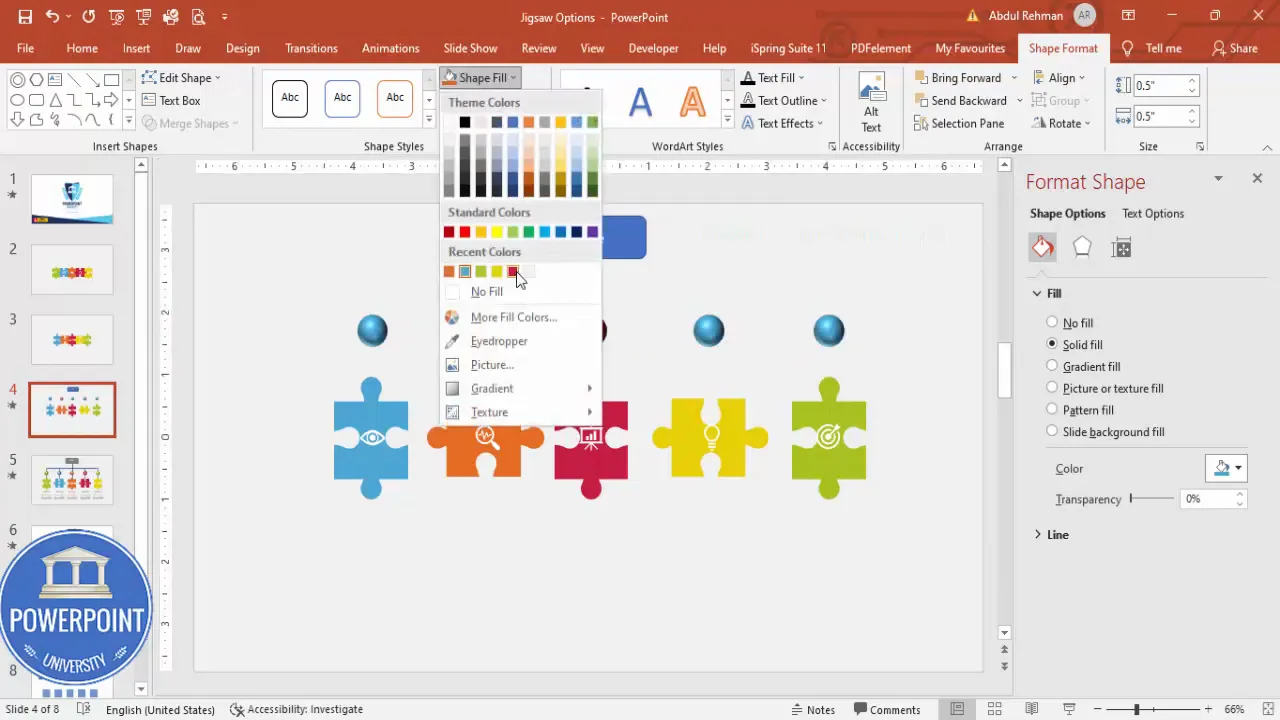
- For each option create a small oval that will act as a spherical bullet. Insert > Shapes > Oval. Make them relatively small and fill each with the same color as the associated puzzle piece.
- Right-click an oval > Format Shape > Effects > 3-D Format. Under Top Bevel choose Round to create a button-like sphere. Remove outline (Shape Outline > No Outline). Adjust height and width to make it look like a rounded sphere.
- Duplicate the sphere for all five options (Ctrl+Shift drag or Ctrl+D) and recolor each to match the matching puzzle piece color.
- Use connector lines to link each sphere to its puzzle piece: Insert > Shapes > Connector — Elbow or Straight. Connectors will remain attached if you move objects and are useful for maintaining clean anchor points.
Connectors are especially helpful if you plan to move content around later: they stay attached to the anchors and maintain the relationship between bullet and piece. If a connector isn’t perfectly straight, use Align tools to nudge endpoints or change to a straight line shape for a clean visual.
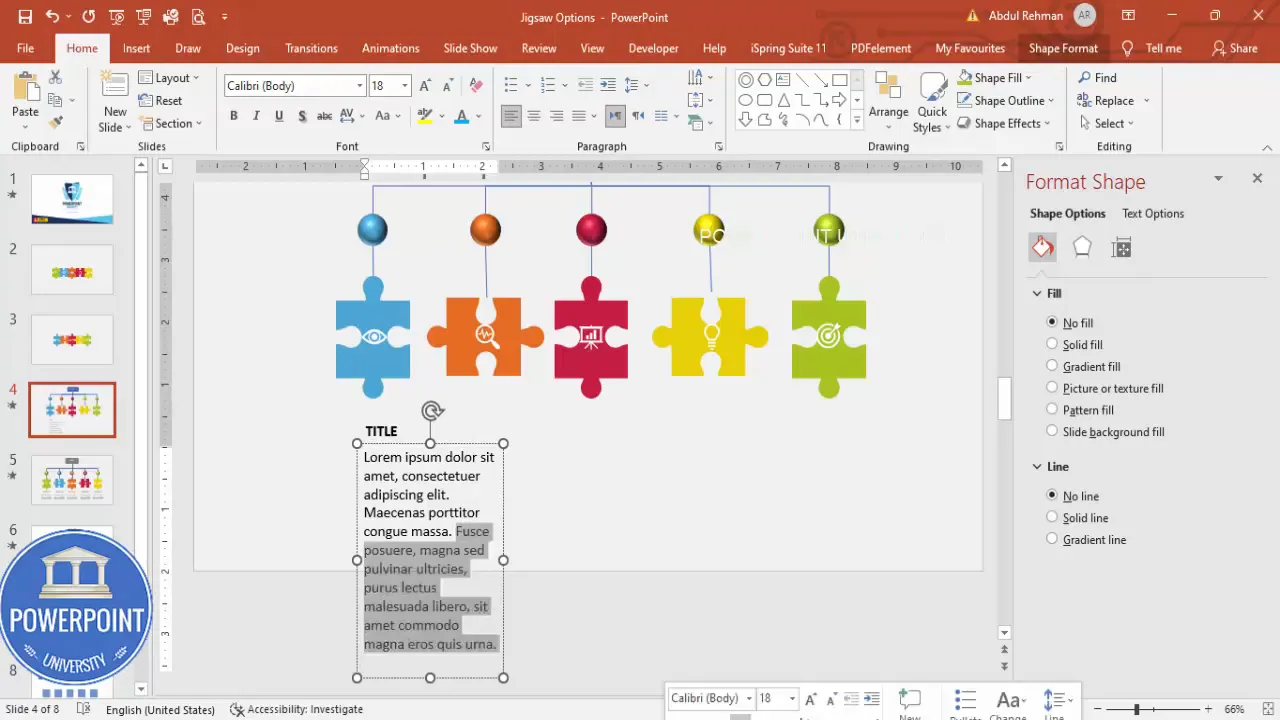
Step 7 — Add option titles and descriptions
Below each spherical bullet, add a title and a short descriptive text to explain each option. Keep text short and scannable — think 6–12 words for the title and a one-sentence description (10–20 words) for details.
- Insert text boxes below each sphere. For the title use bold and a larger font (e.g., 14–18 pt), for the description use a smaller font and regular weight (e.g., 11–12 pt).
- To quickly add placeholder text, PowerPoint supports typing =lorem(1) and pressing Enter to generate a line of placeholder text. Use it to structure your layout and then replace with real copy.
- Center align the description under each sphere or align left if you prefer a compact look. The demo used centered text for balance beneath each spherical marker.
- Select the sphere, title, and description and group them (Ctrl+G) so each option moves as a unit if you need to rearrange the layout.
Grouping these elements with the spheres is a best practice: it eases slide adjustments and ensures connectors remain visually tied to the correct piece.
Design tips, accessibility and troubleshooting
Below are practical tips and common fixes to keep your jigsaw puzzle options slide both beautiful and functional.
Color and contrast
- Pick colors with sufficient contrast against white icons: if a piece color is light, consider darkening it slightly or use a dark icon instead of white.
- Use consistent saturation across your palette so pieces read as a set — varying saturation can make elements unintentionally competing.
Icon selection
- Choose simple icons with clear silhouettes (avoid highly detailed icons that lose clarity at small sizes).
- Keep icon color consistent (white is typically best against colored shapes).
Animation smoothness
- If Morph appears to jump, verify that objects on both slides are grouped and named consistently. PowerPoint’s Morph works best when identical objects exist across slides.
- For more control, create multiple duplicate slides with incremental movements for a step-by-step reveal.
Alignment and spacing
- Use the Align tool (Home > Arrange > Align) to distribute spheres evenly and keep text consistent.
- Snap to Grid can help for pixel-perfect placement — toggle it on in the View tab if needed.
Performance and file size
- Vector icons keep file size low. Avoid embedding large bitmaps inside grouped objects.
- If PowerPoint slows while editing complex merged shapes, temporarily hide other slides or work on a copy of the shape in a separate slide and paste back later.
Troubleshooting Merge Shapes
- If Union or Subtract does not give the expected result, check the selection order and whether shapes overlap precisely where intended.
- Undo (Ctrl+Z) frequently during shape editing to avoid complex mistakes that are hard to repair.
Variations and advanced ideas
The core jigsaw puzzle options slide is a template for creativity. Here are several variations and enhancements you can try:
- Sequential reveals: Instead of a single Morph explode, create a slide sequence where pieces separate one by one, focusing discussion on each option.
- Click-to-show details: Use the pieces as triggers for animated entrance of detailed text boxes. This requires building animations with triggers in the Animations pane.
- Interactive links: Link each piece to a slide with deeper content (right-click > Link) so clicking a piece navigates to a related section of your deck.
- Reverse motion: After discussing a piece, clicking or advancing can animate the piece back into place using a reverse Morph or a subsequent slide with pieces repositioned.
- Different shapes: Replace spherical bullets with numerals or pictograms to emphasize ordering instead of mere identification.
All of these variations are straightforward once the puzzle pieces are created and grouped; the key is planning your slide structure so morphs and links are predictable to the audience.
FAQ — Frequently Asked Questions
Q: Does the Jigsaw Puzzle Options Slide work on all versions of PowerPoint?
A: The Morph transition is available in Office 365 / Microsoft 365 and PowerPoint 2019+ desktop versions. If you’re on an older version, you can replicate the effect with carefully choreographed motion animations, but Morph makes it easier and cleaner. Always test the slide on the target machine before presenting.
Q: How do I ensure the Morph transition animates exactly the items I want?
A: Keep object names and grouping consistent between the original and duplicate slide. Grouping icons and pieces together early helps. Avoid duplicating similar shapes with different names; instead, duplicate the whole slide and then move grouped objects to new positions so Morph recognizes them as the same objects in different positions.
Q: I see unexpected jumps during Morph — what causes that?
A: Unexpected jumps occur when PowerPoint mismatches objects between slides because their shape properties or group structure changed. Fix by ensuring the same object hierarchy and groups exist on both slides and by avoiding replacing grouped elements with new objects after duplication.
Q: Can I add more than five pieces?
A: Yes. The technique scales, though the layout and readability become more challenging with small pieces. For more items consider an outer ring with smaller connectors or a different infographic type if readability suffers.
Q: How do I make the spherical bullets look realistic?
A: Use Format Shape > Effects > 3-D Format > Top Bevel set to Round and subtly adjust height/width. Remove outlines and keep shading minimal for a modern look. Match the fill color to the corresponding piece.
Q: Can I reuse the Jigsaw Puzzle Options Slide as a template?
A: Absolutely. Save the slide in a template or a “library” presentation. Keep an editable master copy (with pieces and grouping intact) so you can copy/paste into new presentations and just replace icons, colors, and text.
Q: Are there tips for making the slide accessible?
A: Ensure sufficient color contrast between icons/text and piece colors; add text labels for each piece so screen readers have content to read; and avoid relying on color alone to signify meaning — include icons or text cues as well.
Q: Can I animate icons separately from pieces after grouping?
A: If you anticipate separate icon animation, don’t group the icon with the piece until after you finish animations. Instead, keep them as separate objects with identical positions so Morph can still map them correctly between slides, or use animation triggers to control icon motion independently.
Q: Will connectors move correctly if I rearrange slides?
A: Connector lines that are true connectors (Insert > Shapes > Connector) will maintain their attachment points as you move endpoints. If you use a regular line, it will not have the same anchor behavior.
Q: I want a similar layout for mobile or smaller screens — any advice?
A: Simplify the design for smaller screens: fewer words, larger icons, and more generous spacing. Consider a stacked list of bullets with small puzzle visuals rather than a full ring of pieces for readability on mobile.
Conclusion
The Jigsaw Puzzle Options Slide offers a visually compelling way to present five cohesive options while retaining clarity and interactivity. By building the puzzle piece from basic shapes, grouping icons with pieces, and leveraging PowerPoint’s Morph transition, you can create an elegant animated slide without external tools. The method described here is flexible — adapt the layout, colors, iconography and animation sequence to suit your audience and message.
Key takeaways:
- Create a reusable base jigsaw piece with Edit Points and Merge Shapes.
- Duplicate, rotate and use Union/Subtract operations to make interlocking pieces.
- Group each piece with its icon to make animation and alignment simpler.
- Use Morph to animate pieces separating and returning with minimal effort.
- Use spherical bullets and connector lines to label and connect details to each piece.
Use this Jigsaw Puzzle Options Slide technique to make your next presentation more memorable — whether you are explaining five core services, five steps in a process, or five pillars of strategy.
If you want to reuse the exact structure, keep a master slide copy and swap colors, icons and text for each presentation. Small adjustments — such as increasing the Morph duration to 1.5s for a slower reveal, or staging the separation across multiple slides — allow you to tailor the pacing for different audiences.
Now go ahead and try building your own Jigsaw Puzzle Options Slide. Start with the single piece, keep a backup copy, and remember: Merge Shapes and Morph are your friends for creating professional, dynamic slides fast.
Check out the full video: Create Jigsaw Puzzle Options Slide in PowerPoint. Tutorial No.: 990


