
PowerPoint is an incredibly powerful tool for creating presentations, but many users only scratch the surface of what it can do. To help you unlock its full potential, this article dives into top advanced tips and tricks for PowerPoint, curated to take your presentations to the next level. These techniques are perfect for users who want to go beyond the basics and create engaging, professional, and dynamic slides.
This guide is inspired by the expertise shared by Sele Training, a seasoned educator in PowerPoint and Office 365 tools, who offers practical advice in an easy-to-follow style. Whether you’re a business professional, educator, or content creator, these tips will help you save time, enhance your slides, and impress your audience.
Let’s explore each tip in detail, covering everything from add-ins and design enhancements to multimedia integration and data linking.
Table of Contents
- 1. Harness the Power of Add-ins to Expand Functionality
- 2. Elevate Your Slides Instantly with Design Ideas
- 3. Seamlessly Present with Skype for Business Integration
- 4. Record Your Screen Directly in PowerPoint
- 5. Create Custom Templates to Maintain Brand Consistency
- 6. Bring Life to Your Slides by Animating Images
- 7. Break Language Barriers with the Built-in Translator
- 8. Manage Slide Objects Efficiently with the Selection Pane
- 9. Link Excel Data for Dynamic and Up-to-Date Charts
- 10. Create Instant Slideshows with Photo Albums
- Conclusion
- Frequently Asked Questions (FAQ)
1. Harness the Power of Add-ins to Expand Functionality
One of the lesser-known but incredibly useful features of PowerPoint 2016 is the ability to add add-ins from the Microsoft Store. Add-ins are mini-applications that extend PowerPoint’s capabilities, allowing you to insert specialized content, automate tasks, or enhance your slides with dynamic elements.
To access add-ins, navigate to the Insert tab on the ribbon, then click on Add-ins. Choose My Add-ins and then explore the Office Store. Here, you’ll find a wide variety of options ranging from free tools to paid apps.
For example, one popular add-in is the Comic Character app, which lets you insert cartoon characters into your slides with just a few clicks. This can add a fun, engaging element to your presentation, especially when you want to lighten the mood or explain concepts visually.
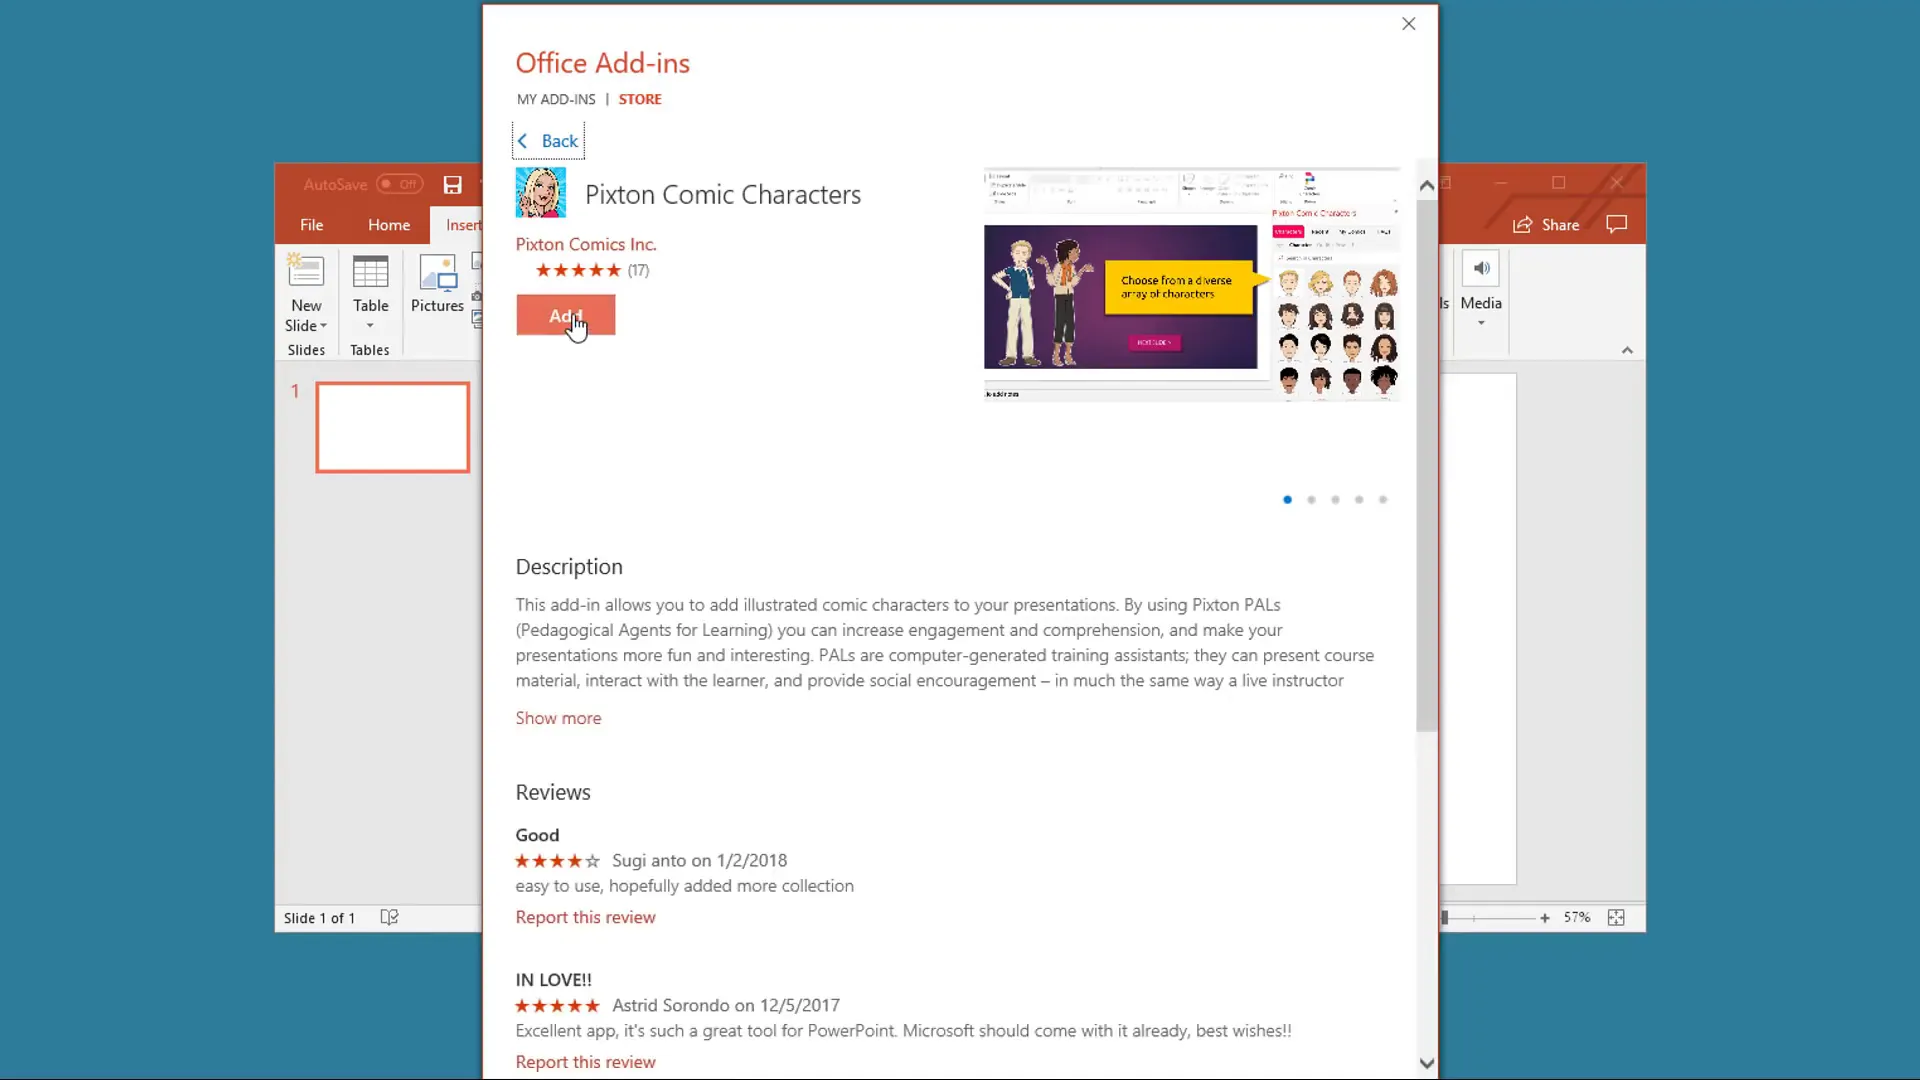
Other add-ins include stock pickers, weather widgets, image galleries, and more. Some provide real-time data or interactive content, making your slides more informative and visually appealing. Since some add-ins are free and others require a purchase, it’s worth browsing the store to find tools that best suit your presentation needs.
Using add-ins can significantly enrich your presentations by bringing in content and functionalities that are not built into PowerPoint by default. This approach is especially handy for professionals who want to impress clients or educators who need to deliver engaging lessons.
2. Elevate Your Slides Instantly with Design Ideas
Design Ideas is a fantastic feature in PowerPoint 2016 that helps you transform dull slides into professionally designed layouts without needing graphic design skills.
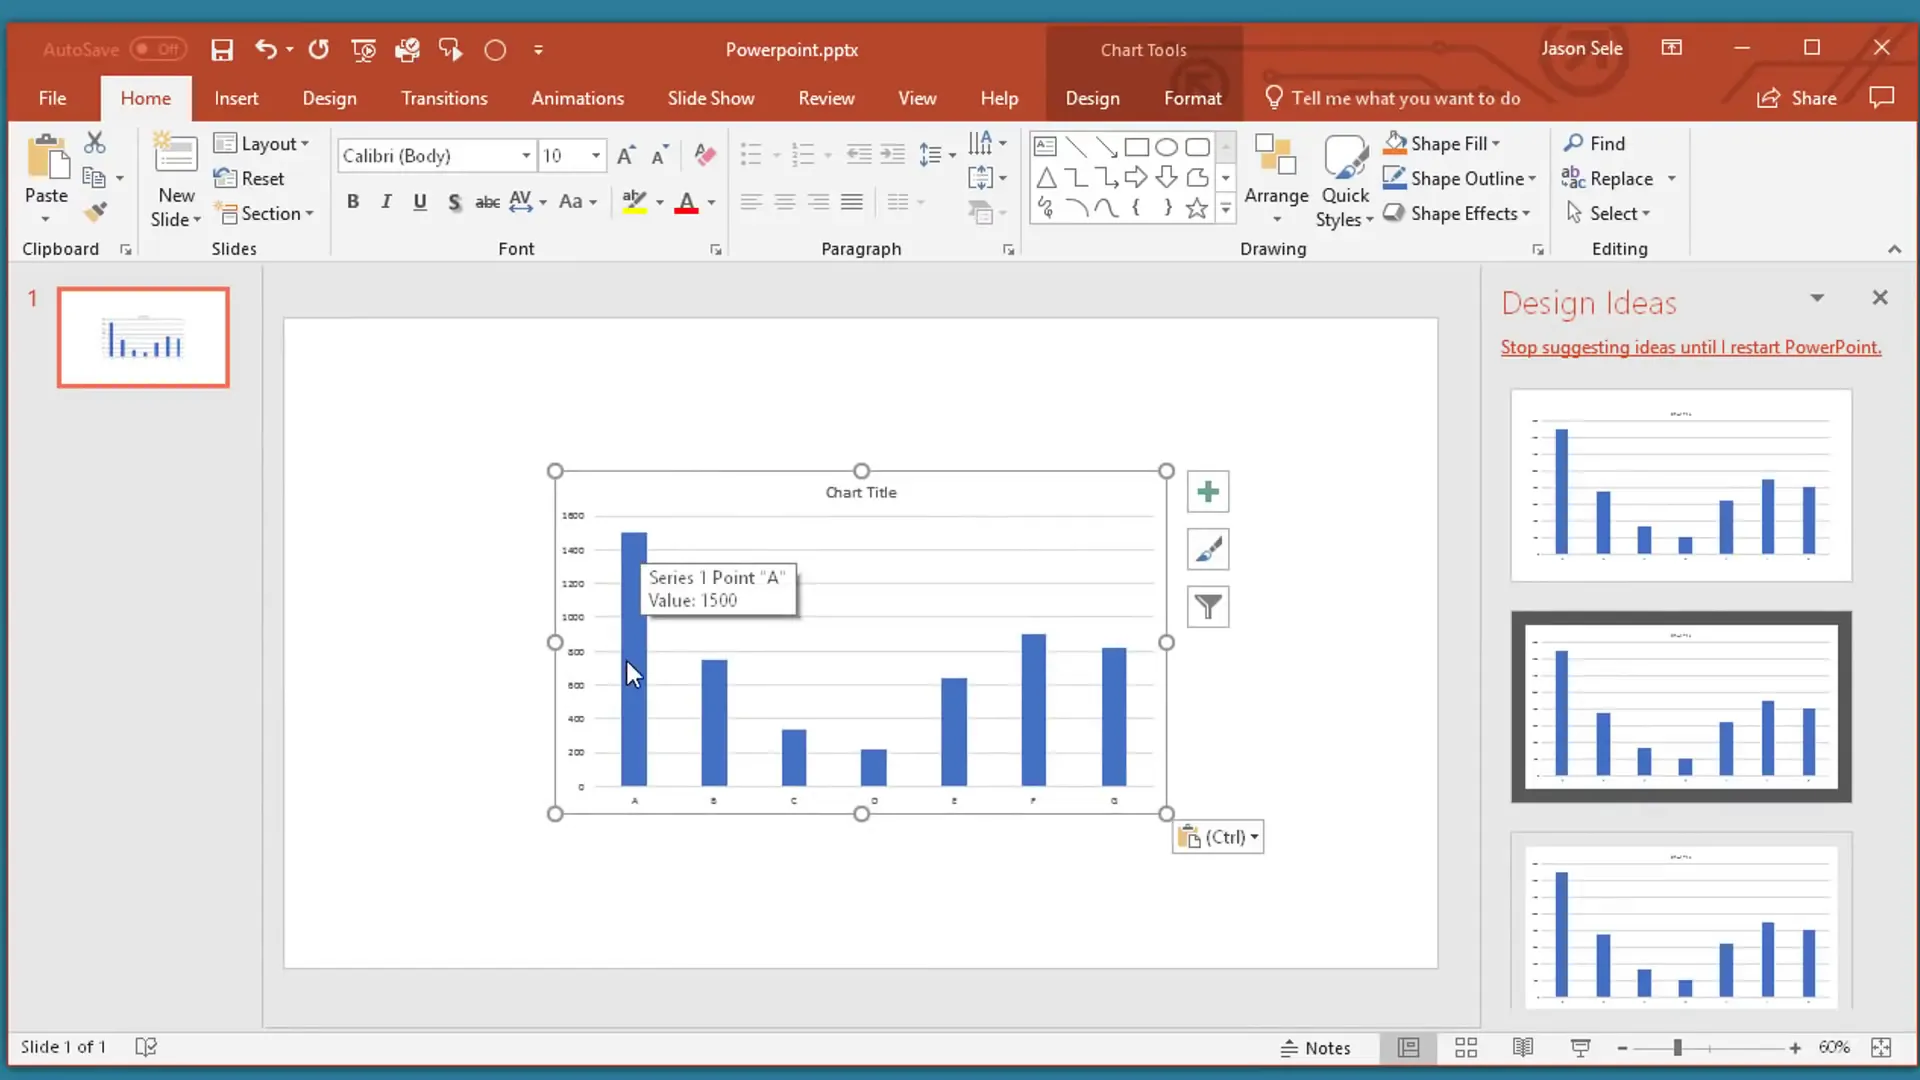
Start with a simple or “boring” slide — maybe just some text or bullet points. Then go to the Design tab and turn on Design Ideas. PowerPoint will automatically generate several layout suggestions that look polished and well-structured. This feature harnesses AI to analyze your slide content and offer design options that improve readability and visual balance.

To take it a step further, add a photo to your slide. You don’t even need to place it precisely on the page; just insert it. Design Ideas will then offer layouts that integrate the photo beautifully with your text, making your slide look much more professional and appealing.
This tool is perfect for users who want quick improvements without spending hours tweaking their slides. It’s also a great way to learn about effective slide design by seeing what PowerPoint suggests.
3. Seamlessly Present with Skype for Business Integration
If you’re using Office 365 and Skype for Business, PowerPoint 2016 offers a powerful way to share your presentations remotely. Instead of just sharing your desktop, you can upload your PowerPoint file directly to the cloud and present it through Skype for Business.
This method improves performance and user experience, especially when your presentation includes large media files like videos or high-resolution images. Uploading the file means viewers receive a smooth, uninterrupted experience without lag or choppiness.
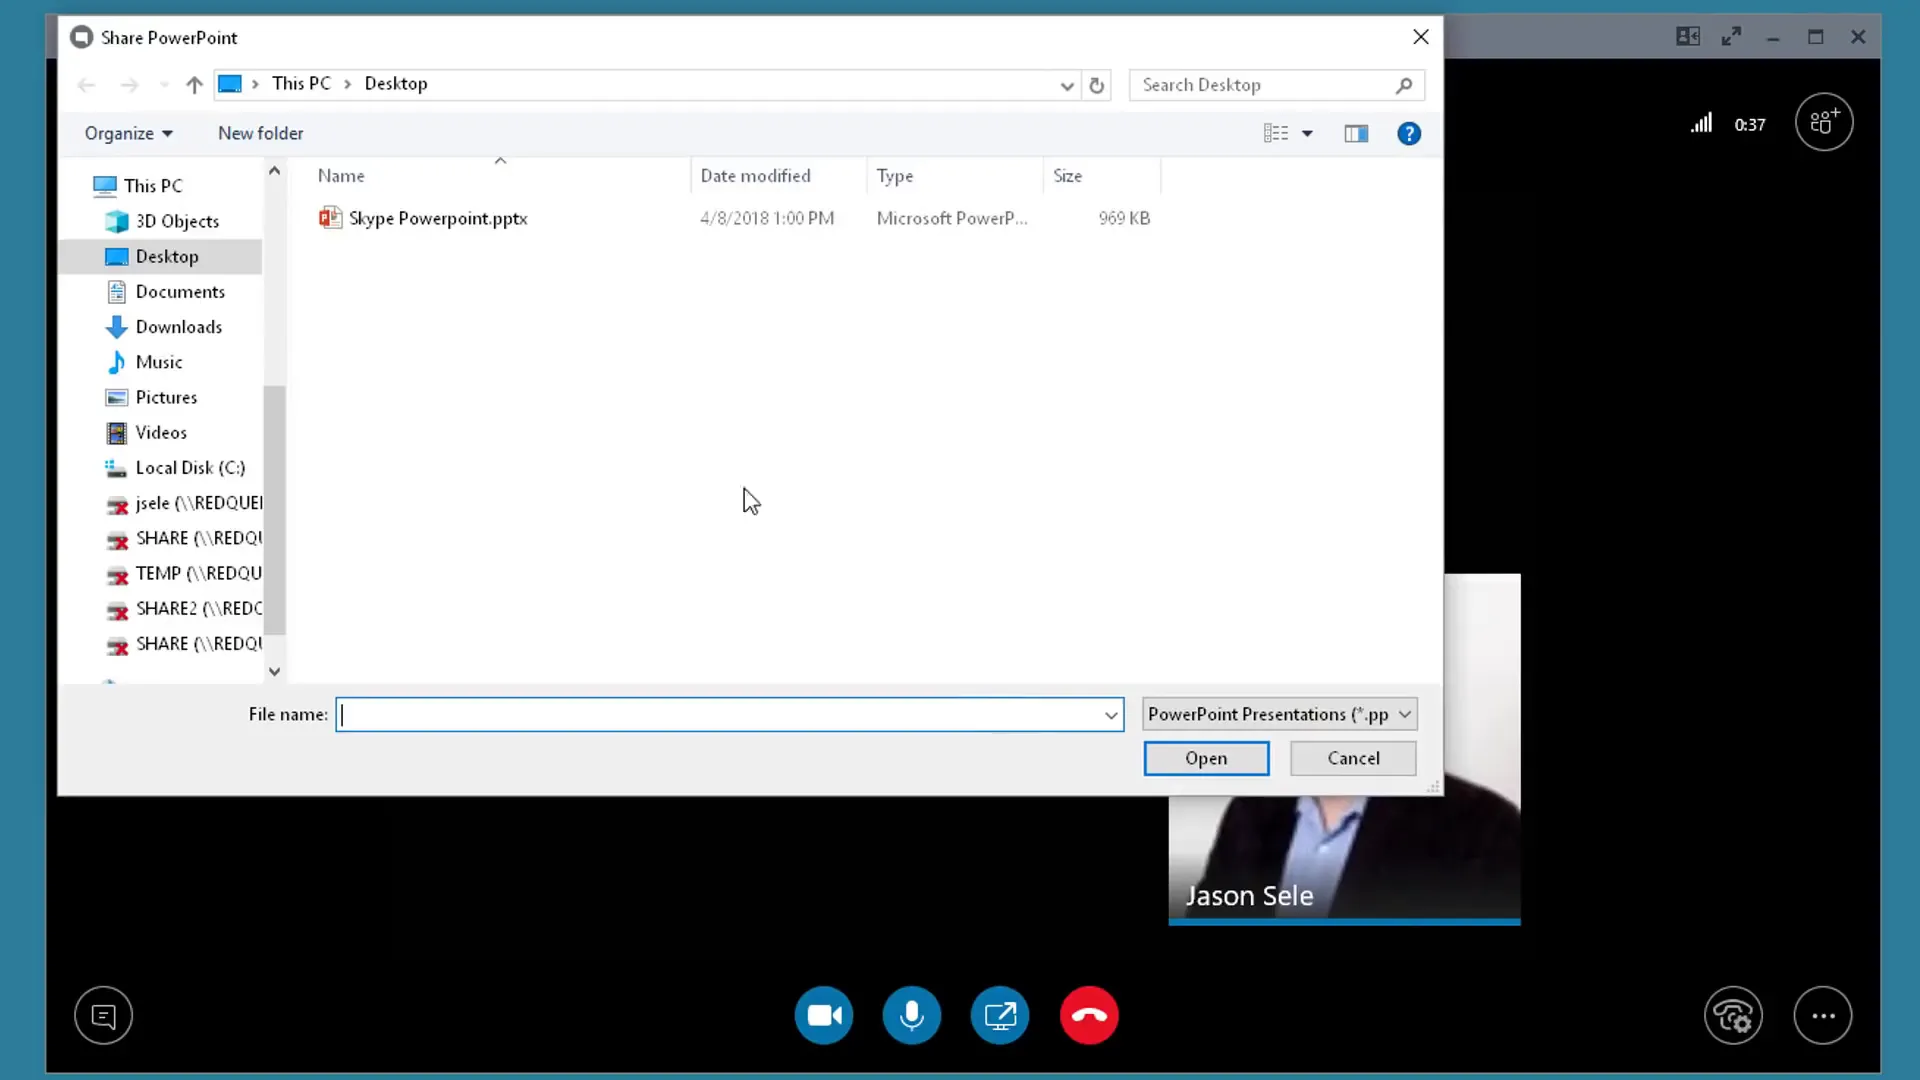
Once uploaded, you control the slide progression, scrolling through your slides one by one while others see exactly what you present. There’s also an annotation tool that lets you mark or highlight parts of the slide in real-time, which your audience can see.
This feature is invaluable for remote meetings, webinars, and online training sessions, ensuring your audience stays engaged and follows along easily.
4. Record Your Screen Directly in PowerPoint
Did you know you can record your screen within PowerPoint and insert the recording directly into your presentation? This is a fantastic way to demonstrate software, walkthrough tutorials, or showcase web content without leaving PowerPoint.
To do this, go to the Insert tab, find the Media section, and select Screen Recording. You’ll be prompted to select the area of your screen you want to record. Once selected, hit the record button and PowerPoint will count down before starting.
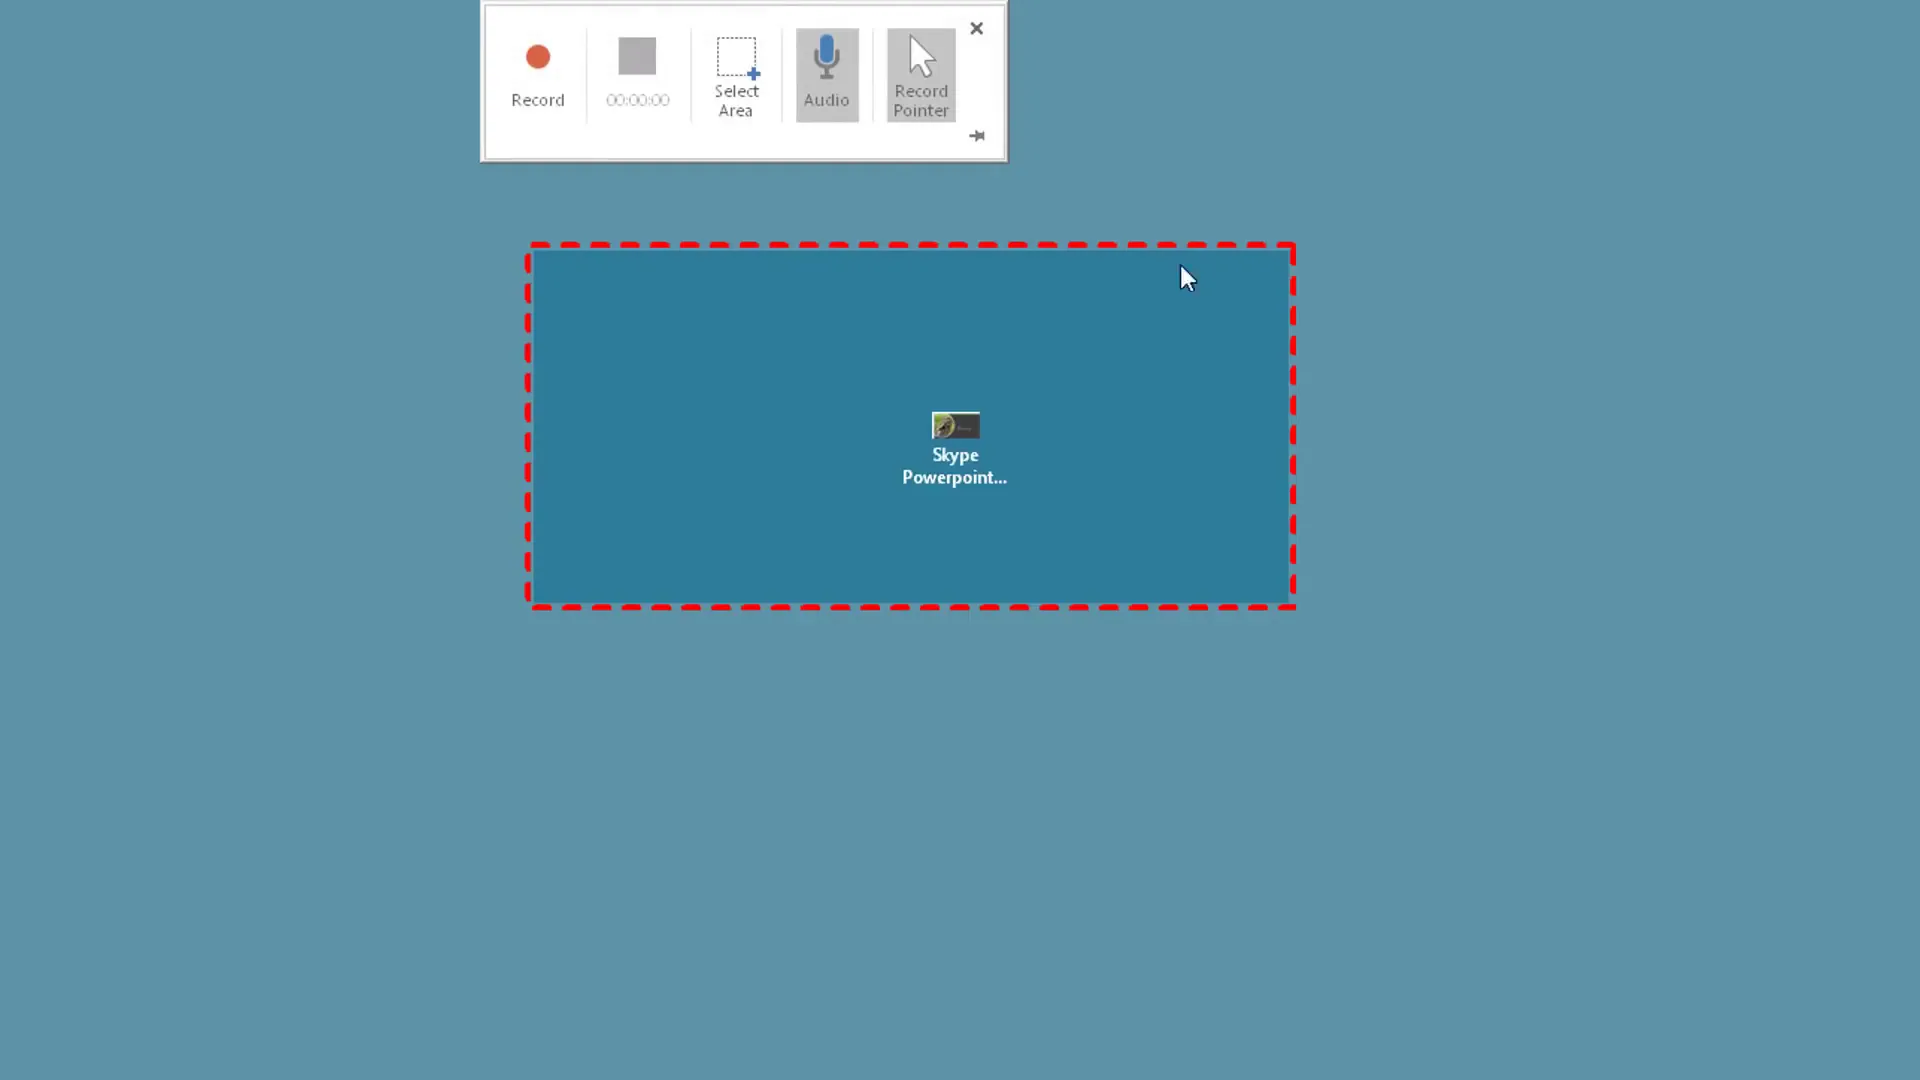
When you finish recording, you can pause, restart, or stop. The recorded video is then embedded directly into your slide. You can resize or move it like any other object on the slide.
For a smooth presentation experience, right-click on the recording and set it to start automatically. This way, the video plays as soon as you navigate to that slide, creating a seamless effect.
Screen recording is perfect for educators who want to create step-by-step guides, marketers showcasing software demos, or anyone who wants to add dynamic video content without using external video editing tools.
5. Create Custom Templates to Maintain Brand Consistency
While PowerPoint comes with many predefined templates, creating your own custom template ensures your presentations always align with your brand’s colors, fonts, and style.
Start with a blank presentation and go to the View tab. Click Slide Master to open the master slides. At the top of the slide list is the Master Title slide, which controls the overall design.
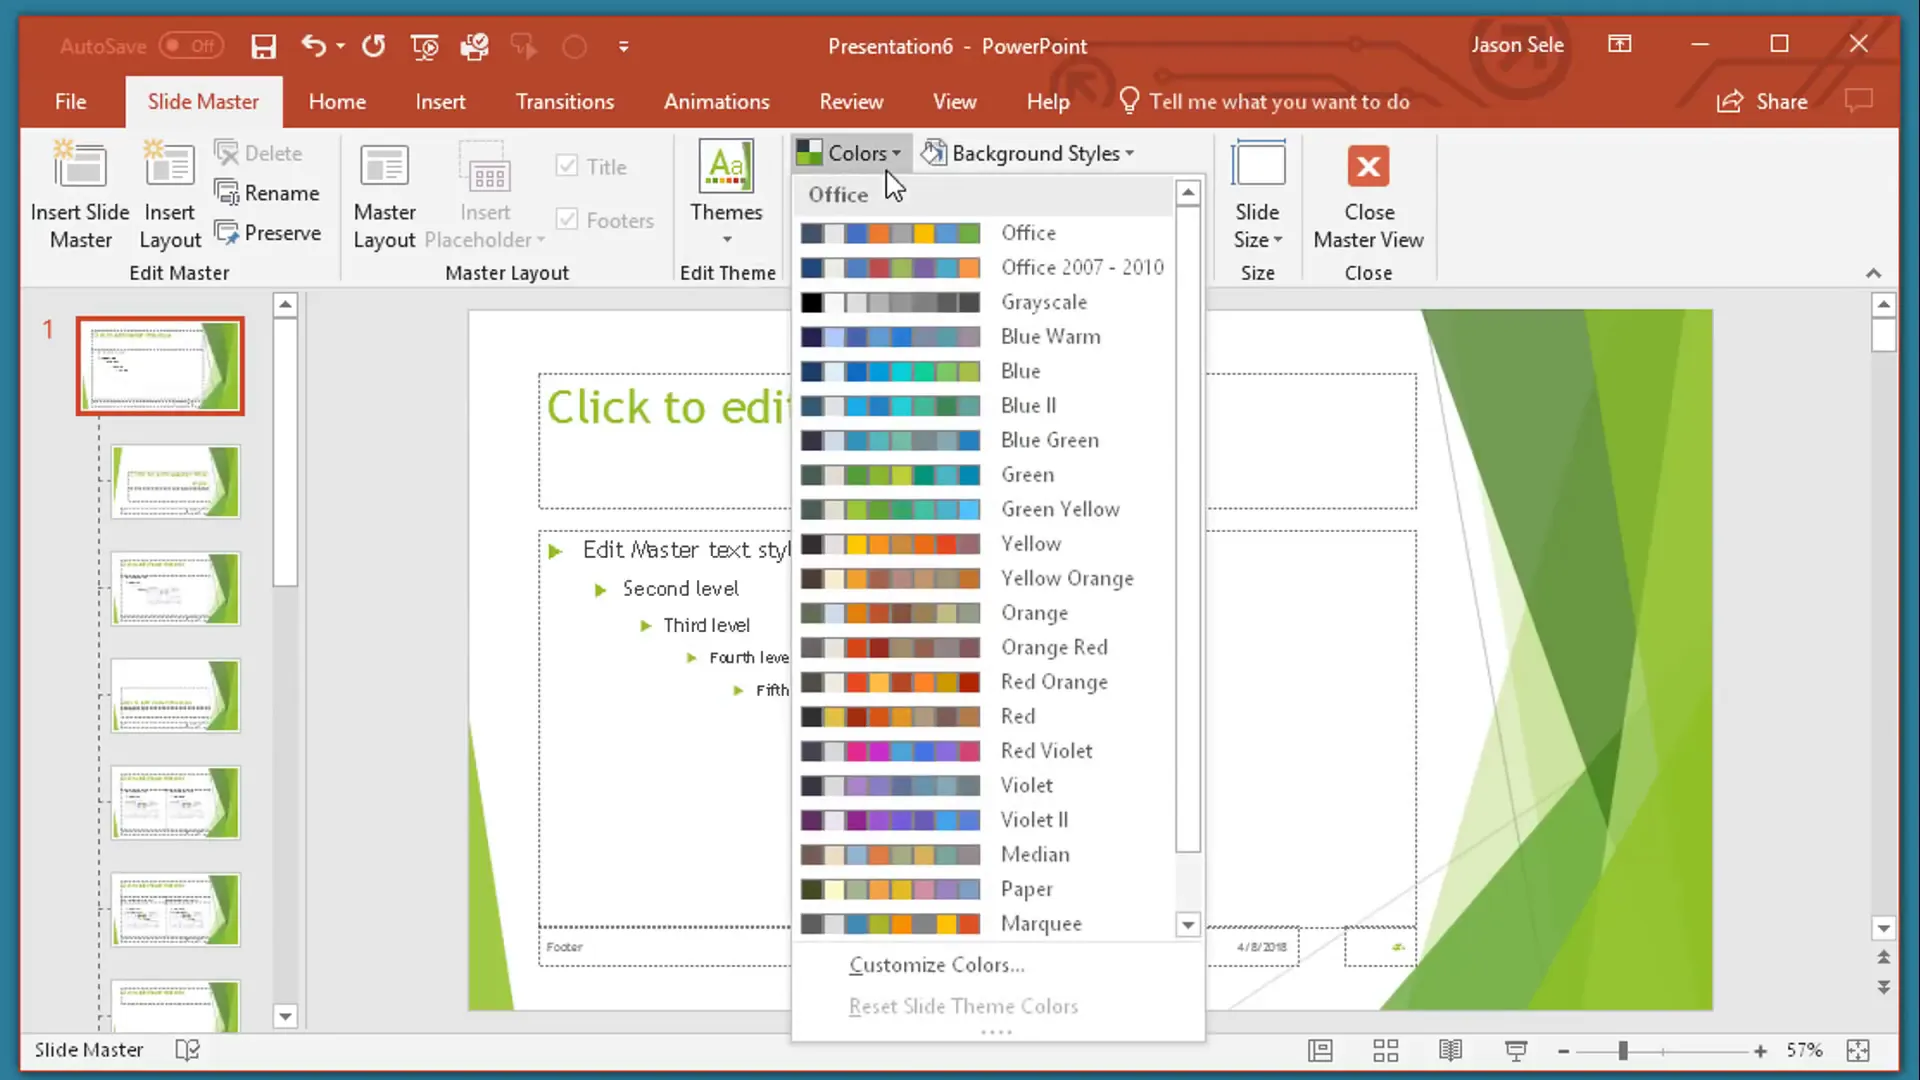
Here, you can:
- Set your theme
- Choose color schemes
- Change fonts
- Add background styles
- Insert logos or other branding elements
Once you finalize your design, go to File > Save As and select PowerPoint Template (*.potx) as the file type. Give your template a name and save it.
Later, when creating a new presentation, look under the Personal tab to find your custom template. Selecting it will create a new presentation with your predefined styles, saving you time and ensuring consistency across all your slides.
Custom templates are essential for businesses and educators who want every presentation to reflect their unique identity without starting from scratch every time.
6. Bring Life to Your Slides by Animating Images
Animations can make your presentations more engaging, but they don’t have to be complicated. PowerPoint 2016 lets you add motion to images using a simple technique called Custom Path Animation.
Insert an image and resize it to your liking. Select the image, then go to the Animations tab. From the animation options, scroll to the bottom and choose Custom Path.
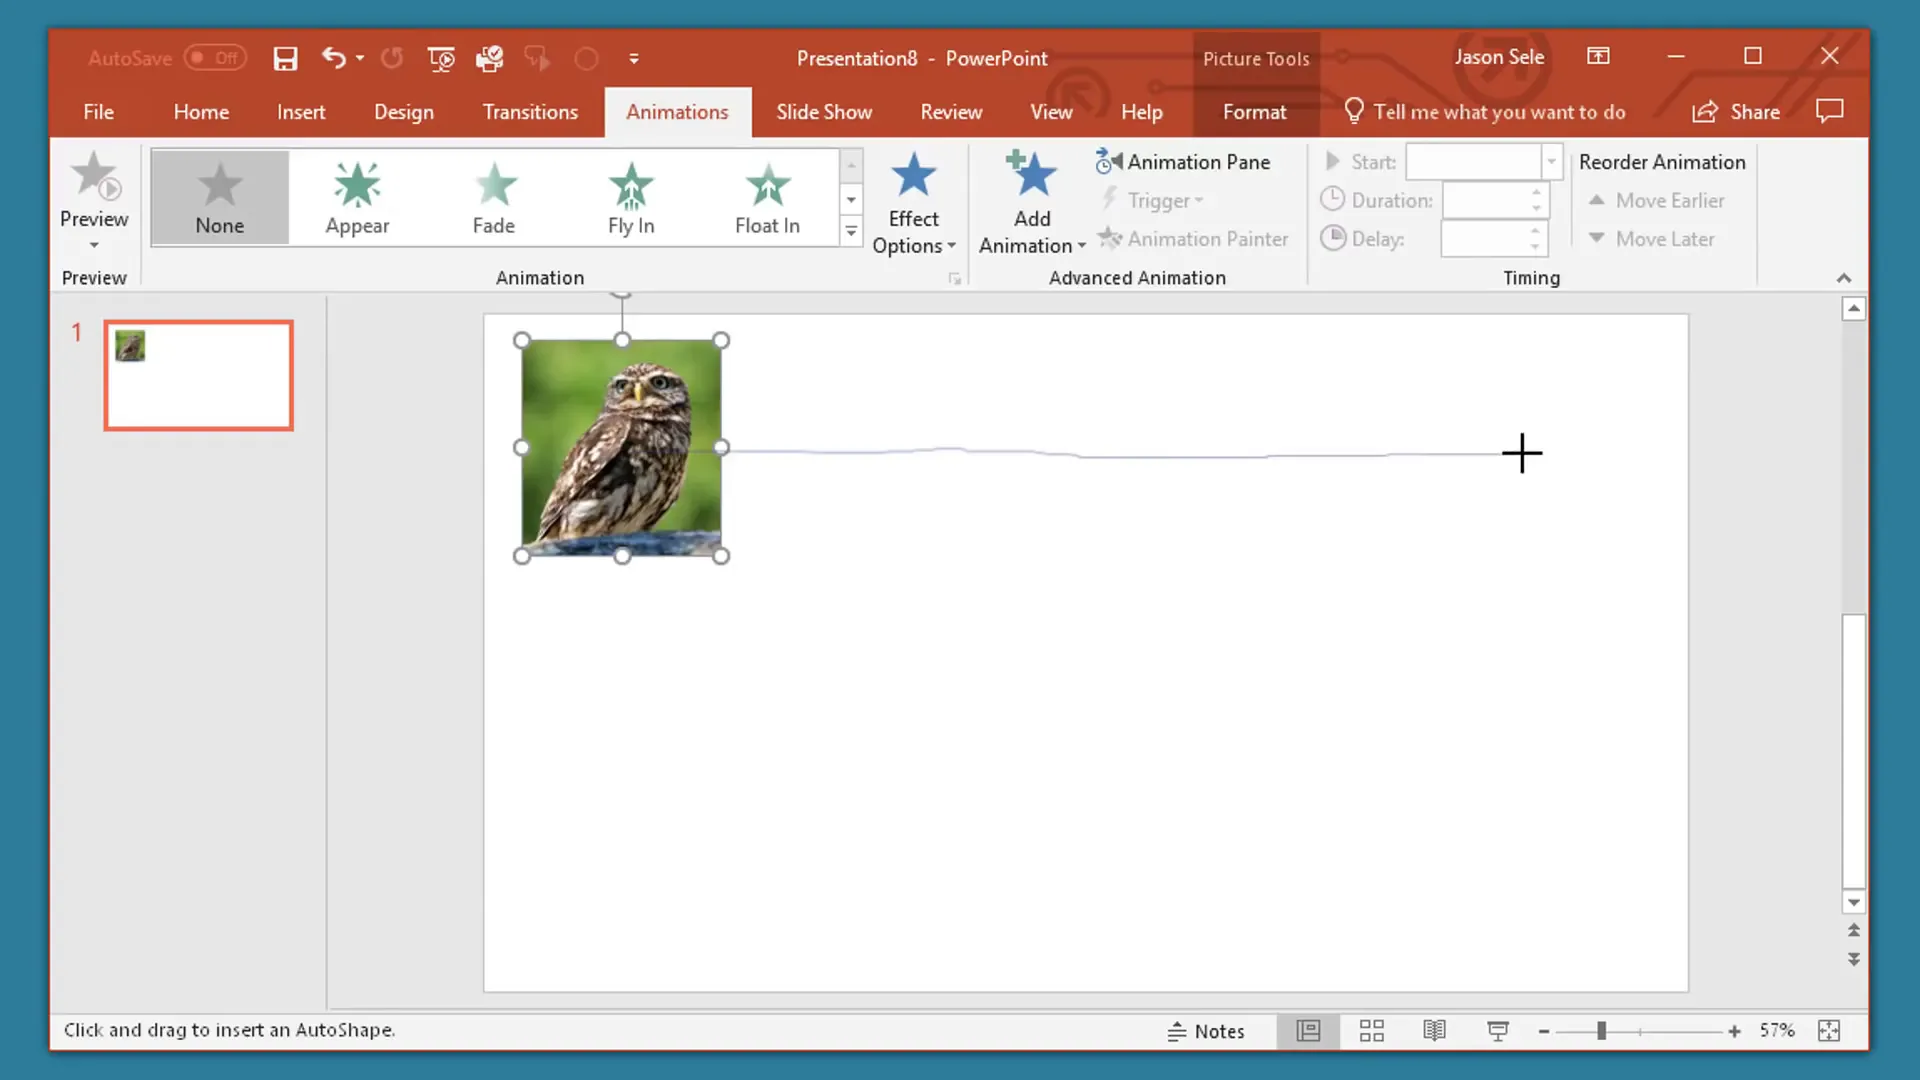
Draw a path by clicking to create points—here, we draw a straight line across the slide. Double-click at the end point to finish the path. The image will now move along this path during your presentation.
To control the animation speed and behavior, open the animation settings. Remove the smooth start and smooth end to create a steady motion. Set the timing to With Previous and extend the duration to something like 20 seconds. You can also set the animation to repeat until the slide ends.
This creates a slow, continuous movement that adds a dynamic element to your slide. You can get as complex as you want by adding multiple animations, grouping images, or changing directions.
Animating images is a great way to catch your audience’s eye and add a modern touch to your presentation.

7. Break Language Barriers with the Built-in Translator
If you present to multilingual audiences, PowerPoint 2016’s built-in translator tool can be a lifesaver. It allows you to translate selected text directly inside your presentation, supporting many languages.
Go to the Review tab and click on Translate. A pane will open where you can select the text you want translated. PowerPoint automatically detects the source language and lets you choose the target language from a dropdown list.
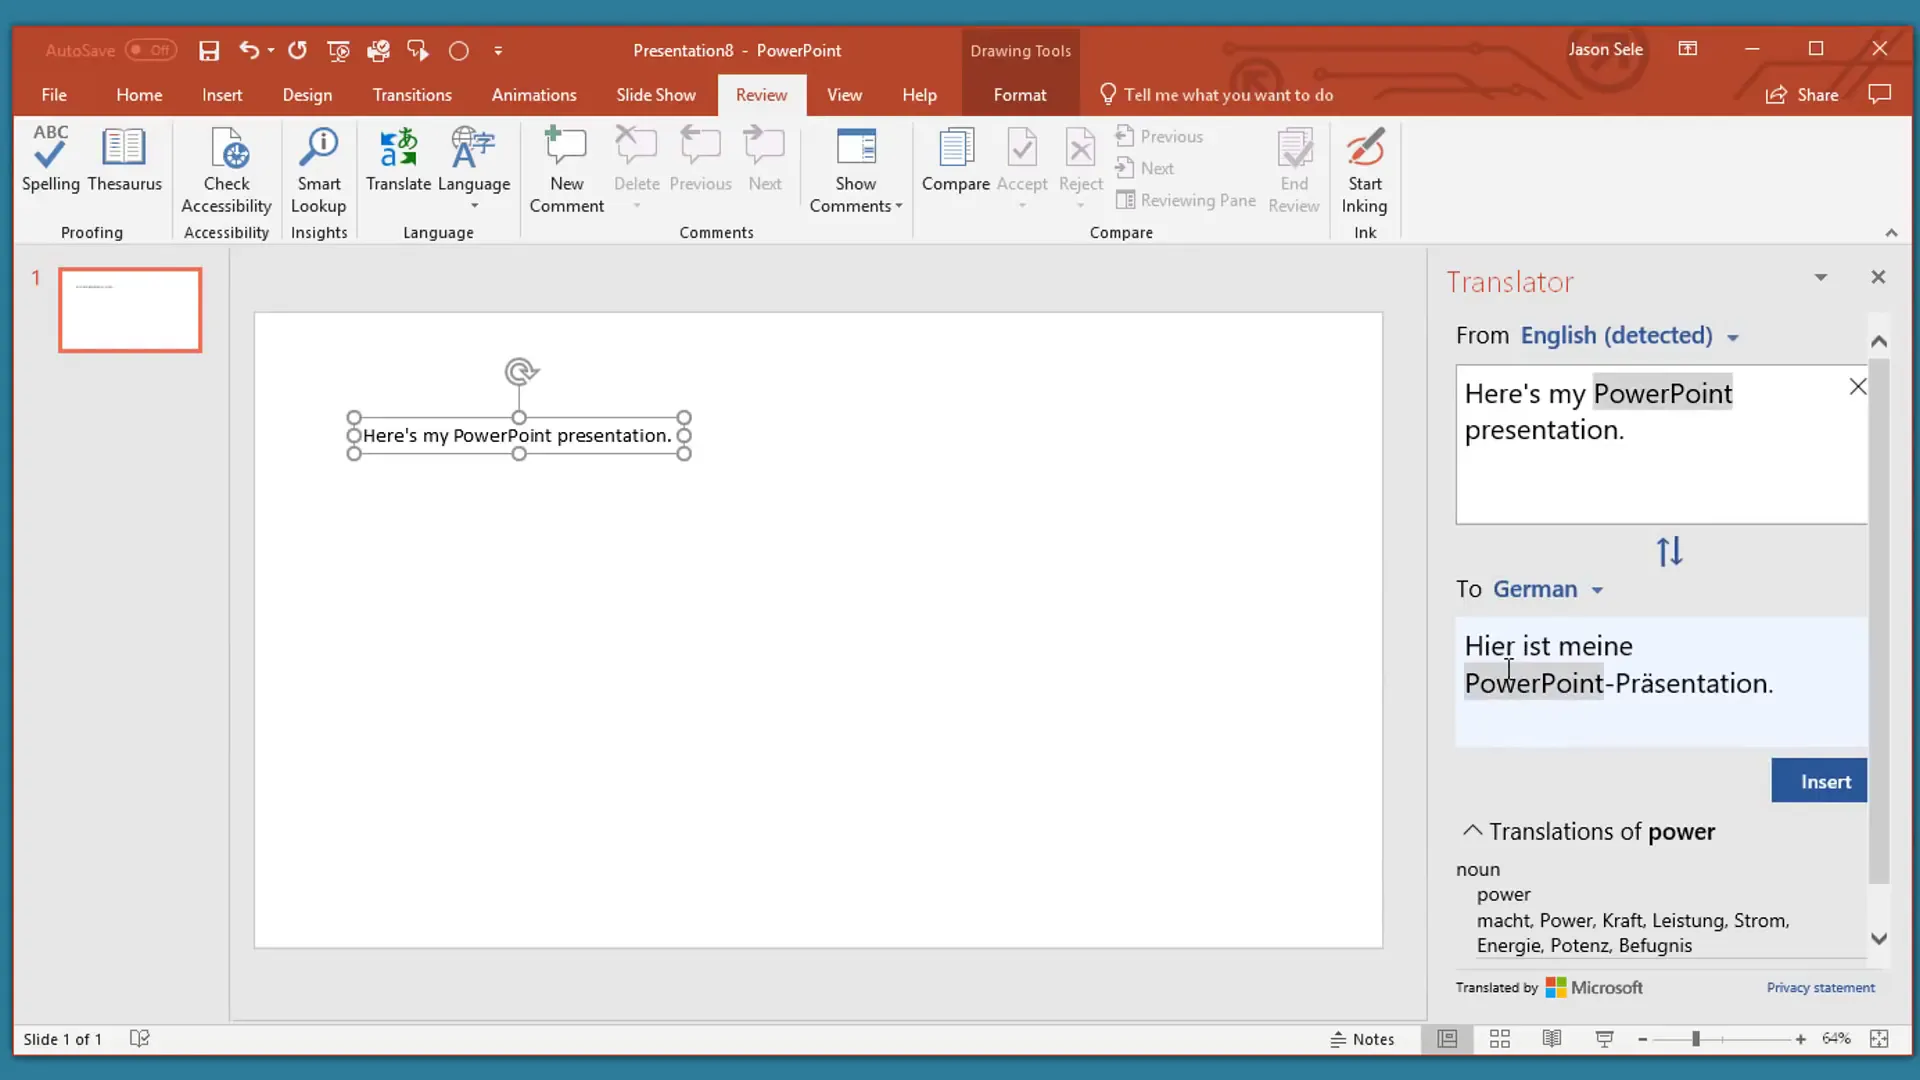
For example, if you select English text and choose German, the tool will generate the German translation. You can then insert the translated text into your slide, creating side-by-side language versions if needed.
This feature is perfect for international meetings, classrooms with diverse learners, or any situation where you want to communicate clearly across languages without leaving PowerPoint or using external translation services.
8. Manage Slide Objects Efficiently with the Selection Pane
When working with complex slides containing multiple overlapping objects, managing their order and visibility can be challenging. The Selection Pane is your go-to tool for this.
Access it by going to the Home tab, clicking on Arrange, and selecting Selection Pane at the bottom of the menu.
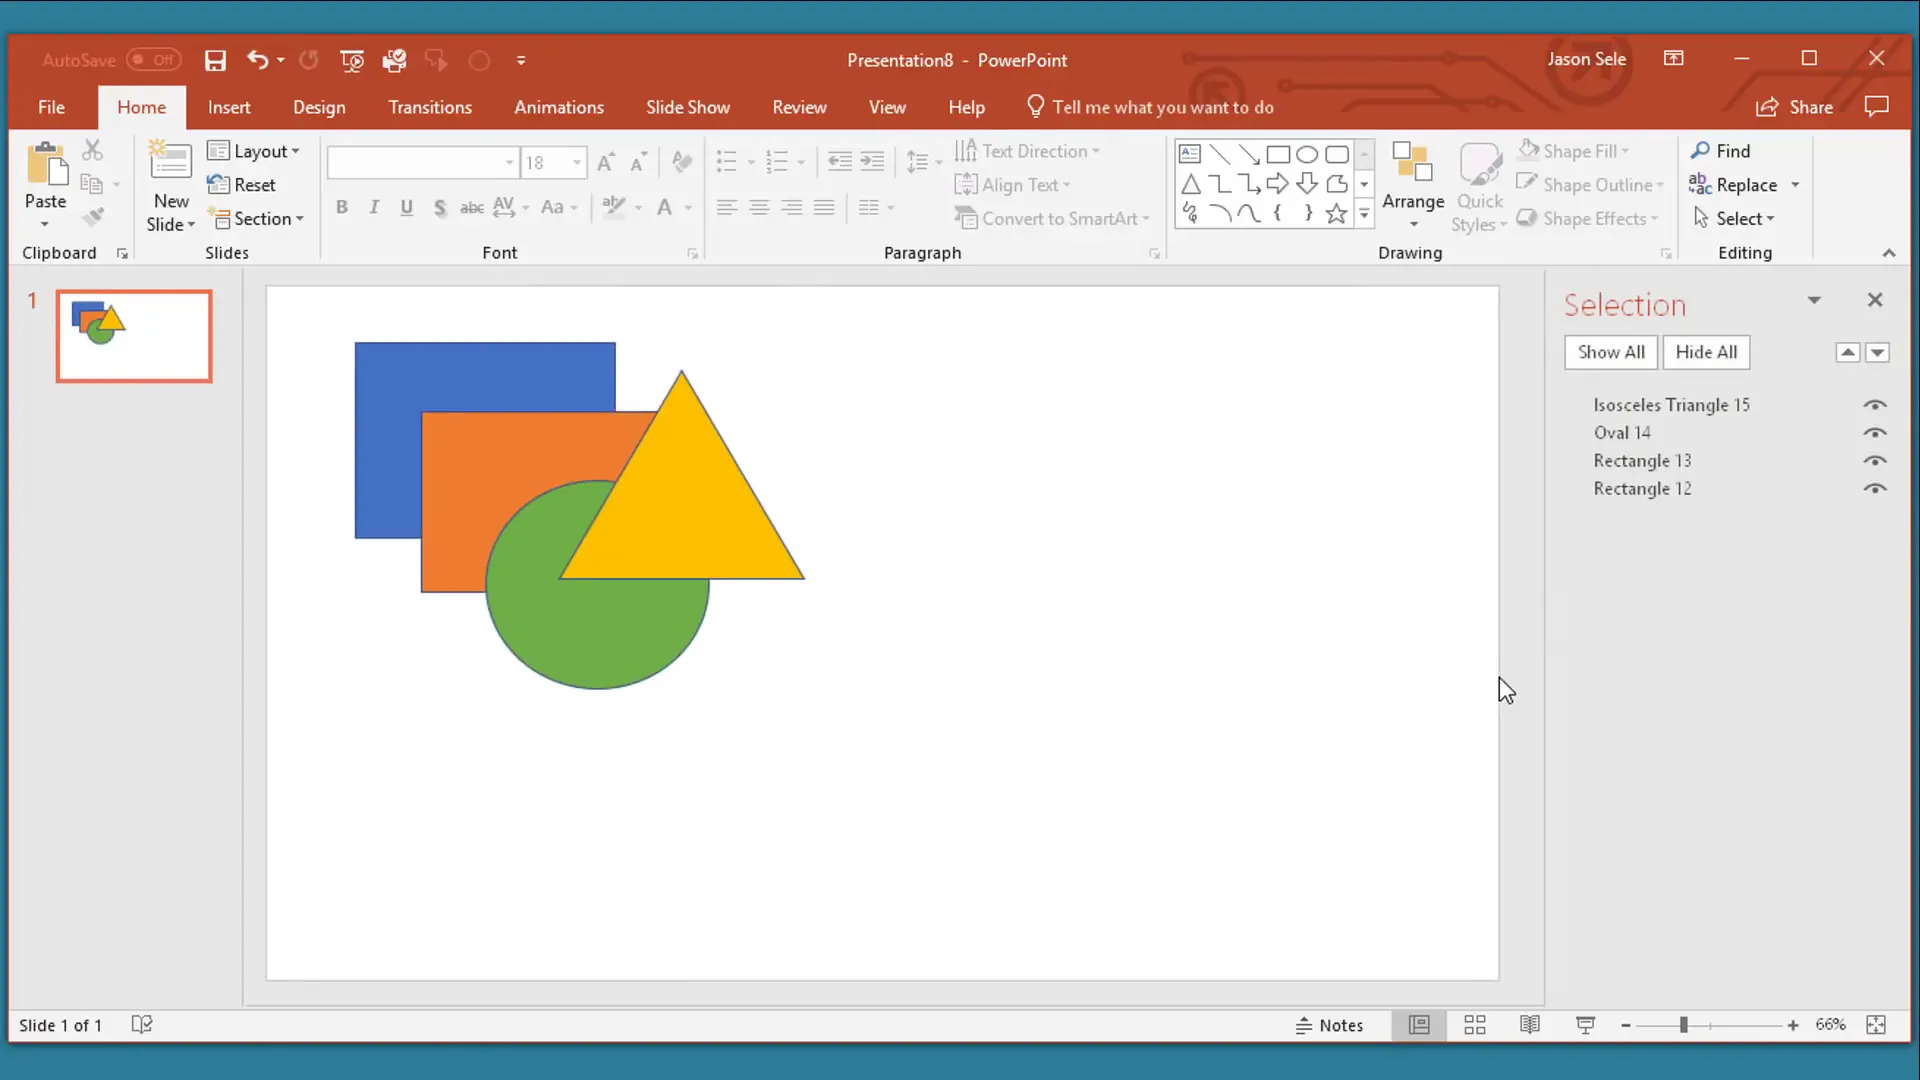
The pane lists every object on your slide in order from top to bottom. You can:
- Toggle visibility on or off by clicking the eye icon
- Rearrange the layering by dragging objects up or down
- Rename objects for easier identification
This is especially useful for presentations with complex graphics, multiple images, or layered text boxes. It gives you precise control over what appears in front or behind and helps keep your slides organized.
9. Link Excel Data for Dynamic and Up-to-Date Charts
PowerPoint 2016 allows you to link Excel data directly into your presentation, ensuring your charts and tables stay updated whenever the source Excel file changes.
There are two main methods to do this:
Method 1: Copy-Paste with Link
- In Excel, select your chart or data and press Ctrl + C to copy.
- Switch to PowerPoint and press Ctrl + V to paste.
- After pasting, look for paste options in the bottom-right corner of the object and select the one with a chain icon, which means linked data.
With this link established, any updates you make in the Excel file will automatically reflect in your PowerPoint chart, provided you save the Excel file before reopening the presentation.
Method 2: Create a Button to Open Excel
- Create a button or text box in PowerPoint and label it appropriately (e.g., “Open Excel Data”).
- Select the button, then set a hyperlink to the Excel file’s location.
- During your presentation, clicking this button will open the Excel file for live data review or editing.
This method is helpful if you want to show the raw data during a presentation or quickly jump between Excel and PowerPoint.
Linking Excel data is a powerful way to maintain accuracy and professionalism, especially in business or financial presentations where data changes frequently.
10. Create Instant Slideshows with Photo Albums
Want to quickly turn a collection of photos into a slideshow? PowerPoint’s Photo Album feature makes this process fast and simple.
Go to the Insert tab and select Photo Album, then choose File/Disk to browse and select the photos you want to include.
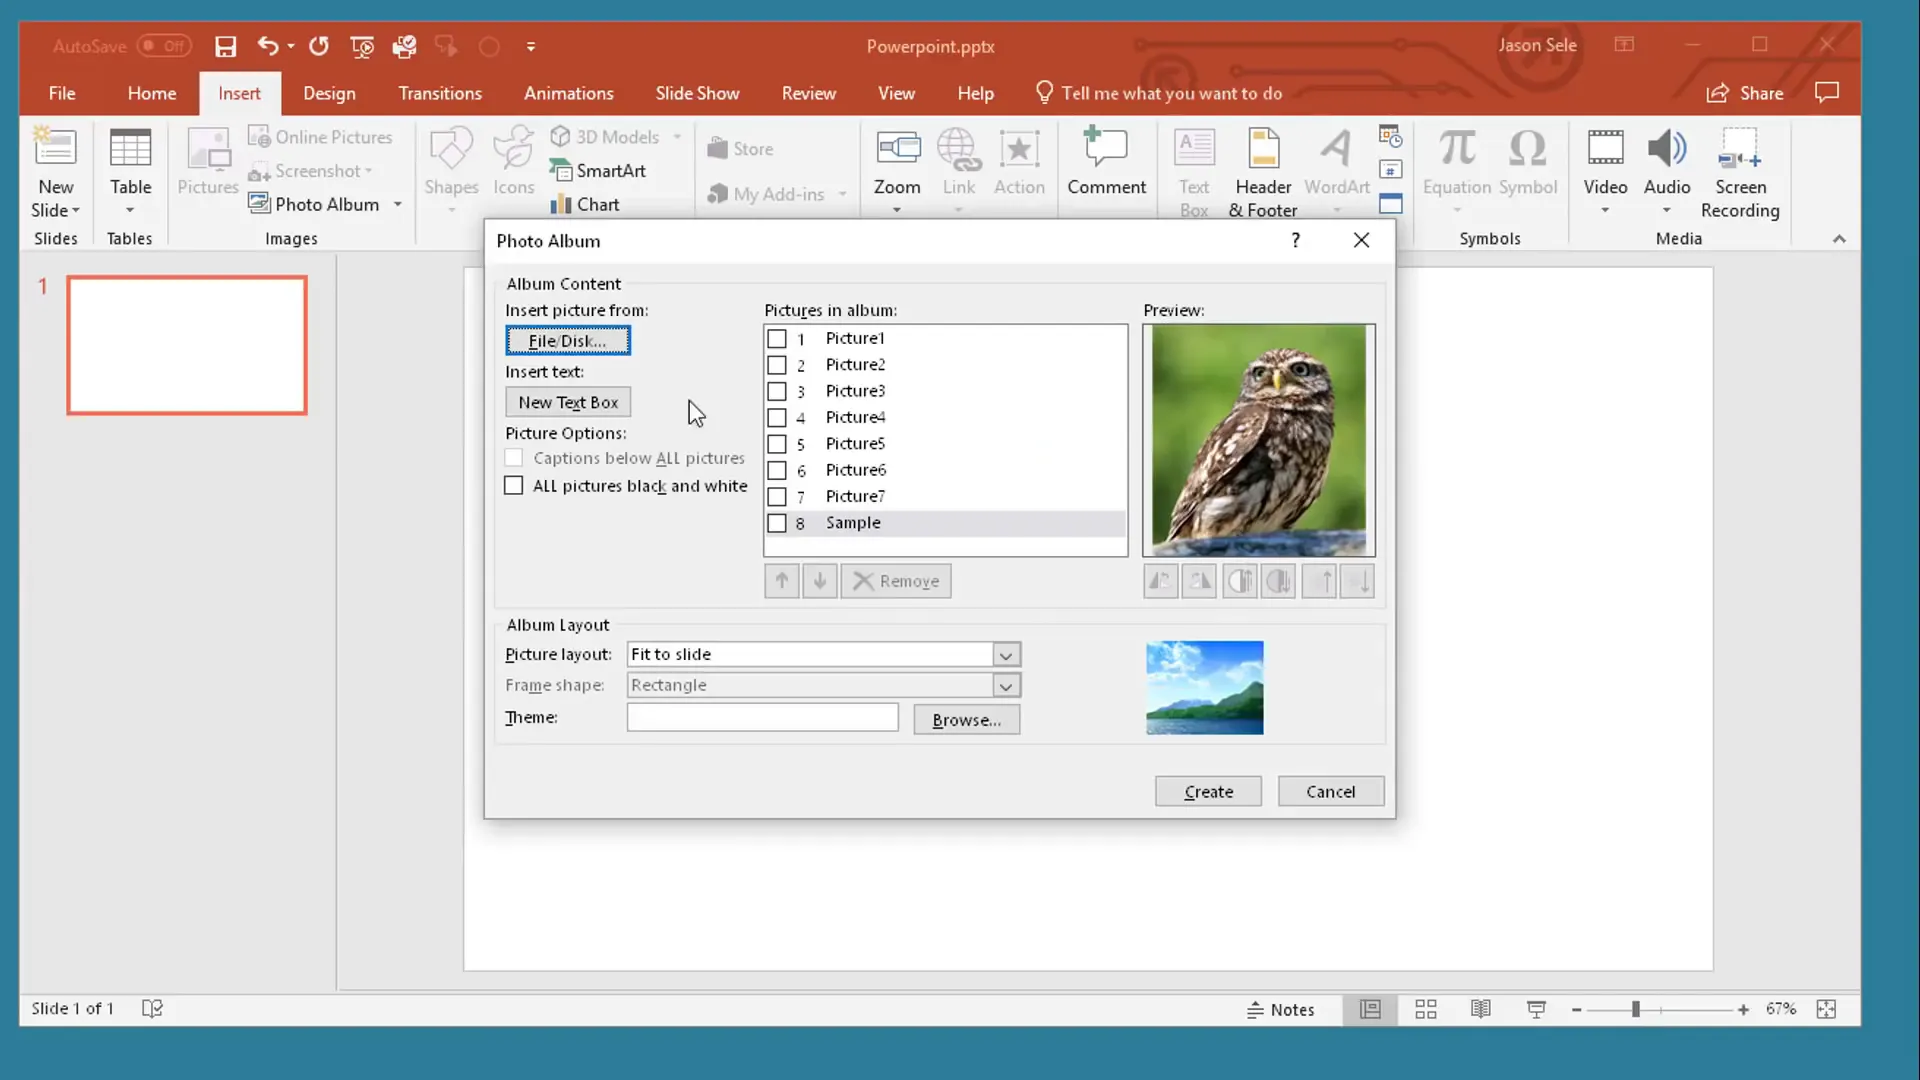
You can adjust formatting options such as picture layout or keep the default Fit to Slide. Once you click Create, PowerPoint generates a new presentation with each photo on its own slide, ready for a slideshow.
To add polish, you can use the Design Ideas feature to select a stylish intro slide or customize the album further.
This is perfect for events, portfolios, or any scenario where you want to showcase images without manually creating each slide.
Conclusion
PowerPoint 2016 offers a treasure trove of advanced features that can transform your presentations from ordinary to extraordinary. By leveraging add-ins, design tools, multimedia options, and data integration, you can craft slides that captivate, inform, and inspire your audience.
Whether you’re presenting in person or remotely, these tips will help you work more efficiently and creatively. From creating custom templates to animating images and linking live Excel data, you now have a robust toolkit to elevate your PowerPoint skills.
Keep exploring these features, experiment with your own slides, and watch your presentations gain that professional edge.
Frequently Asked Questions (FAQ)
Q1: What are PowerPoint add-ins, and how do I install them?
Add-ins are small applications or tools that extend PowerPoint’s functionality. You can install them from the Microsoft Store by going to the Insert tab, clicking Add-ins, selecting My Add-ins, and browsing the Office Store. Choose an add-in and click Add to install it in your presentation.
Q2: How does the Design Ideas feature work?
Design Ideas uses AI to analyze your slide content and suggest professional layout options. You activate it from the Design tab, and it provides several design alternatives to improve the appearance of your slide, including integrating photos and text in visually appealing ways.
Q3: Can I link Excel charts to PowerPoint so they update automatically?
Yes! By copying charts from Excel and pasting them into PowerPoint using the Paste Special option with linking enabled, your charts will update automatically when the Excel file changes. Just make sure the Excel file is saved and accessible.
Q4: How do I record my screen in PowerPoint?
Go to Insert > Screen Recording, select the area of your screen to capture, and start recording. When finished, the recording is embedded directly into your slide, and you can set it to play automatically during your presentation.
Q5: What is the Selection Pane, and why should I use it?
The Selection Pane helps you manage all objects on a slide, especially when they overlap. It allows you to toggle visibility, reorder layers, and rename objects for easier management, ensuring your slide elements appear exactly as intended.
Q6: How can I translate text within PowerPoint slides?
Use the built-in translator under the Review tab. Select the text you want to translate, choose your target language, and insert the translated text directly into your slide. This is helpful for multilingual presentations.
Q7: Can I create a custom PowerPoint template?
Absolutely! Use the Slide Master view to set your preferred colors, fonts, backgrounds, and layouts. Save this as a PowerPoint Template file (*.potx), and you can reuse it for consistent branding across presentations.
Q8: How do I create a quick photo slideshow in PowerPoint?
Use the Photo Album feature under the Insert tab. Select your photos, configure layout options, and PowerPoint will generate a slideshow presentation with each photo on a separate slide.
By mastering these advanced tips, your PowerPoint 2016 presentations will stand out and deliver your message with clarity and impact. Happy presenting!
Check out the full video: Top 10 Advanced PowerPoint 2016 Tips and Tricks


