
PowerPoint presentations are a powerful tool for communication, but adding the right animations can elevate your slides from ordinary to extraordinary. Whether you’re a beginner or have some experience, mastering animations can transform your message and captivate your audience. In this comprehensive guide, we’ll explore the top 10 animations to improve your PowerPoint presentations, inspired by expert techniques used by One Skill PowerPoint. From simple click animations to advanced 3D model animations, you’ll learn how to make your presentations more dynamic, engaging, and professional.
This article will guide you through each animation style step-by-step, complete with practical tips and tricks. Plus, you’ll find screenshots at key points to help visualize the process. Let’s dive in!
Table of Contents
- 1. Click Animations: The Basics of Revealing Content
- 2. Bounce Animations: Adding Dynamic Movement
- 3. Delayed Animations: Creating Waterfall Effects
- 4. Auto Reverse Animations: Creating Continuous Loops
- 5. Animation Triggers: Interactive Clickable Elements
- 6. Morph Transition: Powerful Slide Animations Without Animation Pane
- 7. Combining Draw and Motion Path Animations: Scribble Effects
- 8. GIF and Video Animations: Bringing Slides to Life
- 9. Masked Animations: Creative Reveals with Shapes
- 10. 3D Model Animations: Engaging and Modern Visuals
- Frequently Asked Questions (FAQ)
- Conclusion
1. Click Animations: The Basics of Revealing Content
Starting with the basics, click animations are perfect for revealing elements one by one on your slide. This simple technique helps maintain audience focus and controls the flow of information.
To create effective click animations, first group your slide elements logically. For example, if you have multiple bubbles or icons, group each one separately. This makes applying animations easier and more organized.
Once your groups are ready, select all of them by holding the Shift key and apply a Fade animation. Make sure each animation is set to start On Click. This setting ensures that each element appears only when you want it to.
You can check the animation order and adjust it in the Animation Pane to confirm the sequence matches your narrative flow.
When you run your presentation, each click will reveal the next element smoothly, helping you maintain control and keep your audience engaged. This method is highly versatile and serves as the foundation for more complex animations.
2. Bounce Animations: Adding Dynamic Movement
To make animations more lively, you can introduce bounce effects. Bounce animations simulate a natural, dynamic movement, making objects fly in with a slight bounce at the end.
Start by duplicating your slide with click animations. Remove the existing animations to begin fresh. Select all groups and apply the Fly In animation; choose the direction based on your layout (e.g., from left for left-side elements and from right for right-side elements).
Adjust the duration to around one second for a smooth but noticeable effect.
To add bounce, go to Effect Options in the Animation Pane and find the Bounce End slider. Setting it to approximately 0.8 seconds gives a satisfying bounce effect at the end of the fly-in animation.
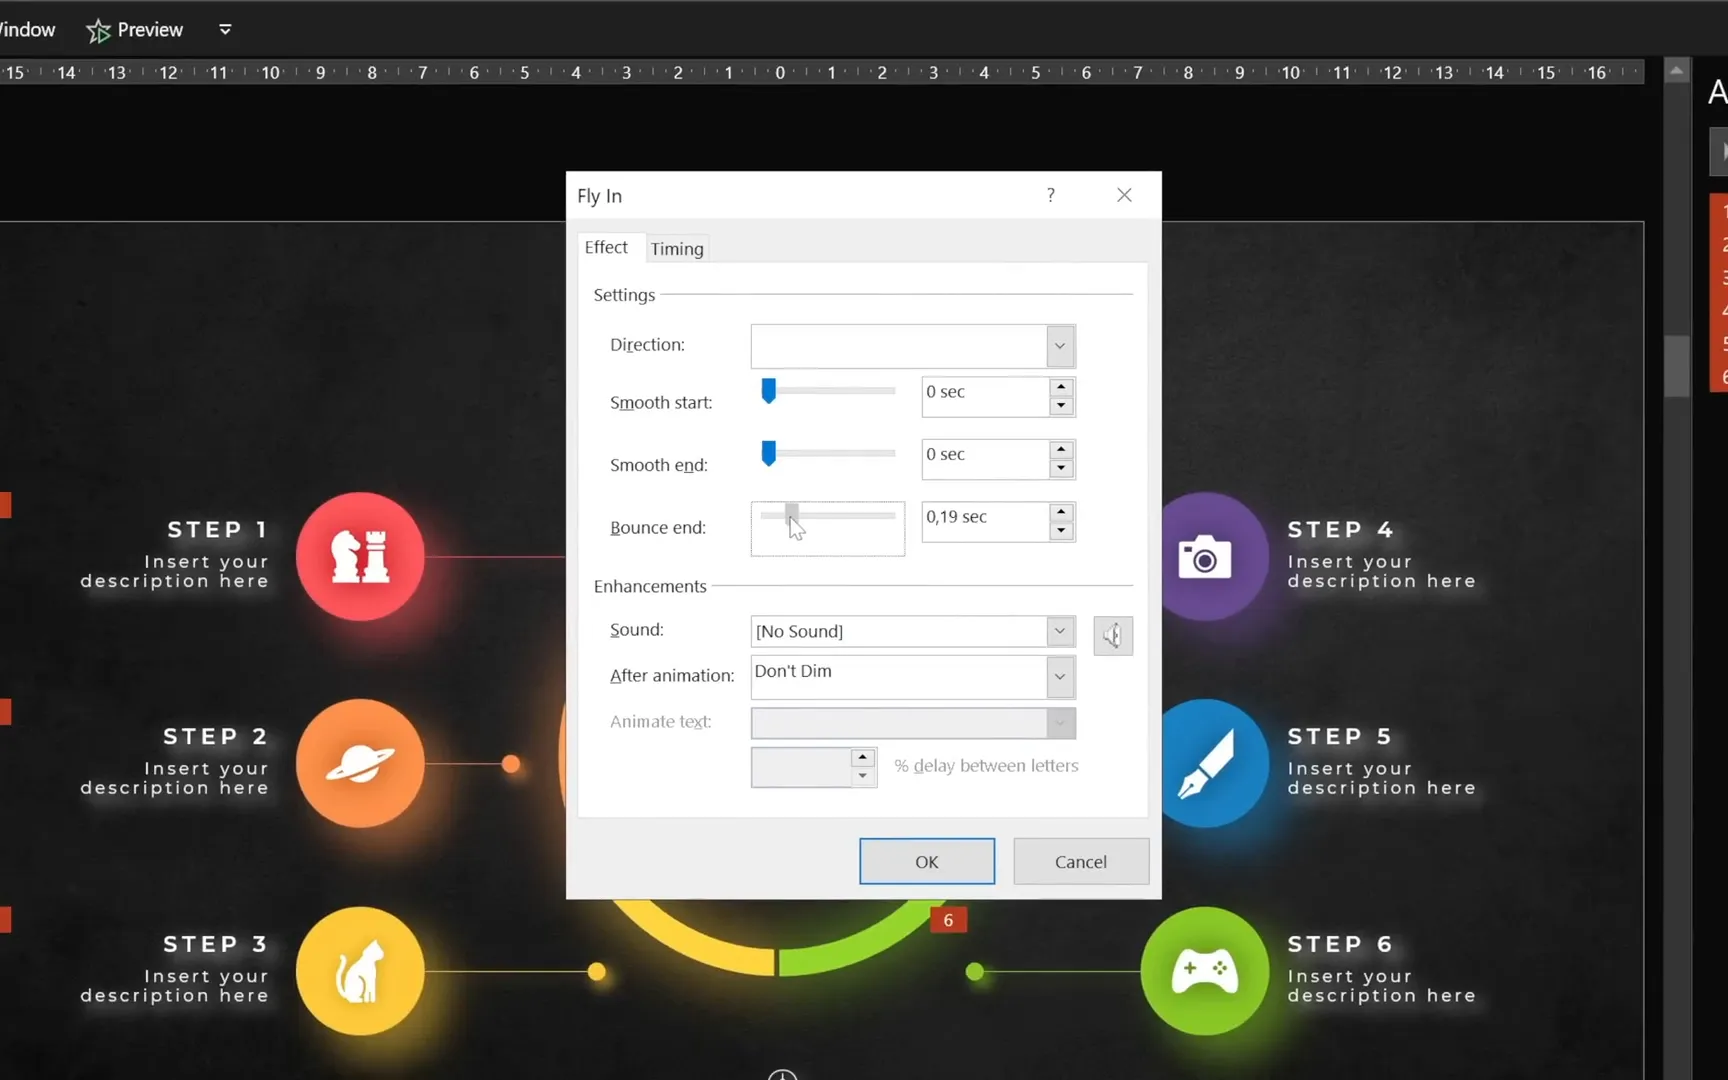
This subtle bounce adds energy to your slide transitions, making your presentation feel more dynamic and polished. If you want to explore more bounce animation ideas, consider looking into blueprint animations, which offer creative variations.
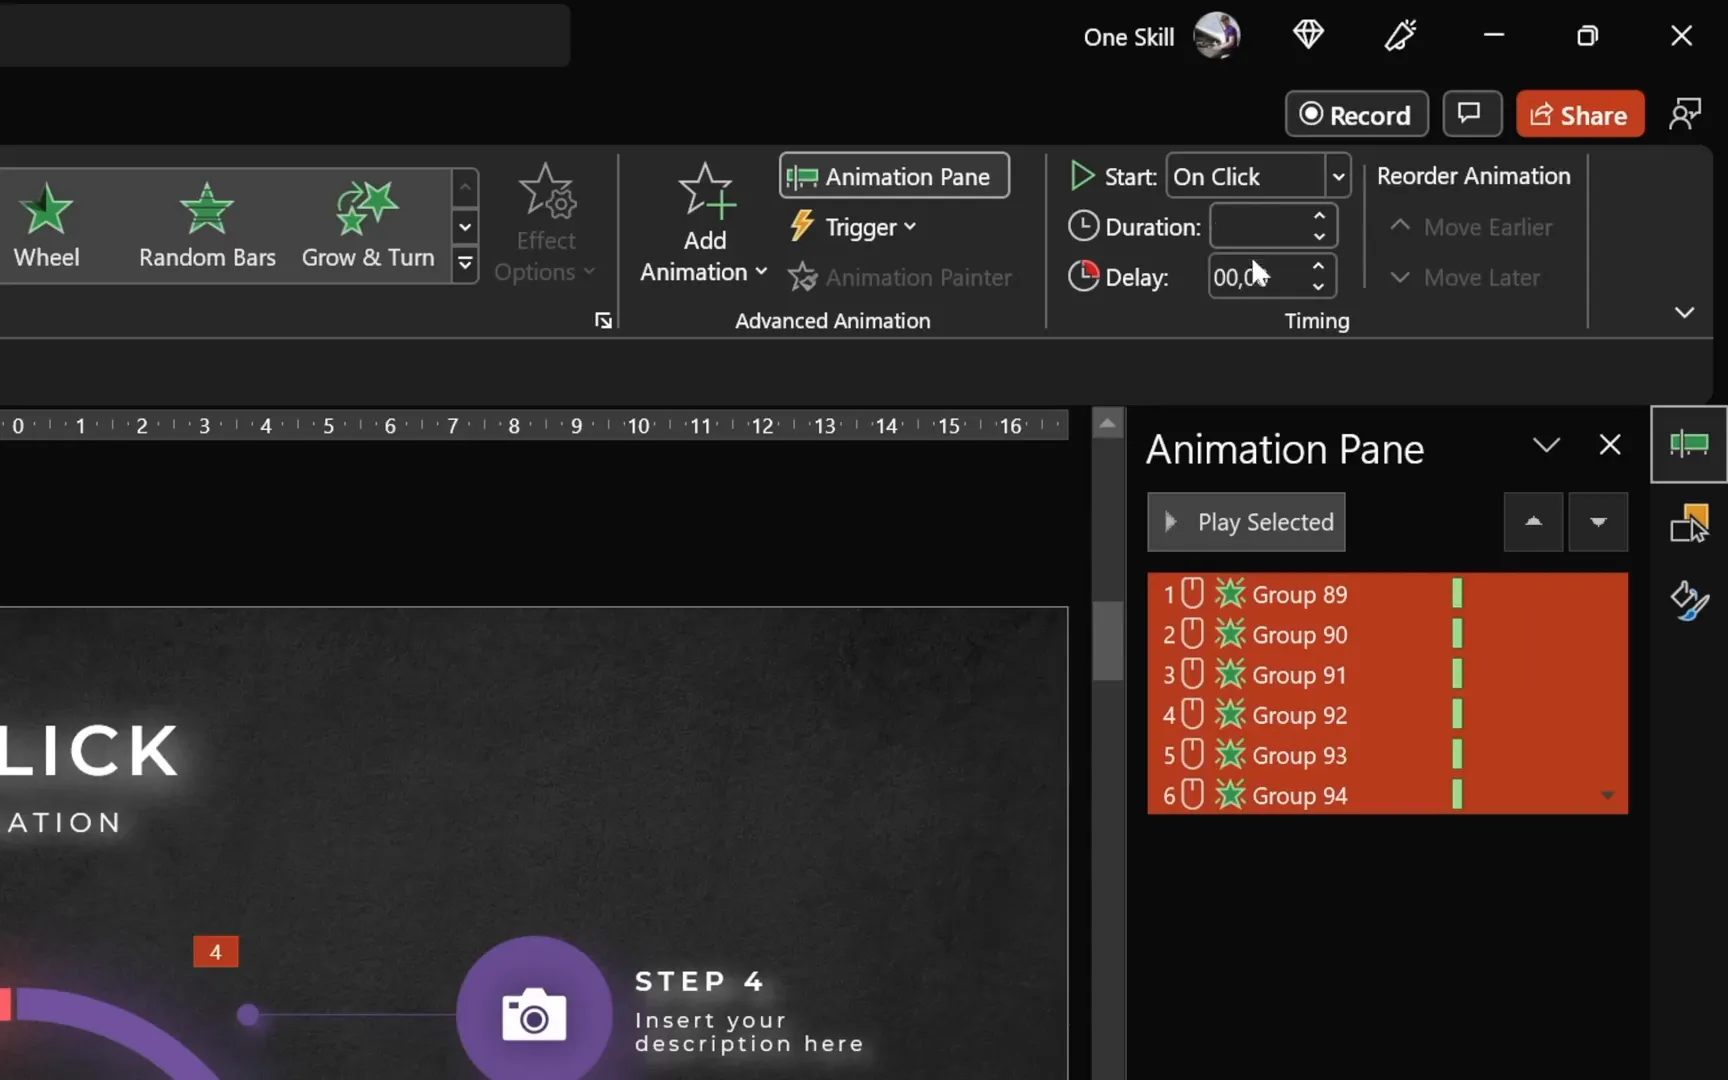
3. Delayed Animations: Creating Waterfall Effects
Delayed animations are a fantastic way to animate multiple elements sequentially with a slight delay, creating a waterfall or cascade effect.
To prepare, break your illustration into separate objects or groups. You can ungroup complex illustrations and regroup parts logically. Rename the groups in the Selection Pane numerically to keep track of the animation order.
Select all groups and apply a Fly In animation from the top with a duration of around two seconds. Add a Bounce End effect for extra flair.
Next, add incremental delays to each group’s animation (for example, 0.1 seconds between each). This staggering causes the elements to animate one after another rather than all at once, producing a beautiful cascading effect.
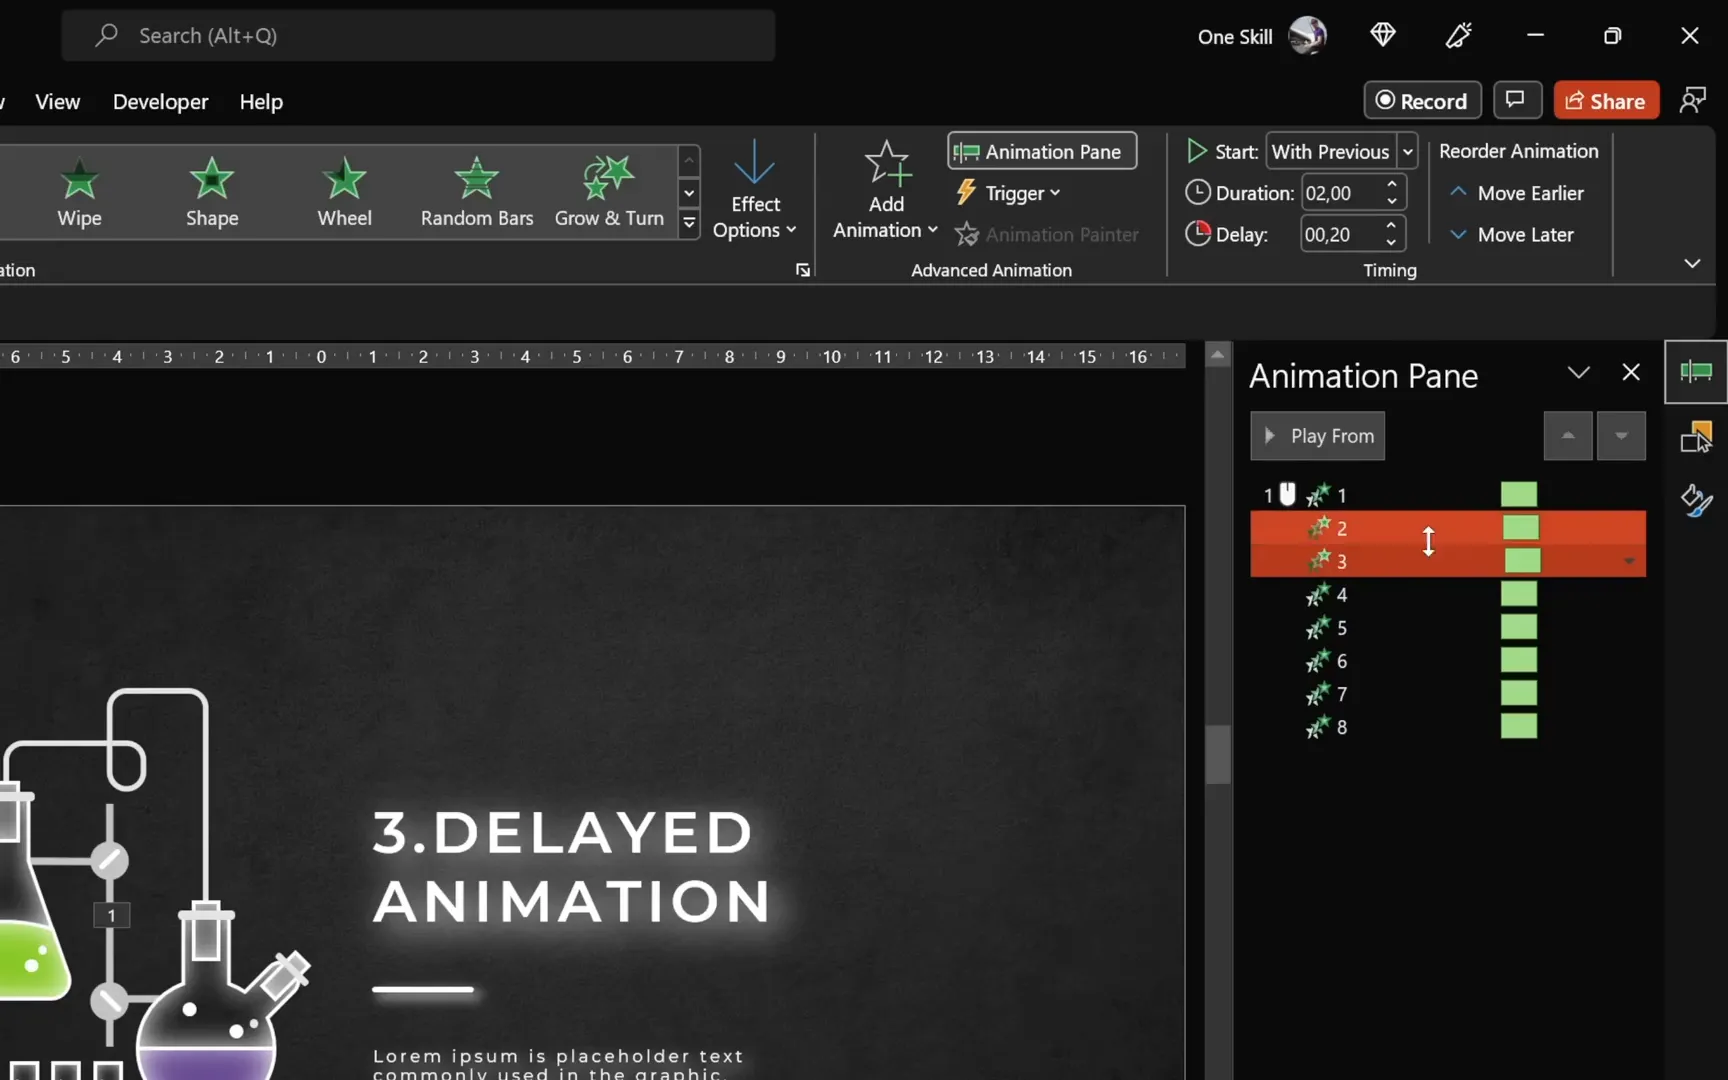
This technique is excellent for presenting data, illustrating processes, or simply adding sophistication to your slide visuals. It keeps the audience’s attention moving naturally through the content.
4. Auto Reverse Animations: Creating Continuous Loops
The auto reverse option in PowerPoint animations adds the ability for an object to animate back to its starting position automatically, creating a looping effect.
To demonstrate, select an object (such as a robot icon) and apply a Motion Path animation like a Line path moving to the right. Adjust the path length as needed.
In the Effect Options, enable the Auto Reverse checkbox. Then, in the timing settings, set the animation to repeat Until End of Slide. Adjust the duration for speed control (e.g., one second for a quick slide).
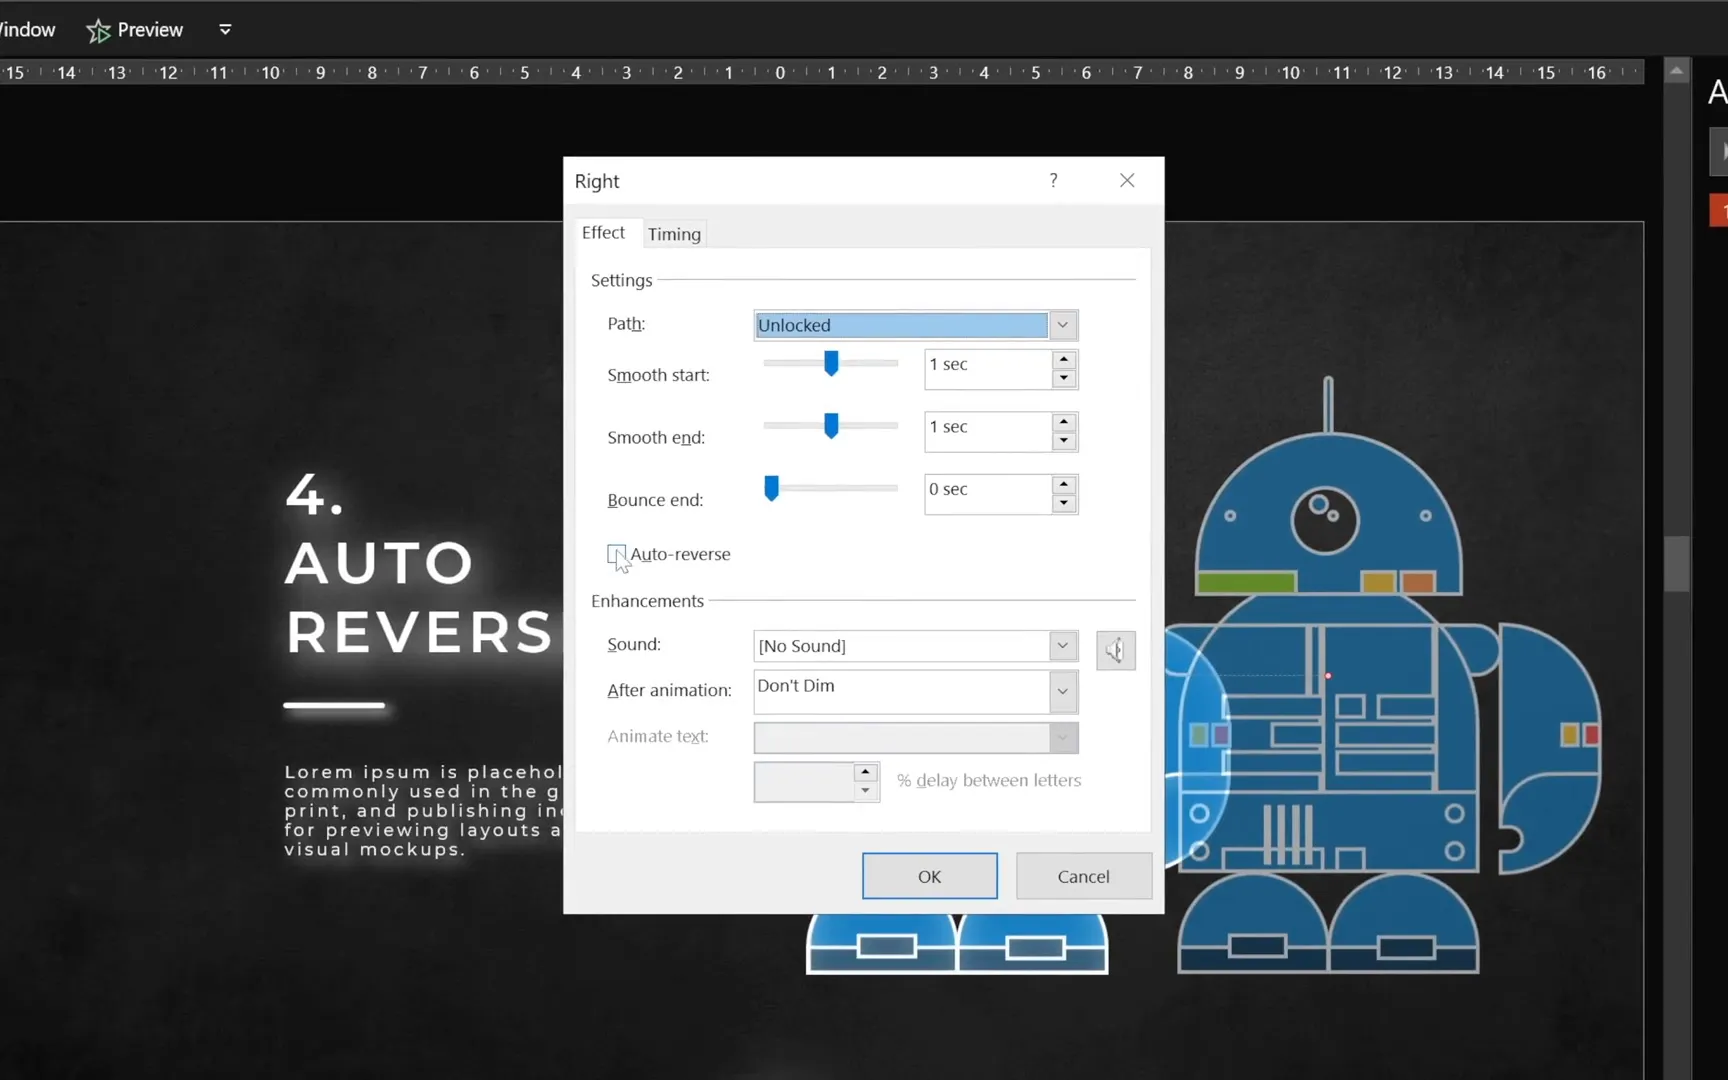
Now, the object will slide right and automatically reverse left continuously, creating a smooth loop. This technique is great for emphasizing ongoing processes or adding movement without manual repetition.
5. Animation Triggers: Interactive Clickable Elements
Animation triggers allow you to create interactive elements where animations start only when you click specific objects, like buttons or map pins.
For example, on a map slide, you can have city names appear only when you click their corresponding pins.
To set this up, first add a simple Fade In animation to the label you want to reveal. Then, in the Animation Pane, under Triggers, select Start effect on click of and choose the corresponding pin (an object like a small circle).
This setup means the label appears only when that pin is clicked. To add toggle functionality, add a Fade Out exit animation triggered by clicking the same pin again. Make sure to place the exit animation in the same trigger group and sequence correctly.
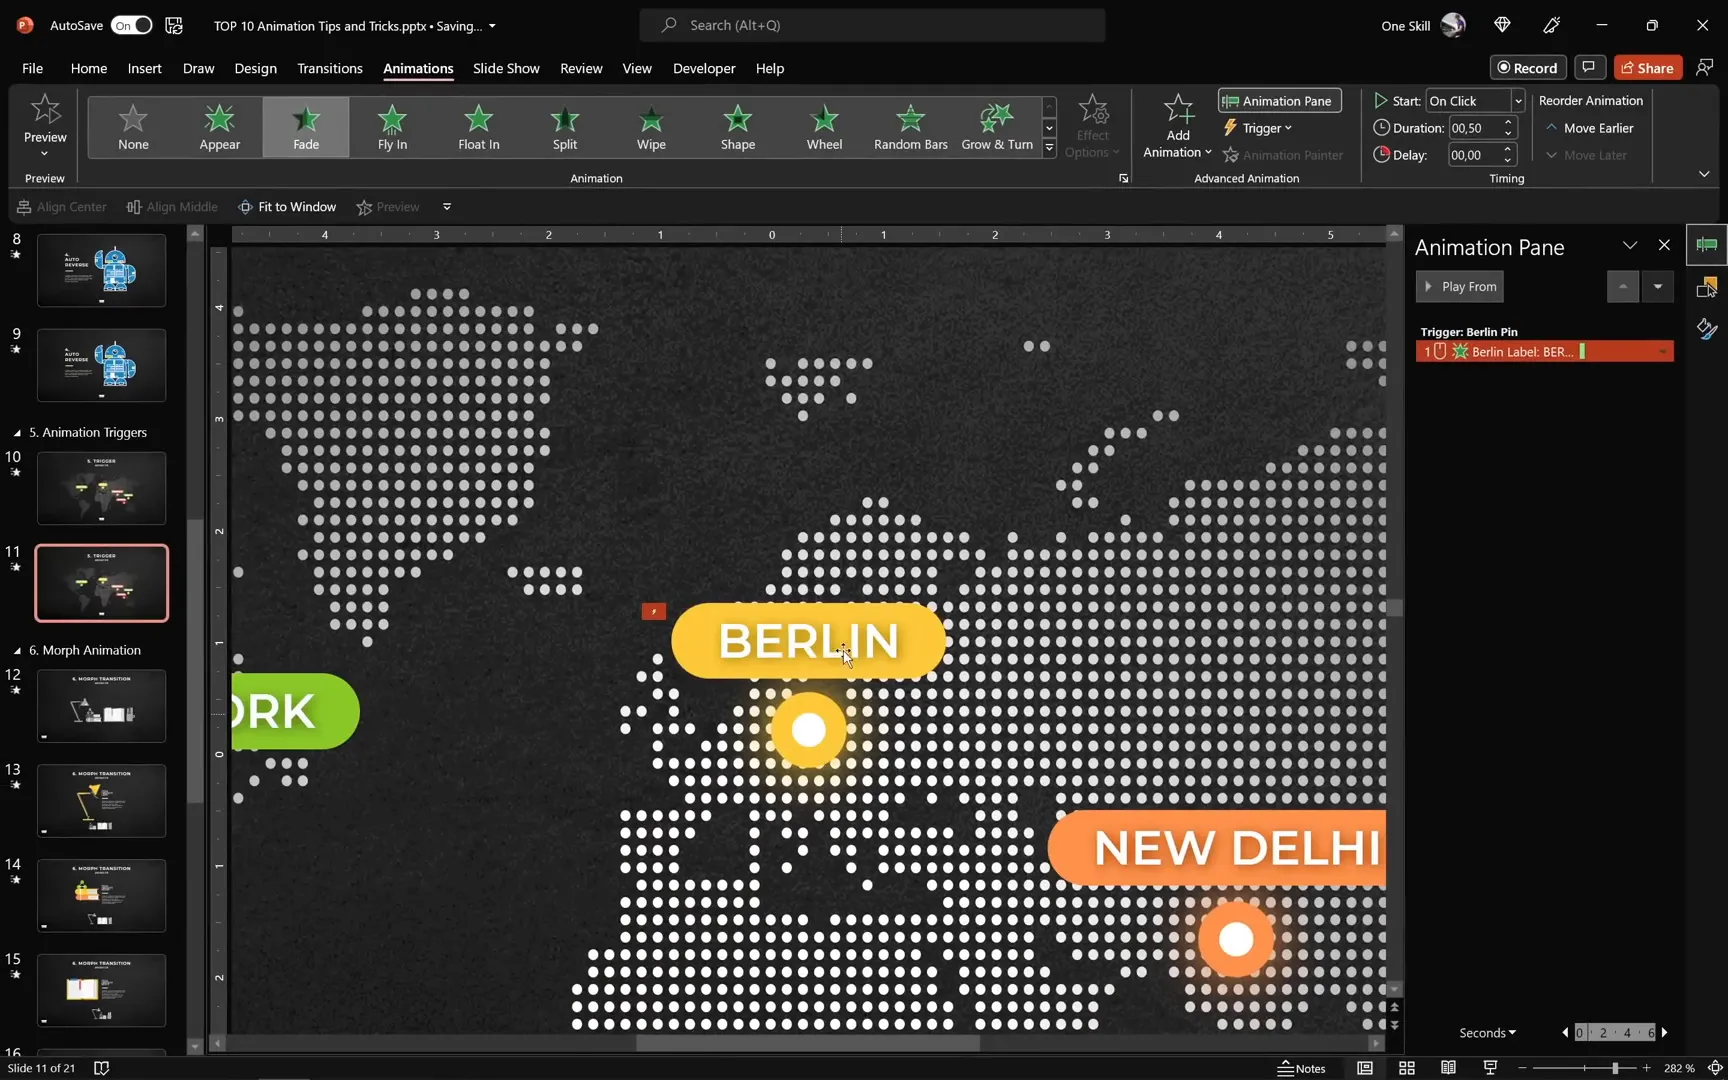
This technique is perfect for creating interactive maps, quizzes, or any slide where you want the viewer to control what information is displayed.
6. Morph Transition: Powerful Slide Animations Without Animation Pane
The Morph Transition is a game-changer that animates changes between slides automatically without needing manual animations.
To use Morph, duplicate a slide and make changes on the duplicate—resize, reposition, rotate, or recolor objects. For example, make a lamp bigger and rotate its head while changing its color.
Apply the Morph transition to the second slide. When you play the presentation, PowerPoint animates the changes smoothly, creating effects like growing, rotating, and color changes without setting up animations.

You can adjust the duration of the Morph transition to control speed. This feature requires PowerPoint 2019 or later or Microsoft 365 and opens up creative possibilities with minimal effort.
7. Combining Draw and Motion Path Animations: Scribble Effects
Combining drawing animations with custom motion paths can create organic, hand-drawn effects like scribbles appearing dynamically.
Start by using the Draw tab’s pencil tool to create a colorful scribble or shape. Adjust pen thickness and color as desired.
Apply the Replay animation to the drawing to simulate it being drawn on screen. Adjust duration to control drawing speed.

Next, add a pencil icon to your slide and set its rotation center to the pencil tip for realistic movement. Group the pencil with an invisible circle shape to control the rotation center.
Create a custom motion path that follows the scribble’s shape for the pencil. Synchronize the pencil’s motion path duration with the drawing animation so they play together.
Enhance the effect by adding a flying animation for the pencil entering the slide and an exit animation for it leaving after drawing.
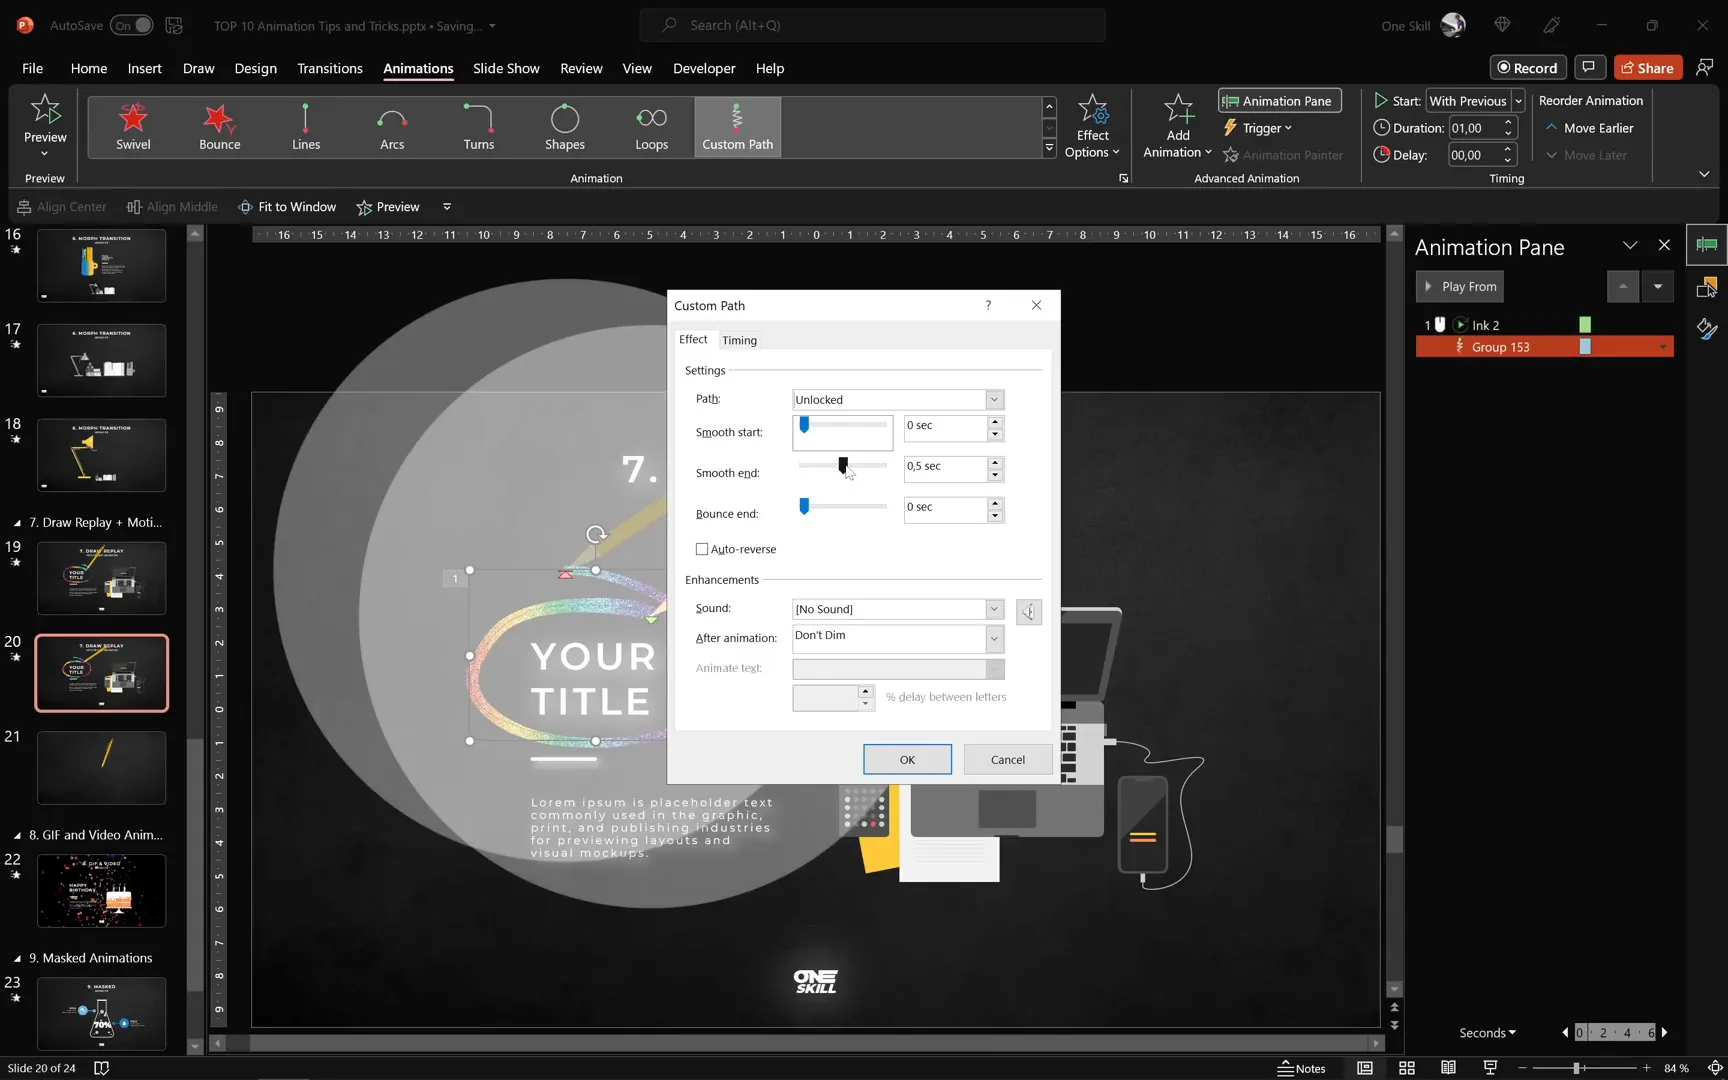
This technique adds a playful, creative touch to titles or illustrations and can make your presentation memorable.
8. GIF and Video Animations: Bringing Slides to Life
Adding GIFs and videos can dramatically enhance the visual appeal and engagement of your slides.
You can insert GIFs directly by copying from websites like Giphy and pasting them into PowerPoint. By default, GIFs autoplay, but you can control visibility with an Appear animation triggered by clicking another object (e.g., clicking a cake to show fireworks).
For video overlays, use PowerPoint’s stock videos or insert your own. Resize and position the video to cover the slide or desired area. Send it to the back to layer it behind other elements.
Add animations to the video like Fly In triggered by clicking a text box and add a Play animation starting with the fly-in. You can also add a Transparency animation to create overlay effects, adjusting transparency to around 70%.
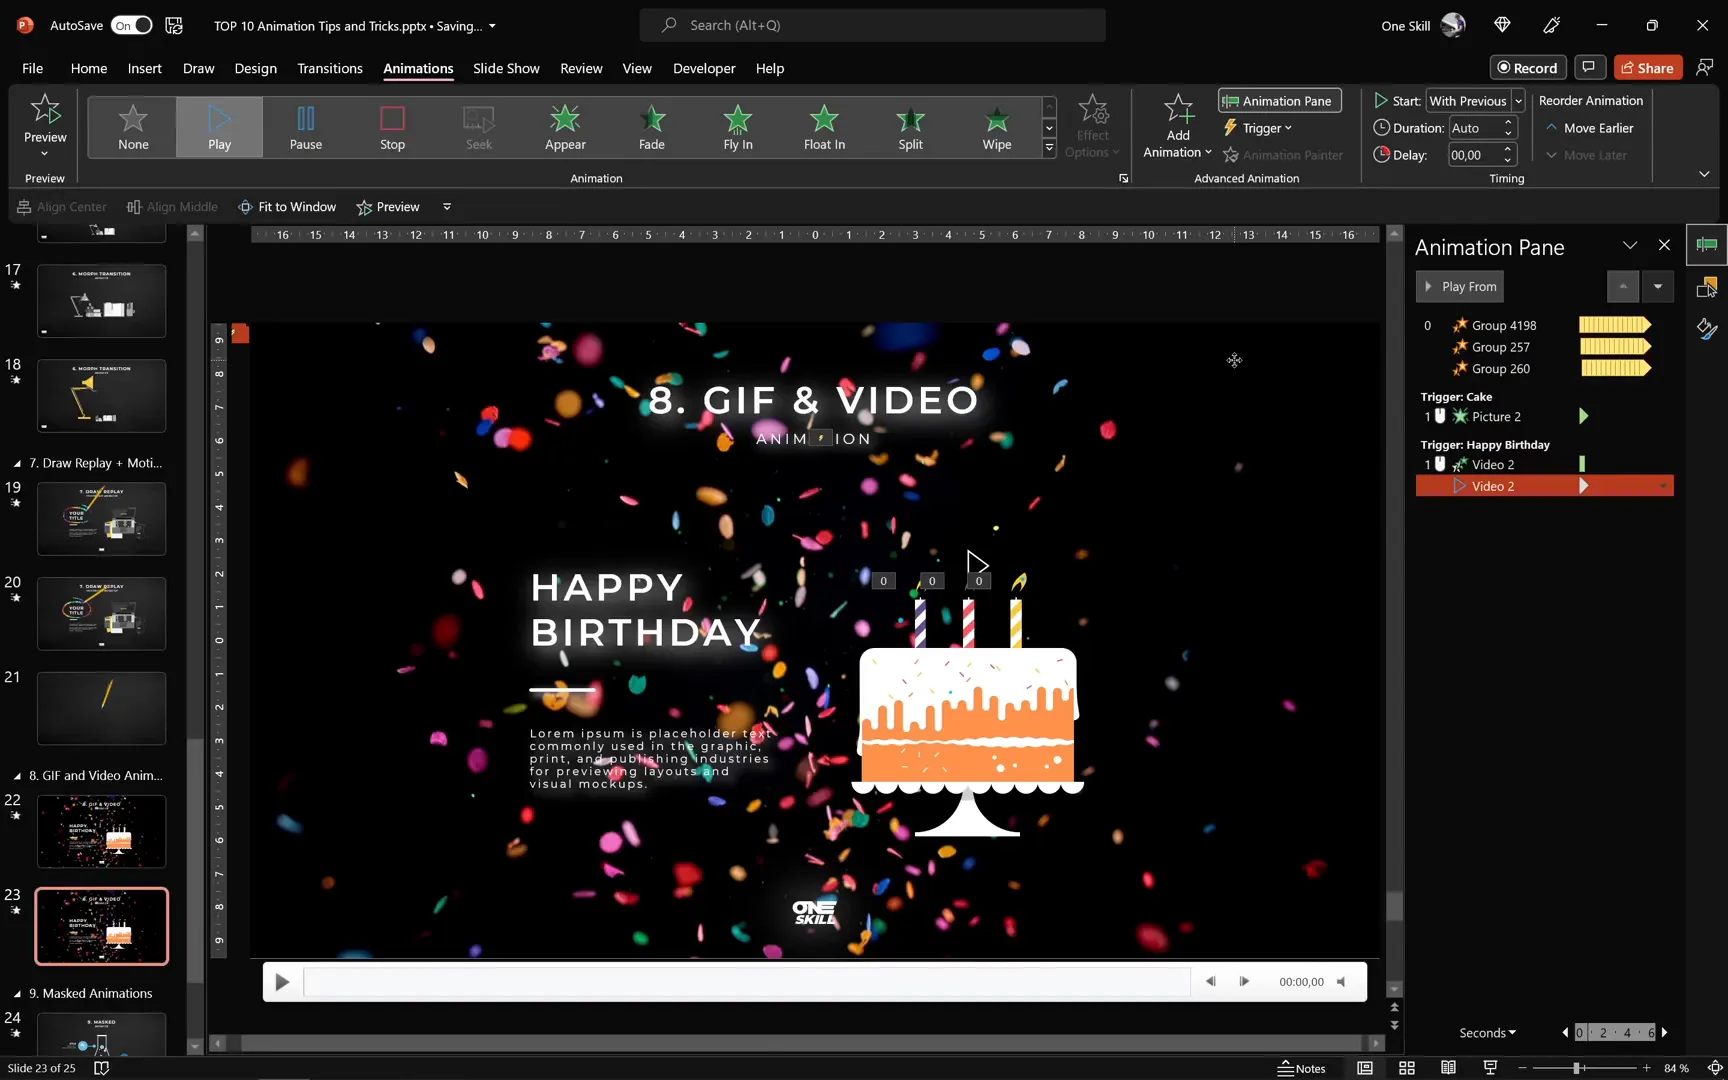
This approach is excellent for celebratory slides, event invitations, or any moment where you want to surprise your audience with motion and color.
9. Masked Animations: Creative Reveals with Shapes
Masked animations use shape subtraction and layering to create effects like filling a bottle with water or revealing content through a mask.
To build a mask, start with a solid rectangle covering your desired area. Use Merge Shapes > Subtract to punch a hole in the rectangle in the shape of another object (e.g., a test tube).
Place the mask above a shape filled with your “fill” color (like blue for water). Animate the fill shape with a Fly In animation from the bottom to simulate filling up.
You can add bounce effects to make the fill animation more lively. Additional elements like bubbles or percentages can be animated with diagonal motion paths to enhance the scene.
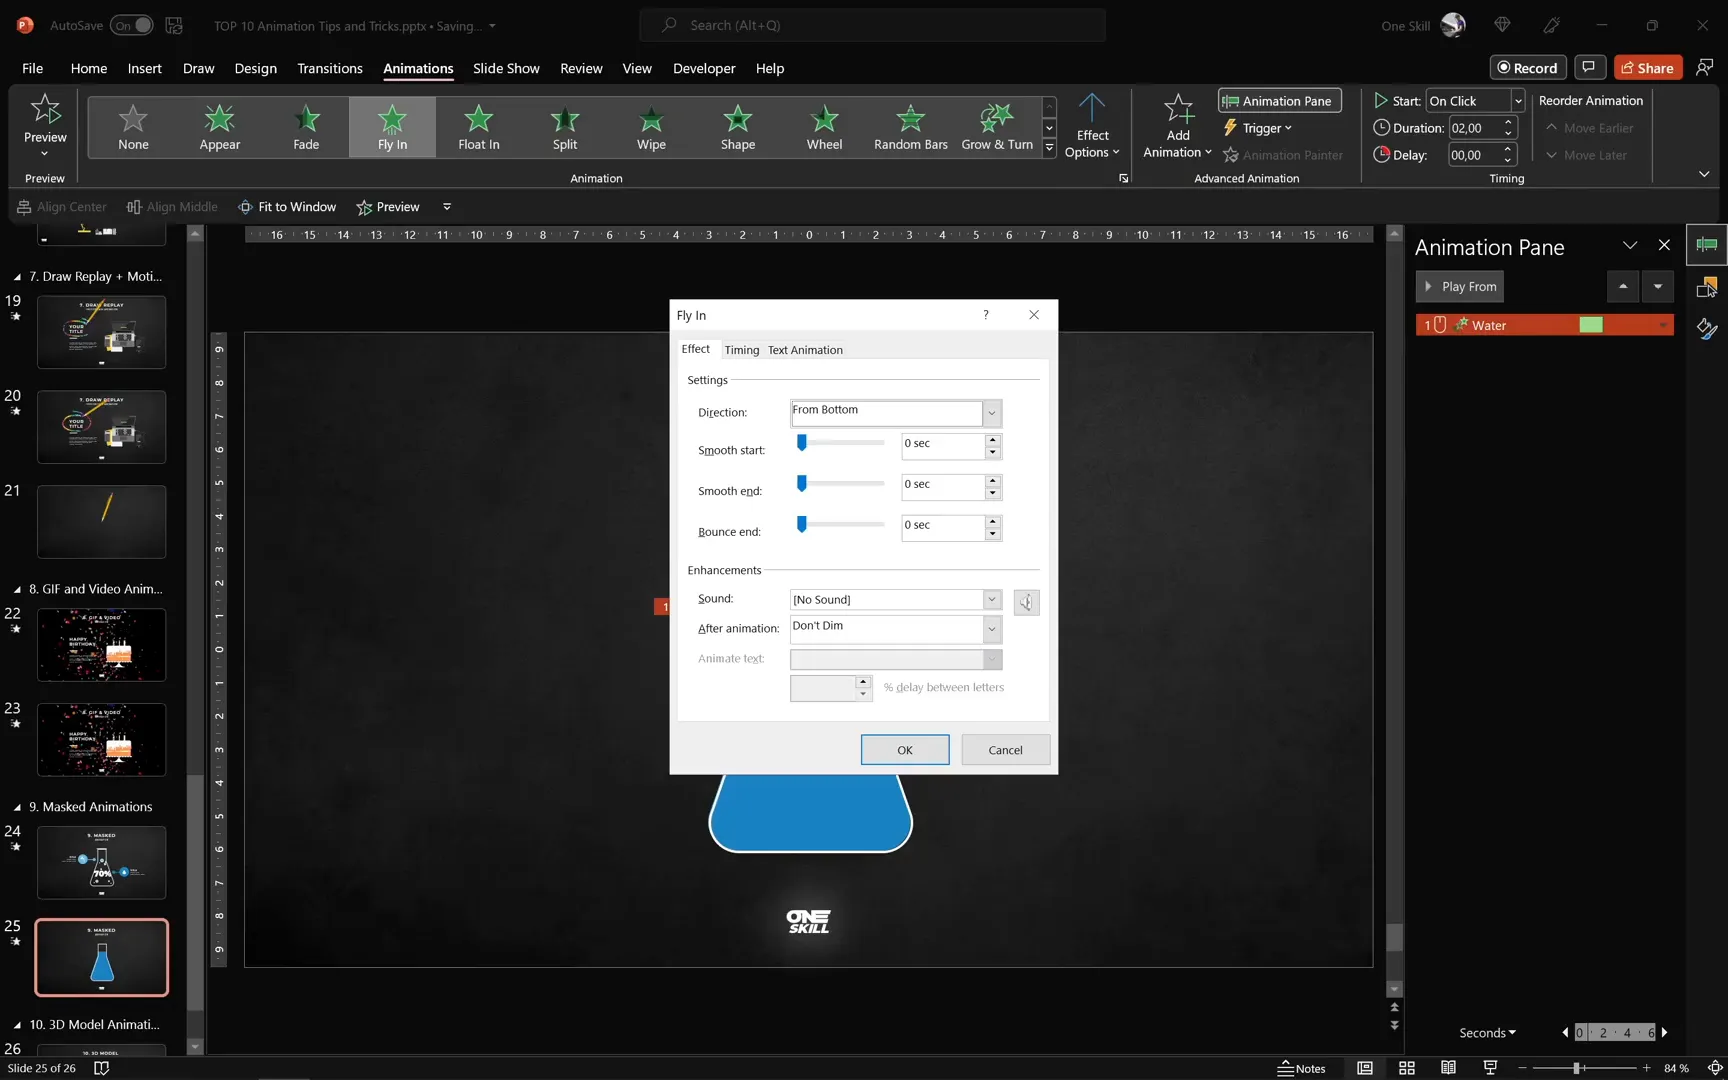
Masked animations are great for illustrating concepts like progress, capacity, or growth in a visually appealing way.
10. 3D Model Animations: Engaging and Modern Visuals
PowerPoint supports 3D models, and these can be animated with unique effects unavailable to standard shapes.
Insert a 3D model from PowerPoint’s stock library or your own files. You can rotate and position the model freely.
Apply animations such as Arrive (which fades and spins the model in) and Turntable (which rotates the model continuously). Adjust duration and timing for smooth effects.
You can also add triggered animations like Jump and Turn that activate when clicking the model itself, adding interactivity.
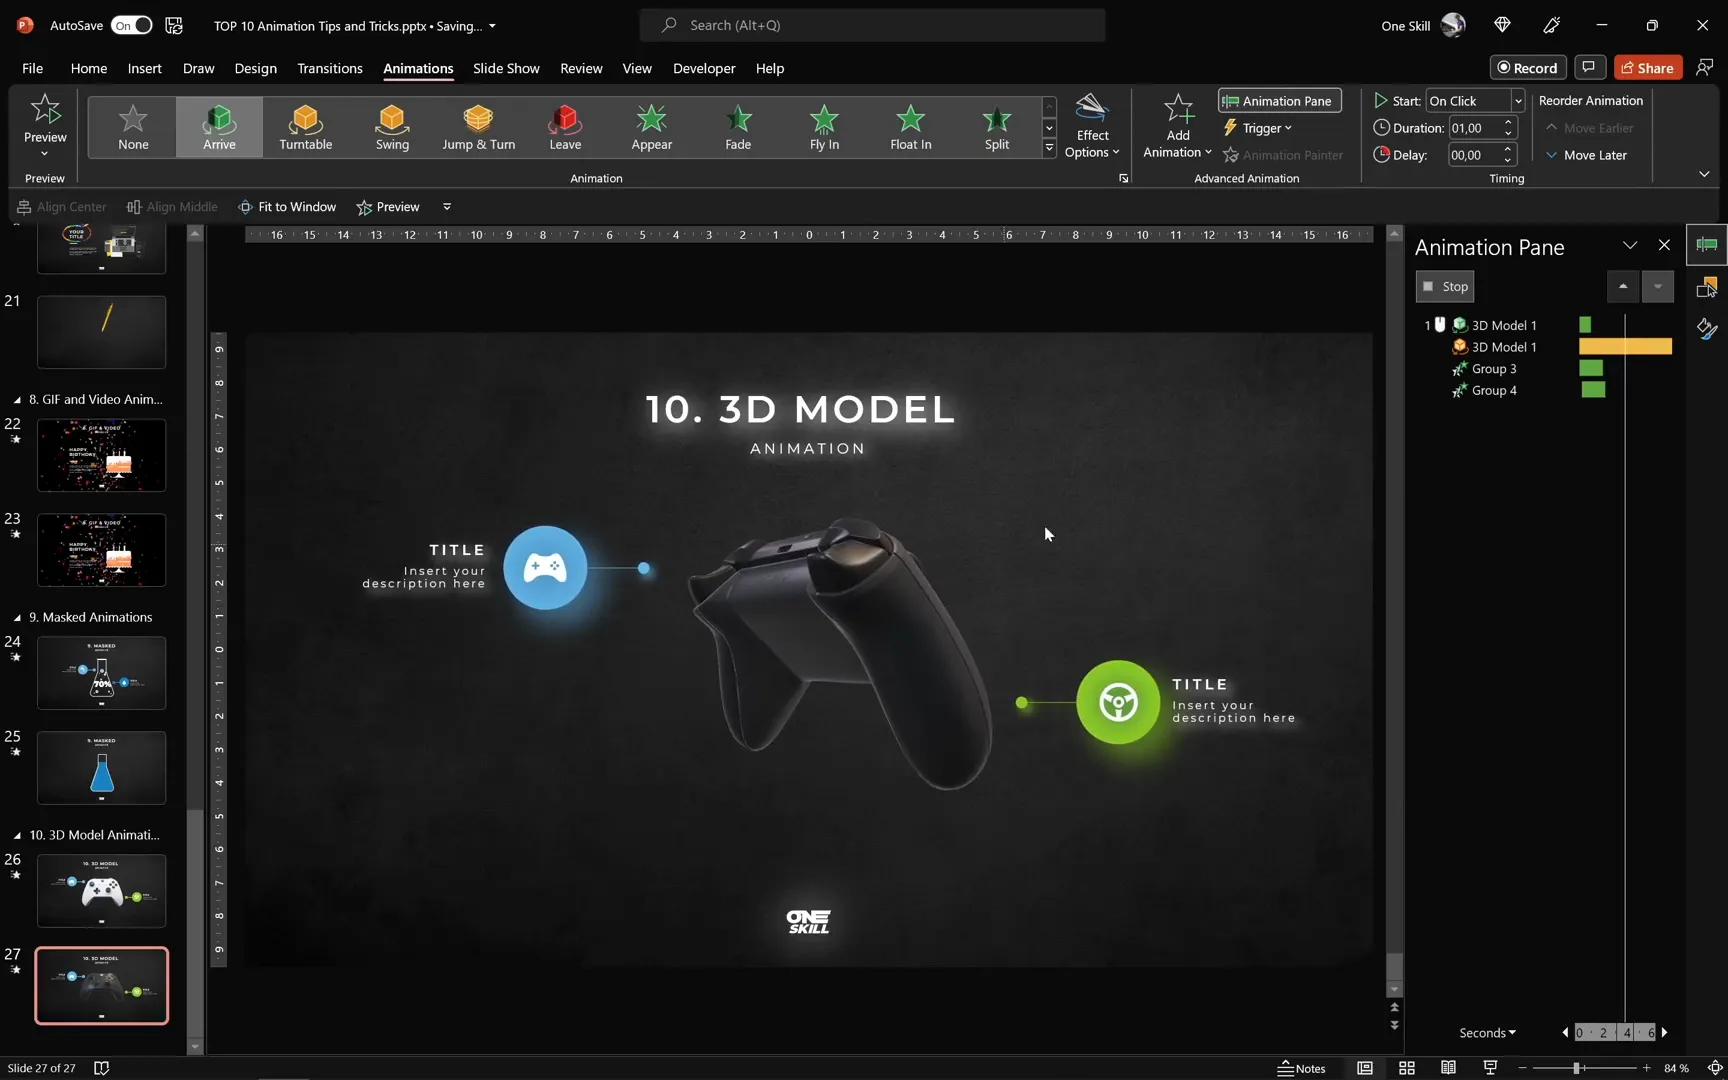
These animations are perfect for product presentations, tech demos, or any slide where you want to impress with modern visuals.
Frequently Asked Questions (FAQ)
Q1: What version of PowerPoint do I need to use these animations?
Most animations work in PowerPoint 2016 and later. However, the Morph transition and 3D model animations require PowerPoint 2019, Microsoft 365, or later versions.
Q2: How can I make animations smoother and more professional?
Use the Effect Options in the Animation Pane to adjust smooth start/end and bounce effects. Combining animations with timing delays and triggers can also create polished, dynamic presentations.
Q3: Can I control when GIFs and videos play in my presentation?
Yes. By using animation triggers, you can set GIFs and videos to appear or play only when specific objects are clicked, giving you full control over playback.
Q4: How do animation triggers work?
Animation triggers start animations only when a designated object is clicked. This allows you to create interactive elements where viewers control what appears on the slide.
Q5: What are some creative uses for custom motion paths?
Custom motion paths can animate objects along any shape or curve you draw, perfect for simulating handwriting, paths on maps, or complex movements that standard animations don’t provide.
Q6: How do I create a mask animation?
Use the Merge Shapes > Subtract feature to create a mask with a hole shaped like your object. Layer this mask over a colored shape and animate the colored shape to reveal content through the mask.
Q7: Can 3D models be animated continuously?
Yes. The Turntable animation can be set to spin continuously until the end of the slide, and additional triggered animations can add interactivity.
Conclusion
Mastering animations in PowerPoint is essential for creating engaging and professional presentations. This guide covered the top 10 animation techniques, starting with simple click animations and progressing to advanced features like Morph transitions and 3D model animations.
By grouping elements, using effect options such as bounce and delays, leveraging animation triggers for interactivity, and incorporating media like GIFs and videos, you can significantly enhance your slide decks. The Morph transition offers a powerful way to animate slides effortlessly, while combining draw animations with motion paths opens creative possibilities.
Masked animations provide clever ways to reveal content, and 3D model animations bring modern, eye-catching visuals to your presentations.
Experiment with these techniques and customize them to fit your content and style. With practice, your PowerPoint presentations will captivate audiences and communicate your message effectively.
Stay creative, keep exploring, and enjoy making your slides come alive!
Check out the full video: TOP 10 PowerPoint Animations 🔥Tips & Tricks🔥


