

- Table of Contents
- Introduction: What this tutorial covers
- What you’ll build and why the new concept in powerpoint presentation works
- Materials you need before you start
- Step-by-step build (detailed walkthrough)
- Design and color tips for impact
- Animation and transition tuning
- Grouping, duplication, and safe-edit workflow
- Common problems and troubleshooting
- Final polishing and delivery checklist
- Frequently Asked Questions (FAQ)
- Resources and download
Introduction: What this tutorial covers
This article is an expanded, in-depth walkthrough of a brand new concept in powerpoint presentation developed and demonstrated by PowerPoint University. If you want to create a single slide that cycles through multiple images, changes bold background color blocks, and swaps headline text with smooth movement — all inside PowerPoint — this tutorial will show you how, step by step. The technique focuses on building layered hollow circle shapes, using merge/fragment operations, coloring paired segments, and applying the Morph transition to animate between states. This new concept in powerpoint presentation is ideal for portfolio slides, image galleries, hero slides, and marketing decks where visual impact matters.
Throughout this guide, I’ll reproduce the exact workflow I use: creating circle hollows, using shape subtraction and fragment tools, coloring paired segments, arranging image placeholders, rotating image stacks, and finally animating everything with Morph and text character transitions. I’ll also share design tips, troubleshooting advice, and best practices so you can recreate — and customize — this new concept in powerpoint presentation for your own needs.
What you’ll build and why the new concept in powerpoint presentation works
At its core, the new concept in powerpoint presentation relies on a few principles:
- Use simple geometric shapes to create bold, modern visual frames.
- Manipulate shapes with Shape Format tools (Subtract, Fragment) to form stylized cut-outs.
- Pair shape segments with contrasting colors to create movement and contrast.
- Insert multiple image rectangles behind segmented shapes so images appear within a framed area.
- Use slide duplication + small layout changes + Morph transition to produce smooth, motion-driven state changes.
This combination keeps everything editable inside PowerPoint (no external animation tools) while producing modern, professional-looking motion. The new concept in powerpoint presentation is flexible: swap images, change sizes, update text, and adjust timing without rebuilding the slide from scratch.

Why this method beats simple fades or standard animations
- Because it uses Morph, the motion is spatially consistent and smooth — PowerPoint calculates trajectories between object states for you.
- By creating shape fragments and coloring them individually, you get clean, non-destructive control over color transitions.
- Image placeholders keep your layout intact; you simply swap images instead of remasking every time.
- The result is a slide that feels custom and polished, with minimal effort compared to frame-by-frame animation.
Use this approach when you want a single slide to serve multiple purposes: hero image rotation, portfolio showcase, or a dynamic section divider in a pitch deck. It’s also a great teaching piece for learning Shape Format tools and Morph behavior.
Materials you need before you start
Before you begin building this new concept in powerpoint presentation, gather these items:
- PowerPoint (desktop version recommended; Morph and Merge Shapes require modern PowerPoint — Office 365 or PowerPoint 2019+).
- At least four images (photos or illustrations) to tell your story — recommended aspect ratio consistent for consistent appearance.
- Preferred color palette (four contrasting or harmonious colors works well).
- Font for headline text (e.g., Open Sans Extra Bold for bold headlines like in this tutorial).
- Optional: the downloadable template file to speed up setup (link mentioned in Resources section).
Step-by-step build (detailed walkthrough)
This section walks through every step required to build the slide. Follow sequentially and use the screenshots as checkpoints. I’ll also sprinkle pro tips and alternate suggestions as you go.
1) Create the three circle hollow frames
Start with a blank slide. We will create three concentric or overlapping hollow circles that will later act as the visual frame for color segments and image cutouts.
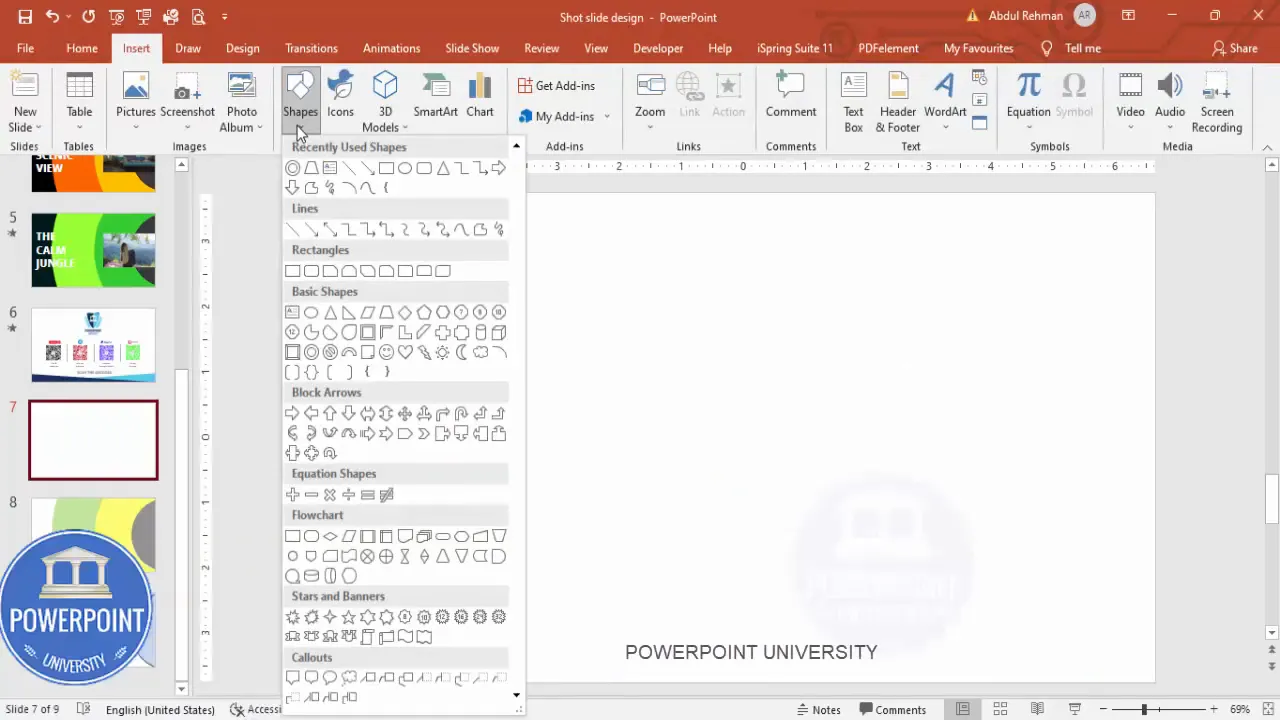
- Go to Insert > Shapes and choose the Circle Hollow (a ring shape).
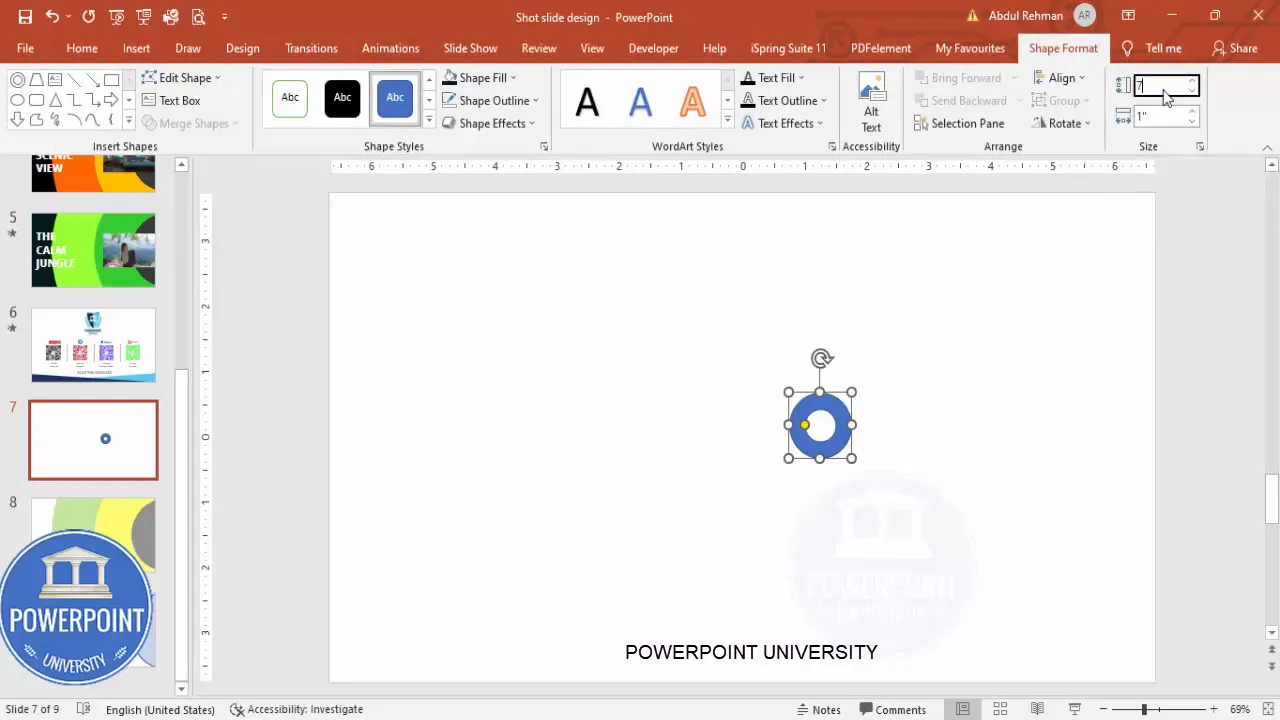
- Draw the first circle hollow. Set its dimensions precisely: width = 7.45 cm and height = 7.45 cm (or use 7.45 as the unit shown in the presenter’s settings). If your UI shows points, use the equivalent suggested size; the key is to maintain consistent scaling.
- Remove the shape outline (Shape Outline > No Outline).
- Right-click > Format Shape > set Fill transparency to create the desired inside visibility — but keep the shape visible for now.
- Align the circle to center of the slide (Shape Format > Align > Align Middle / Align Center).
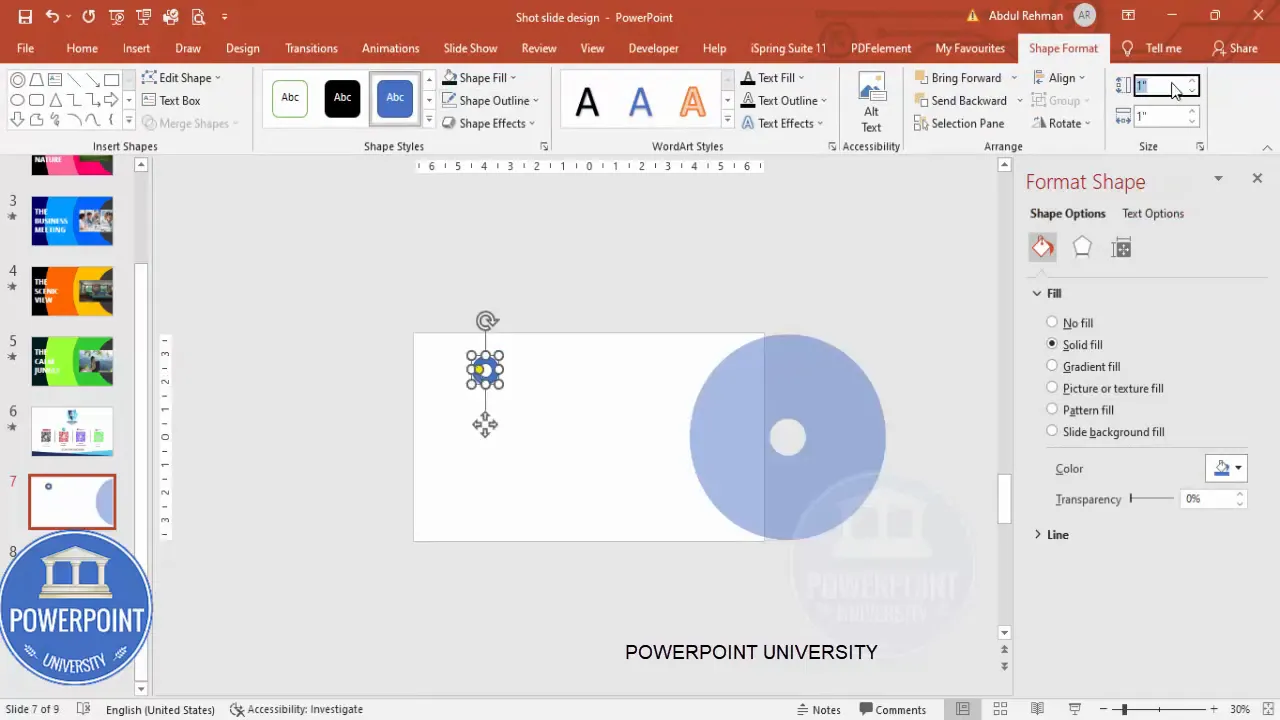
Duplicate or create two more circle hollows:
- Create or duplicate the first circle and set the second one to ~15.55 (width & height) and the third to ~24.65, again removing outlines and aligning their centers. The exact sizes are adjustable; the important part is the proportional progression so circles overlap attractively.
- After placing each circle, align them precisely to the middle so they form a concentric grouping. Overlap is fine and intentionally created — we’ll modify shapes further with merge operations.
2) Prepare a duplicate slide for safety
Before doing destructive edits like Subtract or Fragment, duplicate the slide so you have a fallback. Right-click the slide in the left pane > Duplicate Slide. This is a simple but essential habit when working with Merge Shapes.
3) Trim a circle with a rectangle (Subtract)
We will subtract a rectangular area from the smaller circle to create a cut-out that extends outside the slide — this gives a dynamic cropped look on the slide’s edge.
- Insert a rectangle starting from the slide edge to well beyond the circle area. Set Shape Outline to No Outline.
- Select the smaller circle hollow, then hold Shift and select the rectangle.
- On the Shape Format tab, choose Merge Shapes > Subtract. The rectangle will subtract from the circle, creating a semi-circular cut that reads as a peeled edge.
Pro tip: If Subtract creates fragments you don’t want, use Undo (Ctrl+Z) and adjust the rectangle to be slightly larger. Subtract is sensitive to overlapping edges.
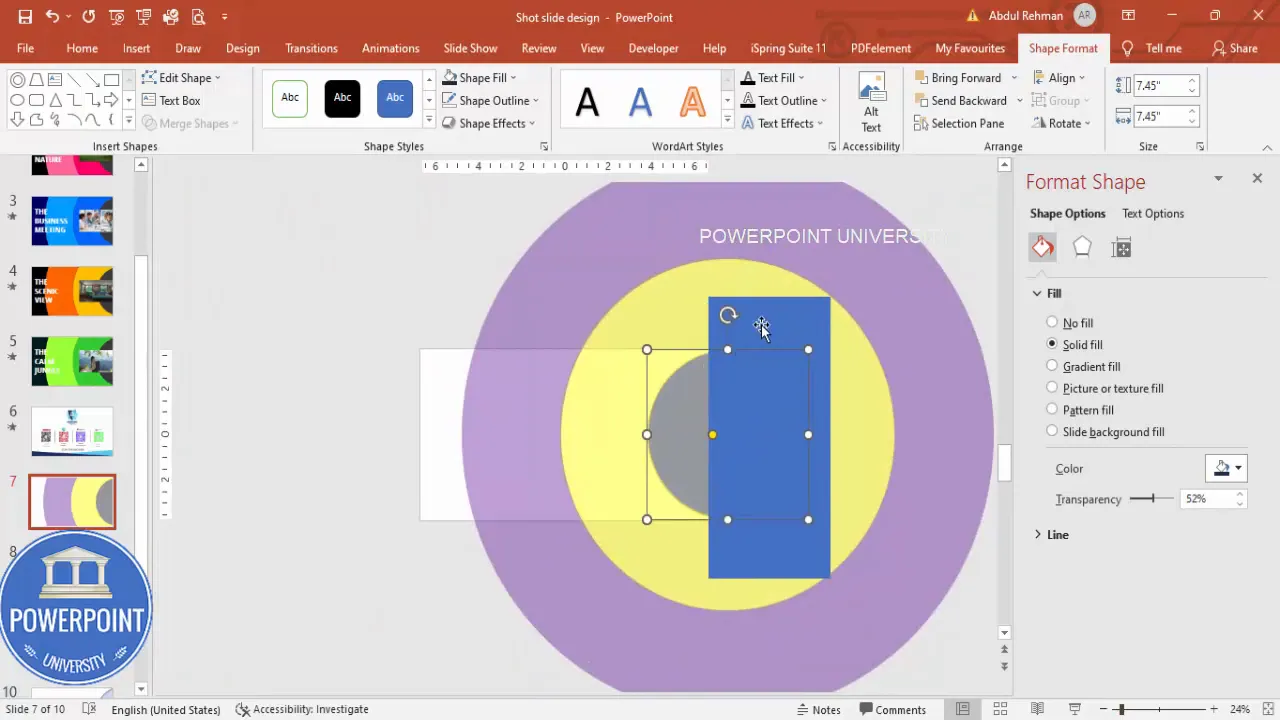
4) Split a circle into two parts (Fragment)
Fragment lets you divide shapes into discrete pieces you can color independently. This is how we’ll create two-tone segments for motion emphasis.
- Place a rectangle slightly larger than the hollow circle across the area you want to split.
- Select the circle and the rectangle, then choose Merge Shapes > Fragment.
- Delete unwanted small pieces and keep the two main parts that emerged from the fragment operation.
After fragmenting the two inner circles (repeat as necessary), you should have separate shapes for left and right segments of the ring. These segments are the pieces you will color and animate.
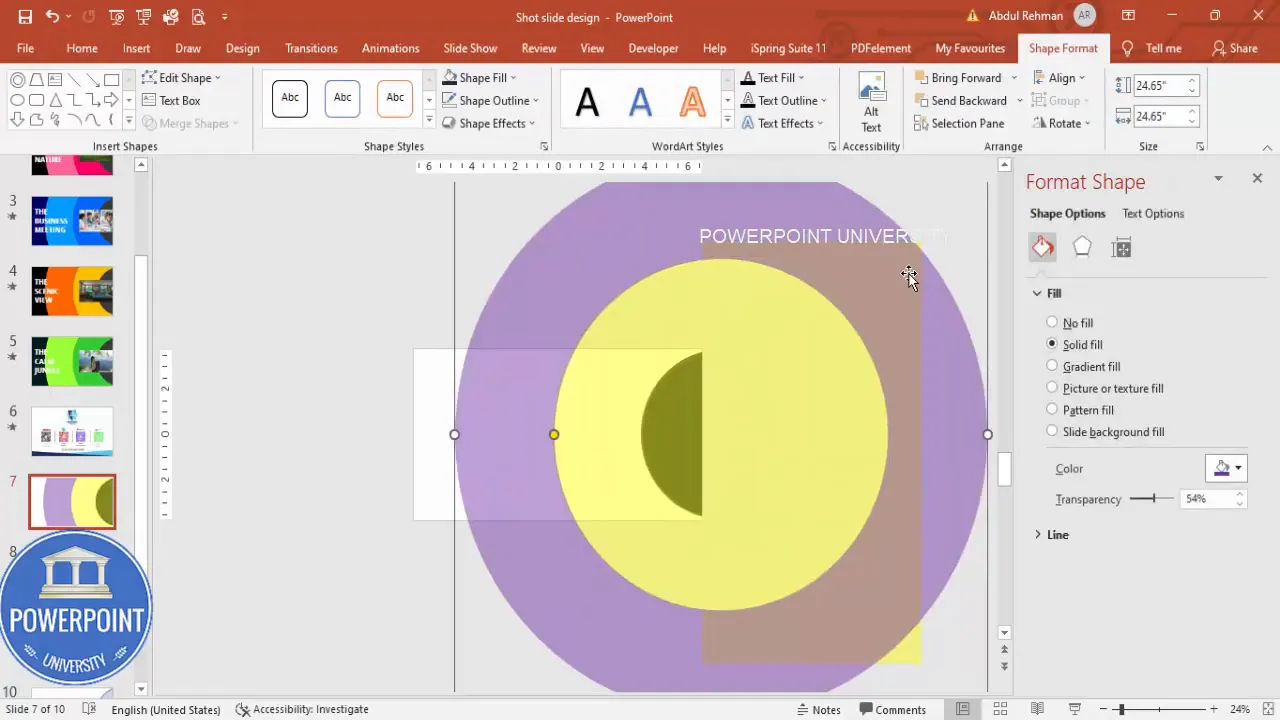
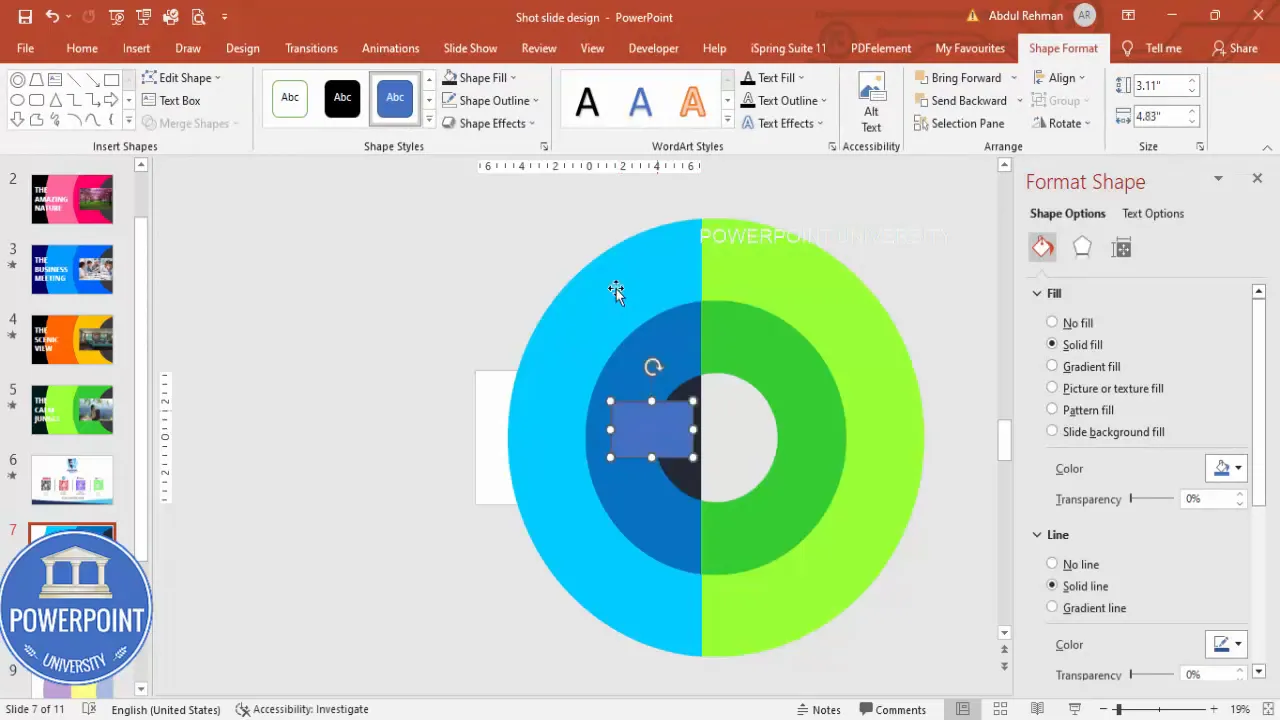
5) Color the fragments: two-tone pairing
Coloring is where the new concept in powerpoint presentation begins to visually pop. Design a pair of colors for each ring: a dark and a light tone for contrast.
- Select the fragment pieces and pick two colors for the inner ring (e.g., dark blue and light blue).
- For the larger outer ring, choose a second pairing (e.g., dark green and light green).
- Remove any transparency so the colors appear solid and vibrant.
- Repeat on the other slide copies with different pairings (e.g., orange/dark orange, purple/lavender) to create multiple states for the Morph transition.
Note: Keep your color contrasts accessible. A dark/light pairing ensures legibility if you place text across these shapes later.
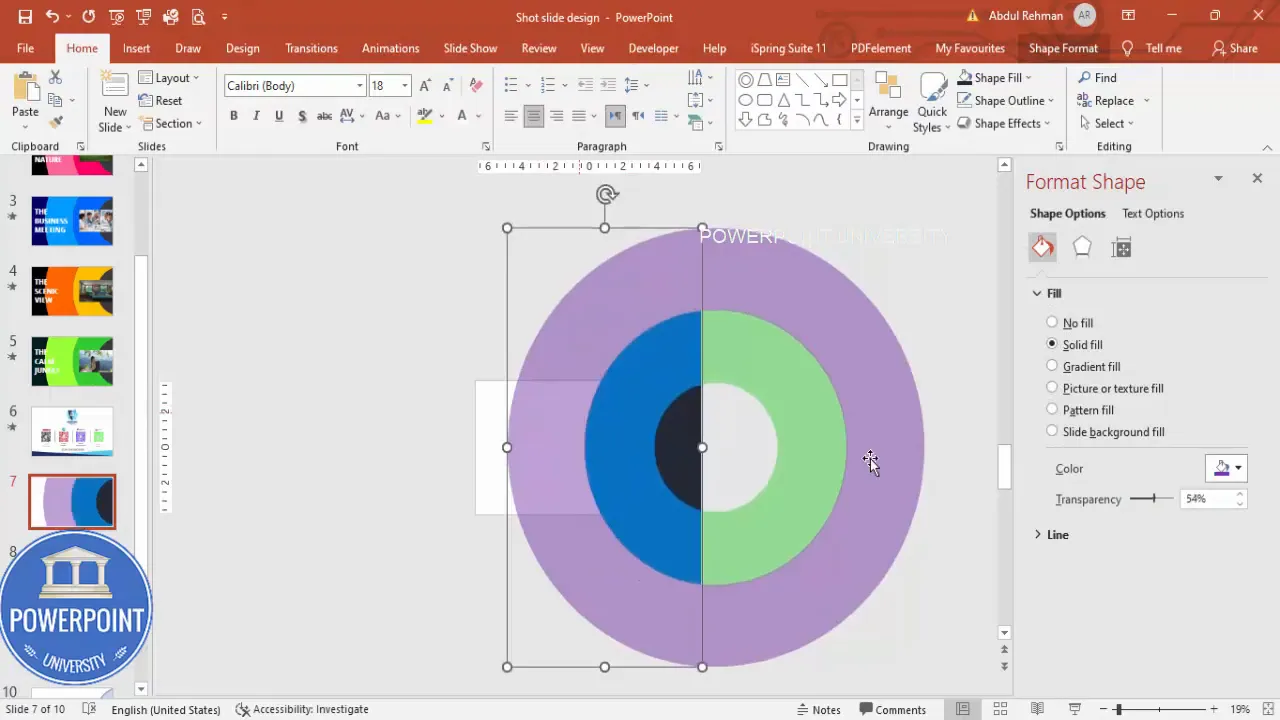
6) Group fragments into two groups
Group the color pairs so you can rotate or move them as single objects. Grouping makes it easier to rotate the left-right pairs and later animate with Morph between slides.
- Select the left fragments for both inner and outer circles > Ctrl+G (Group).
- Select the right fragments for both inner and outer circles > Ctrl+G (Group).
- Now you have two groups: one group will visually slide/rotate left-to-right between slide states; the other will move inverse or oppositely.
7) Duplicate the slide and rotate groups to set the next state
To create motion using Morph, you need at least two slides that differ in object position, rotation, size, or color. Duplicate your slide and then modify the copy.
- Right-click the slide thumbnail > Duplicate Slide.
- On the duplicated slide, rotate one group slightly counterclockwise and the other slightly clockwise. The result will show the colors swapped to opposite sides when Morph runs.
- Align each rotated group so it still visually matches the original center while producing clear motion paths.

8) Apply Morph transition and tune duration
With the two slide states prepared, go to Transitions and select Morph. Morph will animate the groups from their positions on slide 1 to the positions on slide 2.
- Select the second slide.
- Go to Transitions > Morph.
- Under Effect Options choose Objects or Object Only (depending on your PowerPoint version) and set Duration to 1.0 seconds (or 0.5 for a snappier feel).
- Preview and adjust rotation or slight positional differences if the motion looks straight or mechanical — adding a gentle curve by rotating or nudging positions creates organic movement.
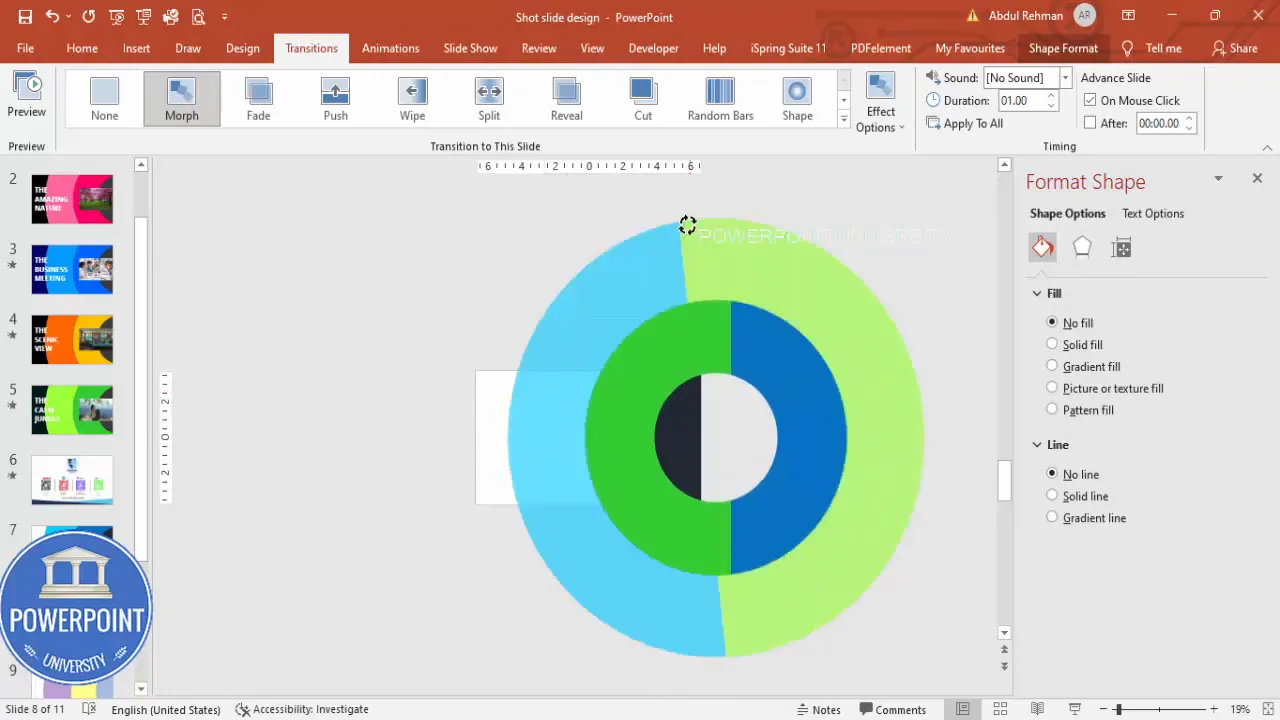
Tip: Small positional changes create the most elegant Morph animations. Avoid extreme repositioning; Morph works best when PowerPoint can map objects easily between slides.
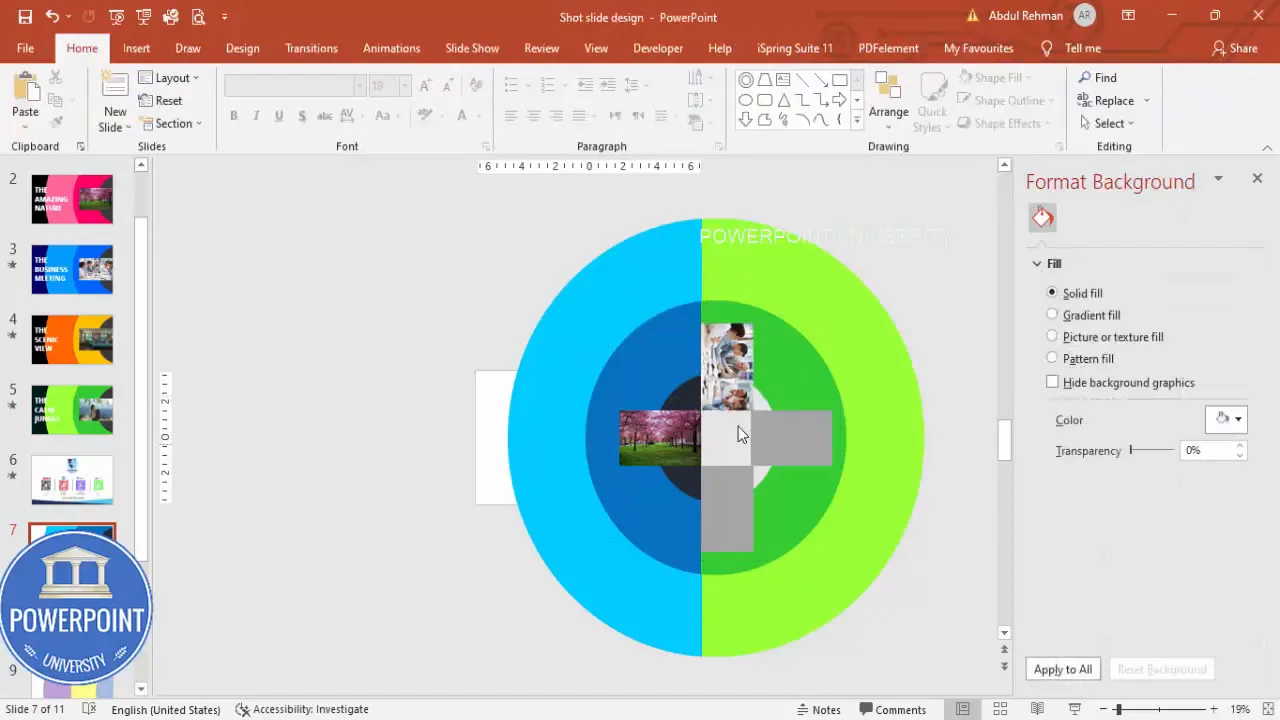
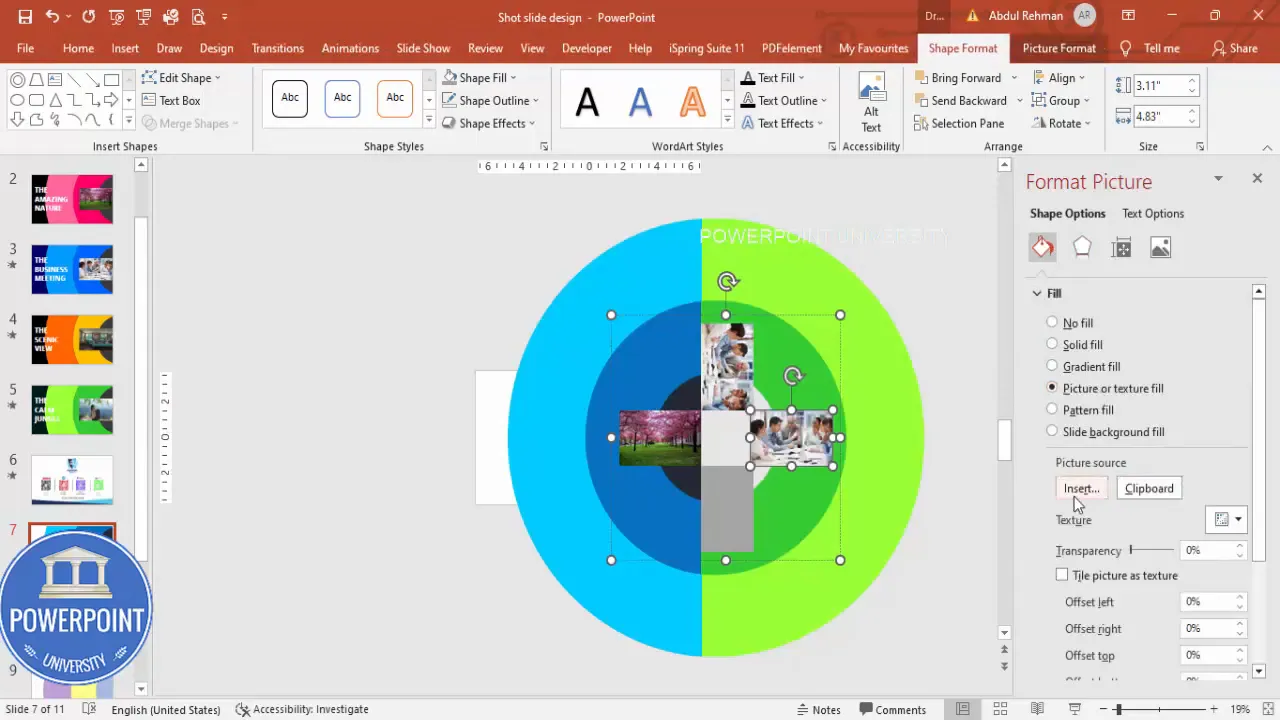
9) Create image placeholders that sit inside the frame
We need image rectangles that will be visible through the ring frames. These rectangles will later be duplicated and rotated per slide state to produce image swaps.
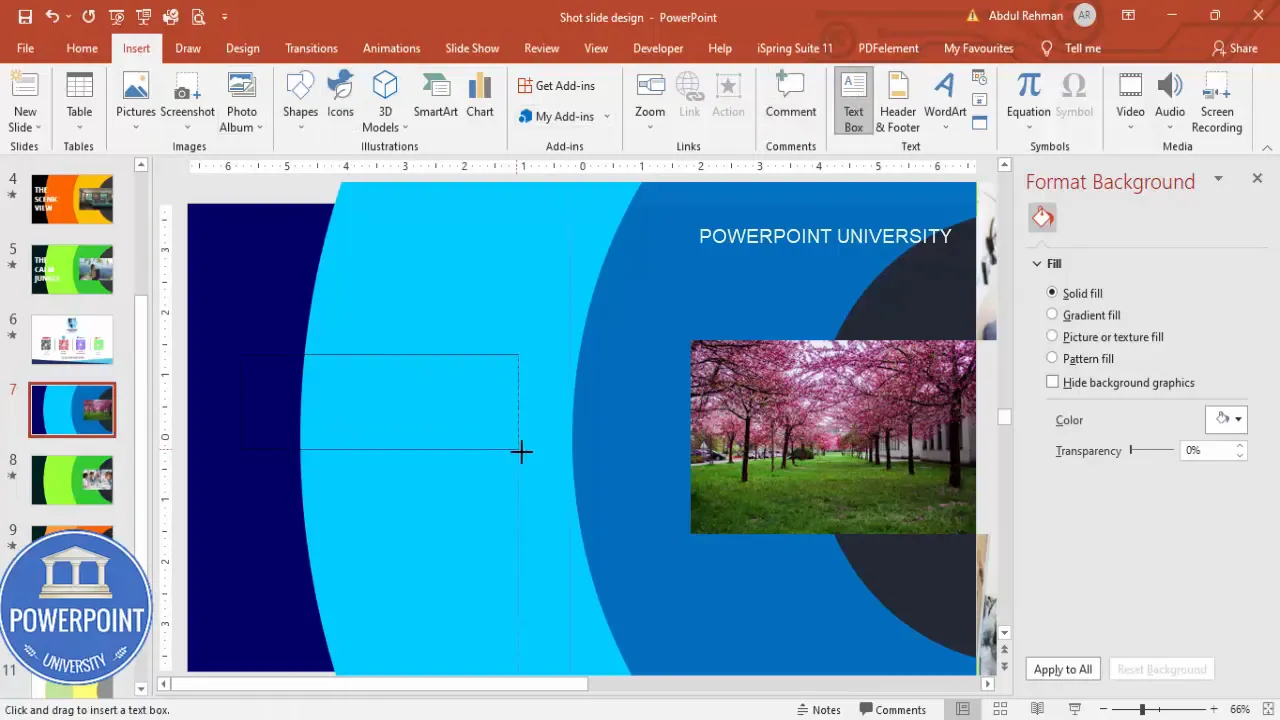
- Insert a rectangle inside the ring area where images should appear. Shape Outline > No Outline. Fill the rectangle with a neutral color while building (we’ll replace with images later).
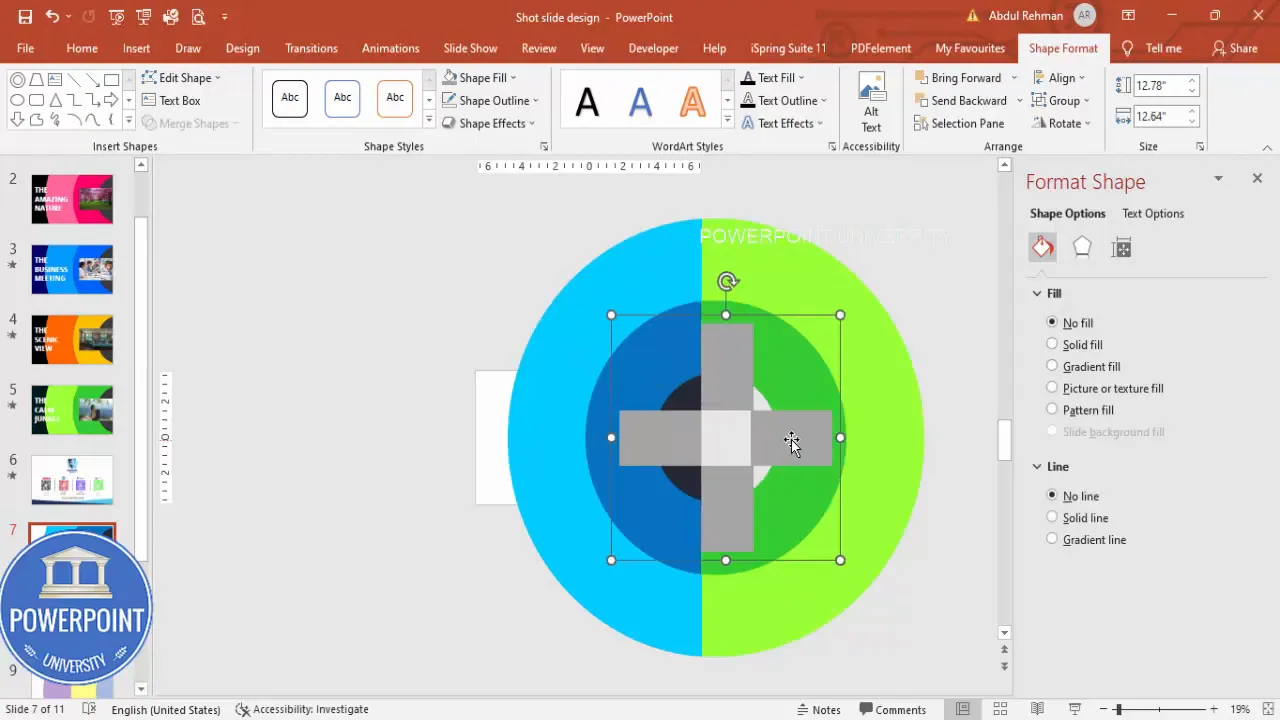
- Align the rectangle to center of the group.
- Duplicate the rectangle vertically to produce a stack of 3–4 rectangles — these act as image placeholders that will rotate visibility when switched between slides.
- Select all rectangles > Ctrl+G to group them for easy positioning.
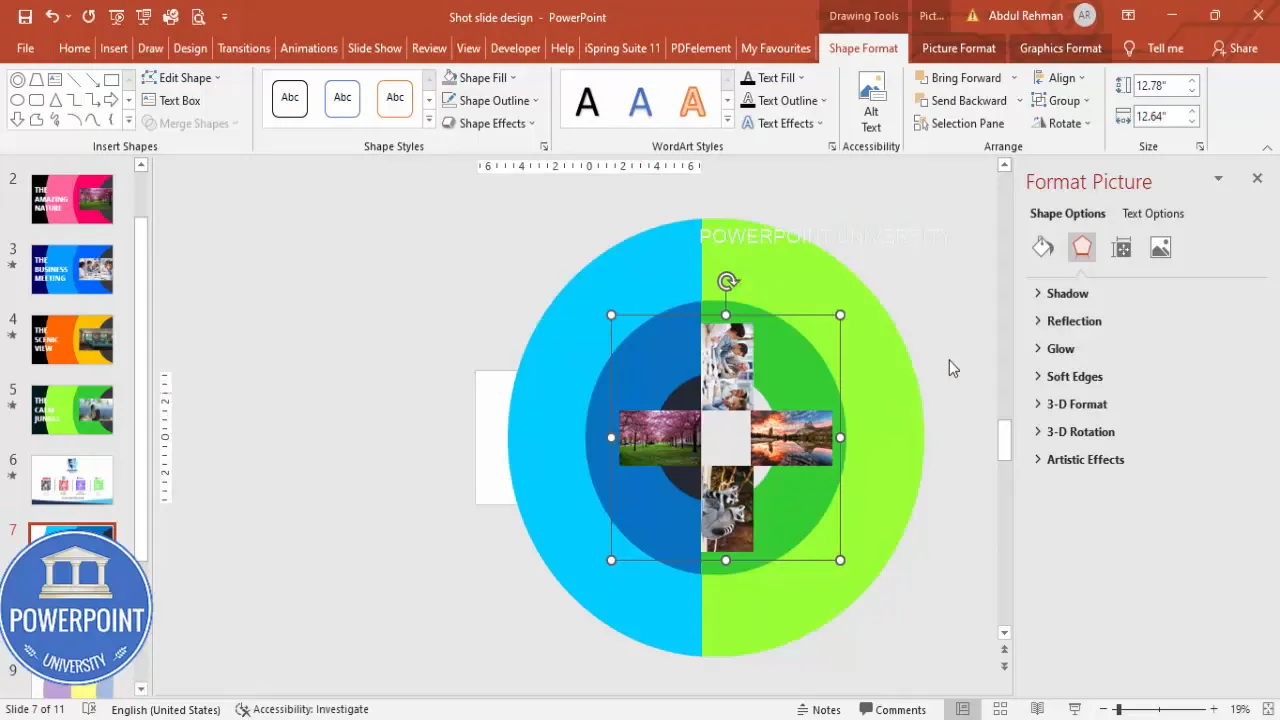
10) Insert images and replace rectangle fills
Now replace each placeholder rectangle with your chosen photos.
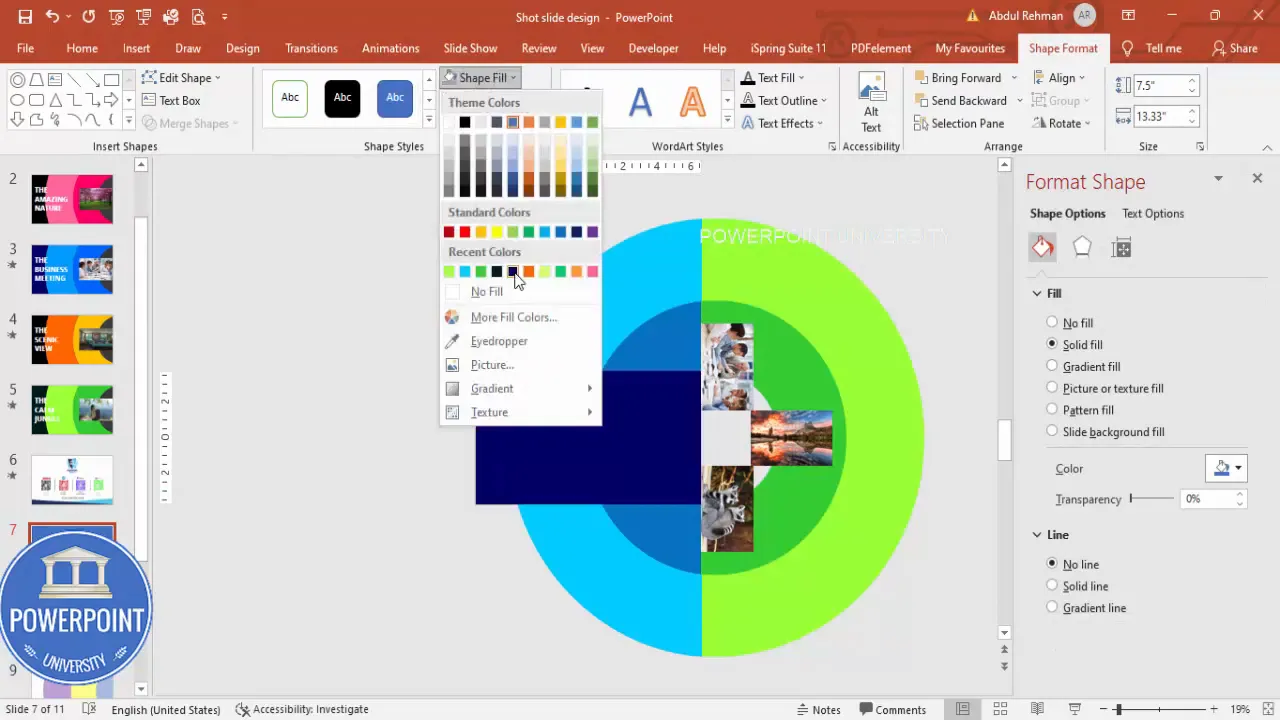
- Select a rectangle > Format Shape > Shape Fill > Picture > Insert from File (or Online Pictures to search). Choose your photo and insert.
- Repeat for each placeholder so you have four different photos filling the four rectangles.
- If an image doesn’t align perfectly, right-click the shape > Format Shape > Picture > Crop and reposition inside the placeholder.
Tip: Use images with similar focal points and aspect ratios to keep the visual center stable across rotations and reveals.
11) Rotate the image group between slide states
The image group must rotate with the color segments so the image that appears through the ring changes in sync with the background color. The strategy is simple:
- Copy the group of image placeholders (Ctrl+C).
- Go to the duplicate slide (the one with rotated color segments) and paste (Ctrl+V).
- Use Alt + Right Arrow to rotate the paste by consistent increments so a different photo appears through the ring on the second slide. Rotations in 90-degree increments or smaller are fine; the presenter’s method used multiple small right-rotations to line up images per state.
Repeat this process for each duplicate slide you make. For three or four states, rotate the images by the same amount each time so each slide reveals a new photo.
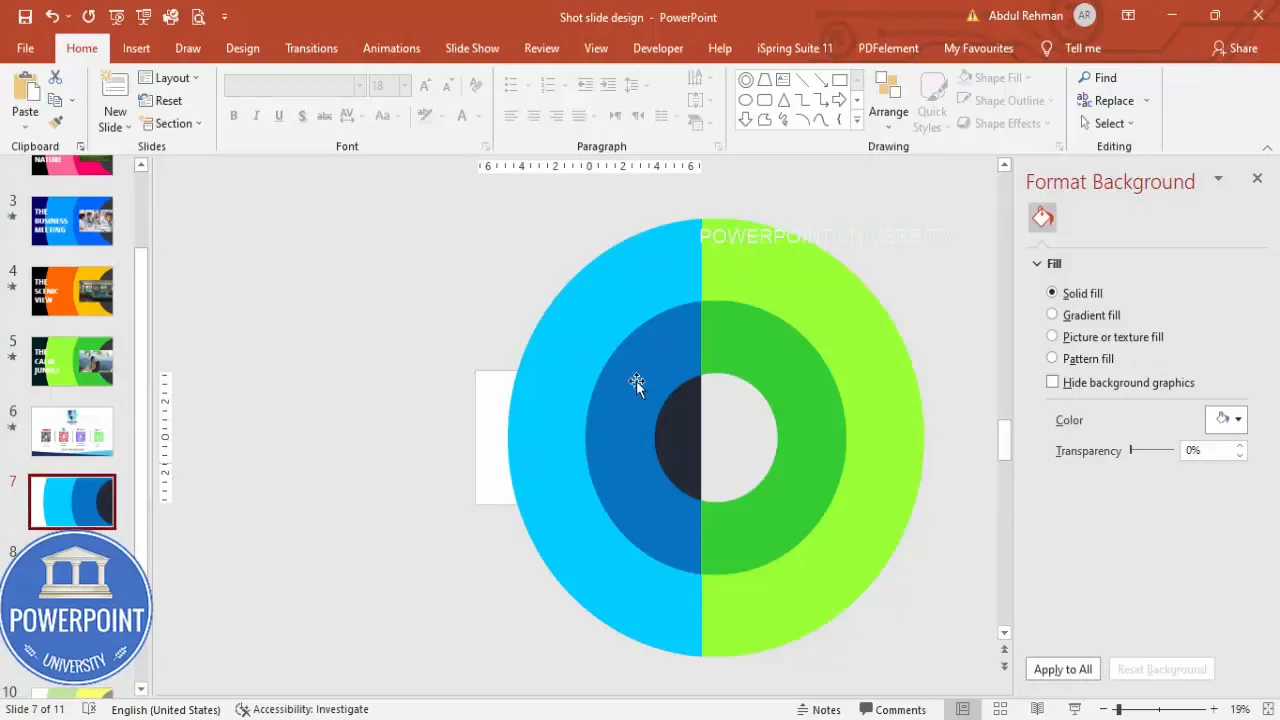
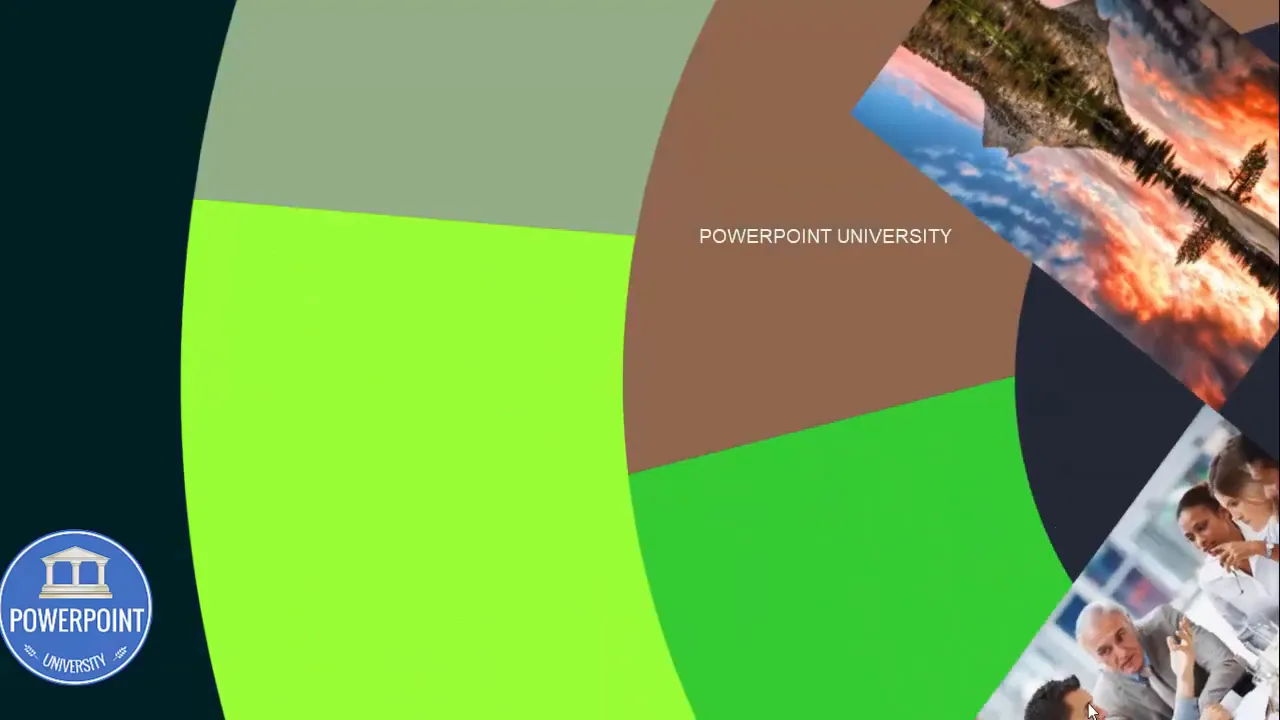
12) Add a dark background panel and send to back
To make the ring segments and images stand out, place a large rectangle that fills the slide and send it to the back. Select a darker color or gradient that complements your color pairs.
Create Slides in Seconds with ExpertSlides AI |
|
Generate AI Presentations today: |
| TRY NOW! |
- Insert a rectangle that fits the full slide (Format > Size > Fit to Slide).
- Choose a darker shade that works with the color pairs; remove outline.
- Right-click > Send to Back so the ring groups and image placeholders remain visible.
13) Duplicate slide states and build additional color/image combinations
Duplicate your slide set to create multiple states. For each duplicated slide set, change the color pairs (e.g., orange/dark orange for warm look) and rotate the image group to reveal a different photo in sync with the color change. This is how you’ll produce a 3–4 click slideshow on a single slide deck.
14) Add headline text with character-based transition
Finally, insert bold headline text that changes with each state. Use a large, readable font (Open Sans Extra Bold works very well) and white or high-contrast color.
- Insert > Text Box. Type your headline (example: “The Beautiful Garden”).
- Format text size (e.g., 80 pt) and alignment (Center). Apply a subtle shadow if needed for depth.
- Duplicate or copy the text into subsequent slide states and replace text content (e.g., “Business Meeting”, “Amazing Sky”).
- On each slide where the text appears, select the slide > Transitions > Effect Options > change to By Character for a semi-typographic reveal. Set the duration to 1.0 second (PowerPoint may revert; re-enter 1.0 after selecting the option).
Using the By Character text transition produces a per-character reveal that pairs nicely with the Morph movement of the colored frames and images, reinforcing the sense of staged content.
Design and color tips for impact
The visual success of this new concept in powerpoint presentation depends on careful design choices. Use these tips to improve readability, contrast, and brand alignment.
Color palette guidance
- Choose two color pairings for each state: a darker tone and a lighter tone. Examples: dark blue + light blue, dark green + light green, dark orange + light orange.
- Maintain consistency across states: keep saturation similar so motion reads as a color swap, not a jarring tone shift.
- Use high-contrast headlines: white or near-white text on dark backgrounds is highly legible.
Typography
- Use a bold, readable display font for the headline (Open Sans Extra Bold recommended in the demo).
- Keep headline length short, one to three words if possible — the animation and color do the heavy lifting; text should be concise.
- Minimum size: aim for 48–80 pts depending on slide size and number of words.
Image selection
- Prefer images with a clear center of interest (portrait or landscape crops with the subject centered) so cropping inside the placeholder looks balanced.
- Keep color temperature consistent across images within a state — mixing too many warm and cool images can reduce perceived cohesion.
- Optimize resolution for the slide: high-res images are fine, but ensure file size stays reasonable to avoid slow presentations.
Animation and transition tuning
Morph is powerful but sensitive. Here are practical tuning tips to keep animations looking natural and professional.
Use small changes between slides
Morph maps objects between slides. The less you move or rotate them, the smoother the animation. Make subtle positional changes and slight rotations to create natural-looking motion.
Duration and pacing
- Duration 0.5s — fast, snappy transitions. Use for live presentations where you need to keep flow.
- Duration 1.0s — balanced pace used in the demo. Great for recorded walkthroughs or slides meant to linger a moment.
- Duration 1.5–2s — slower, cinematic movement. Use sparingly so your audience doesn’t drift.
Text reveal options
Text transitions set to By Character pair well with Morph because typography enters as shapes move. Re-apply Duration after selecting the By Character option — PowerPoint often resets the duration automatically.
Grouping, duplication, and safe-edit workflow
One of the most important habits when working with this new concept in powerpoint presentation is to keep iterations reversible and organized.
- Always duplicate slides before performing destructive operations (Merge Shapes > Subtract/Fragment).
- Group related elements: color fragments, image placeholders, and the headline text remain grouped logically so you can move or rotate them without disturbing layout.
- Label your slides in the left thumbnail pane with state names (e.g., “State 1 — Blue/Green”, “State 2 — Orange”). This helps when you have many states.
- Use a master slide for global background elements (e.g., the full slide dark rectangle) so you don’t have to manage them on every slide.
Common problems and troubleshooting
Even with careful setup, Merge Shapes and Morph can present issues. Here are common problems and quick fixes.
Problem: Fragment or Subtract creates many tiny objects
Fix:
- Undo, then re-draw the cutting rectangle so it covers more area (slightly larger), then attempt Fragment/Subtract again.
- Delete tiny, unwanted fragments manually after Fragment; group only the pieces you intend to keep.
Problem: Morph shows unexpected movement or jitter
Fix:
- Make sure objects have consistent names or similar grouping structure. If possible, group the same logical objects across slides before applying Morph.
- Reduce the amount of movement — smaller rotations and nudges are smoother for Morph.
Problem: Text transition resets duration when changing effect options
Fix:
- After selecting the text Effect Options and picking By Character, re-enter your desired duration because PowerPoint often resets it to default.
- Preview and adjust until the timing feels aligned with your Morph transitions.
Final polishing and delivery checklist
Before you present or export your slide, run through this checklist to make sure everything behaves as expected.
- Duplicate slide backups exist in the left pane for quick recovery.
- Colors are accessible and consistent across states.
- Images are properly cropped and centered inside each placeholder.
- Groups are organized and named logically (use Right-click > Selection Pane to rename objects for complex slides).
- Morph transitions are set on the second slide (and subsequent slides) with chosen Duration.
- Text transitions are set to By Character with desired Duration, and each slide’s text is correct.
- Test the full flow in Slide Show mode and click through each state manually to verify timing and alignment.
- Export a backup PDF or MP4 (if recording) to safeguard your design.

Frequently Asked Questions (FAQ)
Q: Do I need Office 365 to use this new concept in powerpoint presentation?
A: You need a version of PowerPoint that includes the Merge Shapes tools and the Morph transition. These features are available in recent builds of Office 365 (Microsoft 365) and PowerPoint 2019+. If your version lacks Morph or Merge Shapes, consider updating to a modern version to get the full workflow.
Q: How many slides do I need to create to show three different images with this method?
A: For three images, build at least three slide states (one per image). Typically, the pattern is: Slide 1 (State A), Slide 2 (State B with rotated groups/images), Slide 3 (State C with rotated groups/images). Apply Morph between Slide 1→2 and Slide 2→3, and you’ll get a click-through sequence that cycles through images and colors smoothly. You can loop back to Slide 1 by duplicating the layout or adding a final transition to return to the initial state.
Q: Can I use this new concept in powerpoint presentation for multiple slides in a deck?
A: Absolutely. Create a master slide template for the ring frames and color fragments, then duplicate that master and swap images and color pairs for different deck sections. Or embed the animated slide as a single interactive section between content blocks. Keep consistent placement to maintain a cohesive look across the deck.
Q: How can I optimize file size when using many high-res images?
A: Compress images via File > Compress Pictures and choose an appropriate resolution (e.g., Web or 150 ppi) depending on presentation needs. Also consider pre-resizing images in an image editor before importing and avoid embedding extremely large photos unless necessary.
Q: What if Morph doesn’t detect the same object between slides?
A: Morph works best when similar objects exist on consecutive slides. Grouping and consistent naming help Morph map objects accurately. If objects are named differently or created anew, Morph may not find a mapping. Use the Selection Pane to ensure objects are present and grouped consistently across slides.
Q: Can I export this animated slide as a video?
A: Yes. File > Export > Create a Video allows you to export the slide sequence as an MP4 with built-in timing. Make sure to set the timing per transition and allow slide duration sufficient for Morph and text transitions to complete. You can also record narration or presenter video if needed.
Resources and download
If you’d like to download the exact template I used to build this new concept in powerpoint presentation, I provide a free source file for faster learning and experimentation. Download the template and open it in PowerPoint to inspect grouped objects, selection names, and slide transitions.
Free template download (Dropbox): https://www.dropbox.com/scl/fi/0fcc52qztb3ww0infzbag/Shot-slide-design.pptx?rlkey=f049u8drpzx39mi5szt8asfec&dl=0
Support and follow the author: POWERPOINT UNIVERSITY — for more tutorials, you can search channel or follow their tutorial series to learn other creative presentation techniques.

Closing thoughts
This new concept in powerpoint presentation is a practical way to produce a single slide with multi-state visual storytelling. By mastering a handful of tools — Merge Shapes (Subtract & Fragment), color pairing, image placeholders, grouping, duplication, and the Morph transition — you can design a slide that looks like it took hours to animate but remains fully editable inside PowerPoint.
Work iteratively, duplicate slides as backups, test in Slide Show mode, and adjust timing to match your delivery. With practice, the process will become fast and repeatable — and you’ll have a striking asset to showcase images, case studies, or section headings in any professional deck.
Check out the full video: Brand New Concept in PowerPoint Presentation. Tutorial No: 1001


