
If you want to elevate your PowerPoint presentations and captivate your audience with sleek, professional animated slide designs, you’ve come to the right place. This comprehensive guide walks you through creating a stunning four-step infographic with a sliding animation effect — all designed to look like a modern AA battery. By following these step-by-step instructions, you will learn how to build engaging, interactive slides that expand to reveal detailed information and icons, perfect for business presentations, educational content, or corporate storytelling.
This tutorial draws on expert techniques to help you design visually appealing infographics that combine aesthetics with functionality. Whether you’re new to PowerPoint animation or looking to refine your skills, this guide covers everything from setting up shapes and gradients to adding icons, text, and smooth transition effects. Let’s dive in!
Table of Contents
- Introduction to PowerPoint Animated Slide Design
- Designing the Battery-Shaped Infographic Base
- Applying Gradient and Glossy Effects
- Adding Option Numbers, Icons, and Detailed Text
- Grouping Elements and Creating Slide Duplicates
- Setting Up Sliding Animation with Transitions
- Customizing Colors, Backgrounds, and Headlines
- Frequently Asked Questions
- Conclusion: Elevate Your Presentations with Animated Infographics
Introduction to PowerPoint Animated Slide Design
PowerPoint animated slide design is a powerful way to enhance your presentations by integrating motion and interaction that guide your audience’s attention. Animated slides not only make content more engaging but also help communicate complex ideas clearly and memorably.
In this guide, the focus is on creating a four-step infographic with a sliding animation effect that visually resembles a battery or AA battery. This metaphorical design is ideal for showing progress, stages, or segmented information in a compact, visually appealing format.
The design expands on click, revealing detailed text and icons for each step, allowing you to maintain a clean overview while providing depth on demand. This dynamic approach is perfect for business, education, or any context where structured, stepwise information delivery is required.
Designing the Battery-Shaped Infographic Base
The first step in creating this PowerPoint animated slide design is to build the base structure that resembles a battery. This involves using simple shapes and precise measurements to create a clean, professional look.
Step-by-Step Shape Setup
- Add a New Slide: Begin by inserting a new blank slide in your PowerPoint presentation.
- Enable Guides: Go to the View tab and enable Guides to help align your shapes precisely.
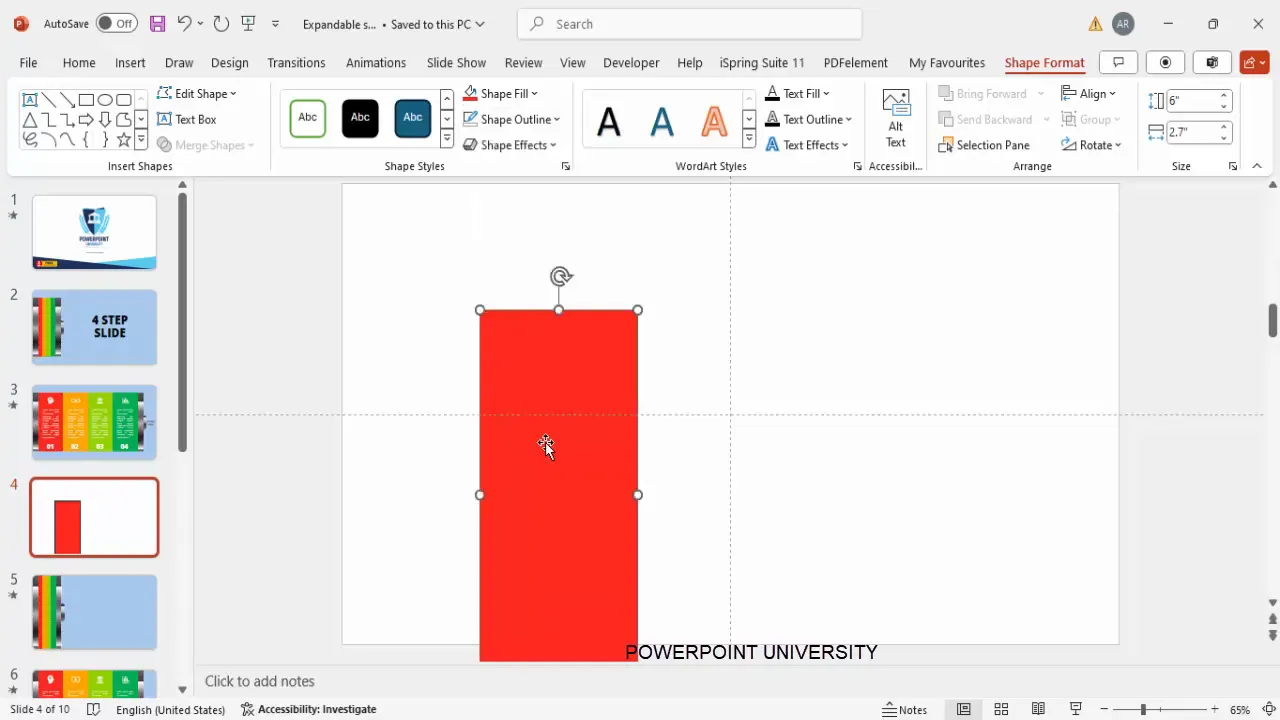
- Insert Rectangles: From the Insert tab, select Shapes and choose the rectangle.
- Set Dimensions: Draw the first rectangle with a height of 6 inches and a width of 2.7 inches. This will be the first segment of your battery shape.
- Color and Outline: Fill this rectangle with your preferred color (e.g., red) and remove the outline by selecting “No Outline.”
- Duplicate Rectangles: Hold Ctrl + Shift and drag the rectangle horizontally to the right to duplicate it. Repeat this process to create four rectangles in total.
- Color Variation: Change the fill color of each rectangle to create a visually distinct four-step design. For example, use different shades such as red, orange, yellow, and green or any color palette that fits your theme.
- Adjust Width if Needed: If you want more steps, reduce the width of each rectangle proportionally to fit more segments.
This segmented rectangle layout serves as the foundation of your battery-shaped infographic, creating clear divisions for each step or option.
Applying Gradient and Glossy Effects
To enhance the battery look and add a professional, glossy effect, use PowerPoint’s advanced shape formatting options. This involves applying gradient fills and layering shapes to simulate light reflection and depth.
Creating the Battery Glossy Effect
- Insert a Smaller Rectangle: Draw a smaller rectangle over the battery base to act as the battery’s terminal or top part.
- Remove Outline: Set the shape outline to “No Outline” to keep the design clean.
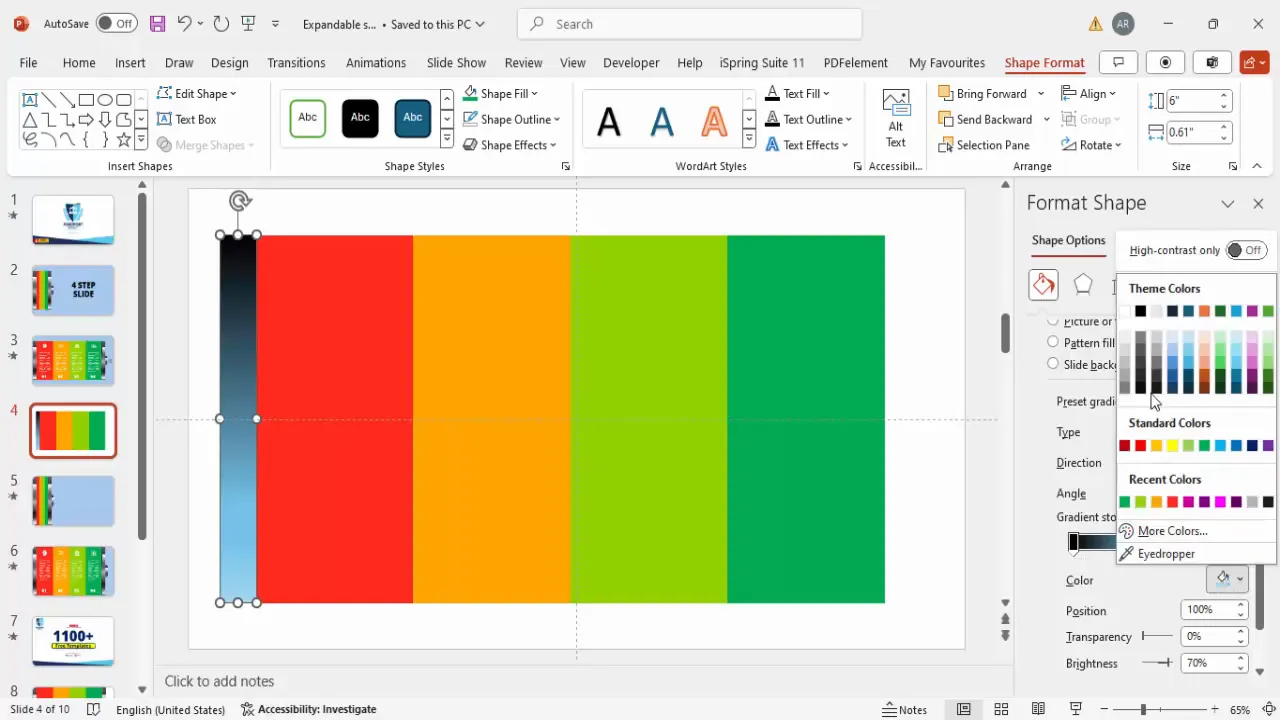
- Apply Gradient Fill: Right-click the shape and select Format Shape. Under the Fill section, choose Gradient Fill.
- Adjust Gradient Stops: By default, PowerPoint provides four stops. Set the first two stops to black and the next two to gray to create a smooth transition that mimics a glossy surface.
- Add Another Rectangle: Place another smaller rectangle on top of the previous one to add a highlight.
- Set Gradient with Two Colors: This time, use only two colors for the gradient fill: white and black.
- Adjust Transparency: Set the black color stop to 100% transparency and the white color stop to 0% transparency to simulate a light reflection.
- Position and Duplicate: Position these glossy shapes carefully so they overlap without gaps. You can duplicate and adjust size to add more highlights or reflections.
- Add Rounded Rectangles: Insert rounded corner rectangles in the center to add subtle glossy effects, using the format painter to copy fill styles.
This layering of gradient fills and shapes creates a visually appealing battery with a realistic glossy finish that enhances the overall aesthetic of your infographic.
Adding Option Numbers, Icons, and Detailed Text
With the battery base ready, it’s time to add meaningful content such as option numbers, icons, and detailed explanatory text for each step. This content will appear when the slide expands, providing clarity and visual interest.
Step-by-Step Content Addition
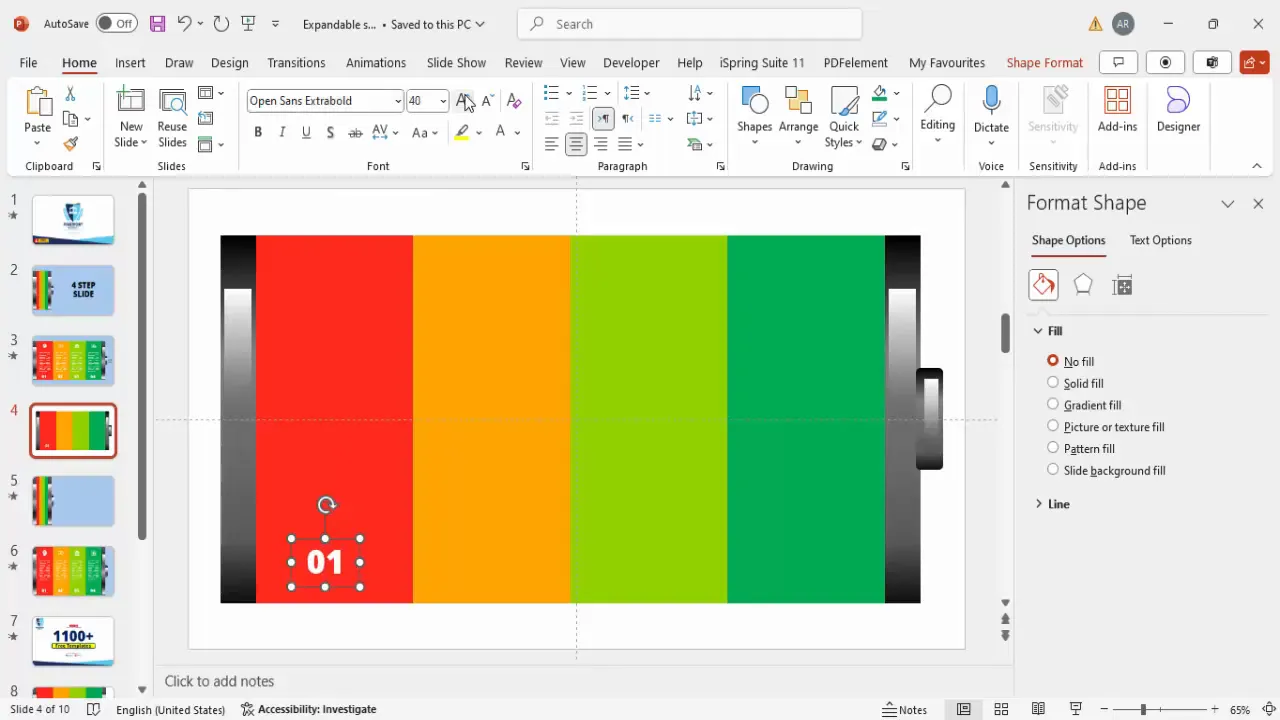
- Insert Option Numbers: Use Insert > Text Box to add the option number (e.g., “Option 01”).
- Format Text: Center align the text, use a bold, clean font like Open Sans Extra Bold, set the font color to white, and increase the font size to around 48 pt for visibility.
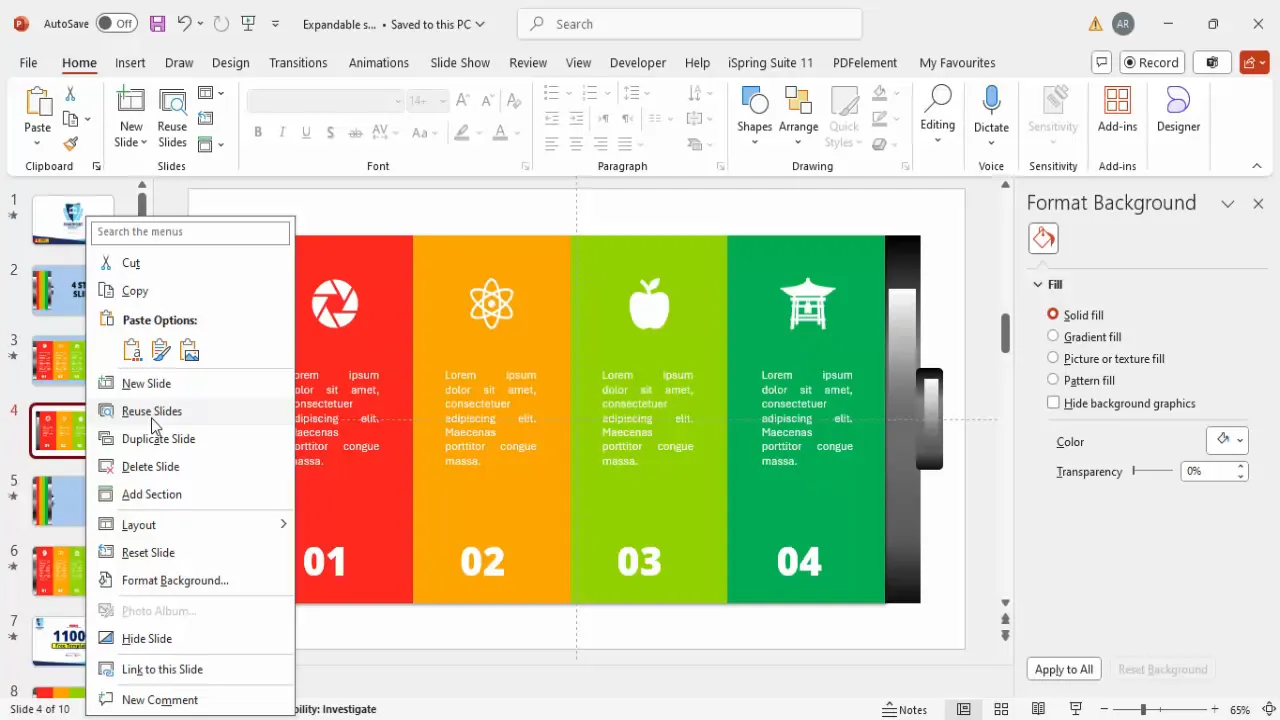
- Add Icons: Go to Insert > Icons and select relevant icons that correspond to each step or concept.
- Insert and Position Icons: Insert the icon, position it centered above or beside the option number, and change the icon color to white to maintain consistency.
- Add Detailed Text: Insert another text box to include a brief description or explanation related to the option.
- Format and Align: Use white font color, center alignment, and keep the text concise. Optionally, justify the text to improve readability.
- Duplicate and Edit: Select all content for the first option (number, icon, text), hold Ctrl + Shift, and drag to duplicate for the next options.
- Update Content: Change option numbers to 2, 3, 4, and replace icons and text to suit each step.
Adding these content elements transforms your infographic from a static shape into an interactive, informative slide that effectively communicates your message step-by-step.
Grouping Elements and Creating Slide Duplicates
To manage your design efficiently and prepare for animation, grouping related elements and duplicating slides is essential. Grouping helps you move and format multiple objects simultaneously, while duplicating allows you to create the expanded and collapsed views for the sliding effect.
How to Group and Duplicate
- Group Elements: Select related shapes and content elements (e.g., the battery segment with its text and icon) and press Ctrl + G to group them.
- Repeat Grouping: Group all four segments separately to maintain control over each step.
- Duplicate Slide: Right-click the slide thumbnail and select Duplicate Slide to create a second slide for the expanded view.
- Adjust First Slide: On the first slide, select grouped objects and use Send to Back or Send Backward to layer content appropriately.
- Position Content: Move grouped objects individually to create a compact, collapsed view where detailed text is hidden.
- Leave Second Slide as Is: Keep the second slide showing the fully expanded infographic with all details visible.
This setup is crucial for the sliding animation to work smoothly, allowing you to toggle between a clean overview and an expanded detailed view.
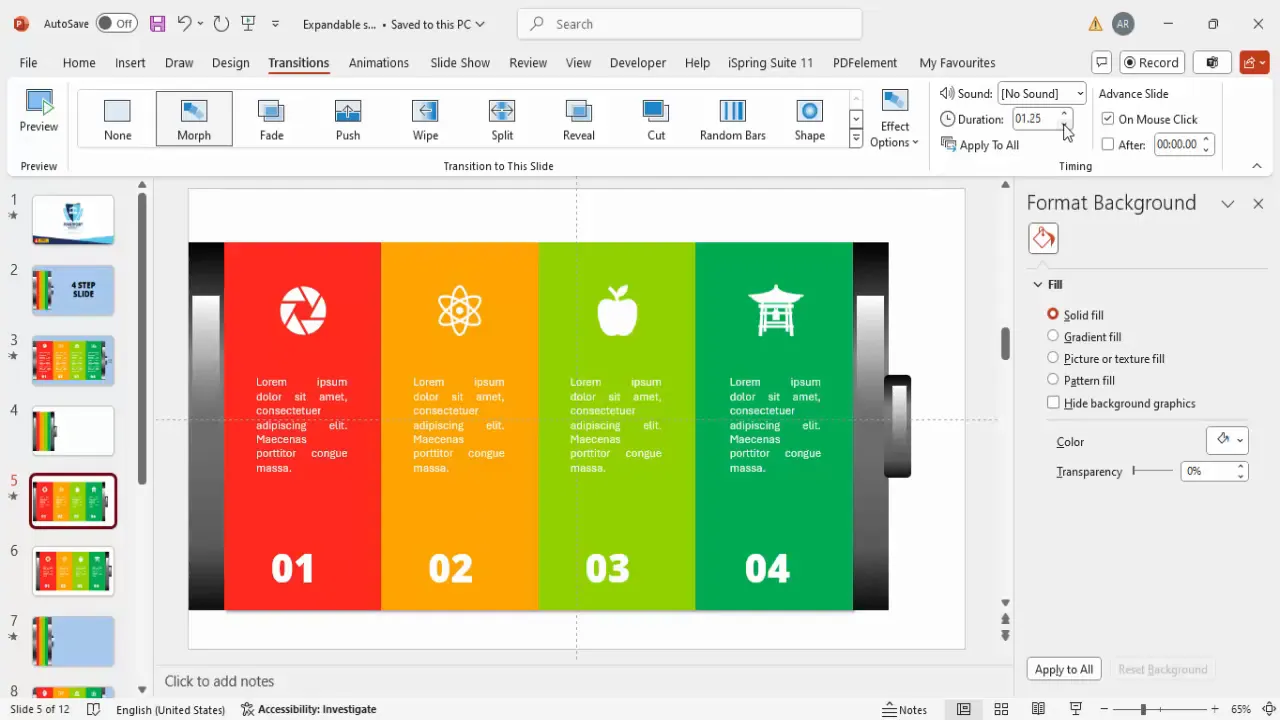
Setting Up Sliding Animation with Transitions
Now that your slides are ready, the next step is to create the sliding animation effect that expands the infographic on click. PowerPoint’s transition features enable smooth, professional animations without complex coding or external software.
Configuring Transitions for Sliding Effect
- Select the Second Slide: Click on the duplicate slide that shows the expanded infographic.
- Choose Transition: Go to the Transitions tab and select a transition such as Push or Wipe that simulates sliding.
- Adjust Duration: Set the transition duration to 1 second or less for a smooth, quick animation.
- Test the Effect: Enter presentation mode and click to see the infographic slide expand seamlessly.
- Ensure Consistency: Apply the same background color and design elements on both slides for a cohesive look.
Using these transition settings, your audience will experience a dynamic slide that visually “slides open” to reveal detailed steps, enhancing engagement and understanding.

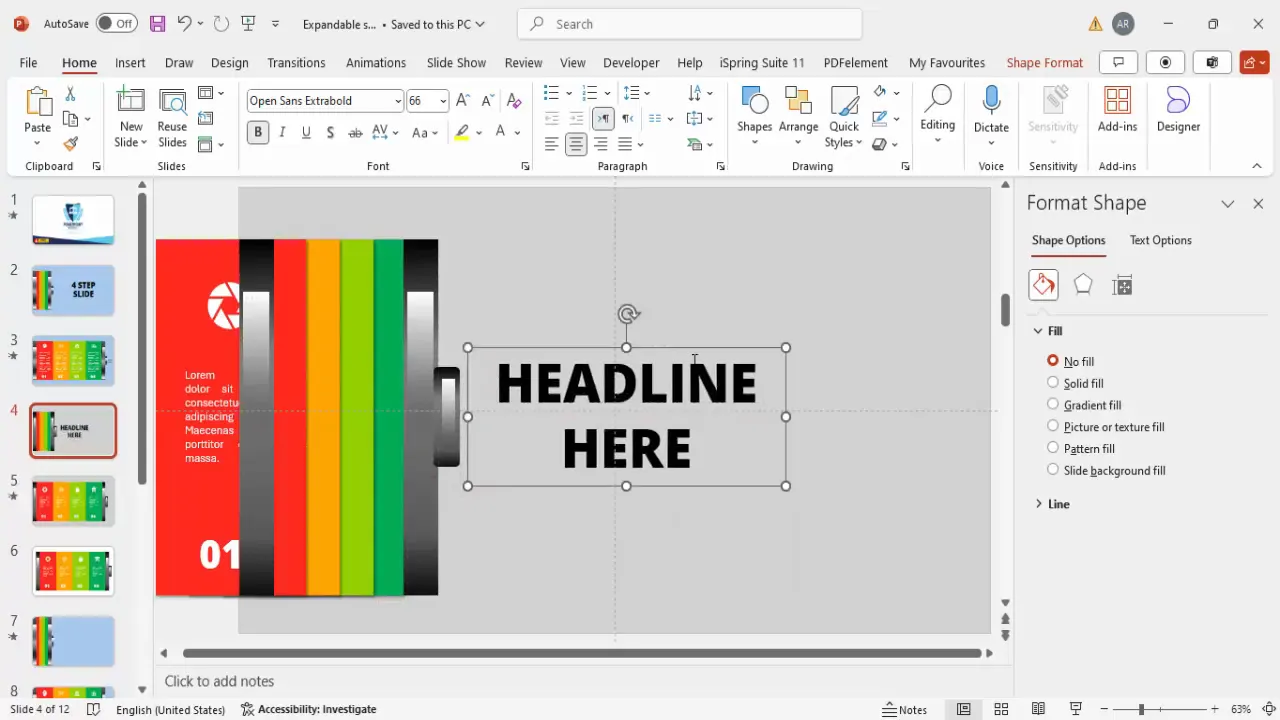
Customizing Colors, Backgrounds, and Headlines
To polish your PowerPoint animated slide design and tailor it to your presentation’s theme, customize colors, backgrounds, and add clear headlines.
Tips for Customization
- Background Colors: Use a light gray or neutral color for the slide background to ensure your infographic stands out.
- Consistent Colors: Apply the same background color on both the collapsed and expanded slides for a seamless transition.
- Add Headlines: Insert a text box with a bold, center-aligned headline using a font like Open Sans Extra Bold.
- Font Size and Position: Adjust font size appropriately — larger on the collapsed slide and slightly smaller on the expanded slide to maintain balance.
- Copy Headlines: Copy and paste the headline between slides to keep text consistent.
These finishing touches contribute to a professional, polished look and make your animated infographic easy to comprehend at a glance.
Frequently Asked Questions
What software do I need to create PowerPoint animated slide designs?
You only need Microsoft PowerPoint, preferably a recent version (PowerPoint 2019, Office 365, or newer) that includes the Icons feature and advanced transition options.
Can I customize the colors and icons in this infographic?
Absolutely! You can change any color, font, or icon to match your branding or presentation theme. PowerPoint makes it easy to modify fills, outlines, and replace icons with just a few clicks.
How do I control the timing and speed of the slide animation?
Under the Transitions tab, you can set the duration of the animation in seconds. A shorter duration (around 1 second) typically looks smooth and professional.
Is it possible to add more than four steps in this design?
Yes. To add more steps, simply reduce the width of each rectangle segment to fit additional steps while maintaining the overall battery shape. Adjust text and icons accordingly.
Can I use this animated infographic for any presentation type?
Yes. This design works well for business presentations, project updates, educational content, marketing strategies, or any context where stepwise information needs to be communicated clearly.
How do I make sure my text is readable in the infographic?
Use high-contrast colors (e.g., white text on dark backgrounds), keep fonts bold and large (minimum 24 pt), and limit text length to concise, impactful sentences.
Can I export this animated slide as a video or GIF?
PowerPoint allows you to export presentations as videos, which preserves animations and transitions. You can also use third-party tools to convert slides into GIFs for use in emails or websites.
Conclusion: Elevate Your Presentations with Animated Infographics
Mastering PowerPoint animated slide design is a game-changer for anyone looking to create compelling, professional presentations. By designing a four-step sliding infographic shaped like a battery, you can present complex information in a visually appealing, interactive way that keeps your audience engaged.
This tutorial has equipped you with the skills to:
- Design clean, segmented shapes with precise measurements
- Apply sophisticated gradient and glossy effects to add depth
- Add clear option numbers, icons, and concise text for each step
- Group and duplicate elements for efficient slide management
- Set up smooth sliding animations using PowerPoint transitions
- Customize colors, backgrounds, and headlines for a polished look
With these techniques, your PowerPoint presentations will not only look professional but also deliver your message more effectively. Experiment with colors, icons, and transition styles to match your unique style and presentation needs.
Remember, well-designed animated slides can transform your storytelling and leave a lasting impression on your audience. Start creating your dynamic infographics today and watch your presentations come to life!
Check out the full video: Professional Animated PowerPoint Presentation


