If you’re passionate about taking your PowerPoint presentations to the next level, learning how to create engaging PowerPoint animation effects is essential. Recently, Microsoft announced an exciting AI productivity tool called Microsoft 365 Copilot, integrated into popular apps like Word, Excel, Outlook, and PowerPoint. One of the standout features is Copilot’s ability to transform written documents into dynamic PowerPoint presentations complete with polished animations.
Though Copilot is not yet publicly available, this article will guide you through a step-by-step tutorial on how to replicate some of those impressive animations using PowerPoint’s own powerful tools, especially the Morph transition. Inspired by the Copilot animation style, you’ll learn how to create a beautiful photo crop animation alongside a sleek text reveal effect that can captivate your audience and elevate your storytelling.
Let’s dive into the process and master these PowerPoint animation effects to bring your presentations to life.
Table of Contents
- Introduction to Microsoft 365 Copilot Animation
- Preparing Your Slide Layout
- Filling Rectangles with Photos Using Merge Shapes
- Working with Text Boxes for Text Reveal Animation
- Applying Morph Transition for Smooth Animation
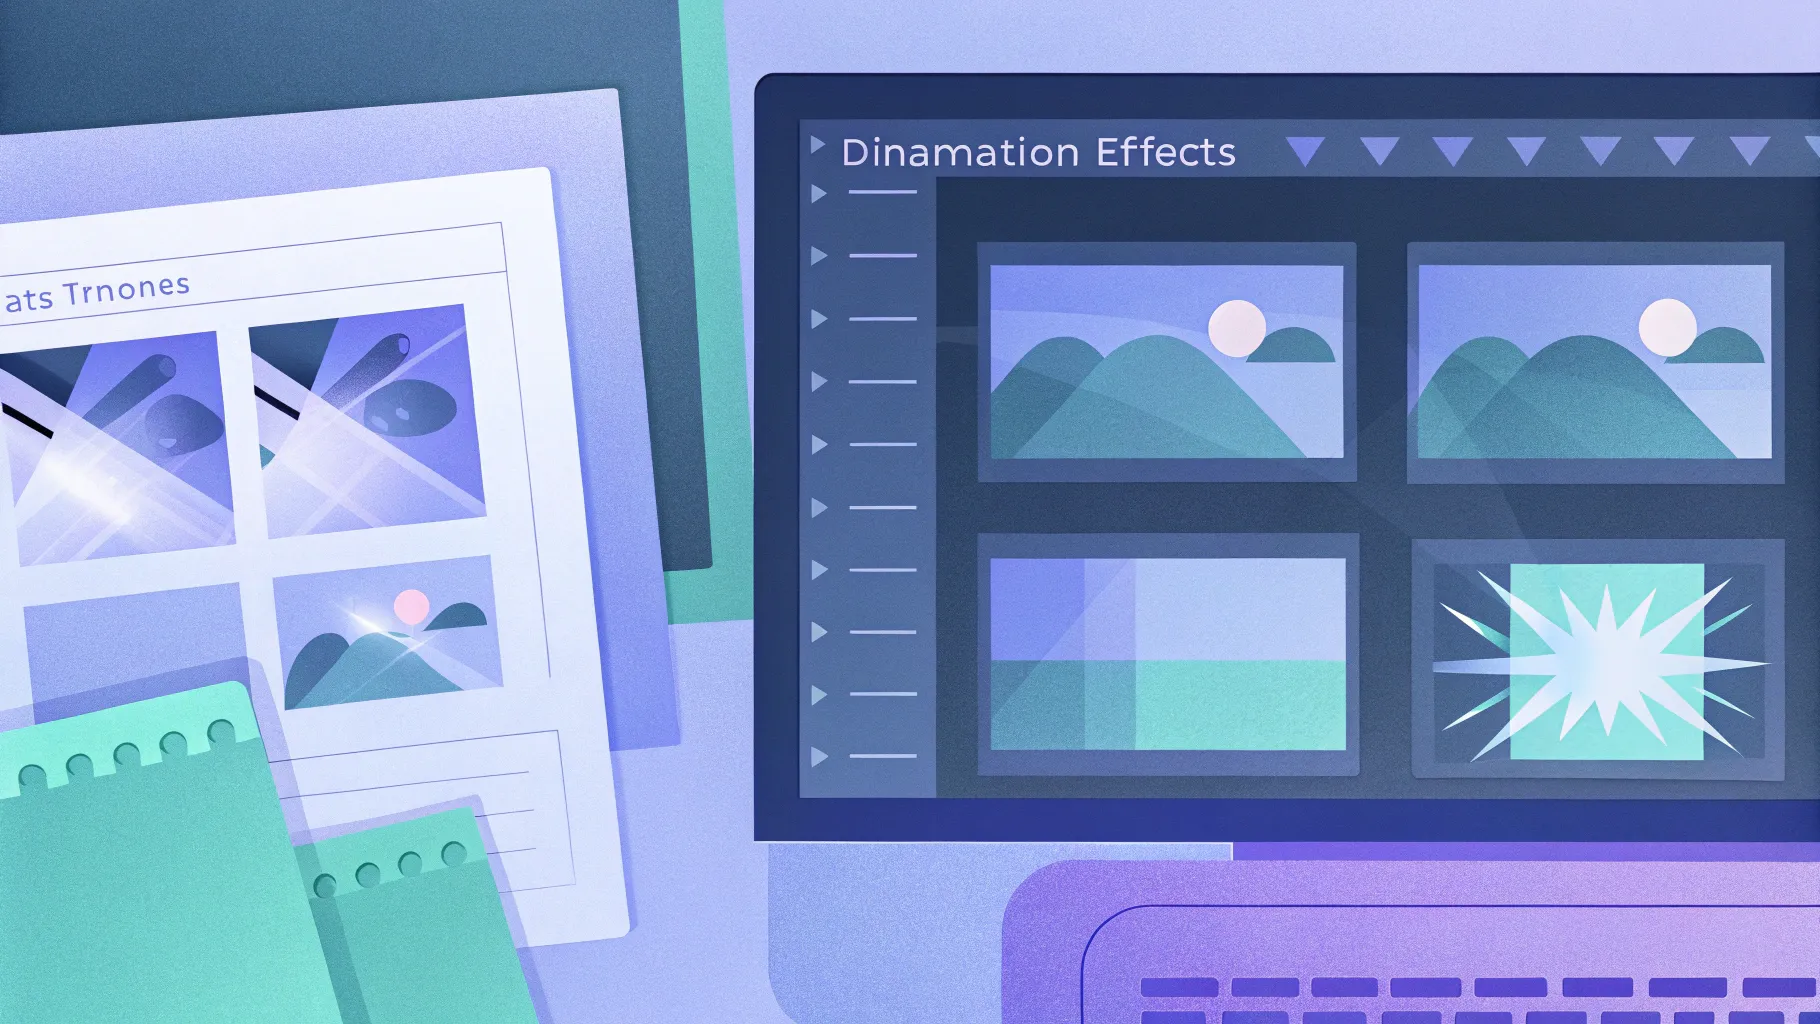
- Creating the Photo Crop Animation
- Adding Animation Delays for a Polished Look
- Final Thoughts and Additional Resources
- Frequently Asked Questions (FAQ)
Introduction to Microsoft 365 Copilot Animation
On March 16th, Microsoft introduced an AI-powered productivity assistant called Microsoft 365 Copilot, designed to enhance workflows across popular Microsoft 365 apps such as Word, Excel, Outlook, and PowerPoint. One of the most exciting features showcased was Copilot’s ability to quickly transform written documents into fully-animated PowerPoint presentations.
What really caught the attention of many users was Copilot’s capability to add professional-grade PowerPoint animations automatically. These animations include photo cropping effects and text reveal animations that make presentations visually dynamic and engaging.
Since Copilot isn’t publicly available yet, replicating these PowerPoint animation effects manually is a great way to prepare yourself for the future of presentation design and to impress your audience today.
Preparing Your Slide Layout
The first step in creating these animations is to prepare your slide layout with the right shapes and text elements. Here’s how you can do it:
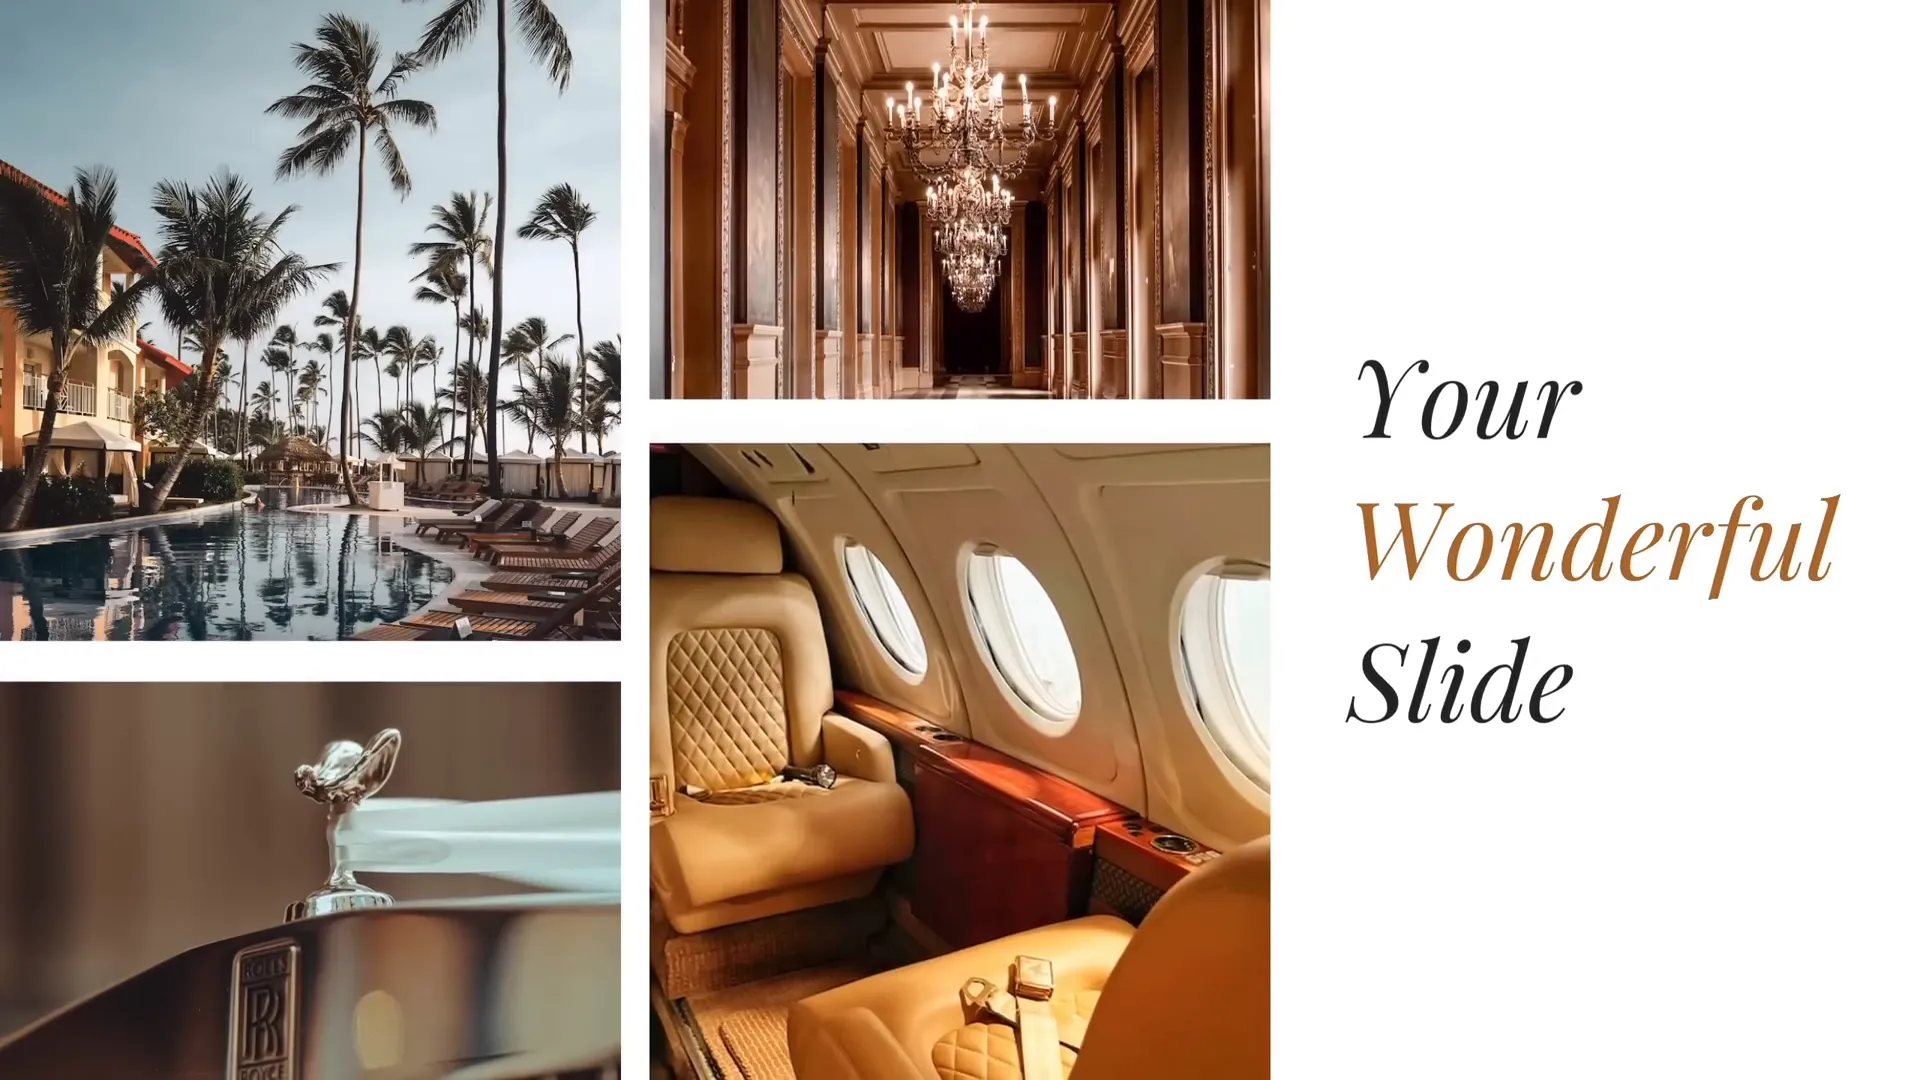
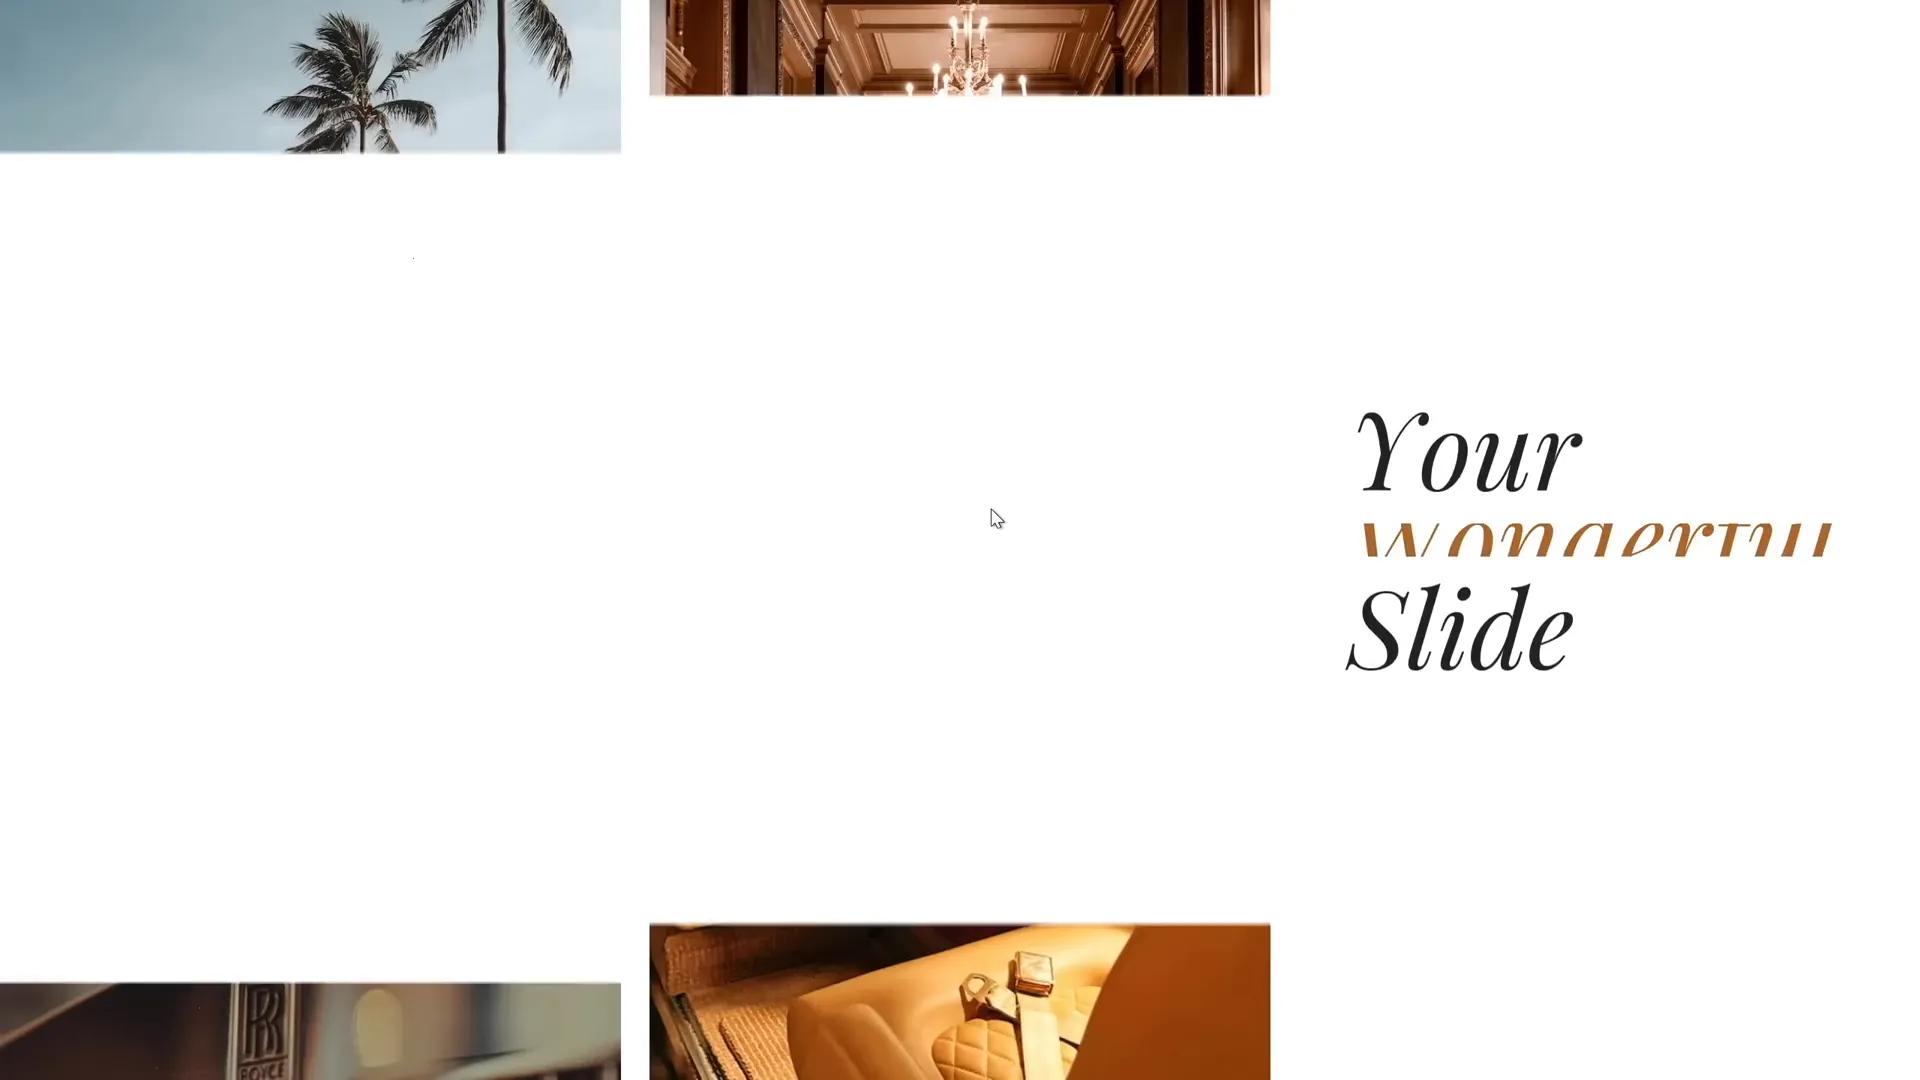
- Insert Four Rectangles: Start by adding four rectangles to your slide. Vary their heights to create visual interest and make sure to maintain equal gaps between all rectangles for a balanced look.
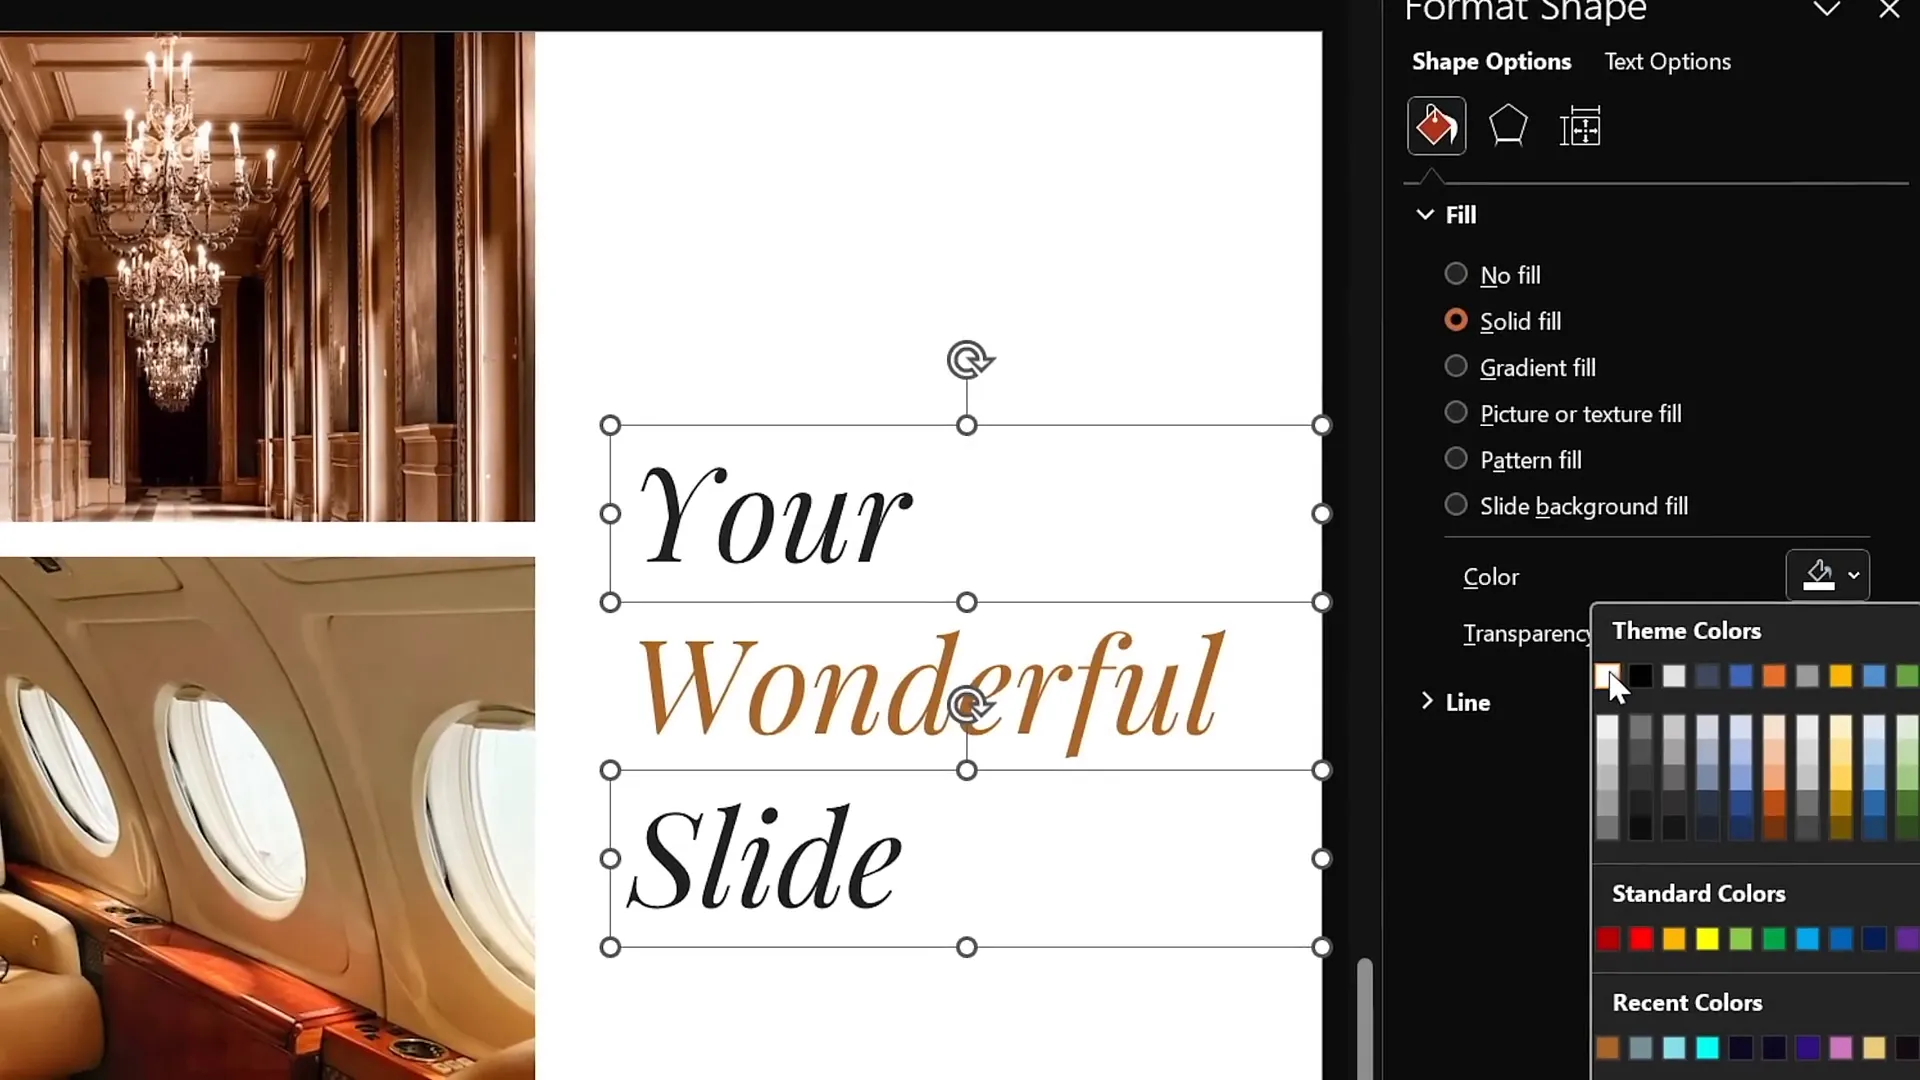
- Position Text Boxes: On the right side of the slide, insert two simple text boxes. Use the Playfair Display font set to size 54 for a professional and elegant look.
It’s important to keep the layout clean and balanced before moving on to the animation phase. This foundation will help the animations look smooth and polished.
Filling Rectangles with Photos Using Merge Shapes
Next, you want to fill the rectangles with photos to create that dynamic photo crop effect. While PowerPoint offers a simple way to fill shapes with pictures via the Format Shape options, it doesn’t provide the precise results we’re aiming for here.
Instead, use this method to embed photos perfectly inside the rectangles:
- Upload Photos: Use high-quality images from sources like Unsplash. Copy and paste a photo onto your slide.
- Position and Send to Back: Drag the photo to align with the rectangle (e.g., bottom-left corner) and send it to the back of the slide elements.
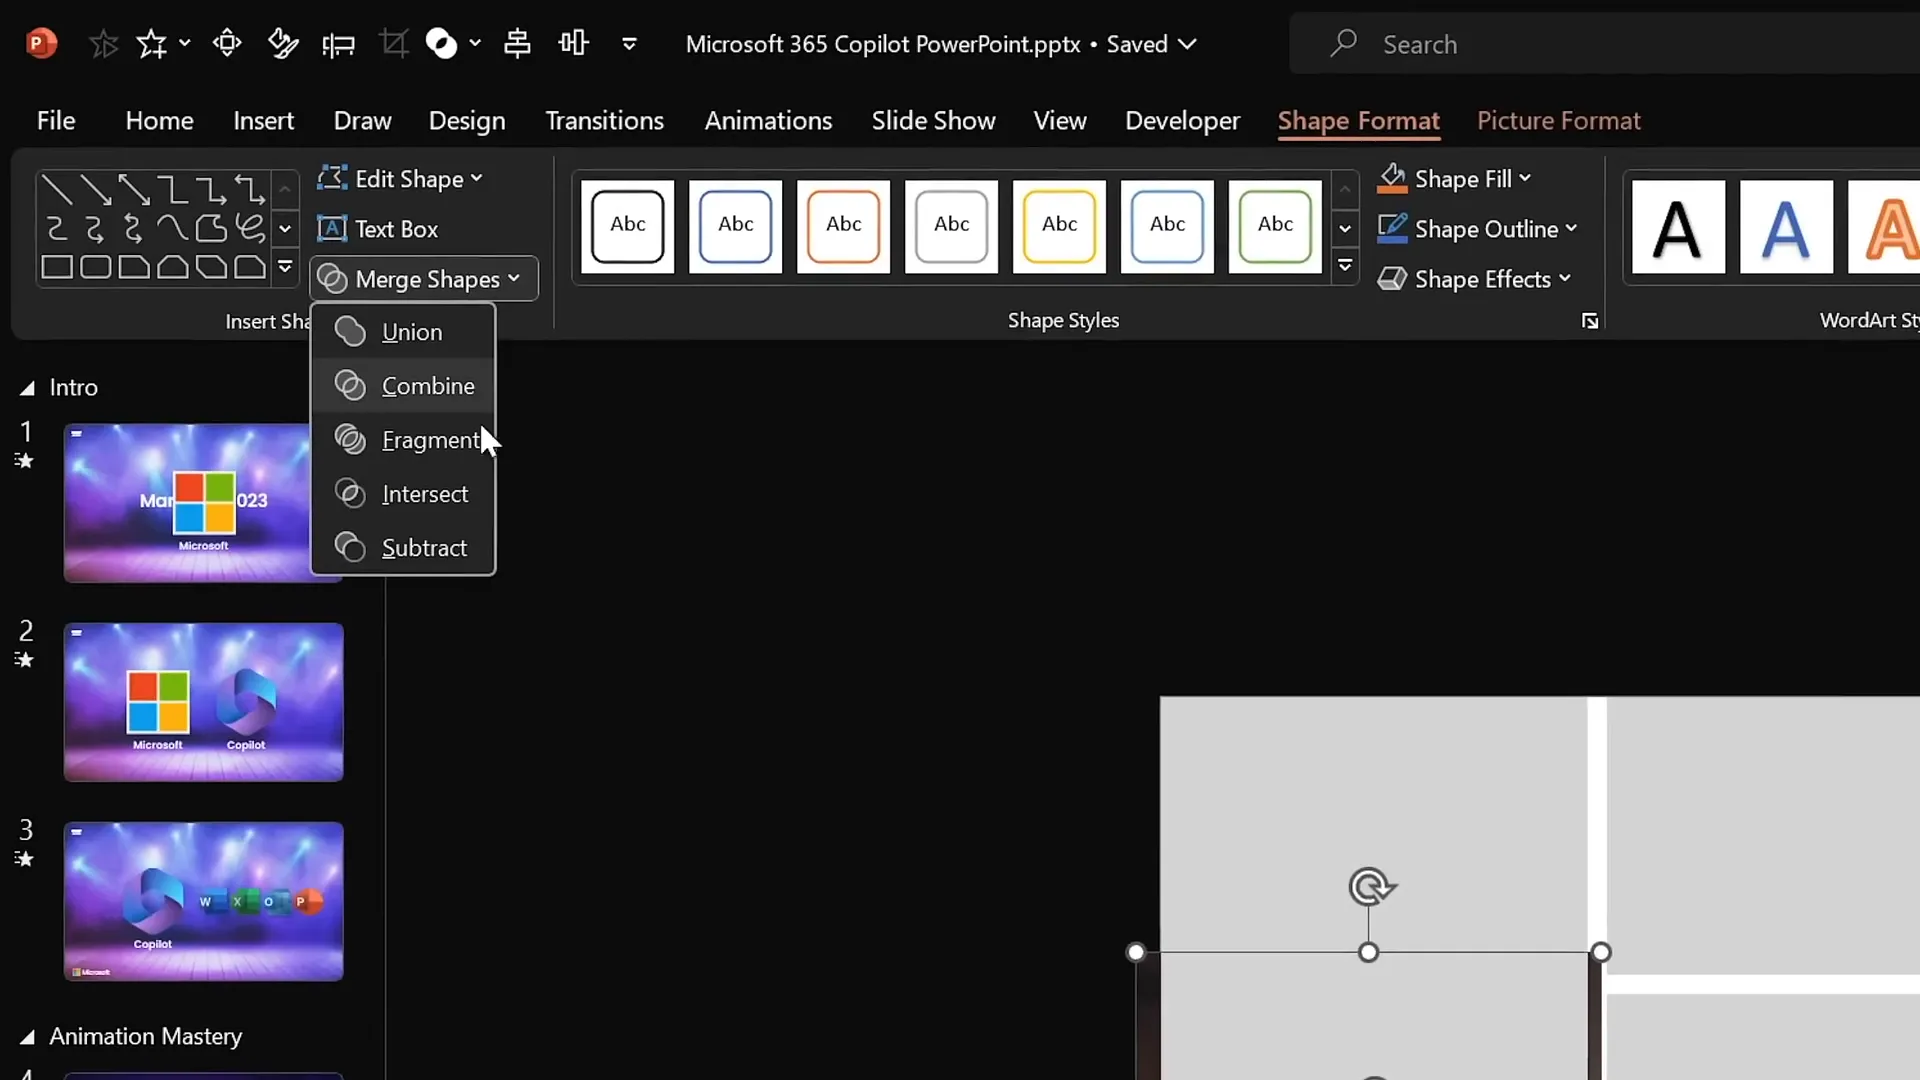
- Select Photo and Rectangle: Hold down the Shift key and select both the photo and the rectangle.
- Merge Shapes – Intersect: Go to Shape Format > Merge Shapes > Intersect. This will crop the photo to the exact shape of the rectangle.
- Repeat: Repeat these steps for each rectangle with different photos to fill all shapes.
Once you’ve intersected a photo with a rectangle, you can fine-tune the cropping by using the crop tool on the picture to reposition the photo within the shape.
Working with Text Boxes for Text Reveal Animation
Now, let’s enhance the right side of the slide with a text reveal animation:
- Add a Third Text Box: Duplicate one of the existing text boxes by holding Ctrl + Shift and dragging it vertically to create a new text box in the middle.
- Edit Text and Color: Change the middle text box’s content to “wonderful” and adjust the color to complement your slide’s design.
- Distribute Vertically: Select all three text boxes and distribute them vertically with equal spacing.
- Group and Align: Group the three text boxes and align the group to the middle of the slide for a clean layout. Then ungroup them for individual adjustments.
- Add White Fill: Add a solid white fill to the top and bottom text boxes. This step is crucial as these white-filled boxes will later hide the middle text box during animation.
- Bring to Front: Send the white-filled text boxes to the front to ensure they cover the middle text box during the animation.
This setup will allow for a smooth text reveal animation using the Morph transition.
Applying Morph Transition for Smooth Animation
PowerPoint’s Morph transition is the key magic behind these stunning animations. It allows objects to smoothly transform from one slide to the next, creating seamless motion effects without complex animation setups.
Here’s how to apply Morph transition for your animation:
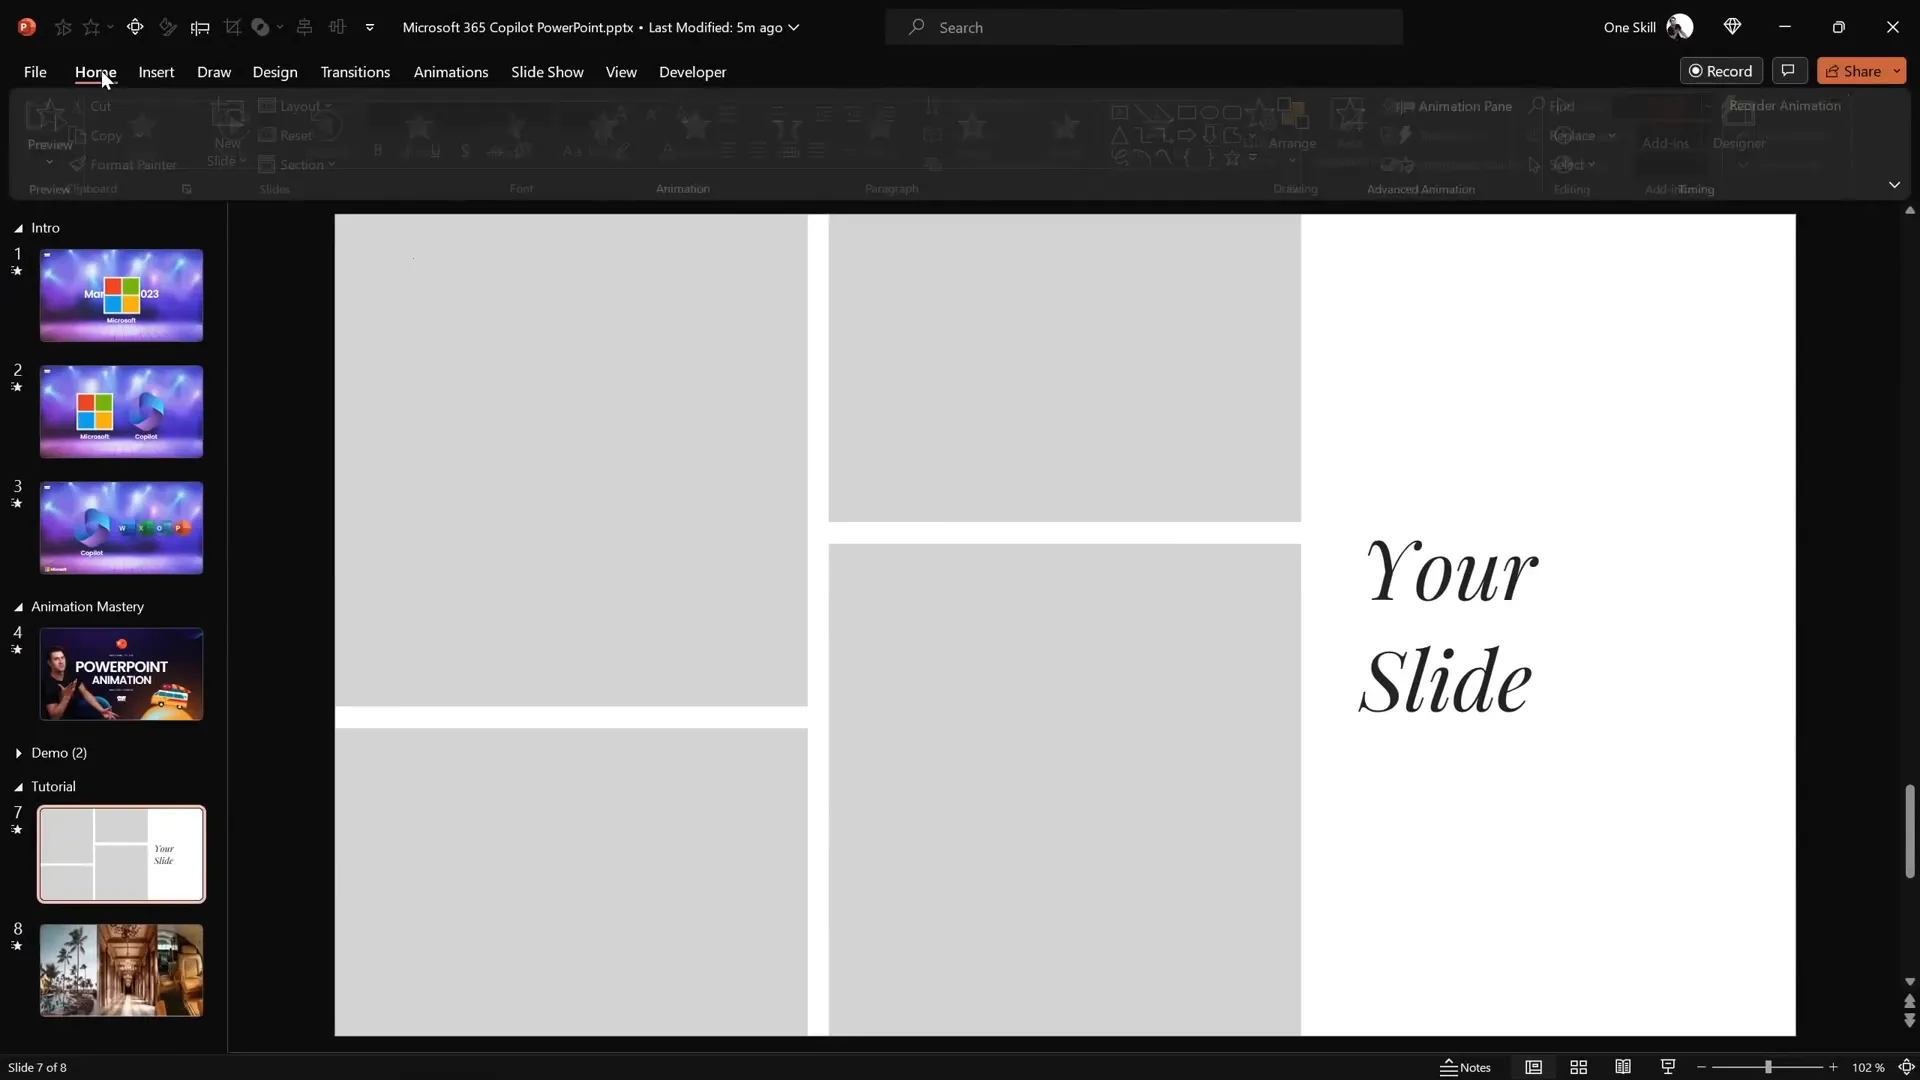
- Duplicate the Slide: Duplicate your prepared slide to create a second slide.
- Enable Morph Transition: On the duplicate slide, go to the Transitions tab and select Morph.
- Hide Middle Text Box: On the first slide, hide the middle text box by either deleting it or setting it invisible.
- Move Top and Bottom Text Boxes: On the first slide, drag the top text box downwards and the bottom text box upwards until they meet at the middle, effectively covering where the middle text box was.
- Preview Animation: Click the Preview button under the Transitions tab to watch the text reveal animation in action.
This simple yet effective technique creates a polished text reveal effect that looks professional and engaging.

Creating the Photo Crop Animation
With the text animation set, let’s animate the photos on the left side of the slide using Morph as well:
- Crop Photos Outside the Slide: On the first slide, select each photo and use the crop tool to move either the top or bottom cropping handles slightly outside the slide bounds. This will create the appearance that photos are sliding into view during the Morph transition.
- Adjust Cropping Handles: For photos at the top, move the bottom cropping handle downward outside the slide; for photos at the bottom, move the top cropping handle upward outside the slide.
- Preview Full Screen: Run the presentation in full screen to see the photo crop animation combined with the text reveal effect.
This method creates a smooth, eye-catching photo crop animation that mirrors the style of the Microsoft 365 Copilot demo.
Adding Animation Delays for a Polished Look
In the original Copilot animation, photos appear with slight delays rather than all at once, adding a layer of sophistication. You can mimic this delay using Morph by adjusting the positioning of photos on the first slide.
Here’s how to create animation delays:
- Move Photos Further Outside Slide: On the first slide, move some photos farther outside the slide boundaries than others.
- Vary Distances: By varying how far each photo is cropped outside the slide, Morph will animate them with slight delays relative to one another.
- Test the Animation: Preview the slide transition to observe the staggered entrance effect of the photos.
This simple trick adds professional timing and rhythm to your animations, enhancing the overall viewer experience.

Final Thoughts and Additional Resources
Congratulations! You now know how to create a beautiful photo crop animation paired with a sleek text reveal animation inspired by Microsoft 365 Copilot’s PowerPoint animations. These effects are all made possible using PowerPoint’s Morph transition and smart use of cropping and shape merging.
Mastering PowerPoint animation effects like these can significantly enhance your presentations, making them more engaging and visually dynamic. Whether you’re a business professional, educator, or content creator, these techniques help you tell your story with impact.
If you want to dive deeper into Morph transition and unlock even more advanced animation tricks, be sure to check out tutorials dedicated to Morph and PowerPoint animation mastery.
And stay tuned for Microsoft 365 Copilot’s public release to see how AI will revolutionize presentation design!
Frequently Asked Questions (FAQ)
What is Microsoft 365 Copilot?
Microsoft 365 Copilot is an AI-powered productivity tool integrated into Microsoft 365 apps like Word, Excel, Outlook, and PowerPoint. It helps automate tasks such as transforming documents into presentations with animations.
What is the Morph transition in PowerPoint?
The Morph transition is a powerful feature in PowerPoint that creates smooth animations by transitioning objects from one slide to another, allowing for seamless transformations like movement, resizing, and color changes.
How do I fill shapes with photos in PowerPoint?
While you can fill shapes with pictures using the Format Shape options, a more precise method is to overlay a photo on a shape and use the Merge Shapes → Intersect feature to crop the photo to the shape’s exact boundaries.
Can I create animation delays with Morph transition?
Yes! By positioning objects at varying distances outside the slide on the first slide, Morph transition will animate them with natural delays as they move into the slide area on the next slide.
Is Morph transition available in all PowerPoint versions?
Morph transition is available in PowerPoint for Microsoft 365, PowerPoint 2019, and later versions. It may not be available in older versions.
Where can I find free photos to use in PowerPoint animations?
Websites like Unsplash offer a wide range of free, high-quality photos perfect for presentations.
What fonts work well for professional PowerPoint presentations?
Fonts like Playfair Display, used in this tutorial, offer an elegant serif style. For clean and professional looks, simple serif and sans-serif fonts are recommended. Avoid overly decorative or script fonts for readability.
Can I use these animation techniques for other types of presentations?
Absolutely! These PowerPoint animation effects are versatile and can be applied to business, educational, marketing, or creative presentations to enhance visual storytelling.
Summary Table: Key Steps to Create Copilot-Inspired PowerPoint Animations
| Step | Action | Purpose |
|---|---|---|
| 1 | Insert rectangles with equal gaps | Prepare photo placeholders with balanced layout |
| 2 | Fill rectangles with photos via Merge Shapes → Intersect | Create precise photo cropping inside shapes |
| 3 | Add and format text boxes with white fills | Set up text elements for reveal animation |
| 4 | Duplicate slide and enable Morph transition | Prepare for smooth animation between slides |
| 5 | Adjust text boxes to hide middle text on first slide | Create text reveal effect |
| 6 | Crop photos outside slide on first slide | Animate photos sliding into view |
| 7 | Vary photo cropping distances | Introduce animation delays for dynamic effect |


