PowerPoint animation effects are a powerful way to add visual interest and professionalism to your presentations. Among these effects, zoom animations are popular for introducing text or shapes dynamically on your slides. However, the default zoom animations in PowerPoint often end abruptly, creating a jarring experience for your audience. Wouldn’t it be great to have a smooth zoom animation that softly zooms in and ends gracefully?
In this comprehensive guide, inspired by expert PowerPoint designer One Skill PPT, we will explore how to create a custom smooth zoom animation in PowerPoint by cleverly combining multiple built-in animations. This method lets you achieve a polished, professional zoom effect that enhances your slides without the harsh stop of default animations.
Table of Contents
- Understanding Default Zoom Animations in PowerPoint
- Why Smooth Zoom Animation Matters
- Tools Needed to Create Smooth Zoom Animation
- Step-by-Step: Creating a Smooth Zoom Animation
- Applying the Animation to Other Slide Elements
- Tips to Master PowerPoint Animation Effects
- FAQ: Smooth Zoom Animation in PowerPoint
- Conclusion
Understanding Default Zoom Animations in PowerPoint
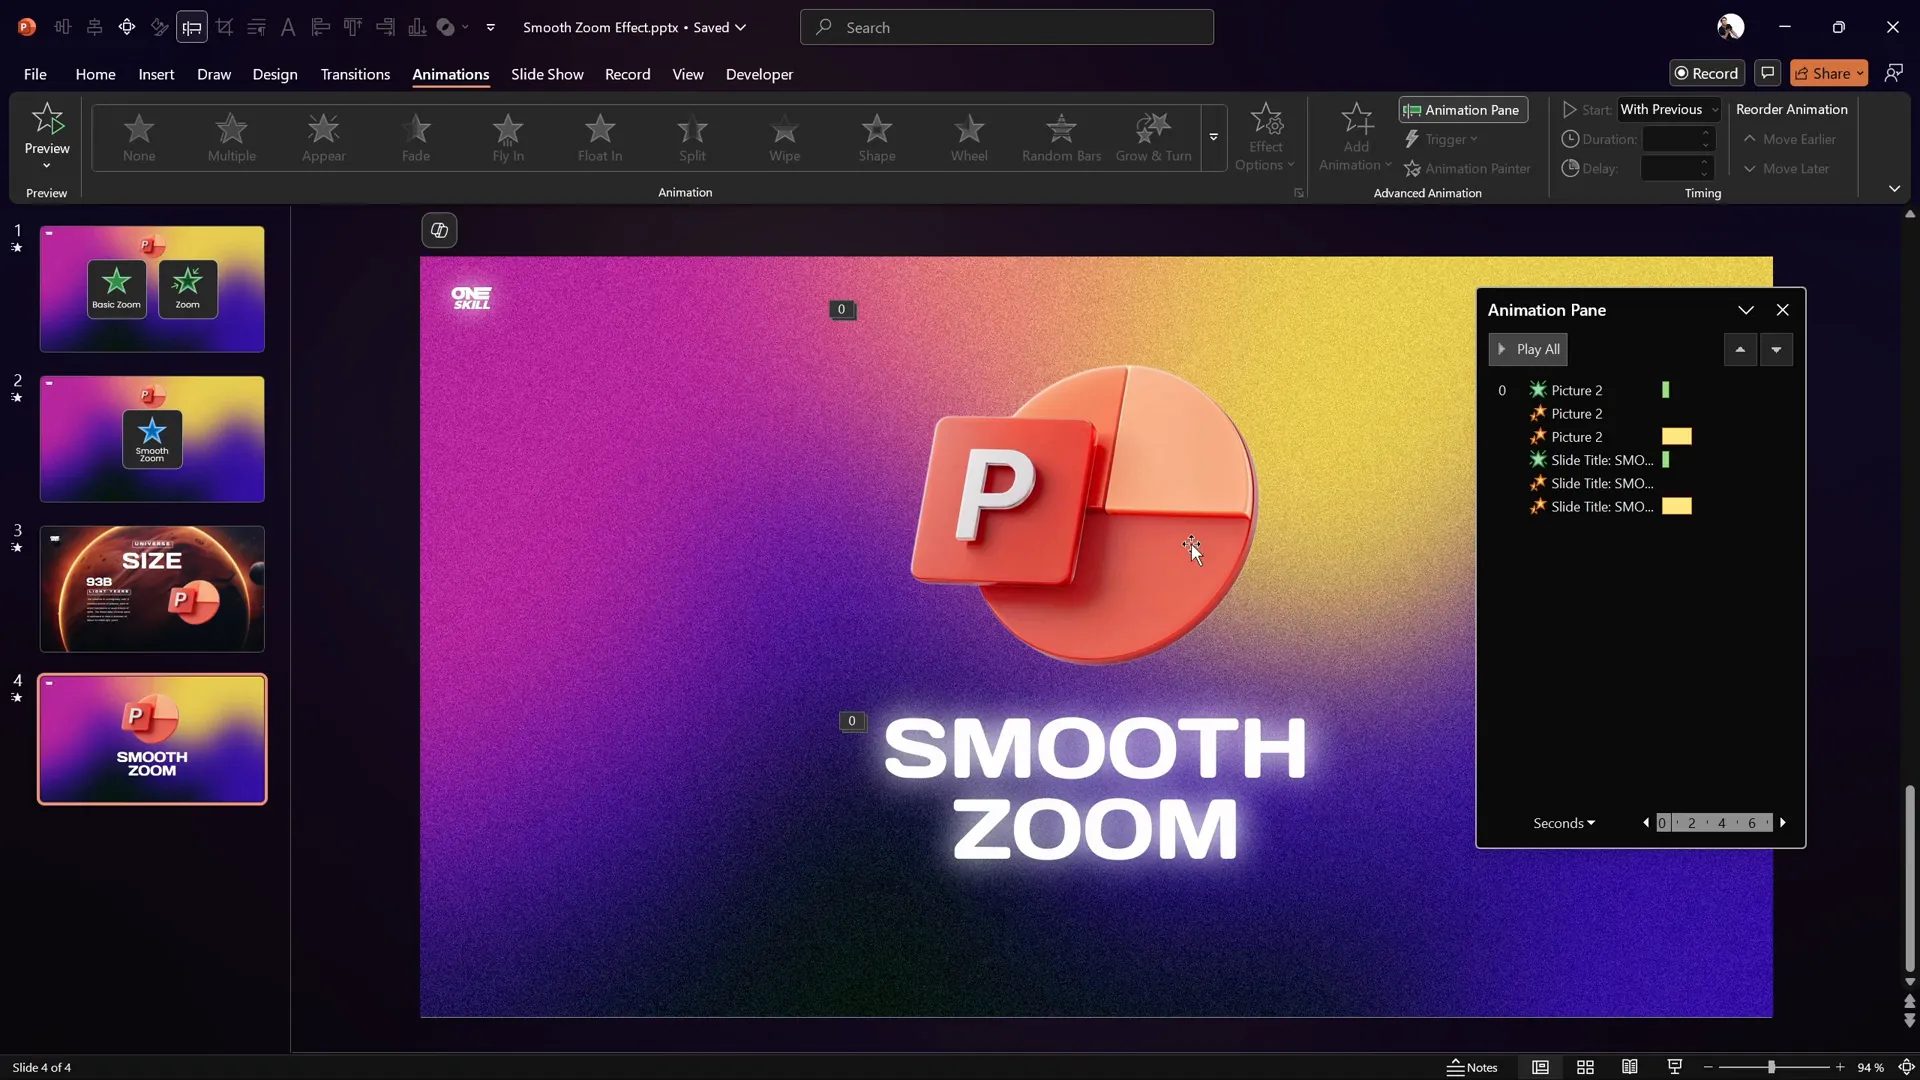
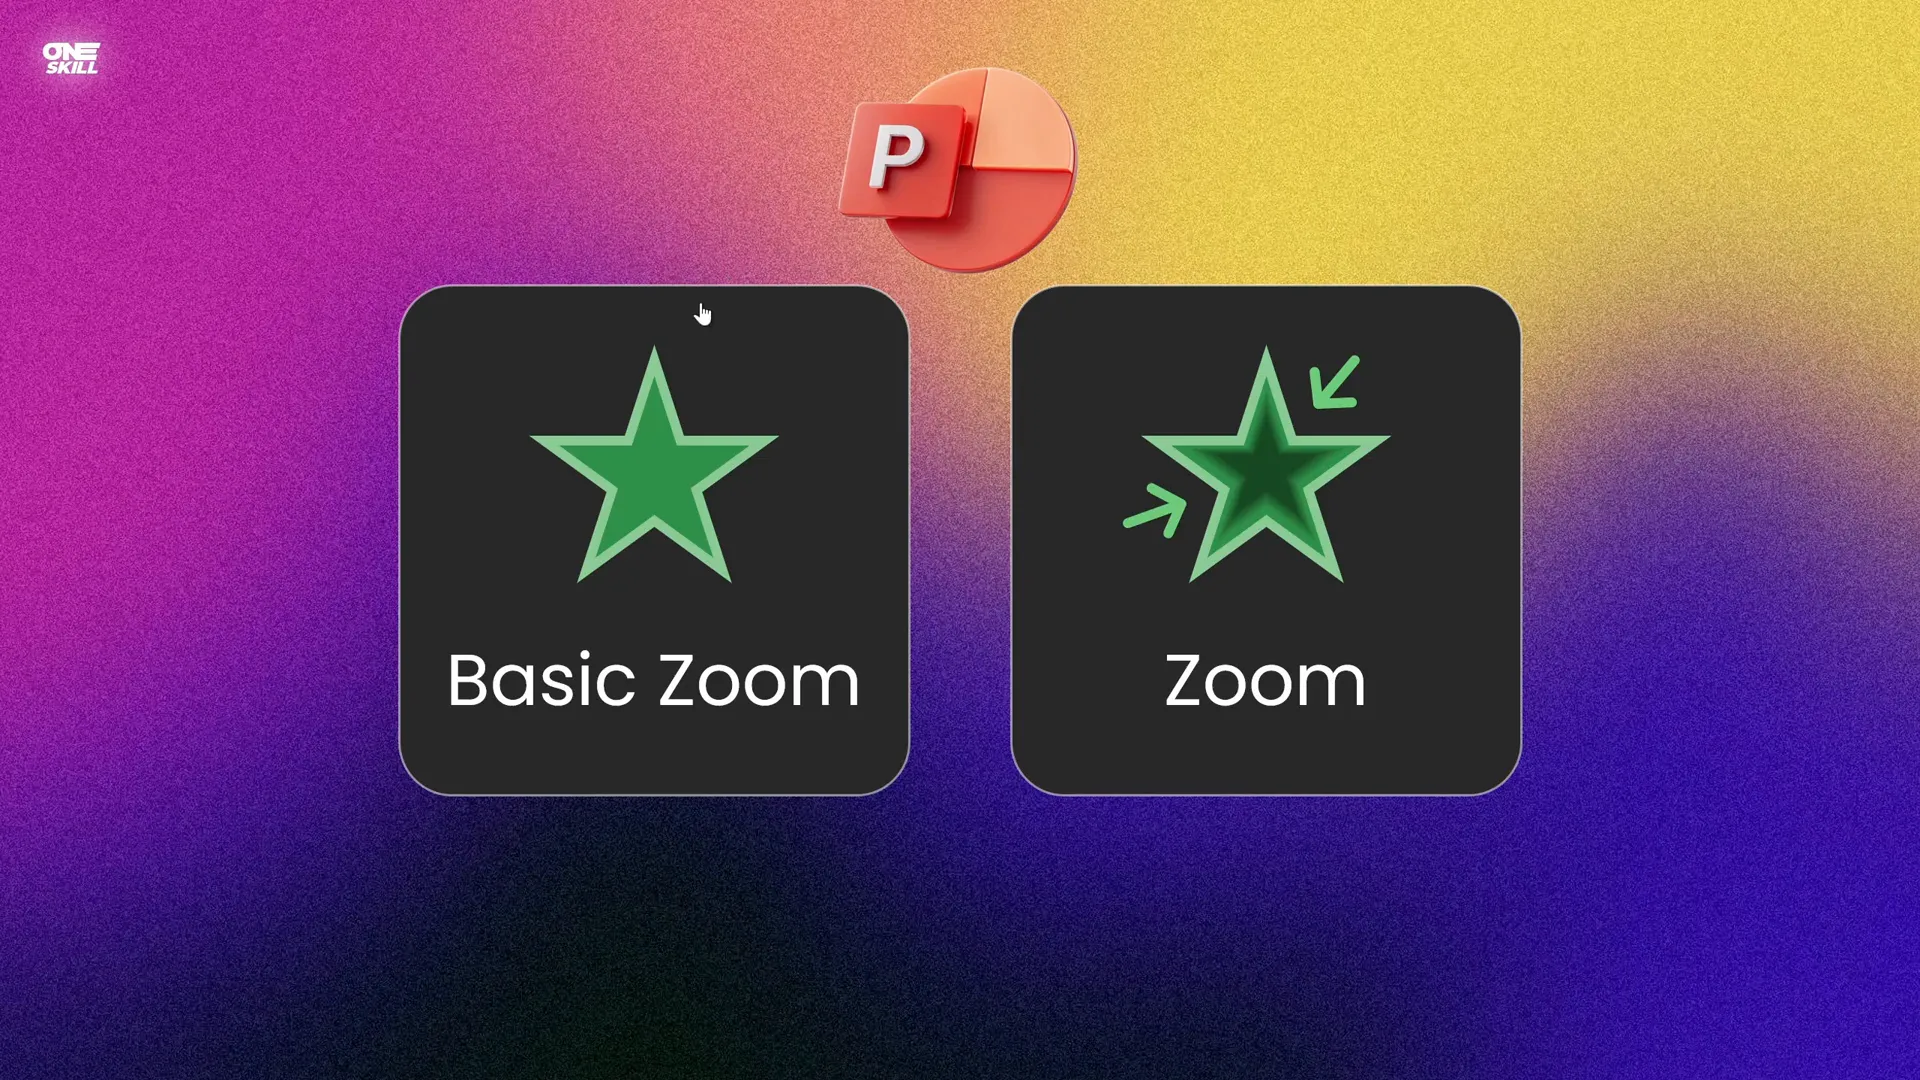
PowerPoint offers two primary zoom animations to introduce text or shapes into your slides:
- Basic Zoom Animation: This effect zooms the object in without any additional fade or transition.
- Zoom Animation: Similar to basic zoom but includes a fade-in effect before zooming.
While these animations look visually pleasing at first, they share one common drawback: they end abruptly. This sudden stop, or “hard landing,” can feel jarring and disrupt the smooth flow of your presentation.

Both animations literally “zoom in” and then stop immediately, which can look somewhat mechanical or unrefined. This is a limitation because neither animation allows you to control the smoothness of the animation’s end.
Why Smooth Zoom Animation Matters
Imagine your slide elements zooming in with a natural gradual finish, like an object softly landing rather than crashing. A smooth zoom animation:
- Creates a more professional and polished look.
- Draws attention subtly and elegantly.
- Improves the viewer’s visual experience by avoiding abrupt stops.
- Can be applied consistently across different slide elements to maintain design coherence.
Unfortunately, PowerPoint’s built-in zoom animations don’t provide a “smooth end” option. However, with a bit of creativity, you can combine other animations that do offer smoothing options to simulate this effect.
Tools Needed to Create Smooth Zoom Animation
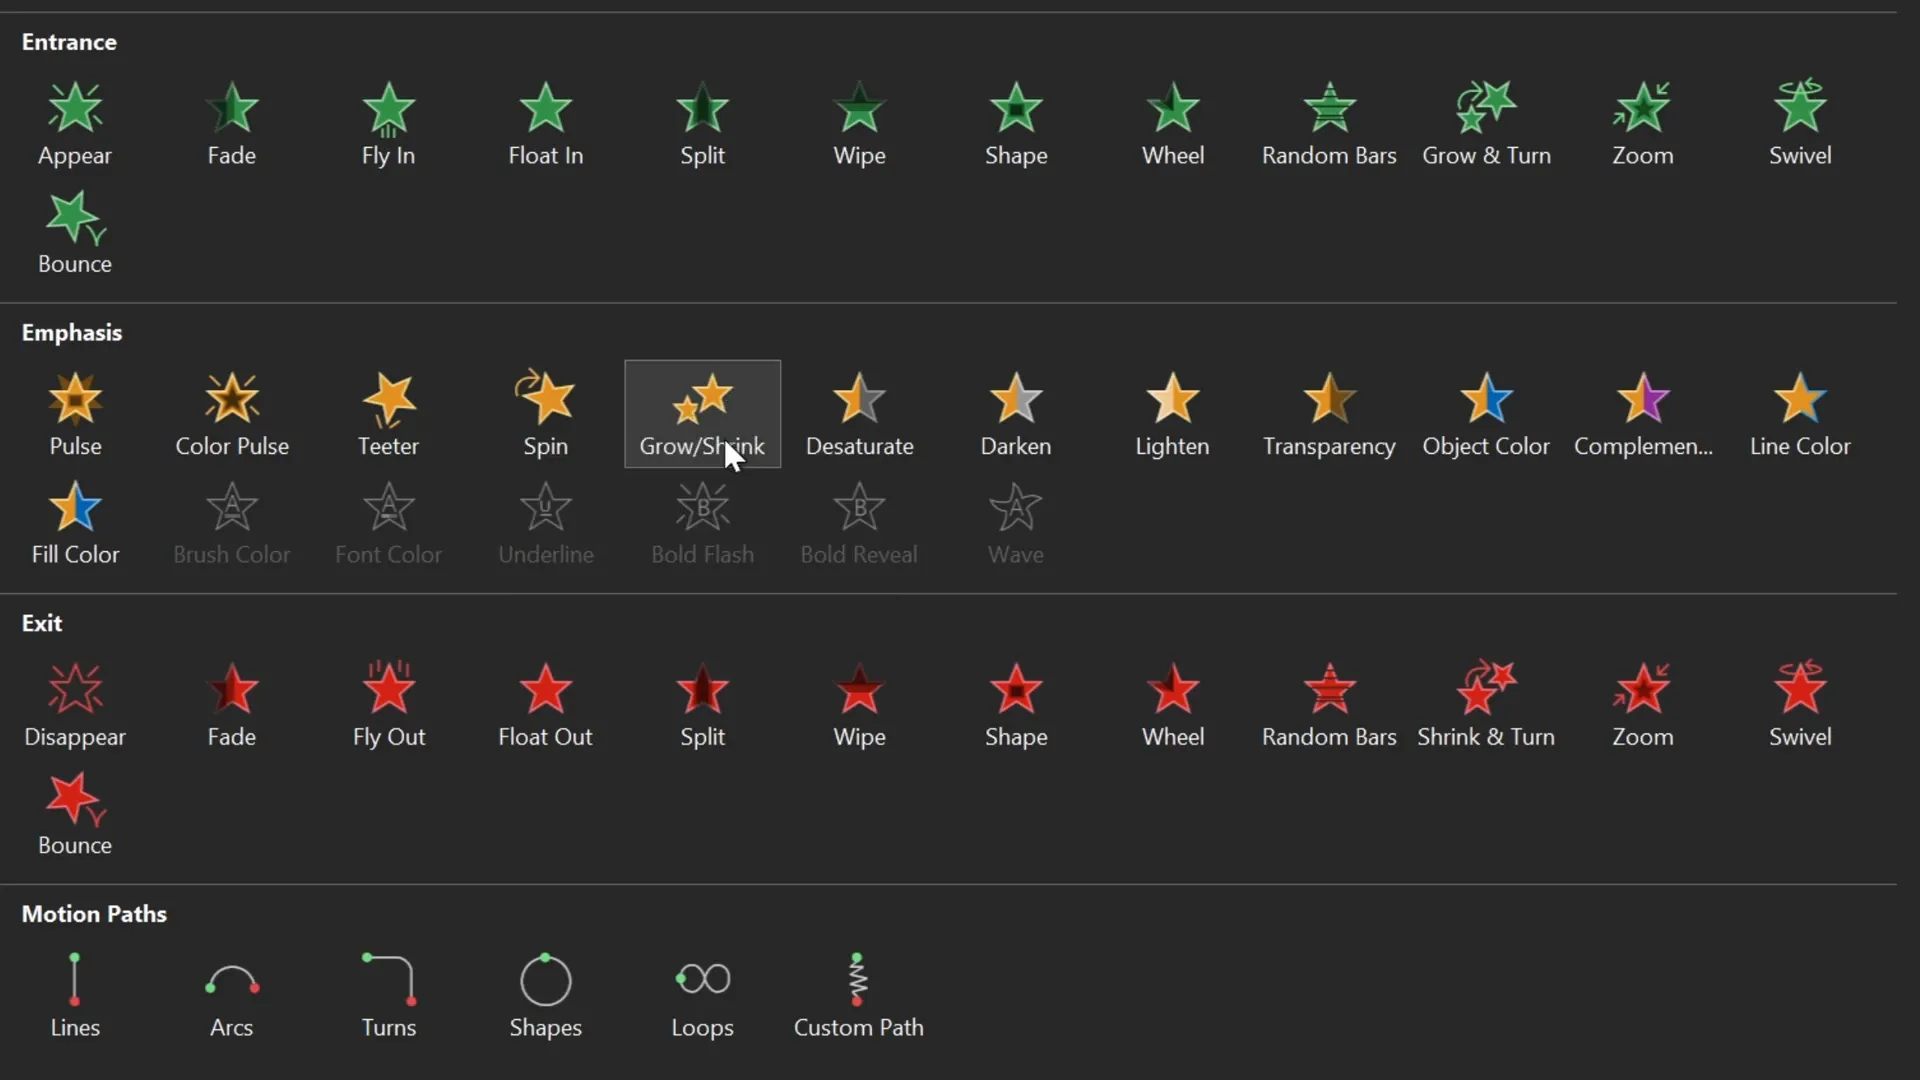
To create your custom smooth zoom animation, you will use three existing PowerPoint animations that have smooth end options:
- Grow/Shrink Animation: Allows resizing of objects with adjustable percentages and smooth end settings.
- Fade Animation: For a subtle fade-in effect at the start of your animation sequence.
These animations are available in PowerPoint’s animation pane and can be combined with precise timing and settings to produce a seamless zoom effect.
Step-by-Step: Creating a Smooth Zoom Animation
Let’s walk through the process of creating a smooth zoom animation applied to a 3D logo object. This method works equally well on any text or shape on your slide.
Step 1: Remove Default Zoom Animations
Start by selecting the object (e.g., your logo or text) and removing any existing zoom animations. This ensures a clean slate for your custom animation.
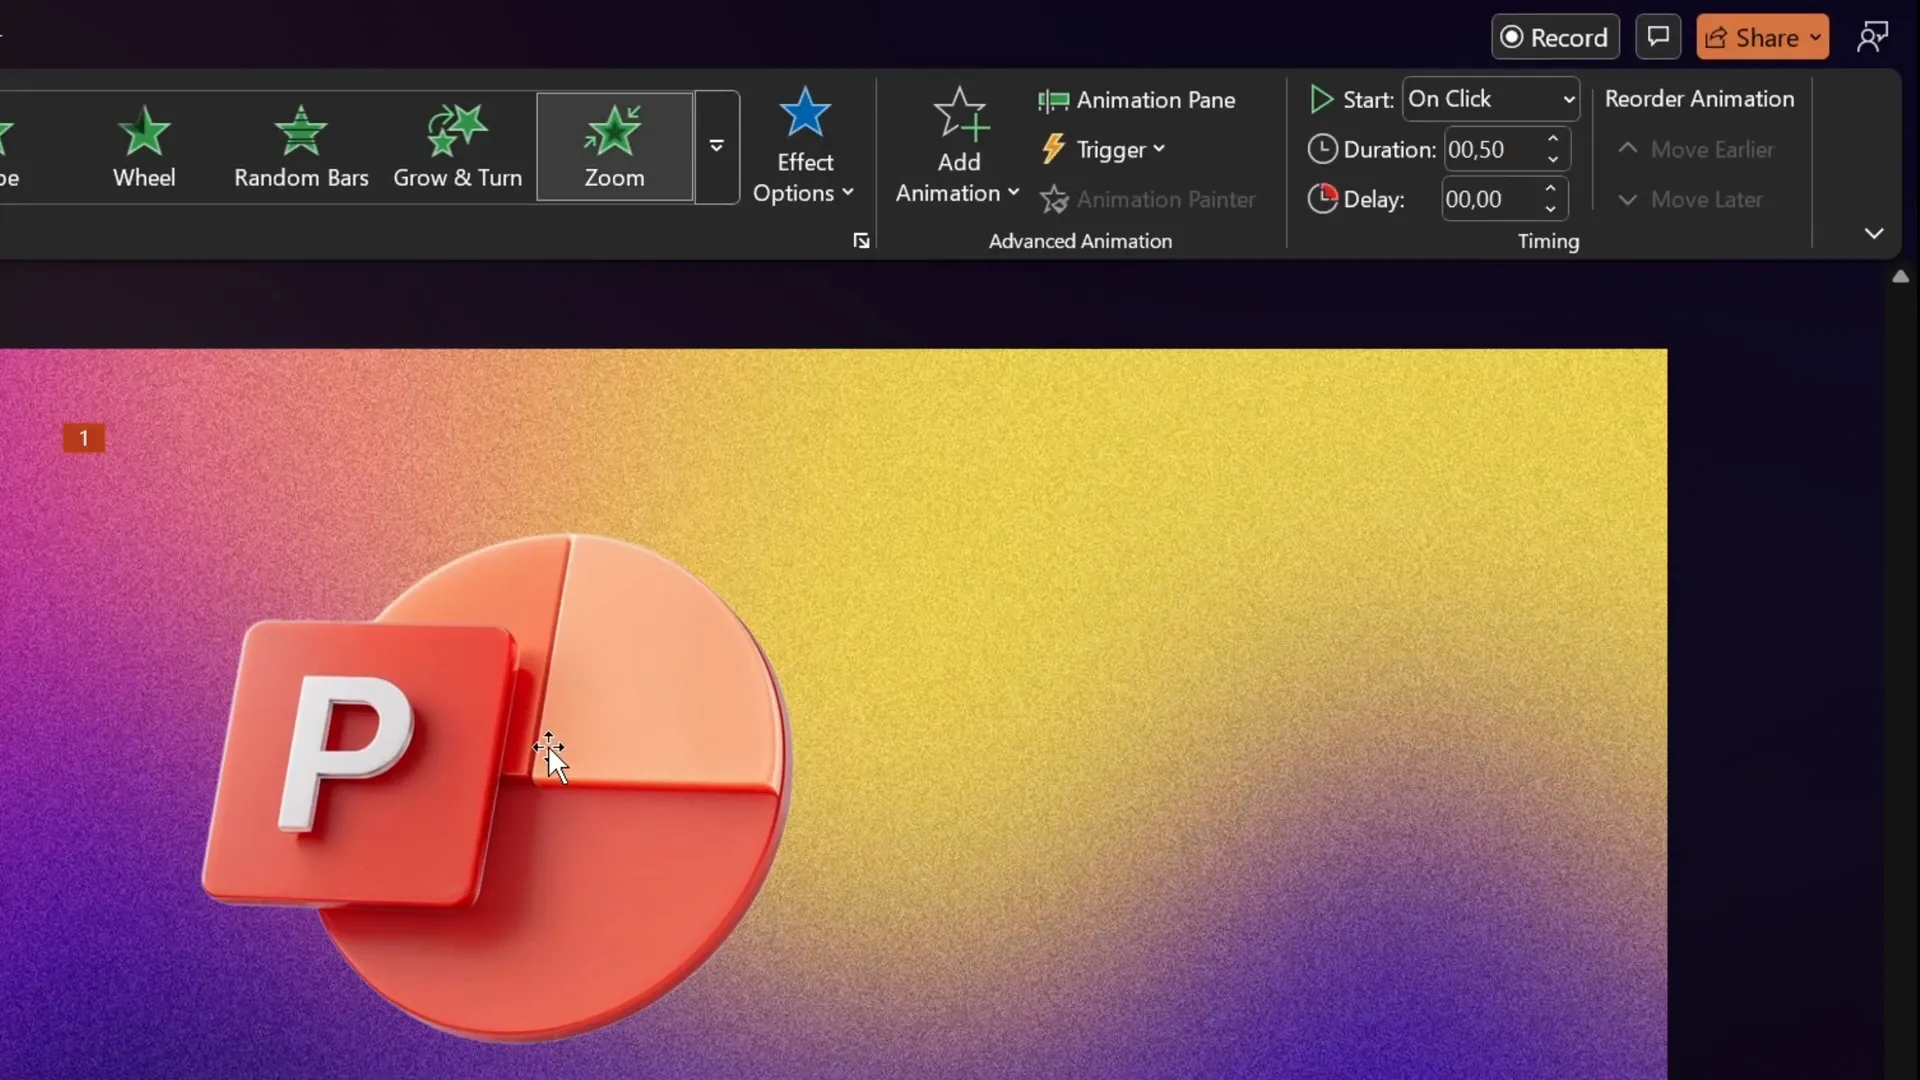
Step 2: Add the First Grow/Shrink Animation to Shrink the Object
- Select the object.
- Open the Animation Pane (found in the Animations tab).
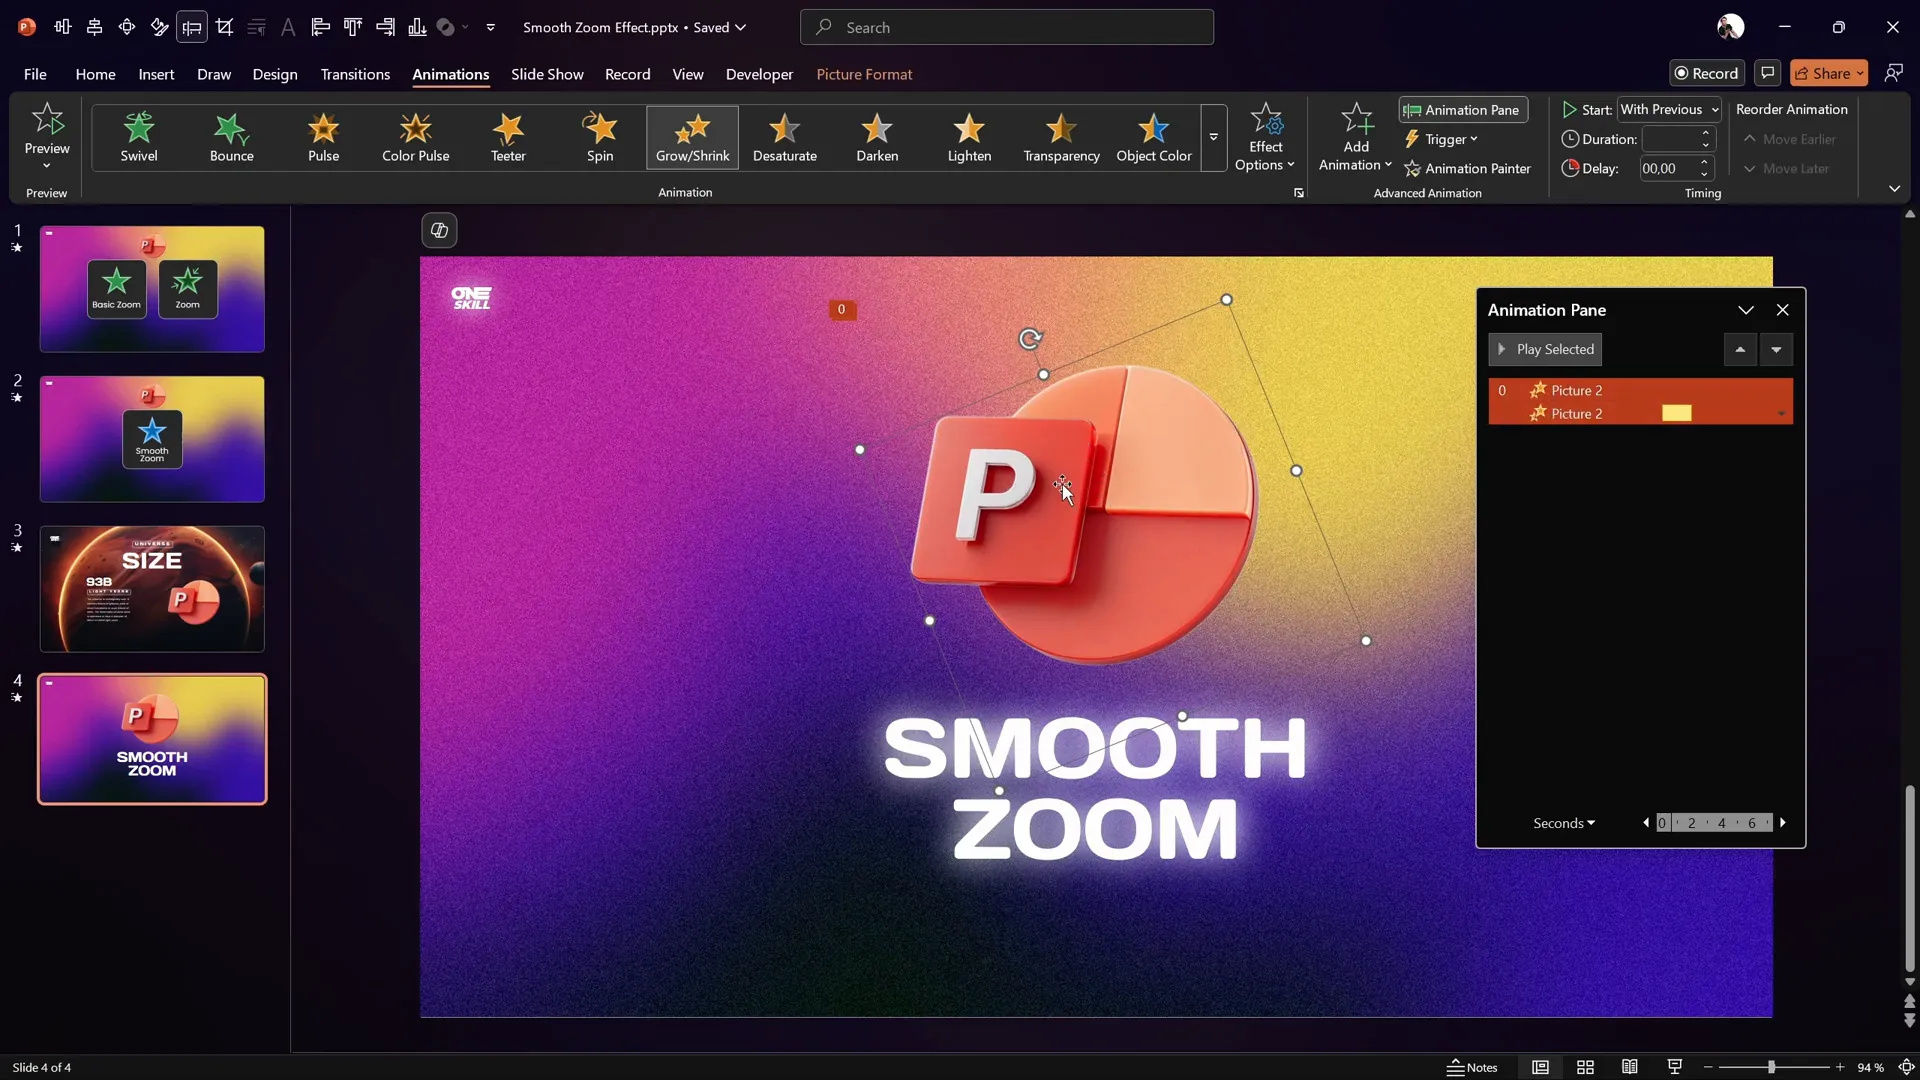
- Add a Grow/Shrink animation.
- Set the animation to start With Previous so it triggers automatically.
- Set the duration to the shortest possible time: 0.01 seconds.
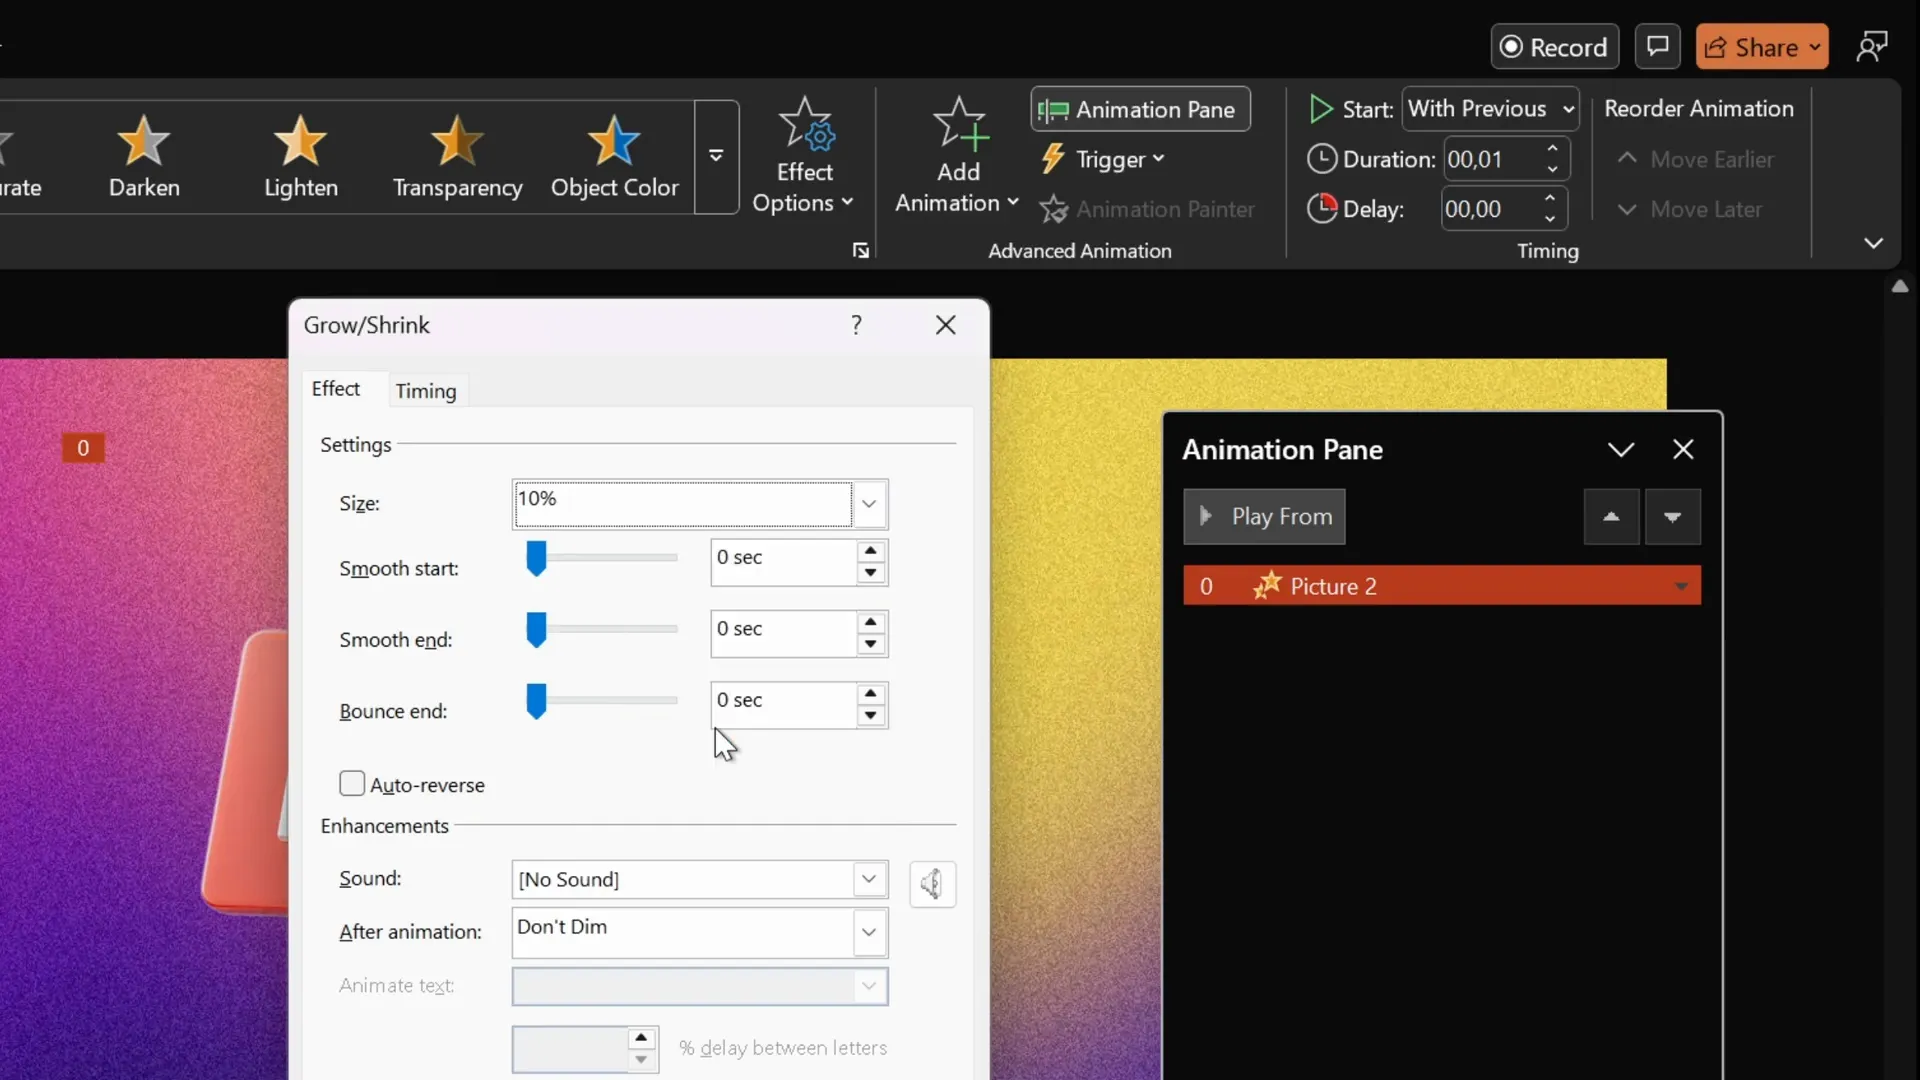
- Double-click the Grow/Shrink animation in the Animation Pane to open its settings.
- Set the size to 10% (this shrinks the object to 10% of its original size instantly).
This step creates the initial “shrink” effect, setting up the object to grow back smoothly.
Step 3: Add the Second Grow/Shrink Animation to Grow the Object Back Smoothly
- With the object still selected, add another Grow/Shrink animation.
- Set this animation to start With Previous for seamless timing.
- Set the duration to 2 seconds for a slow, smooth zoom.
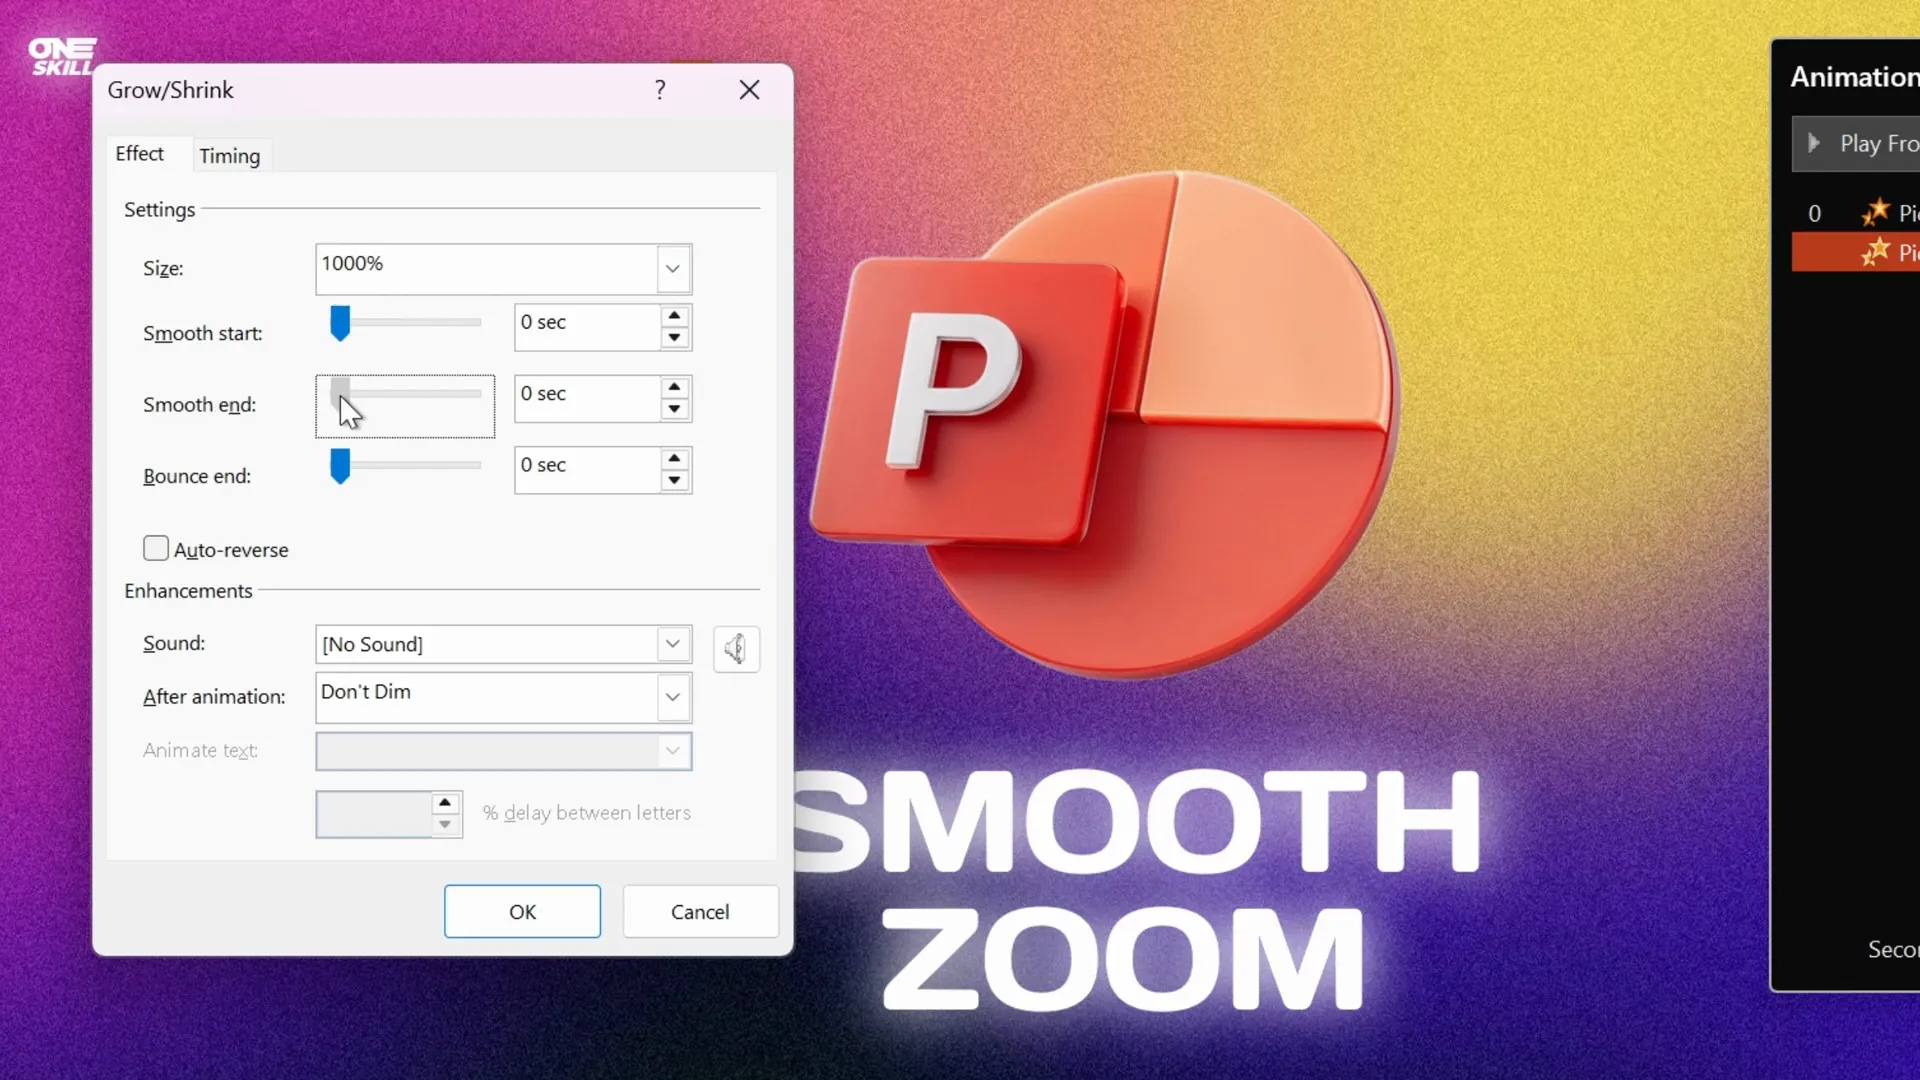
- Open the animation settings and set the size to 1000%.
- Adjust the Smooth End slider to the maximum value.
Why 1000%? Since the object was shrunk to 10% initially, growing it by 1000% returns it to its original size (10% × 1000% = 100%).
This step creates the smooth zoom-in effect with a soft landing.
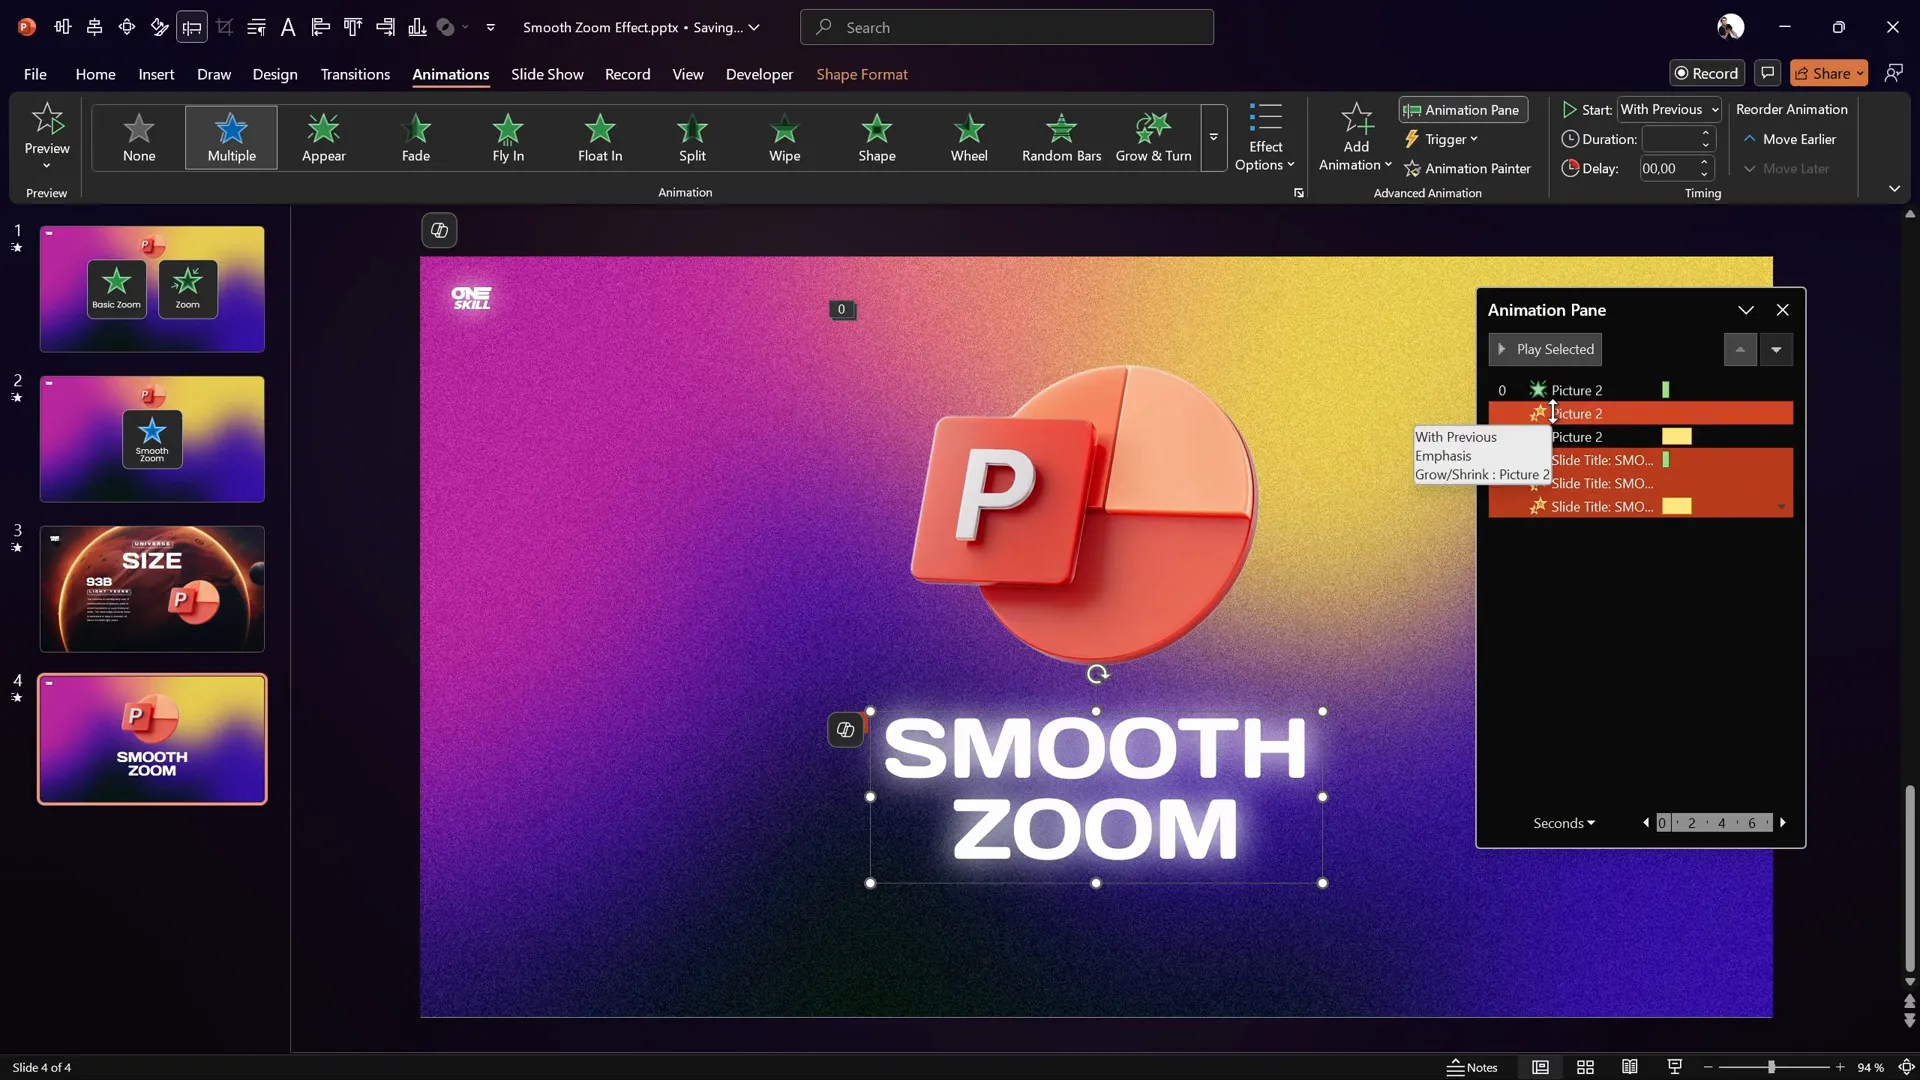
Step 4: Add a Fade-In Animation at the Beginning
- Select the object.
- Add a Fade animation.
- Move the fade animation to the top of the Animation Pane to ensure it triggers first.
- Set it to start With Previous.
- Set the duration to 0.5 seconds for a subtle fade-in.
The fade animation softens the appearance of the object before the zoom effect begins, making the entire entrance smooth and professional.

Step 5: Preview Your Smooth Zoom Animation
Run the slide show to see your smooth zoom animation in action. The object should fade in, shrink instantly, then grow back smoothly with a soft landing.
Applying the Animation to Other Slide Elements
Once you have created this smooth zoom animation on one object, you can quickly apply it to other slide elements like:
- Slide titles
- Subtitles
- Paragraph text
- Other shapes or logos
Simply use PowerPoint’s Animation Painter tool to copy the animation settings from one object and paste them onto another.
This feature saves you time and ensures consistency across your presentation.
Tips to Master PowerPoint Animation Effects
Mastering PowerPoint animation effects, especially custom ones like the smooth zoom, can elevate your presentations dramatically. Here are some professional tips to help you along the way:
| Tip | Description | Benefit |
|---|---|---|
| Use “With Previous” Start Option | Set animations to start with the previous one for seamless transitions. | Creates smooth animation sequences without awkward pauses. |
| Adjust Duration Carefully | Use very short durations for instant effects and longer durations for smooth transitions. | Controls the pacing to keep animations natural and engaging. |
| Leverage Smooth End Slider | Use the built-in smooth end option in Grow/Shrink animations. | Produces soft, polished animation endings. |
| Combine Animations | Layer fade, grow/shrink, spin, or fly animations for complex effects. | Enables creation of custom animations beyond defaults. |
| Use Animation Painter | Copy and paste animation settings between objects. | Saves time and maintains consistency. |
| Practice Animation Timing | Preview and adjust timings to match your speech or slide flow. | Ensures animations enhance rather than distract from your message. |
If you want to dive deeper and master all PowerPoint animations, consider exploring dedicated courses like the PowerPoint Animation Mastery course by One Skill PPT, which offers step-by-step guidance and insider tips from years of experience.
FAQ: Smooth Zoom Animation in PowerPoint
Q1: Can I create a smooth zoom animation without combining multiple effects?
A: Unfortunately, PowerPoint does not provide a built-in smooth zoom animation with a soft end. Combining Grow/Shrink and Fade animations is the best way to achieve this effect.
Q2: What versions of PowerPoint support the Grow/Shrink animation with smooth end options?
A: Most modern versions of PowerPoint (2016 and later) support these animations. If you cannot find the smooth end slider, ensure your PowerPoint is updated.
Q3: How do I apply the smooth zoom animation to multiple objects quickly?
A: Use the Animation Painter tool to copy the animation from one object and paste it onto others, maintaining consistent animation settings.
Q4: Can I adjust the speed of the smooth zoom animation?
A: Yes, you can modify the duration of the Grow/Shrink animations to speed up or slow down the zoom effect as needed.
Q5: Is it possible to add other effects like spin or fly along with smooth zoom?
A: Yes, you can layer additional animations such as spin or fly, but be mindful not to overwhelm your audience with too many simultaneous effects.
Conclusion
Creating smooth, professional PowerPoint animation effects can significantly improve the impact of your presentations. While PowerPoint’s default zoom animations are functional, their abrupt endings can disrupt the flow and feel less polished.
By combining Grow/Shrink animations with fade effects and leveraging the smooth end option, you can craft a custom smooth zoom animation that elevates your slides with elegant, soft zoom-ins. This technique is versatile, applicable to logos, text, and shapes, and can be quickly replicated across your presentation using the Animation Painter.
Experiment with the timing and smooth end settings to find the perfect pace for your content. And if you want to master these and other PowerPoint animation effects comprehensively, consider investing in expert courses like the PowerPoint Animation Mastery course.
With this knowledge and technique in your toolkit, your next presentation will not only look great but also engage your audience more effectively, making your message memorable and impactful.
Happy animating!