PowerPoint animation effects can transform a basic presentation into a captivating visual story. Inspired by the recent announcement of Microsoft 365 Copilot, an AI productivity tool that integrates seamlessly with Microsoft 365 apps like Word, Excel, Outlook, and PowerPoint, I decided to recreate one of the most eye-catching animations featured in the Copilot demo. This article will walk you through how to make beautiful photo crop animations combined with elegant text reveal effects using PowerPoint’s powerful Morph transition. Whether you’re a beginner or looking to elevate your presentation design skills, this step-by-step guide will help you master these effects and impress your audience.
Let’s dive into the process of creating polished animations that appear as if they were generated by AI—without the AI! By the end of this post, you’ll understand how to use shapes, photo cropping, and Morph transitions to create dynamic, professional-looking slides.
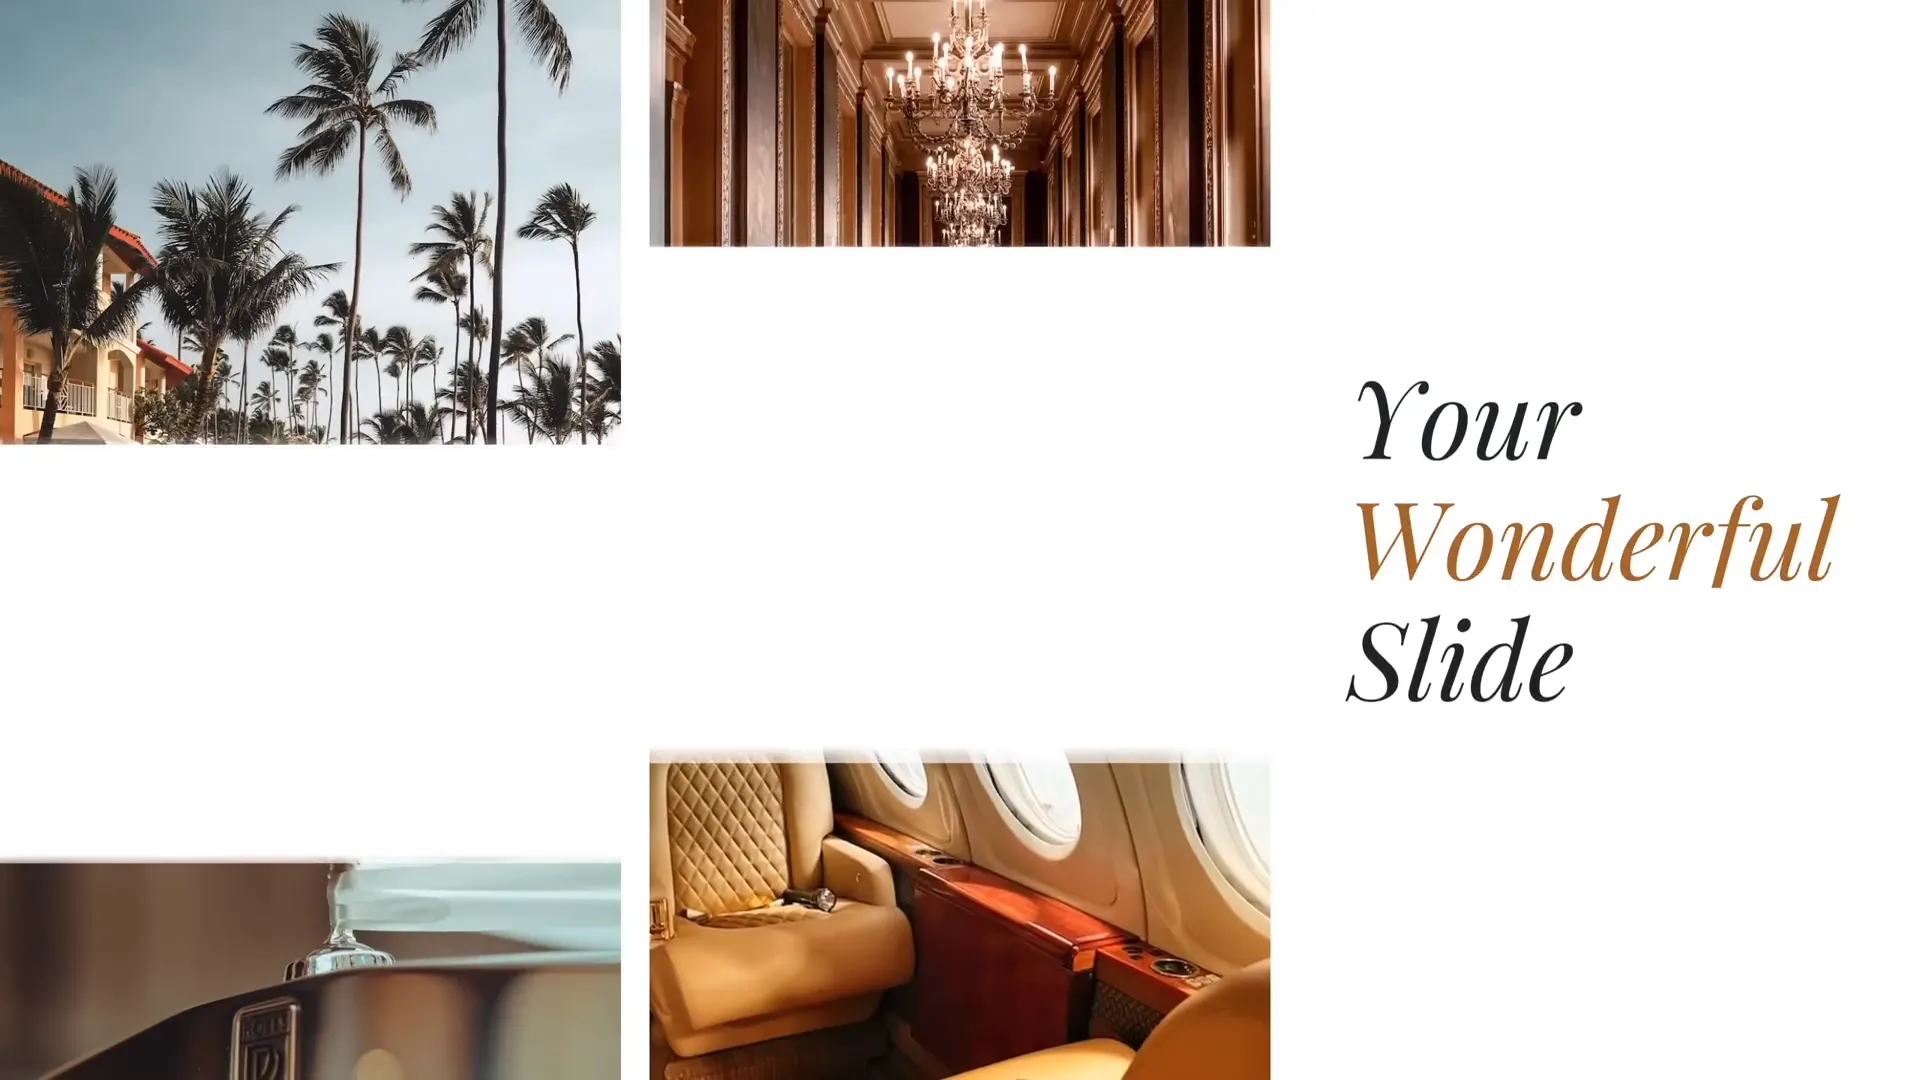
Table of Contents
- Introduction to PowerPoint Animation Effects
- Preparing the Slide Layout
- Filling Rectangles with Photos Using Merge Shapes
- Working with Text Boxes and Fonts
- Applying Morph Transition for Animation
- Creating the Photo Crop Animation
- Adding Delays to Photo Animations
- Conclusion and Next Steps
- Frequently Asked Questions (FAQ)
Introduction to PowerPoint Animation Effects
Microsoft 365 Copilot is a cutting-edge AI tool that enhances productivity by integrating AI capabilities directly into Microsoft 365 apps. One of the standout features shown in Copilot’s announcement was its ability to quickly turn written documents into PowerPoint presentations, complete with professional animations that bring slides to life.
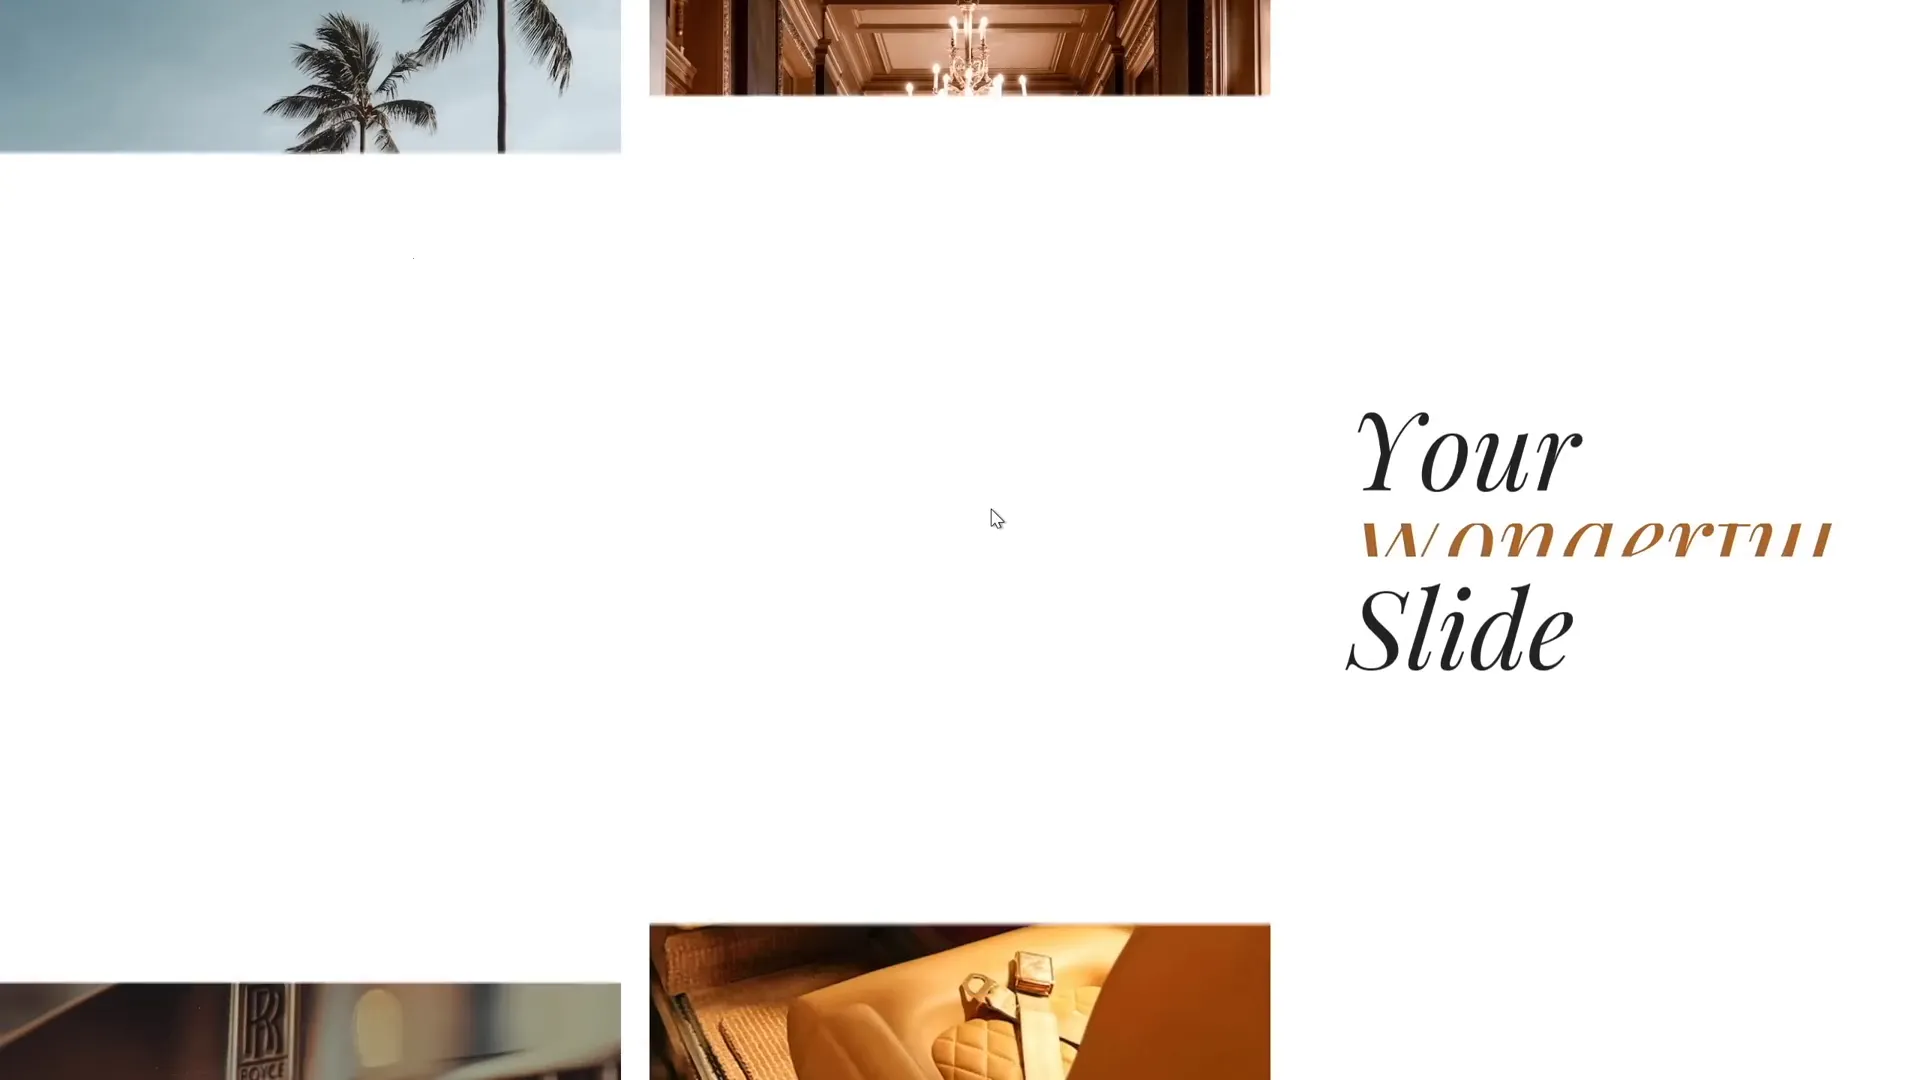
Among these animations, the photo crop effect paired with a text reveal on the right side stood out for its sleek, modern look. Since Copilot isn’t publicly available yet, I took it upon myself to recreate a similar animation using PowerPoint’s in-built features, primarily focusing on the Morph transition.
This powerful transition enables smooth and automatic animation effects by morphing objects from one slide to the next, creating visually stunning movement without the need for complex animation timelines or triggers.
Before we begin, here’s a quick overview of the tools we’ll use:
- Rectangles with varying heights: To create an interesting photo grid.
- Photos from Unsplash: High-quality, free images used to fill the rectangles.
- Playfair Display font: A stylish serif font for the text elements.
- Morph transition: The key to animating the slide elements seamlessly.
- PowerPoint’s Merge Shapes tool: To crop photos inside shapes.
Preparing the Slide Layout
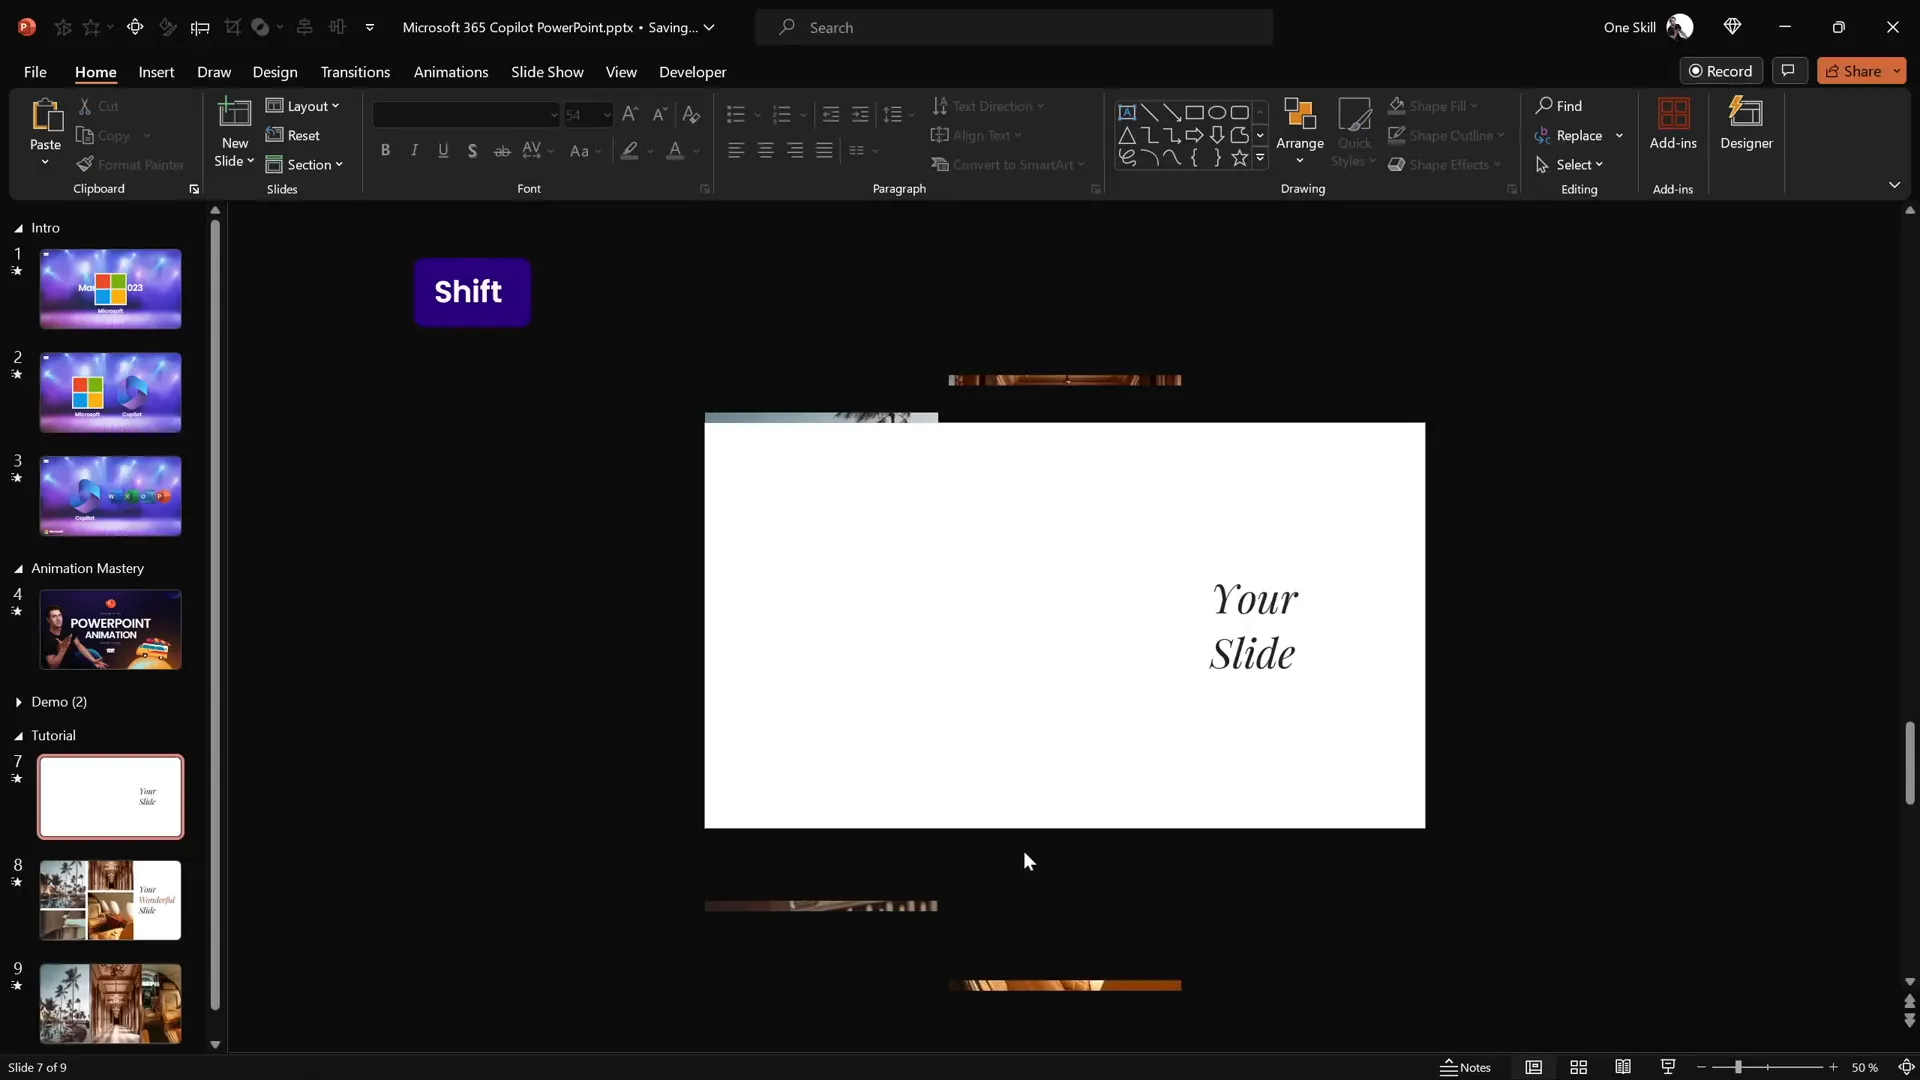
To start, open a new PowerPoint slide and insert four rectangles on the left side of the slide. These rectangles should have different heights to add visual interest and variety. Make sure to maintain equal gaps between them to keep the slide balanced and aesthetically pleasing.
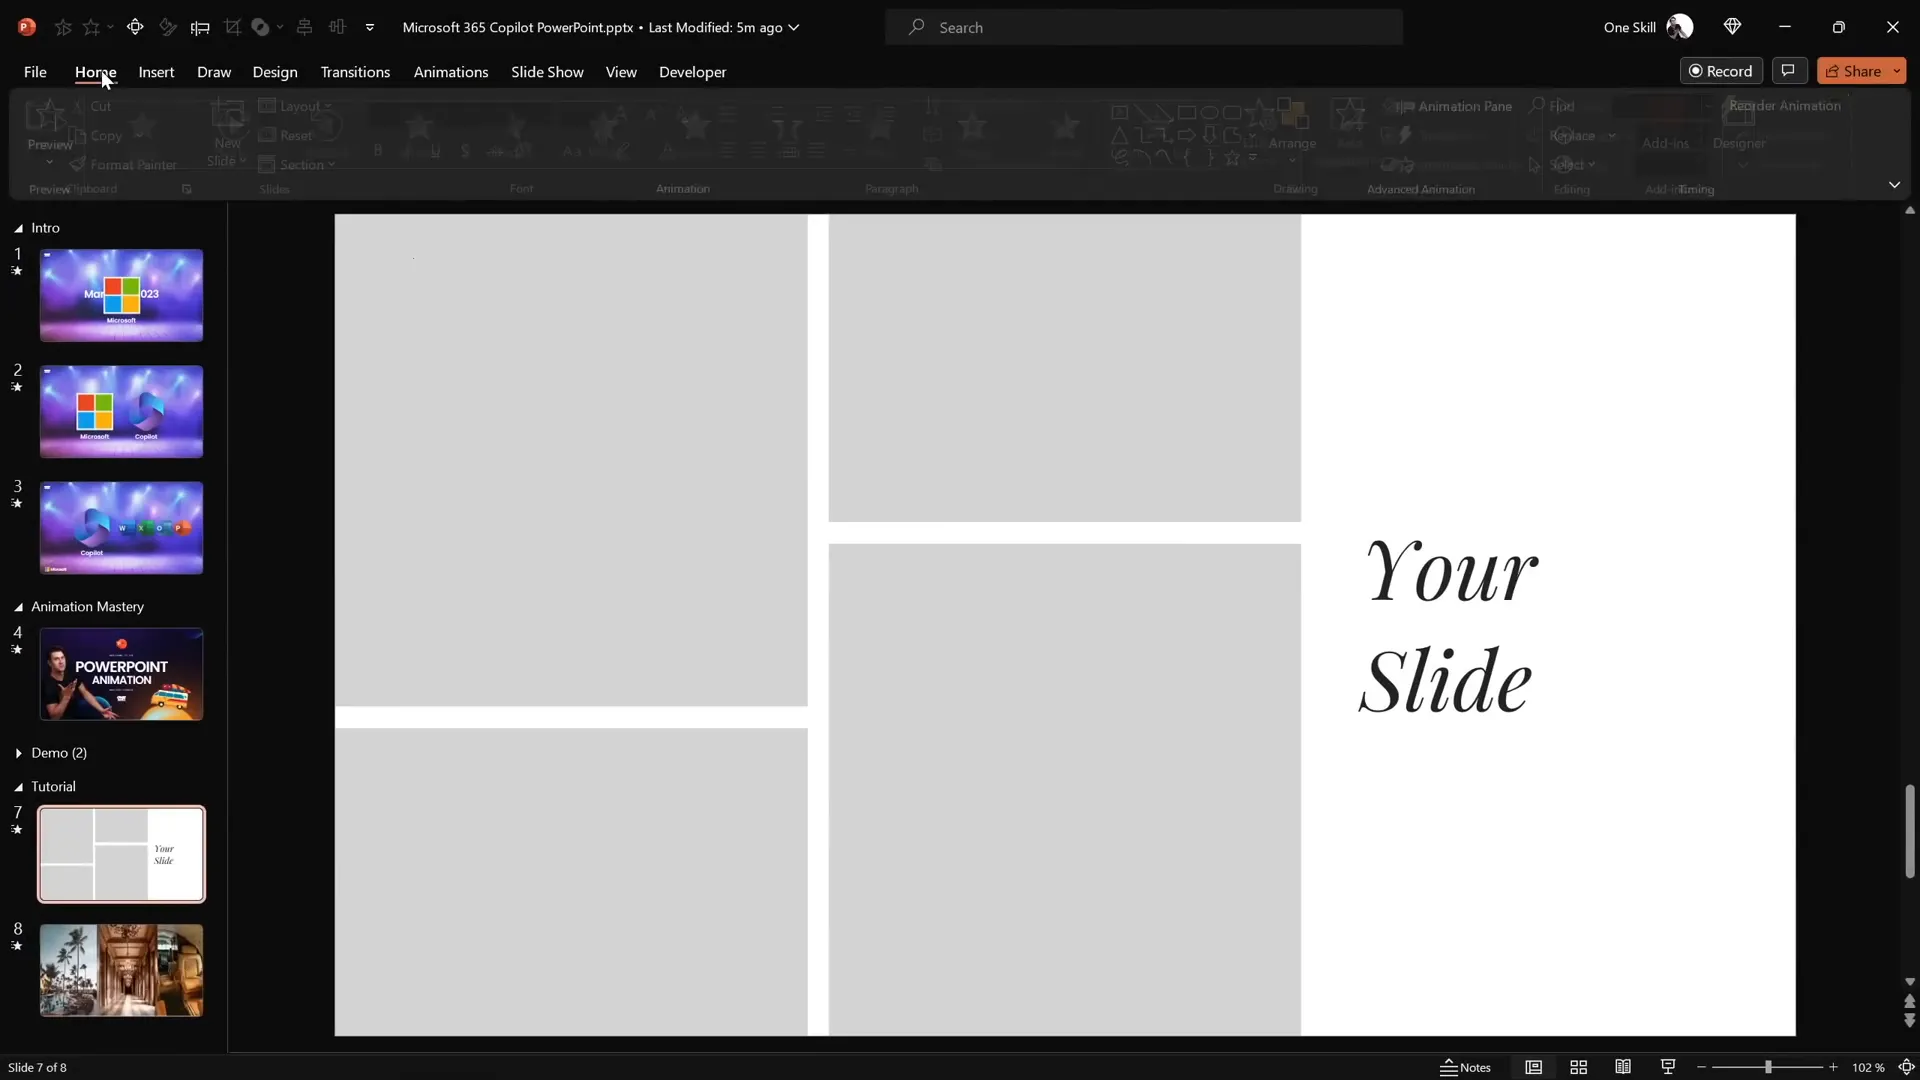
On the right side, add two simple text boxes. For the font, I used Playfair Display at size 54 to give the text a refined and elegant look. This font is freely available on Google Fonts and adds a professional feel to your presentation.
Make sure your slide looks well balanced, with the rectangles aligned neatly on the left and the text boxes on the right. You can adjust the positioning and spacing using the Align and Distribute tools in PowerPoint to ensure everything is perfectly spaced.
Tips for Layout Preparation
- Use the Align and Distribute features in the Shape Format tab to evenly space your rectangles and text boxes.
- Keep the slide background simple to let your photo and text animations stand out.
- Choose a font size and style that is readable but also fits the design aesthetic you want.
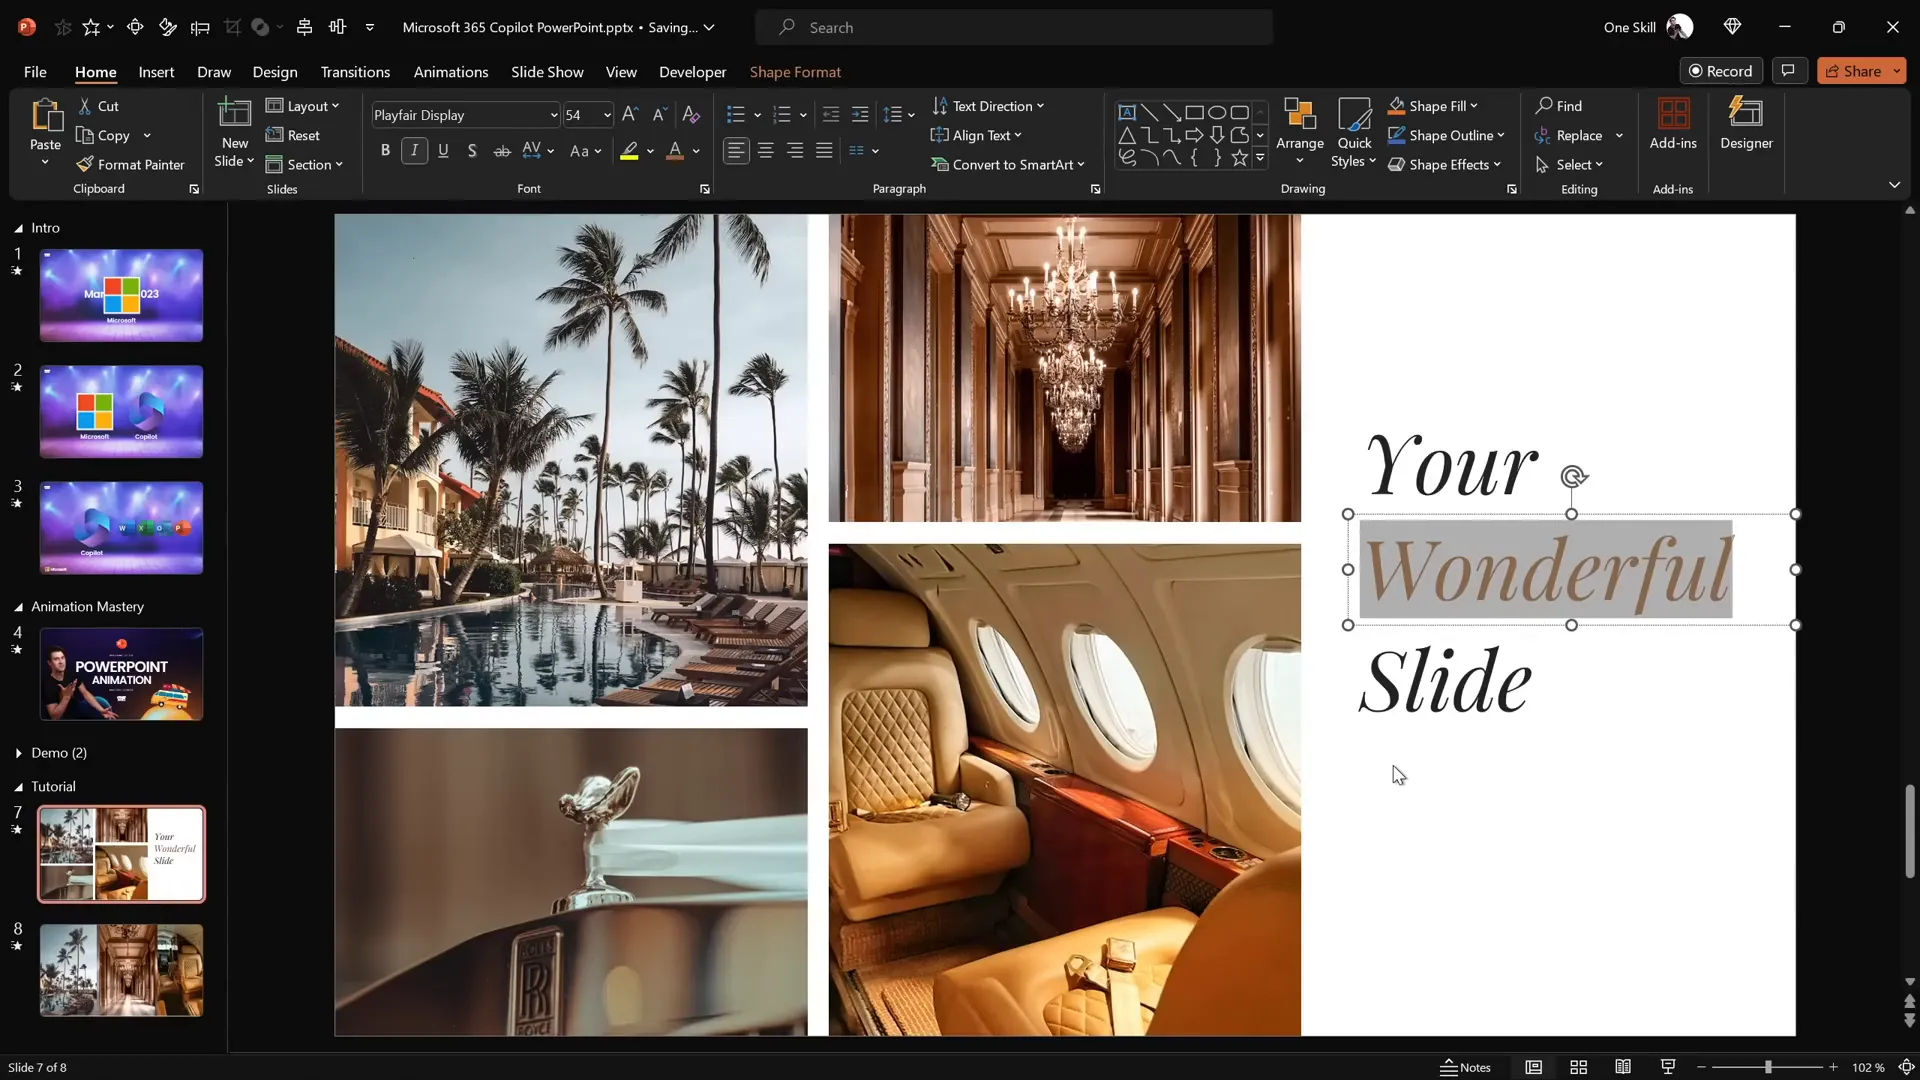
Filling Rectangles with Photos Using Merge Shapes
The next step is to fill each of the rectangles with photos. While PowerPoint provides a straightforward way to fill shapes with pictures through the Format Shape pane, this method doesn’t always give the best visual results for animation purposes.
Instead, I recommend a more advanced but effective approach using the Merge Shapes tool:
- Upload or insert your photos onto the slide. I sourced mine from Unsplash—a fantastic site offering free, high-quality images.
- Position a photo directly over a rectangle, aligning it carefully. For example, drag the photo to the bottom-left corner of the rectangle.
- Send the photo to the back layer (right-click → Send to Back) so it rests behind the rectangle.
- Select the photo, hold down the Shift key, then select the rectangle.
- Go to the Shape Format tab, click Merge Shapes, and choose Intersect.
Voilà! The photo is now perfectly cropped within the shape of the rectangle. Repeat these steps for all four rectangles.

If you want to adjust how the photo fits inside the cropped shape, just select the cropped image, click Crop in the Picture Format tab, and reposition or resize the image within the crop area.
Benefits of Using Merge Shapes for Photo Cropping
- Precise control over photo placement within shapes.
- Improved visual consistency across multiple cropped images.
- Better compatibility with Morph transition animations.
Working with Text Boxes and Fonts
Now, let’s refine the text on the right side of the slide. We initially created two text boxes, but we need a third one to complete the effect.
- Select one of the existing text boxes.
- Hold down Ctrl + Shift and drag the text box vertically to create a copy aligned perfectly.
- Change the text in the middle box to something meaningful, like wonderful.
- Adjust the text color to complement your slide design—something vibrant yet readable.
- Select all three text boxes and use the Distribute Vertically option to space them evenly.
- Group the three text boxes together and center them on the slide.
- Ungroup them if you want to make individual adjustments later.
For the top and bottom text boxes, add a solid white fill to create a masking effect during the animation:
- Select the top and bottom text boxes.
- Go to Format Shape → Fill → Solid Fill and choose white.
- Send these two text boxes to the front so they can hide the middle text box during the animation.
This setup ensures the middle text box will be revealed smoothly during the Morph transition.
Applying Morph Transition for Animation
With the slide content ready, it’s time to bring the animation to life using the Morph transition.
- Duplicate the completed slide. The first slide will be your starting point, and the duplicate will be the destination for the Morph effect.
- On the duplicate slide, go to Transitions and select Morph.
- On the first slide, you can keep the Fade transition or none—it doesn’t affect the Morph animation.
- On the first slide, hide the middle text box by either deleting it or moving it off-slide.
- Drag the top text box downward until it touches the middle line of the slide.
- Drag the bottom text box upward until it covers the middle text box, effectively hiding it.
When you preview the transition, the Morph effect animates the text boxes sliding smoothly, revealing the middle text box in a beautiful text reveal animation.

Why Morph Transition?
The Morph transition is a game-changer in PowerPoint animation effects. Unlike traditional animations that require complex timelines, Morph automatically animates changes in position, size, and appearance between two slides, creating seamless movement. This makes your slides dynamic without manual animation setup.

Creating the Photo Crop Animation
Next, let’s animate the photos on the left side. The key to this effect is manipulating the crop handles of each photo between the two slides to create a smooth “photo crop” animation.
- Return to the first slide and zoom out to see all four photo rectangles clearly.
- Select the top-left photo, go to Picture Format → Crop.
- Drag the bottom cropping handle slightly outside the slide boundary to create a “crop-in” effect during Morph.
- Repeat for the top-right photo, moving its bottom crop handle outside the slide as well.
- For the two bottom photos, drag the top cropping handle down beyond the bottom of the slide.
When you transition to the second slide with Morph activated, the photos animate by cropping into view, just like in the Microsoft 365 Copilot animation.
Tips for Effective Photo Crop Animations
- Move crop handles just enough outside the slide to create smooth animation without abrupt cropping.
- Ensure photos remain aligned with their rectangles for consistency.
- Use high-resolution photos to maintain image quality during cropping.
Adding Delays to Photo Animations
In the original Copilot animation, the photos didn’t all animate simultaneously—they appeared with slight delays, adding a refined rhythm to the presentation.
To replicate this using Morph, adjust the distance each photo is moved outside the slide on the first slide:
- Photos moved further away from the slide will take longer to animate into the slide on the transition.
- Photos closer to the slide boundary will animate in sooner.
By staggering the crop positions, you create natural-looking delays between each photo’s animation, enhancing the overall effect.
Preview the Morph transition again to see the staggered photo crop animation in action. Notice how the top-right photo appears slightly later than the top-left photo, and the bottom photos animate with their own timing.
Conclusion and Next Steps
Congratulations! You now know how to create a stunning photo crop animation paired with a sleek text reveal effect inspired by the Microsoft 365 Copilot demo. With just a few rectangles, photos, text boxes, and the Morph transition, you can produce animations that look professional and engaging without complicated animation setups.
This method leverages PowerPoint’s built-in tools creatively, showing that with some practice and imagination, you can unlock powerful PowerPoint animation effects to level up your presentations.
Here’s a quick recap of what you learned:
| Step | Description | Key PowerPoint Tool |
|---|---|---|
| 1. Slide Layout | Create rectangles with varying heights and text boxes with the Playfair Display font. | Align, Distribute |
| 2. Photo Cropping | Use Merge Shapes → Intersect to crop photos inside rectangles. | Merge Shapes, Crop |
| 3. Text Box Styling | Add solid white fills to top and bottom text boxes for masking during animation. | Format Shape Fill |
| 4. Morph Transition | Duplicate slide and animate text boxes and photos for smooth reveal and crop effects. | Transitions → Morph |
| 5. Animation Delays | Stagger photo positions outside slide to create natural animation delays. | Crop Handles, Morph |
If you want to deepen your mastery of Morph transitions and PowerPoint animations, consider exploring courses and tutorials dedicated to animation techniques. Mastering these effects will give you a major edge in crafting memorable presentations.
Frequently Asked Questions (FAQ)
What is the Morph transition in PowerPoint?
The Morph transition is a feature that animates smooth movement, resizing, and transformation of objects between two slides. It helps create professional animations without complex timelines or triggers.
Can I use any photos for the photo crop animation?
Yes, but for the best visual quality, use high-resolution photos that fit well with the shape sizes. I recommend free, high-quality photos from sites like Unsplash.
Is Playfair Display the only font I can use?
No, you can use any font that fits your presentation style. Playfair Display is a stylish serif font that works well for elegant text reveals, but feel free to experiment with other fonts.
How do I add delays to animations using Morph?
By positioning objects at different distances outside the slide boundaries on the starting slide, Morph creates staggered animation timing when transitioning to the next slide.
Is this animation effect compatible with older versions of PowerPoint?
The Morph transition is available in PowerPoint 2019, PowerPoint for Microsoft 365, and PowerPoint Online. Older versions might not support this feature, so check your PowerPoint version for compatibility.
Where can I learn more about advanced PowerPoint animations?
There are many online courses and tutorials available. For example, consider PowerPoint animation mastery courses that cover Morph and other animation effects in depth.
Check out the full video: How I Made Microsoft 365 Copilot Animation in PowerPoint 😁✨


