

Creating engaging and visually dynamic presentations is a skill every professional and educator strives to master. One of the most powerful yet underutilized features in PowerPoint that can elevate your slides is the Morph Transition. This technique allows you to craft smooth animations and transitions between slides, making your presentation not only more attractive but also more impactful.
In this comprehensive guide, I’ll walk you through the step-by-step process to create a captivating morph animation slide in PowerPoint, focusing on an airplane taking off and flying over different cityscapes. Whether you’re a beginner or an intermediate PowerPoint user, this tutorial will equip you with the skills to transform your static slides into animated stories that captivate your audience.
- What is the Morph Transition in PowerPoint?
- Preparing Your Slide Assets
- Creating and Customizing Shapes for Background
- Inserting Images and Adding Text
- Duplicating and Editing Slides for Animation
- Applying the Morph Transition
- Customizing Your Animation Timing and Effects
- Tips and Tricks for Polished Morph Animation Slides
- Frequently Asked Questions
- Conclusion
What is the Morph Transition in PowerPoint?
The Morph Transition is a dynamic PowerPoint feature that creates seamless movement and transformation effects between slides. It works by comparing the objects on two consecutive slides and animating the changes in position, size, color, and other properties.
For example, if you have an image of a plane on one slide and then increase its size or move it to a different location on the next slide, applying the Morph Transition will smoothly animate the plane moving and resizing, rather than abruptly switching to the new slide.
This feature opens up exciting possibilities for storytelling, making your presentations more engaging and professional.
Preparing Your Slide Assets
Before diving into the animation process, it’s crucial to gather and prepare the assets you will use, including images and shapes.
- Airplane Image: Download a PNG image of an airplane with a transparent background to allow easy layering over other images.
- Background Images: Collect high-quality aerial views of airports, cityscapes, mountain views, landscapes, and sunset scenes depending on your story.
- Fonts: Choose clear, bold fonts like Open Sans Extra Bold for titles and simple fonts for detailed text to ensure readability.
Most images can be sourced from free stock photo websites or directly inserted through PowerPoint’s online picture search feature.
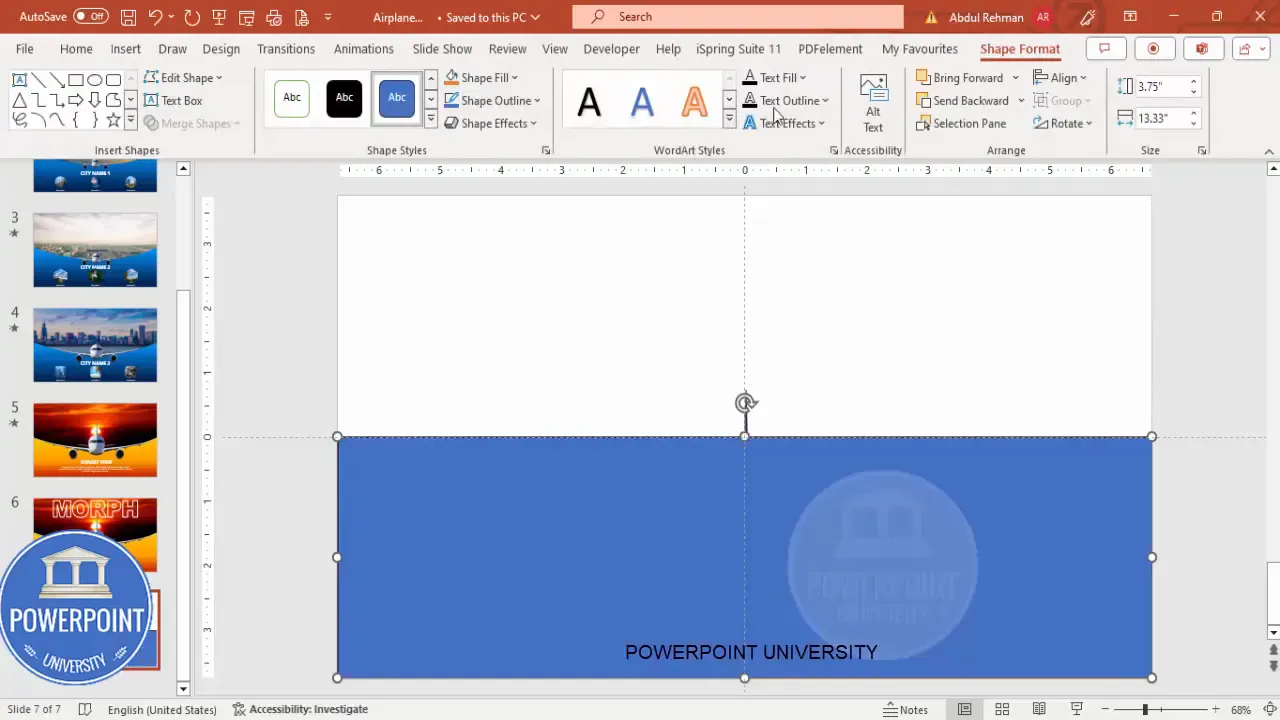
Creating and Customizing Shapes for Background
To create a visually appealing background that complements your images, you can use PowerPoint’s shape tools. Here’s how to create a custom curved shape with a gradient fill:
- Insert a Rectangle: Go to Insert > Shapes > Rectangle and draw a rectangle covering the desired background area, such as from the airplane’s tail down to the bottom of the slide.
- Remove Outline: Select the shape, go to Shape Outline and select No Outline to keep the background clean.
- Send to Back: Right-click the shape and choose Send to Back so that images and text appear on top.
- Edit Points to Curve: Right-click the rectangle and select Edit Points. Drag the top right and top left points downward to create a curved shape that mimics a horizon or wave.
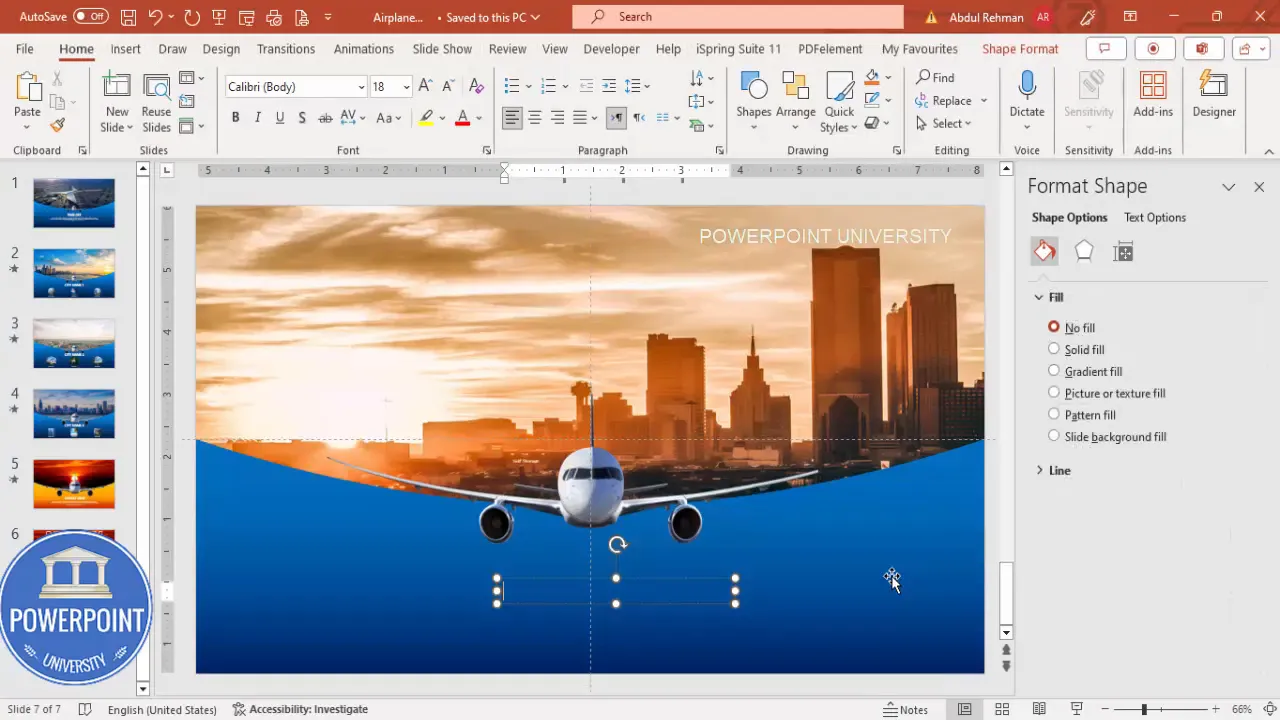
- Apply Gradient Fill: Right-click the shape and select Format Shape. Under Fill, choose Gradient Fill. Delete two of the four gradient stops and adjust the remaining stops to a dark blue and light blue gradient to simulate sky or water.
This gradient background adds depth and professionalism to your slides.
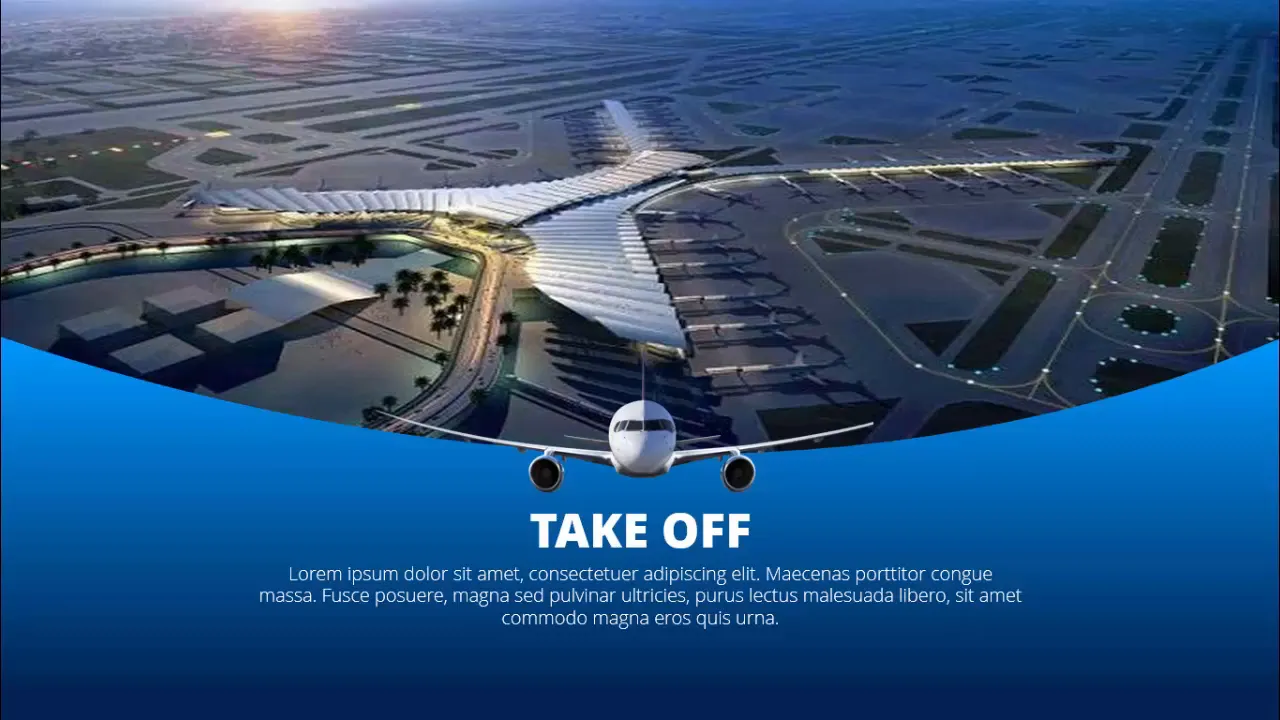
Inserting Images and Adding Text
Once the background is set, it’s time to insert your images and add descriptive text.
- Insert Background Images: Use the rectangle shape created earlier and fill it with pictures. You can insert pictures from your PC or use PowerPoint’s texture fill feature with online images.
- Adjust Image Properties: After inserting, uncheck the option Rotate with Shape if you don’t want the image to rotate when the shape is edited. Use offset settings to align the image perfectly within the shape.
- Add Text Boxes: Insert text boxes for city names, titles, and detailed information. Use clear fonts like Open Sans Extra Bold for headings and simple fonts for body text. Align text centrally for a balanced look.
- Color and Size: Use white font color for text on dark backgrounds to ensure readability.
This step personalizes your slides and provides context for your audience.
Duplicating and Editing Slides for Animation
To create the morph animation effect, you need multiple slides with gradual changes in object size, position, or content. Here’s how:
- Duplicate the Slide: Right-click the slide thumbnail and select Duplicate Slide. This saves time and ensures consistency in layout and design.
- Resize Objects: Select the airplane image and hold Ctrl + Shift while dragging a corner to increase the size proportionally. Gradually increase the plane size on subsequent slides to simulate it coming closer or taking off.
- Change Background Images: Replace the background images on each duplicated slide to show different cityscapes or views like mountains, landscapes, or sunsets.
- Update Text: Modify city names and attraction details to match the new background images, adding variety and context.
- Add Additional Images: Insert multiple images on slides if desired, such as three airport views or different attractions.
By duplicating and modifying slides, you prepare the content for smooth morph animation.

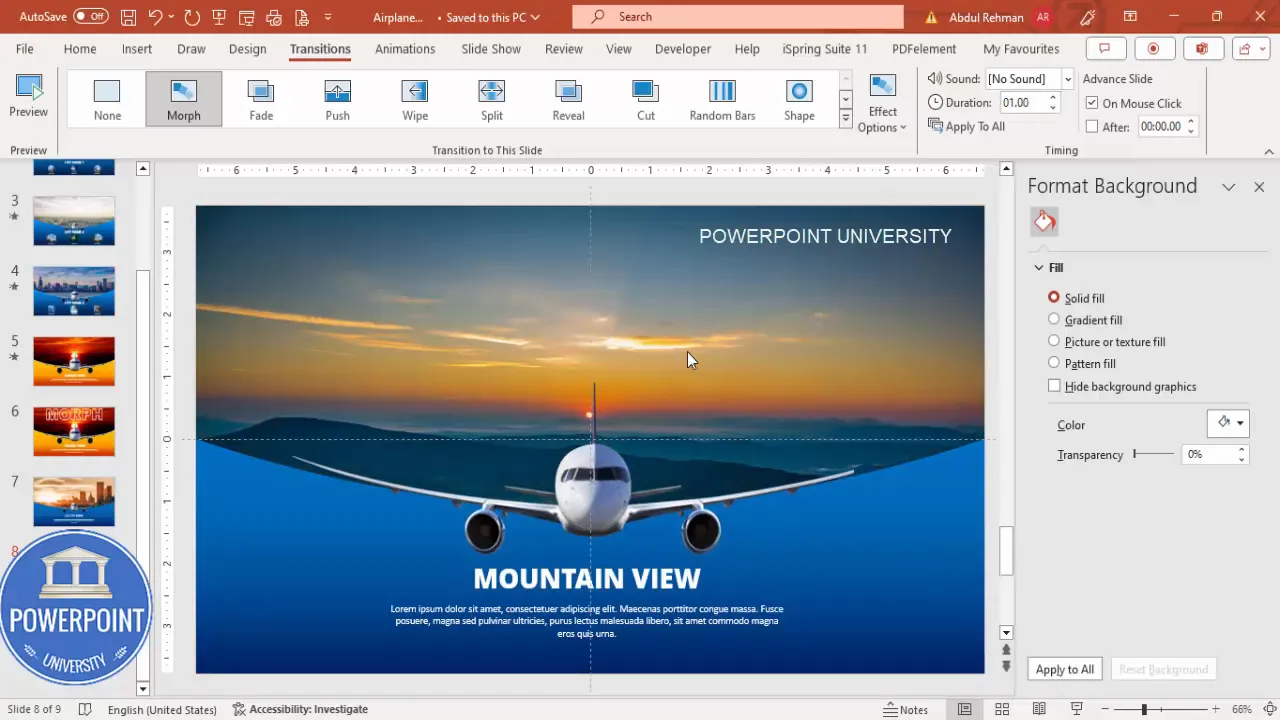
Applying the Morph Transition
With your slides ready, the next step is to apply the Morph Transition to create the animation effect.
- Select Slides: Click on the first slide, then hold Shift and select all subsequent slides you want to animate.
- Apply Morph: Go to the Transitions tab and select Morph from the transition options.
- Adjust Timing: Set the transition duration to around one second for smooth and quick animations.
- Test Animation: Run the slideshow from the beginning to see the airplane smoothly grow and the background images change in a dynamic, animated sequence.
This technique enhances storytelling, making your presentation visually appealing and memorable.
Create Slides in Seconds with ExpertSlides AI |
|
Generate AI Presentations today: |
| TRY NOW! |
Customizing Your Animation Timing and Effects
To further refine your morph animation slides, consider the following customizations:
| Customization | Purpose | How to Adjust |
|---|---|---|
| Transition Duration | Control speed of animation | Set duration in Transitions tab (e.g., 1 second) |
| Slide Order | Maintain logical flow | Drag slides in thumbnail pane to rearrange |
| Text Animation | Add emphasis to titles or details | Use Animations tab to add fade or zoom effects |
| Image Alignment | Ensure smooth morphing | Use guides and gridlines to align objects consistently |
| Shape Editing | Enhance background aesthetics | Adjust shape points or gradient stops in Format Shape |
Experimenting with these settings will help you create professional and polished PowerPoint animation slides that stand out.
Tips and Tricks for Polished Morph Animation Slides
- Use Guides and Gridlines: Enable guides (View > Guides) to position objects precisely for smooth morphing.
- Keep Fonts Consistent: Stick to one or two fonts throughout the presentation to maintain a cohesive look.
- Limit Text: Use concise text and bullet points to avoid cluttering slides and distracting from the animation.
- Choose High-Quality Images: Crisp images enhance professionalism and visual appeal.
- Test Transitions: Always preview your slideshow to ensure smooth animations and correct timing.
- Duplicate Slides for Variations: Use slide duplication to create multiple animation stages without recreating layouts from scratch.
- Use Transparent PNGs: For objects like airplanes, use PNG images with transparent backgrounds for seamless layering.
- Balance Colors: Use gradient fills and complementary colors to create depth and avoid flat-looking slides.
Frequently Asked Questions
What versions of PowerPoint support the Morph Transition?
The Morph Transition is available in PowerPoint 2016 and later versions, including Office 365. Ensure your software is updated to access this feature.
Can I morph between different shapes and images?
Yes, Morph can animate changes in size, position, color, and shape, as long as the objects exist on both slides. Using consistent object names helps Morph recognize the elements.
How do I ensure smooth morph animations?
Align objects consistently across slides and use the same object names where possible. Avoid drastic changes between slides for smoother transitions.
Can I use Morph Transition for text?
Yes, Morph can animate text boxes moving, resizing, or changing color, allowing dynamic text presentations.
Is it possible to add audio or other multimedia with Morph slides?
Yes, you can add audio, video, and other multimedia elements, but these won’t morph. You can set audio to play across slides to complement your animation.
Can I export Morph animations as video?
PowerPoint allows you to export your presentation as a video file, preserving Morph animations for sharing outside PowerPoint.
Conclusion
Mastering PowerPoint Animation Slides using the Morph Transition can dramatically enhance the quality and engagement level of your presentations. By following the steps outlined—from preparing your images and shapes, adding text, duplicating slides, to applying the Morph transition—you can create smooth, professional animations that tell compelling visual stories.
This technique is versatile and can be adapted for business presentations, educational content, marketing pitches, and more. The key is thoughtful preparation and attention to detail in aligning and sizing your objects across slides.
Remember, the Morph Transition is not just a flashy effect—it’s a storytelling tool that helps you guide your audience’s attention and make your message unforgettable. Take the time to experiment with different backgrounds, images, and timings to find the perfect flow for your presentation.
Start creating your own morph animation slides today, and watch your PowerPoint presentations transform into dynamic, engaging experiences.
Check out the full video: How to make Morph Animation Slides in PowerPoint


