If you’re looking to make your PowerPoint presentations more dynamic, engaging, and visually appealing, mastering PowerPoint animations is a must. Looping animations, in particular, can breathe life into your slides by continuously emphasizing key elements, animating backgrounds, or creating captivating effects that keep your audience hooked.
In this comprehensive guide, based on the expert tutorial by One Skill PPT, you’ll discover the five best ways to create looping animations in PowerPoint. From simple repeats to advanced seamless loops and sequence loops, this article will walk you through each technique with detailed steps, tips, and creative ideas to help you elevate your presentation game.
Table of Contents
- Simple Looping Animations
- Auto-Reverse Looping Animations
- Seamless Looping Animations
- Pause Loop Technique
- Sequence Loop Animations
- Bonus: Exporting PowerPoint Animations as GIFs
- Frequently Asked Questions (FAQ)
- Conclusion
1. Simple Looping Animations
Simple looping animations are the foundation for making elements on your slide continuously animate without stopping. This technique is great for spinning icons, moving objects along a path, or adding repeating text effects.
Examples of Simple Looping Animations
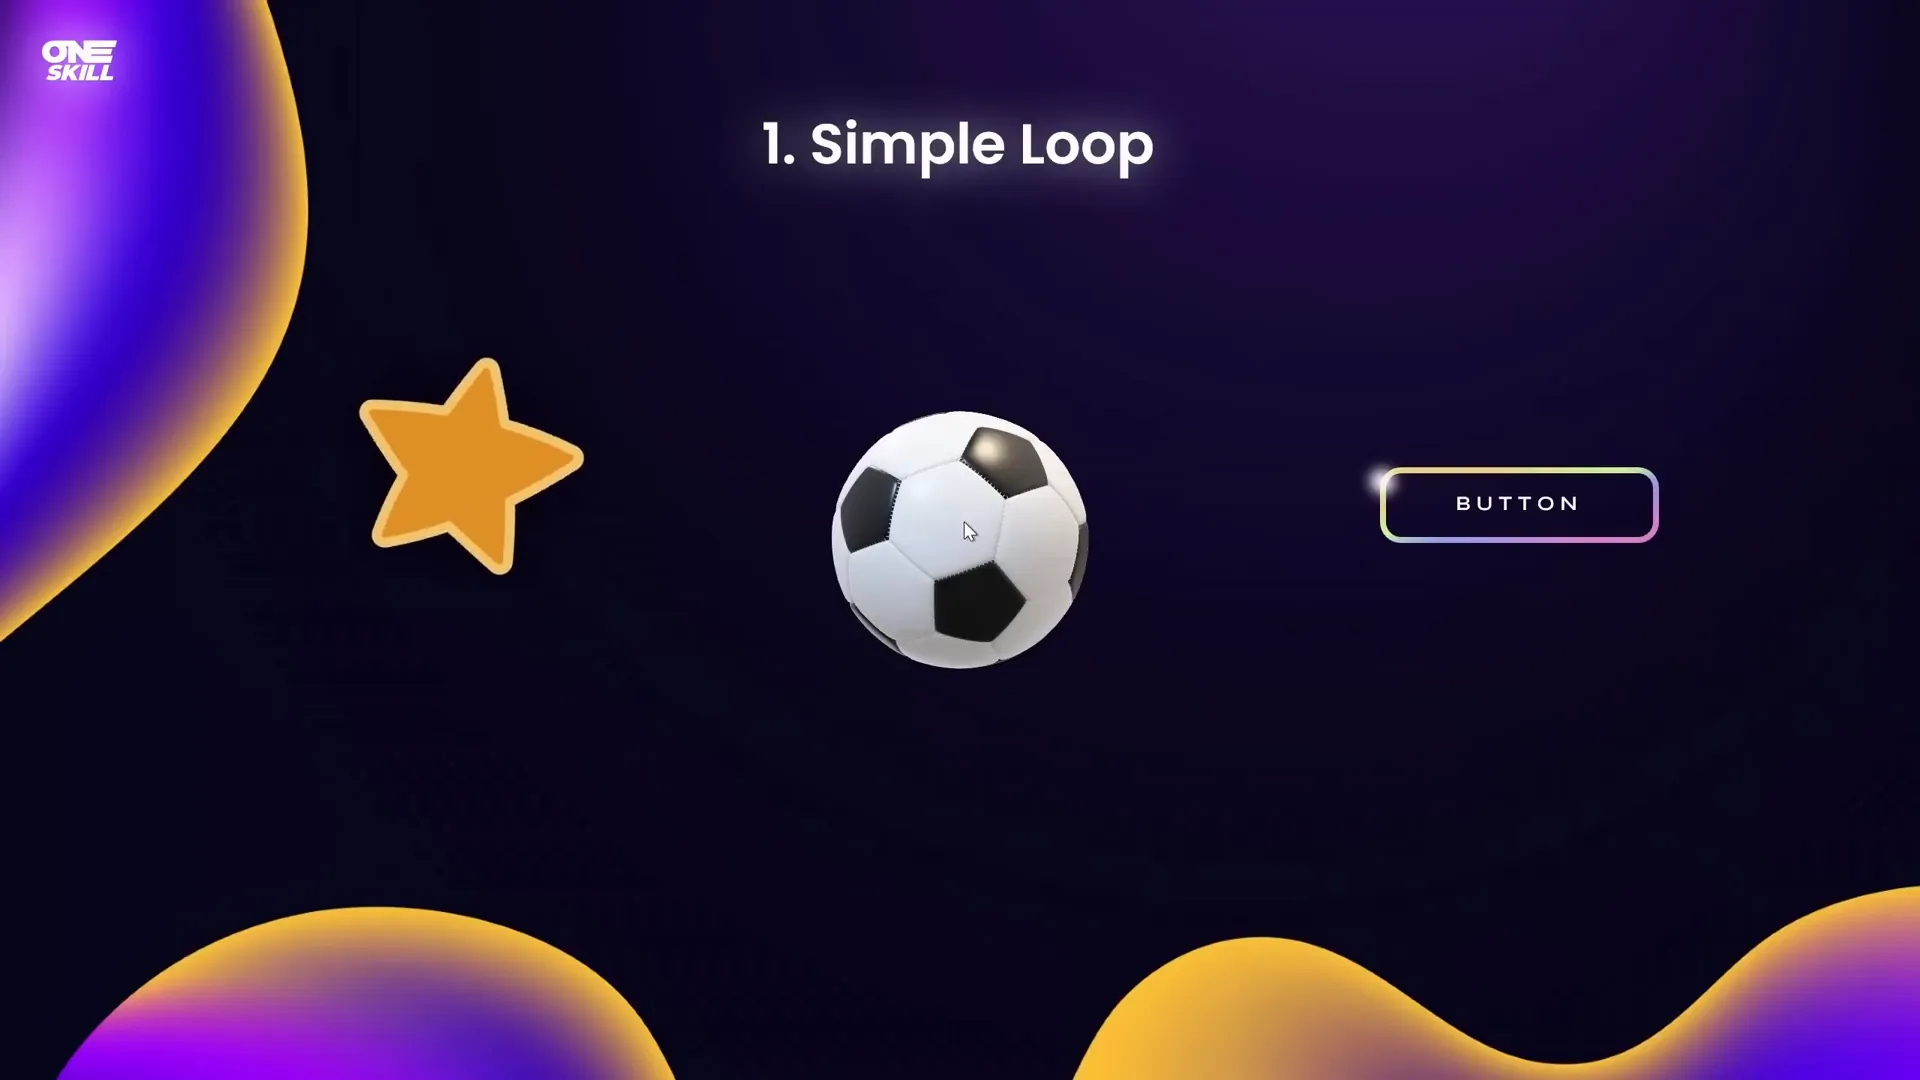
- A star spinning indefinitely, adding a dynamic accent to your slide.
- A 3D soccer ball model revolving continuously, perfect for sports-related presentations.
- A subtle highlight moving around the edges of a rectangle to emphasize content.
- A ship moving from left to right using a motion path animation that loops endlessly.
- A slide title animated with a waving text effect that repeats continuously.

How to Create a Simple Loop Animation
- Remove existing animations: Duplicate your slide, then open the Animation Pane (Animations tab > Animation Pane). Select all animations and delete them to start fresh.
- Add a Spin Animation to an Object: Select the object (e.g., a star), click Add Animation, and choose Spin.
- Customize the Spin: Set the animation to start On Click, duration to 3 seconds, direction to clockwise, and amount to a full spin.
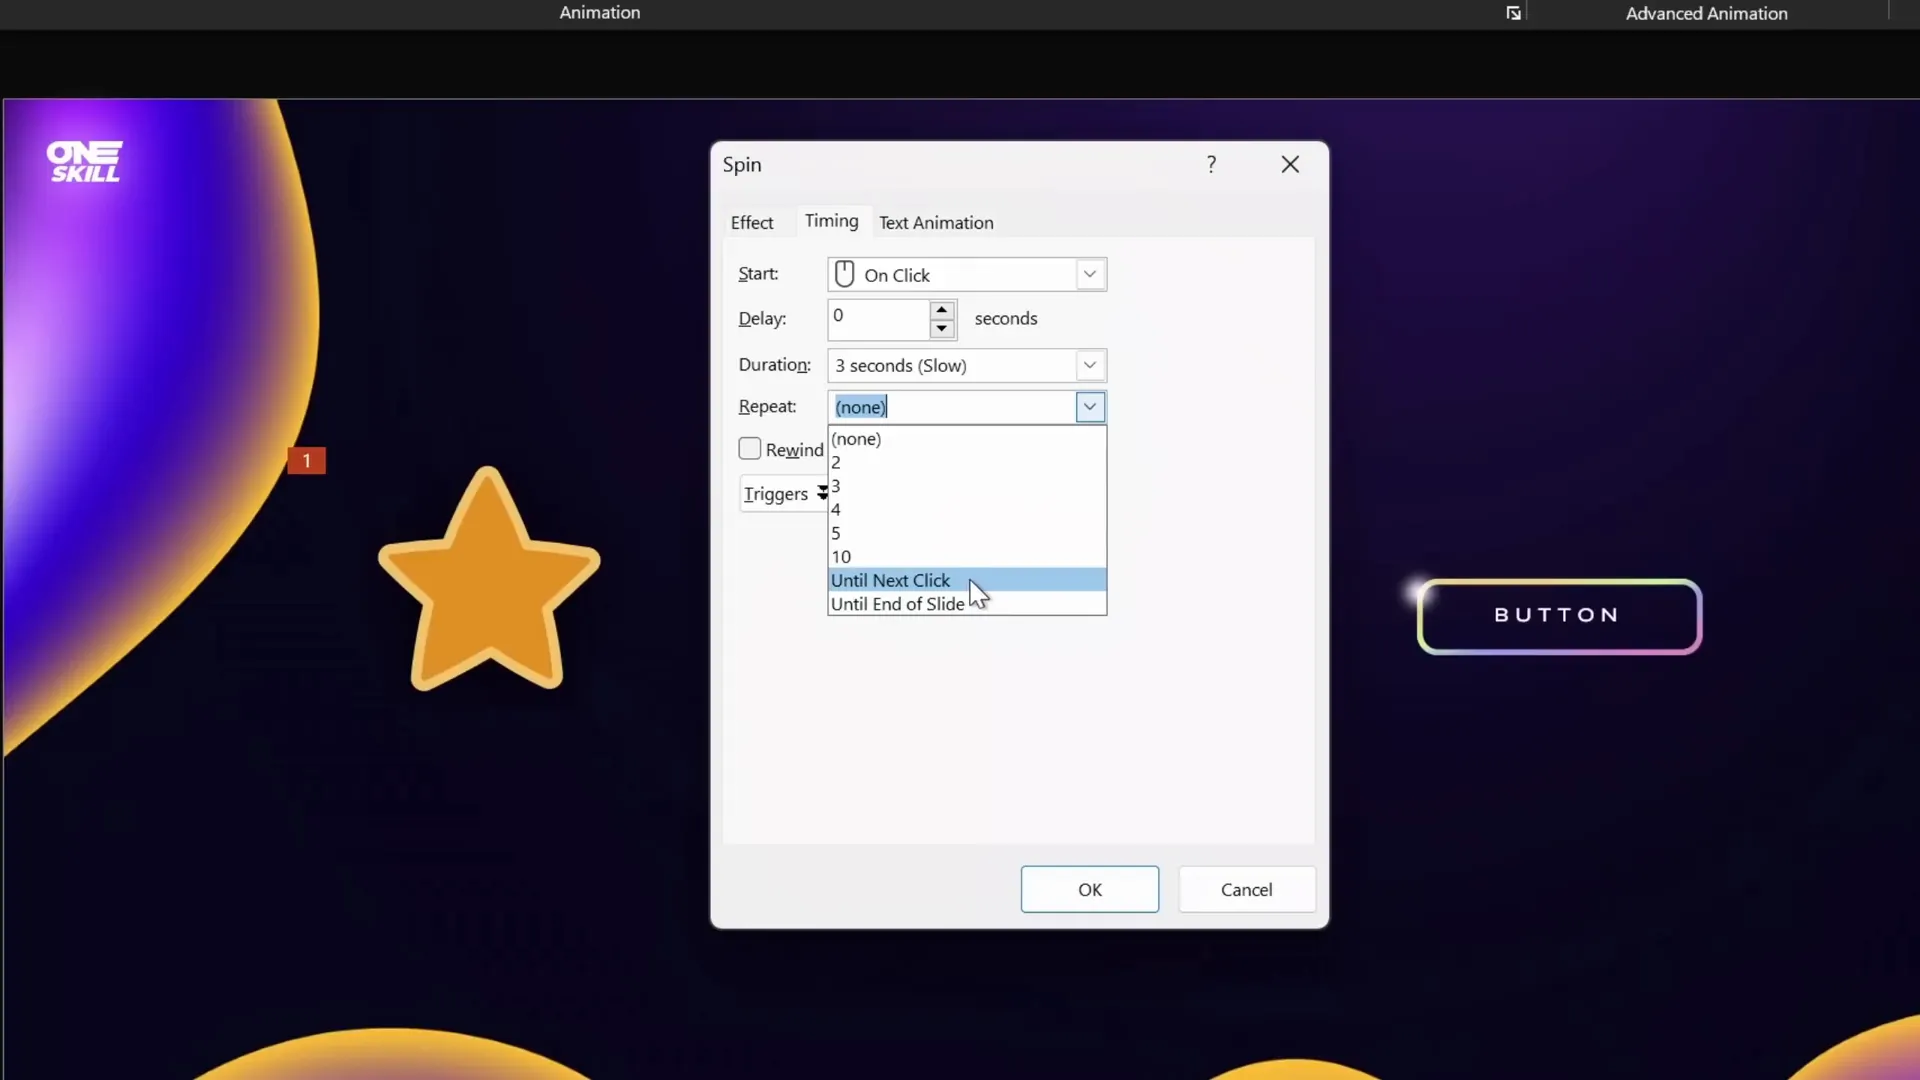
- Enable Looping: Double-click the animation in the Animation Pane to open its options. Go to the Timing tab and find the Repeat dropdown. Choose Until End of Slide to make it loop continuously.
- Preview: Run the slideshow and click to start the animation. The object will spin endlessly.
This process can be repeated for other animations such as 3D model turns, motion paths, and text effects.
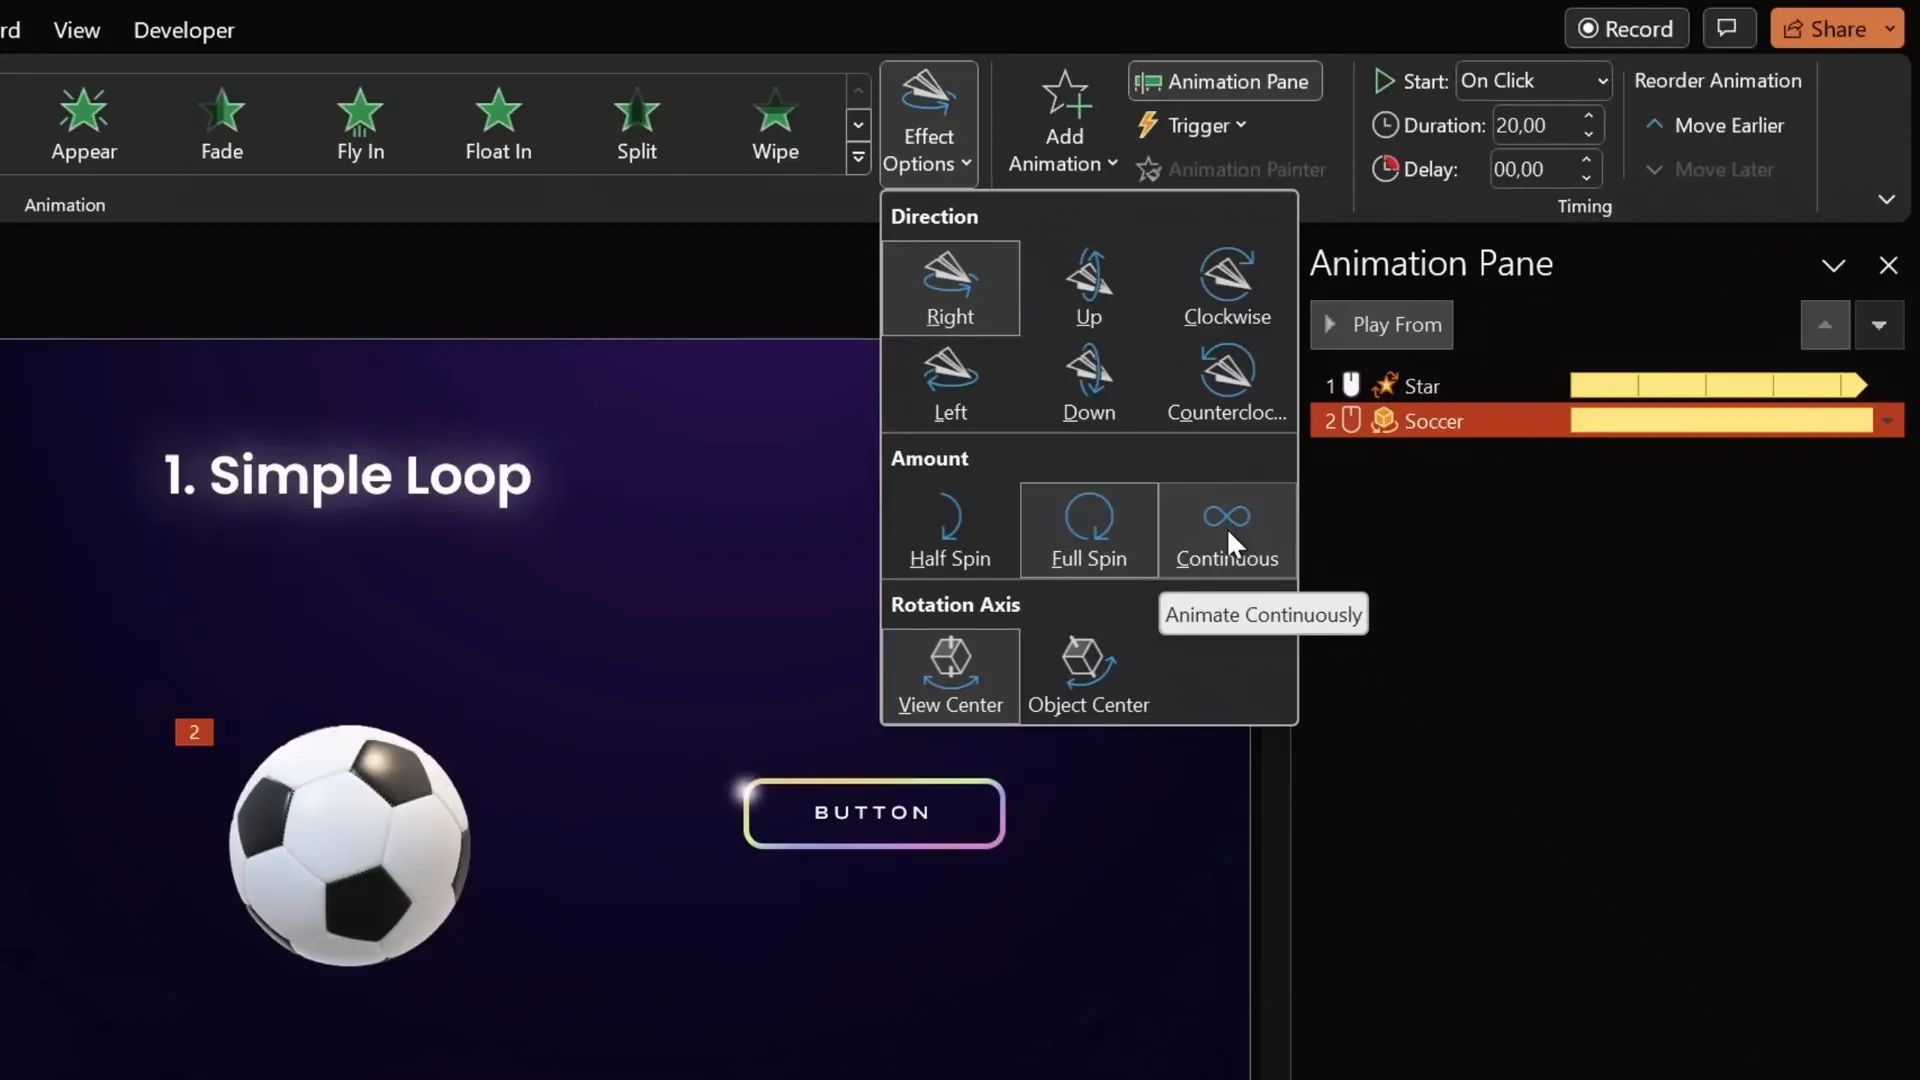
Using 3D Model Animations
PowerPoint supports 3D animations like the Turntable effect, which can be set to loop continuously:
- Select the 3D model (e.g., soccer ball).
- Go to Add Animation > 3D Animations > Turntable.
- In Effect Options, select Continuous to enable infinite rotation.
- Set duration (e.g., 5 seconds) and confirm the repeat is set to Until End of Slide.
Loop Until Next Click vs. Until End of Slide
You can choose to repeat animations either until the end of the slide or until the next click. For example, setting the star spin to repeat until the next click means it will stop when you click again, allowing another animation to start.
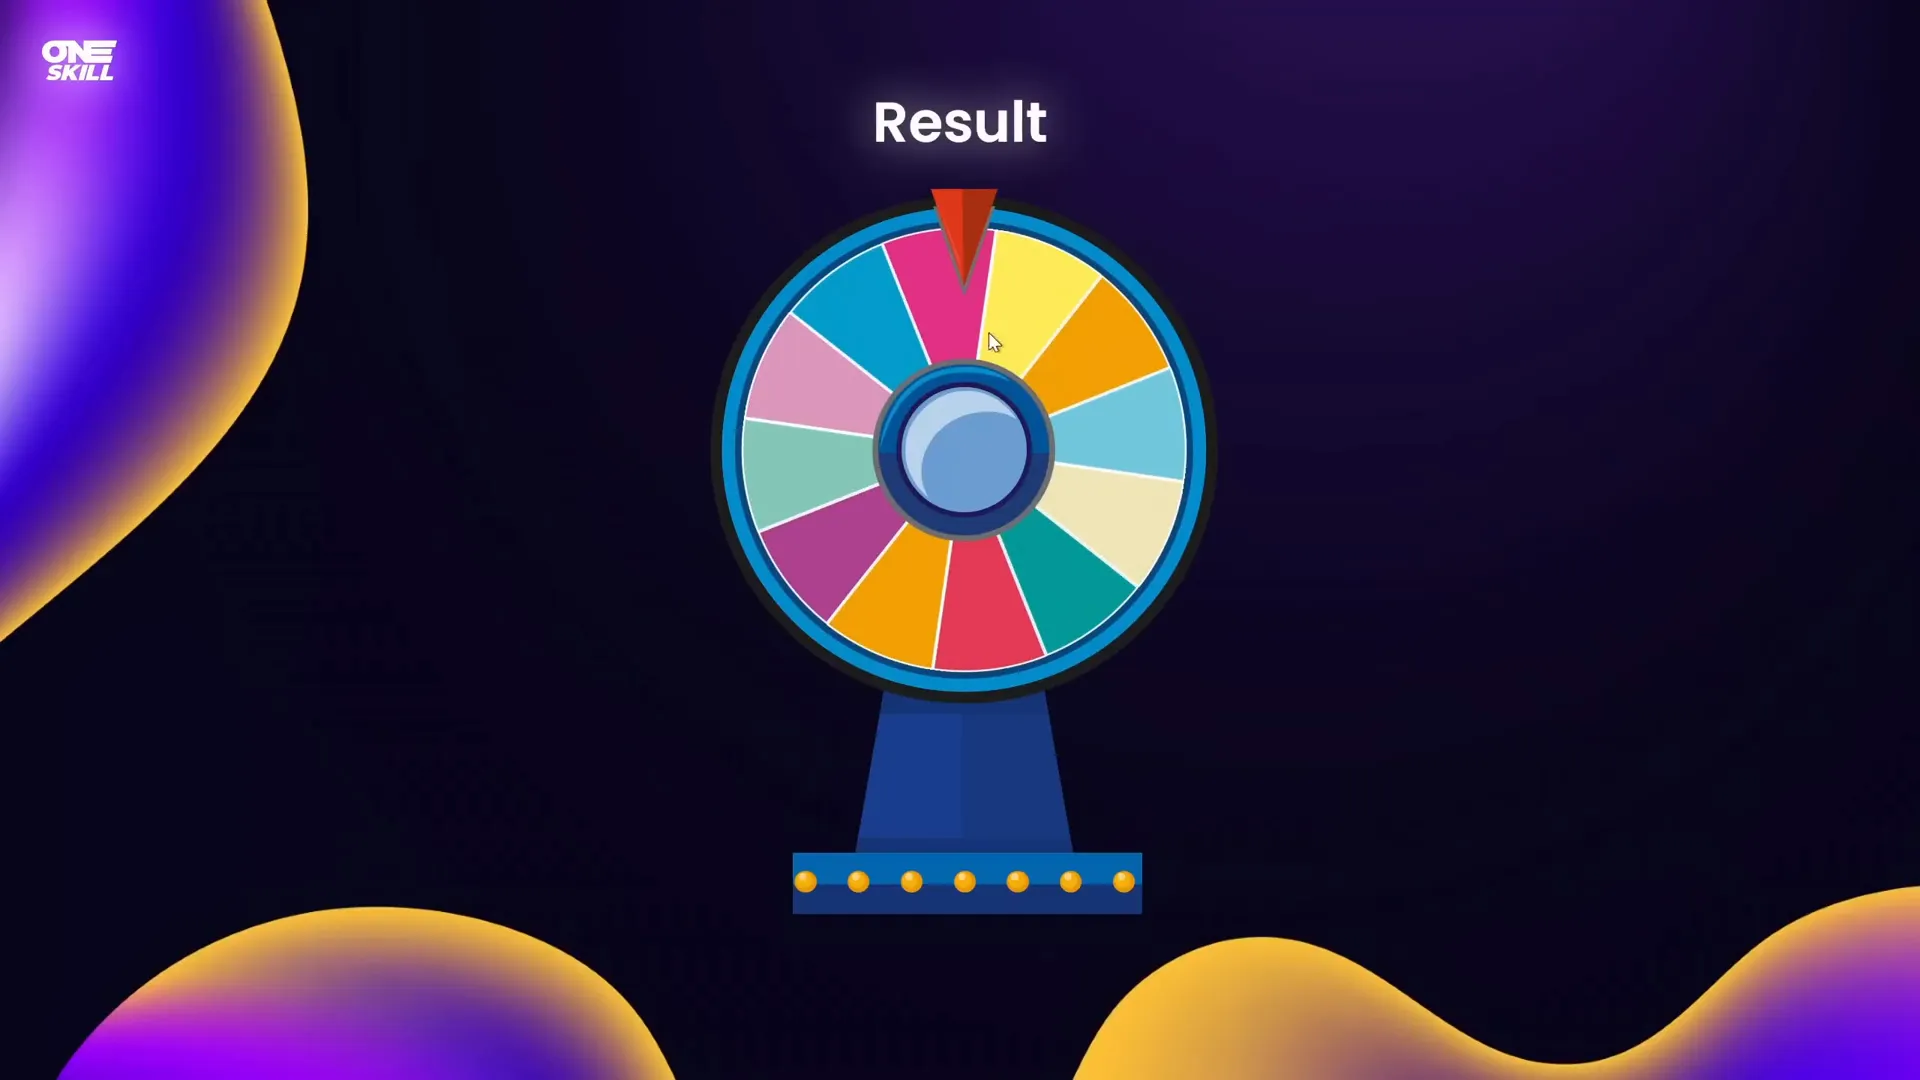
This is useful for interactive slides like a Wheel of Fortune, where you want the wheel to spin continuously until you decide to stop it with a click.
Creating a Wheel of Fortune Animation
Here’s a quick guide to make a spinning wheel that you can control with clicks:
- Use a colorful segmented shape as the wheel background (illustrations can be sourced from free sites like Freepik).
- Add a Spin animation to the wheel, set to start on click, with a duration of 1 second, and repeat Until Next Click.
- Add a Fade animation to a result text box that appears after the wheel stops.
- Click once to start spinning and again to stop and reveal the result.
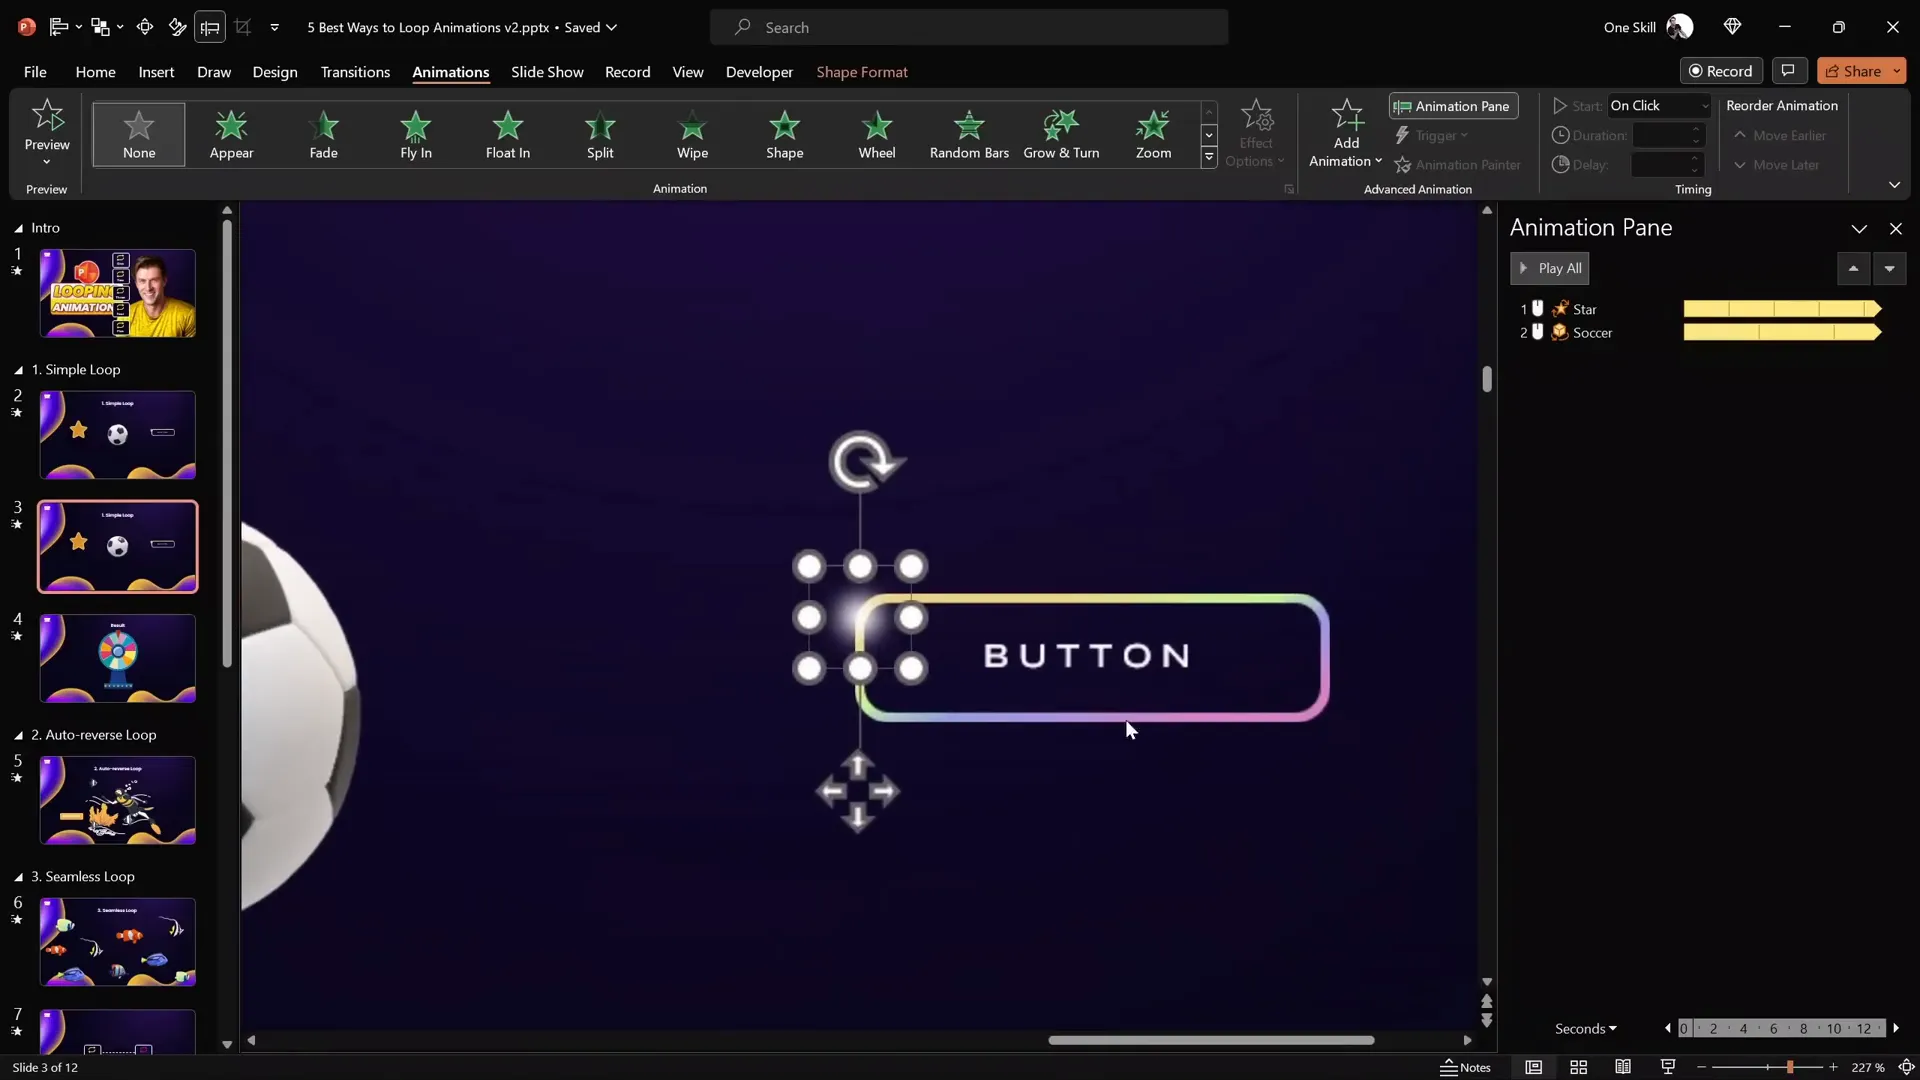
Custom Motion Path Loop
To create a highlight that moves along a custom path (such as around a rectangle), use a Custom Motion Path:
- Create a small circle with a radial gradient fill and soft edges to serve as the highlight.
- Select the highlight, then add a Custom Motion Path animation by clicking points around the shape’s edges.
- Ensure the path ends where it started to form a loop.
- Disable smooth start and smooth end for a consistent speed.
- Set the animation to repeat Until End of Slide and adjust the duration as needed (e.g., 5 seconds).
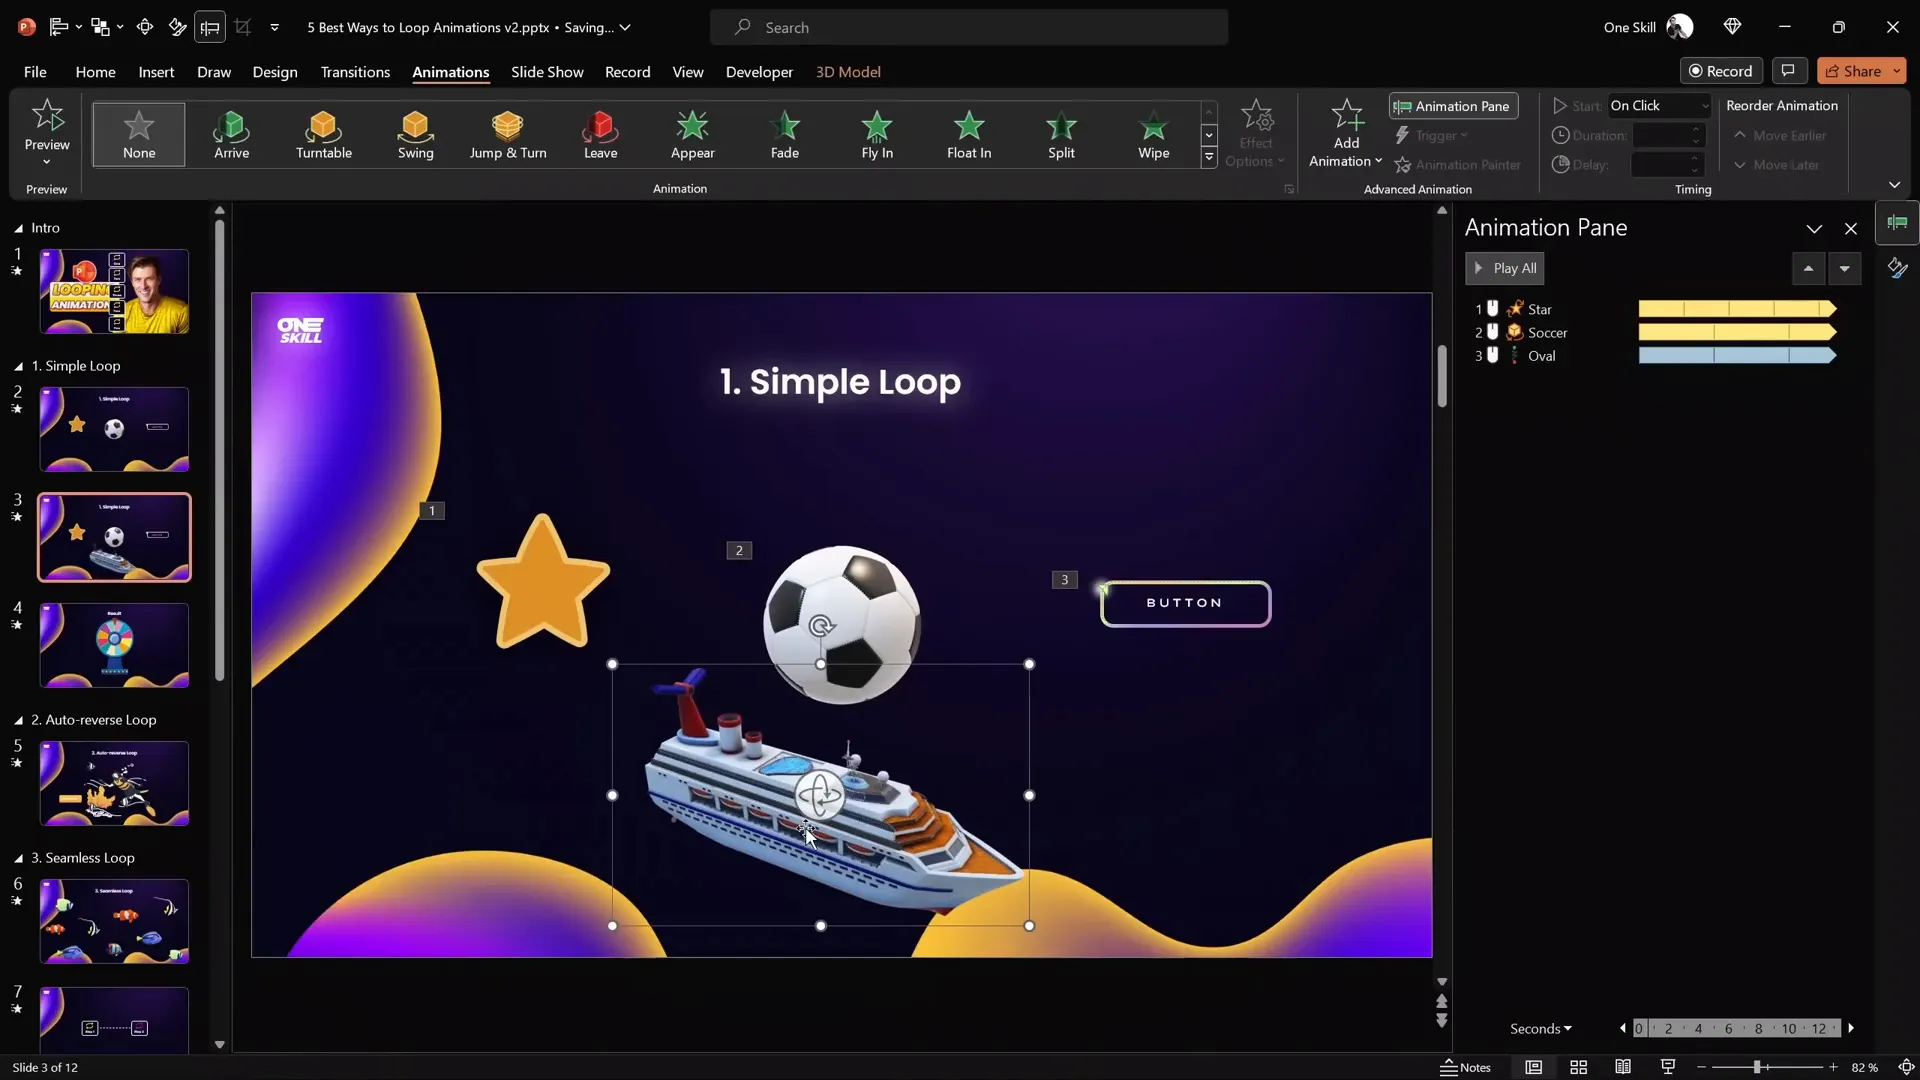
Looping Motion Path for 3D Models
For moving objects like a 3D ship model, you can apply a motion path animation that loops infinitely:
- Position the ship off slide on the left.
- Add a motion path animation with the direction set to the right.
- Extend the endpoint off slide on the right.
- Remove smooth start/end and set repetition Until End of Slide.
- Adjust duration to control speed (e.g., 5 to 10 seconds).
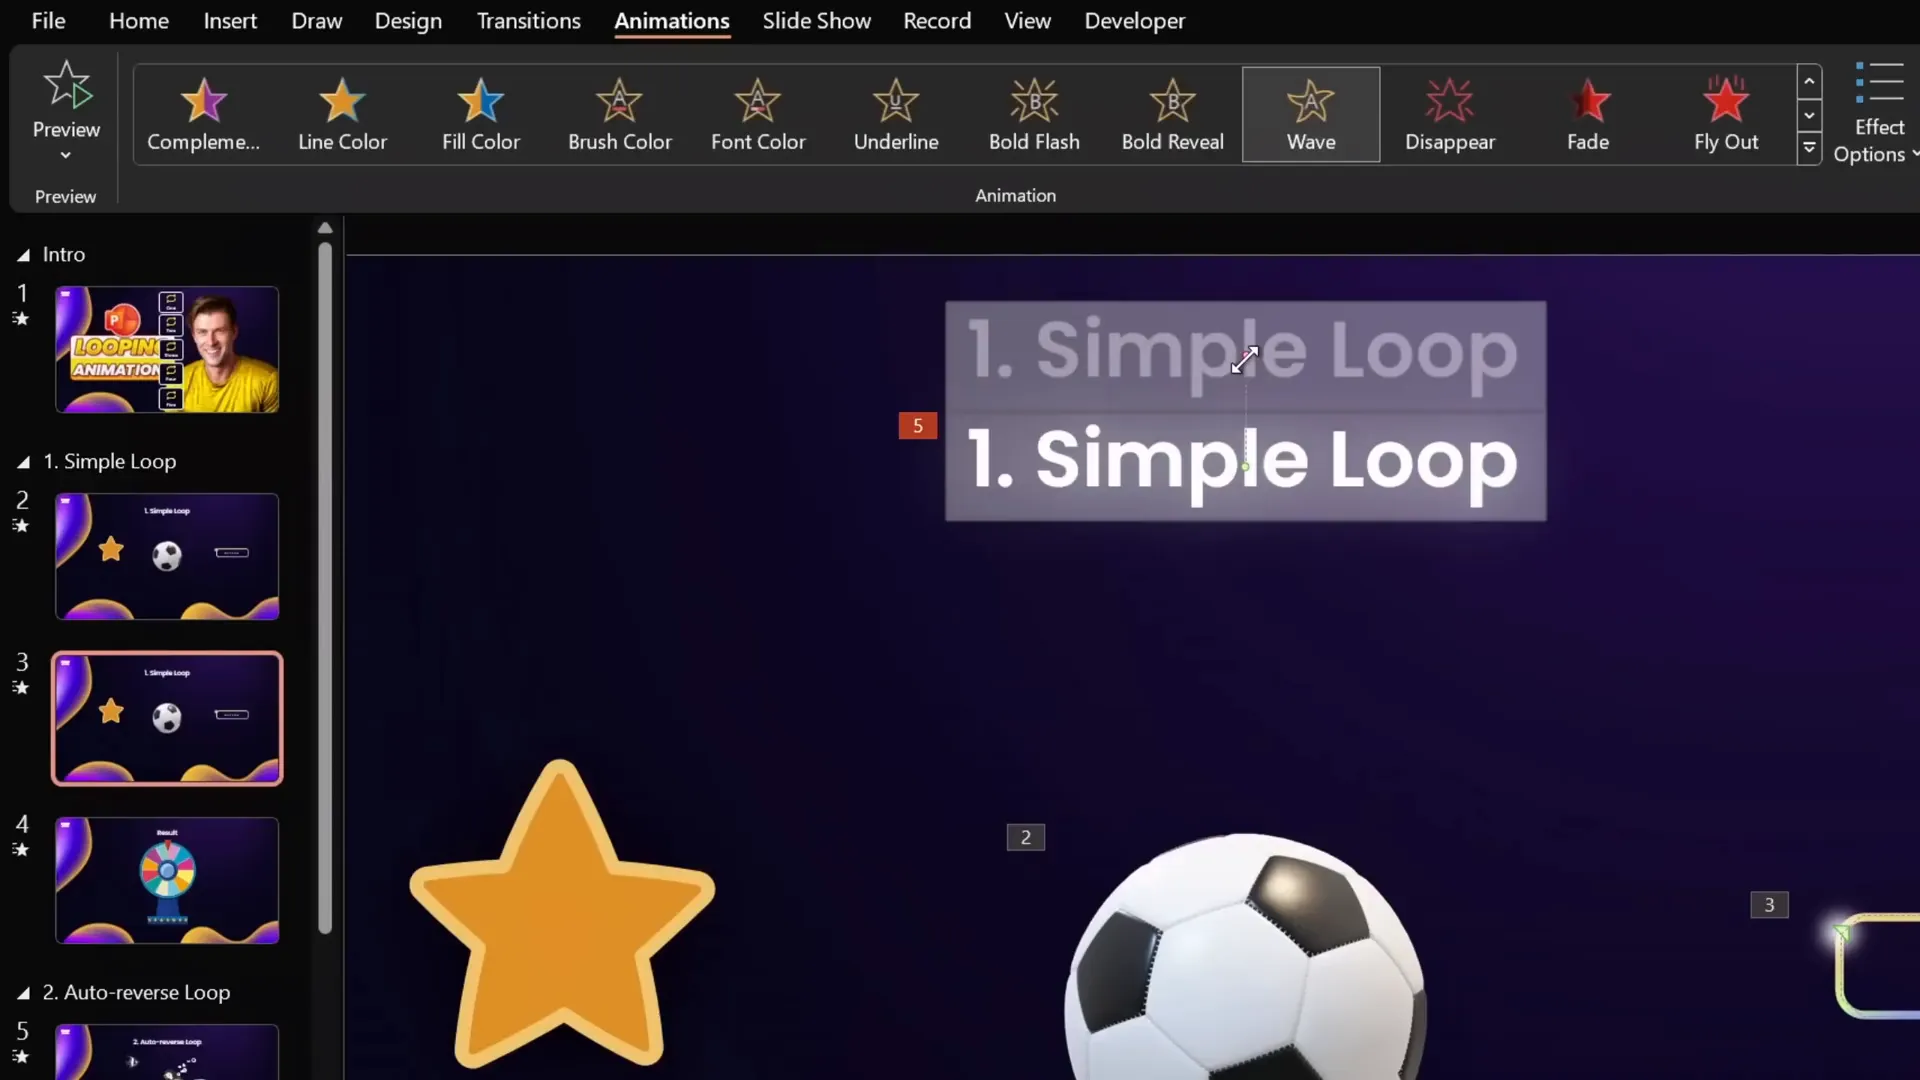
Looping Text Wave Animation
Animating text with a looping wave effect adds a subtle dynamic touch to titles or headings:
- Select the text box.
- Choose an emphasis animation like Wave.
- Adjust the wave height by moving the red endpoint bubble.
- Animate text by letter with a delay (e.g., 10%).
- Set the animation to repeat Until End of Slide.
2. Auto-Reverse Looping Animations
Auto-reverse animations are those that move back and forth seamlessly, creating a natural oscillation effect. This technique is perfect for objects that need to move up and down or side to side repeatedly.
Examples of Auto-Reverse Animations
- A diver moving up and down smoothly.
- Fishes swimming horizontally back and forth.
- A button pulsing by growing and shrinking.

How to Create Auto-Reverse Loop Animations
- Select the object you want to animate.
- Add a Motion Path Line animation for movement.
- Choose the direction (e.g., Up or Left).
- Adjust the endpoint to set the distance.
- Open the animation options and check Auto Reverse.
- Set the animation to repeat Until End of Slide in the Timing tab.
- Adjust the duration to control speed.
You can use the Animation Painter to copy animations to similar objects and adjust their paths or durations to create natural-looking group animations.
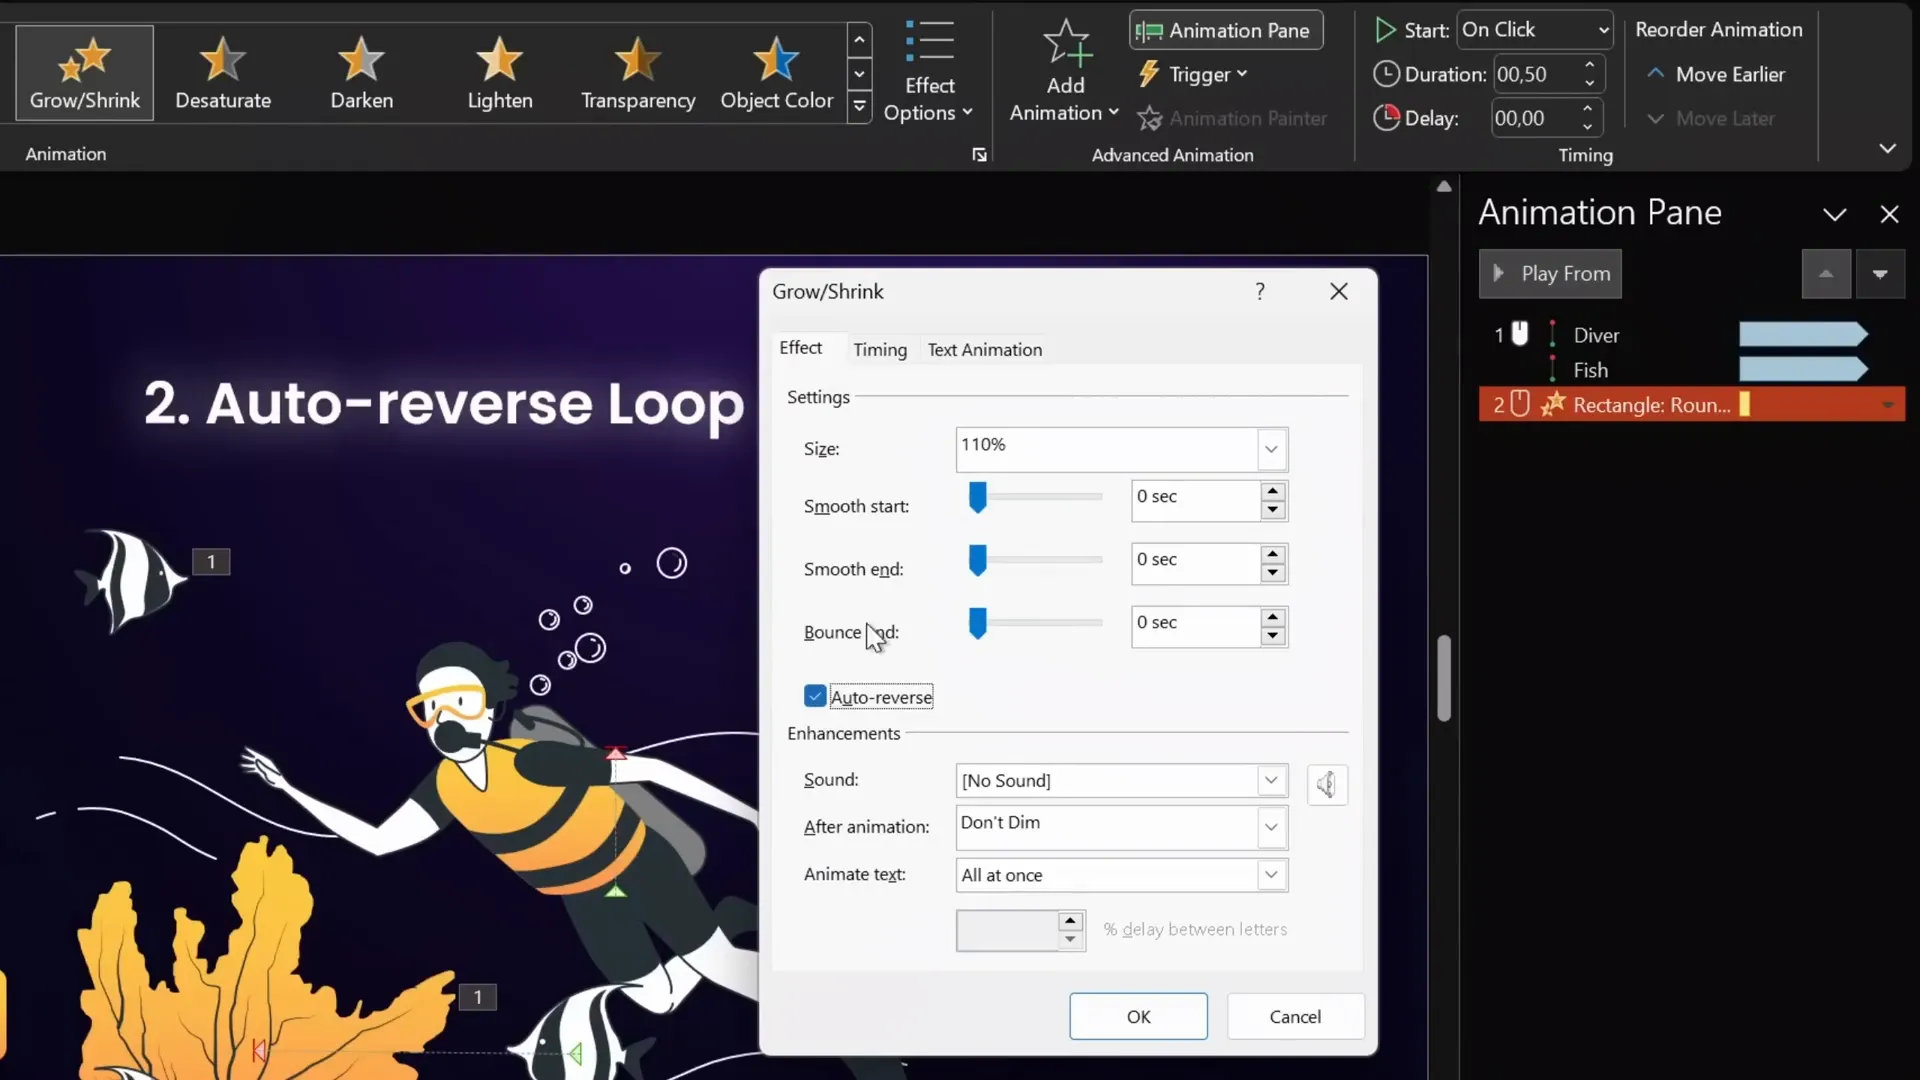
Creating a Pulsing Button
To make a button pulse, use the Grow/Shrink emphasis animation:
- Select the button shape.
- Add a Grow/Shrink animation.
- Set a short duration (e.g., 0.5 seconds).
- Choose a subtle growth percentage (e.g., 110%).
- Enable Auto Reverse to shrink back.
- Set repetition Until End of Slide.
- Adjust duration to speed up or slow down the pulsing effect.
3. Seamless Looping Animations
Seamless looping animations create the illusion of endless movement without visible jumps or breaks. This is ideal for backgrounds, flowing lines, or any element that requires continuous smooth motion.
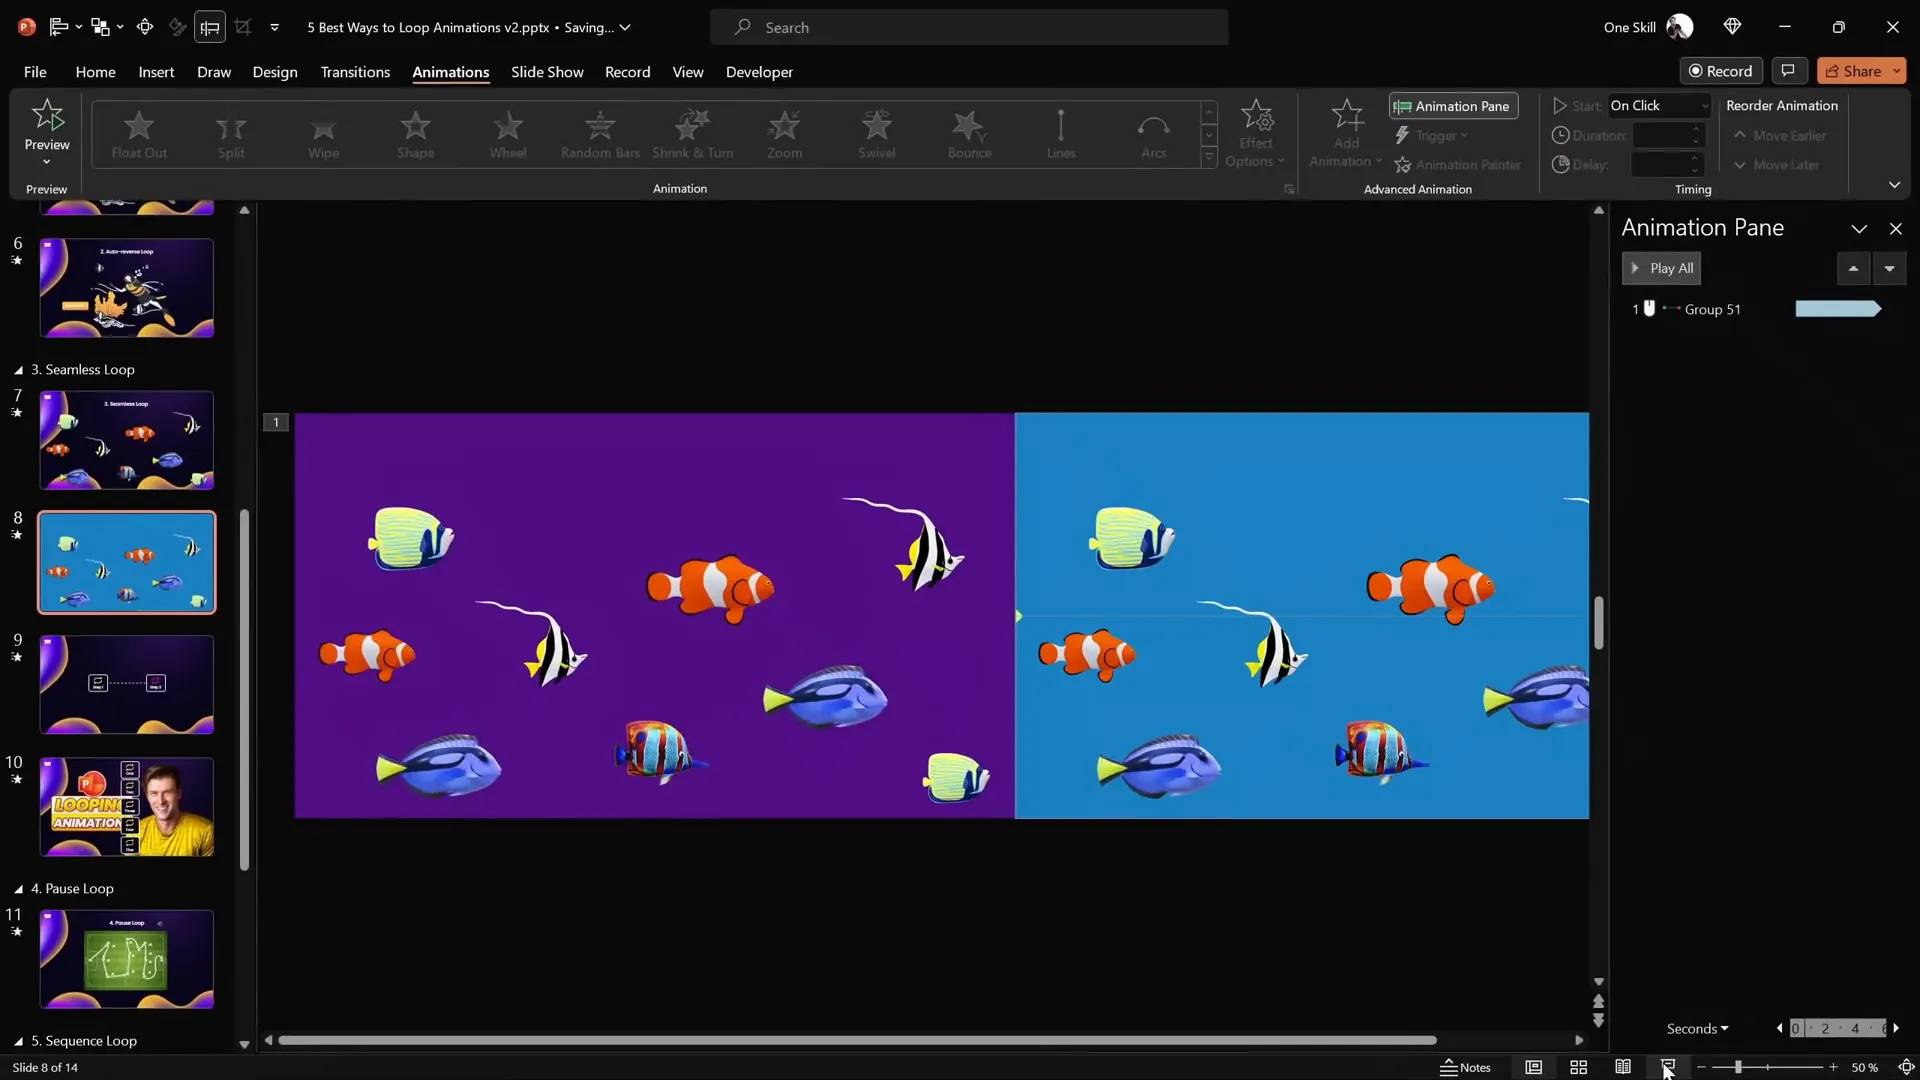
Seamless Fish Animation Example
The tutorial demonstrates colorful fish swimming continuously across the slide using a clever grouping and motion path technique:
- Insert a rectangle covering the entire slide as a container.
- Select all fish and the rectangle, group them.
- Duplicate the group and place the copy to the left, overlapping edges precisely.
- Change the rectangle fill color in the second group for differentiation during setup.
- Group both groups into one large group.
- Add a motion path animation moving the large group to the right.
- Set the endpoint so the duplicate group perfectly overlaps the original group at the slide’s right edge.
- Remove smooth start/end, disable auto-reverse, and set repetition Until End of Slide.
- Make the rectangles invisible by setting their fill to Slide Background Fill.
This setup creates a continuous swimming effect where fish appear to keep coming in endlessly.
Seamless Loop for Scrolling Dotted Line
The seamless loop technique can also be applied to lines, such as a dotted line moving infinitely between two text boxes:
- Draw a dotted line between two elements.
- Duplicate the line and offset it to the left.
- Use alignment tools and a temporary vertical line to precisely connect the dots.
- Group both dotted lines.
- Add a motion path animation moving the group to the right.
- Set the endpoint so the second line overlaps the first at the right edge.
- Insert two rectangles on the left and right edges as masks with Slide Background Fill to hide the lines outside the desired area.
- Remove smooth start/end and auto-reverse, set repetition Until End of Slide.
- Adjust duration to control speed.
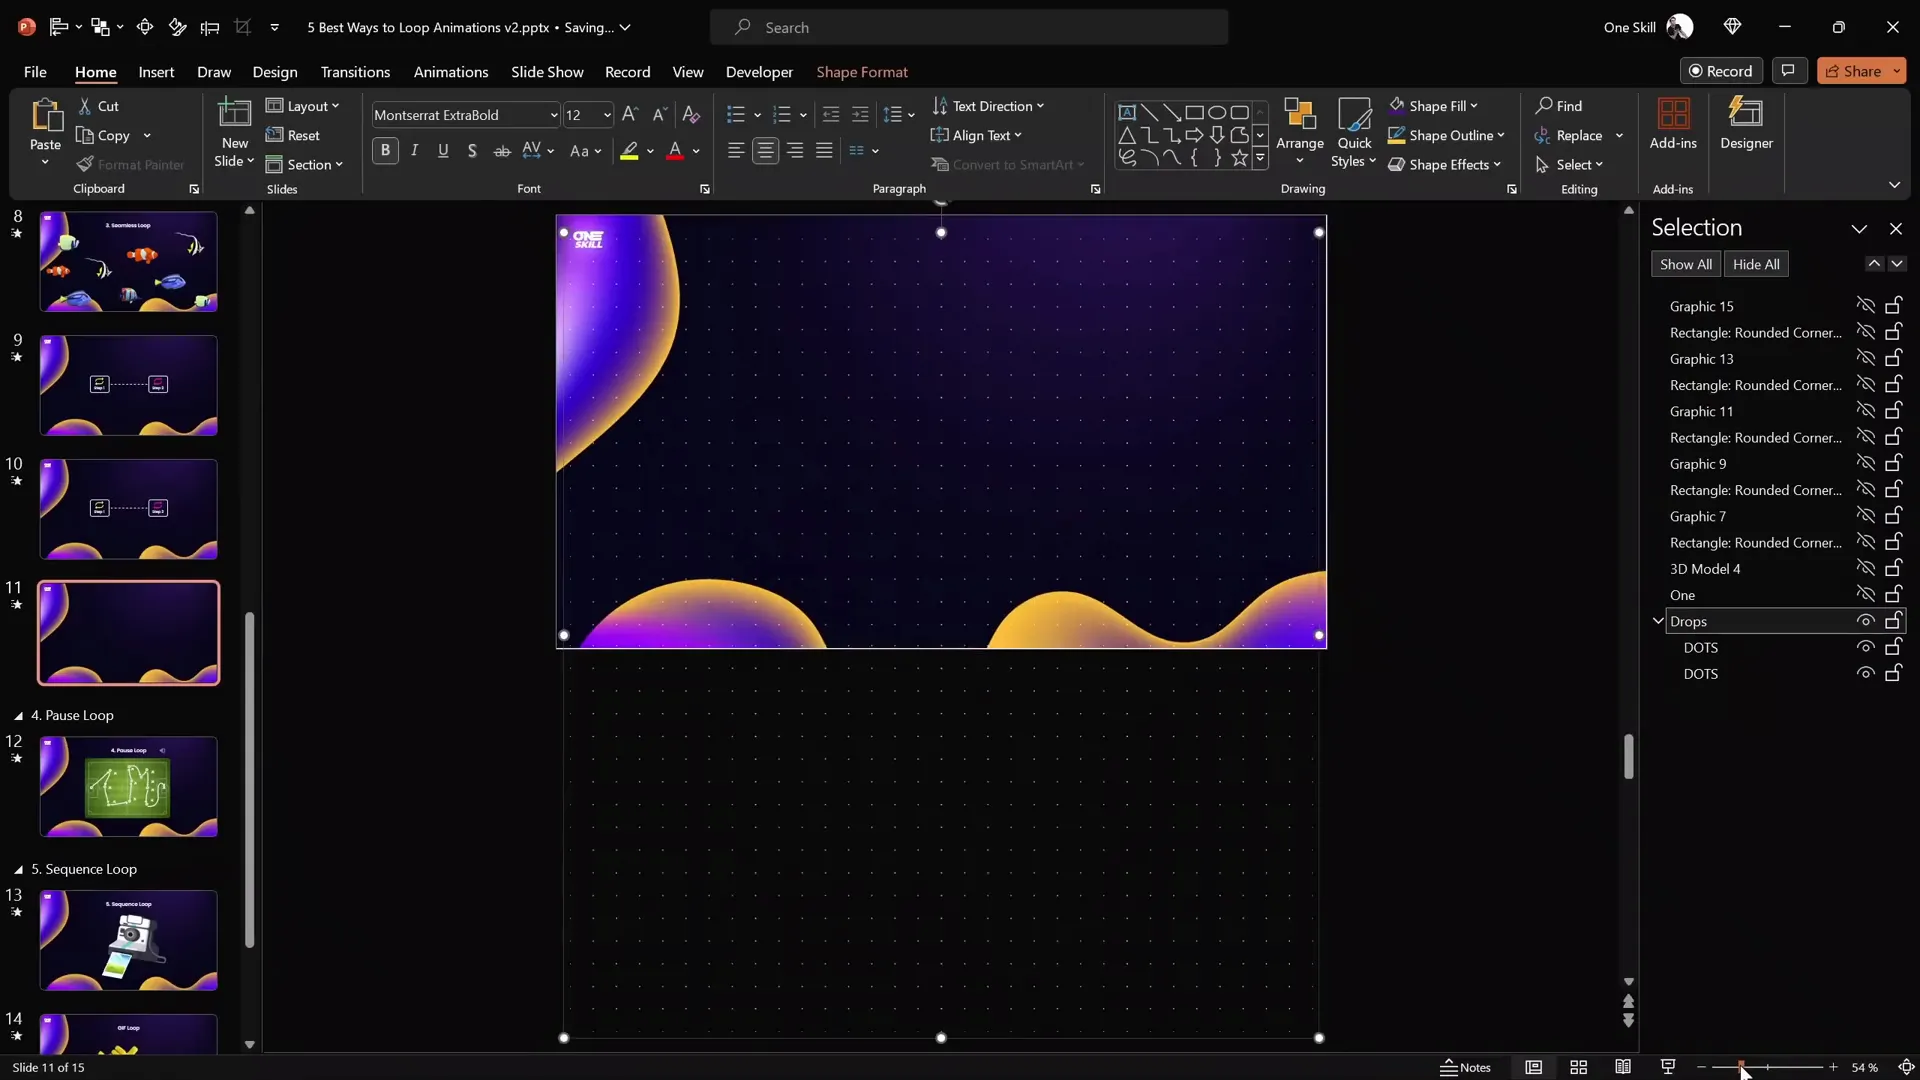
Seamless Looping Background with Dots
A beautiful example of seamless looping is a dotted background animation where dots move upward continuously:
- Fill the slide with small dots.
- Duplicate the dots group and place the copy just below the slide.
- Group all dots into one group.
- Add an upwards motion path animation to the dots group.
- Set the animation to repeat Until End of Slide with a long duration (e.g., 17 seconds) for a slow, smooth effect.
- Remove smooth start/end.
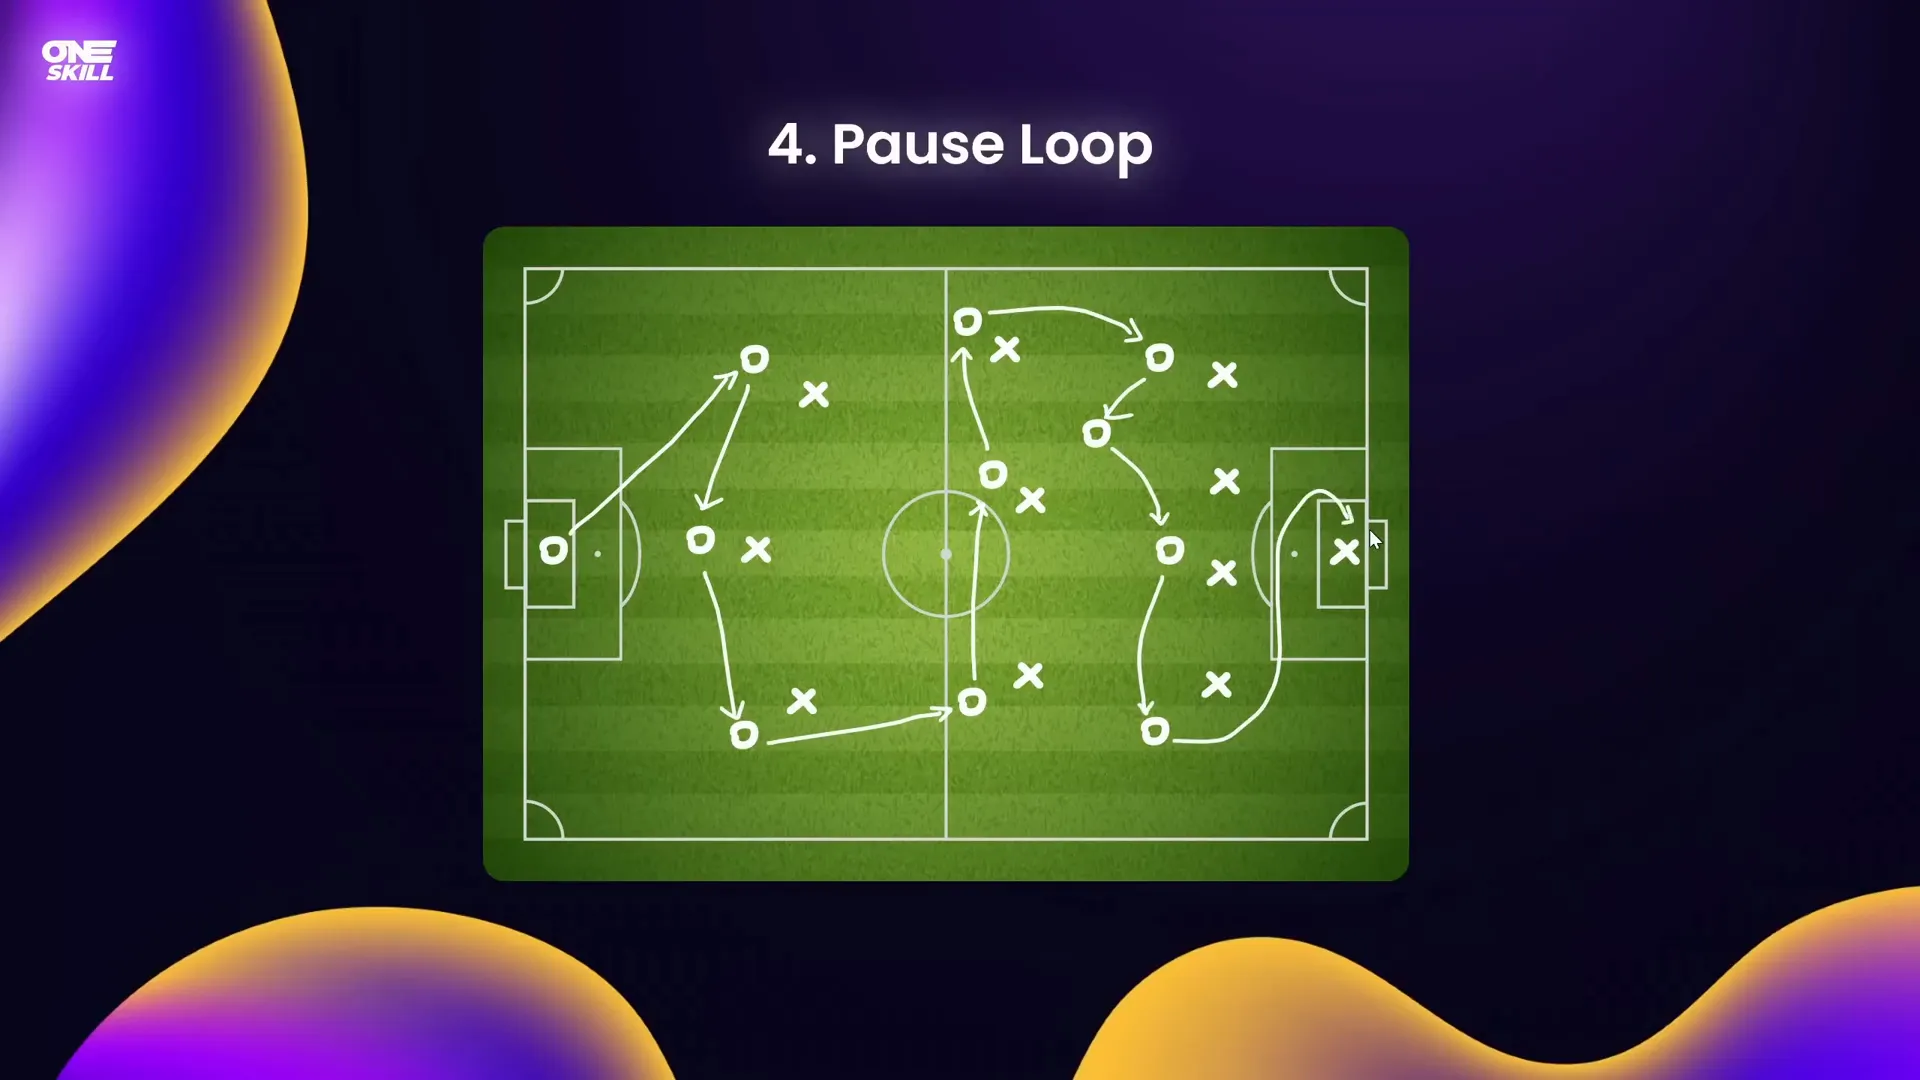
4. Pause Loop Technique
Sometimes you want your animation to loop but also include a brief pause or hold at the end before repeating. This is where the Pause Loop technique comes in handy.
Example: Drawing Passing Lines on a Football Field
Imagine drawing passing lines between players on a football field using PowerPoint’s Ink Replay animation:
- Draw lines using the Draw tab’s pen tool.
- PowerPoint groups the ink strokes automatically.
- Apply the Replay animation from the Ink animation category.
- Set duration to control the speed of the drawing.
- Try setting repetition Until End of Slide to loop the drawing.
However, looping the replay animation directly creates an immediate reset without any pause. To add a pause, use the following workaround.
Step-by-Step Pause Loop Setup
- Remove repetition from the replay animation.
- Determine the animation length (e.g., 5 seconds).
- Record a silent audio clip slightly longer than the animation (e.g., 7 seconds).
- Insert the audio clip into the slide and trim it to the exact length.
- Add a bookmark at the start of the audio clip.
- Set the audio clip to loop Until Stopped.
- In the Animation Pane, set the replay animation to trigger on the audio bookmark.
- Hide the audio icon during the slideshow by moving it off-slide or setting Hide During Show.
This method uses the looping audio bookmark to repeatedly trigger the replay animation with a built-in pause, creating a smooth pause loop effect.
5. Sequence Loop Animations
Sequence loops involve looping an entire series of animations in order, which is useful for complex animated sequences like camera flashes or multi-step effects.
Example: Polaroid Camera Flash Sequence
A Polaroid camera flash animation includes:
- A flash rectangle animating as a camera flash.
- A camera image split into two parts (top and bottom) for layered animation.
- A photo flying out animation.
Simply setting all animations to loop Until End of Slide causes them to play simultaneously, which looks incorrect.
How to Loop a Sequence Correctly
- Remove repetition from all animations.
- Determine the total length of the animation sequence (e.g., 2 seconds).
- Record a silent audio clip slightly longer than the animation (e.g., 2.5 seconds).
- Insert and trim the audio clip precisely.
- Add a bookmark on the audio clip at the beginning.
- Set the audio to loop Until Stopped.
- Set all animations to trigger on the audio bookmark.
- Hide the audio icon during the slideshow.
This setup triggers the entire sequence on the looping audio bookmark, creating a smooth repeating animation sequence with optional pauses.
Bonus: Exporting PowerPoint Animations as GIFs
Another creative way to loop animations is by exporting your PowerPoint animation as a GIF, which can be embedded in other presentations or platforms.
Steps to Create a Looping GIF from PowerPoint
- Insert your animated object (e.g., a sticker icon from Microsoft 365’s Stickers library).
- Adjust the rotation center if needed by grouping the object with an invisible shape to change pivot points.
- Add your desired animation (e.g., spin with auto-reverse for a subtle rocking effect).
- Ensure no slide transitions are applied to the slide.
- Go to File > Export > Create an Animated GIF.
- Choose quality (e.g., extra large) and enable transparent background if needed.
- Export the GIF for the specific slide containing your animation.
- Insert the GIF into any slide via Insert > Pictures.
The exported GIF will loop endlessly and maintain animation effects outside PowerPoint.
Frequently Asked Questions (FAQ)
Q1: How do I make an animation loop continuously in PowerPoint?
A: In the Animation Pane, double-click the animation, go to the Timing tab, and set the Repeat option to “Until End of Slide.” This makes the animation loop continuously until you move to the next slide.
Q2: Can I make animations auto-reverse in PowerPoint?
A: Yes. For motion path or emphasis animations, open the Effect Options and check the “Auto Reverse” box. Then set the animation to repeat to create a smooth back-and-forth effect.
Q3: How can I create a seamless looping background animation?
A: Use the seamless loop technique by grouping your background elements twice, placing the duplicate off to one side, then animating the whole group with a motion path that moves the group across the slide. Make the background masks invisible to create a continuous loop effect.
Q4: What is the pause loop technique and why would I use it?
A: The pause loop uses a looping audio clip with bookmarks to trigger animations repeatedly with a pause between loops. It’s useful when you want to replay an animation but also hold the final frame for a moment before restarting.
Q5: Can I export PowerPoint animations as GIFs?
A: Yes. PowerPoint allows you to export slides as animated GIFs (File > Export > Create an Animated GIF). This is useful for reusing animations on other platforms or embedding in presentations without PowerPoint.
Conclusion
Mastering PowerPoint animations, especially looping animations, opens up endless creative possibilities for your presentations. Whether you want subtle continuous effects, dynamic moving objects, or complex sequences, these five methods offer a solid foundation:
- Simple Looping: Perfect for continuous spins, turns, or motion paths.
- Auto-Reverse Looping: Ideal for natural back-and-forth movements.
- Seamless Looping: Great for endless background animations or scrolling effects.
- Pause Loop: Adds controlled pauses between animation repeats.
- Sequence Loop: Loops complex animation sequences smoothly.
Plus, exporting animations as GIFs gives you another powerful way to reuse your animated content.
With these techniques, you can turn static slides into engaging stories, capture attention, and communicate your message more effectively. Try experimenting with these methods to create your own unique looping animations and wow your audience every time.
For more PowerPoint animation mastery, check out the tutorial slides attached to the PowerPoint Animation Mastery course and explore other tutorials on the One Skill PPT YouTube channel.
Happy animating!


