
If you’re looking to elevate your PowerPoint presentations with captivating animated title slides, you’re in the right place. Creating dynamic, eye-catching animations in PowerPoint can make your presentations stand out and leave a lasting impression on your audience. In this comprehensive guide, you’ll learn step-by-step how to craft an awesome animated title slide using PowerPoint animations, including techniques for adding gradient fills, drawing smooth handwritten text, inserting videos, and applying sophisticated animations to your slide elements. Let’s dive in and unlock the full creative potential of PowerPoint animations!
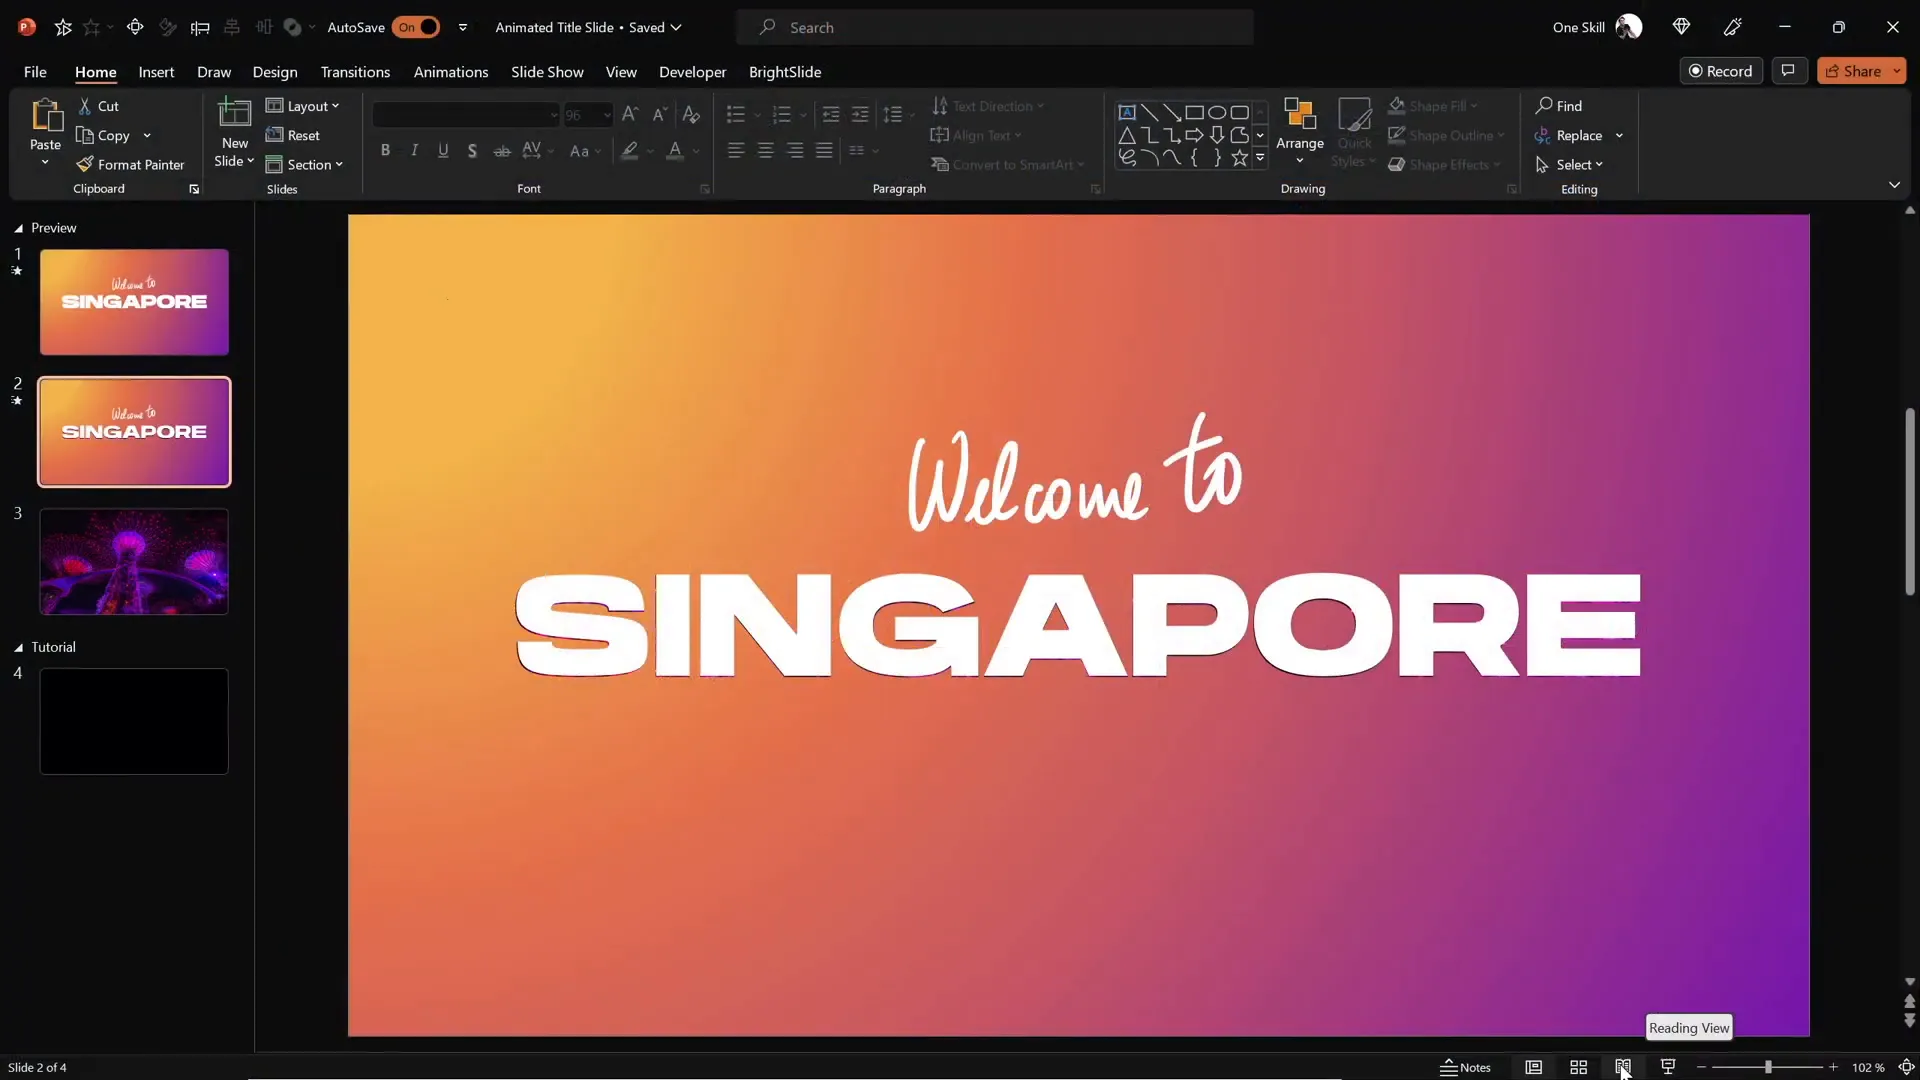
Table of Contents
- Getting Started: Setting Up Your Slide
- Adding a Beautiful Gradient Fill
- Inserting and Styling the Slide Title
- Using the Draw Tool for Handwritten Text
- Applying PowerPoint Animations
- Cutting Out Text from the Background
- Inserting and Animating Video Backgrounds
- Adding Exit Animations for a Polished Finish
- Final Touches and Tips
- Frequently Asked Questions about PowerPoint Animations
Getting Started: Setting Up Your Slide
The foundation for any great animated title slide starts with a clean, well-prepared canvas. Begin by opening PowerPoint and selecting a blank slide with a black background to create a dramatic effect that will make your animations pop.
Once you have your blank slide ready, the first step is to insert a full-screen rectangle shape that covers the entire slide. This will serve as the base layer to which you can apply a gradient fill and other effects.
- Go to the Insert tab.
- Click on Shapes and select the Rectangle tool.
- Draw the rectangle so that it spans the entire slide.
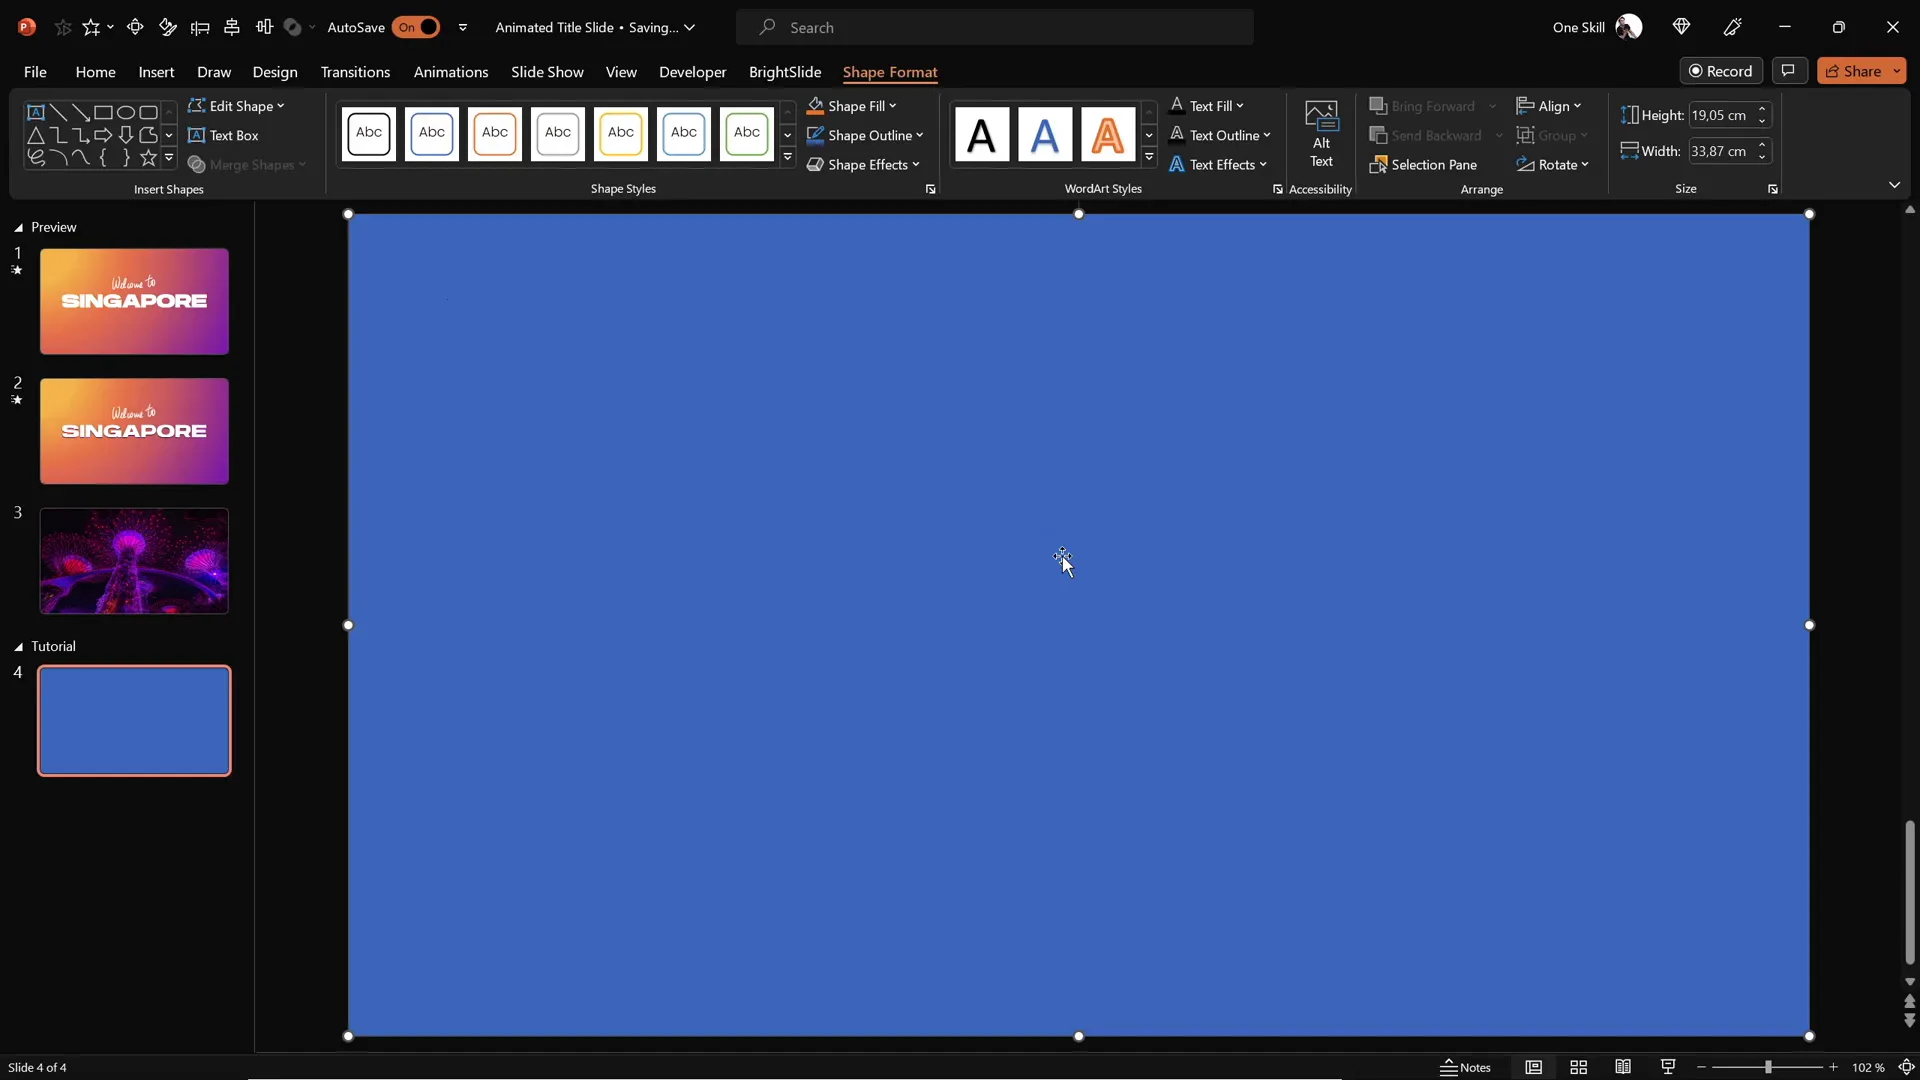
With the rectangle in place, you’re ready to enhance it with a beautiful gradient fill that will add depth and visual interest to your slide.
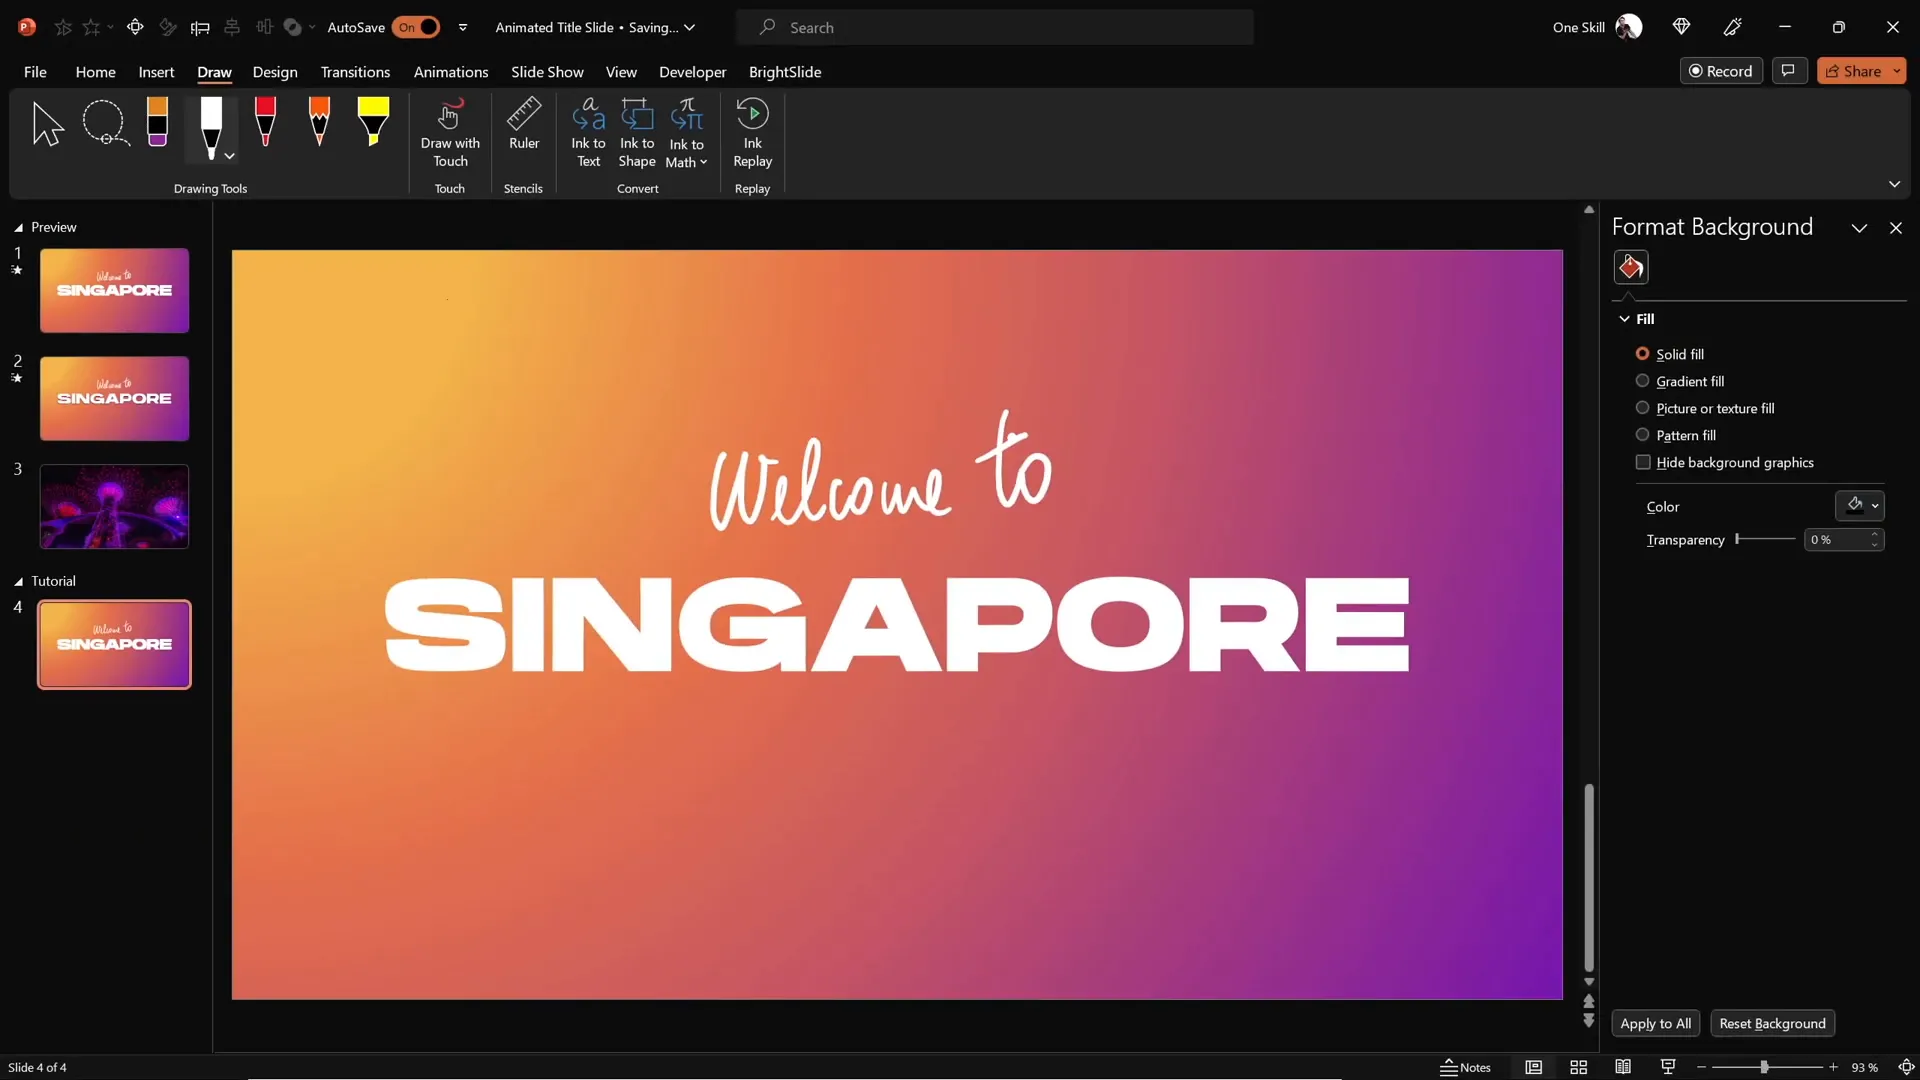
Adding a Beautiful Gradient Fill
Gradient fills add dimension and style to your slide, making it visually appealing. You can quickly copy a gradient fill from a previously created shape or customize your own.
To apply a gradient fill:
- Select the rectangle shape.
- Go to the Home tab and click the Format Painter tool.
- Click on a shape with the desired gradient fill to copy the style.
- Alternatively, open the Format Shape pane to customize the gradient manually.
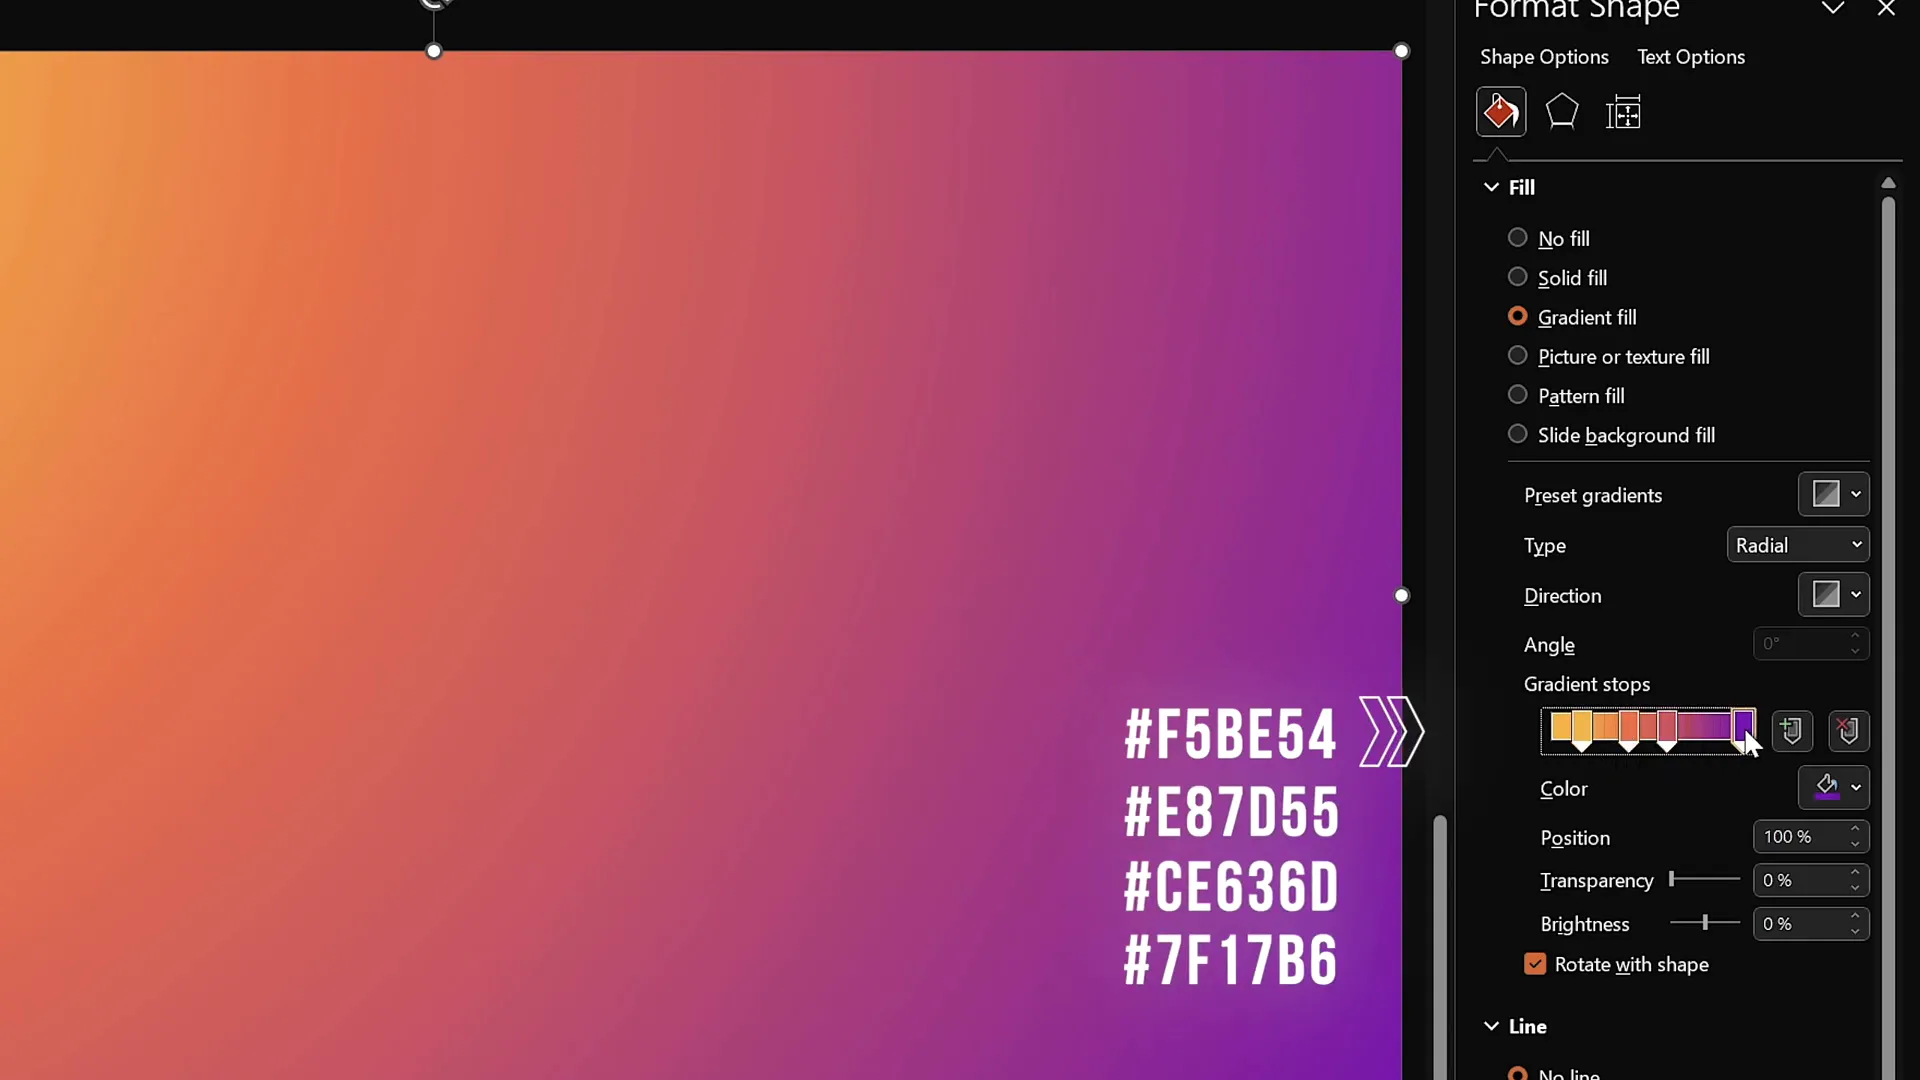
For this project, we use a radial gradient fill that originates from the top-left corner, creating a soft glowing effect. Here are the key points to note about the gradient:
- Gradient Type: Radial
- Direction: From the top-left corner
- Four color stops with specific hex codes (available for your reference if you want to replicate the exact look)
This gradient fill sets a sophisticated tone for your animated title slide and provides a vibrant backdrop for your text and video elements.
Inserting and Styling the Slide Title
Next, it’s time to add a striking title that will capture the audience’s attention. Follow these steps to insert and style your slide title:
- Go to the Insert tab and select Text Box.
- Draw a text box in the center of your slide.
- Type your desired title text. For this example, we use the word “Singapore”.
- Set the font to Hanson and the size to 96 points for boldness and readability.
- Center-align the text within the text box.
The font choice and size contribute to the slide’s impactful visual hierarchy, making the title the focal point of your presentation.
Using the Draw Tool for Handwritten Text
To add a personal and creative touch, you can use PowerPoint’s Draw tool to overlay handwritten-style text on top of your slide title. This technique adds warmth and uniqueness to your slide.
Here’s how to do it:
- Activate the Draw tab in PowerPoint.
- Select the Pen tool and choose your preferred color and pen thickness.
- Draw your custom text or message. For example, write “Welcome to” above the slide title.
Drawing smooth, natural-looking handwriting can be challenging with a mouse. For best results, consider using a graphics tablet such as the Wacom Intuos, which offers precision and fluidity in your strokes. This tool is highly recommended for anyone who frequently uses the Draw tool in PowerPoint.
Once your handwritten text is complete, position it slightly above and close to your main title to create a cohesive design.
Applying PowerPoint Animations
Now that your text elements are in place, it’s time to bring your slide to life with animations. PowerPoint offers powerful animation features that allow you to control how each element appears and behaves on your slide.
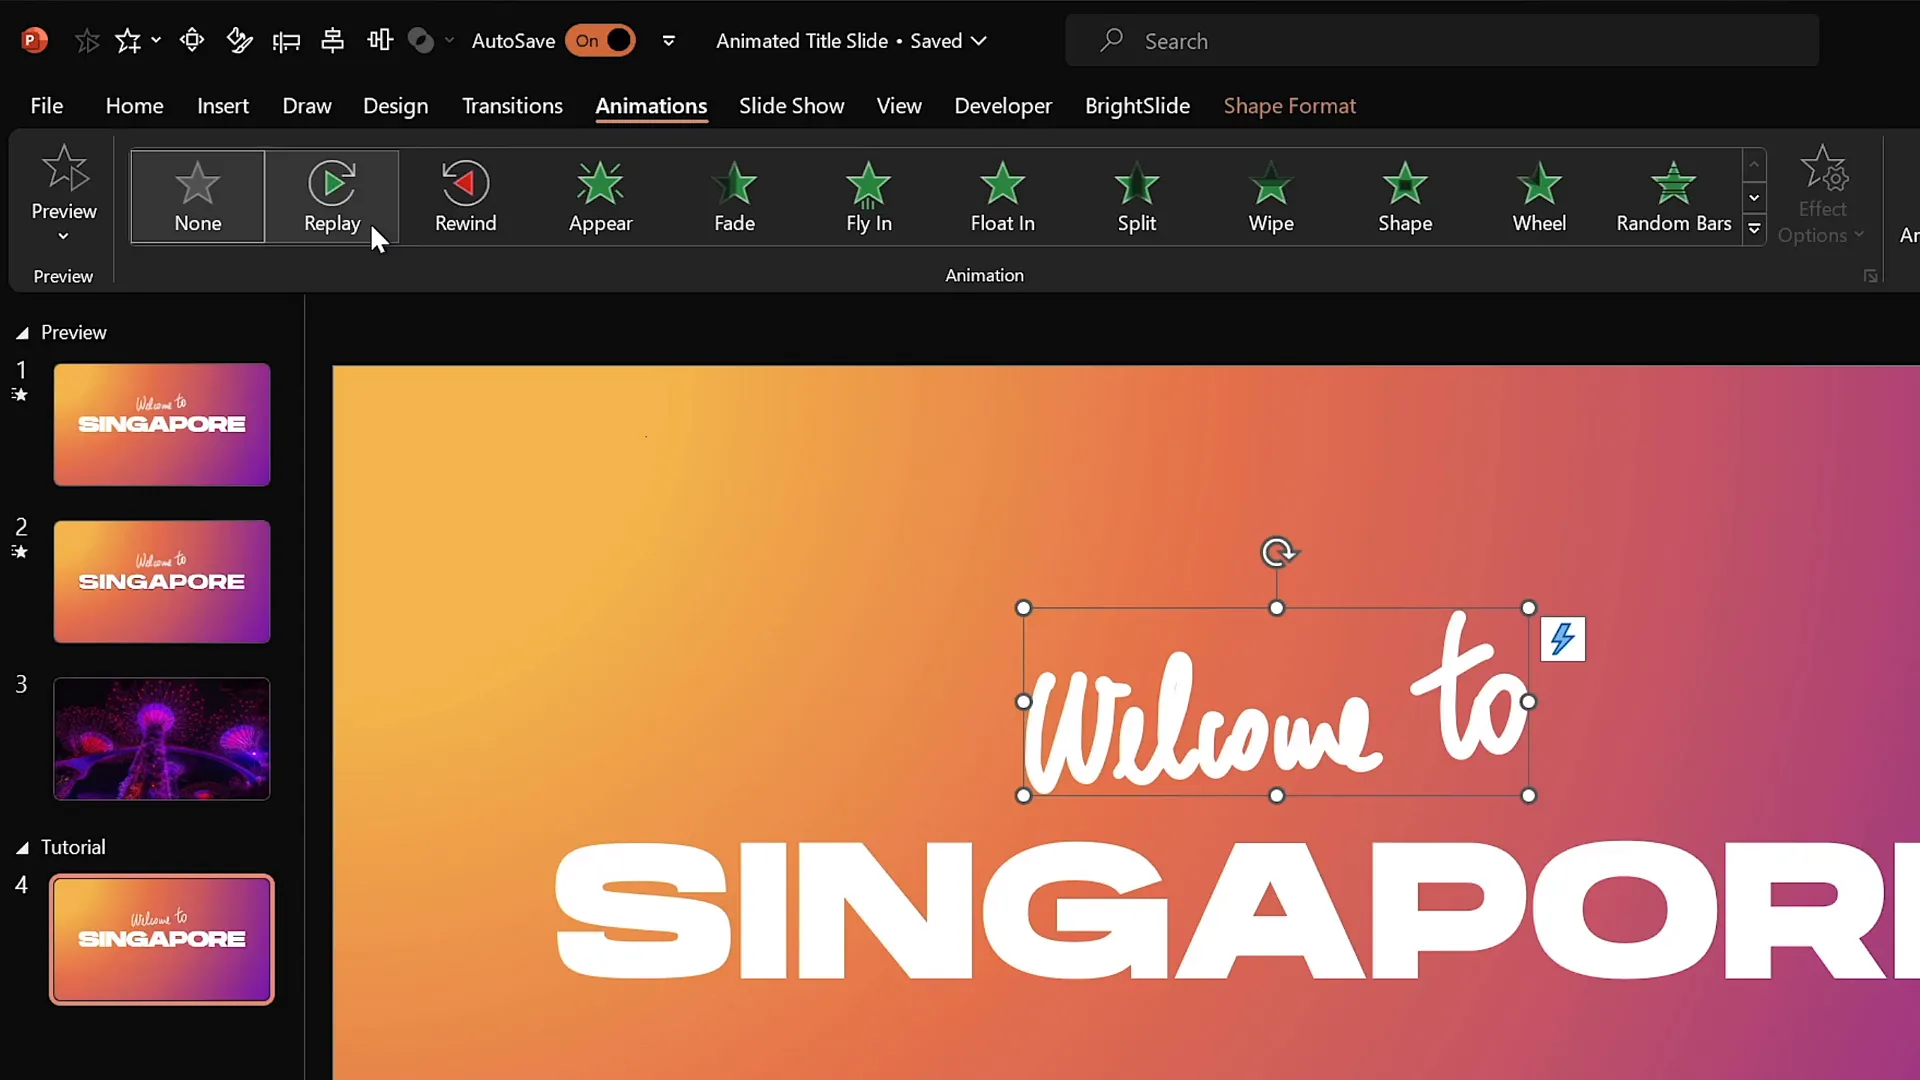
Animating the Handwritten Text with Replay Animation
Since the handwritten text was created with the Draw tool, you can apply the Replay animation, which replays the drawing stroke by stroke, creating a dynamic “writing” effect.
- Select the handwritten text.
- Go to the Animations tab and choose the Replay animation.
- Open the Animation Pane to fine-tune the animation duration.
- Adjust the duration from the default 2 seconds to around 1.3 seconds for a snappier effect.
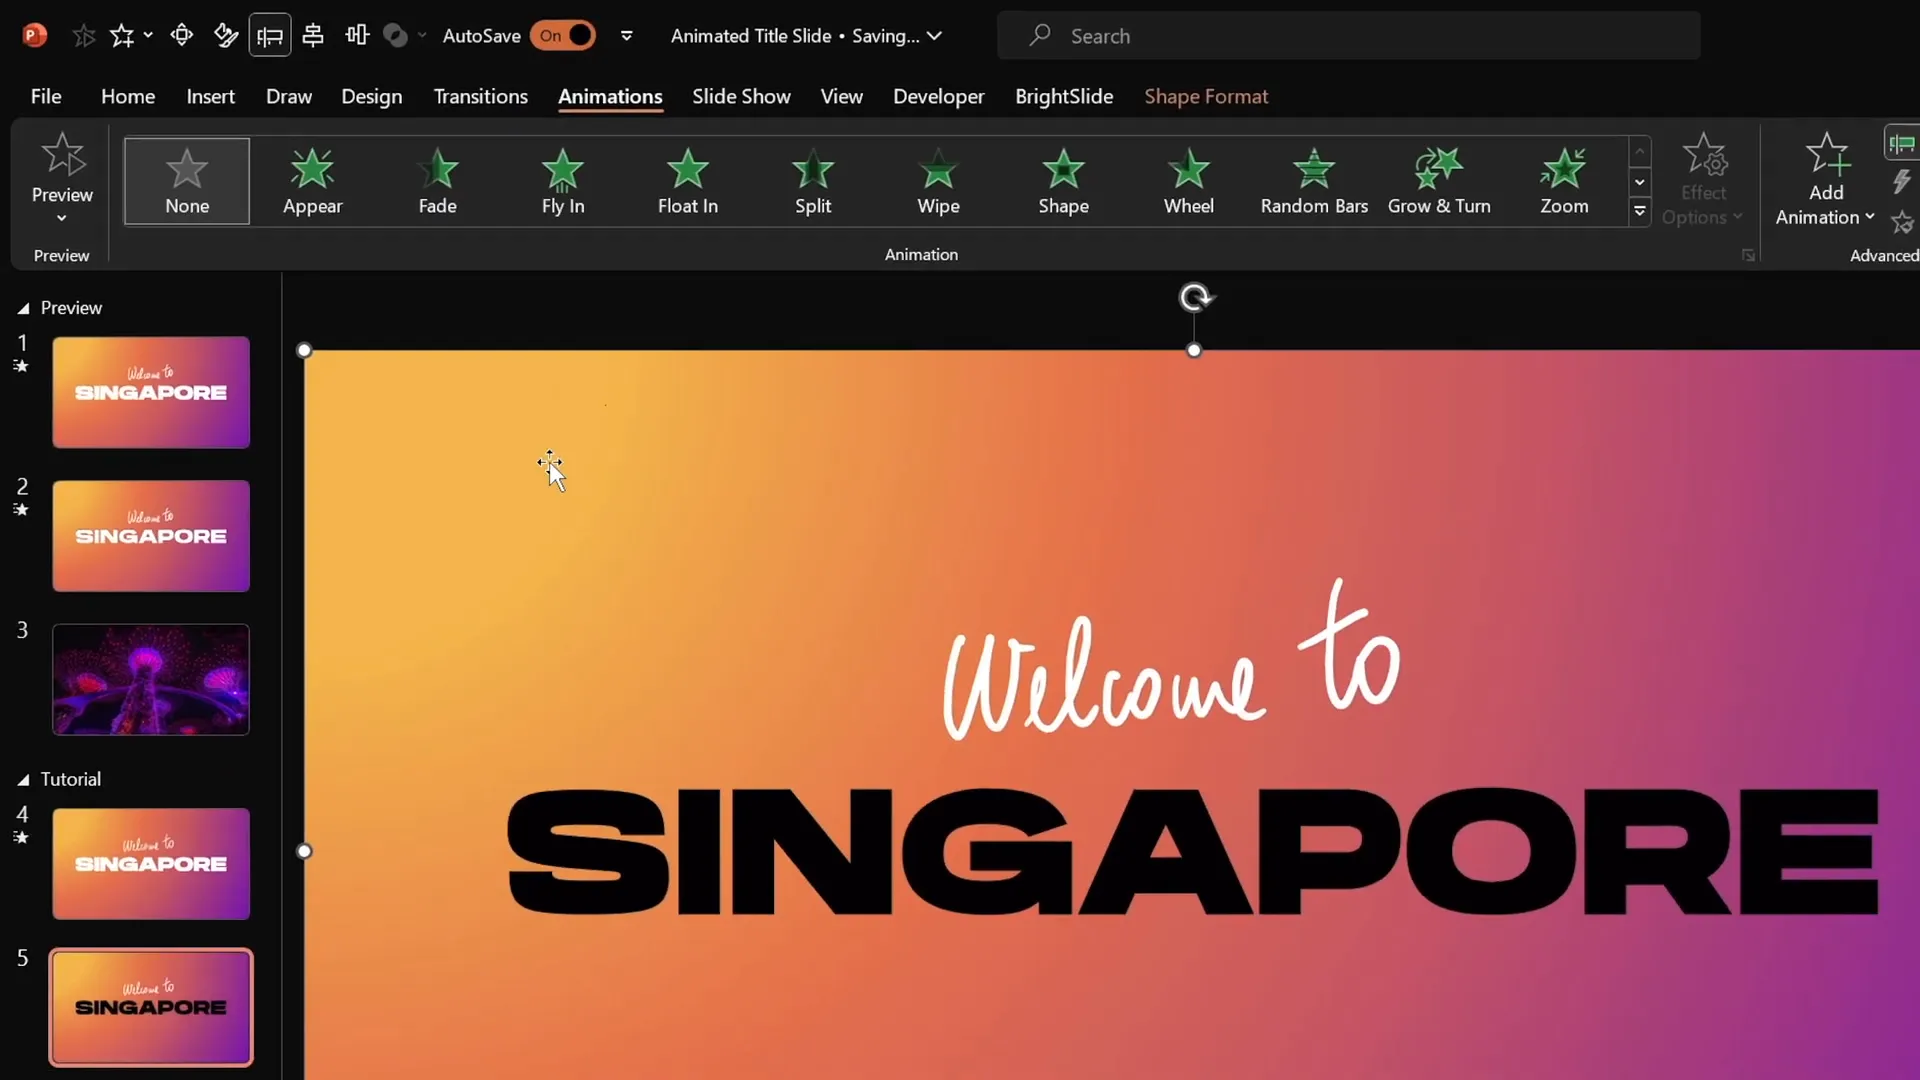
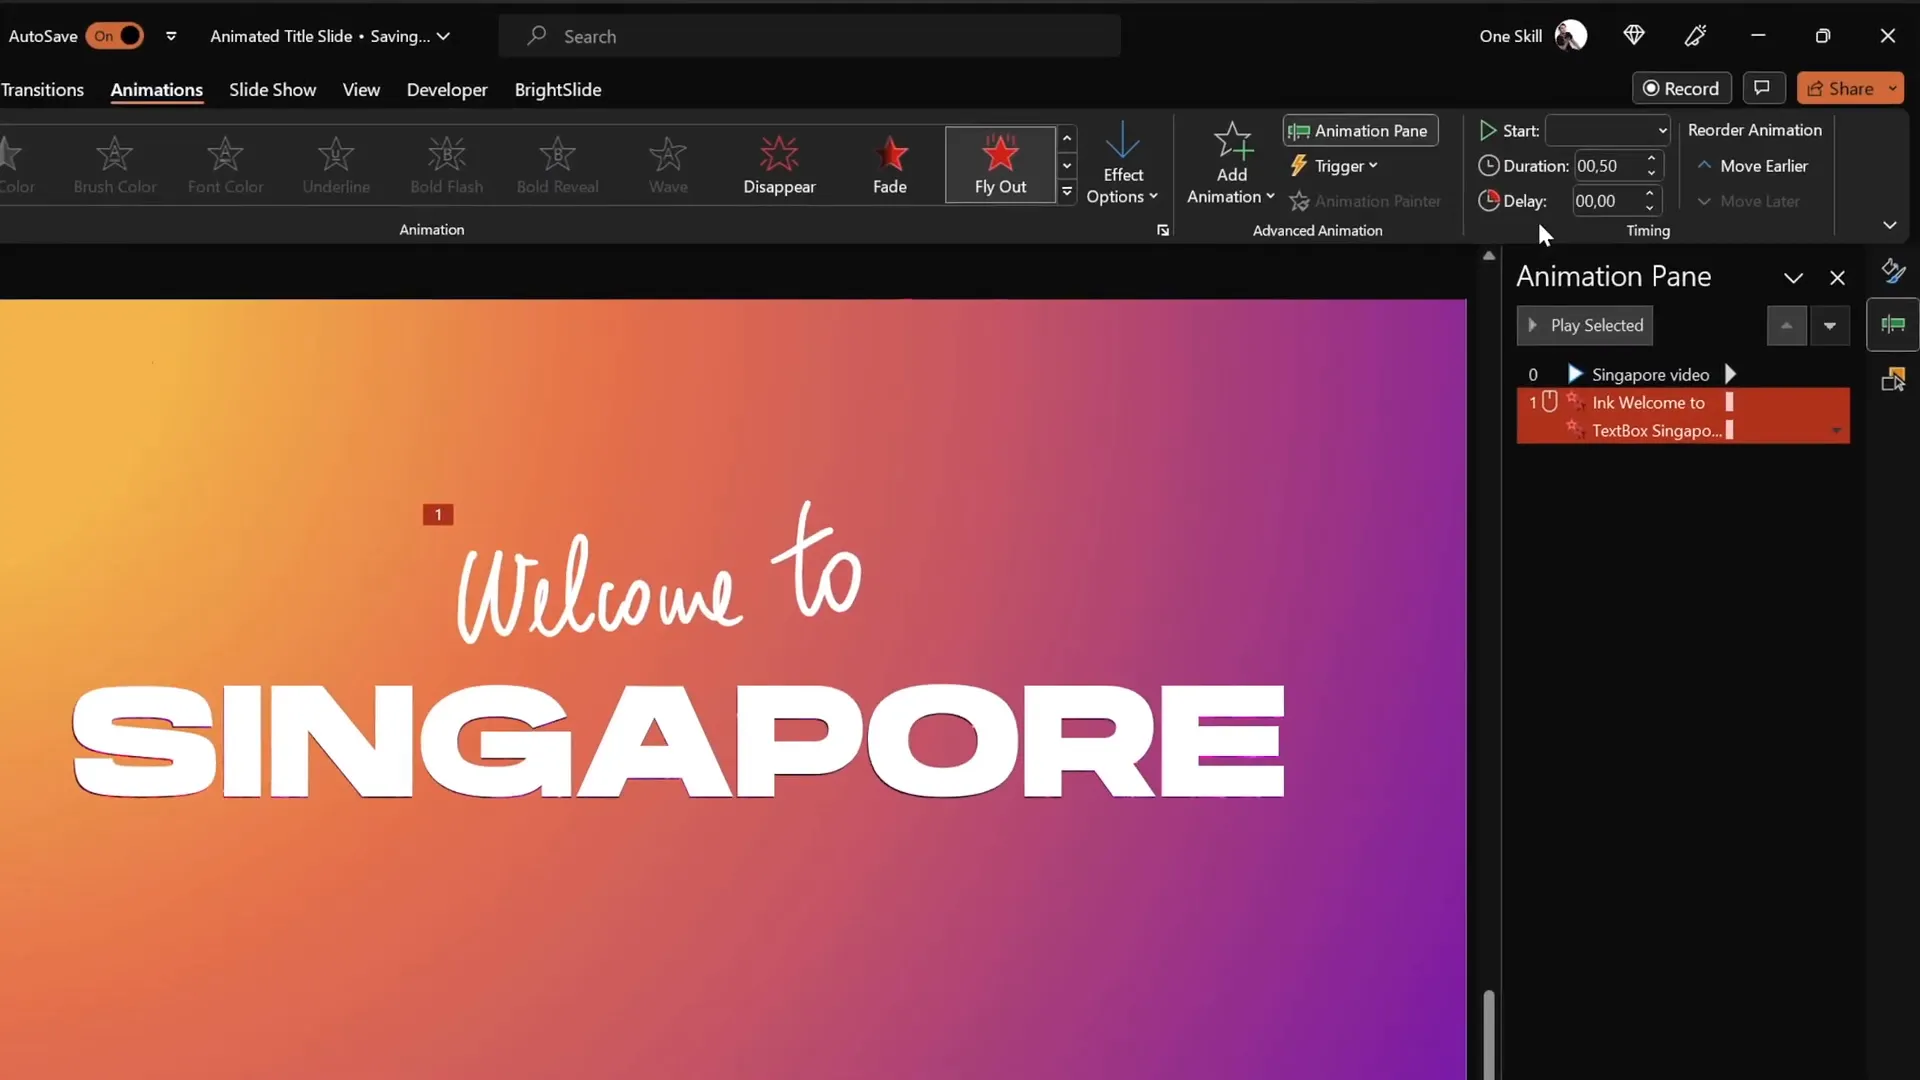
Animating the Slide Title with Fly In Effect
For the main title text, use the Fly In animation to create an engaging entrance effect:
- Select the slide title text box.
- Apply the Fly In animation with the direction set to From Right.
- Set the animation to start With Previous so it plays simultaneously with the handwritten text.
- Set the duration to 1 second for a smooth but quick entrance.
- In the animation options, increase the movement to maximum for a soft landing effect.
- Animate the text By Letter with a 10% delay between letters to add a dynamic staggered reveal.
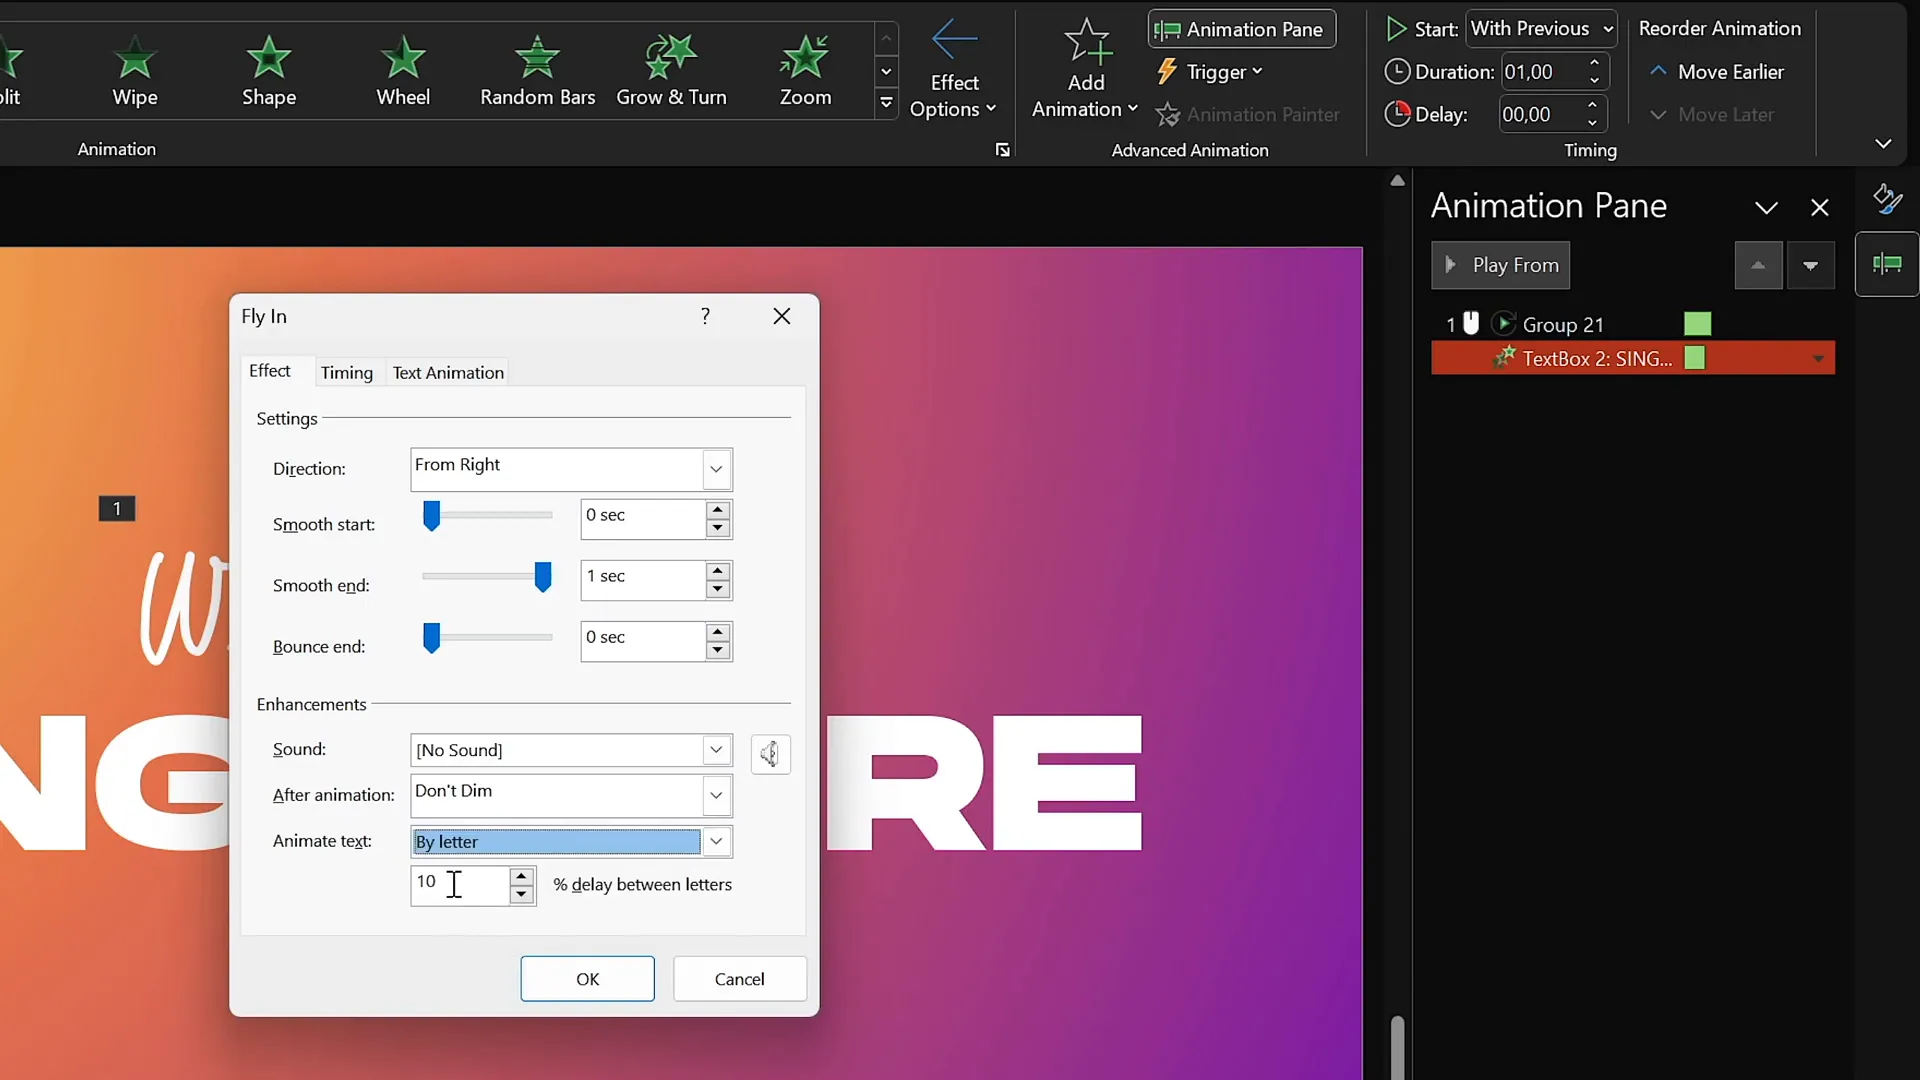
The combination of these animations creates an appealing, professional-looking title sequence that captures attention immediately.
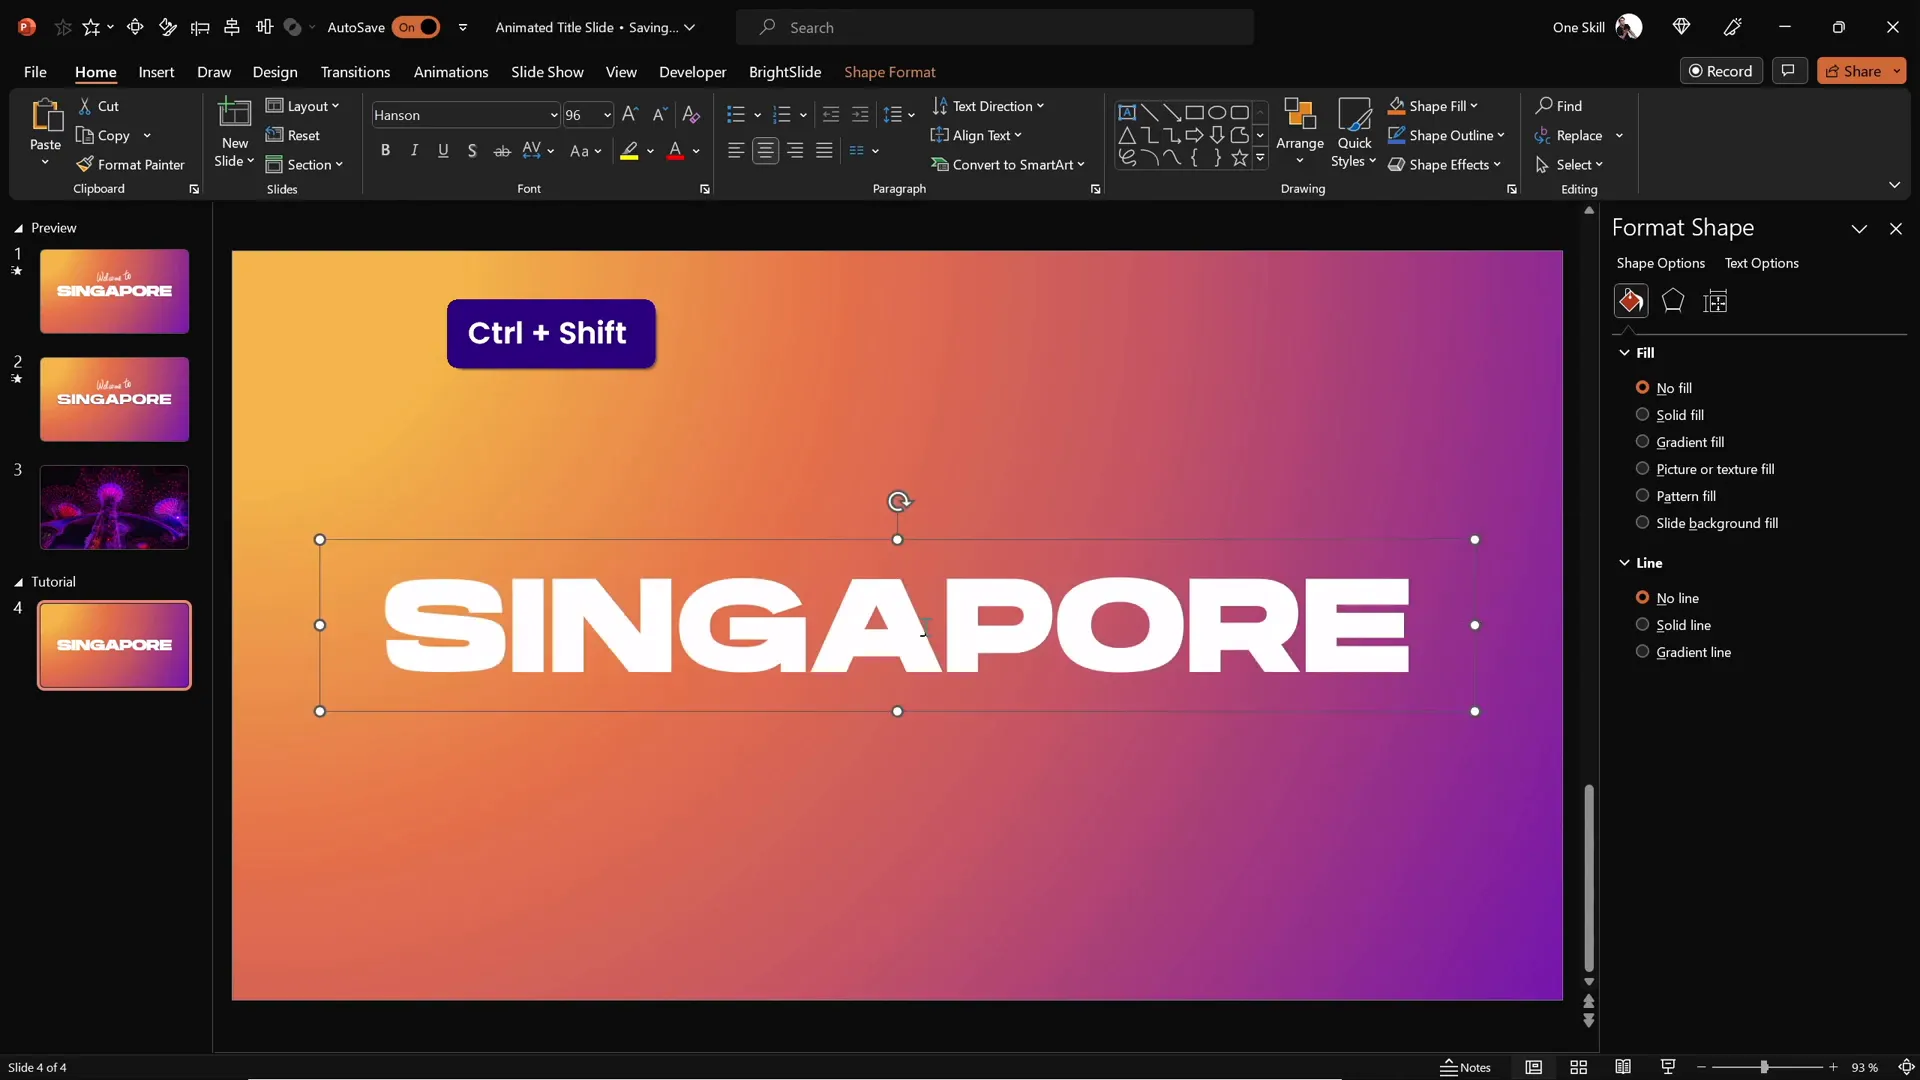
Cutting Out Text from the Background
To add an advanced visual effect, you can “cut out” the title text from the gradient background, allowing the slide background or a video to show through the text. This technique creates an impressive layered look.
Follow these steps to punch a hole in your gradient rectangle using the slide title text:
- Duplicate the slide with your animations.
- On the duplicate slide, remove all animations temporarily to work with static elements.
- Select the gradient rectangle first.
- Hold the Shift key and select the slide title text box.
- Go to the Shape Format tab, click Merge Shapes, and choose Subtract.
This subtracts the text shape from the rectangle, creating a transparent cutout where the text was, revealing whatever is behind the rectangle—perfect for layering videos or images.
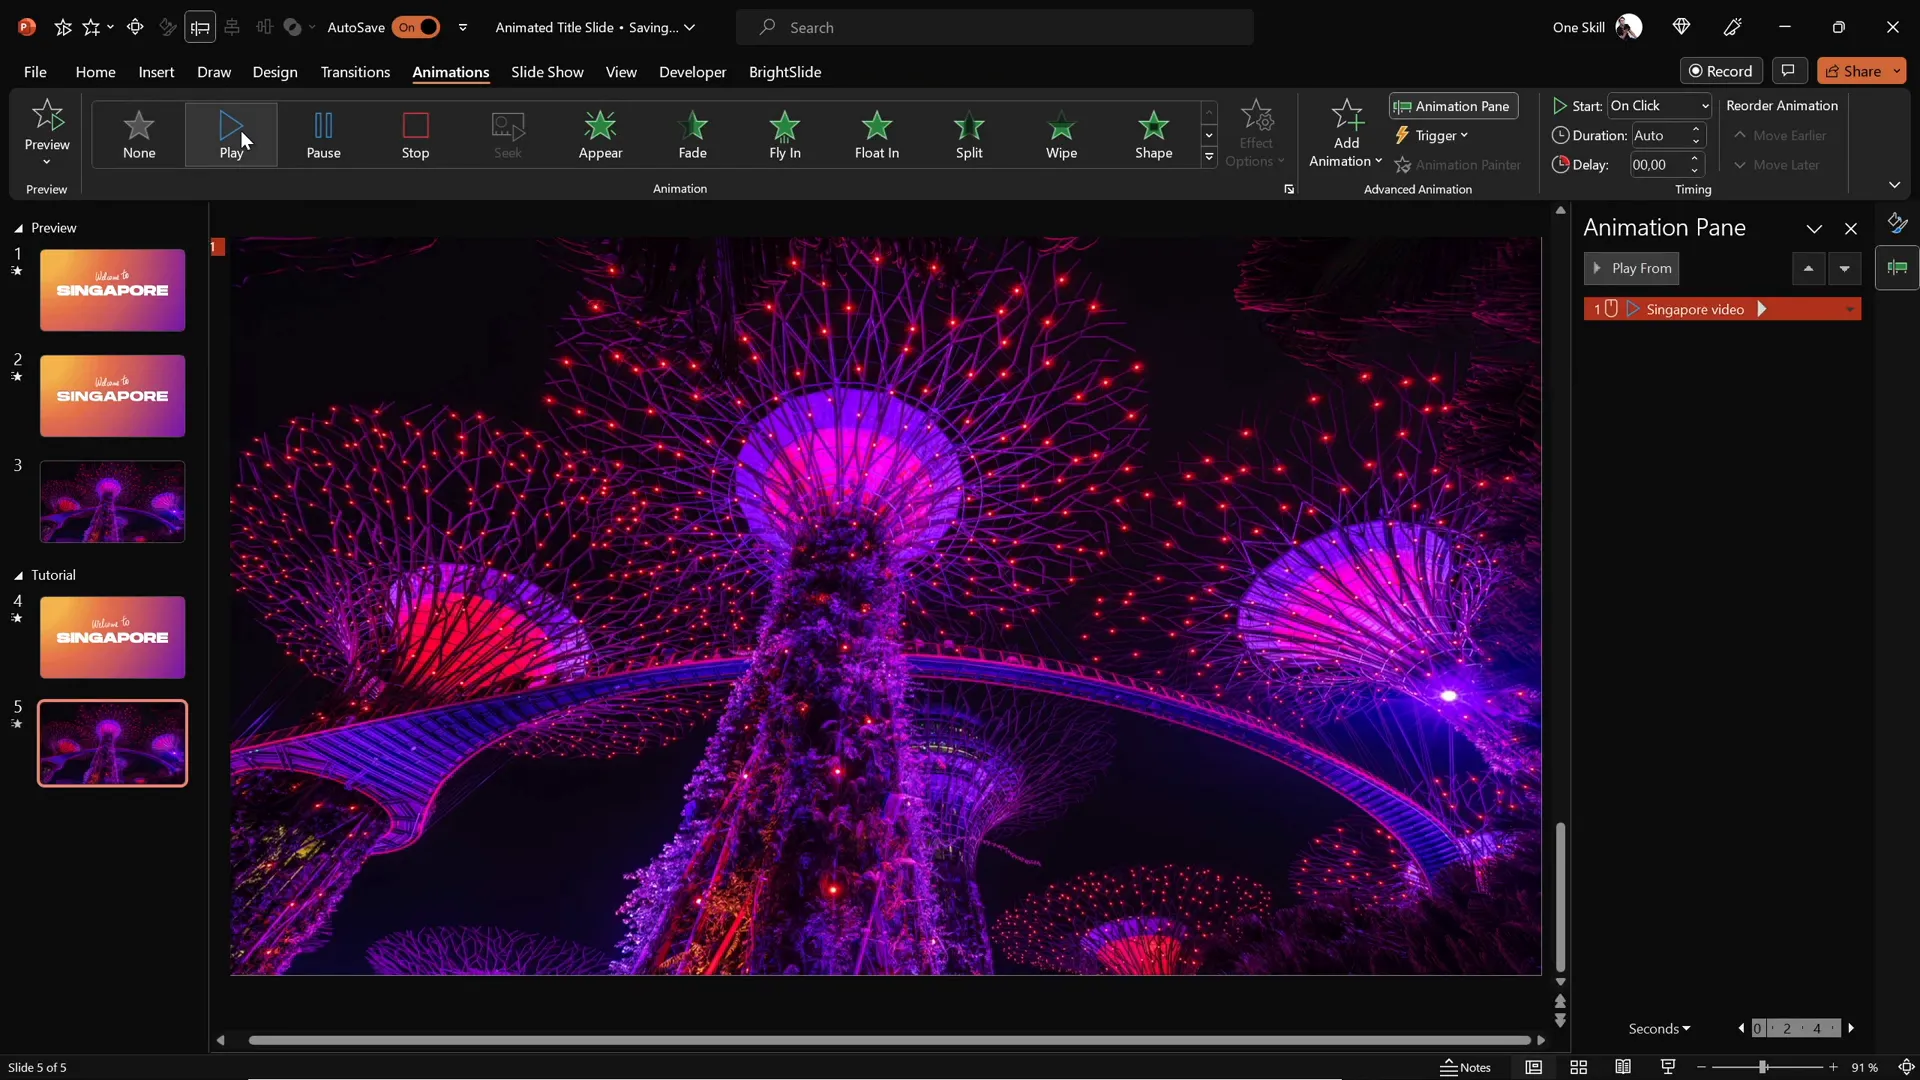
Inserting and Animating Video Backgrounds
Adding a video background behind your cutout text can dramatically enhance the visual impact of your title slide.

For this project, a video of Singapore’s iconic supertrees lighting up at night was used, sourced from Depositphotos, a great resource for royalty-free stock photos, videos, and music.
How to insert and animate your video:
- Download your chosen video from a stock resource like Depositphotos.
- Copy and paste the video onto the slide with the cutout gradient rectangle.
- Center-align the video to fit perfectly behind the cutout text.
- Add a Play animation to the video, setting it to start With Previous so it plays automatically when the slide loads.
- Enable the Loop playback option so the video plays continuously.
- Send the video to the back layer, ensuring the cutout rectangle is on top.
To complete the effect, paste the slide title text box (without animations) on top of the cutout to fill in the letters and maintain clarity.
Adding Exit Animations for a Polished Finish
Exit animations help transition your slide elements out smoothly, creating a professional and polished look.
Here’s how to add exit animations to the handwritten text and slide title:
- Select both the handwritten text and the slide title text boxes.
- Go to the Animations tab and click Add Animation.
- Choose an exit effect such as Cloud.
- Set the animations to start With Previous for simultaneous exit.
- Set the direction to To Top and duration to 1 second for a smooth fade away.
- In animation options, apply Maximum Smooth Start for gentle motion.
- For the slide title, animate By Letter with a delay to create staggered letter exit effect.
These exit animations provide a subtle yet effective way to close your animated sequence gracefully.
Final Touches and Tips
The last step involves animating the cutout rectangle itself to create an eye-catching zoom and fade effect.
Apply the Grow/Shrink animation to the gradient cutout rectangle with these settings:
| Animation Setting | Value |
|---|---|
| Start | With Previous |
| Duration | 2 seconds |
| Size (Growth) | 9000% |
| Smooth Start | Maximum |
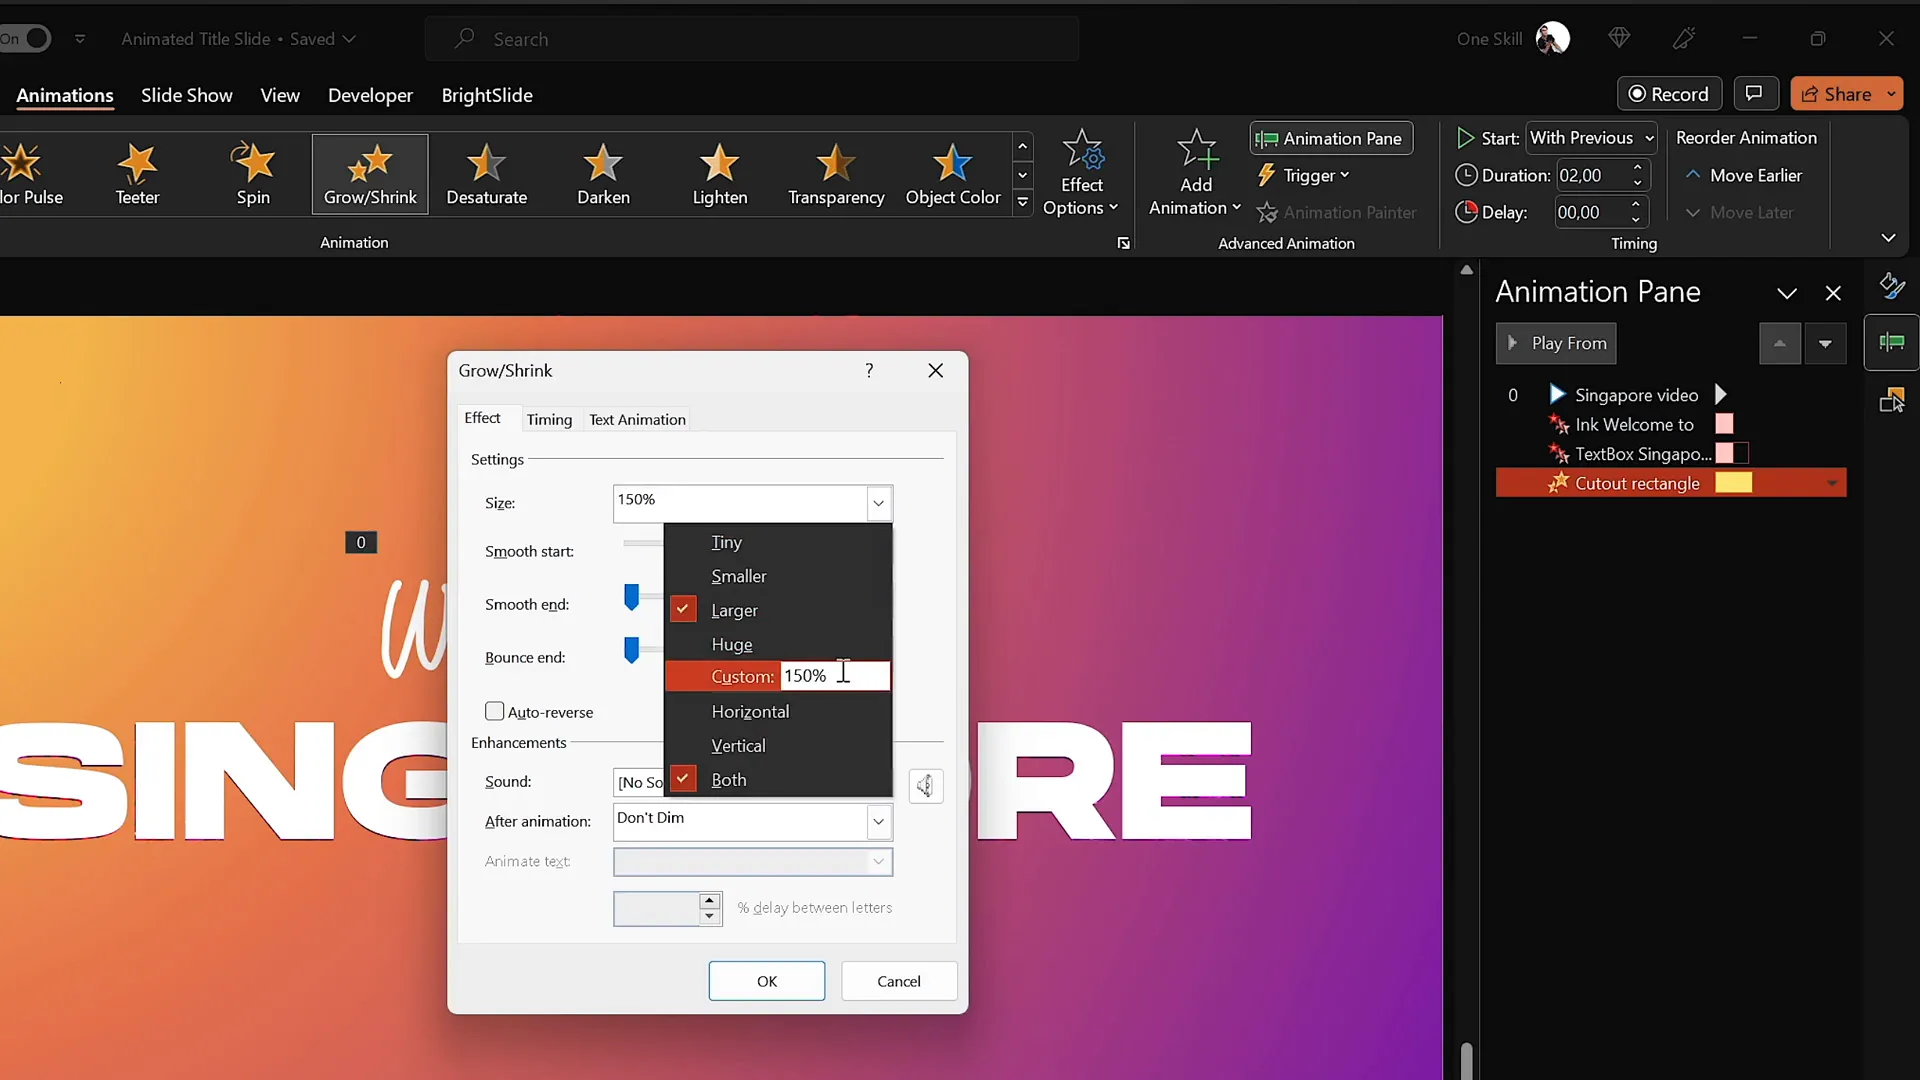
This huge growth makes the cutout rectangle expand rapidly, revealing the video background through the letters and then flying away for a dramatic finish.
Remember to set the slide transition on the video slide to None so the transition between slides is instant and seamless, enhancing the animation effect.
Frequently Asked Questions about PowerPoint Animations
What is the best way to create smooth handwritten text in PowerPoint?
Using the Draw tool with a graphics tablet such as the Wacom Intuos provides the smoothest and most natural handwriting effect. It allows you to draw directly onto the slide with precision and control, making your handwritten text look polished and professional.
How can I make animations play automatically in PowerPoint?
Set your animations to start With Previous in the Animation Pane. This setting triggers the animation automatically when the slide loads or when the previous animation finishes, depending on your sequence.
Can I insert videos directly into PowerPoint slides?
Yes! PowerPoint allows you to insert videos from your computer or online sources. Once inserted, you can resize, align, and animate the video just like any other slide object. You can also set videos to play automatically and loop continuously.
How do I create a cutout text effect in PowerPoint?
Use the Merge Shapes feature with the Subtract option. Select the background shape first, then the text shape, and subtract to punch out the text from the background. This reveals whatever is behind the shape, such as an image or video.
What are some tips for animating text by letter in PowerPoint?
In the animation options, choose to animate By Letter and set a delay percentage (e.g., 10%) to stagger the animation of each letter. This creates a dynamic effect where letters appear or exit sequentially, adding polish and professionalism to your text animations.
Where can I find royalty-free videos and images for my PowerPoint presentations?
Stock photo and video websites like Depositphotos offer a wide range of royalty-free resources. You can download high-quality videos, photos, vectors, and music to enhance your presentations. Depositphotos also provides creative tools such as background removers and image upscalers to streamline your design process.
Conclusion
Mastering PowerPoint animations can transform your presentations from ordinary to extraordinary. By combining gradient backgrounds, handwritten text, cutout effects, and video backgrounds, you create a visually stunning animated title slide that captivates your audience from the first glance.
Remember, the key to great animation is subtlety and timing. Use animations to enhance your message, not distract from it. With the techniques shared here, you can confidently design animated title slides that are professional, engaging, and uniquely yours.
If you want to continue expanding your PowerPoint animation skills, consider exploring more tutorials and practicing with different animation types and sequences. The possibilities are endless when you harness the full power of PowerPoint.
Happy animating!
Check out the full video: How to Create ANIMATED PowerPoint ✨TITLE SLIDE✨


