
PowerPoint presentations are everywhere — in classrooms, boardrooms, conferences, and online webinars. But how do you make your slides stand out and captivate your audience? The answer lies in the art of Powerpoint animations. Whether you’re a beginner or an advanced user, mastering animations can transform your presentations from plain and static to dynamic and memorable.
In this comprehensive guide, inspired by the expertise of Kaspare from Vilnius, Lithuania (known as One Skill on YouTube), you’ll learn everything about creating stunning animations in PowerPoint. Kaspare has shared his PowerPoint animation secrets after nearly a decade of experience helping millions enhance their presentations. This article unpacks his proven methods and tips to turn you into a PowerPoint animation pro.
Ready to learn the secret to incredible PowerPoint animations? Let’s dive in.
Table of Contents
- Introduction to PowerPoint Animations
- The Four Main Types of PowerPoint Animations
- How to Add Animations in PowerPoint
- Tips for Using PowerPoint Animations Effectively
- Four Additional Ways to Animate in PowerPoint
- Creating Custom Animations Using Multiple Effects
- Animation Smoothing and Polishing Your Work
- FAQ: PowerPoint Animations
- Conclusion: Master PowerPoint Animations Today
Introduction to PowerPoint Animations
Have you ever wanted to add life to your PowerPoint slides but didn’t know where to start? Or maybe you’ve dreamed of creating advanced, unique animations but felt overwhelmed by PowerPoint’s features. You’re not alone. Many users find animations intimidating, yet they hold the key to engaging your audience and making your message unforgettable.
This guide is your roadmap to mastering Powerpoint animations. Starting from the basics and progressing to advanced techniques, you’ll gain the skills to create animations that capture attention, emphasize key points, and add professionalism to your presentations.
Kaspare’s PowerPoint Animation Mastery course, which this article is based on, is designed to build your confidence step-by-step — starting with fundamentals and moving on to advanced animations, including text, photos, videos, animated intros, infographics, and even 3D models.
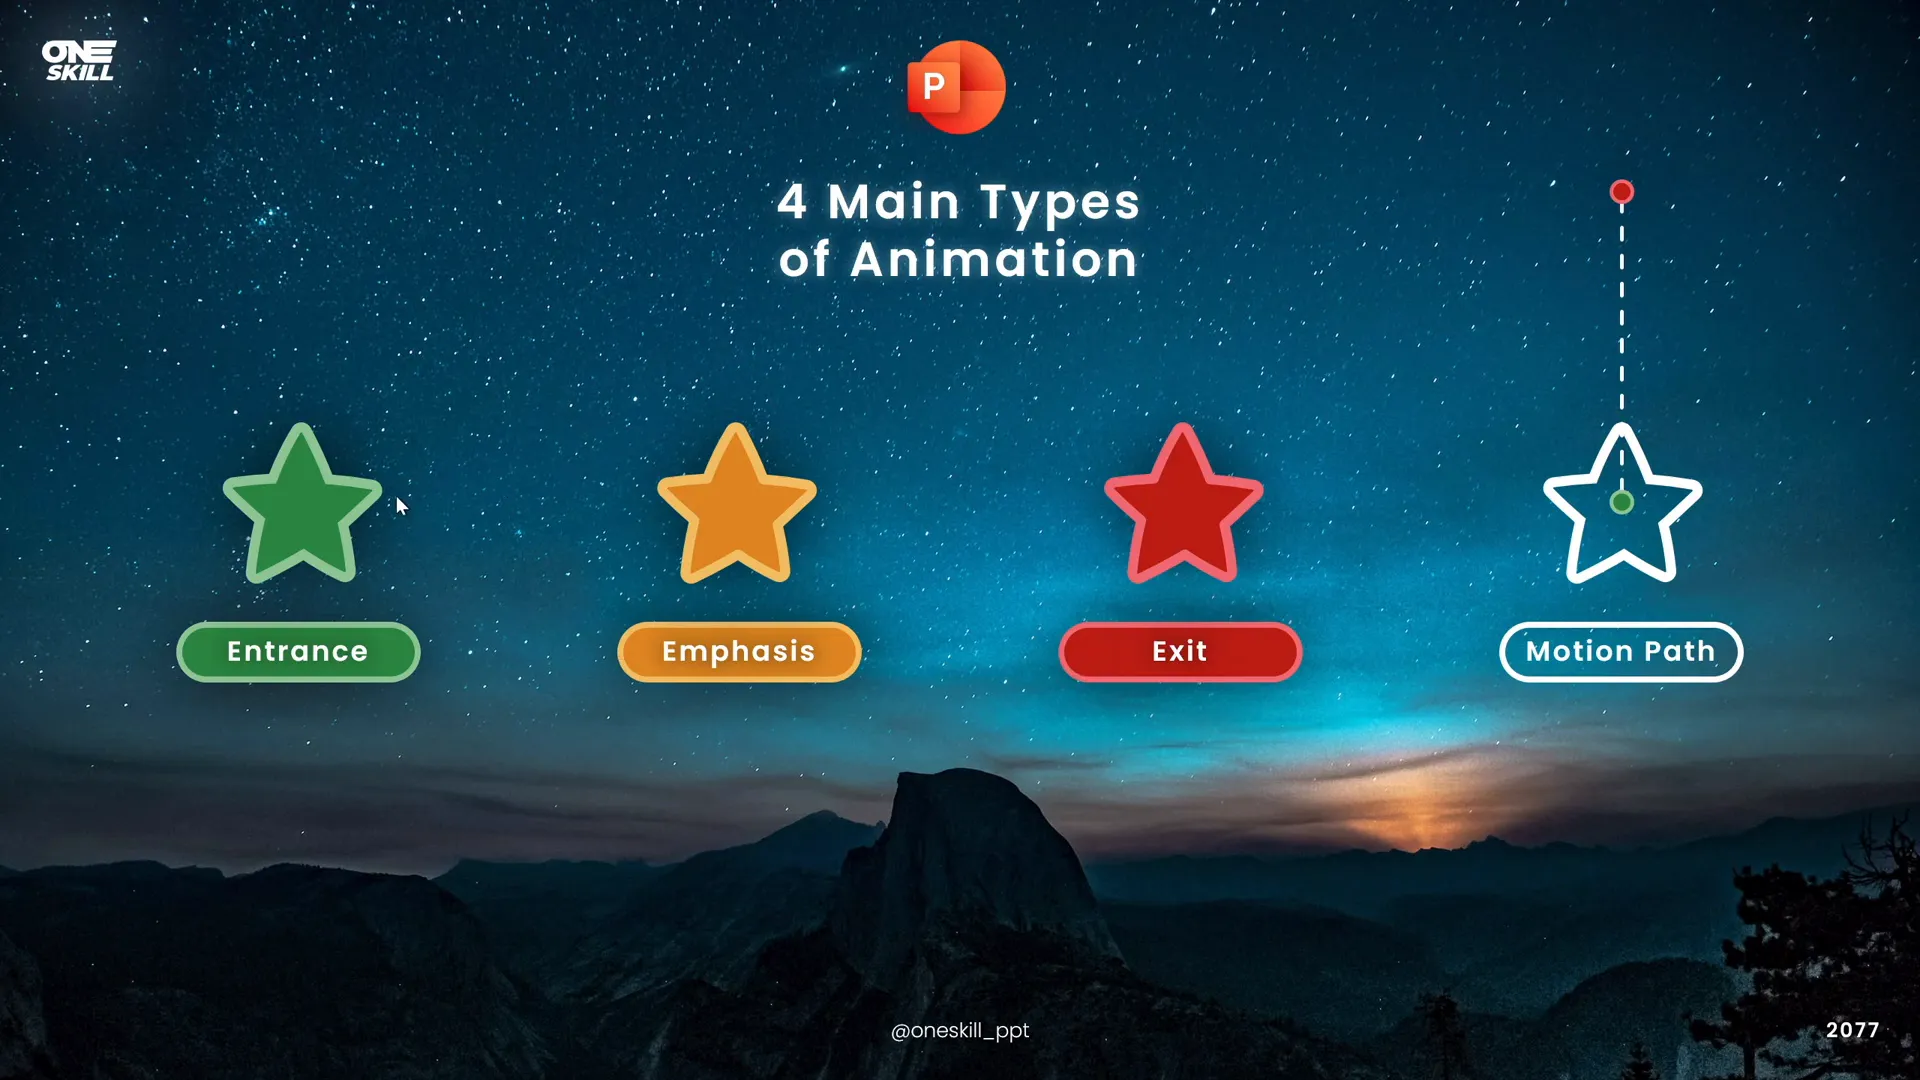
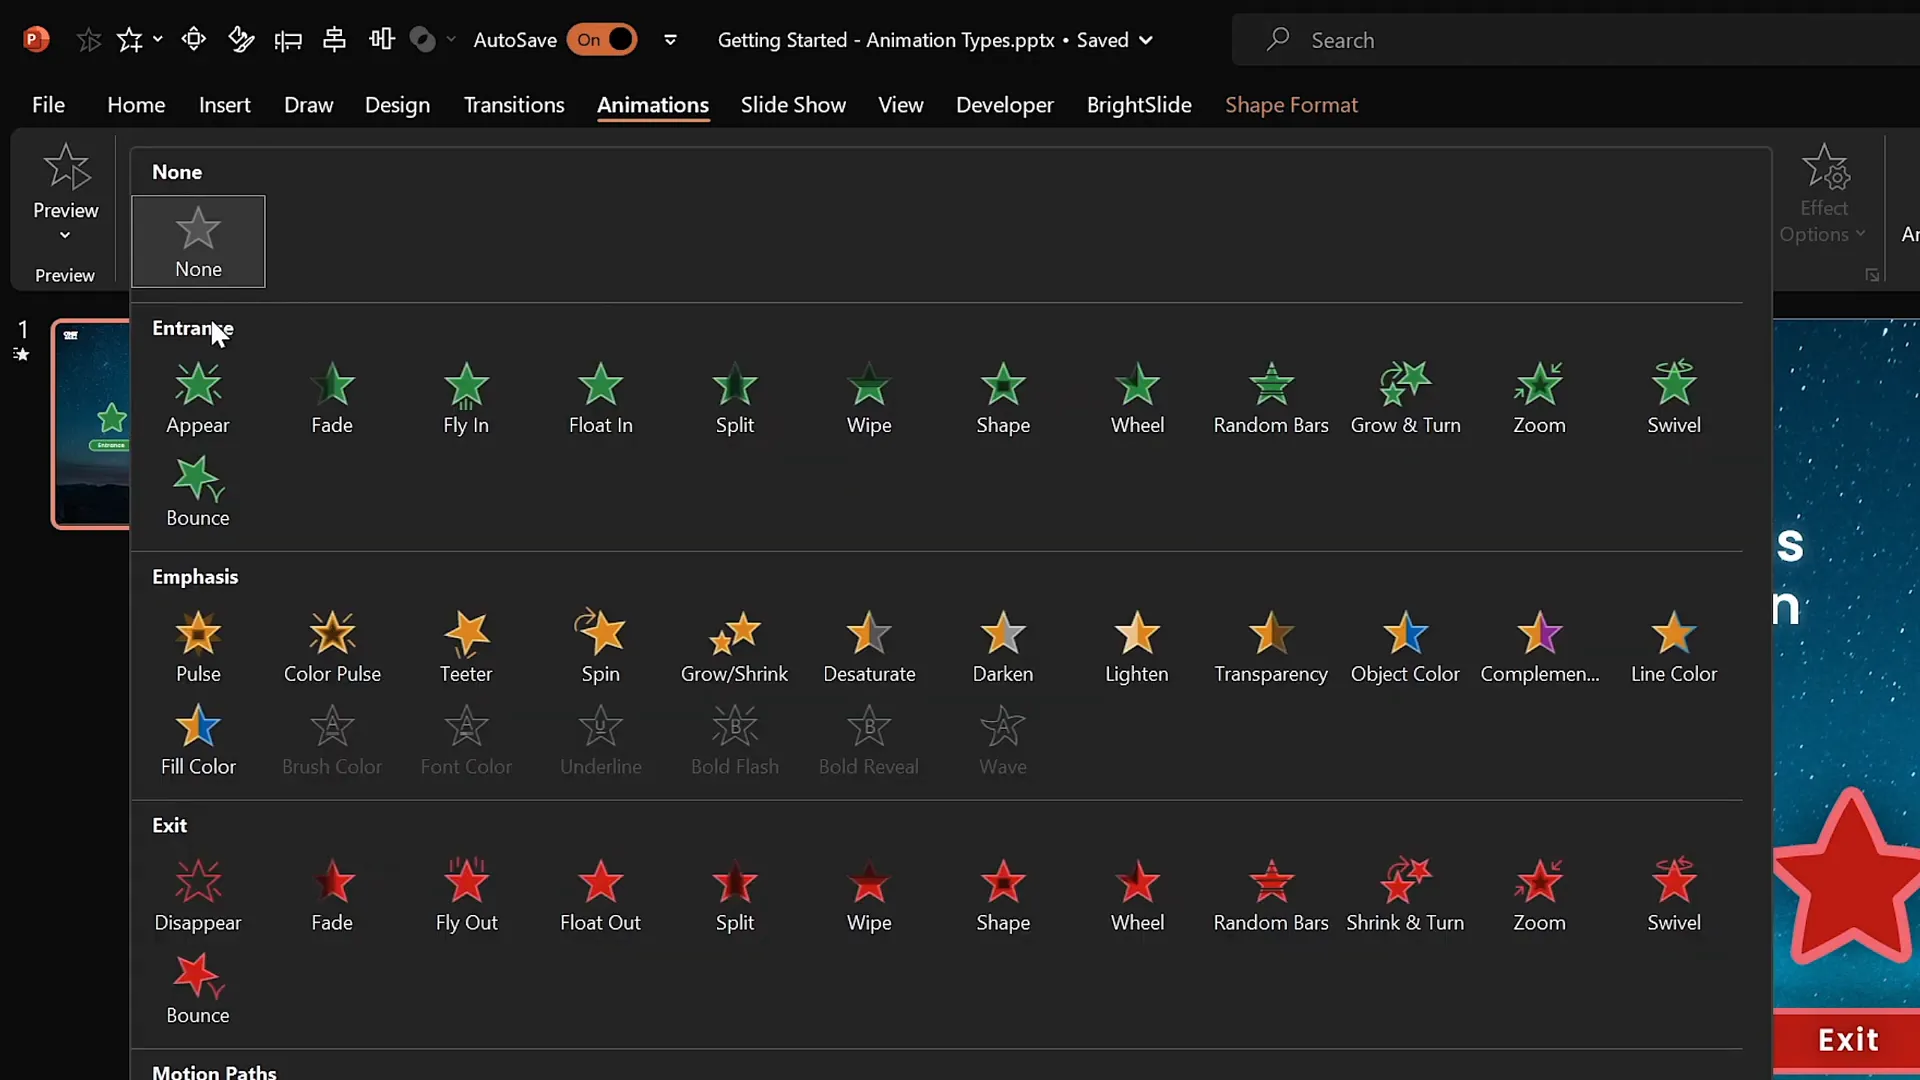
The Four Main Types of PowerPoint Animations
Understanding the types of animations available is the first step toward mastering them. PowerPoint offers four primary types of animations, each with distinct purposes:
- Entrance Animations: Use these to introduce objects onto your slide — text, images, videos, or shapes appear with style.
- Emphasis Animations: These highlight or draw attention to an existing object on the slide, such as spinning or changing color.
- Exit Animations: Use these to smoothly remove objects from your slide, making them disappear with effect.
- Motion Path Animations: These move objects along a specified path on the slide, which can be straight lines, curves, circles, or custom shapes.
Each type serves a unique role in storytelling and can be combined for powerful effects.
Entrance Animations
Entrance animations are perfect when you want to bring attention to new content as it appears on the slide. For example, a headline might fly in from the top, or a photo might fade gently into view. The green color coding in PowerPoint‘s animation list helps you identify entrance animations quickly.
Emphasis Animations
Once content is on the slide, you might want to add emphasis to it. Emphasis animations make objects stand out by spinning, pulsing, or changing color. These animations help keep your audience focused on important points without overwhelming them.
Exit Animations
Exit animations allow you to remove objects gracefully. Instead of abruptly disappearing, objects can zoom out, fade away, or fly off the slide. This keeps the flow natural and professional.
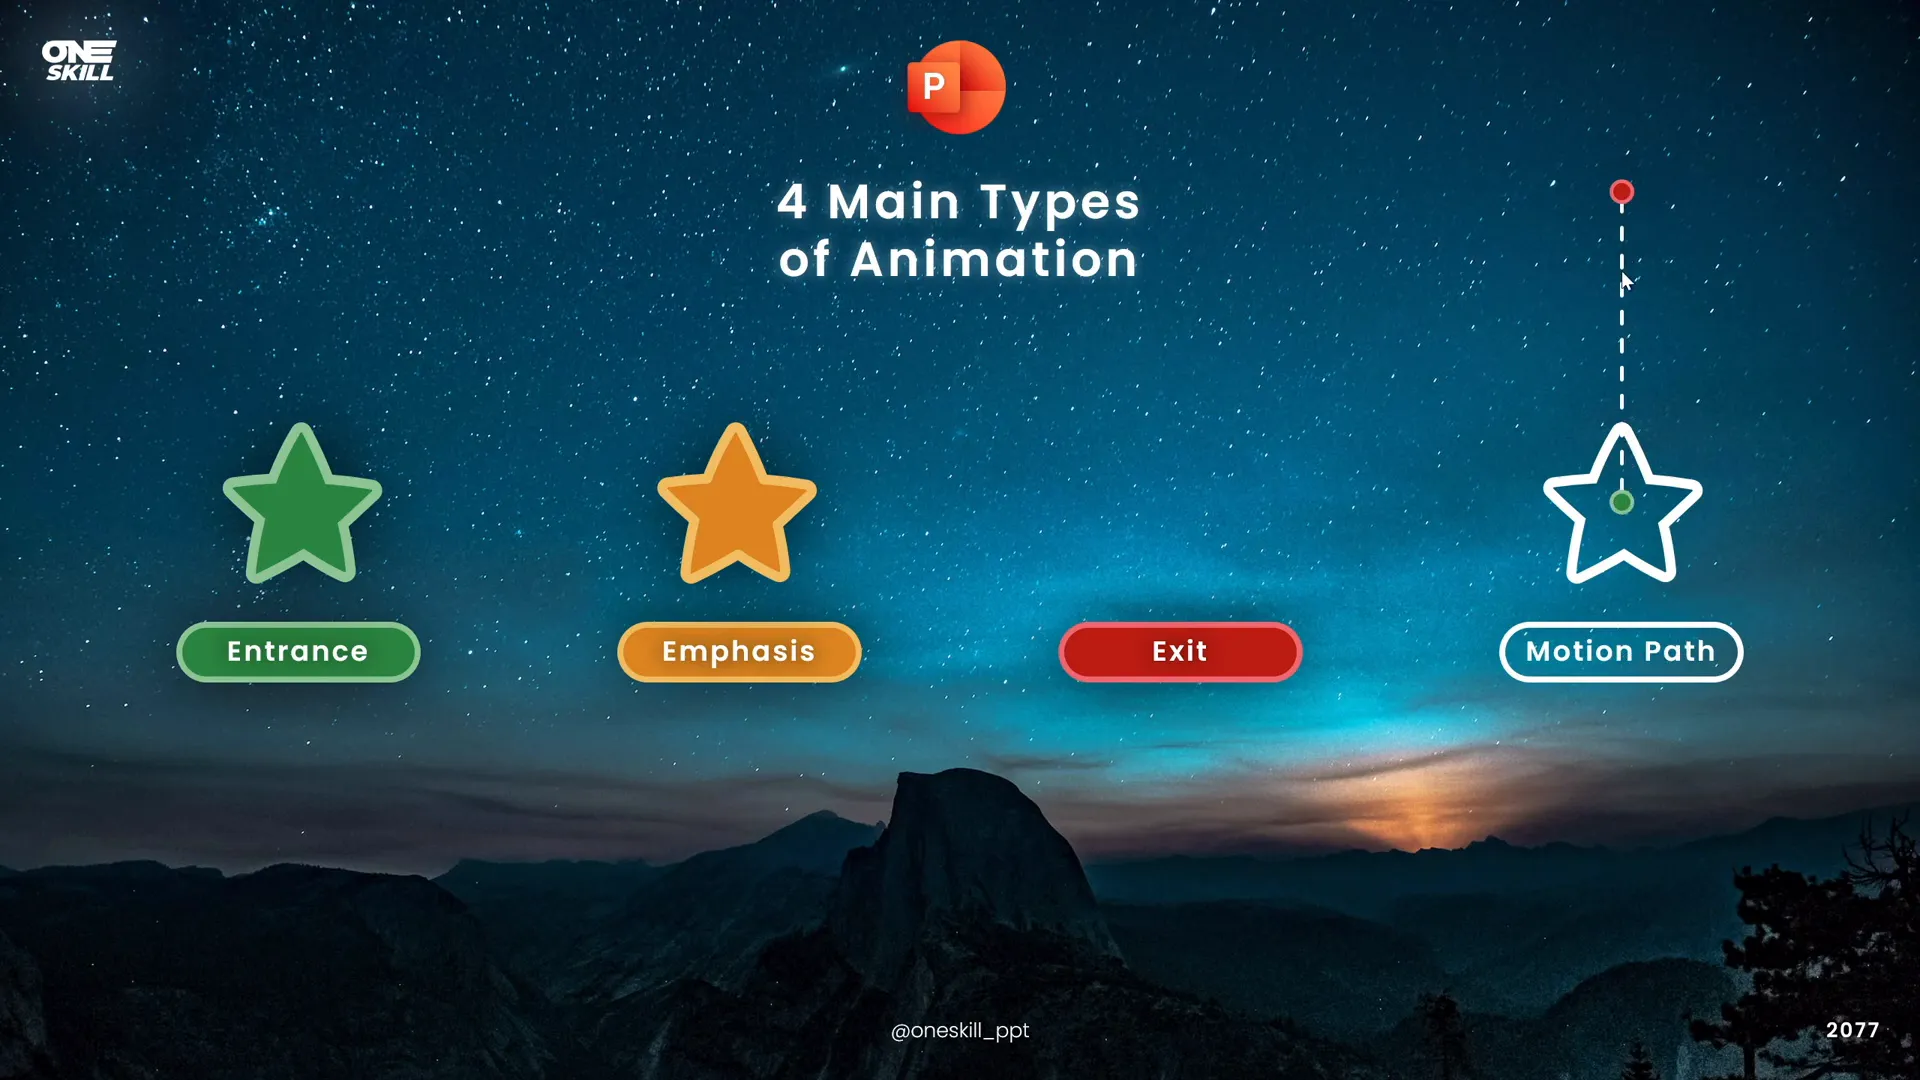
Motion Path Animations
Motion path animations move objects along a path you define. This could be a straight line, a curve, or even a complex custom path. The green bubble marks the starting position, and the red bubble marks the ending position. You can drag these to adjust the motion path to fit your design perfectly.
How to Add Animations in PowerPoint
Adding animations is straightforward once you understand the interface. Here’s a step-by-step guide to get you started:
- Select the Object: Click on the shape, text box, image, or video you want to animate.
- Go to the Animations Tab: This is where PowerPoint‘s animation tools are housed.
- Choose an Animation: The ribbon shows a few common animations initially. Click the small arrow to expand the list and explore more options, categorized into entrance, emphasis, exit, and motion paths.
- Apply the Animation: Click on the desired animation to apply it to your selected object.
- Preview the Animation: Use the Preview button to see how your animation looks in action.
Using the ‘Add Animation’ Button
To add multiple animations to the same object, always use the Add Animation button rather than selecting animations directly from the animation list. This prevents new animations from replacing existing ones.
For example, if your object already has a flying animation and you want to add a spin effect, select the object, click Add Animation, and then choose the spin animation. This method stacks animations and allows you to create complex effects.
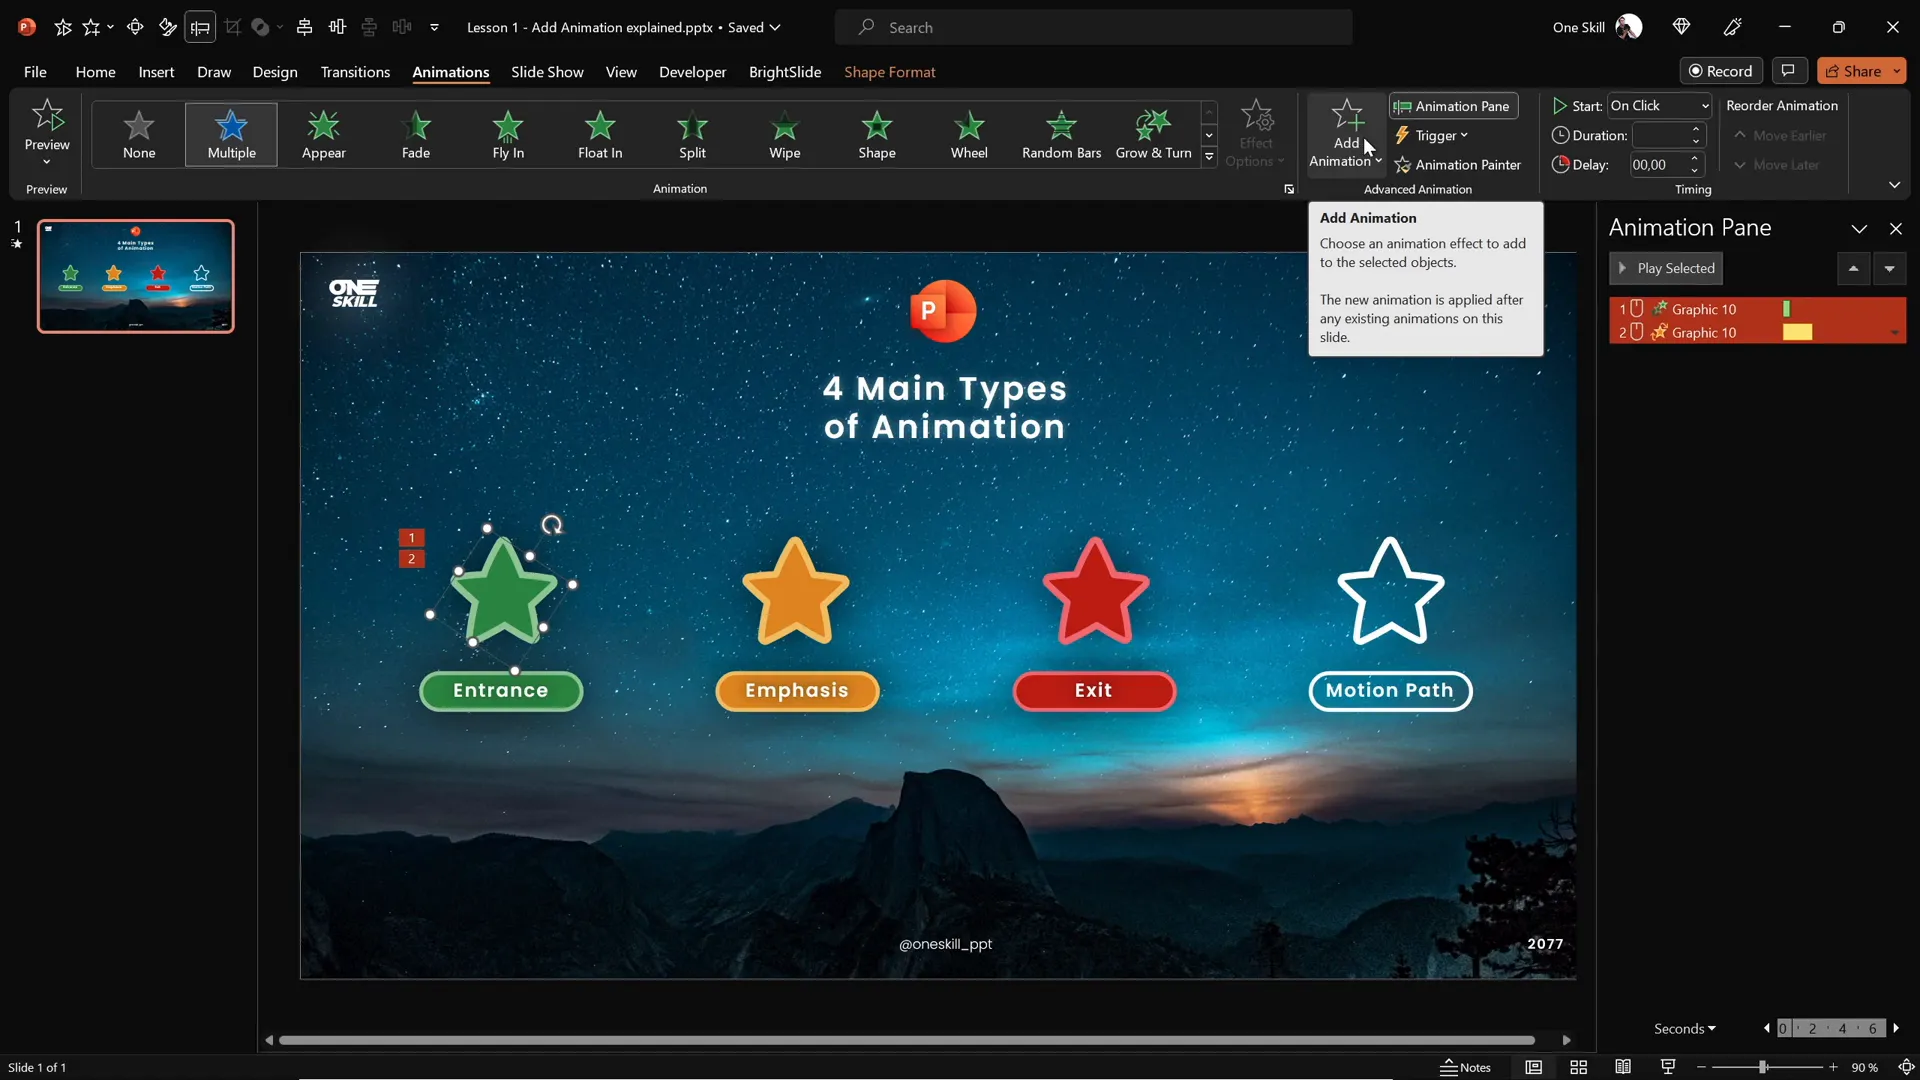
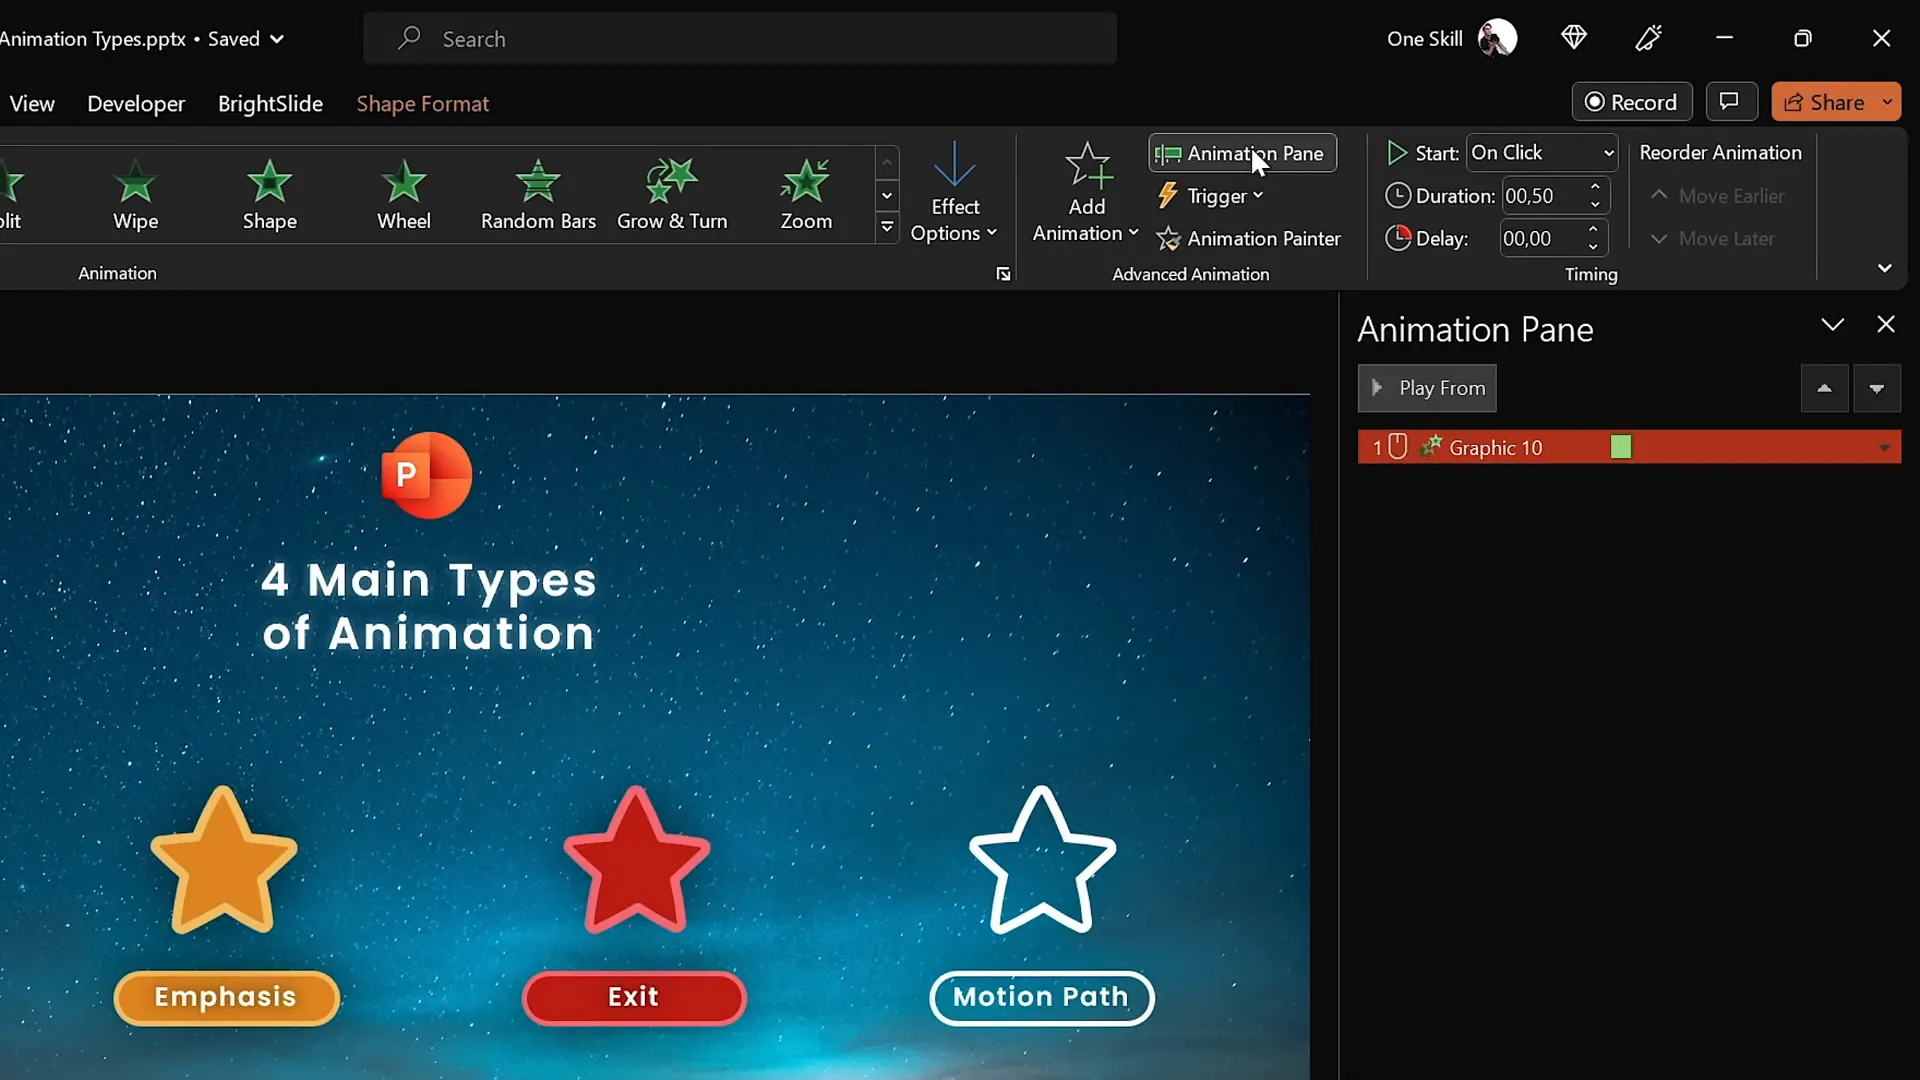
Animation Pane: Your Control Center
PowerPoint’s Animation Pane is an essential tool to manage all animations on your slide. Here’s what you can do:
- See all animations currently applied to objects.
- Adjust the order of animations.
- Change start options: On Click, With Previous, or After Previous.
- Modify animation duration and delays.
- Access advanced options like animation triggers.
Using the Animation Pane, you can fine-tune how and when animations play, giving you precise control over your presentation’s flow.
Tips for Using PowerPoint Animations Effectively
Animations can be powerful, but overusing or misusing them can distract your audience. Here are some expert tips to keep your animations professional and engaging:
- Keep It Simple: Use subtle animations like fade or zoom for smooth transitions. Avoid excessive or flashy effects that can overwhelm.
- Match Animation Style to Content: For text, fade and zoom work well. For photos, consider pinwheel or flying animations to introduce them dynamically.
- Use Entrance Animations to Guide Attention: Introduce key points or images in a sequence to help your audience follow along.
- Combine Animations Wisely: Multiple animations on one object can be effective but ensure they complement each other and do not confuse viewers.
- Preview Frequently: Test your animations in slideshow mode to see how they look in real time.
- Adjust Timing: Use the Animation Pane to set durations and delays that make your animations flow naturally.
Popular Animations by Category
| Category | Recommended Animations | Use Case |
|---|---|---|
| Basic | Flying | Introducing objects with a simple entrance |
| Subtle | Fade, Zoom | Gentle emphasis and smooth transitions |
| Moderate | Basic Zoom, Float Down | Adding dynamic movement without distraction |
| Exciting | Pinwheel | Introducing photos or important visuals with flair (use sparingly) |
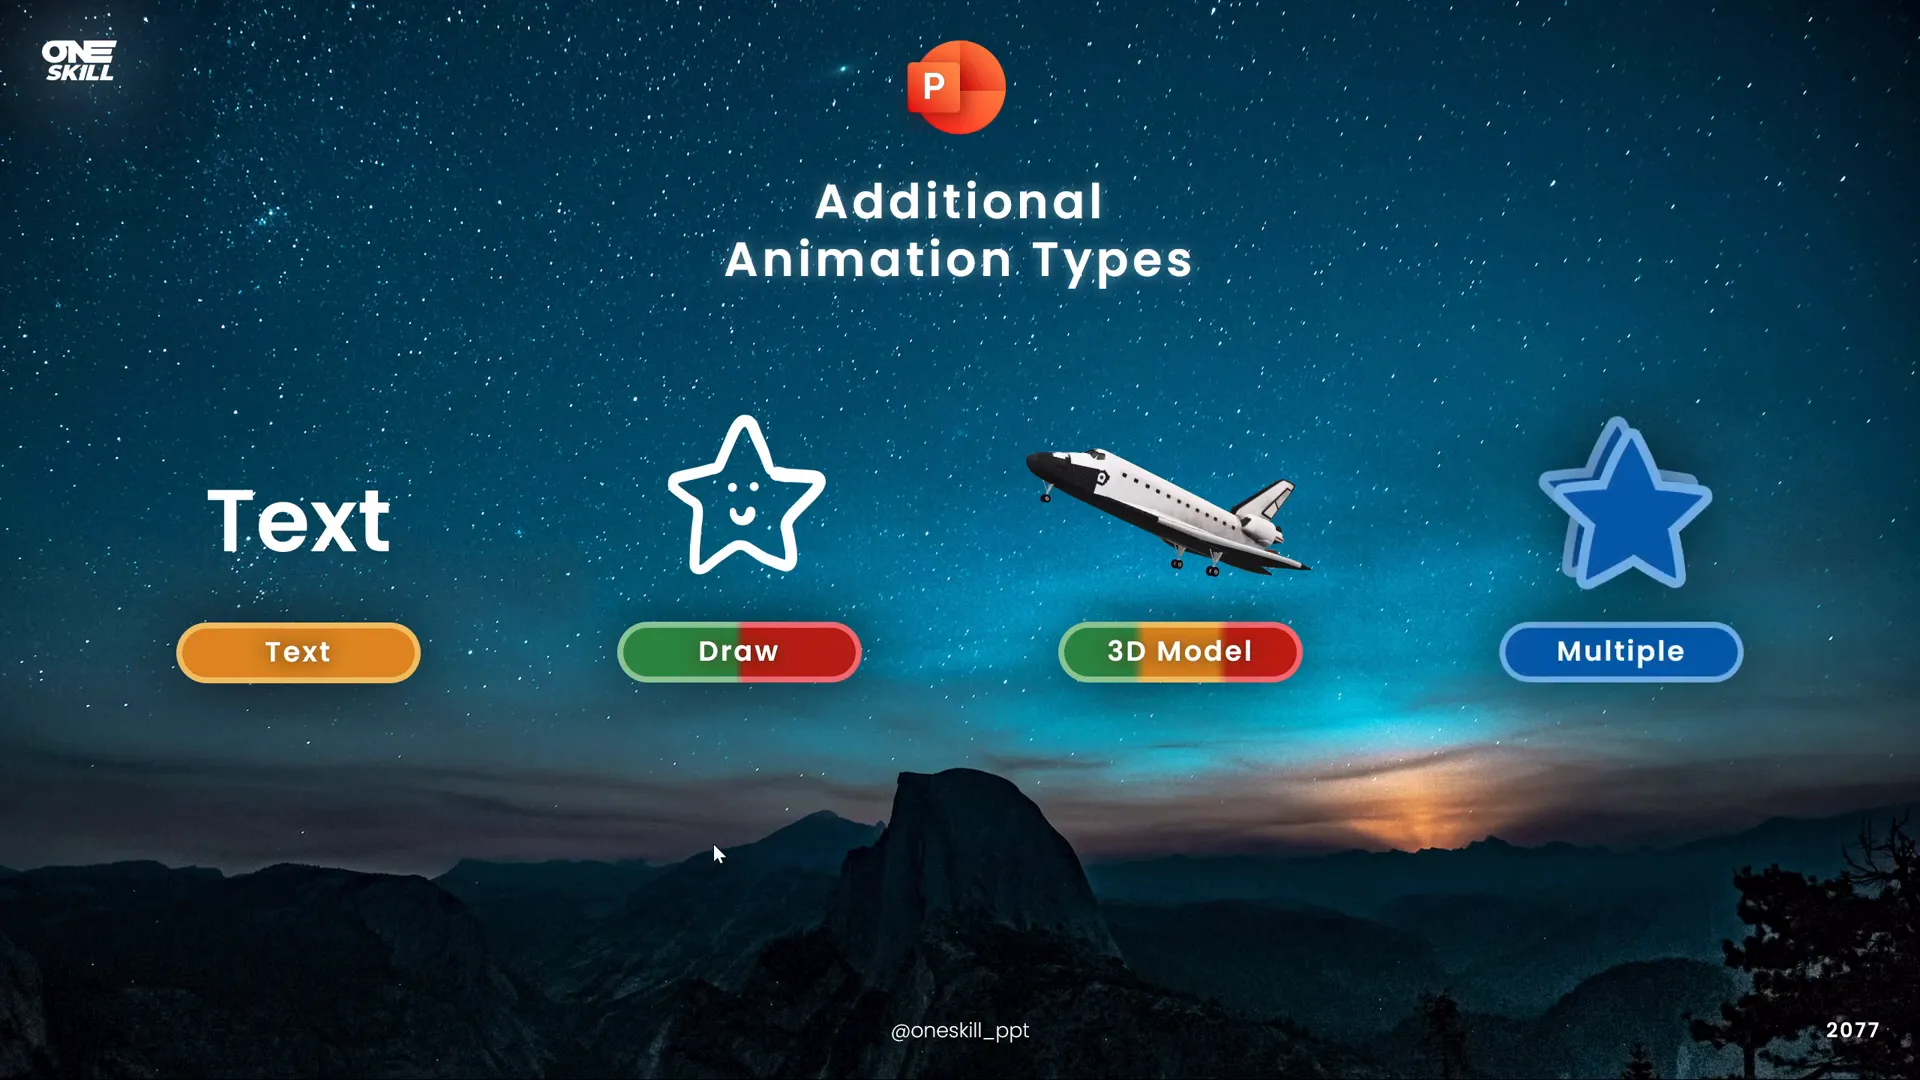
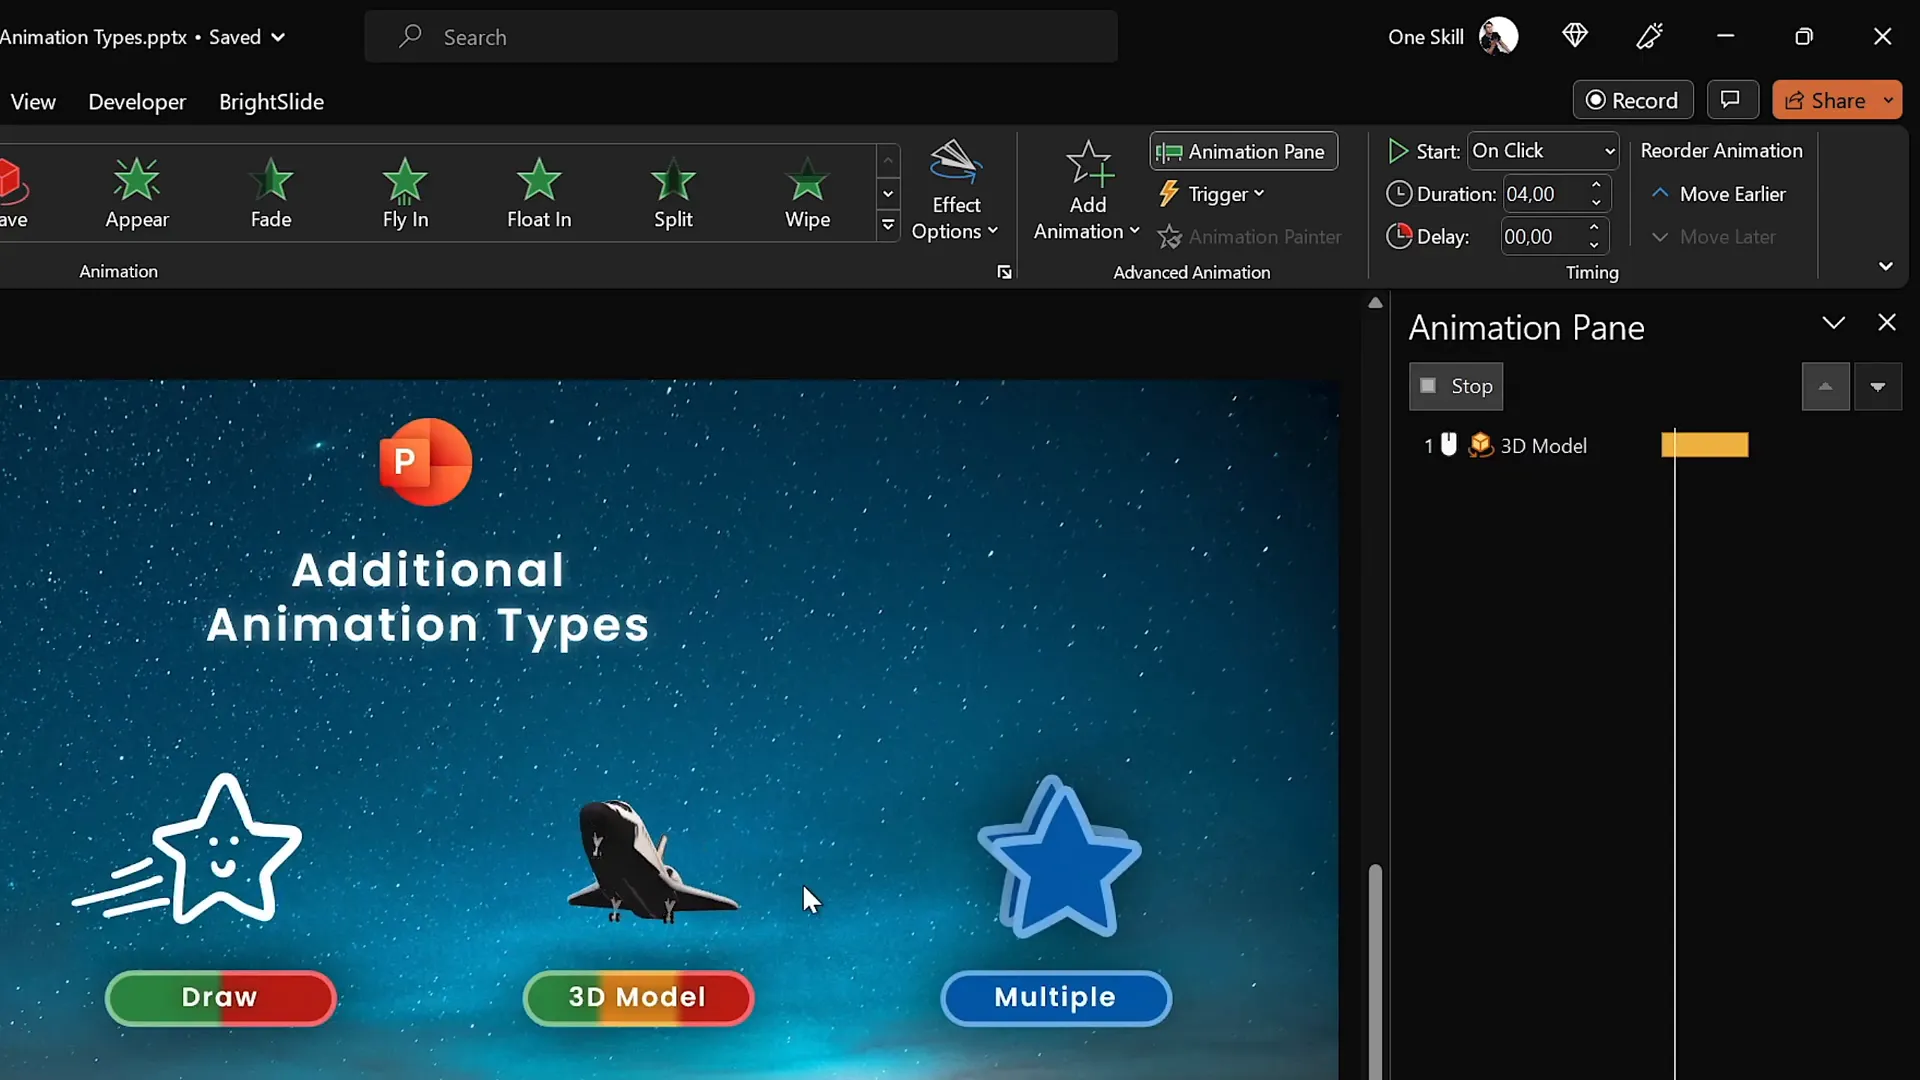
Four Additional Ways to Animate in PowerPoint
Beyond the four main animation types, PowerPoint offers additional ways to bring your slides to life:
- Text Animations: Special emphasis animations apply exclusively to text, allowing you to animate text color changes, waves, and other text-specific effects.
- Draw Animations: If your version of PowerPoint includes the Draw feature, you can create hand-drawn elements and animate their drawing and erasing using replay and rewind animations.
- 3D Model Animations: PowerPoint supports 3D models with unique entrance, emphasis, and exit animations, enabling you to add rotating and spinning 3D objects to your slides.
- Multiple Animations: Combine several animation effects on a single object to create custom, complex animations.
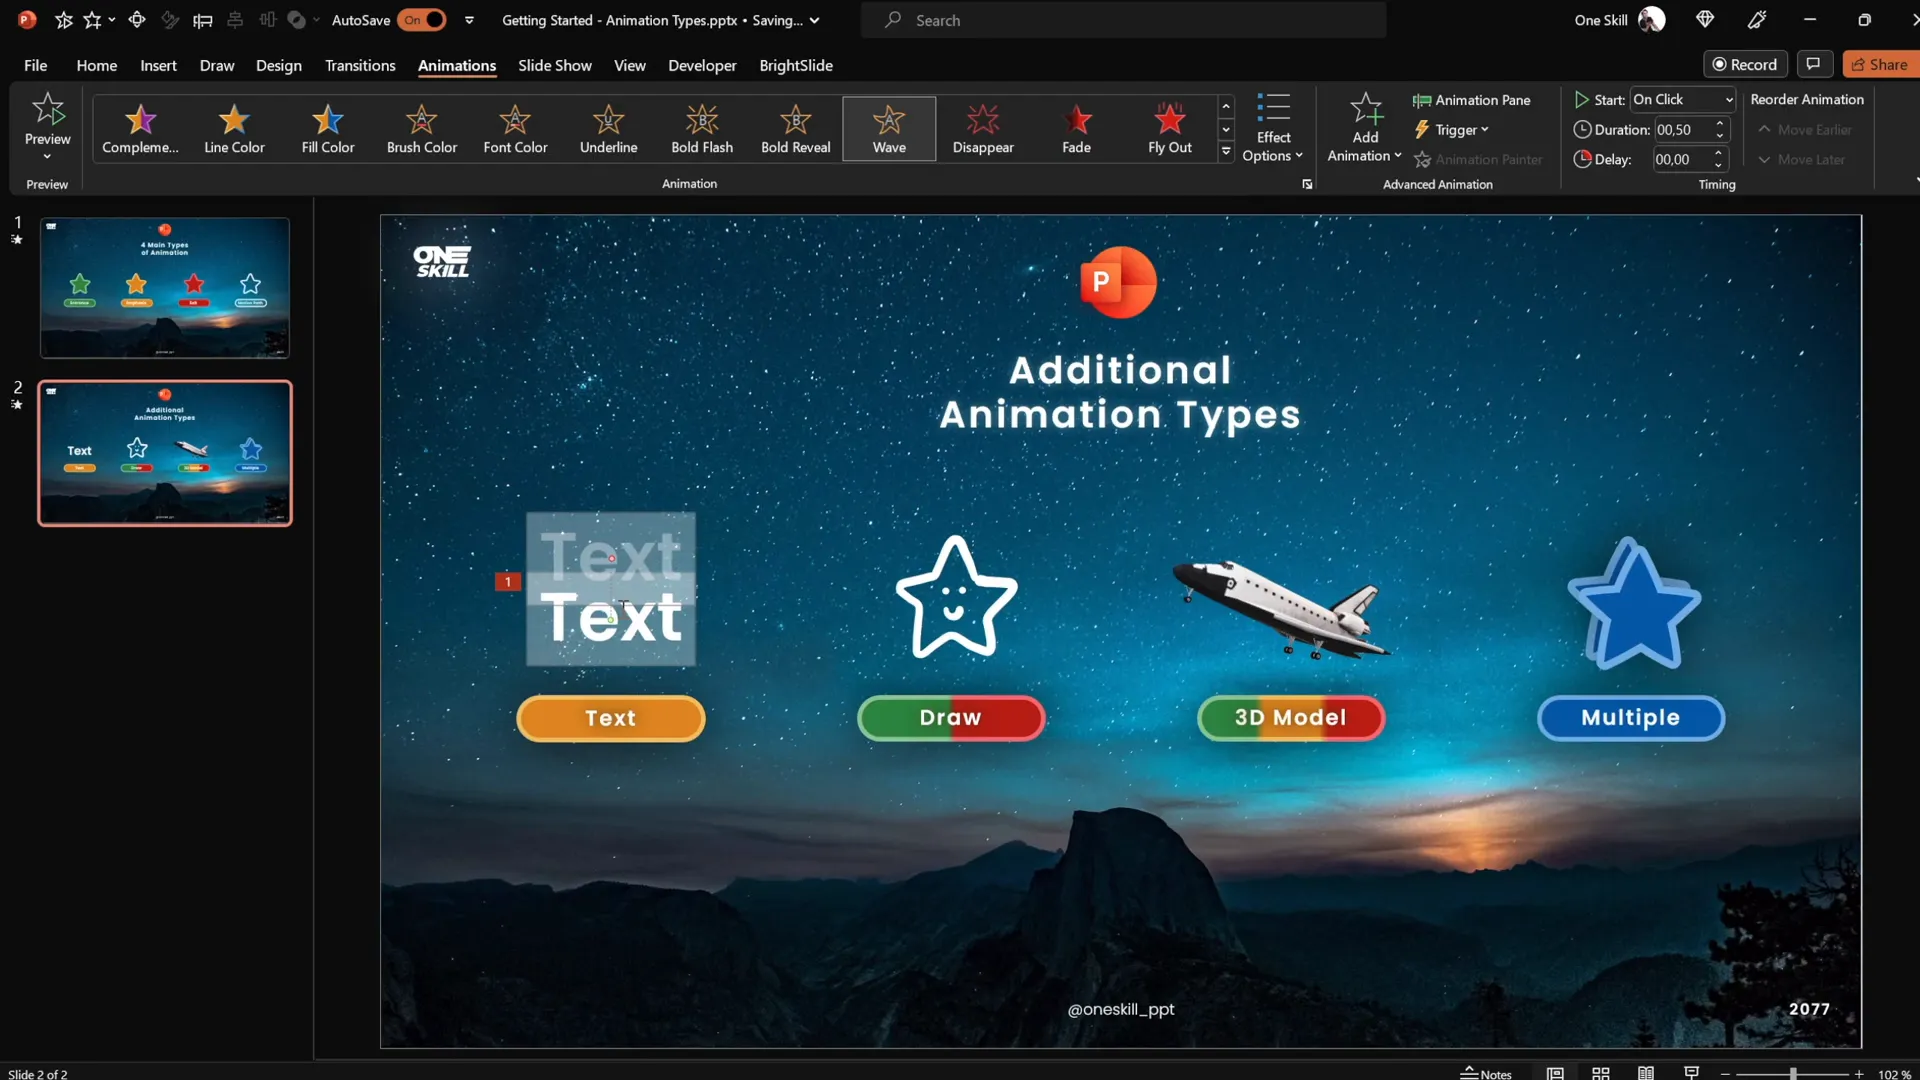
Animating Text
Text animations are a subset of emphasis animations that only apply to text objects. For example, you can add wave effects or color changes that make your text more dynamic and engaging.

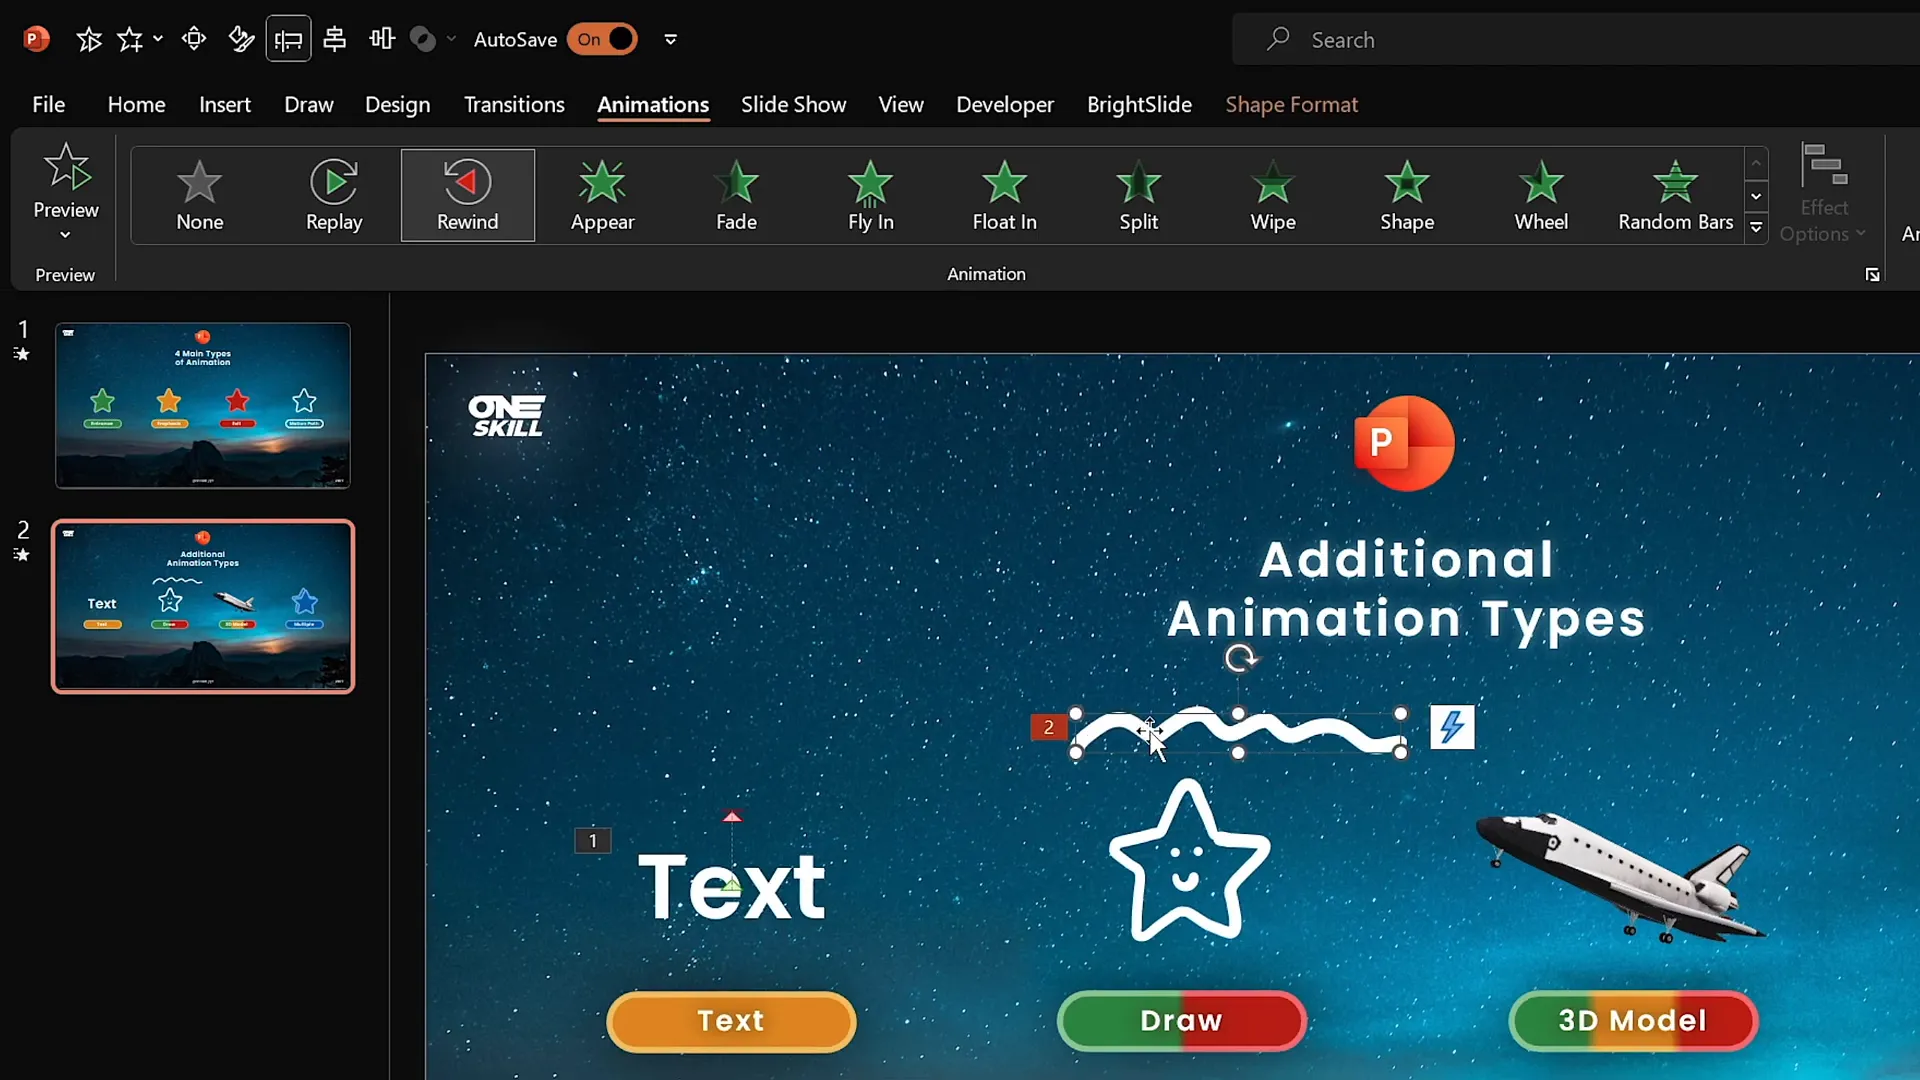
Draw Animations
The Draw feature lets you create custom drawings on your slides using pens of different thicknesses and colors. You can then animate these drawings to replay (draw on screen) or rewind (erase) during your presentation. This is perfect for adding a personal, hand-crafted touch to your slides.
3D Model Animations
PowerPoint’s support for 3D models opens exciting animation possibilities. You can insert 3D objects such as a space shuttle and apply animations like turntable spins, which rotate the model around its axis. Adjusting animation duration controls the speed of rotation, adding flair to your presentation.
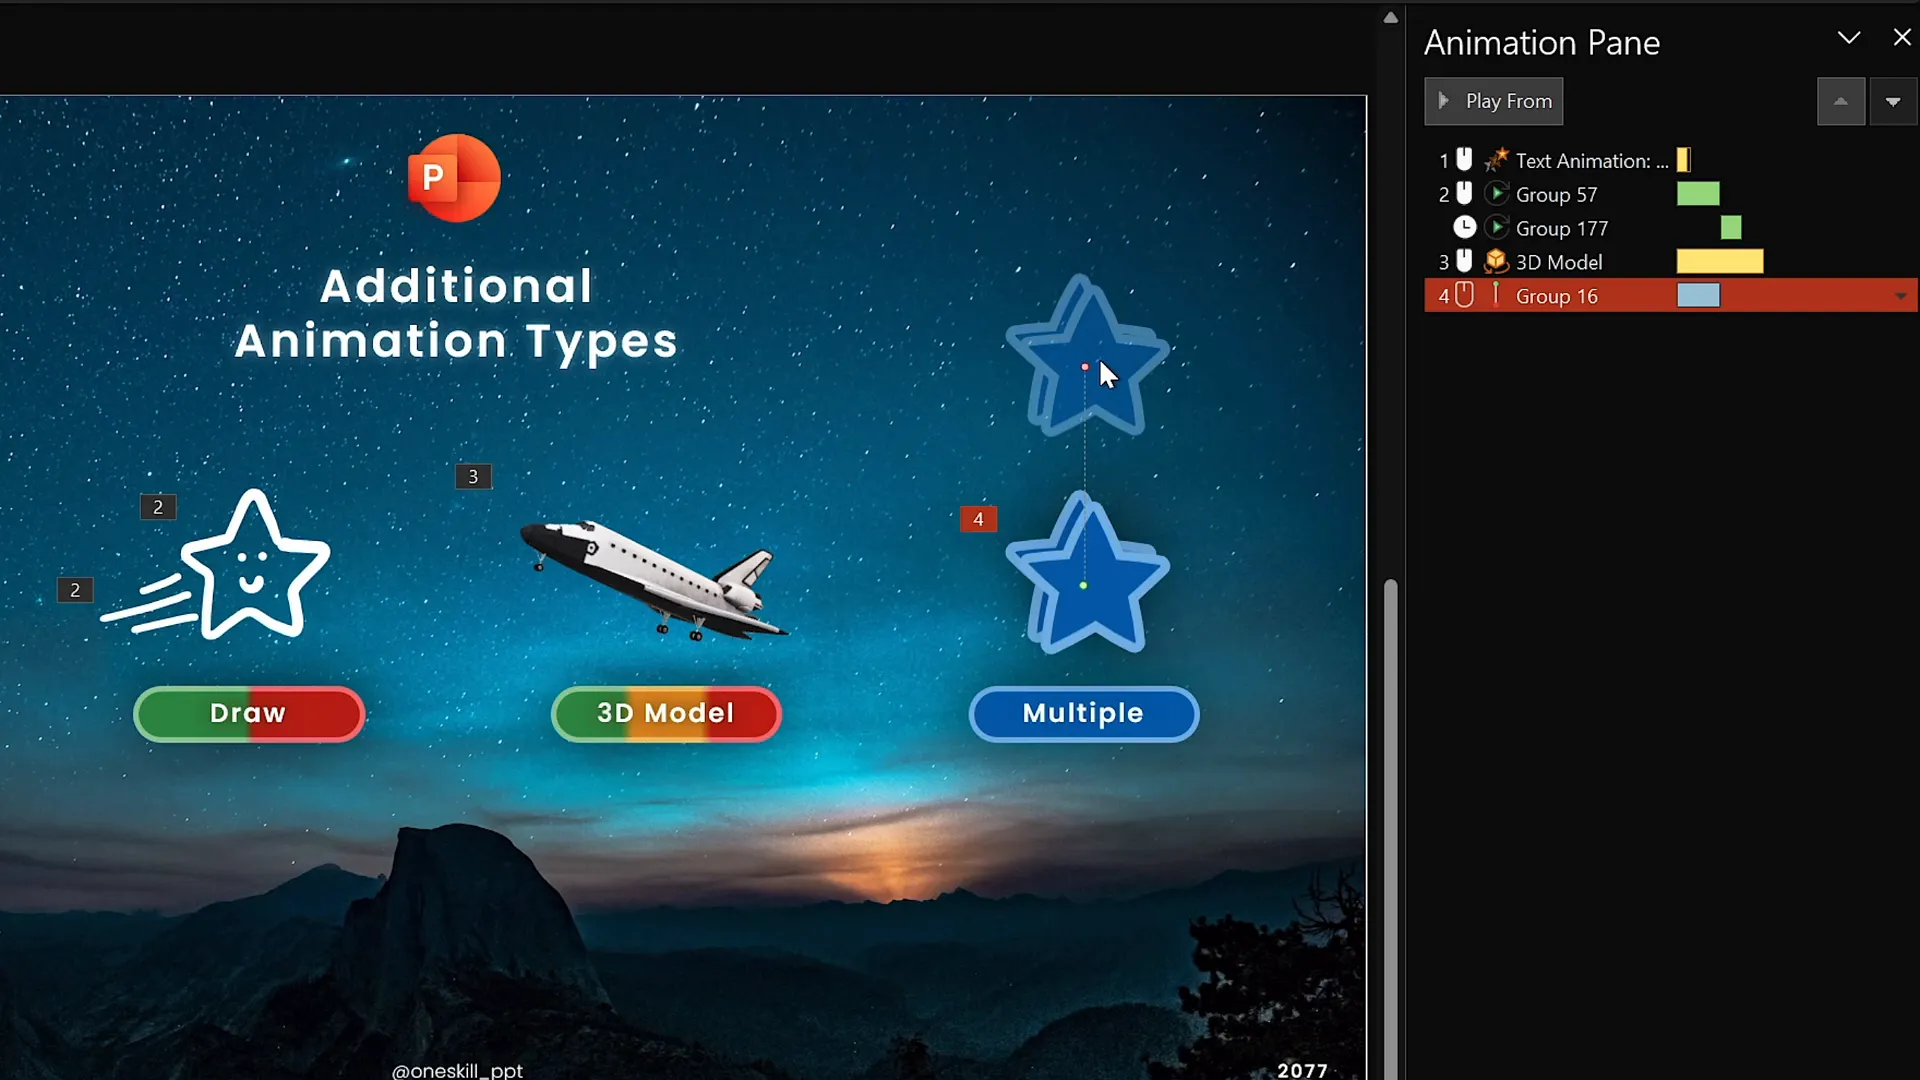
Multiple Animations on a Single Object
By combining multiple animations, you can create custom effects that stand out. For example, grouping two stars and applying both motion path and spin animations can create an engaging composite animation.
Creating Custom Animations Using Multiple Effects
Combining animations allows you to craft unique motion sequences. Here’s how to do it effectively:
- Group Objects: If animating multiple items together, group them to apply animations simultaneously.
- Add the First Animation: Usually a motion path or entrance effect.
- Use Add Animation: Add further animations such as spin, pulse, or color change without replacing the first.
- Adjust Start Options: Use the Animation Pane to set animations to start With Previous or After Previous for smooth sequencing.
- Synchronize Durations: Match animation lengths to ensure coordinated effects.
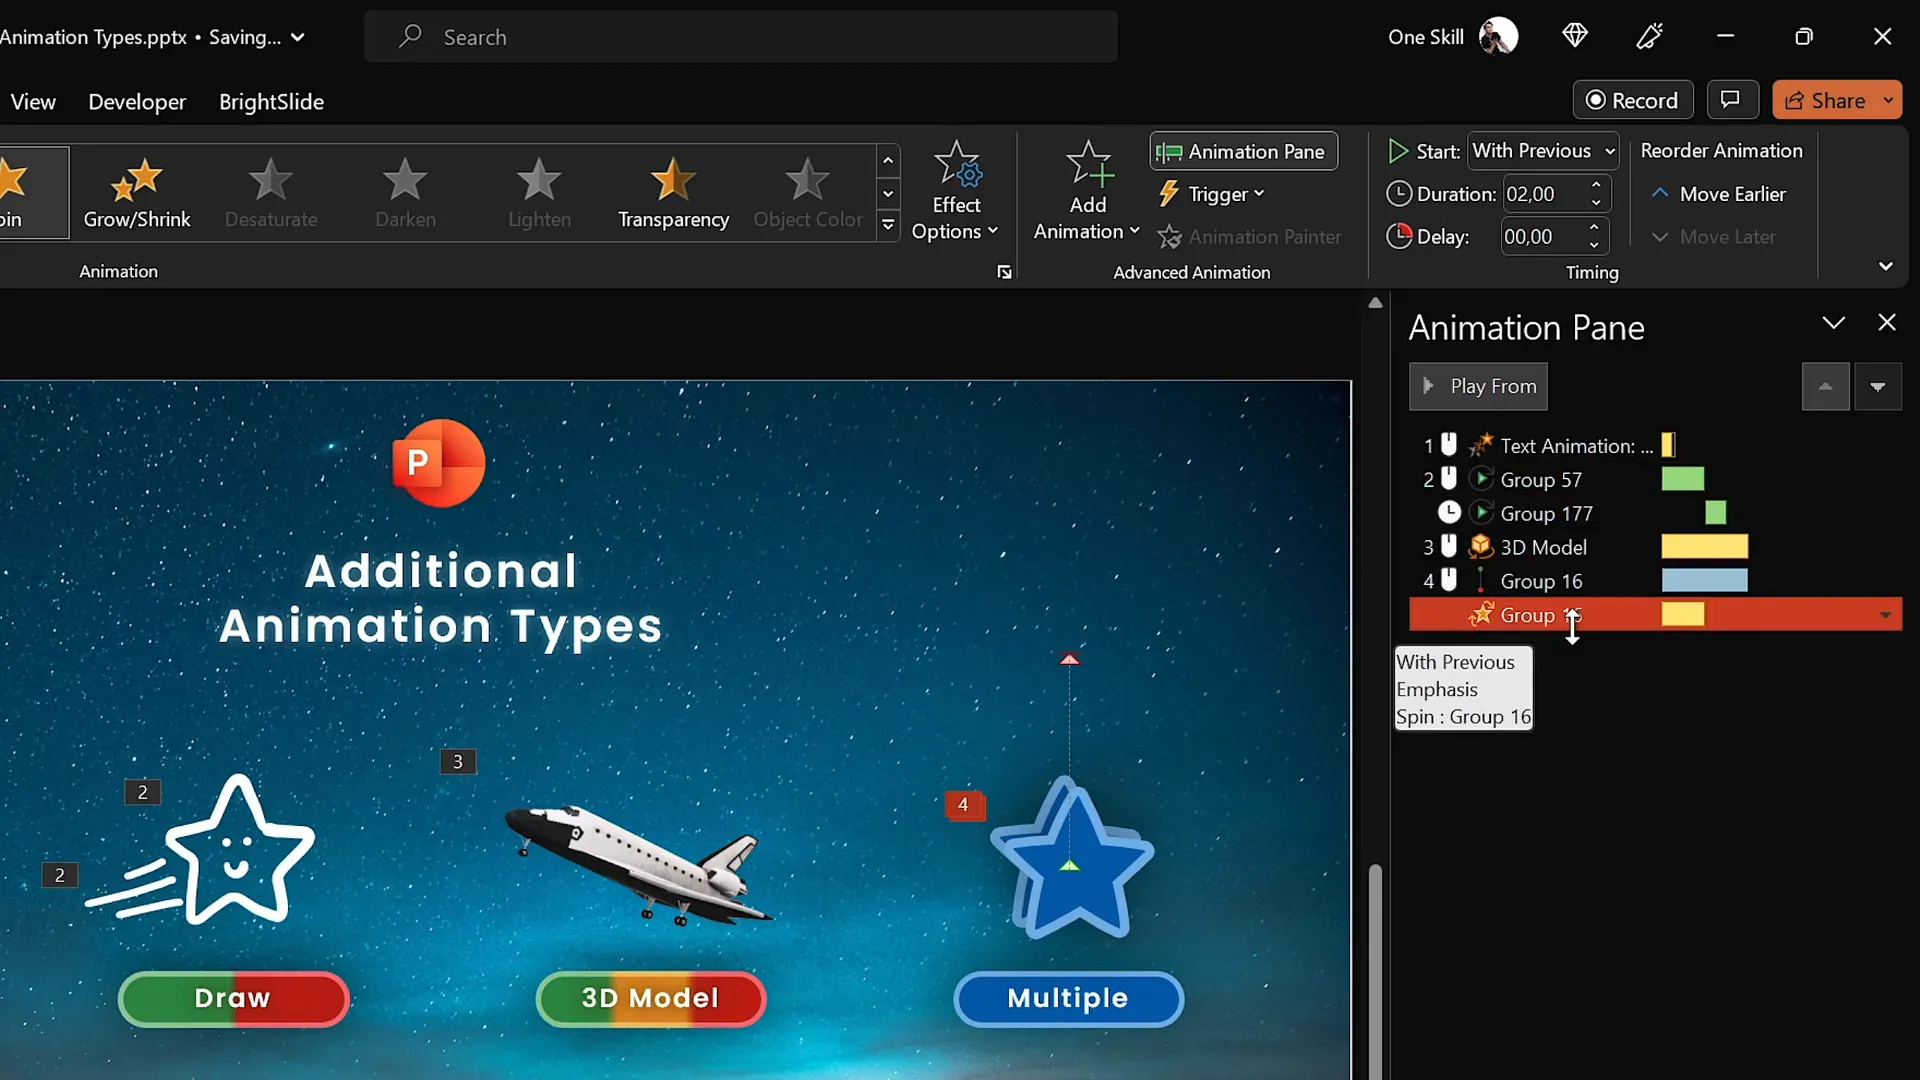
- Activate Auto Reverse: For motion paths, enabling auto reverse makes the object return to the start position, doubling the animation duration.
Example: Two blue stars grouped together have a motion path line animation moving them upward with auto reverse enabled, combined with a spin animation starting simultaneously. Adjusting both durations to one second makes them spin and move smoothly together.
Animation Smoothing and Polishing Your Work
To make your animations look professional and pleasing to the eye, consider animation smoothing:
- Smooth Start and End: Adjust sliders in the animation options to soften the beginning and end of animations, avoiding abrupt movements.
- Consistent Timing: Use uniform durations for animations that work together.
- Preview and Refine: Constantly review your animations in slideshow mode and tweak as needed.
Applying smoothing to both motion paths and spins gives your animations a polished, natural flow that impresses your audience.
FAQ: PowerPoint Animations
What are the best PowerPoint animations to use for professional presentations?
Subtle animations like fade, zoom, and flying are excellent for professional settings. They add movement without distracting from your message. Avoid overusing exciting animations like pinwheel unless you want to highlight a special point or image.
Can I add more than one animation to the same object?
Yes! Use the Add Animation button to layer multiple animations on a single object. This lets you create custom effects such as moving and spinning an object simultaneously.
Do I need a specific version of PowerPoint to access advanced animations?
For the best experience, use PowerPoint 2019, 2021, or Microsoft 365 on Windows. These versions include advanced features like the animation timeline. Mac users can still animate but have fewer advanced options.
How do I animate 3D models in PowerPoint?
Insert a 3D model using the Insert tab, then apply entrance, emphasis, or exit animations designed specifically for 3D objects. You can control animations like spinning or turning the model.
Can I animate drawings I make in PowerPoint?
If your version supports the Draw feature, you can create custom drawings and animate them with replay or rewind effects to simulate hand-drawing or erasing on the slide.
How do I control when animations start and their duration?
Use the Animation Pane to set animations to start on click, with the previous animation, or after the previous animation. You can also adjust each animation’s duration and delay to control timing perfectly.
Conclusion: Master PowerPoint Animations Today
Mastering Powerpoint animations is a game-changer for anyone looking to elevate their presentations. From simple entrance effects to combining multiple animations and animating 3D models, the possibilities are vast and exciting.
With the right knowledge and practice, you can create presentations that not only convey your message clearly but also captivate and inspire your audience. Remember to start with the fundamentals, experiment with different animation types, and use the Animation Pane to refine your work.
Kaspare’s approach to PowerPoint animation mastery — starting with the four main animation types and then exploring additional creative techniques — provides a proven path to becoming a PowerPoint animation pro.
So, what are you waiting for? Start animating your slides today and transform your presentations into unforgettable experiences!
Check out the full video: The Secret to INCREDIBLE PowerPoint Animations! 🤫✨


