
If you’ve ever wanted to add stunning animations to your PowerPoint presentations but felt unsure where to start, or if you’re aiming to create truly unique, advanced animations but don’t know how, this article is for you. PowerPoint animations can transform ordinary slides into captivating stories that engage and impress your audience. Mastering these animations can elevate your presentations to professional levels, making your message memorable and impactful.
In this comprehensive guide, inspired by the expertise of Kaspare from Vilnius, Lithuania—known on YouTube as One Skill—you’ll learn everything about creating breathtaking PowerPoint animations. Kaspare has been sharing his PowerPoint animation secrets with millions for almost a decade, and now, we’re distilling his lessons into a detailed walkthrough.
Whether you’re a beginner or an advanced user, a business professional, educator, entrepreneur, or student, this guide will help you master PowerPoint animations step-by-step. We’ll cover the fundamentals, explore advanced techniques, and reveal tips to create custom animations that will wow any audience.
Table of Contents
- Introduction to PowerPoint Animation Mastery
- The Four Main Types of PowerPoint Animations
- How to Add Animations in PowerPoint
- Using the Animation Pane to Manage Animations
- Four More Advanced Ways to Animate in PowerPoint
- Creating Custom Animations with Multiple Effects
- Enhancing Animations with Smoothing Techniques
- Frequently Asked Questions About PowerPoint Animations
- Conclusion: Become a PowerPoint Animation Pro
Introduction to PowerPoint Animation Mastery
Animations in PowerPoint are powerful tools to engage your audience and enhance your message. However, many users struggle to utilize them effectively due to a lack of guidance or confidence in their animation skills.
Kaspare’s PowerPoint Animation Mastery Course is designed to fill that gap. This course covers everything from the basics of PowerPoint animation to advanced techniques like animated intros, infographics, drawing animations, and even 3D model animations. The course is regularly updated based on user feedback, ensuring that it stays relevant and comprehensive.
This guide reflects the essence of Kaspare’s teaching, providing you with the foundational knowledge and practical tips to start animating like a pro right away.
The Four Main Types of PowerPoint Animations
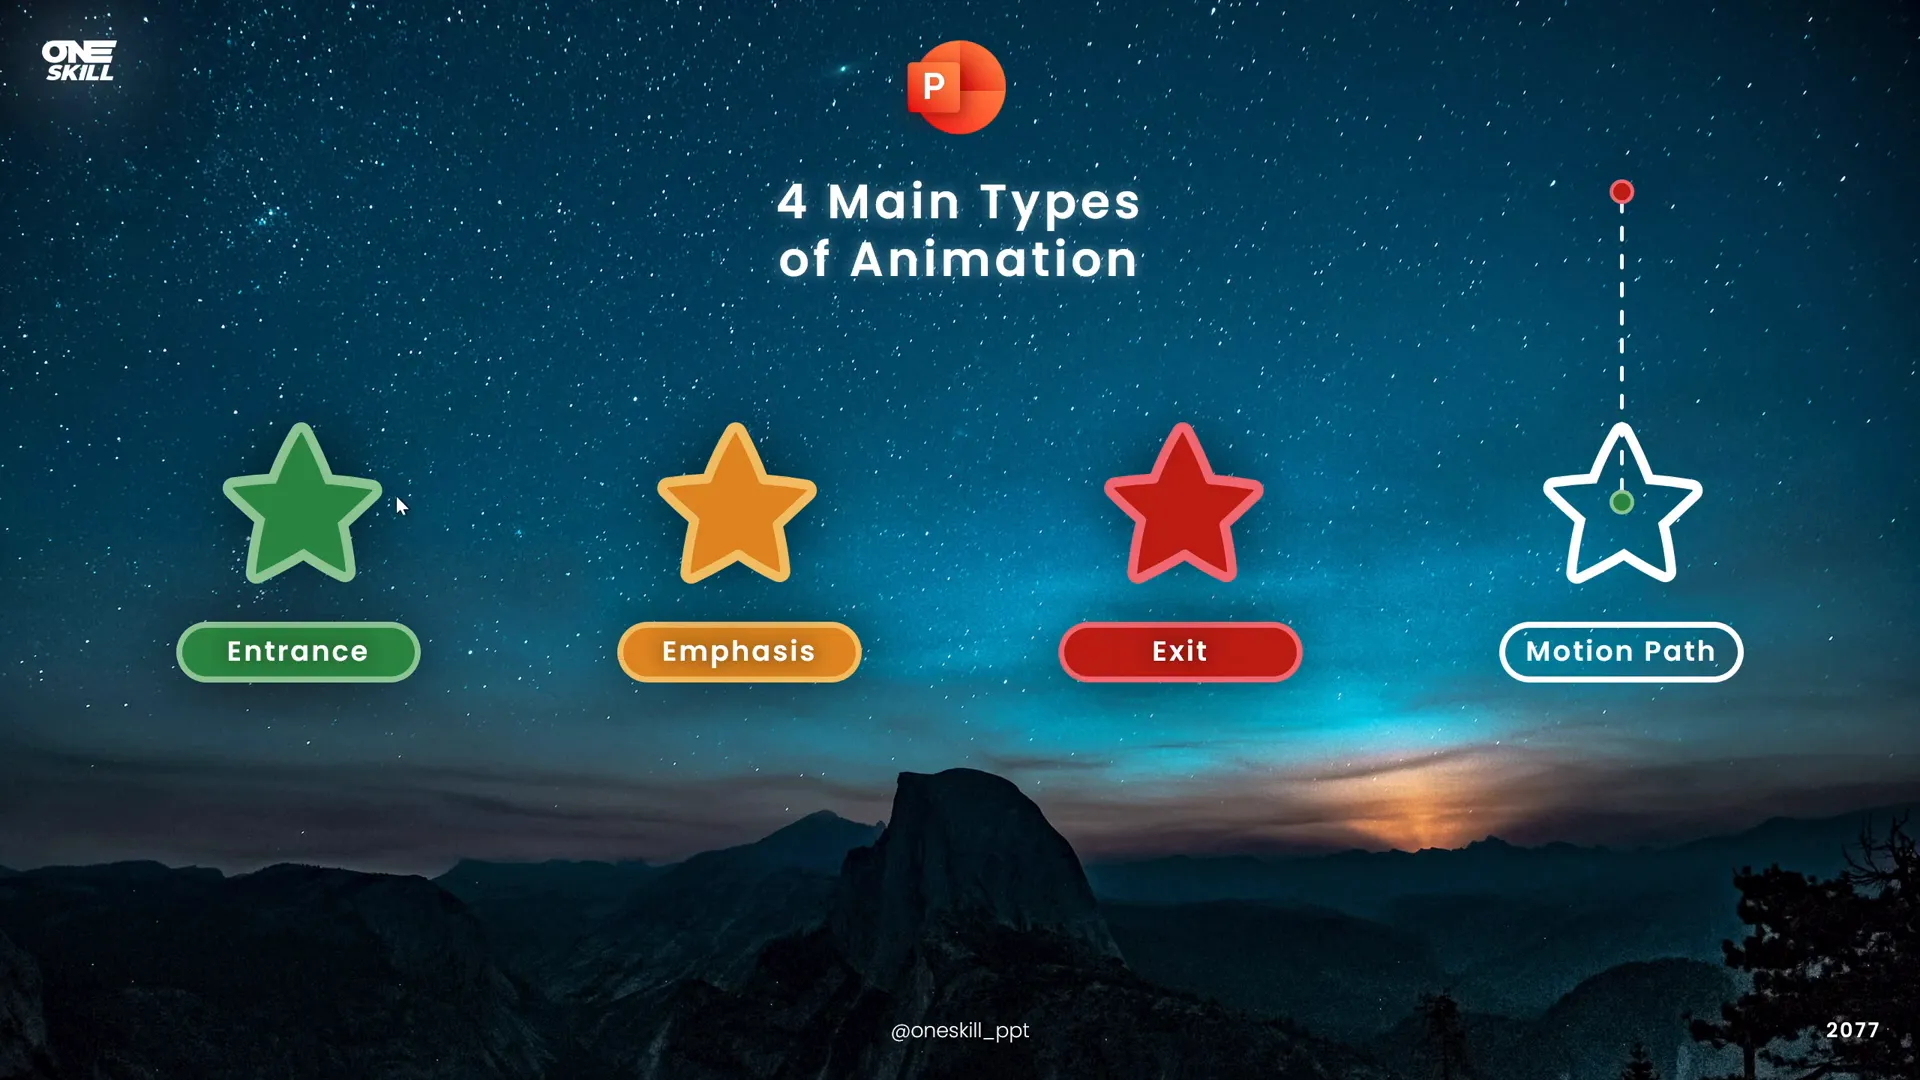
Understanding the types of animations available in PowerPoint is the first step toward mastering animation. There are four primary categories:
- Entrance Animations: These animations introduce objects to your slide. They are perfect when you want to bring in text, images, shapes, or videos dynamically.
- Emphasis Animations: Once an object is on the slide, emphasis animations highlight or add focus to it without moving it away. Examples include spinning, pulsing, or changing colors.
- Exit Animations: These animations remove objects from the slide, helping you control the flow of information by hiding or fading out elements.
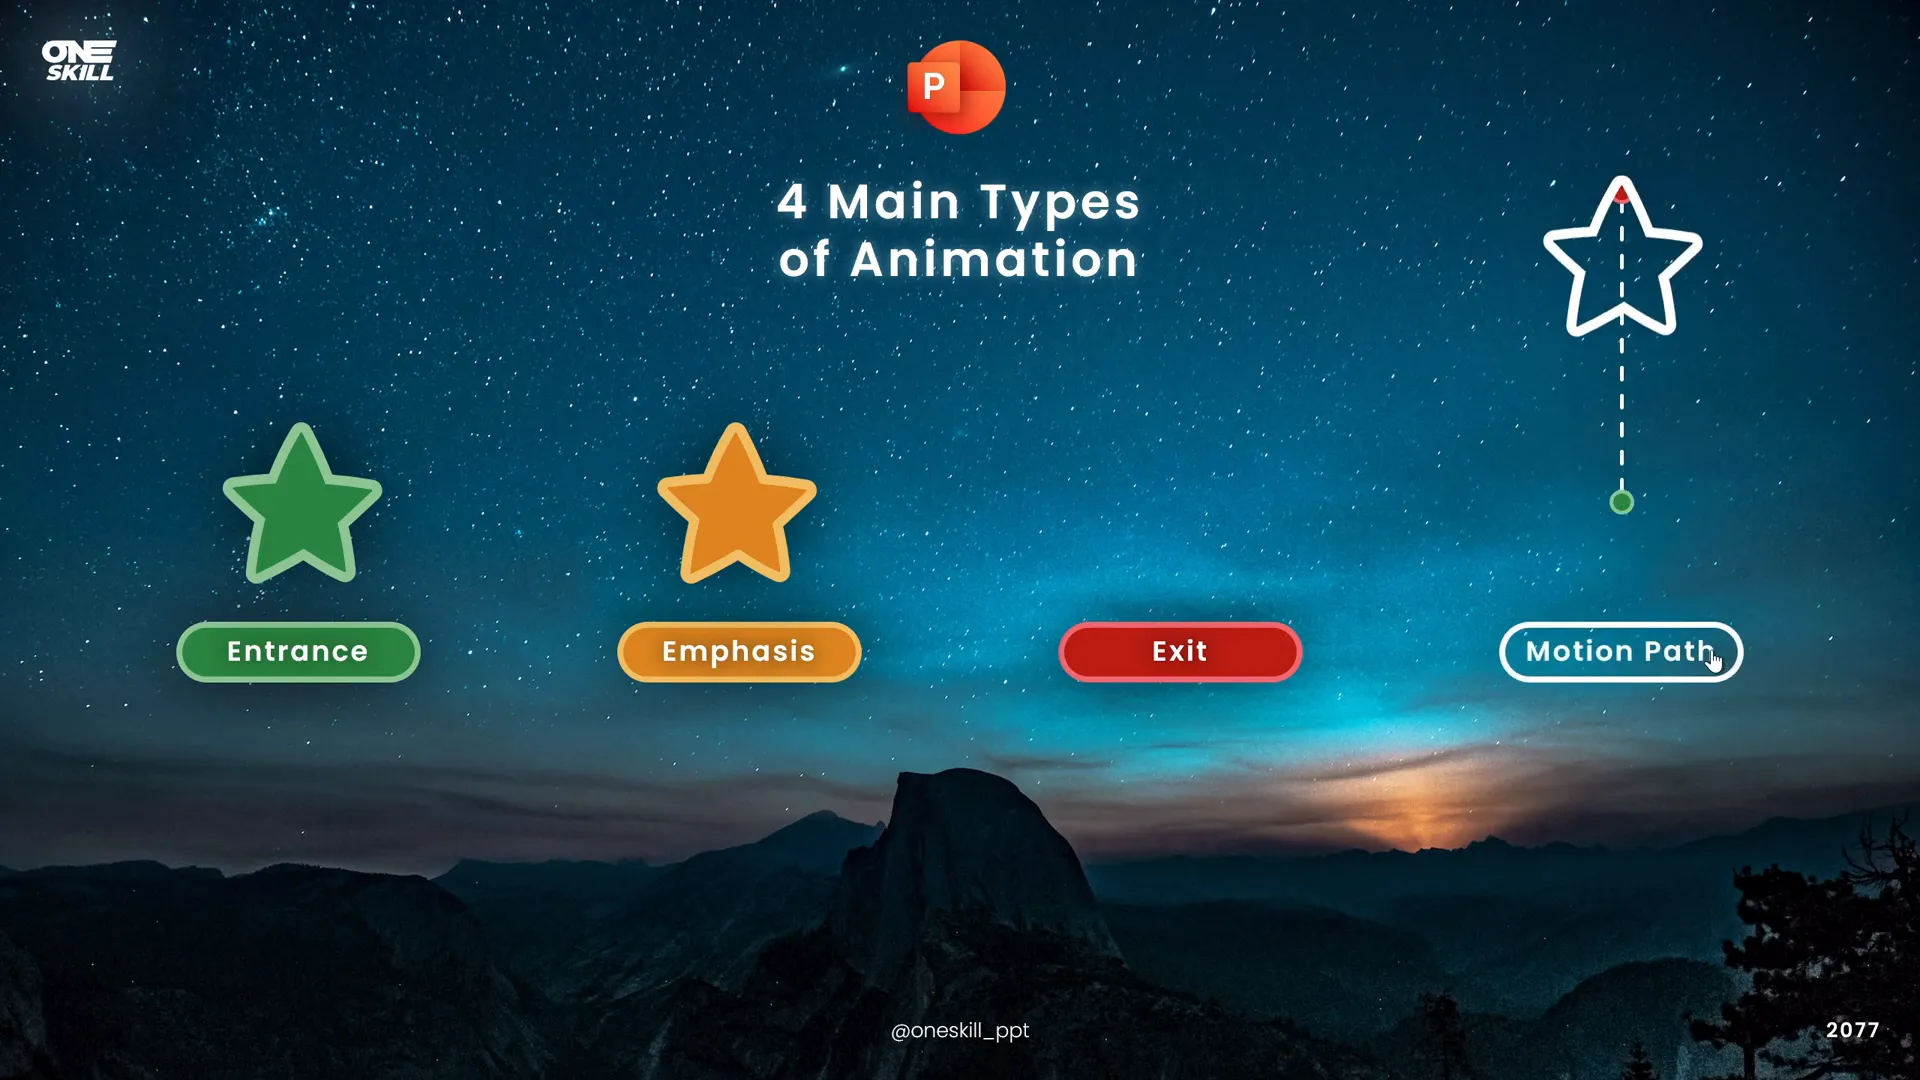
- Motion Path Animations: These allow objects to move along a defined path on the slide. You can customize the path shape, direction, and length.
Entrance Animations
Entrance animations are marked with green icons in PowerPoint and are used to make objects appear on the slide in an engaging way. Common examples include flying in, fading in, or zooming in.
Emphasis Animations
Emphasis animations add interest to objects already present on the slide. You might use these to draw attention or add dynamism, such as spinning text or pulsing images.
Exit Animations
Exit animations gracefully remove objects from view, helping you keep the slide uncluttered or transition smoothly between points.
Motion Path Animations
Motion paths let you animate objects along custom routes on your slide. The green bubble marks the start position, and the red bubble marks the end, which you can adjust freely to suit your desired motion.
How to Add Animations in PowerPoint
Adding animations to your PowerPoint objects—shapes, text boxes, images, videos—is straightforward once you know where to look.
Step 1: Select Your Object
Click the object on your slide that you want to animate. It can be anything from a simple shape to a text box or image.
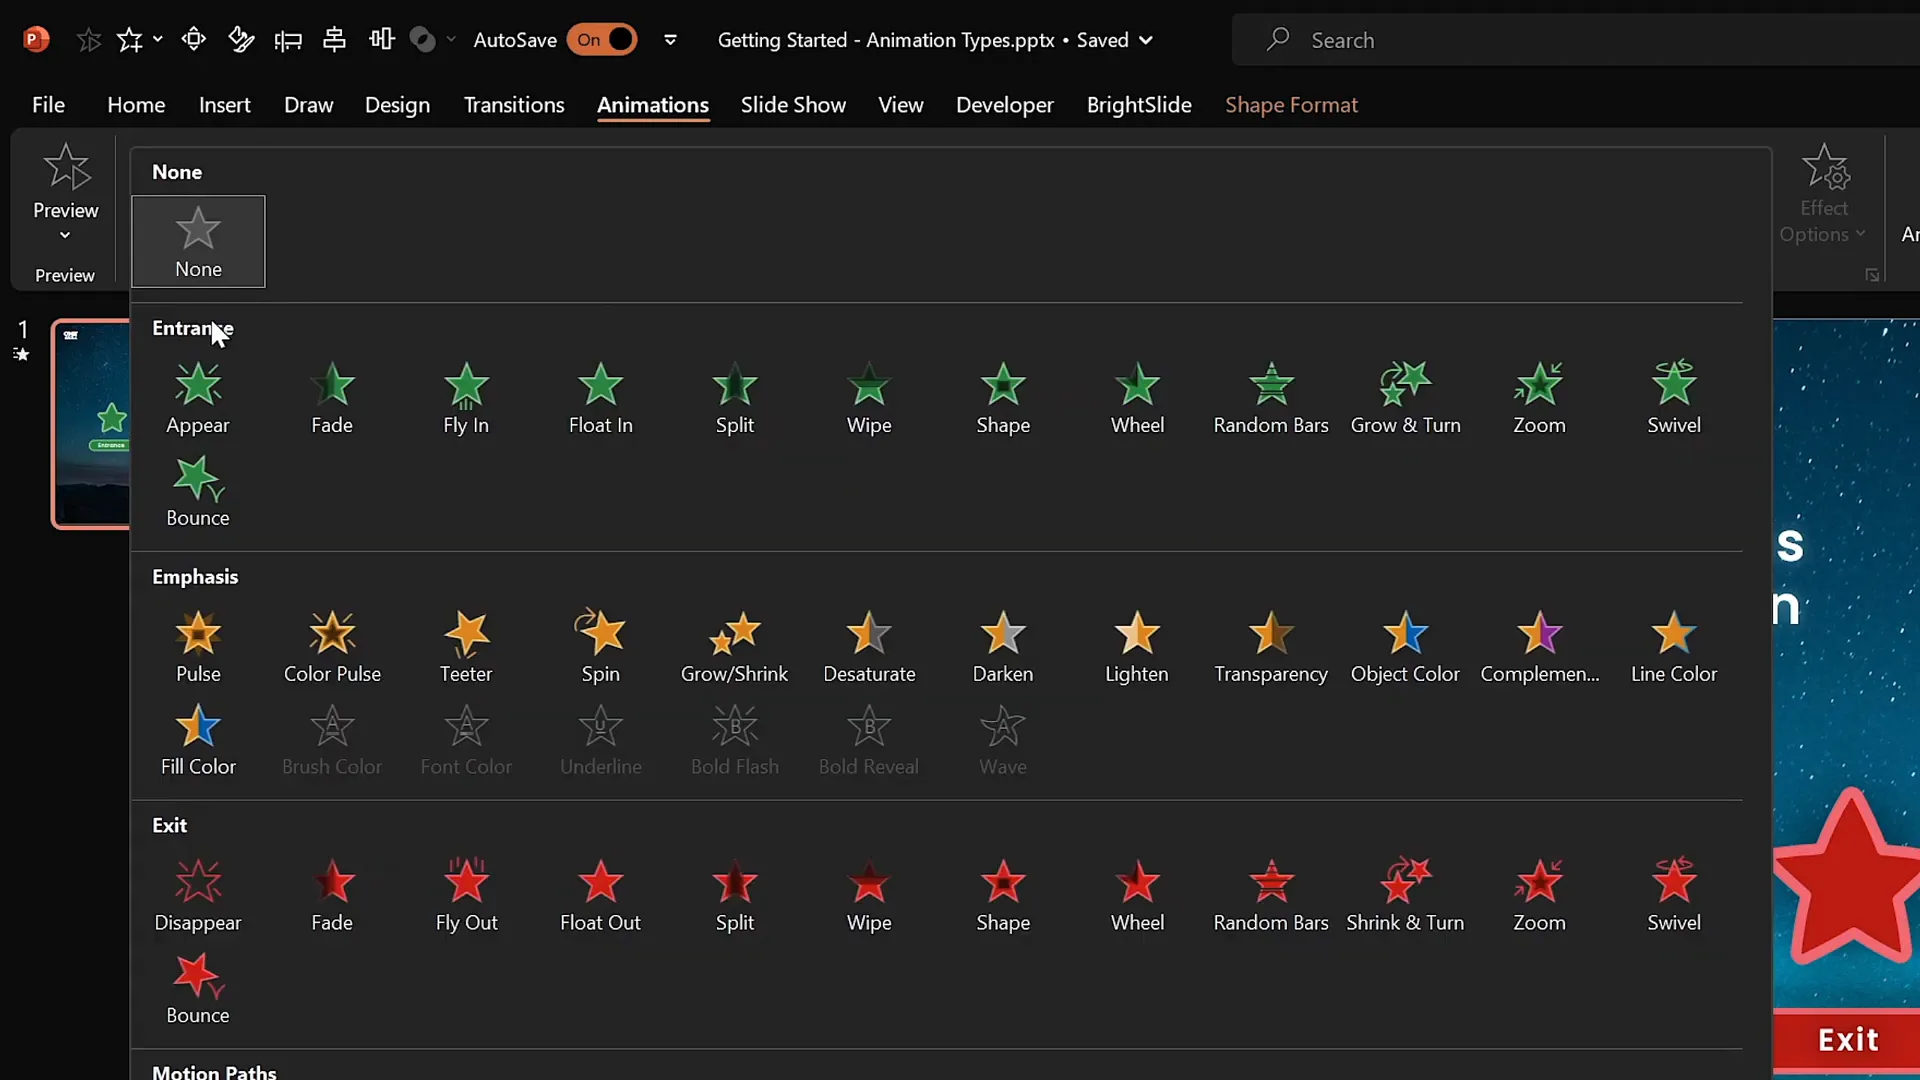
Step 2: Open the Animations Tab
Navigate to the Animations tab in PowerPoint’s ribbon. Here, you’ll see a selection of commonly used animations.
Step 3: Choose an Animation
Click the dropdown arrow to expand the full list. You’ll notice the four animation categories (Entrance, Emphasis, Exit, Motion Paths) organized for easy selection.
Step 4: Apply the Animation
Click on an animation to apply it. PowerPoint will preview the effect automatically if your auto preview is enabled. You can toggle this with the Preview button.
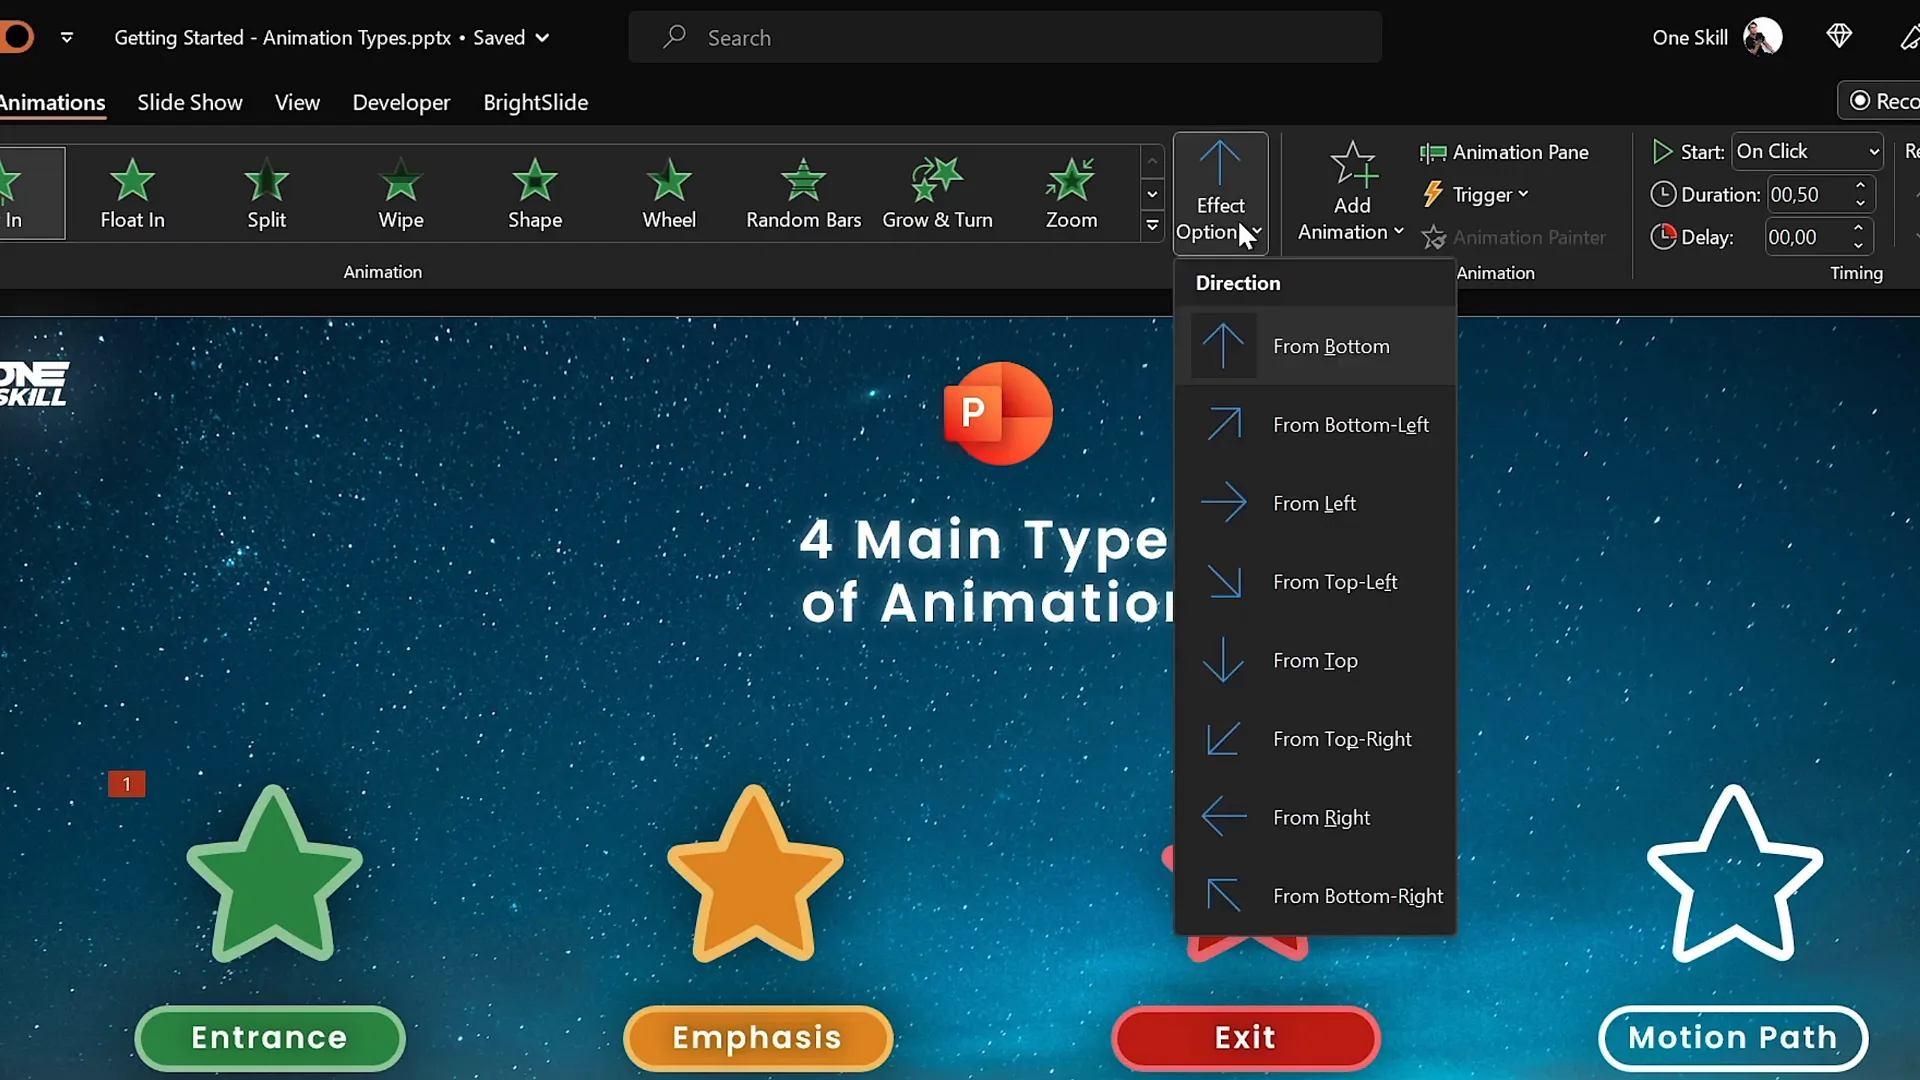
Additional Options
Many animations come with customizable options. For example, the flying entrance animation lets you choose the direction from which the object flies in (top, bottom, left, right).
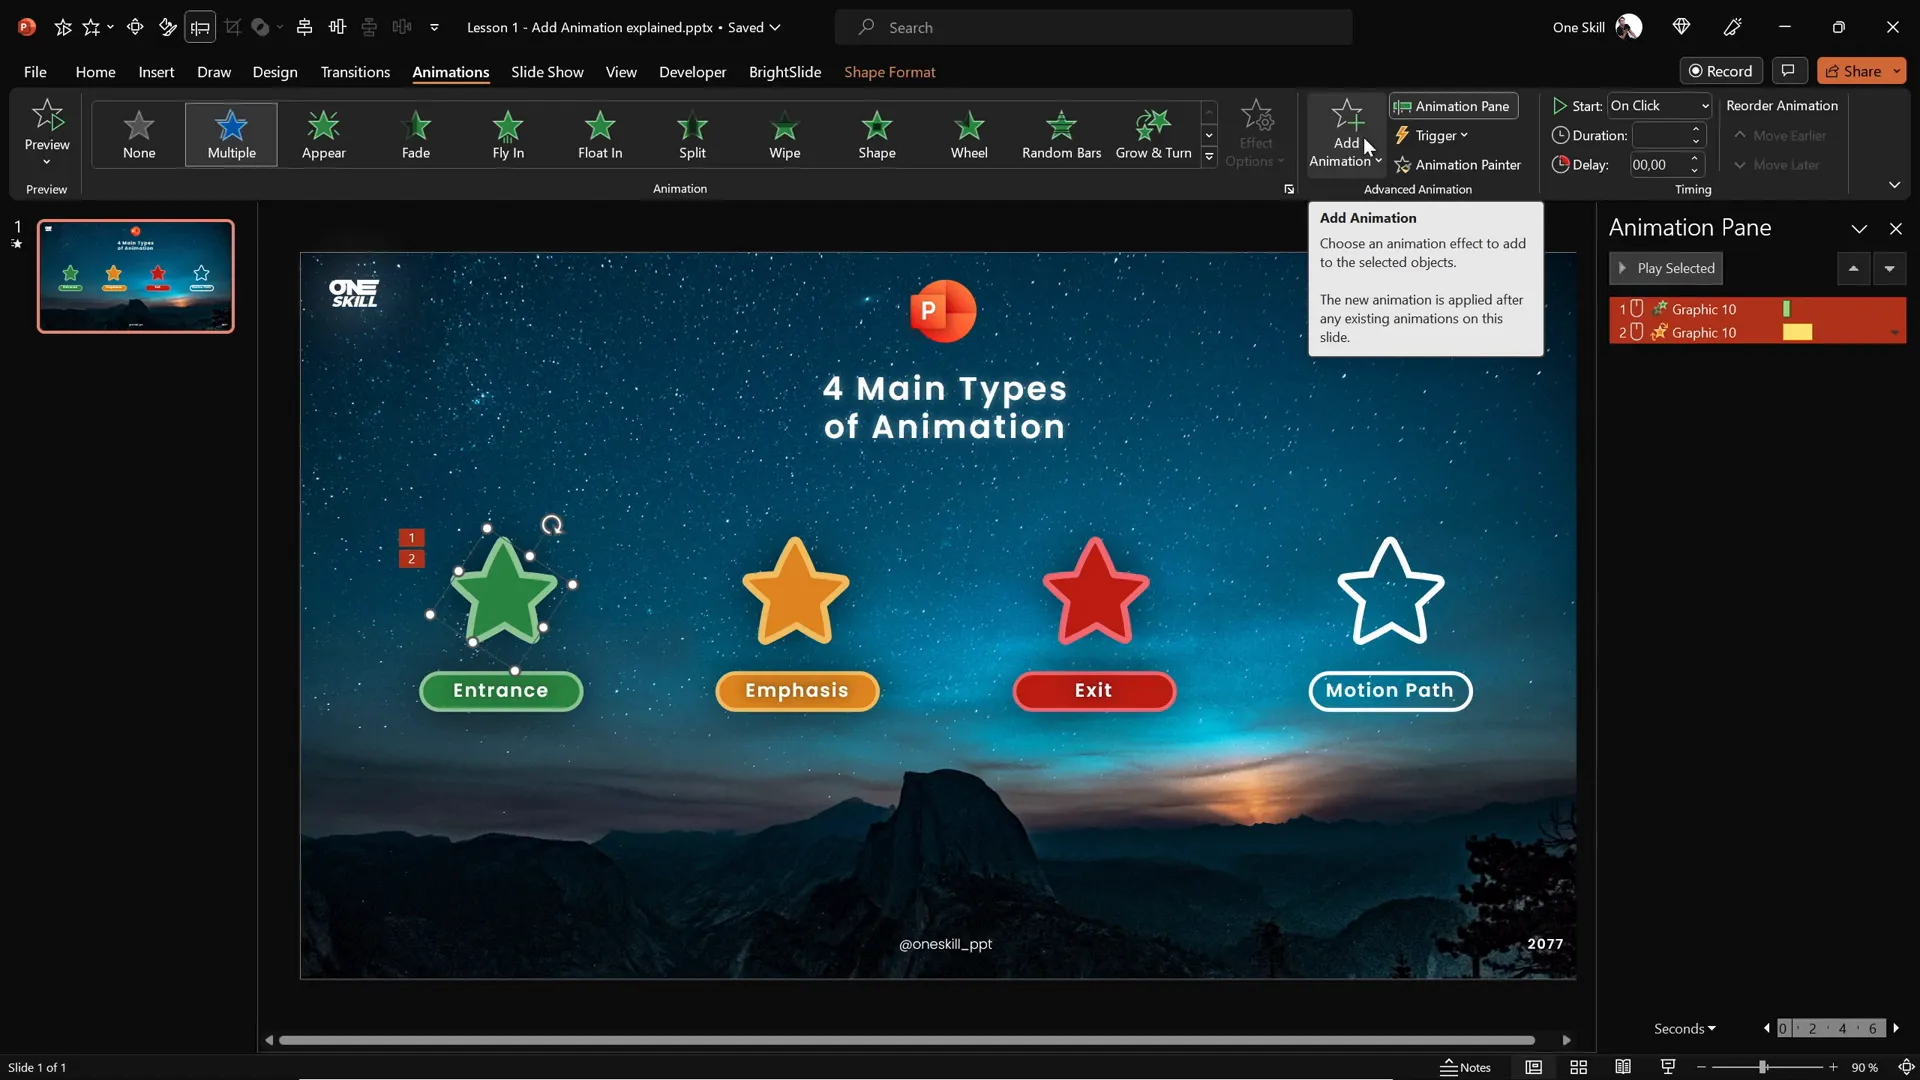
Adding Multiple Animations to One Object
Want to apply more than one animation to the same object? Use the Add Animation button instead of the main animation list. This prevents the new animation from replacing the previous one.
Using the Animation Pane to Manage Animations
The Animation Pane is a powerful tool in PowerPoint that lets you view and manage all animations on a slide.
Opening the Animation Pane
Click the Animation Pane button in the Animations tab to open the pane on the right side of your screen.
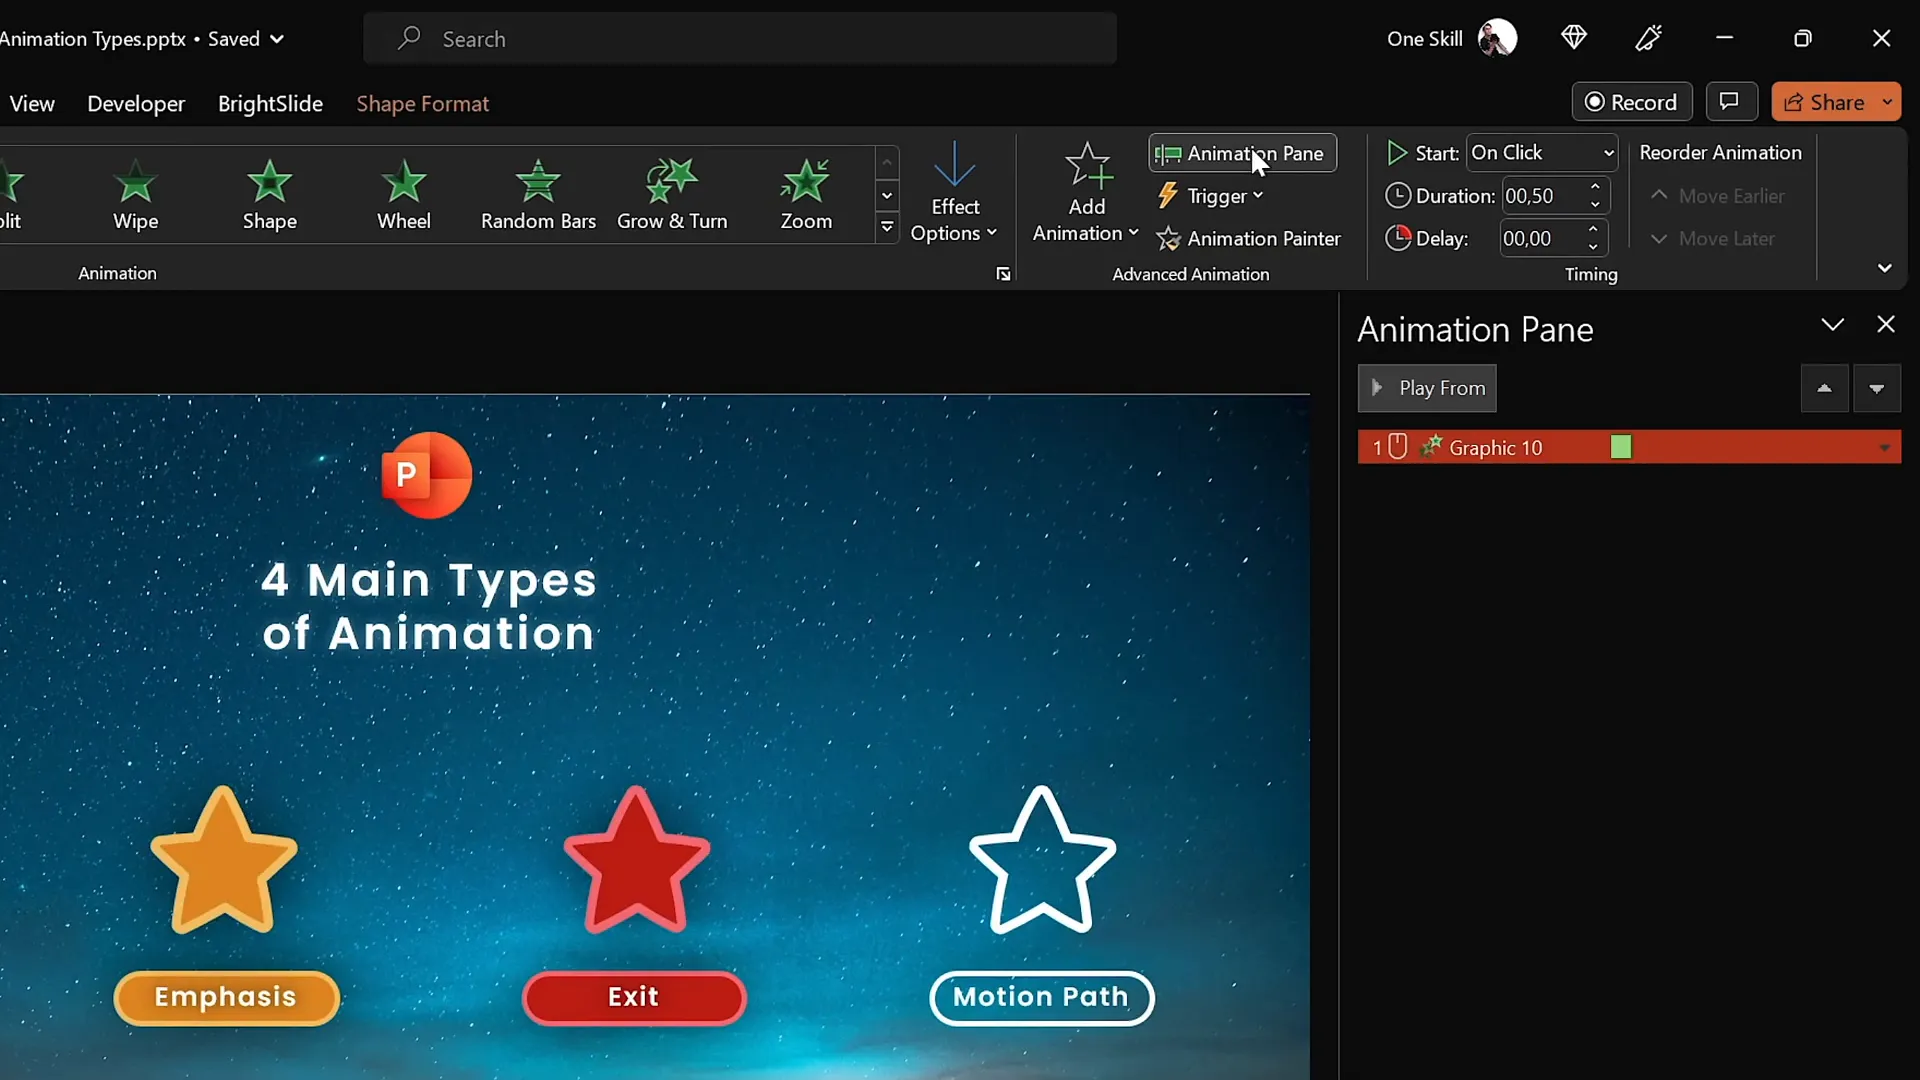
What You Can Do in the Animation Pane
- See all animations in order
- Hover over an animation to see details such as trigger type and animation name
- Change when animations start: On Click, With Previous, or After Previous
- Adjust animation duration and delay
- Reorder animations by dragging
Example: Chaining Animations
For example, you can have a flying animation start on click, followed by a spin animation that starts automatically after the flying finishes. Adjust durations for pacing.
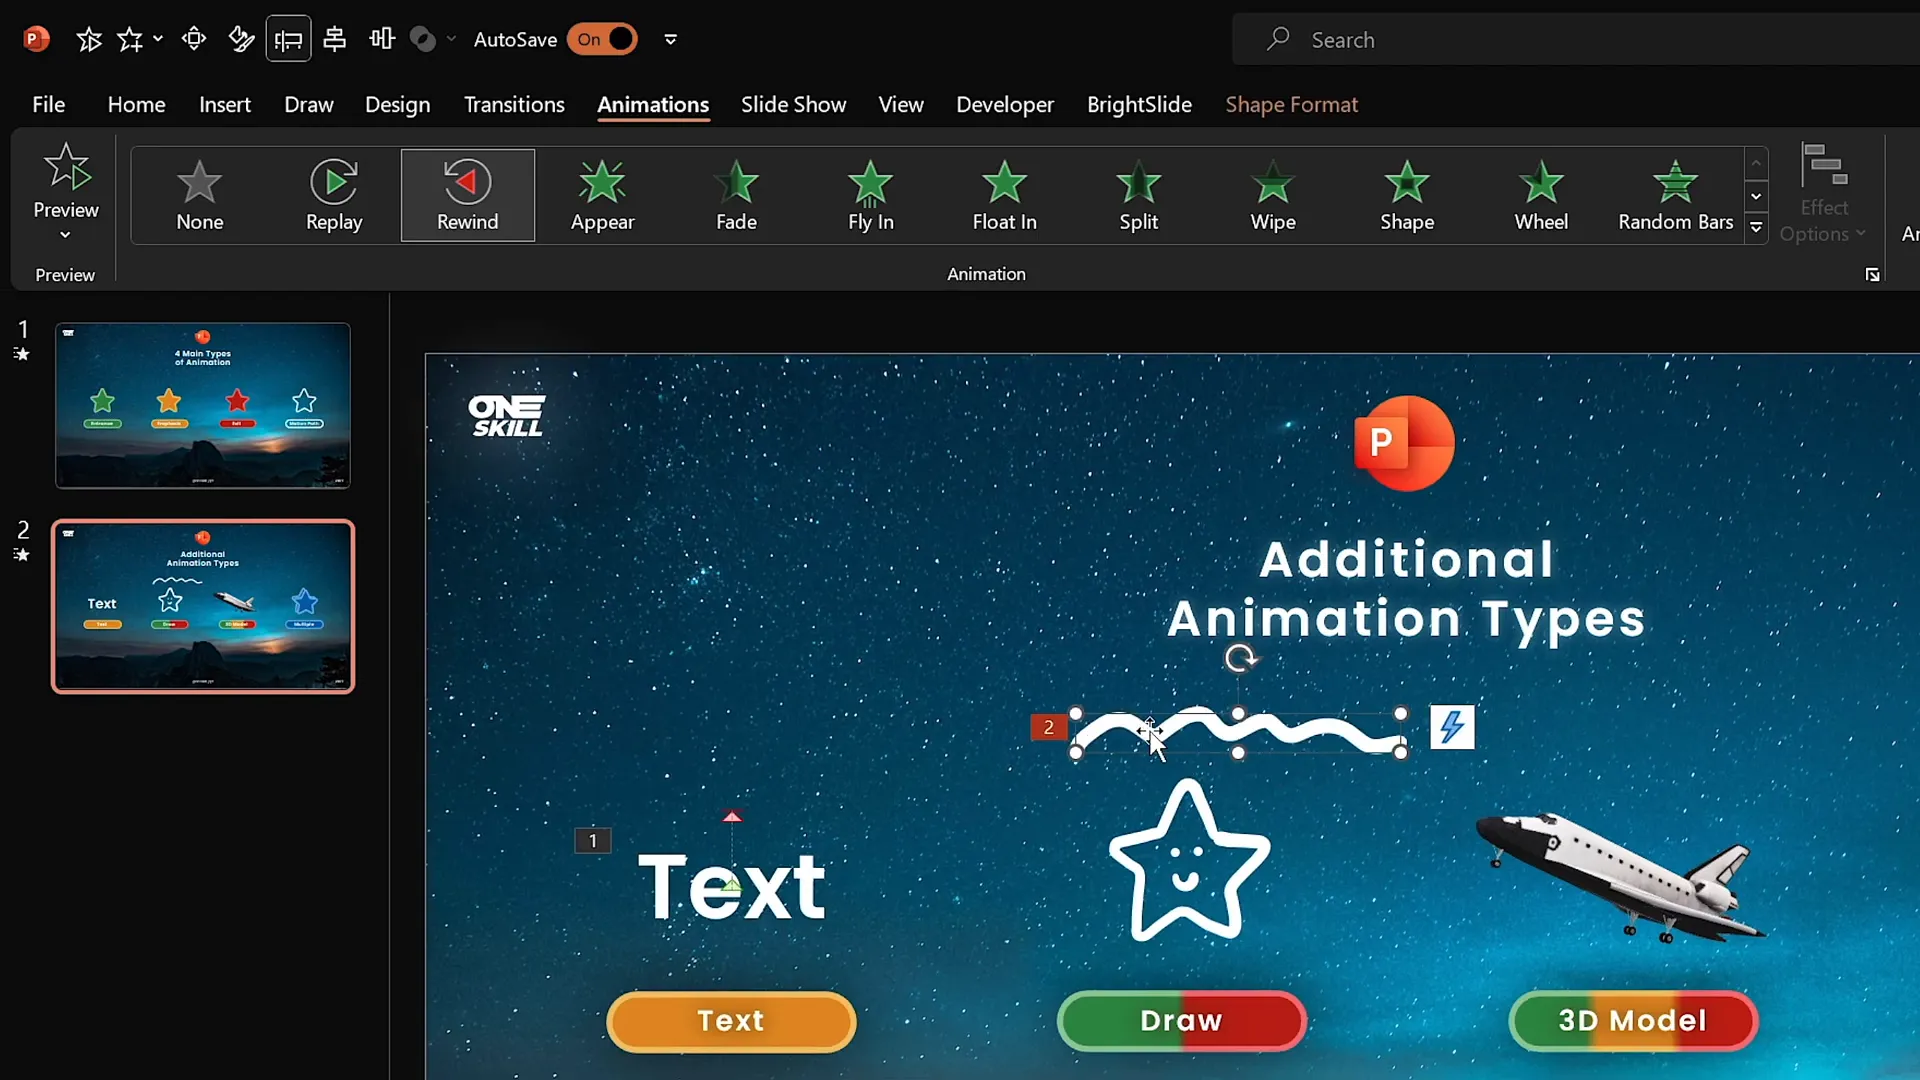
Four More Advanced Ways to Animate in PowerPoint
Beyond the four main animation types, PowerPoint offers additional exciting animation techniques to enhance your presentations.
1. Text Animations
These are special emphasis animations that only apply to text. You can animate text color, add waves, or animate by word or letter, adding subtle dynamic effects to your text content.
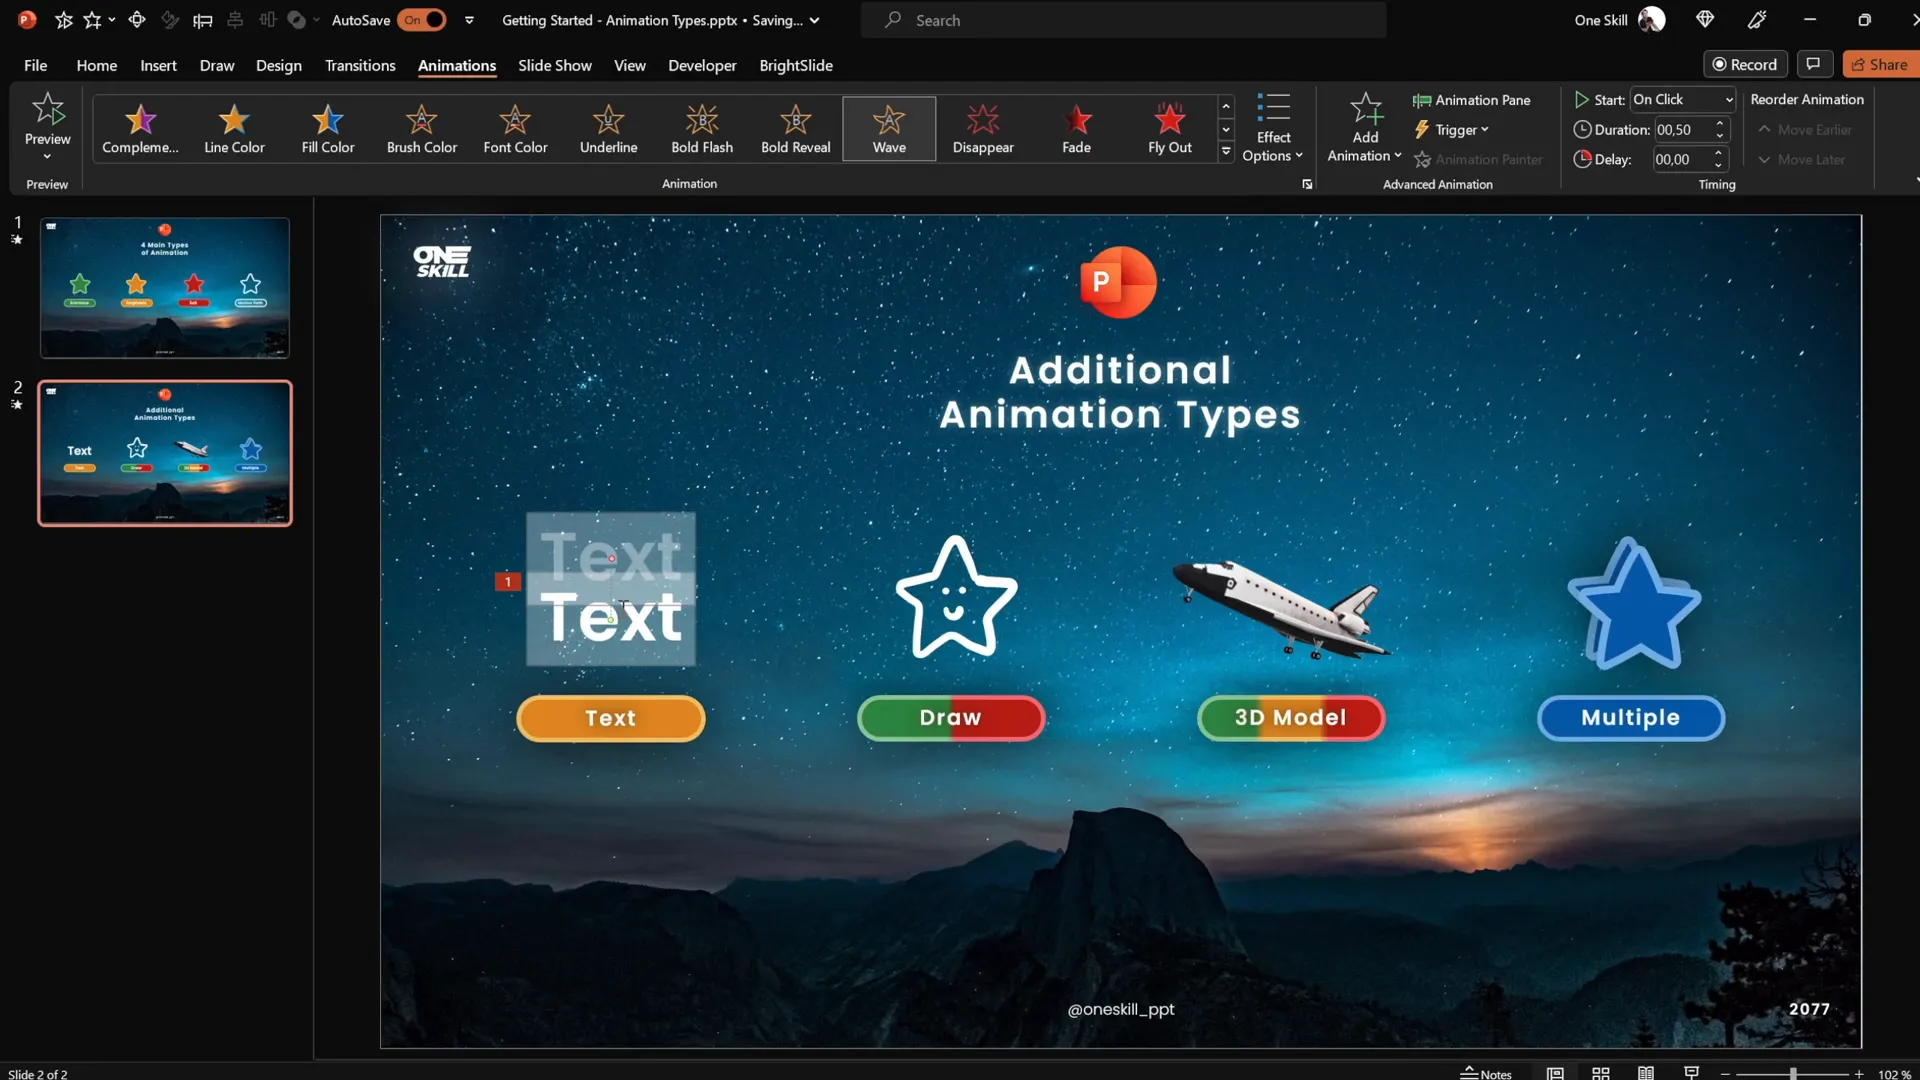
2. Draw Animations
If your version of PowerPoint includes the Draw feature, you can create custom drawings and animate them with Replay or Rewind animations.
This lets you simulate hand-drawing effects, perfect for emphasizing points or adding playful elements.
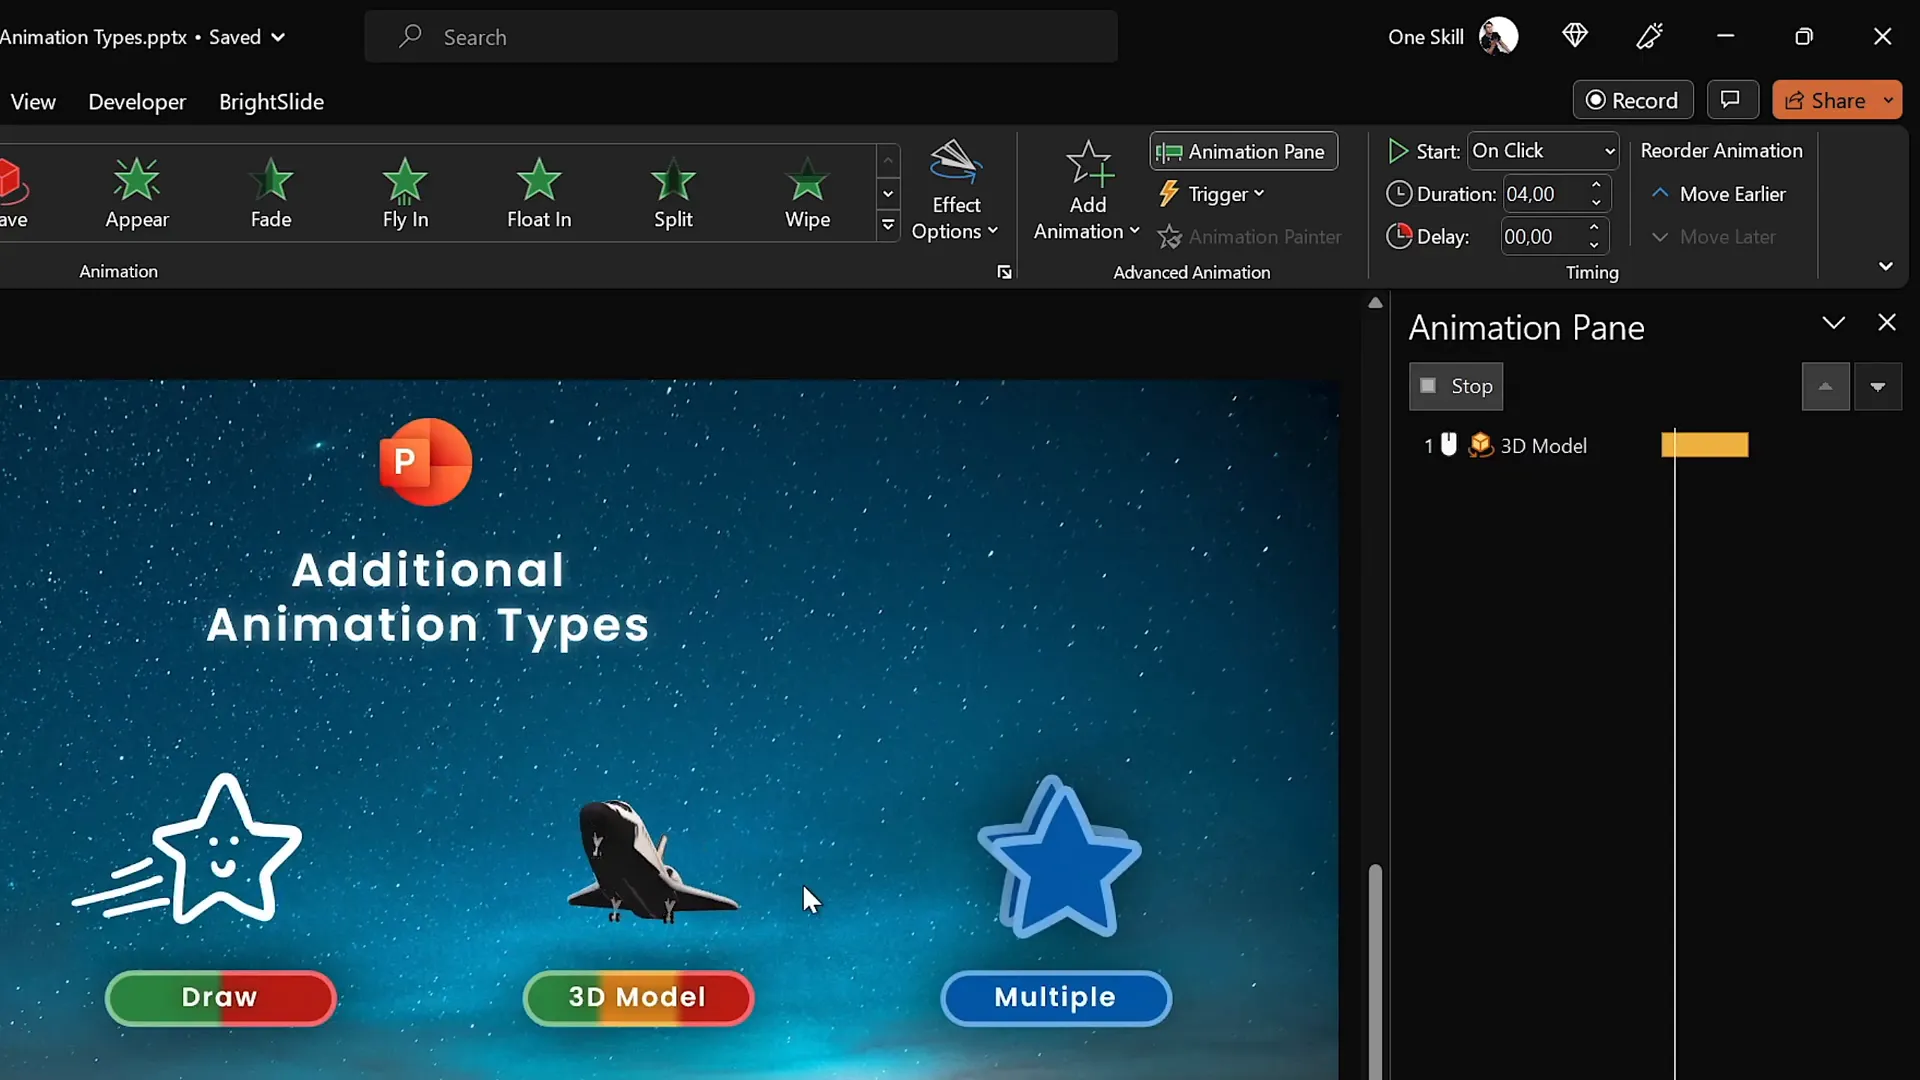
3. 3D Model Animations
PowerPoint supports 3D models that can be animated with entrance, emphasis, and exit effects. These animations allow 3D objects to spin, turn, or appear dynamically, adding a modern and engaging touch.
4. Multiple Animations on One Object
Combine several animations on a single object to create custom effects. For example, apply a motion path and a spin animation simultaneously for a dynamic movement.
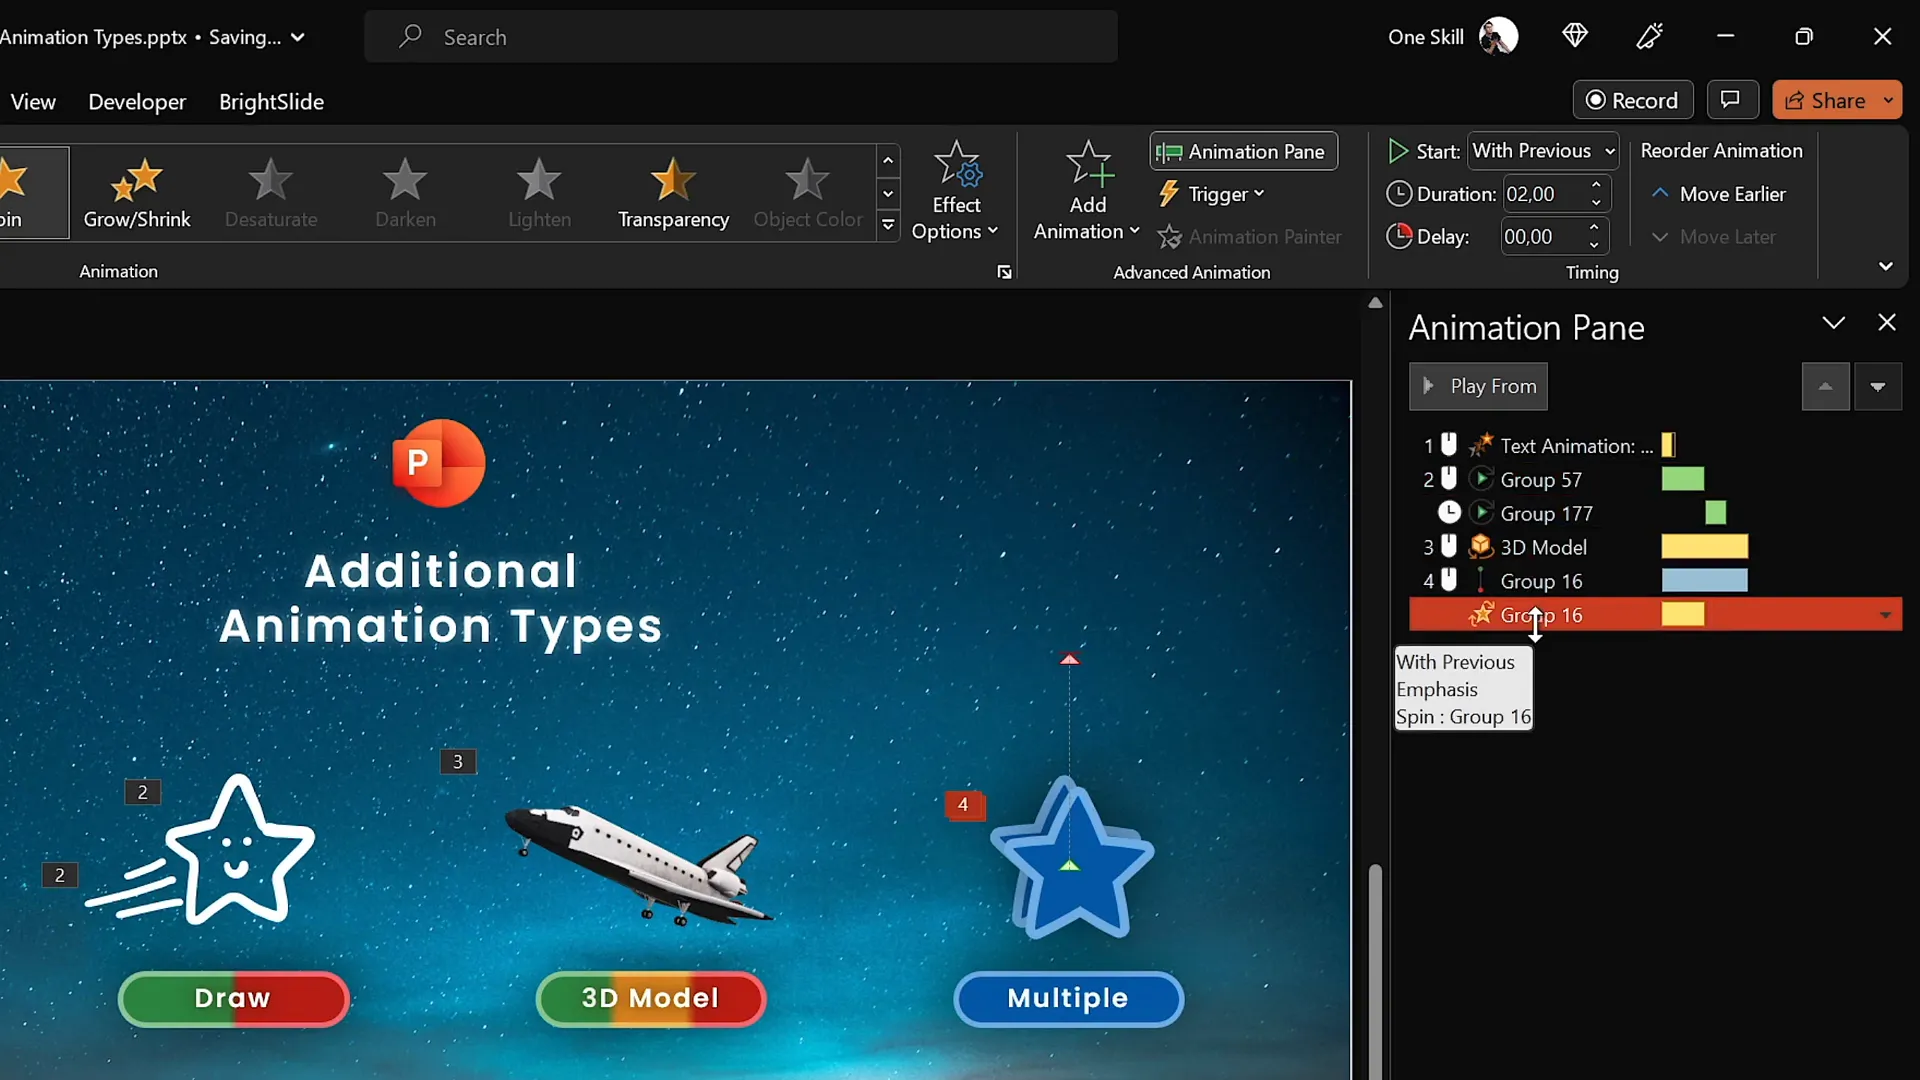
Creating Custom Animations with Multiple Effects
Combining animations allows you to tell richer visual stories. Here’s a step-by-step example:
- Group Objects: Select multiple objects and group them to animate as one unit.
- Add Motion Path: Apply a motion path animation, e.g., moving upwards.
- Enable Auto Reverse: In the animation options, activate Auto Reverse so the object returns to its start position.
- Add Spin Animation: Use the Add Animation button to apply a spin effect.
- Synchronize Animations: Set the spin animation to start With Previous and adjust durations so both animations align.
This approach creates smooth, eye-catching animations that combine movement and rotation.
Enhancing Animations with Smoothing Techniques
Animation smoothing controls how the animation starts and ends, making movements feel more natural and less abrupt.
In the animation options, you can adjust the Smooth Start and Smooth End sliders to soften the acceleration and deceleration of animations. Applying maximum smoothing to both the motion path and spin animations will make your custom animations look polished and professional.
Frequently Asked Questions About PowerPoint Animations
Q1: Which version of PowerPoint is best for animations?
For the best animation experience, use PowerPoint 2019, 2021, or Microsoft 365 on Windows. The Windows version offers an advanced animation timeline that is very helpful for creating complex animations. Mac users can still animate but have fewer advanced timeline features.
Q2: Can I animate any object in PowerPoint?
Yes! You can animate shapes, text boxes, images, videos, drawings, and even 3D models. Most objects can have entrance, emphasis, exit, and motion path animations applied.
Q3: How can I add multiple animations to the same object?
Always use the Add Animation button to add additional animations to an object. Selecting animations directly from the main animation list will replace existing animations on that object.
Q4: What are motion path animations?
Motion path animations move an object along a line or custom path on the slide. You can adjust the start and end points and create shapes like circles or curves for the path.
Q5: How do I control when animations start?
- On Click: Animations start when you click the mouse or keyboard.
- With Previous: Animations start simultaneously with the previous animation.
- After Previous: Animations start immediately after the previous one finishes.
Q6: What is animation smoothing?
Animation smoothing controls the acceleration and deceleration of an animation, making transitions appear more fluid and natural.
Q7: Can I animate 3D models in PowerPoint?
Yes! PowerPoint supports 3D models that can be animated with entrance, emphasis, and exit animations such as spinning or turning.
Conclusion: Become a PowerPoint Animation Pro
PowerPoint animations have the power to transform your presentations from static slides to dynamic storytelling tools. Starting with the four main animation types—entrance, emphasis, exit, and motion paths—you can quickly create engaging effects. Expanding into text animations, draw animations, 3D model animations, and combining multiple animations opens up even more possibilities.
Remember, the key to mastering PowerPoint animations is practice and experimentation. Use the Animation Pane to manage your effects, customize timing and triggers, and apply smoothing to polish your animations. Always keep your audience in mind and use animations to enhance your message, not distract from it.
By following the techniques shared here and in Kaspare’s PowerPoint Animation Mastery course, you’ll soon be creating presentations that captivate and impress.
Ready to start animating like a pro? Dive in, experiment, and watch your presentations come alive!


