
If you’re a teacher, trainer, or content creator with a ready PowerPoint presentation, you might be wondering how to elevate your slides into a fully interactive online course without spending a dime. Luckily, with the right techniques and tools, transforming your PowerPoint into a dynamic online course is easier than you think.
In this comprehensive guide, I’ll walk you through the entire process of PowerPoint online course creation—from designing an interactive sidebar for navigation, adding engaging slide zooms, embedding multimedia, creating quizzes, to publishing your course online for free. The method I share is practical, accessible, and designed to empower educators and professionals alike.
Let’s dive in and explore how you can take your existing PowerPoint presentations and convert them into immersive online courses that captivate and educate your students effectively.
Table of Contents
- Presentation Overview: Setting the Stage for Your Course
- Creating a Clickable Sidebar Navigation
- Animating the Sidebar for Better User Experience
- Mastering Slide Zoom Animations for Interactive Content
- Embedding Multimedia: YouTube Videos and Live Websites
- Creating Engaging Quizzes to Test Knowledge
- Publishing Your PowerPoint as an Online Course
- Frequently Asked Questions (FAQ)
- Conclusion
Presentation Overview: Setting the Stage for Your Course
Imagine you’re a teacher preparing a course on artificial intelligence (AI). You’ve already created a detailed PowerPoint presentation full of valuable information. But how do you make it more engaging and accessible as an online course?
Here’s an example of a presentation structure I created for a course on AI:
- An Introduction slide that welcomes learners.
- A detailed explanation of What Artificial Intelligence Is.
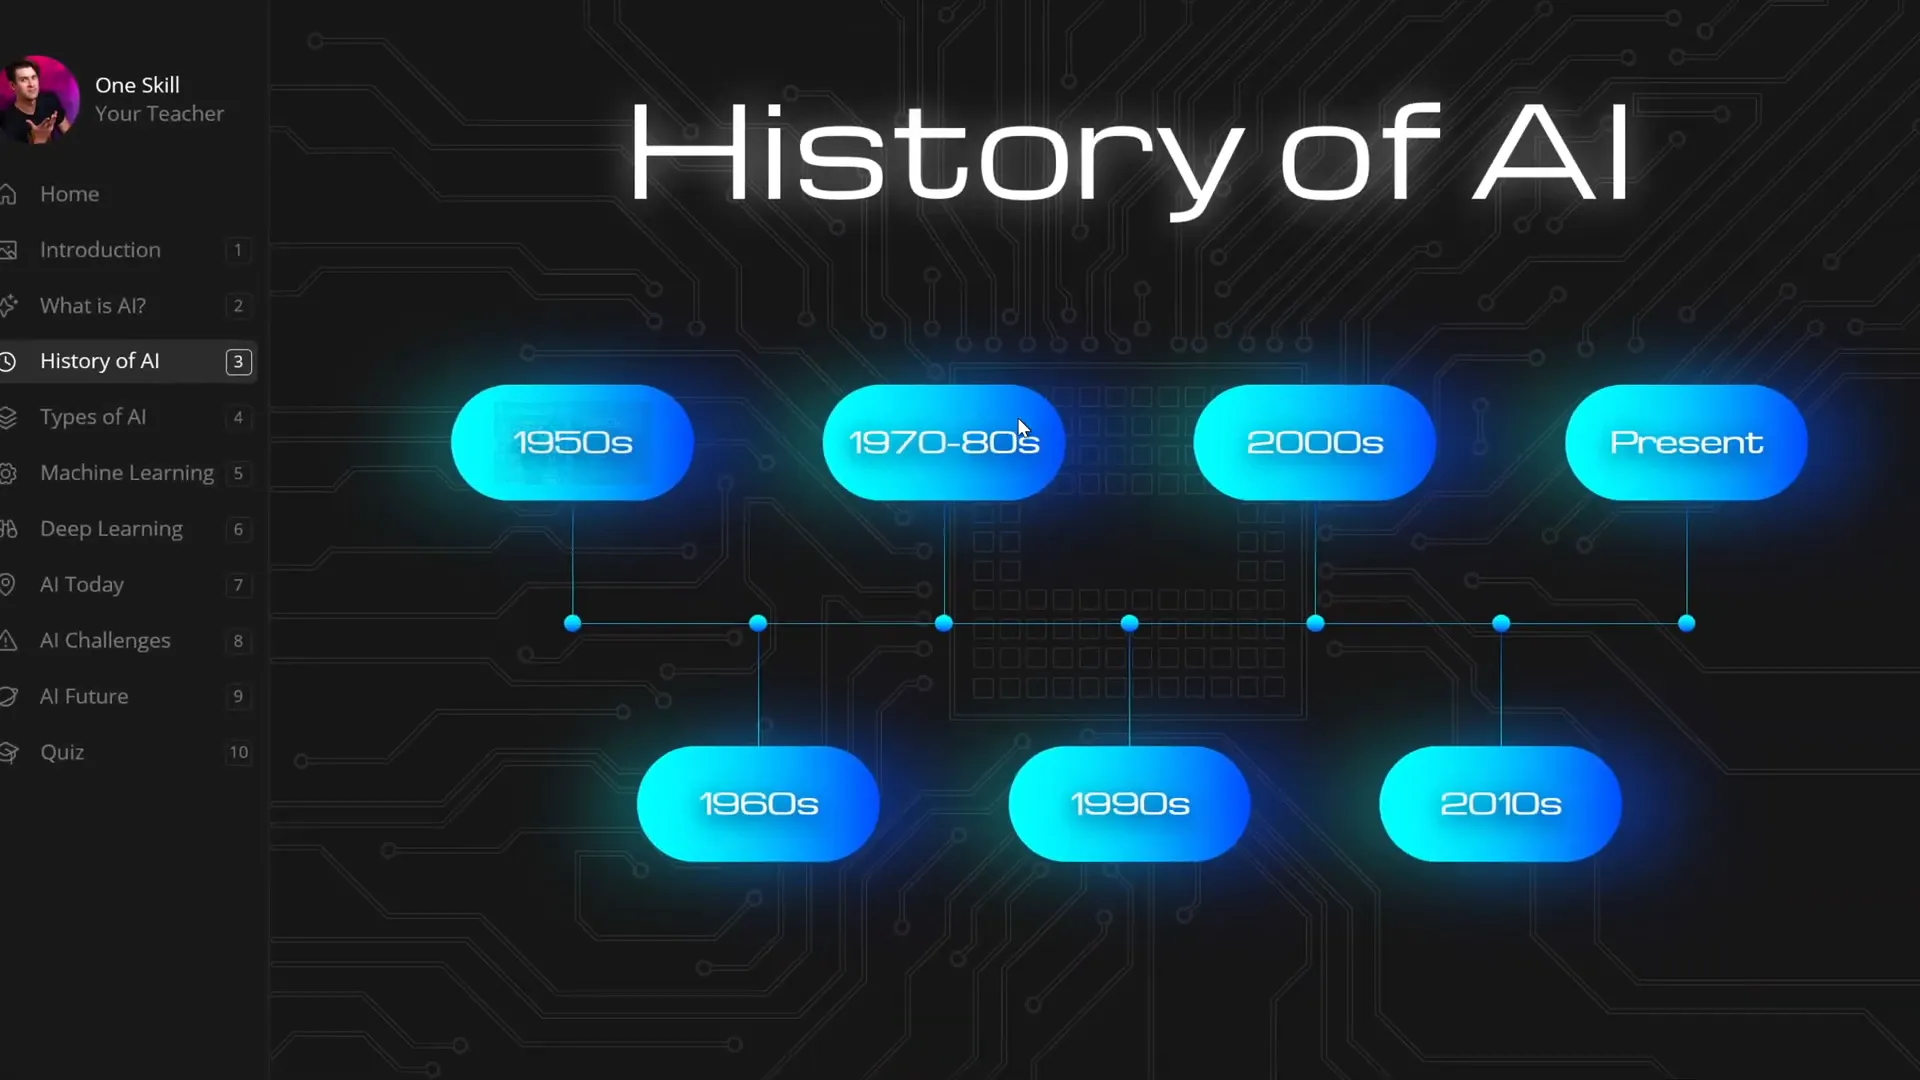
- A historical timeline slide where students can zoom into specific years to learn about important milestones in AI’s development.
- Slides covering the Types of Artificial Intelligence with clickable numbers that reveal more details.
- Content on Machine Learning and Deep Learning.
- Insights into the Applications and Challenges of AI Today.
- A forward-looking slide on The Future of AI.
- A Quiz at the end to test learners’ knowledge.
This kind of structure creates a natural flow, allowing students to explore topics in depth with interactive elements that keep them engaged.

Creating a Clickable Sidebar Navigation
One of the most useful features for an online course is a navigation sidebar. This sidebar allows learners to jump between sections easily, mimicking the experience of a professional e-learning platform. Here’s how to create one in PowerPoint:
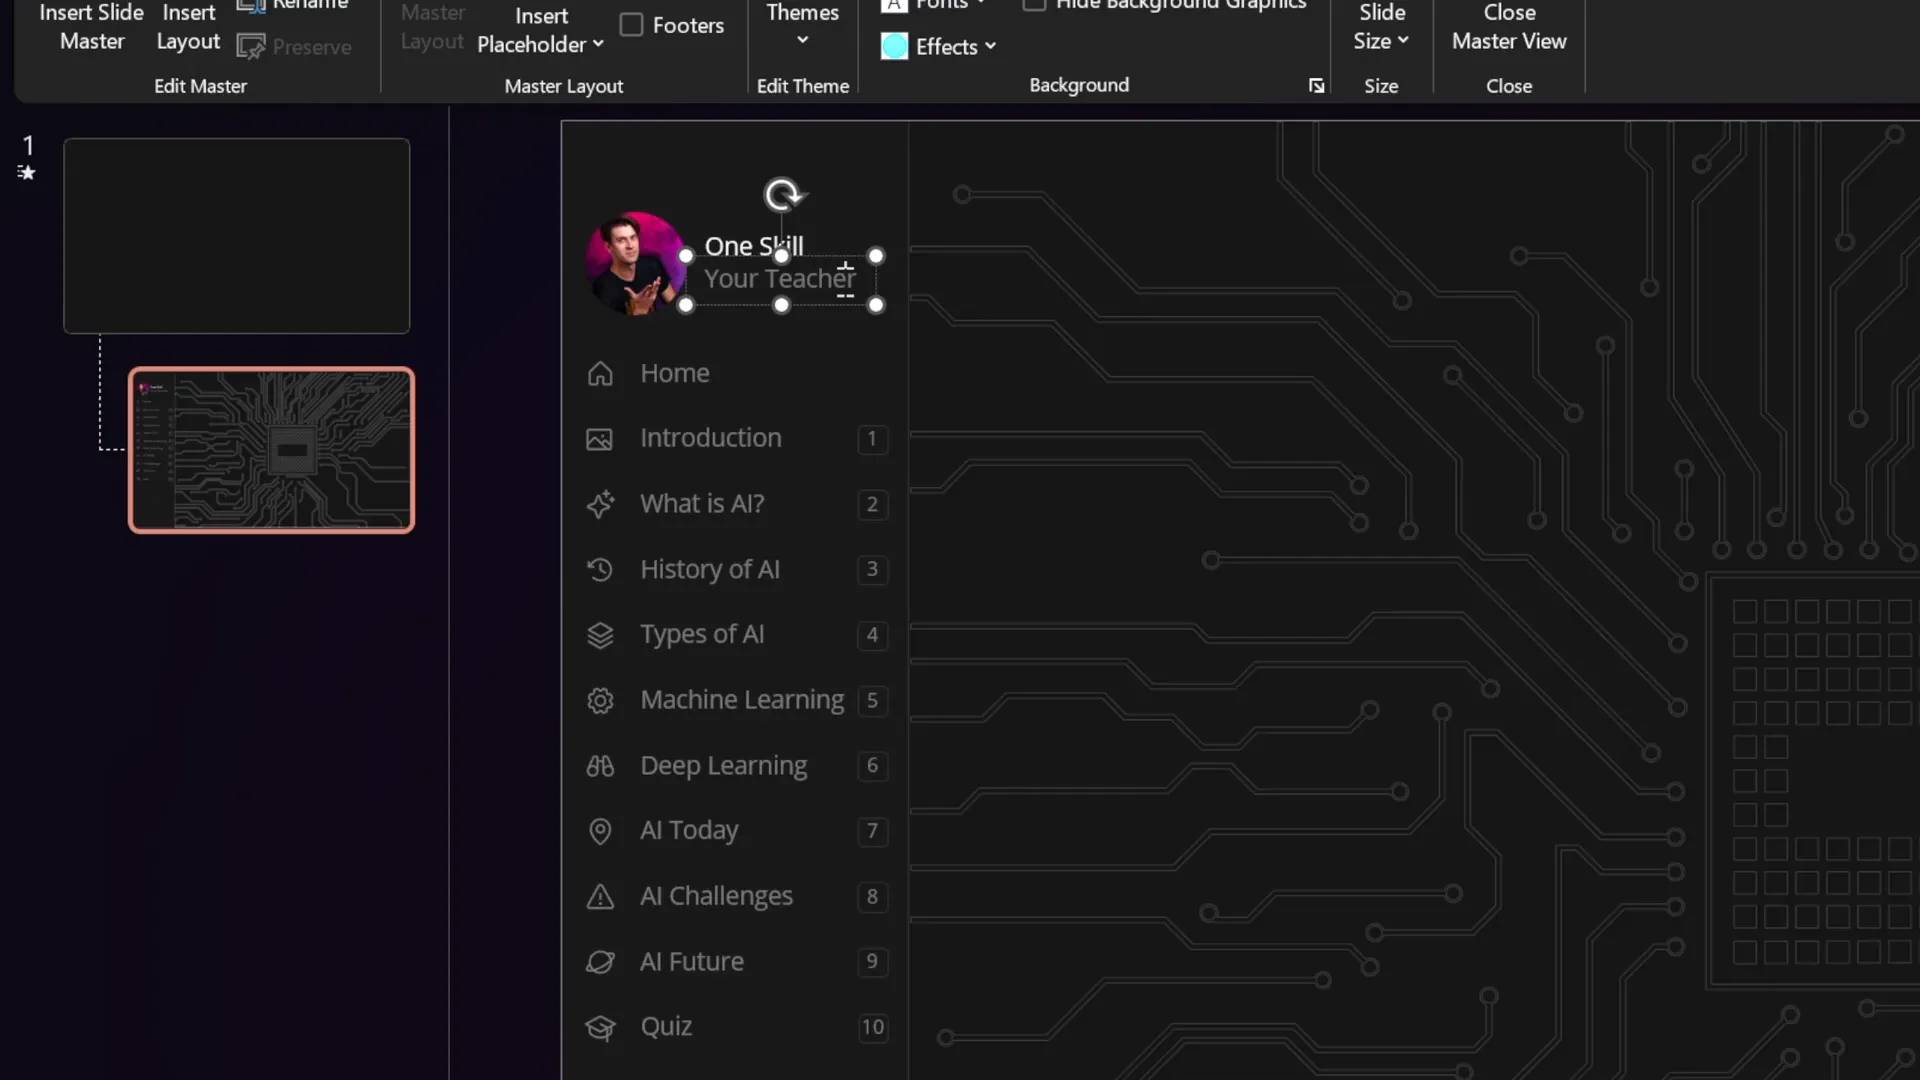
Using Slide Master View for Consistency
The secret to an efficient sidebar is to create it once in the Slide Master View. This way, the sidebar appears on every slide that uses the same layout, saving you time and ensuring consistency.
- Open PowerPoint and go to View > Slide Master.
- Create your sidebar design here—this includes text boxes for section titles, icons, and section numbers.
- For example, you can add a vertical sidebar with:
- Section names such as Home, Introduction, What is AI, etc.
- Icons representing each section for visual appeal.
- Section numbers to help learners track progress.
- Don’t forget to add a background shape or image, like a microchip design, that repeats on every slide.
Making Sidebar Sections Clickable
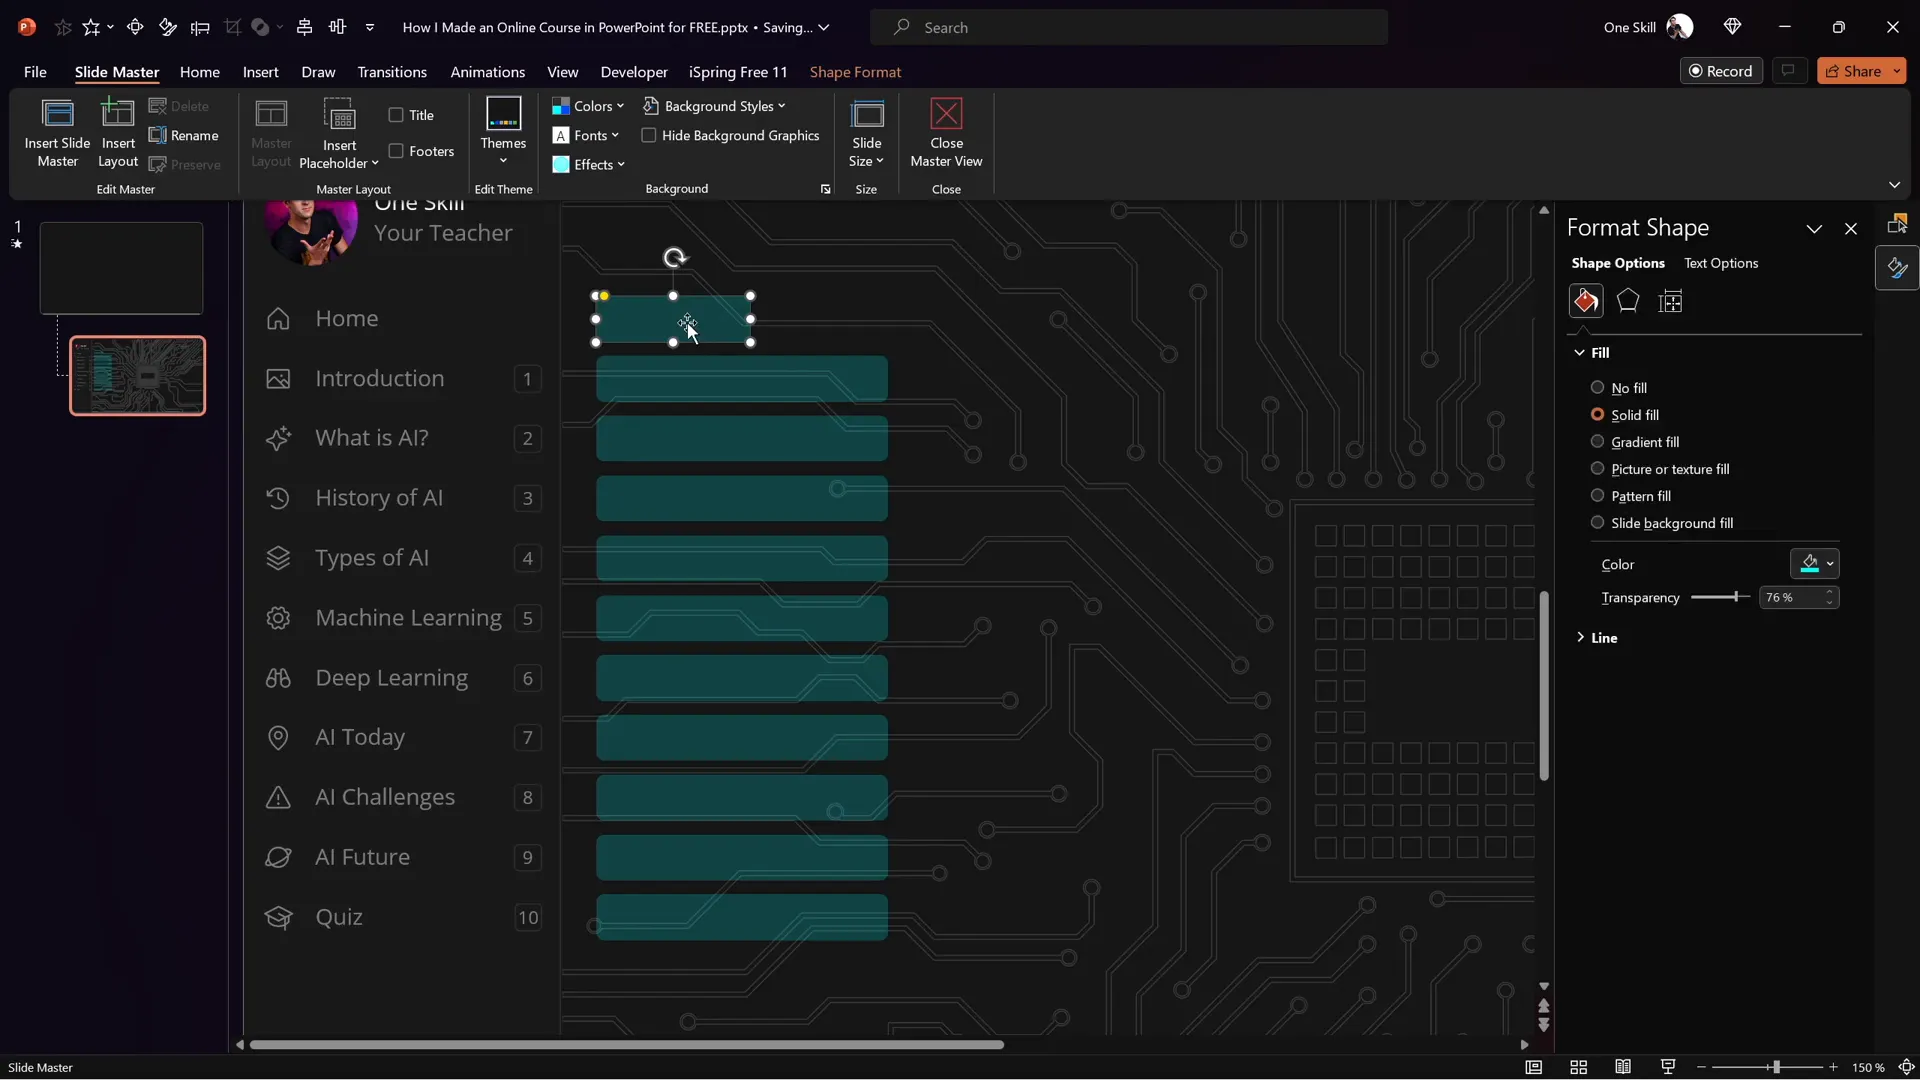
To make the sidebar interactive, you’ll overlay invisible shapes with hyperlinks to various slides:
- Insert rounded rectangles over each sidebar section.
- Make these rectangles invisible by setting their fill transparency to 100%.
- Open the Selection Pane (Home > Select > Selection Pane) to manage these objects easily.
- Select each rectangle and add a hyperlink (Insert > Link) to the corresponding slide.
- For example, the “Introduction” rectangle links to slide 2, “What is AI” links to slide 3, and so on.
This setup allows learners to click on any sidebar section and jump directly to that part of your presentation.
Editing Sidebar Globally
If you need to update the sidebar design or text, simply go back to the Slide Master view, make your changes, and they will automatically apply to all slides using that layout. This is a huge time saver and ensures design uniformity.
Animating the Sidebar for Better User Experience
Static navigation is good, but adding subtle animations can improve the user experience by highlighting active sections and providing visual feedback.
Creating Active States for Sidebar Items
Since animations in Slide Master view are limited, we create active sidebar states directly on individual slides:
- Duplicate the sidebar and create a “highlighted” version of each section (e.g., a colored background or glowing effect behind the text).
- On each slide, paste the active sidebar version highlighting the current section.
- Move the inactive section off-slide to keep it hidden.

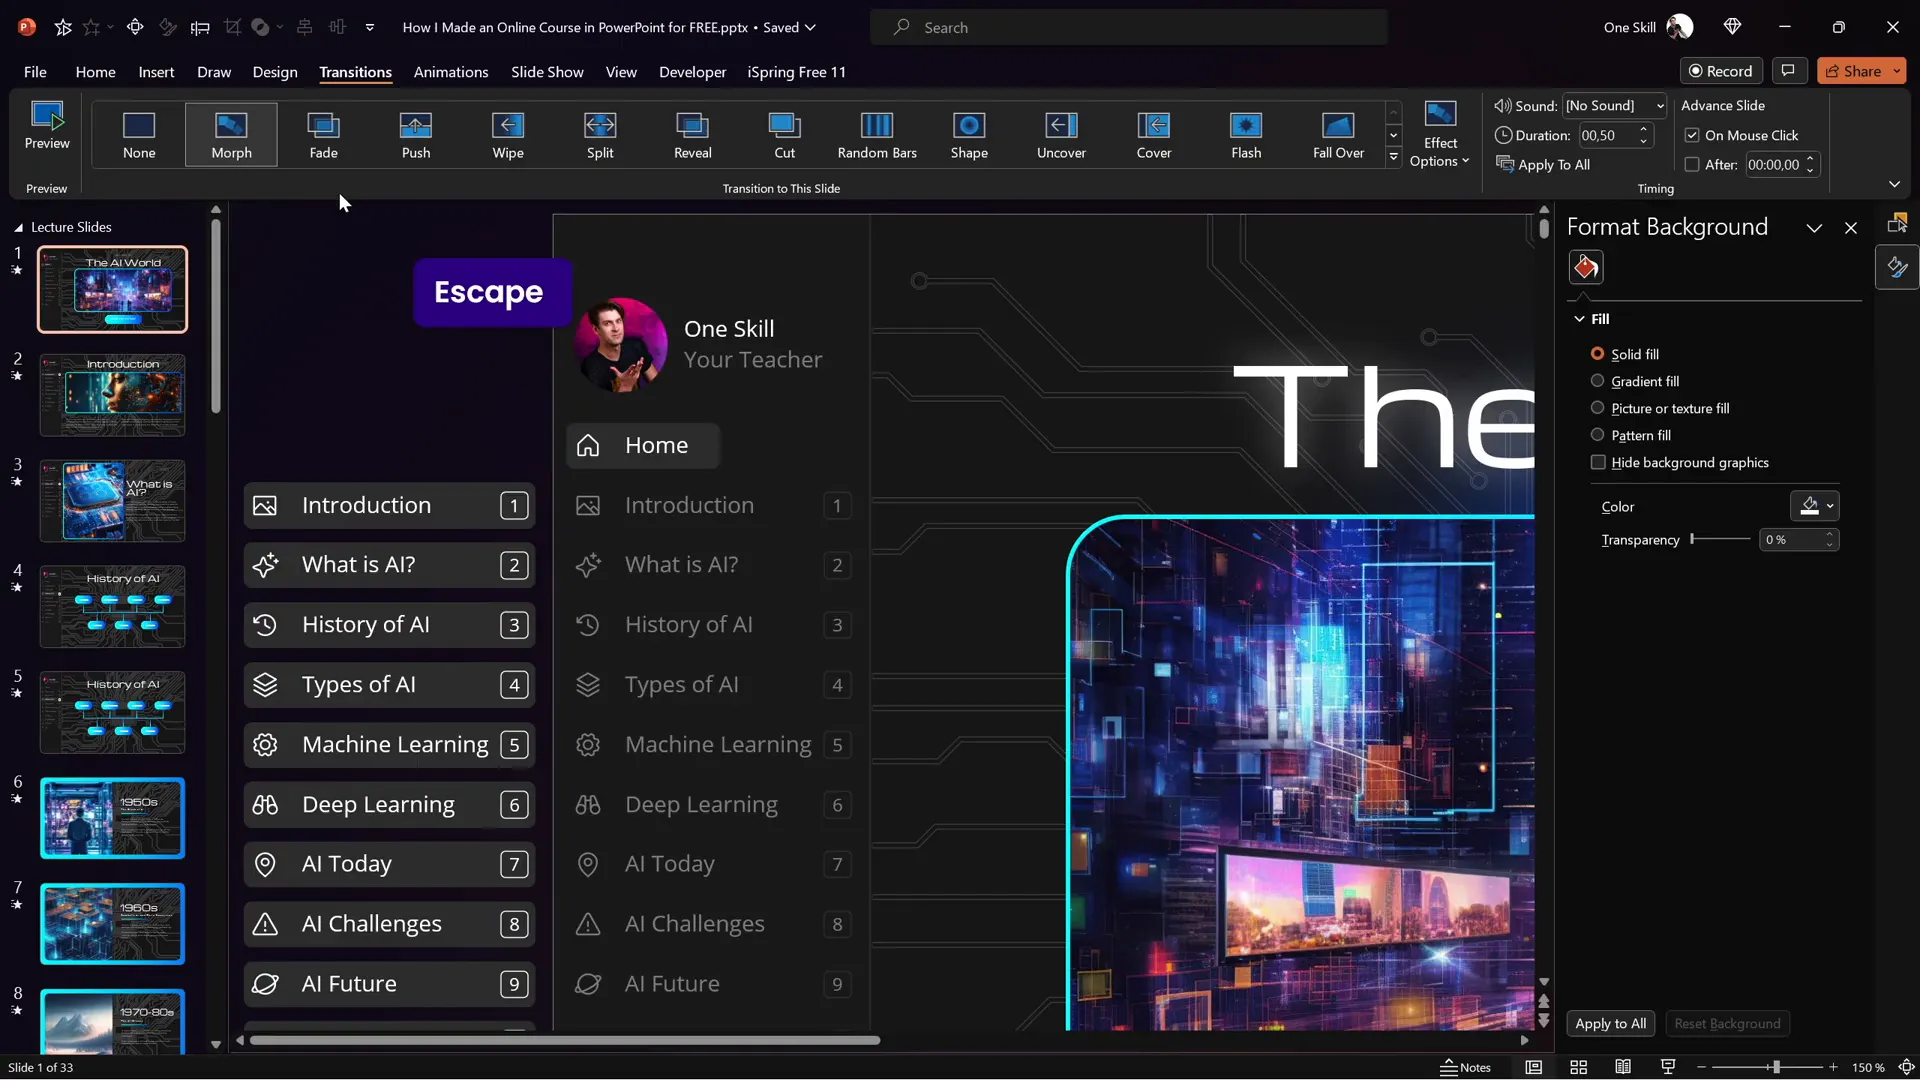
Using Morph Transition for Smooth Animations
The Morph transition in PowerPoint powers the animation magic:
- Set the slide transition to Morph with a duration of about 0.5 seconds.
- When navigating between slides, the sidebar smoothly animates the active section moving in and the previous section moving out.
This creates a polished and professional look for your navigation sidebar without complicated animation setups.
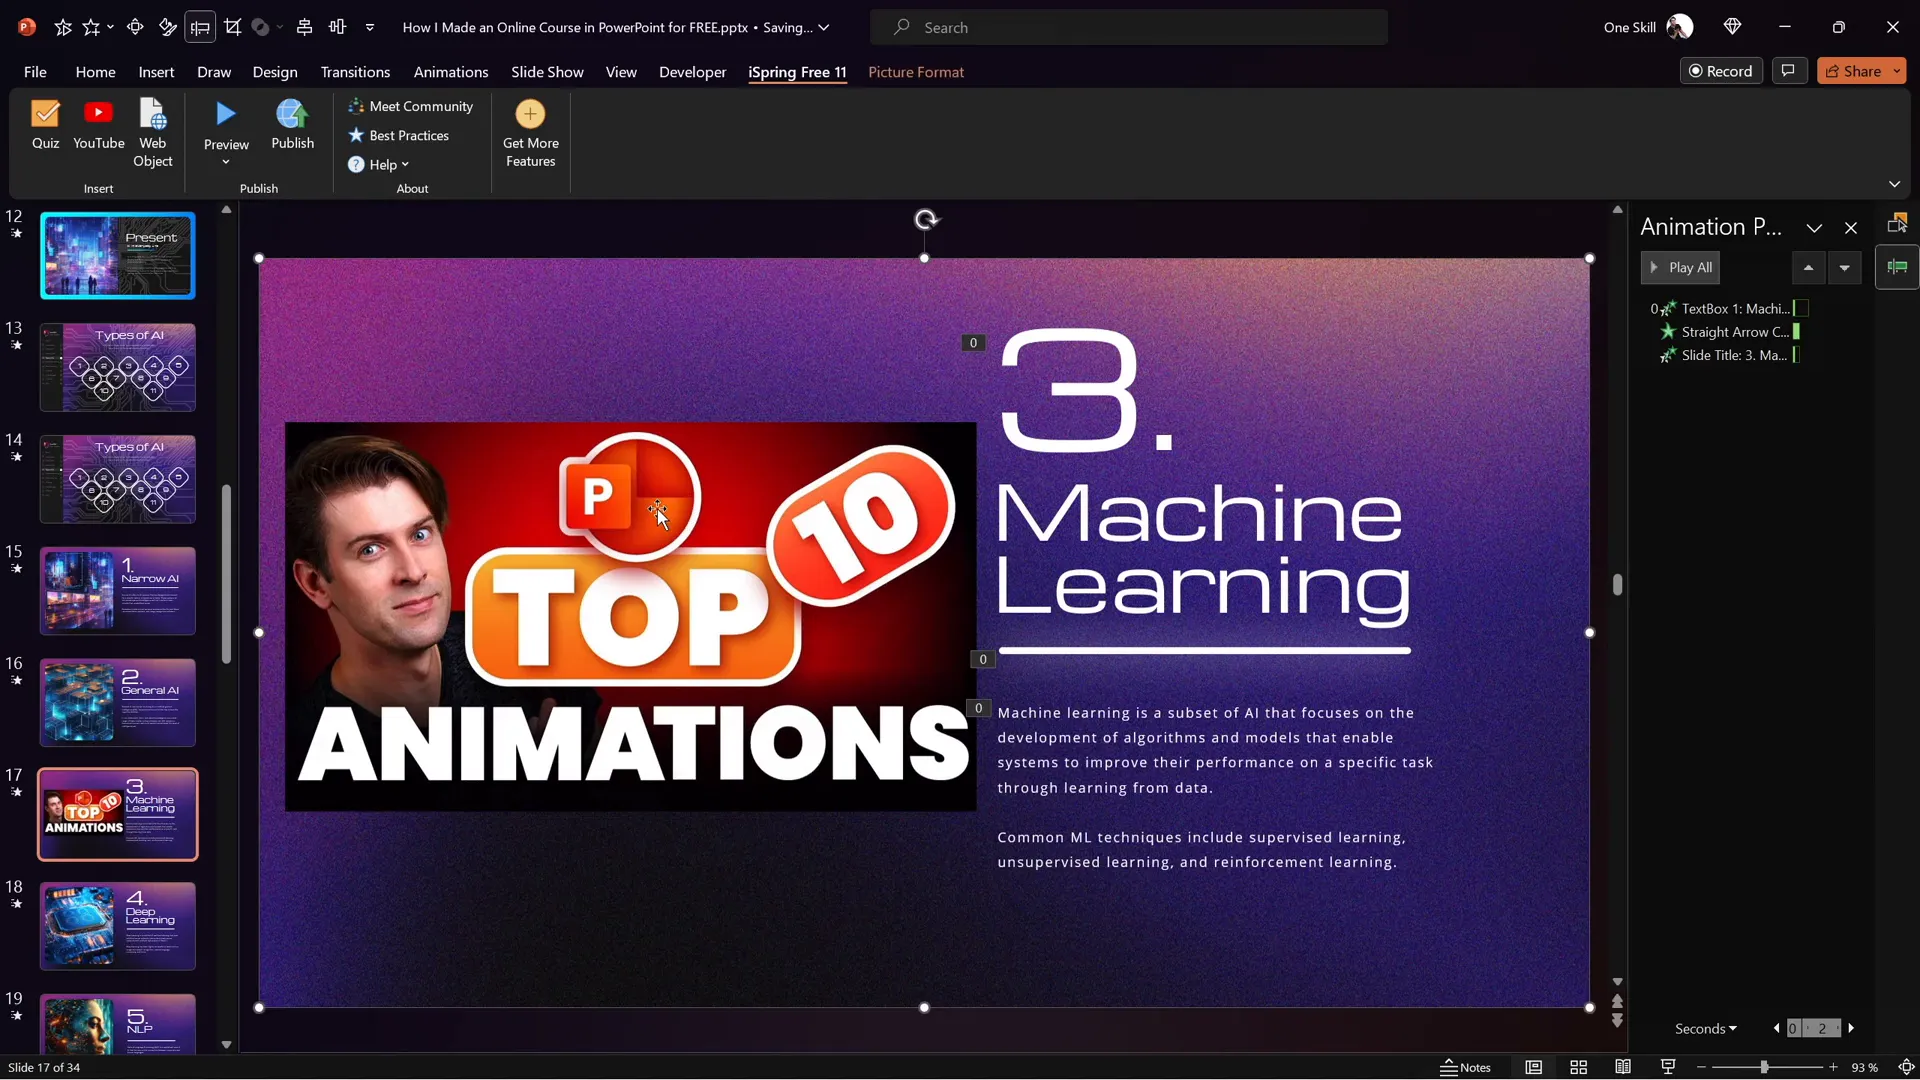
Mastering Slide Zoom Animations for Interactive Content
Slide Zooms are a fantastic PowerPoint feature that lets you embed clickable thumbnails of other slides. This lets learners dive deeper into subtopics without losing context.
Using Invisible Slide Zooms
To keep your slides clean and professional, make your slide zooms invisible by setting a transparent image as the cover image for each zoom. This way, learners click on an invisible hotspot to jump to detailed slides.
Example use cases:
- Zooming into specific years on the AI history timeline.
- Clicking numbers on the “Types of AI” slide to reveal details.
Controlling Animation Playback of Slide Zooms
One challenge with slide zooms is that any animations on the zoomed slide replay every time you zoom in or out, which can be distracting.
Here’s a simple workaround to make animations play just once:
| Slide | Content | Transition Setting |
|---|---|---|
| Slide 1 (Original) | Animations only (no slide zooms) | Auto transition after 0 seconds |
| Slide 2 (Duplicate) | Slide Zooms only (no animations) | Manual transition |
Steps:
- Duplicate the slide with animations and zooms.
- On the first slide, delete all slide zooms but keep animations.
- On the second slide, delete all animations but keep slide zooms.
- Set the first slide to transition automatically after zero seconds.
- When the presentation plays, animations run once, then it auto-transitions to the second slide where learners can use slide zooms without replaying animations.
Embedding Multimedia: YouTube Videos and Live Websites
Modern online courses thrive on multimedia. Embedding videos and websites directly into your slides boosts engagement and provides richer learning experiences.

Inserting YouTube Videos with iSpring Free Plugin
Using the free iSpring 3.11 plugin, you can embed YouTube videos seamlessly:
- Delete any placeholder image on your slide.
- Go to the iSpring 3.11 tab in PowerPoint.
- Click the YouTube button and paste your video URL.
- Preview the video to ensure it works.
- Resize and position the video on your slide.
This embedded video plays smoothly within your course player, giving learners the convenience of watching videos without leaving the course.
Embedding Live Websites
You can also embed live websites as web objects, which is especially useful for showing dynamic content, tools, or additional resources:
- Delete any placeholder image on the slide.
- Copy the URL of the website you want to embed.
- Click the Web Object button on the iSpring tab.
- Paste the URL and insert it.
- Resize and position the embedded website frame on your slide.
When previewing or publishing, the embedded website is fully functional—learners can scroll, click links, and interact with the site directly inside the slide.
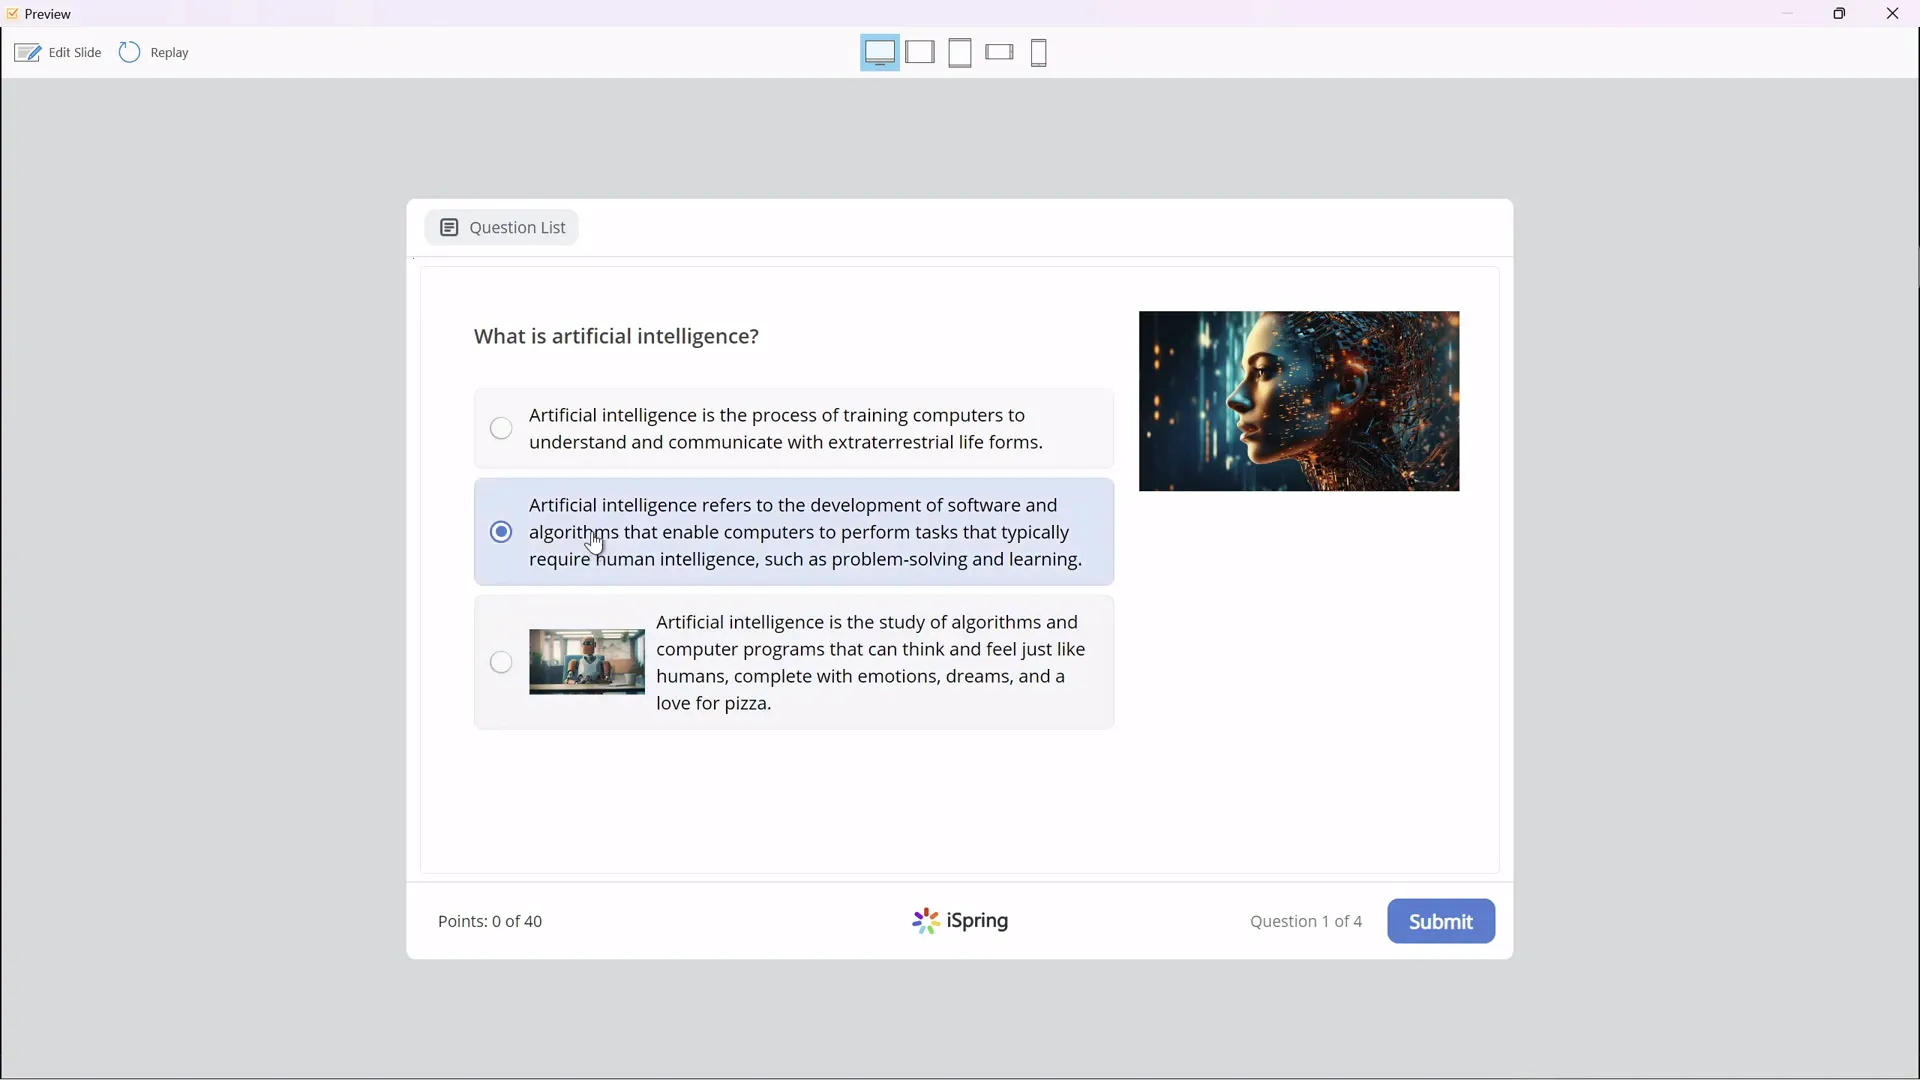
Creating Engaging Quizzes to Test Knowledge
Quizzes are essential in online courses to reinforce learning and assess understanding. With the iSpring 3.11 free plugin, creating quizzes inside PowerPoint is straightforward and versatile.
Types of Quiz Questions You Can Create
| Question Type | Description | Example Use |
|---|---|---|
| Multiple Choice (Single Answer) | Choose one correct option | What is AI? |
| Multiple Response | Select multiple correct answers | Select all false statements about AI |
| Short Answer | Type a text response | Abbreviation for Natural Language Processing? |
| Survey (Non-graded) | Collect feedback without scoring | Course feedback |
Creating Your Quiz
- Navigate to the slide where you want your quiz.
- On the iSpring 3.11 tab, click the Quiz button and select Graded Quiz.
- Add questions by choosing the type and entering your question and answer options.
- Mark the correct answers and customize feedback messages for correct and incorrect responses.
- Set quiz options such as name, slide size, passing score (e.g., 50%), shuffling answers, and report sending.
- Add an intro slide or instructions if desired.
- Optionally, add images to questions or answers for enhanced visual appeal.
- Preview the quiz to test its flow and functionality.
- Save and return to the course to embed the quiz into your presentation.
For example, a quiz on AI could include questions like:
- What is artificial intelligence? (Multiple Choice)
- When did the AI winter occur? (Multiple Choice)
- Select all false statements about AI. (Multiple Response)
- How do you abbreviate natural language processing? (Short Answer)
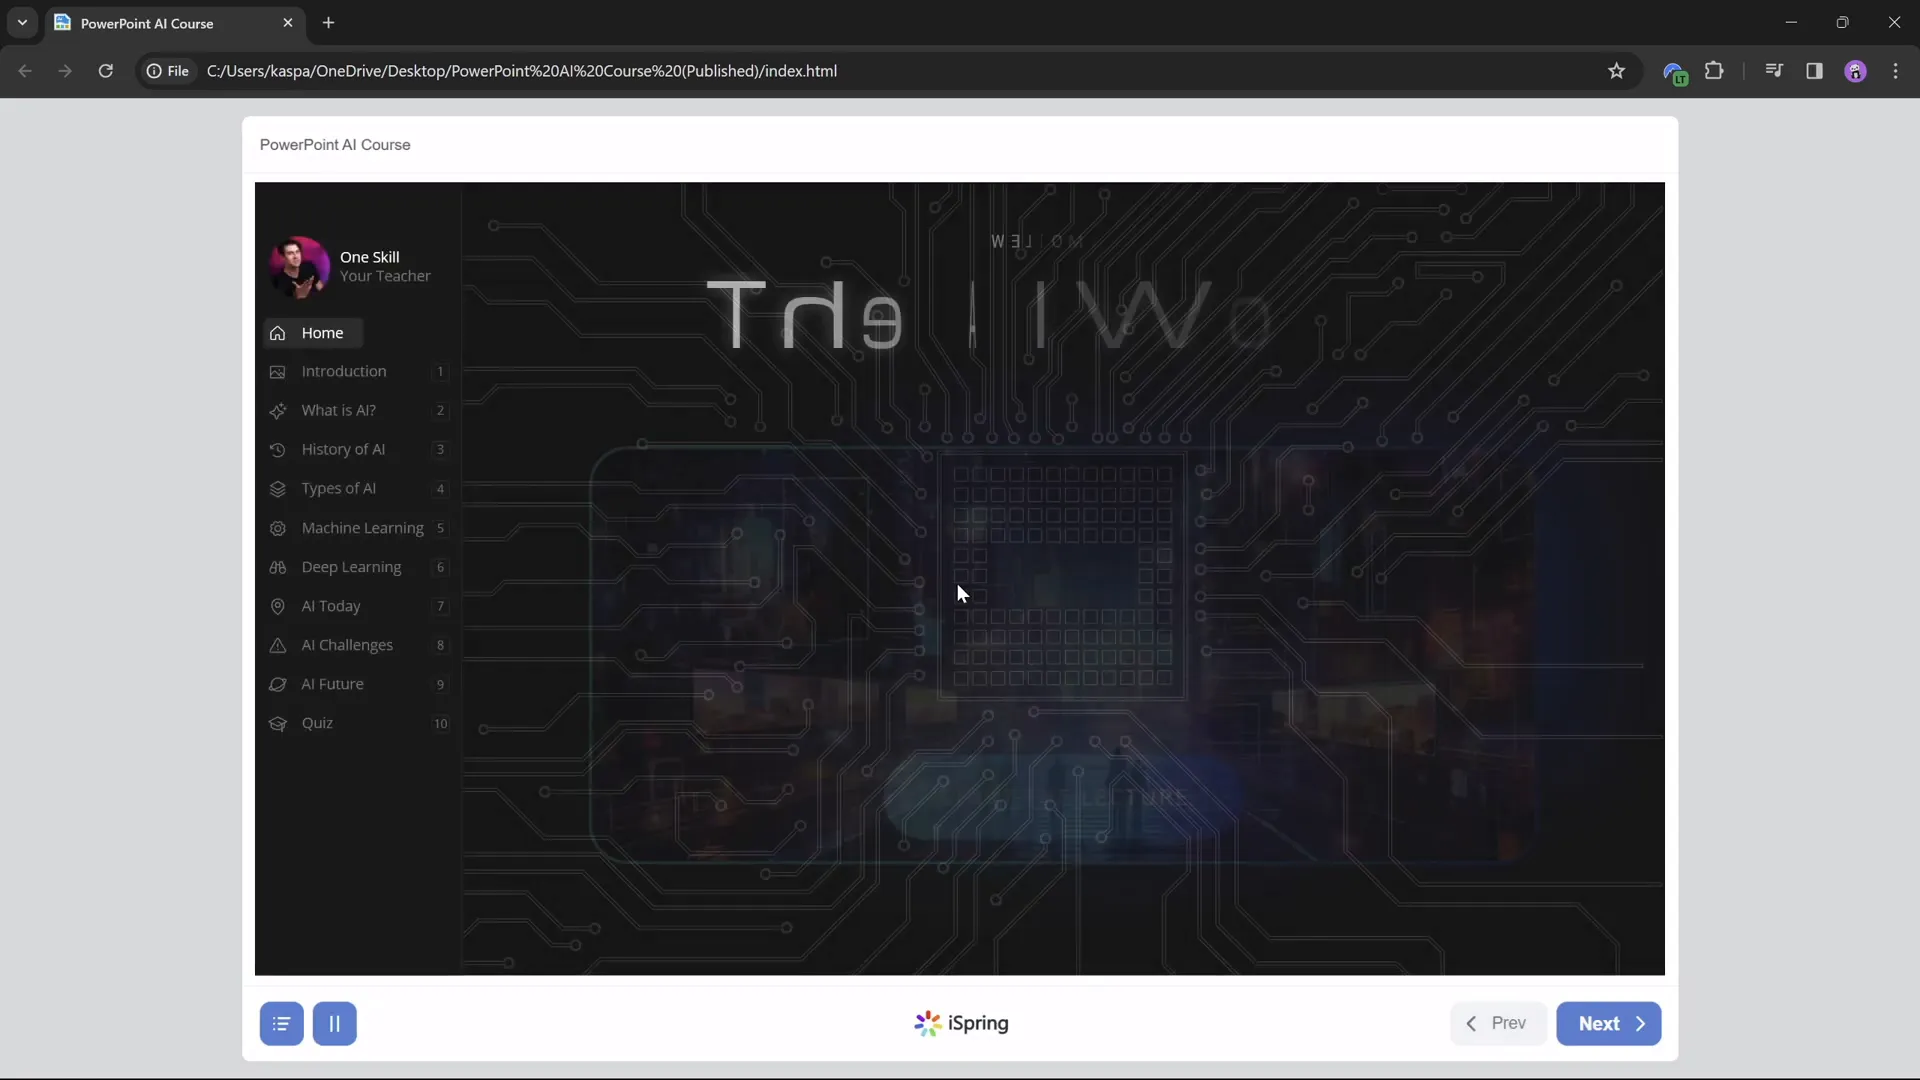
Publishing Your PowerPoint as an Online Course
Once your slides, interactive elements, multimedia, and quiz are ready, the final step is publishing your course.
Publishing Options with iSpring 3.11
The iSpring 3.11 plugin provides several convenient publishing options:
| Publishing Method | Description | Best For |
|---|---|---|
| Publish to Computer | Export course files locally (HTML5) | Sharing via web server or local hosting |
| Publish to LMS (SCORM) | Export SCORM package compatible with LMS platforms | Schools, companies using Moodle, Blackboard, etc. |
| Publish to iSpring Learn | Upload directly to iSpring’s cloud LMS | Easy cloud hosting and tracking |
| Publish to YouTube or iSpring Page | Publish as video or standalone webpage | Public sharing and marketing |
Steps to Publish Your Course
- Click the Publish button on the iSpring 3.11 tab.
- Choose your preferred publishing method.
- Name your course and select the destination folder.
- Decide whether to publish all slides or selected slides.
- Choose the course size options (e.g., fit to browser window).
- Click Publish and wait for the process to complete.
- Click View Course to preview the published course.
Once published, your course will retain all interactive elements, animations, multimedia, and quizzes, providing learners with a rich and engaging experience.
Frequently Asked Questions (FAQ)
Is iSpring 3.11 really free to use?
Yes, iSpring 3.11 is a free PowerPoint plugin that lets you convert your presentations into online courses with quizzes, video embedding, and more.
Can I add multimedia other than YouTube videos?
Yes, you can embed local videos, audio files, and live websites as web objects using iSpring tools.
Do I need advanced PowerPoint skills to create these interactive features?
No, the steps are designed to be straightforward. Using Slide Master, hyperlinks, and iSpring’s intuitive interface makes it accessible for users with basic to intermediate PowerPoint experience.
Can I publish courses compatible with LMS platforms?
Absolutely. iSpring allows you to export SCORM or xAPI packages that can be imported into most LMS platforms like Moodle, Blackboard, or Canvas.
How do I ensure animations don’t replay every time I zoom in on slide zooms?
Use the two-slide method: one slide with animations but no zooms that auto-transitions to a duplicate slide with zooms but no animations. This ensures animations play only once.
Can I customize the quiz scoring and feedback?
Yes, you can set passing percentages, assign points per question, shuffle answers, and customize feedback messages for correct and incorrect answers.
Conclusion
PowerPoint online course creation doesn’t have to be complicated or expensive. By leveraging PowerPoint’s built-in features like Slide Master and Slide Zoom, combined with the free iSpring 3.11 plugin, you can create an interactive, multimedia-rich online course that engages your learners and enhances their educational experience.
From designing a clickable and animated sidebar, adding interactive slide zooms, embedding YouTube videos and live websites, to crafting quizzes that reinforce learning, this approach covers all the essentials of modern e-learning design—all within the familiar PowerPoint environment.
Whether you’re a teacher wanting to share your classroom lectures remotely or a professional creating training modules, this method empowers you to deliver high-quality online courses for free.
Start transforming your PowerPoint presentations today and engage your audience like never before!
Happy teaching and course creating!
Check out the full video: How I Made an Online Course in PowerPoint for FREE! 😁


