
If you’re a teacher or educator with a ready PowerPoint presentation, have you ever wondered how to convert it into an engaging online course without spending a dime? Creating an online course might seem like a daunting task, but with the right tools and techniques, you can transform your existing presentations into interactive lectures complete with quizzes, videos, and embedded websites. This comprehensive guide will walk you through the process of PowerPoint online course creation, using free tools and smart design techniques to make your course professional, interactive, and student-friendly.
In this article, we’ll explore how to design captivating PowerPoint slides, add navigation and animations, embed multimedia, create quizzes, and finally publish your presentation as an online course. Whether your subject is artificial intelligence, history, or any other topic, this method will help you reach your students effectively online.
Table of Contents
- Presentation Overview: Exploring Interactive PowerPoint Slides
- Creating Sidebar Navigation for Easy Course Navigation
- Animating the Sidebar to Enhance User Experience
- Mastering Slide Zoom Animations for Interactive Content
- Inserting Multimedia: YouTube Videos and Live Websites
- Creating Quizzes to Engage and Assess Students
- Publishing Your PowerPoint as an Online Course
- Frequently Asked Questions
- Conclusion
Presentation Overview: Exploring Interactive PowerPoint Slides
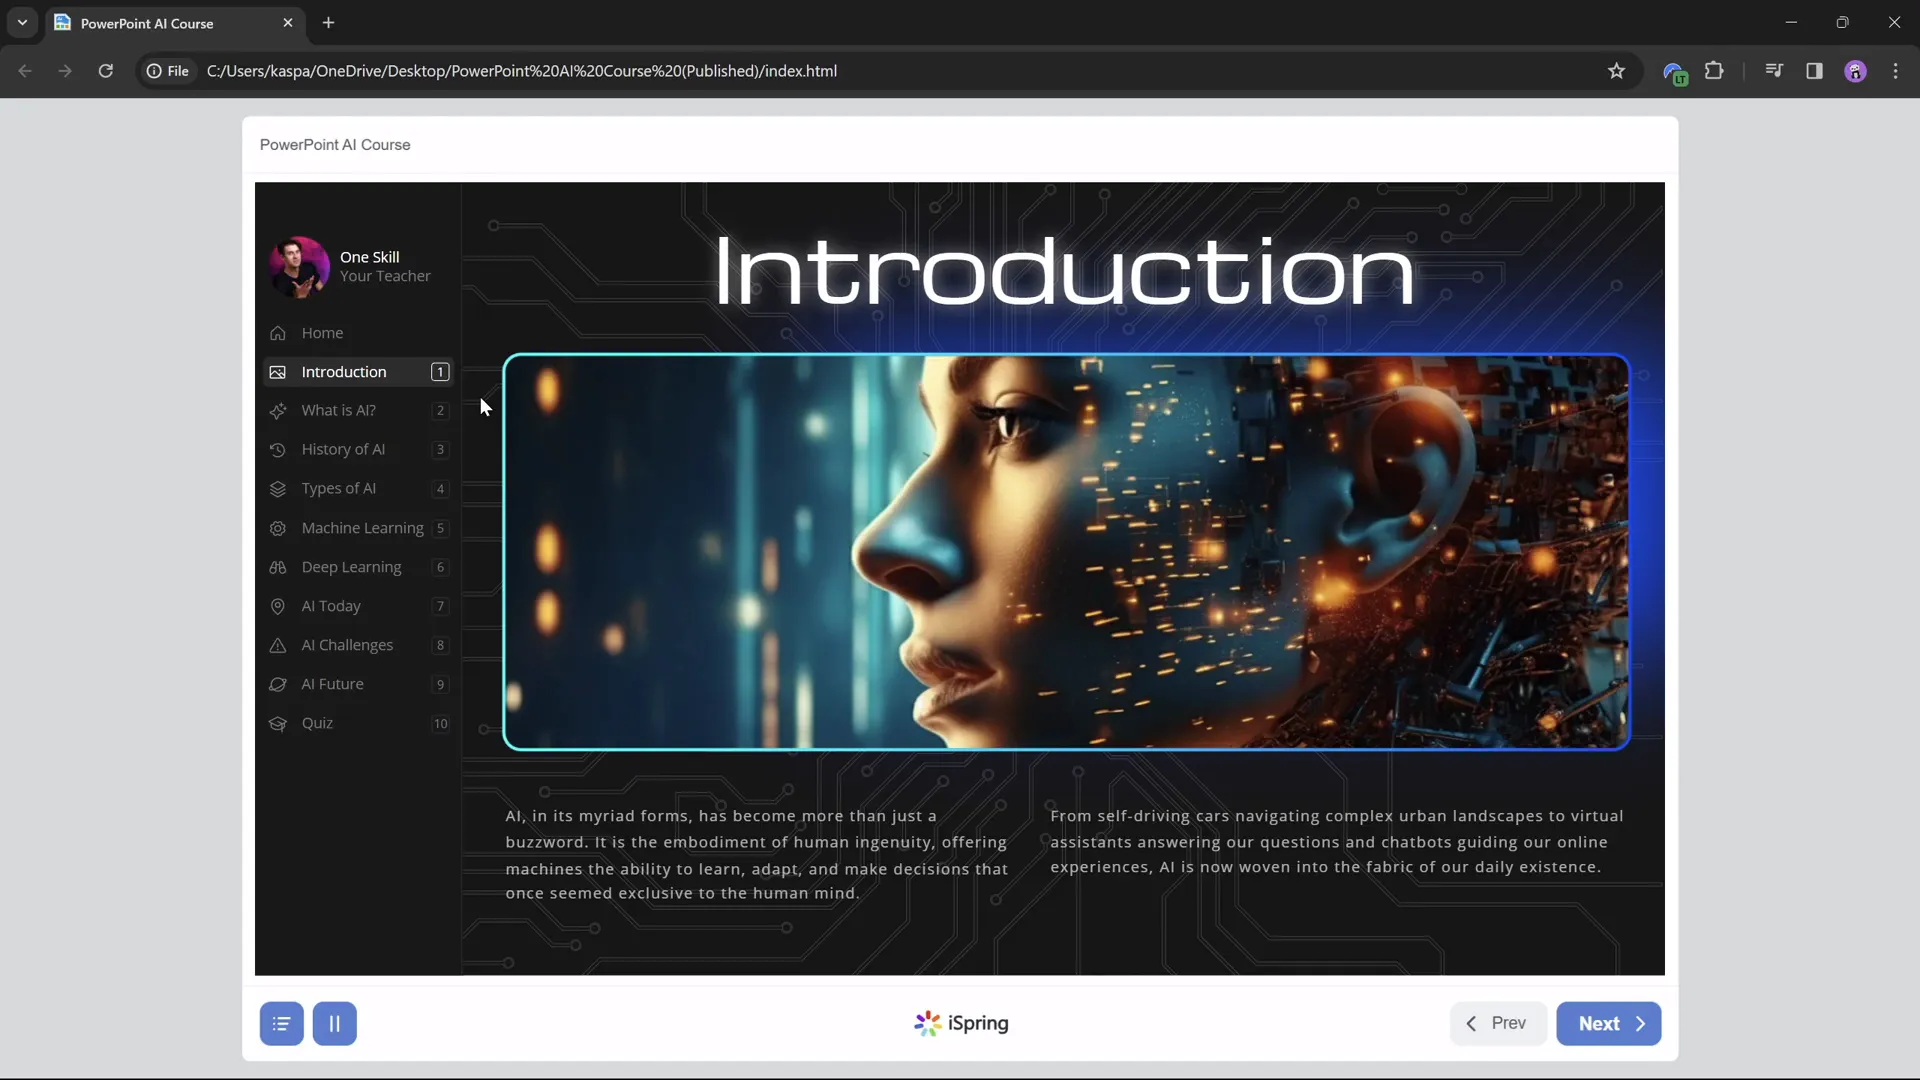
Imagine you are teaching a course on artificial intelligence. You have prepared an informative PowerPoint presentation covering its definition, history, types, applications, challenges, and future prospects. But how do you make this presentation more than just a static slideshow? The key is to add interactive features right inside PowerPoint before converting it into an online course.
For example, the presentation might start with a welcoming introduction slide, followed by a detailed explanation of what artificial intelligence (AI) is. Next, you could have a timeline of AI’s history where students can click on specific years to zoom in and learn more. This is achieved using slide zoom features. Similarly, a slide showing types of AI could have clickable numbers that reveal detailed descriptions of each type.
Other slides might cover machine learning, deep learning, real-world AI applications, and the challenges AI faces today. The course would conclude with a quiz to test students’ knowledge.

These interactive features transform the typical linear presentation into a dynamic learning experience that encourages exploration and engagement.
Creating Sidebar Navigation for Easy Course Navigation
One of the most useful elements in an online course is a clear navigation system. In this case, a sidebar on the left side of the slides acts as a menu, allowing students to jump between course sections conveniently.
Here’s how to create such a sidebar:
- Use Slide Master View: The sidebar is created in the Slide Master view in PowerPoint. This means once you design it, it will appear on all slides that use the same layout, saving you the hassle of copying it slide by slide.
- Design the Sidebar: Add text boxes for section titles, icons for visual appeal, and section numbers for clarity. You can customize the colors, fonts, and images to match your course branding.
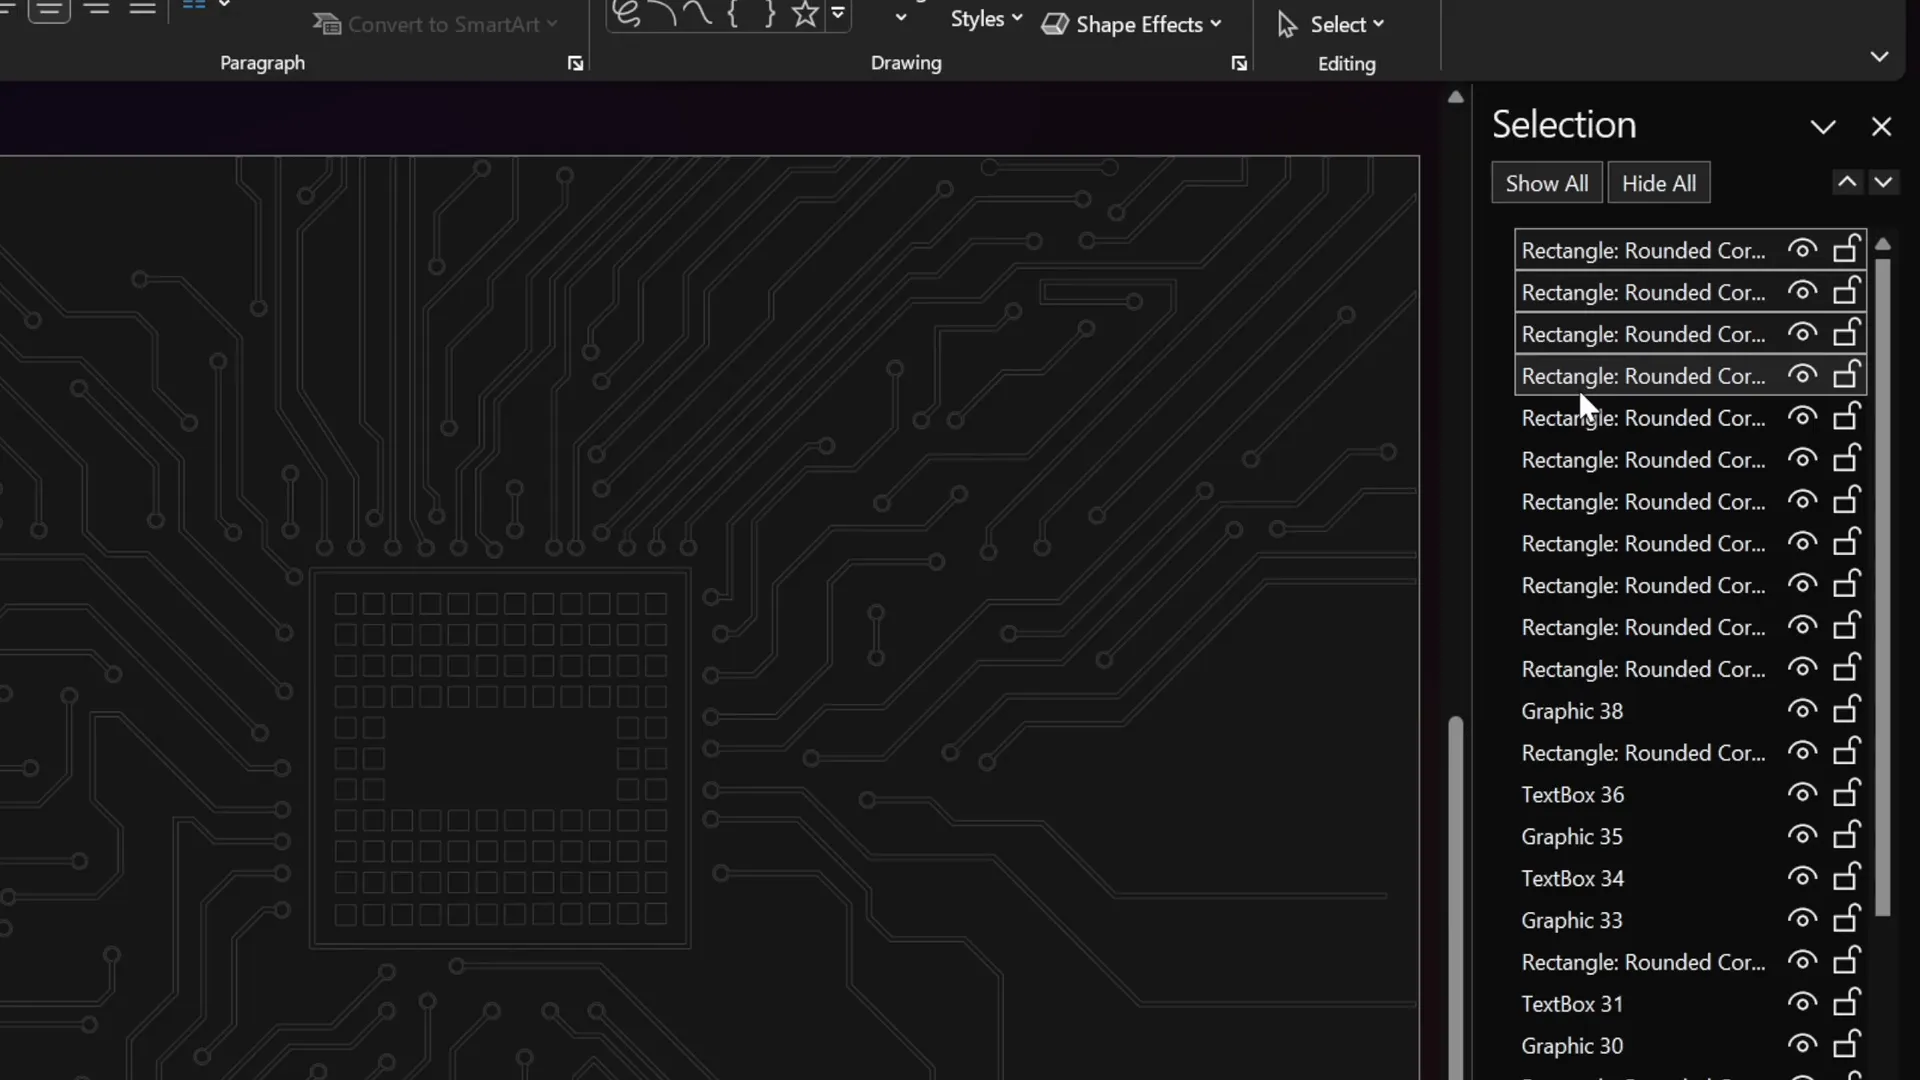
- Make Sections Clickable: Insert invisible rounded rectangles over each section’s text and icon. These rectangles act as clickable areas.
- Add Hyperlinks: Select each rectangle, go to Insert > Link, and link it to the corresponding slide number representing that section.
- Adjust Transparency: Set the rectangles’ fill transparency to 100% so they become invisible but still clickable.
This clickable sidebar makes navigation intuitive and professional.
Tip: If you need to update the sidebar later, simply go back to the Slide Master, make your changes, and they will automatically apply to all slides.
Animating the Sidebar to Enhance User Experience
Static sidebars are functional but can feel dull. Adding subtle animations to highlight the active section enhances the user experience by providing visual feedback on where the learner currently is.
Since it’s tricky to animate objects globally in Slide Master view, the workaround is to:
- Duplicate the Sidebar: Create multiple versions of the sidebar, each highlighting a different section.
- Place Active Cards: On each slide, paste the sidebar version that highlights the active section.
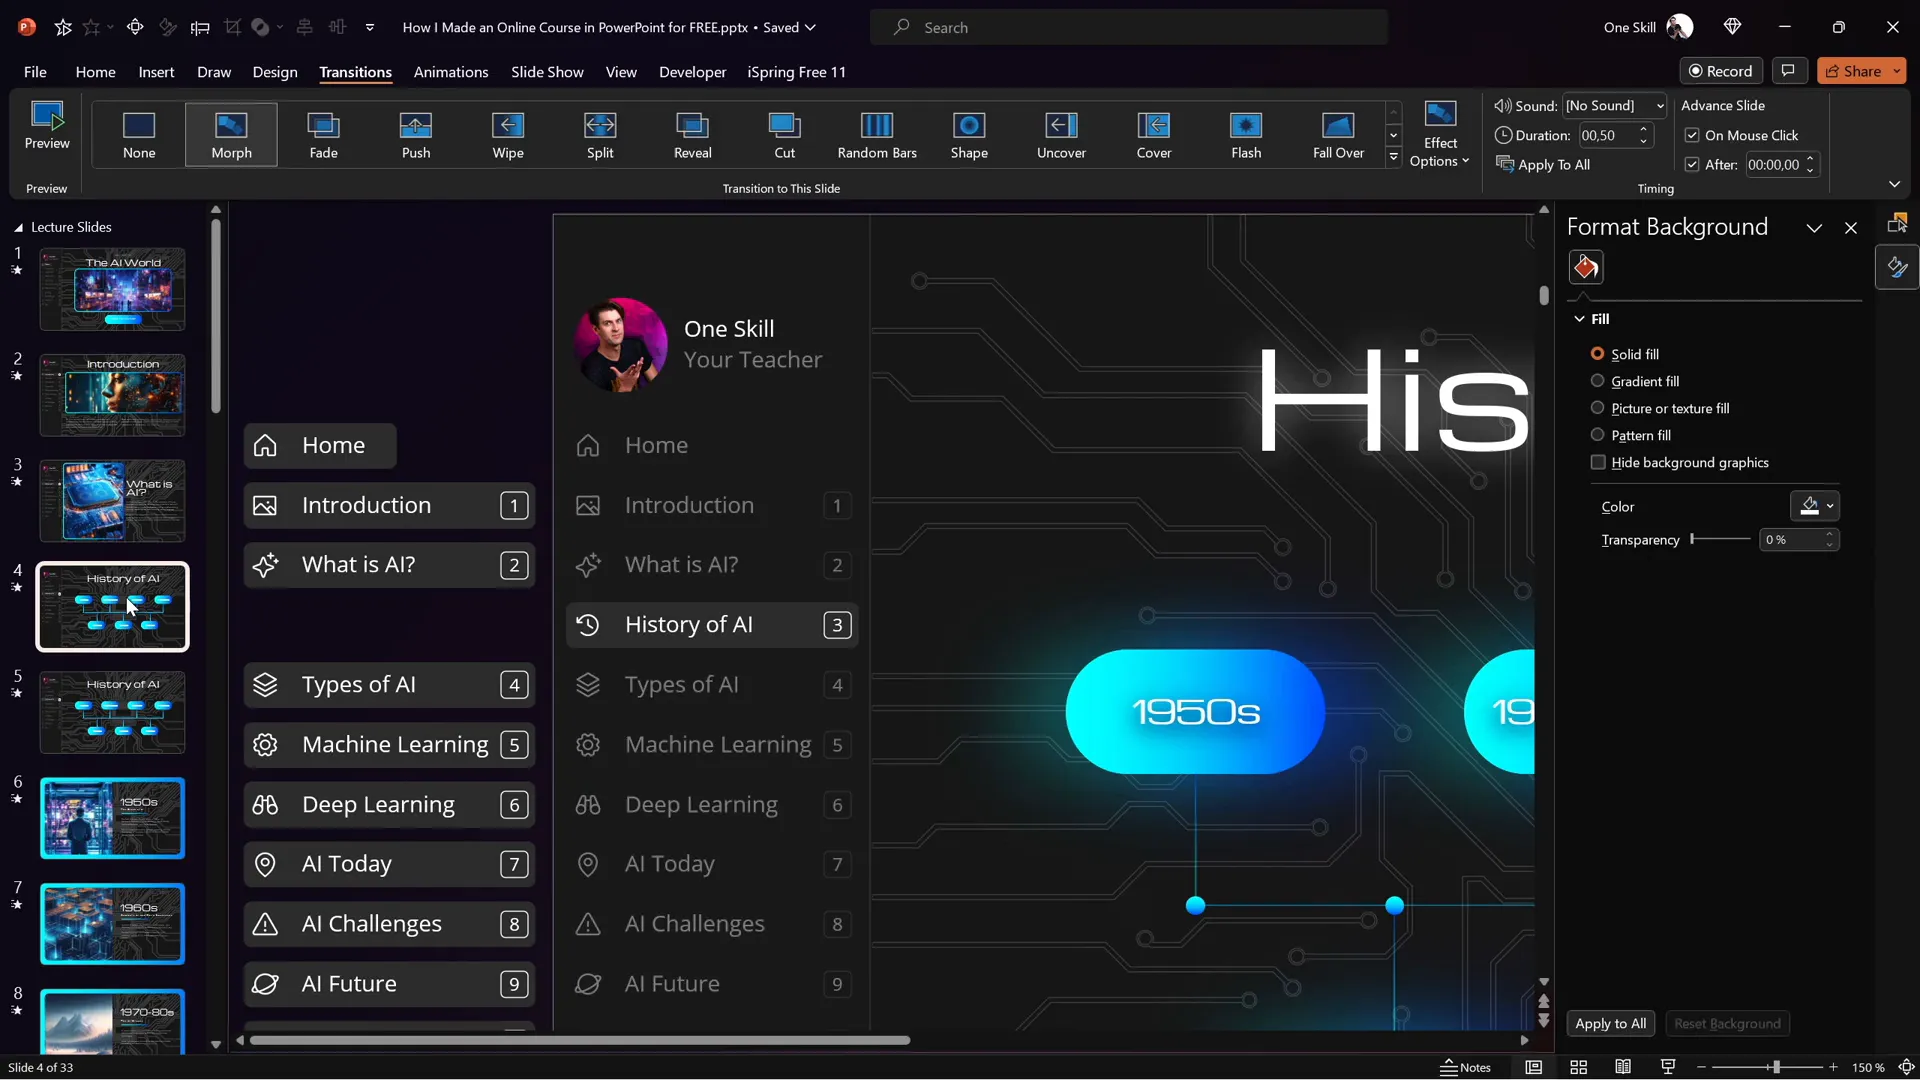
- Use Morph Transition: Apply PowerPoint’s Morph transition between slides. Morph will animate the transition smoothly, making the active section “slide in” while the previous highlight “slides out.”
- Set Transition Duration: Adjust the duration (e.g., 0.5 seconds) to control the animation speed.
This approach creates a polished look where the sidebar dynamically responds to navigation clicks.
Mastering Slide Zoom Animations for Interactive Content
Slide zooms are a powerful PowerPoint feature that lets you create clickable areas that zoom into other slides. This is perfect for expanding on topics without cluttering a single slide.
For example, on a slide showing the history of AI, you can add slide zooms on specific years. Clicking a year zooms into a detailed slide about that year, and clicking back returns to the overview slide.
Making Slide Zooms Invisible: To keep your design clean, you can create invisible slide zooms by using a transparent image as a cover. This way, the clickable areas don’t interfere visually with the design.
Controlling Animation Playback: By default, animations on zoomed slides replay every time you zoom in and out, which may not always be desirable. To allow animations to play only once:
- Duplicate the slide with animations.
- On the first slide, remove all slide zooms but keep animations.
- Set this slide to transition automatically after 0 seconds.
- On the second slide, remove all animations but keep slide zooms.
This setup ensures animations play once when the slide first appears, and subsequent zoom-ins do not replay the animations, providing a smoother user experience.
Inserting Multimedia: YouTube Videos and Live Websites
Enhance your online course by embedding multimedia content directly into your PowerPoint slides using the iSpring Free plugin. This free plugin allows you to insert YouTube videos and live websites seamlessly.
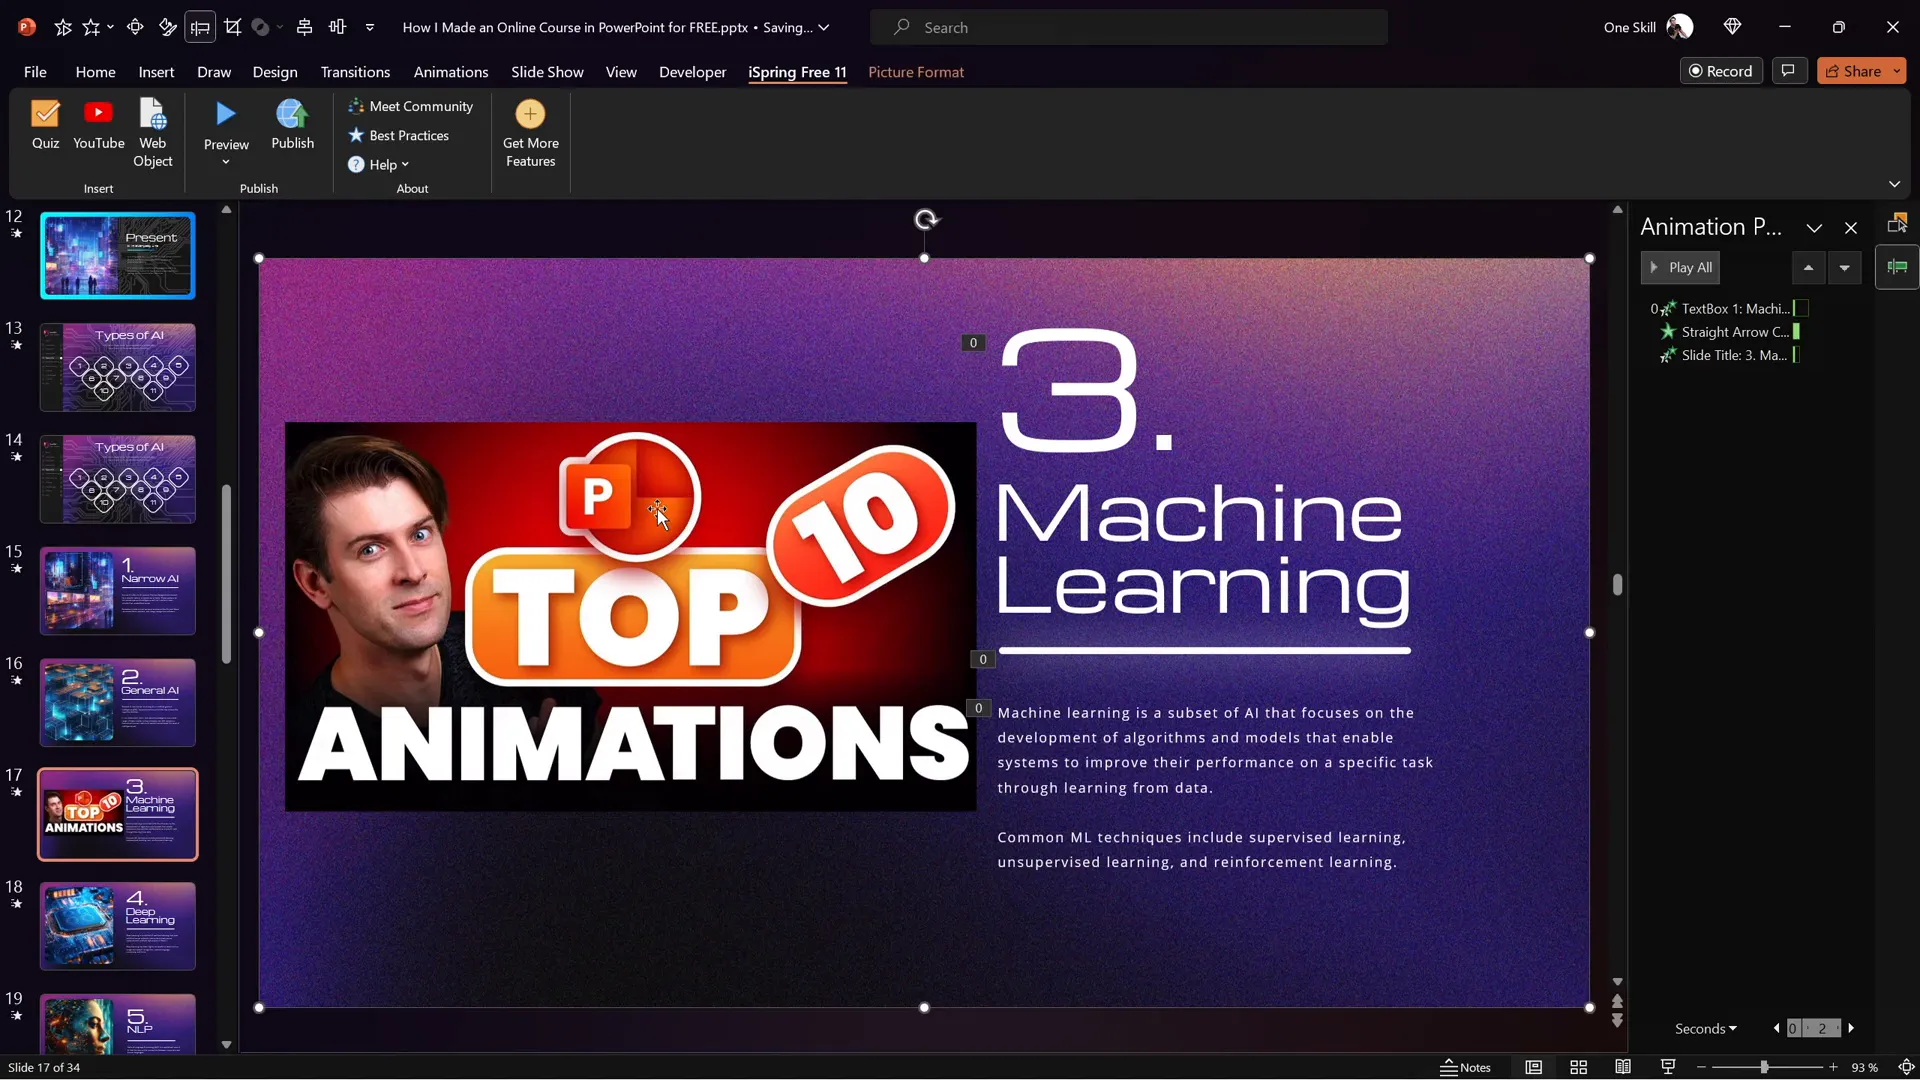
Embedding YouTube Videos
- Delete any placeholder images on the slide where you want the video.
- Open the iSpring Free tab in PowerPoint.
- Click the YouTube button and paste the video URL.
- Preview the video to ensure it works correctly.
- Adjust the size and position of the video on the slide.
The embedded YouTube video plays smoothly within your course player, allowing students to watch without leaving the course environment.
Embedding Live Websites
- Select the slide where you want to embed a website.
- Delete any existing images or placeholders.
- Click the Web Object button in the iSpring Free tab.
- Paste the URL of the website you want to embed.
- Adjust the embedded website’s size and position.
- Preview the slide to verify the website is functional.
Once published, the embedded website is fully interactive — students can scroll, click links, and interact with the content as if they were browsing the site live.
Creating Quizzes to Engage and Assess Students
Quizzes are essential for reinforcing learning and assessing student progress. With the iSpring Free plugin, you can create quizzes directly inside your PowerPoint presentation and integrate them smoothly into your course flow.
Steps to Create a Quiz
- Navigate to the slide where you want to add the quiz.
- Open the iSpring Free tab and click the Quiz button.
- Choose between a Graded Quiz or a Survey. For assessments, select Graded Quiz.
- Click Questions to add new questions.
- Choose the question type:
- Multiple Choice: One correct answer.
- Multiple Response: Multiple correct answers.
- Short Answer: Students type in responses.
- Enter your question and answers, marking the correct ones.
- Customize feedback messages for correct and incorrect answers.
- Set quiz options like passing percentage, scoring, and shuffling answers.
- Optionally, add an intro or instruction slide to your quiz.
- Insert images into questions or answers to enhance clarity and engagement.
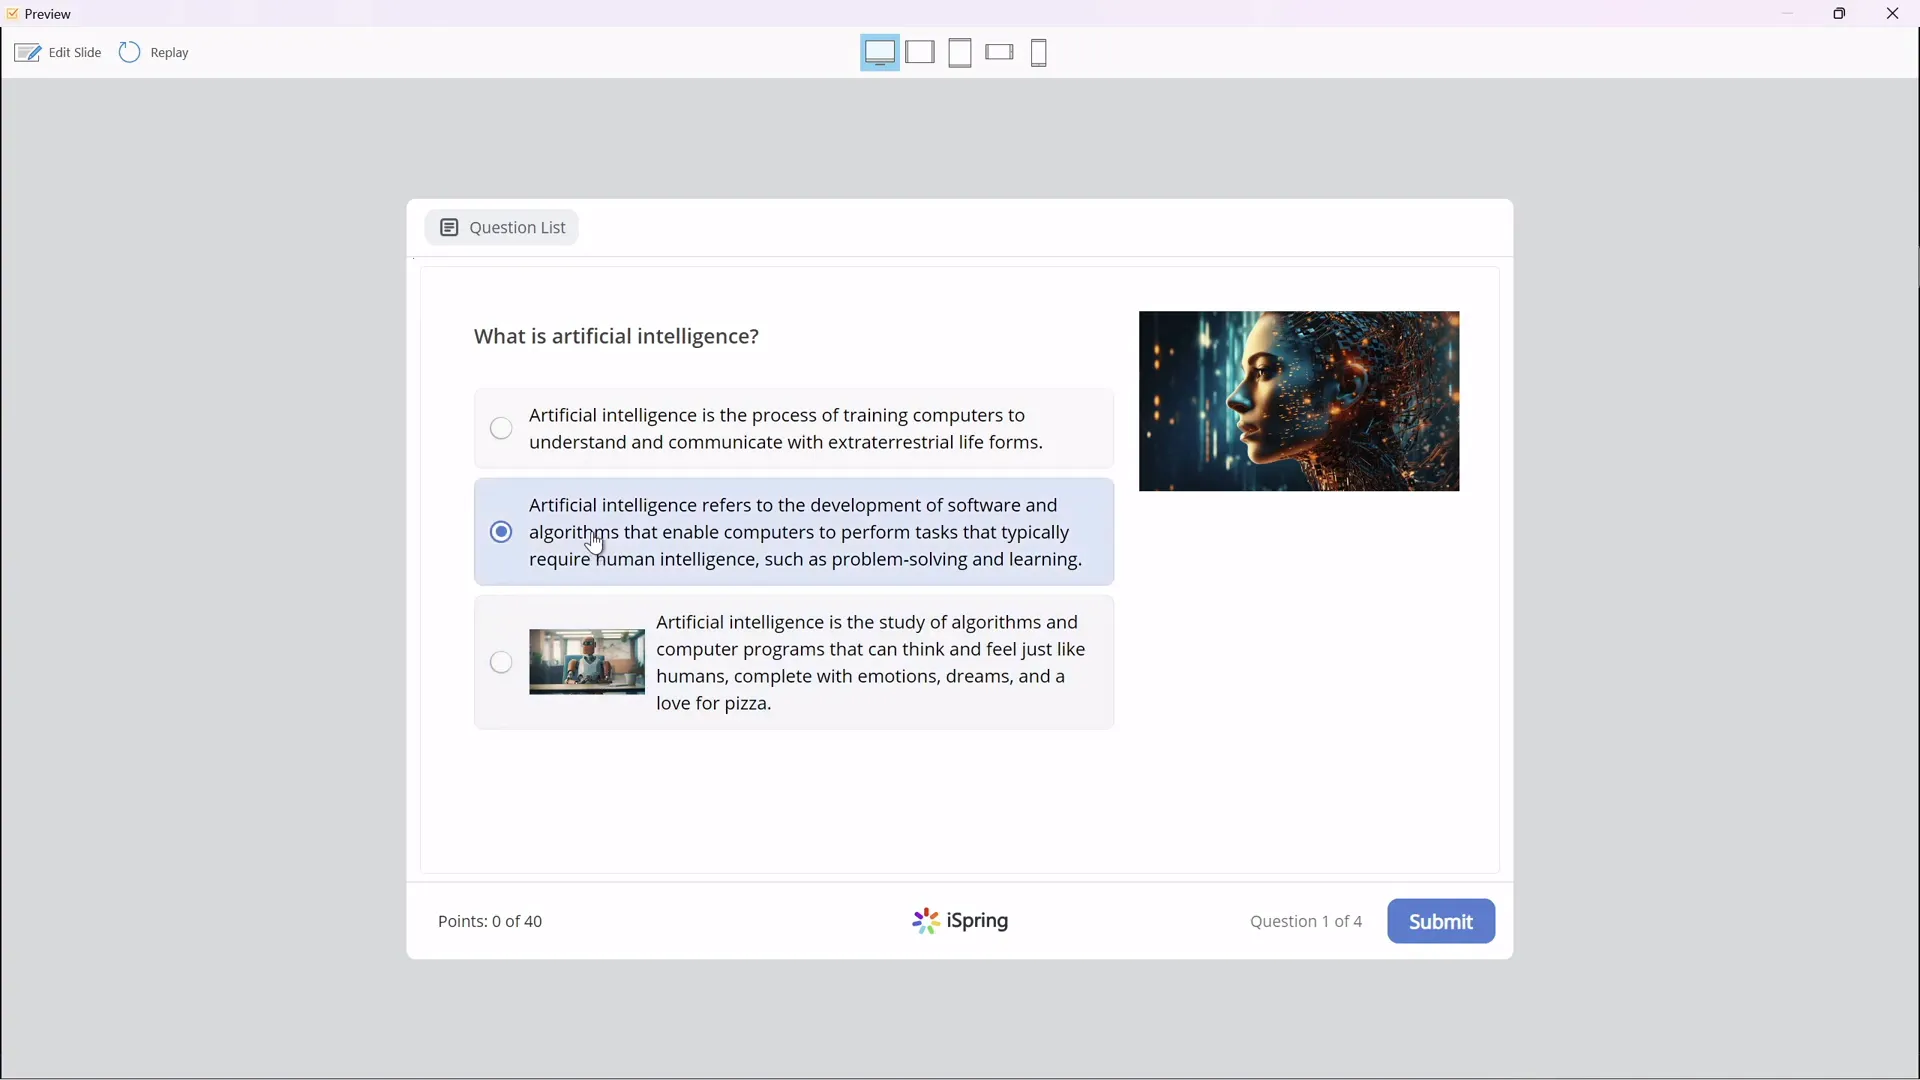
- Preview the quiz to verify functionality.
- Save and return to the course to embed the quiz slide.
For example, in the AI course, you can create a quiz with questions about AI concepts, history, and terminology, such as:
| Question Type | Example Question | Answer Format |
|---|---|---|
| Multiple Choice | What is artificial intelligence? | Select one correct answer |
| Multiple Response | Select all false statements about AI. | Select multiple correct answers |
| Short Answer | How do you shorten Natural Language Processing? | Type the answer (e.g., NLP) |
This quiz helps students actively recall and apply their knowledge, improving retention.
Publishing Your PowerPoint as an Online Course
After designing your presentation with interactive navigation, animations, multimedia, and quizzes, the final step is to publish it as an online course. The iSpring Free plugin simplifies this process.
Publishing Options
- Publish Locally: Export the course to your computer as HTML5 content, ready to upload to any website or LMS.
- Publish for LMS: Export in SCORM format compatible with popular Learning Management Systems like Moodle, Blackboard, or Canvas.
- Publish to iSpring Learn: Upload directly to iSpring’s LMS for seamless course hosting and management.
- Publish to YouTube/iSpring Page/iSpring Market: Share your course as a video or interactive page.
Steps to publish locally:
- Click the Publish button in the iSpring Free tab.
- Name your course and choose the save location.
- Select whether to publish all slides or selected slides.
- Adjust the course size or set it to fit the browser window.
- Click Publish and wait for the export to finish.
- Click View Course to preview the published course in a browser.
The published course includes your clickable sidebar, animations, slide zooms, embedded videos and websites, and quizzes — all functioning as designed.
Frequently Asked Questions
1. What is the best free tool to convert PowerPoint presentations into online courses?
The iSpring Free plugin is an excellent option. It allows you to add quizzes, embed YouTube videos and websites, and publish courses in SCORM format or as standalone HTML5 content.
2. Can I add quizzes directly in PowerPoint without external software?
Not natively. PowerPoint alone does not support quizzes. However, using plugins like iSpring Free, you can create and embed quizzes seamlessly within your presentation.
3. How do I make my PowerPoint presentation navigation user-friendly for online courses?
Create a clickable sidebar menu using the Slide Master view, insert transparent shapes linked to slides, and add animations to highlight the active section. This makes navigation intuitive and engaging.
4. Can I embed live websites inside my PowerPoint course?
Yes, using iSpring Free, you can embed live, fully interactive websites as web objects within your slides, enhancing interactivity and content richness.
5. How can I control animations when using slide zooms?
Use the technique of duplicating slides: keep animations on the first slide set to auto-transition, and slide zooms without animations on the second. This ensures animations play once and do not replay on zoom-back.
6. Is it possible to publish my course to an LMS?
Absolutely. iSpring Free supports exporting courses in SCORM format, which is compatible with most LMS platforms like Moodle, Blackboard, and Canvas.
7. Are there limitations to the free iSpring plugin?
While iSpring Free offers powerful features, the full iSpring Suite provides additional quiz types, advanced editing, and enhanced publishing options for professional course creation.
Conclusion
PowerPoint online course creation has never been more accessible and powerful. With a bit of creativity and the help of free tools like iSpring Free, educators can convert their existing presentations into interactive, multimedia-rich online courses that engage and educate students effectively.
By leveraging slide master navigation sidebars, morph animations, slide zooms, embedded videos and websites, and integrated quizzes, your course will not only look professional but also provide a smooth learning journey for your students.
Ready to take your teaching to the next level? Start designing your PowerPoint presentation with these techniques and publish your first free online course today!
For more information and to download iSpring Free, visit the official iSpring website.
Happy teaching, and stay inspired!


