PowerPoint is often viewed as a simple slide tool, but with the right skills, it transforms into a powerful animation studio. Today, you’ll learn how to create a captivating, customizable 3D laptop animation using nothing but PowerPoint’s native tools. This technique doesn’t rely on complex 3D models; instead, it uses basic shapes, photos, and clever 3D formatting paired with the morph transition to build an animation that’s both professional and visually impressive.
Whether you want to insert text, pictures, or even videos into your animated laptop screen, this guide covers it all. Let’s dive into the world of Powerpoint presentation skills and explore step-by-step how to craft this animation, enhancing your presentations with a dynamic and interactive feel.
Table of Contents
- Getting Started: Setting Up Your Slide
- Building the Laptop Using Simple Shapes
- Creating Custom Rotation Centers for Realistic Movement
- Adding 3D Depth and Bevel for Realism
- Aligning Elements and Creating the Closed Laptop State
- Using Morph Transition for Smooth Animation
- Creating a Realistic Laptop Using Photos
- Inserting Custom Text, Images, and Videos
- Frequently Asked Questions (FAQs)
- Conclusion: Elevate Your PowerPoint Presentations
Getting Started: Setting Up Your Slide
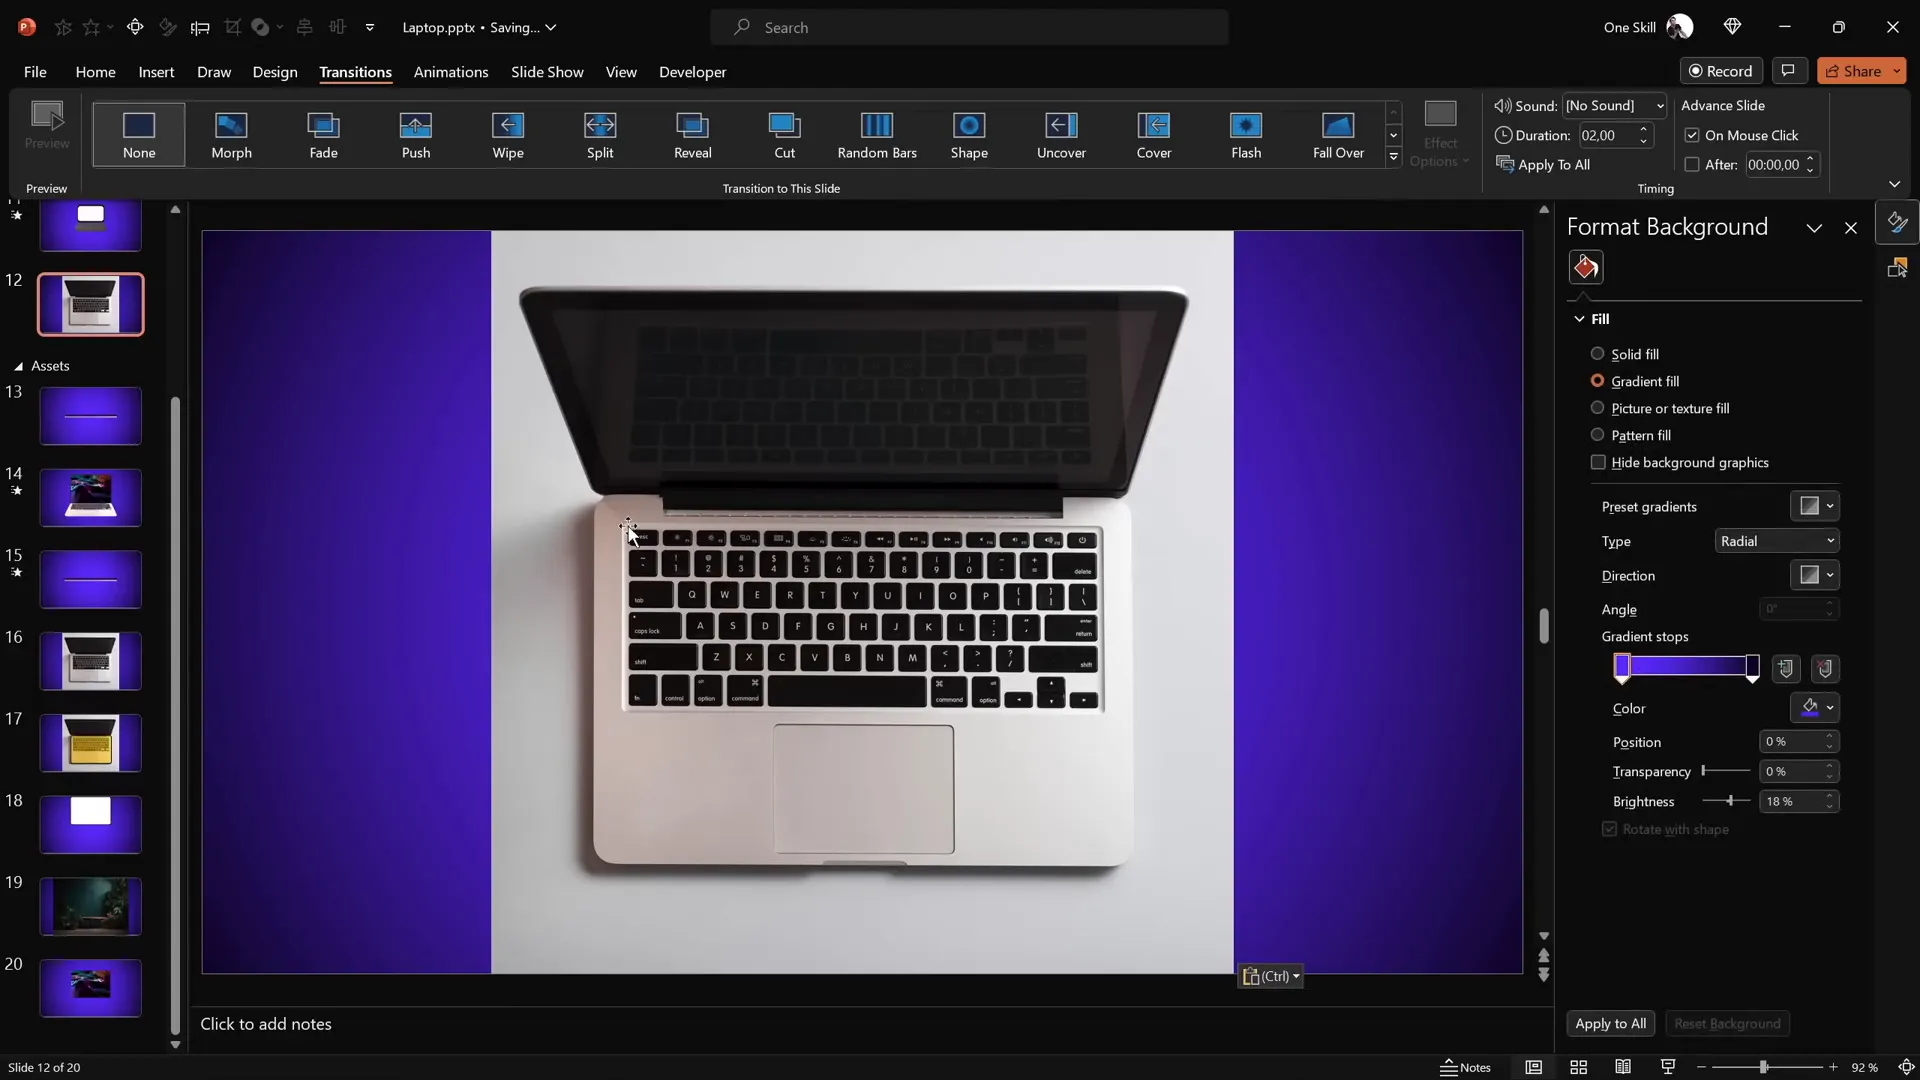
Before jumping into the animation, it’s important to create a visually appealing backdrop for your laptop animation. A beautiful gradient background adds depth and polish to your slide.
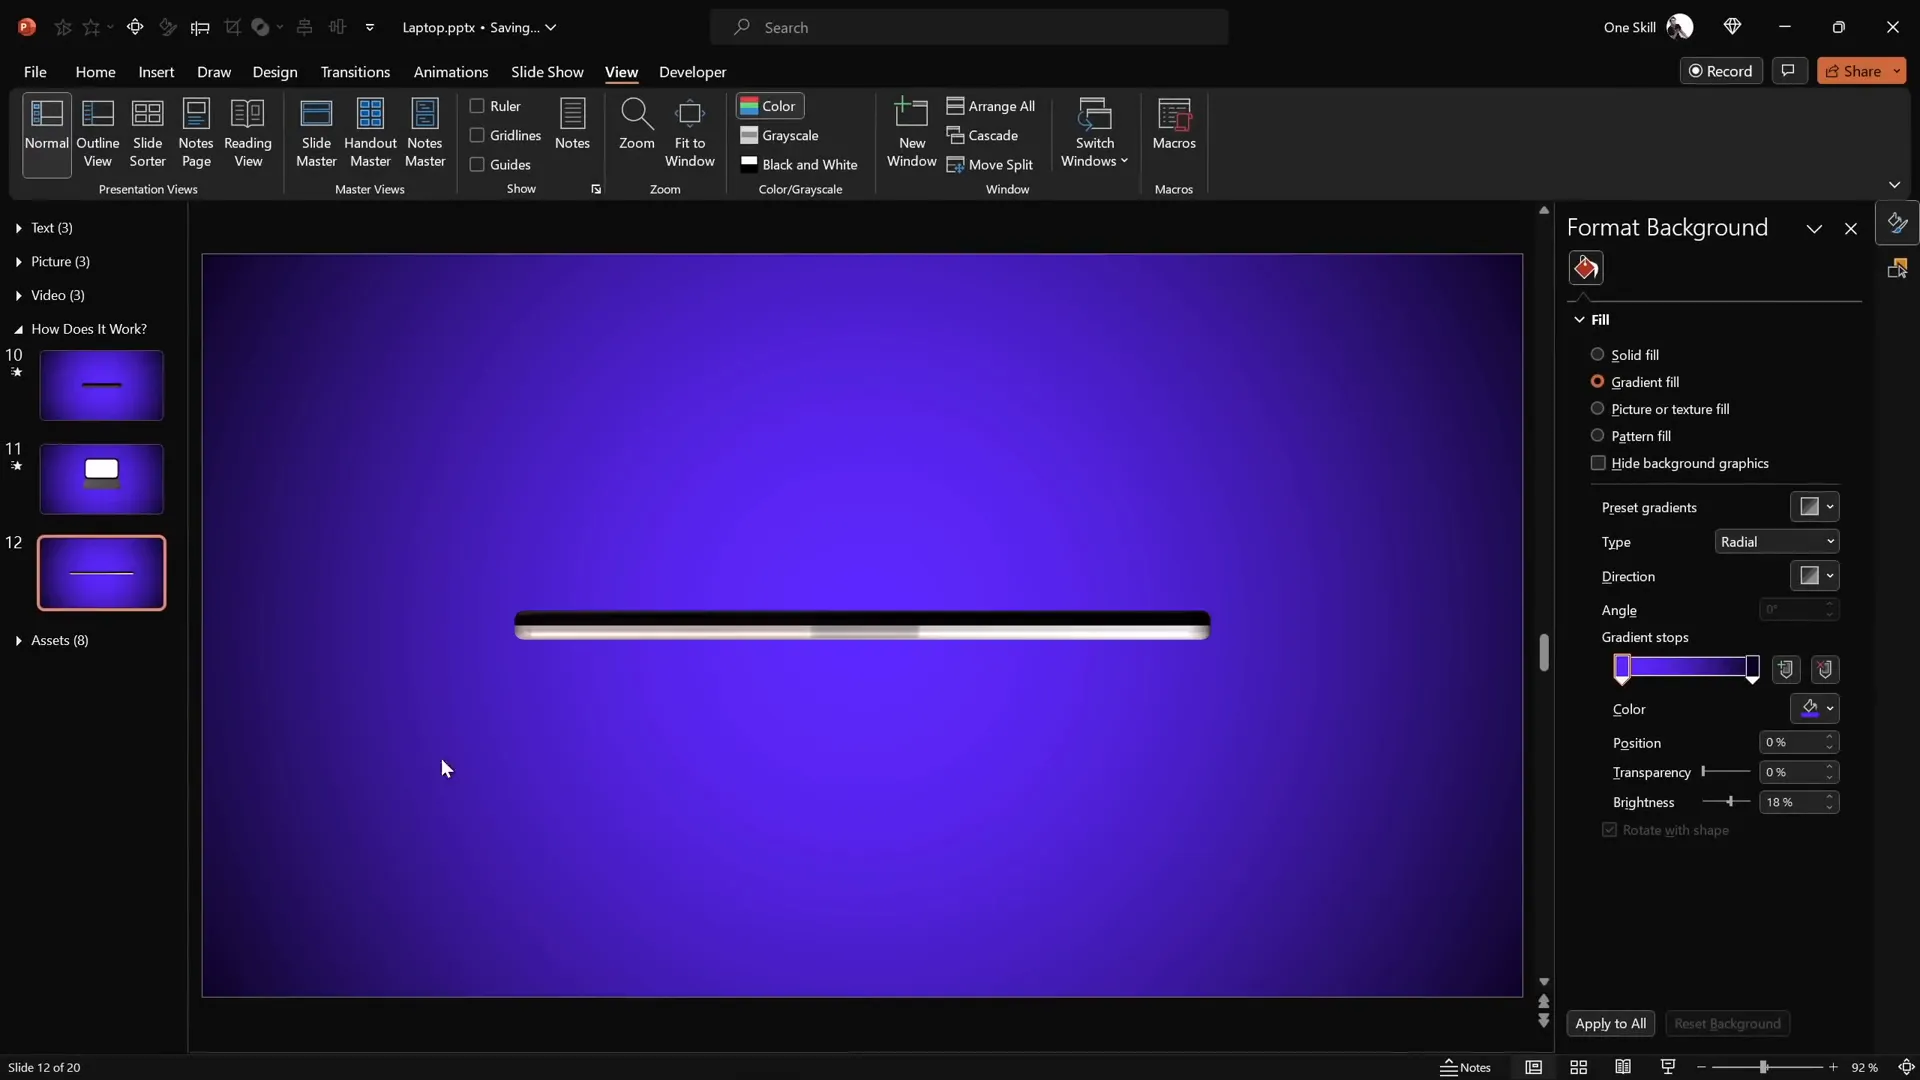
Applying a Gradient Background
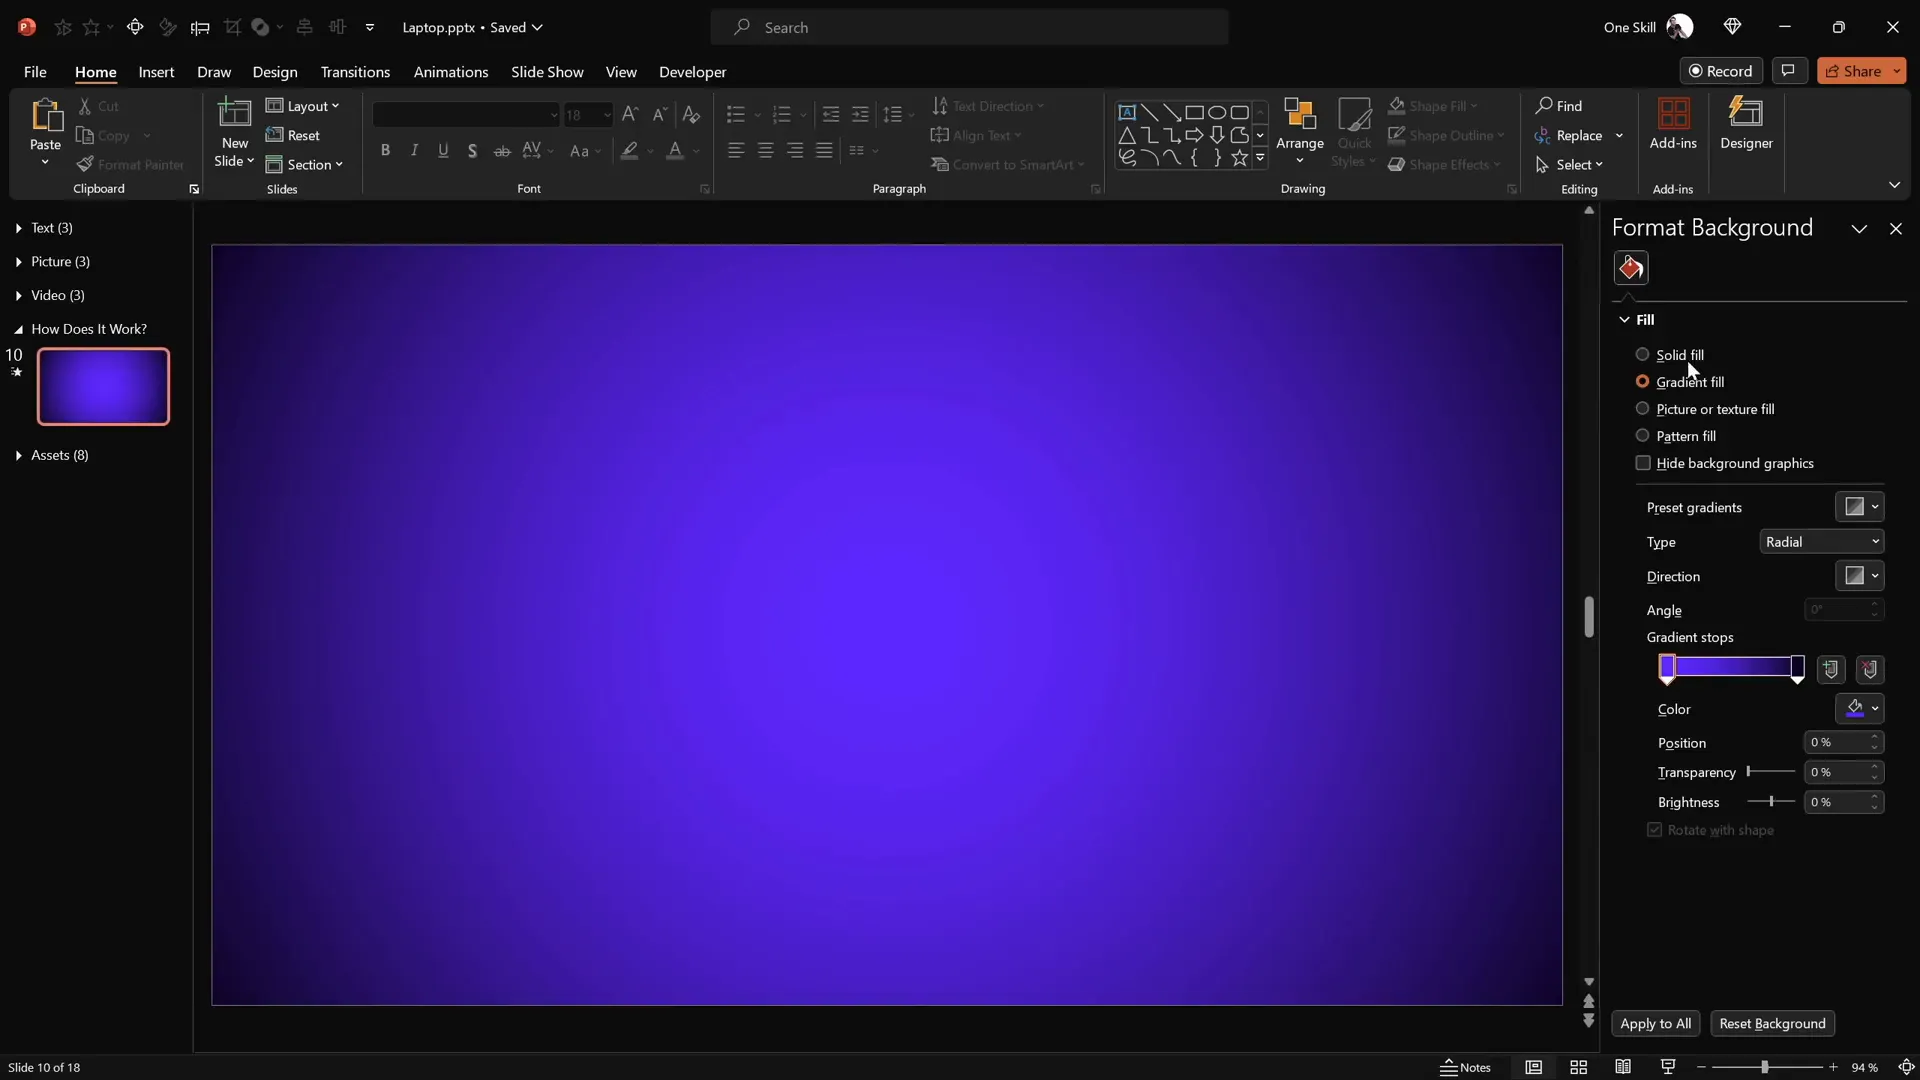
- Right-click anywhere on your slide and select Format Background.
- Choose Gradient Fill as the fill type.
- Use the following HEX color codes to replicate the exact gradient:
| Gradient Stop | HEX Color |
|---|---|
| First Color | #692DFF |
| Second Color | #0D002C |
This gradient isn’t mandatory, but it sets a professional tone and enhances the 3D effect of your laptop animation.
Building the Laptop Using Simple Shapes
The core of this animation is the laptop, which we’ll build using basic shapes. The two primary components are the keyboard and the screen.
Step 1: Creating the Keyboard
- Go to the Insert tab and select Shapes.
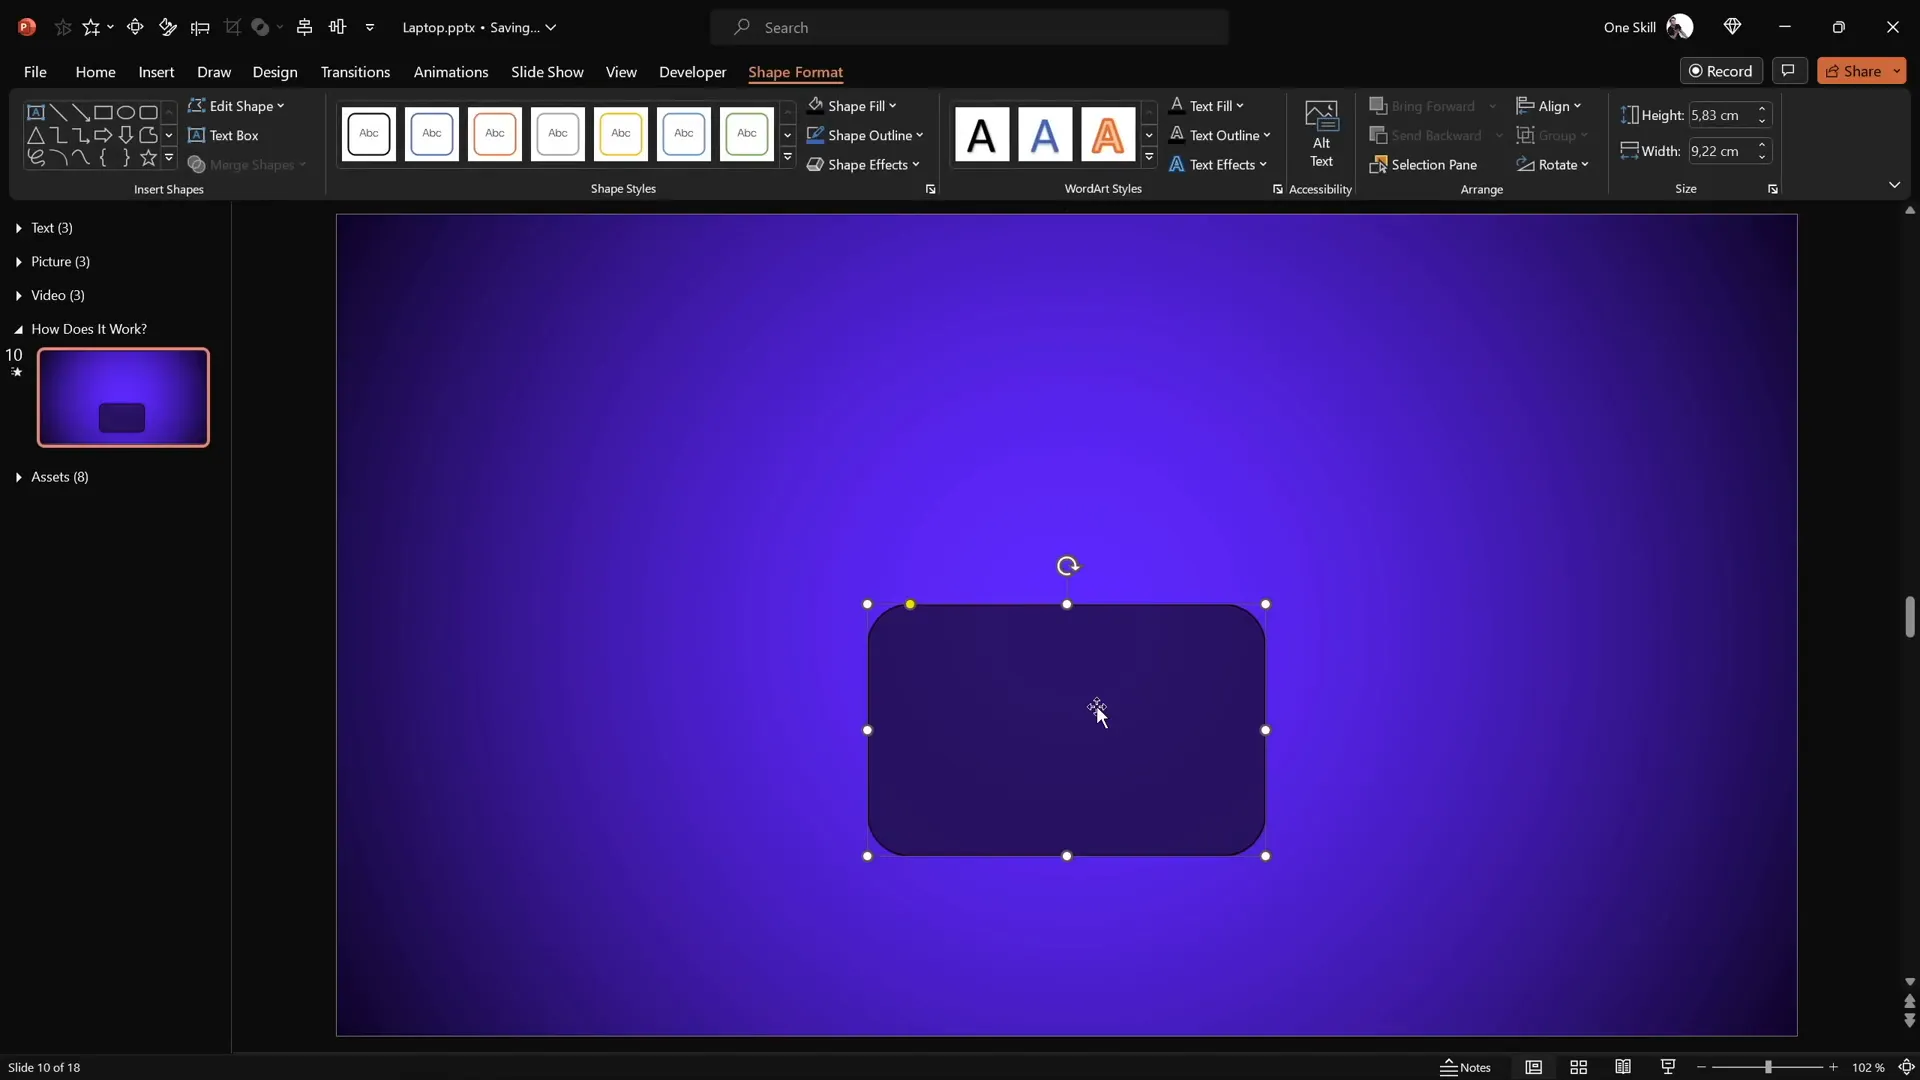
- Choose the Rounded Rectangle tool.
- Draw a rounded rectangle towards the bottom center of the slide. This will serve as the laptop’s keyboard.
- Format the shape by removing any outlines and setting the fill color to a dark gray.
Step 2: Creating the Screen
- Duplicate the keyboard shape by holding
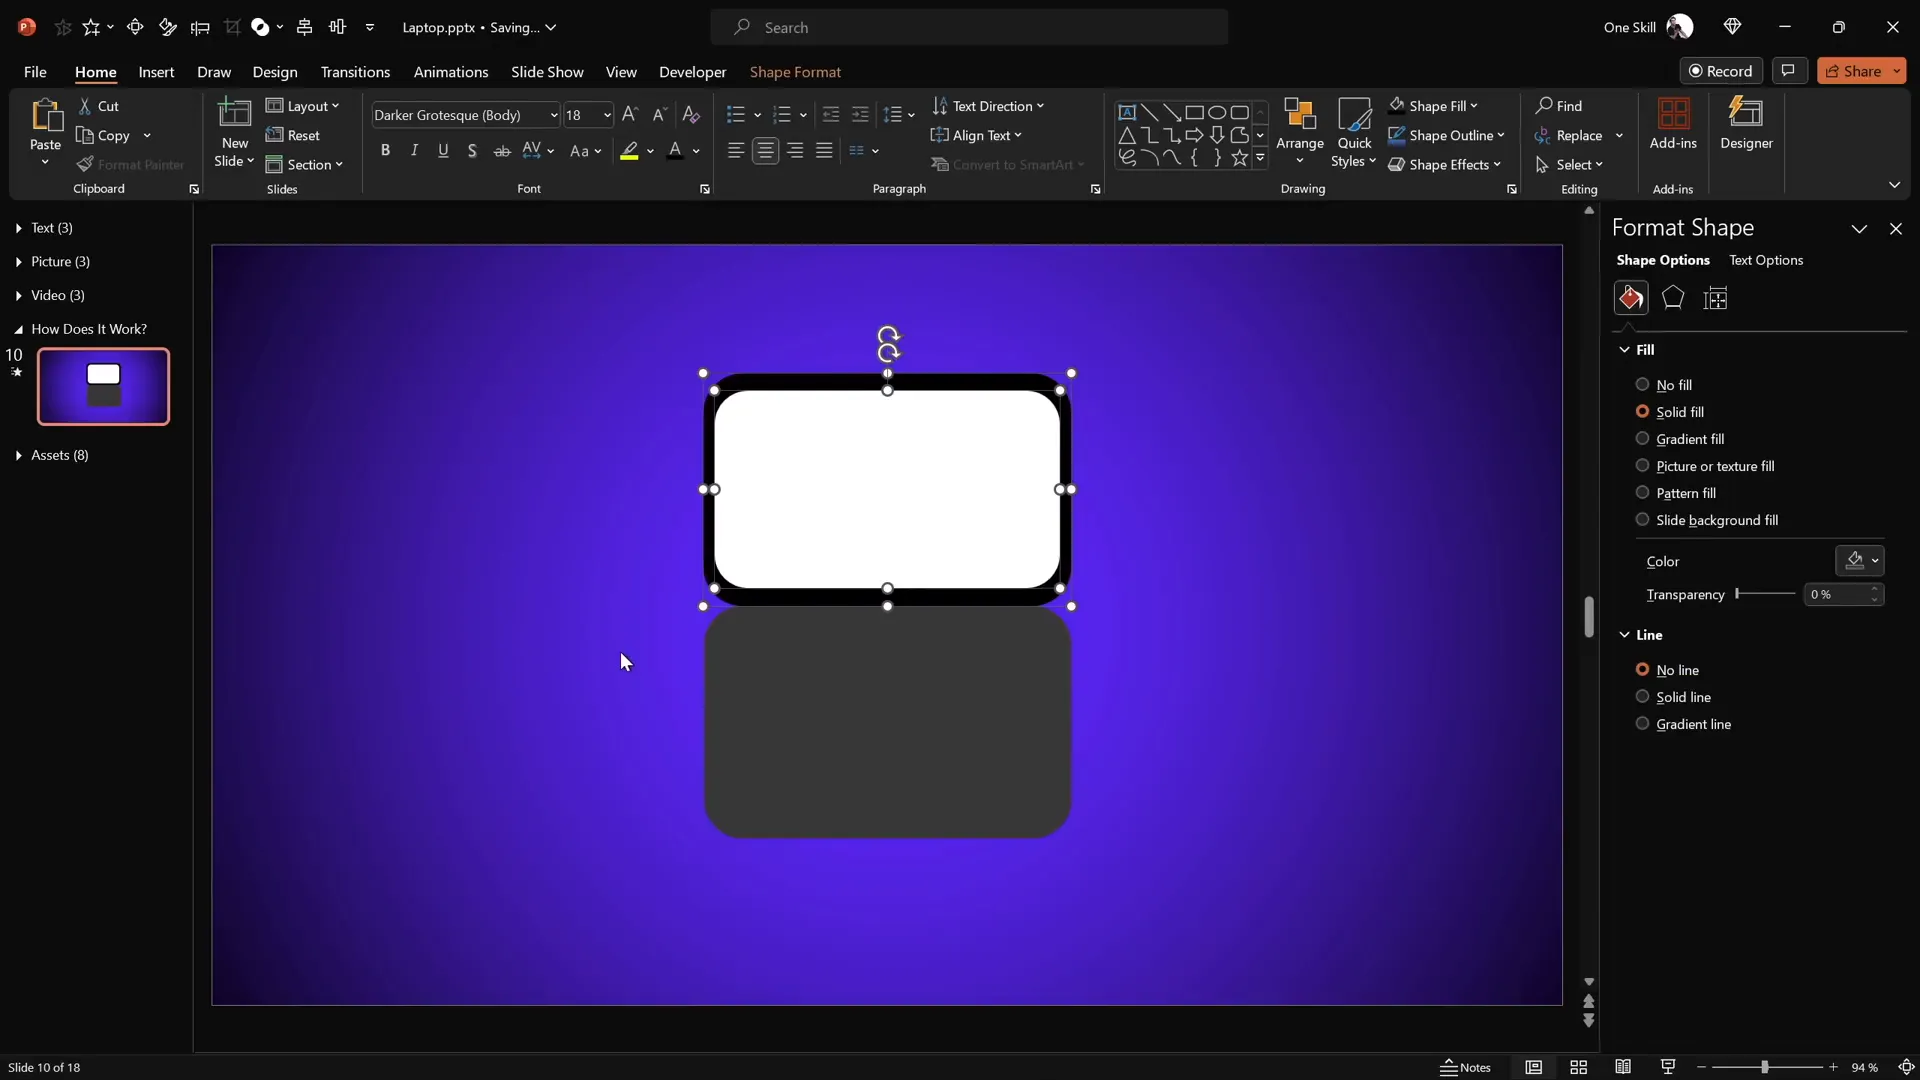
Ctrl + Shiftand dragging upwards. - Change the duplicated shape’s fill color to black to represent the laptop’s screen.
- Attach this black rectangle directly above the keyboard, aligning their edges.
- Duplicate the black screen shape while holding
Ctrl. - Change the duplicate’s fill to white and resize it slightly smaller to create the screen’s display area.
- Center the white rectangle within the black screen shape.
- Select both black and white screen shapes and group them (Ctrl + G).
Creating Custom Rotation Centers for Realistic Movement
To achieve a realistic laptop open animation, the keyboard and screen need to rotate around specific edges, not their centers. PowerPoint’s default rotation pivots shapes around their center, so we need to manually create new rotation centers.
Step 1: Understanding Default Rotation
Initially, when rotating the keyboard using PowerPoint‘s 3D rotation presets, the shape spins around its center, which looks unnatural for a laptop hinge.
Step 2: Creating a New Rotation Center for the Keyboard
- Reset any rotation applied to the keyboard shape.
- Move the keyboard slightly aside to work comfortably.
- Duplicate the keyboard shape (Ctrl + Shift drag upwards).
- Align the duplicated shape so its bottom edge touches the top edge of the original keyboard.
- Select both shapes and group them (Ctrl + G). This group now acts as a new shape with a rotation pivot at the joining edge.
Now, applying the same 3D rotation preset rotates the keyboard around the edge, mimicking a laptop hinge.
Step 3: Hiding the Extra Shape
To avoid seeing the duplicated shape, select the top keyboard shape and set its fill to No Fill. This keeps the rotation center intact but hides the extra shape visually.
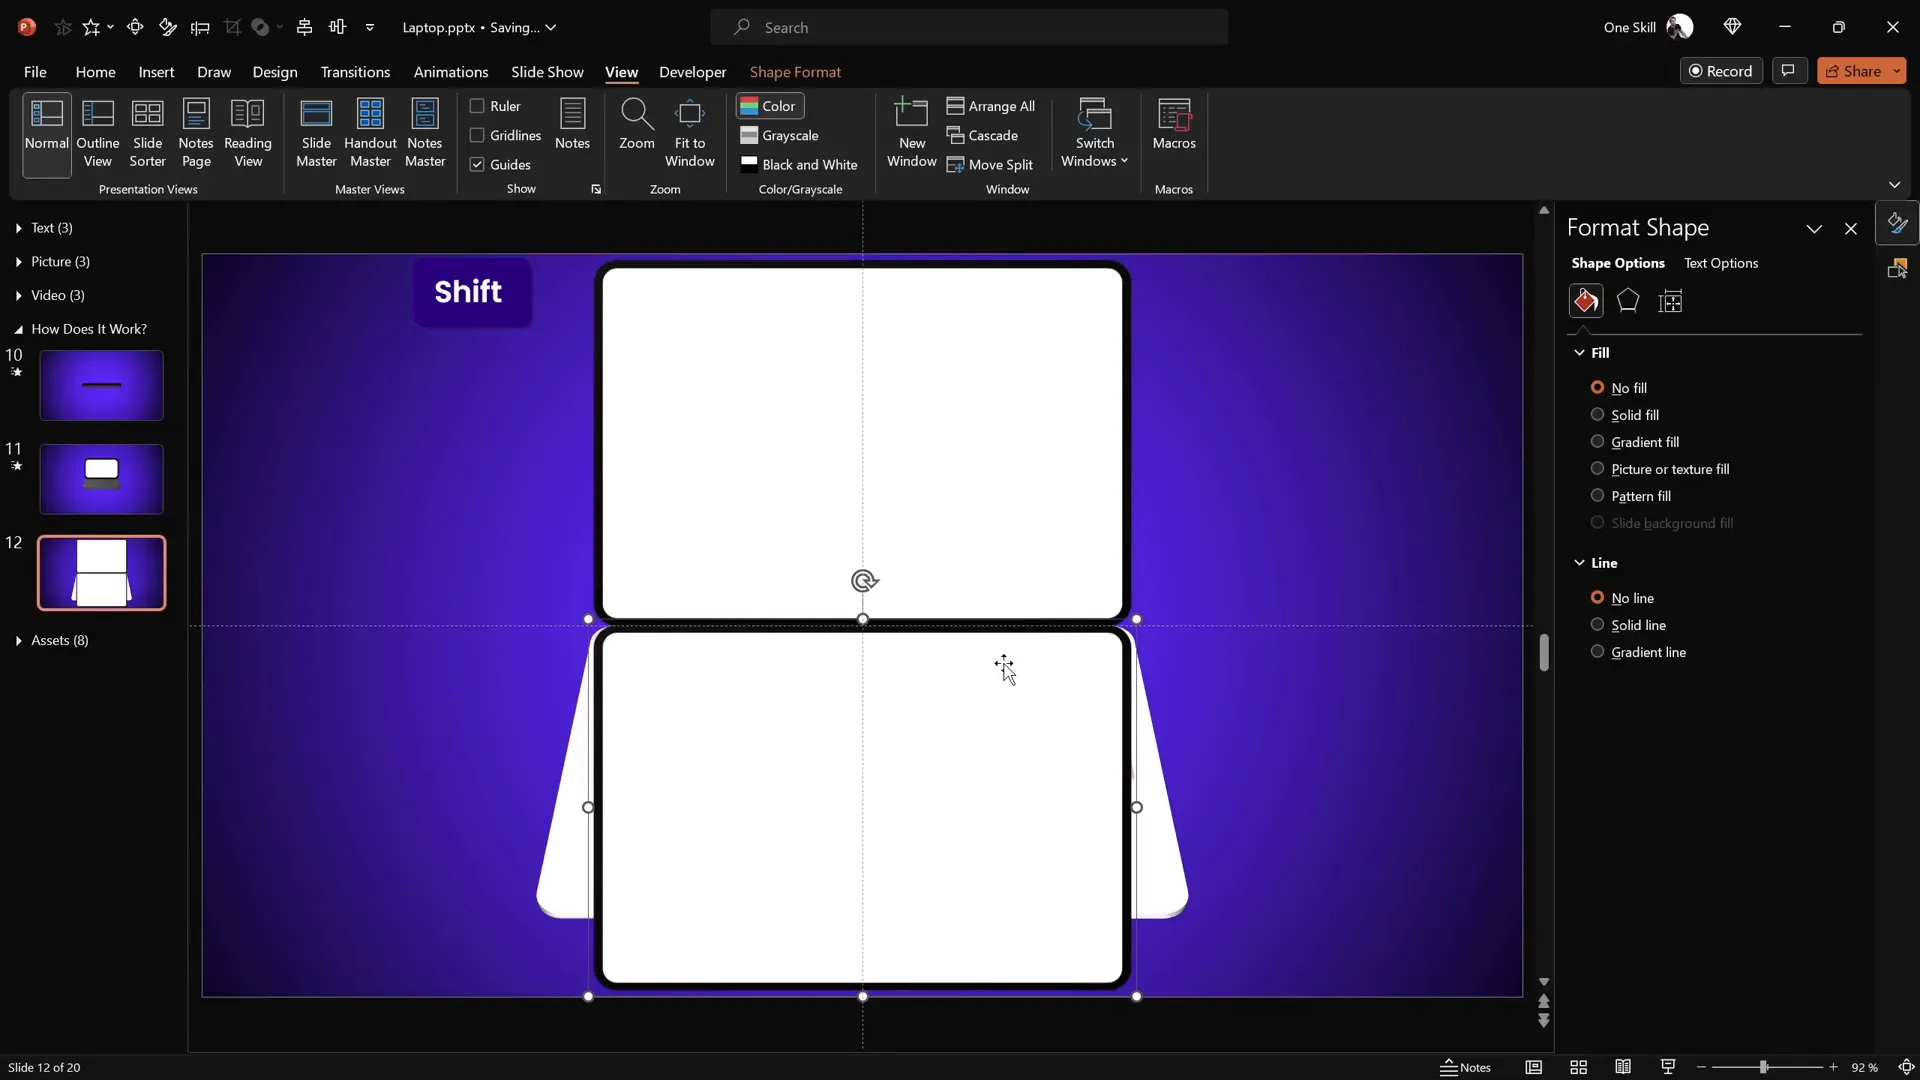
Step 4: Creating a New Rotation Center for the Screen
Repeat similar steps for the screen:
- Duplicate the screen group.
- Attach the duplicate to the bottom of the original screen.
- Group both shapes.
- Set the fill of the bottom group to no fill to hide it.
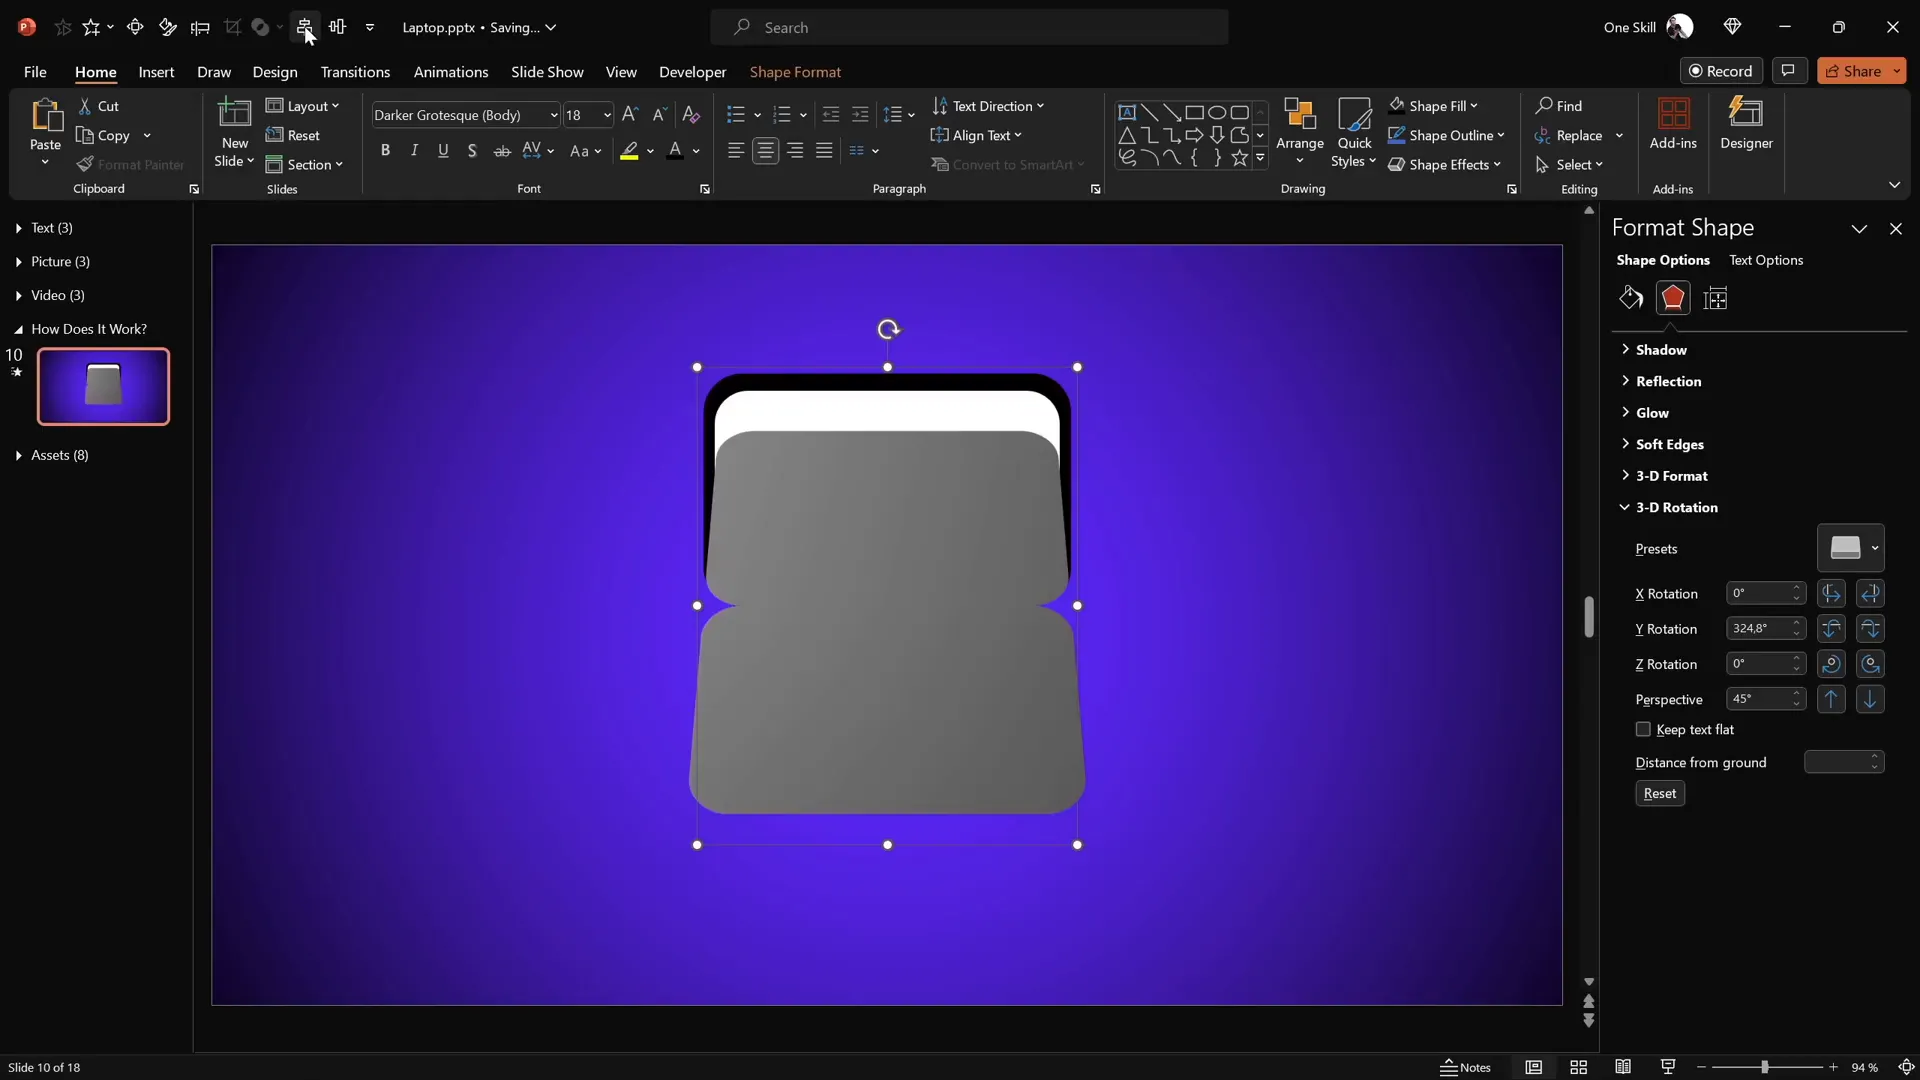
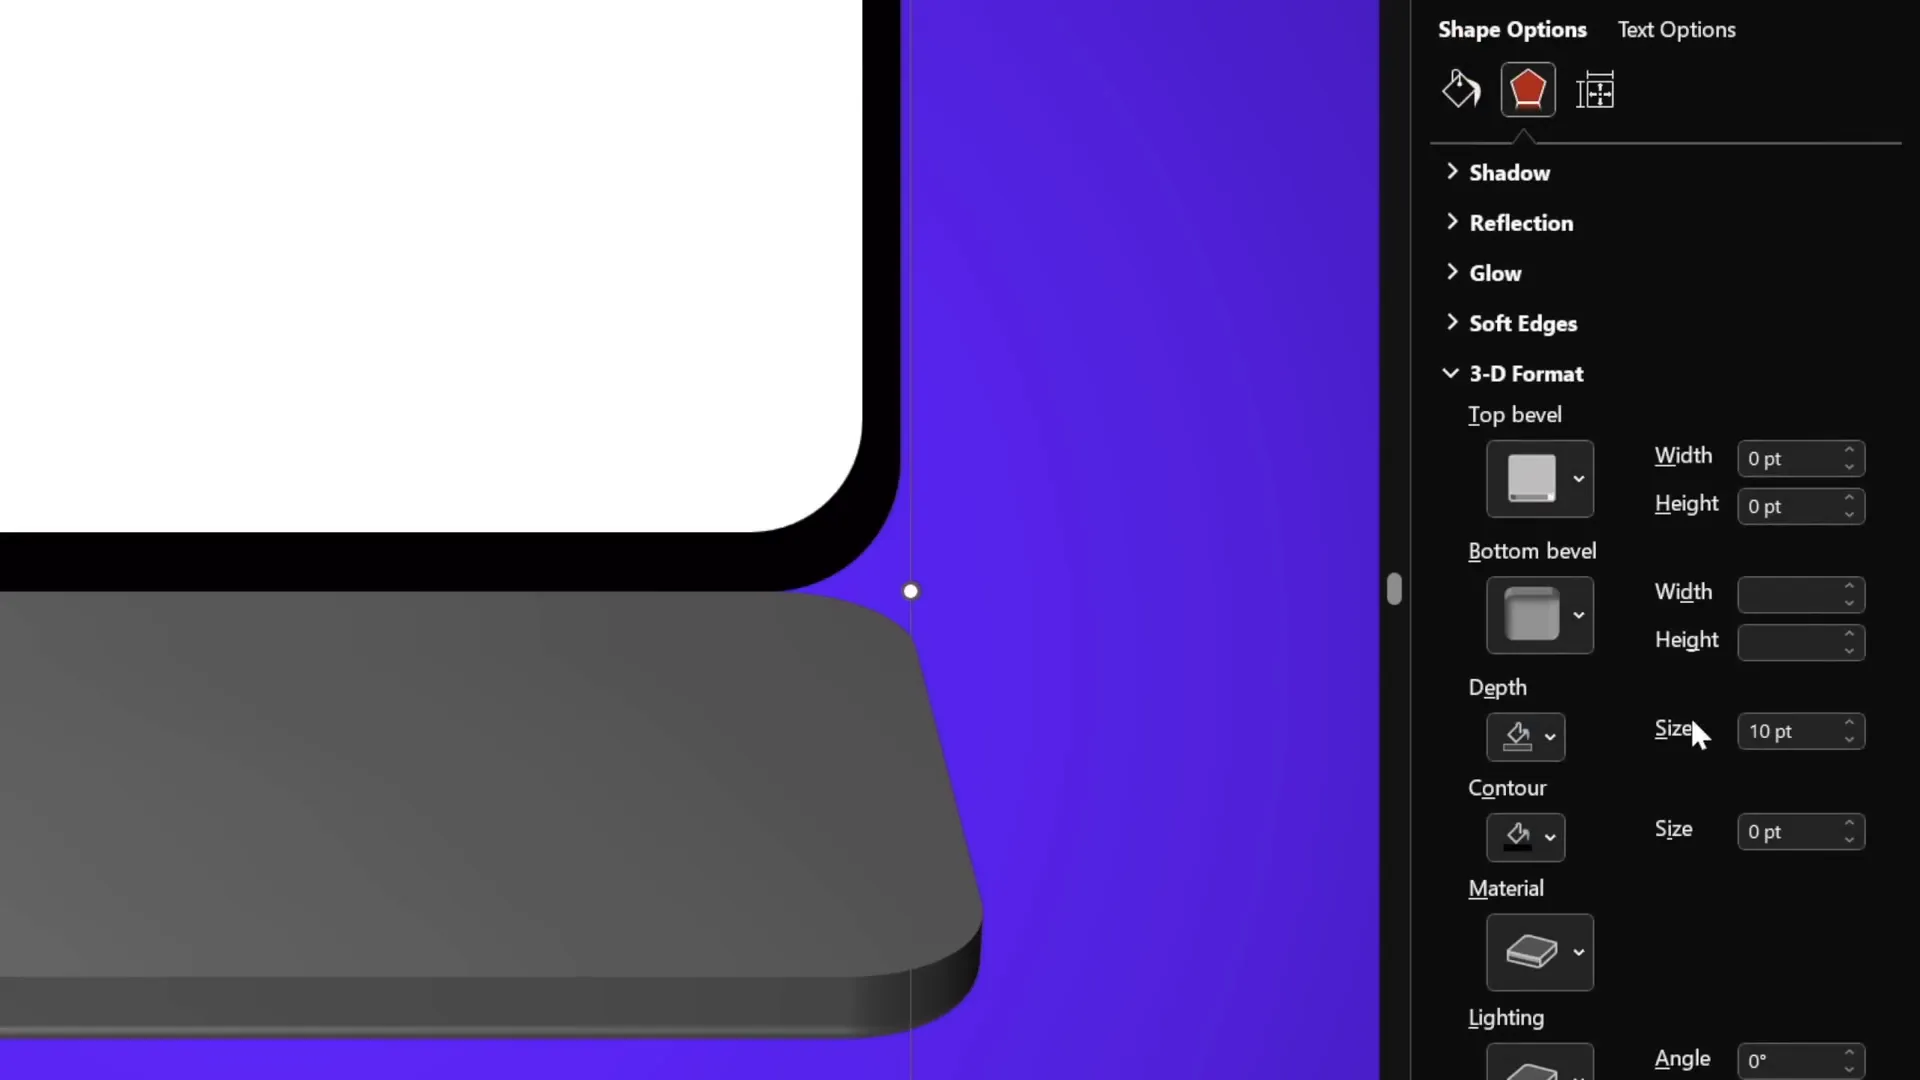
Adding 3D Depth and Bevel for Realism
Flat shapes can make animations look dull. Adding 3D depth and bevel effects brings a realistic touch, making the laptop parts appear tangible.
Adding Depth to Keyboard and Screen
- Select the keyboard group.
- Go to the 3D Format options.
- Increase the Depth (e.g., 10 points for the simple laptop, 3 points for the photo laptop).
- Apply a Bottom Bevel with width and height around 5 points for smooth rounded edges.
Repeat the same for the screen group to maintain visual consistency.
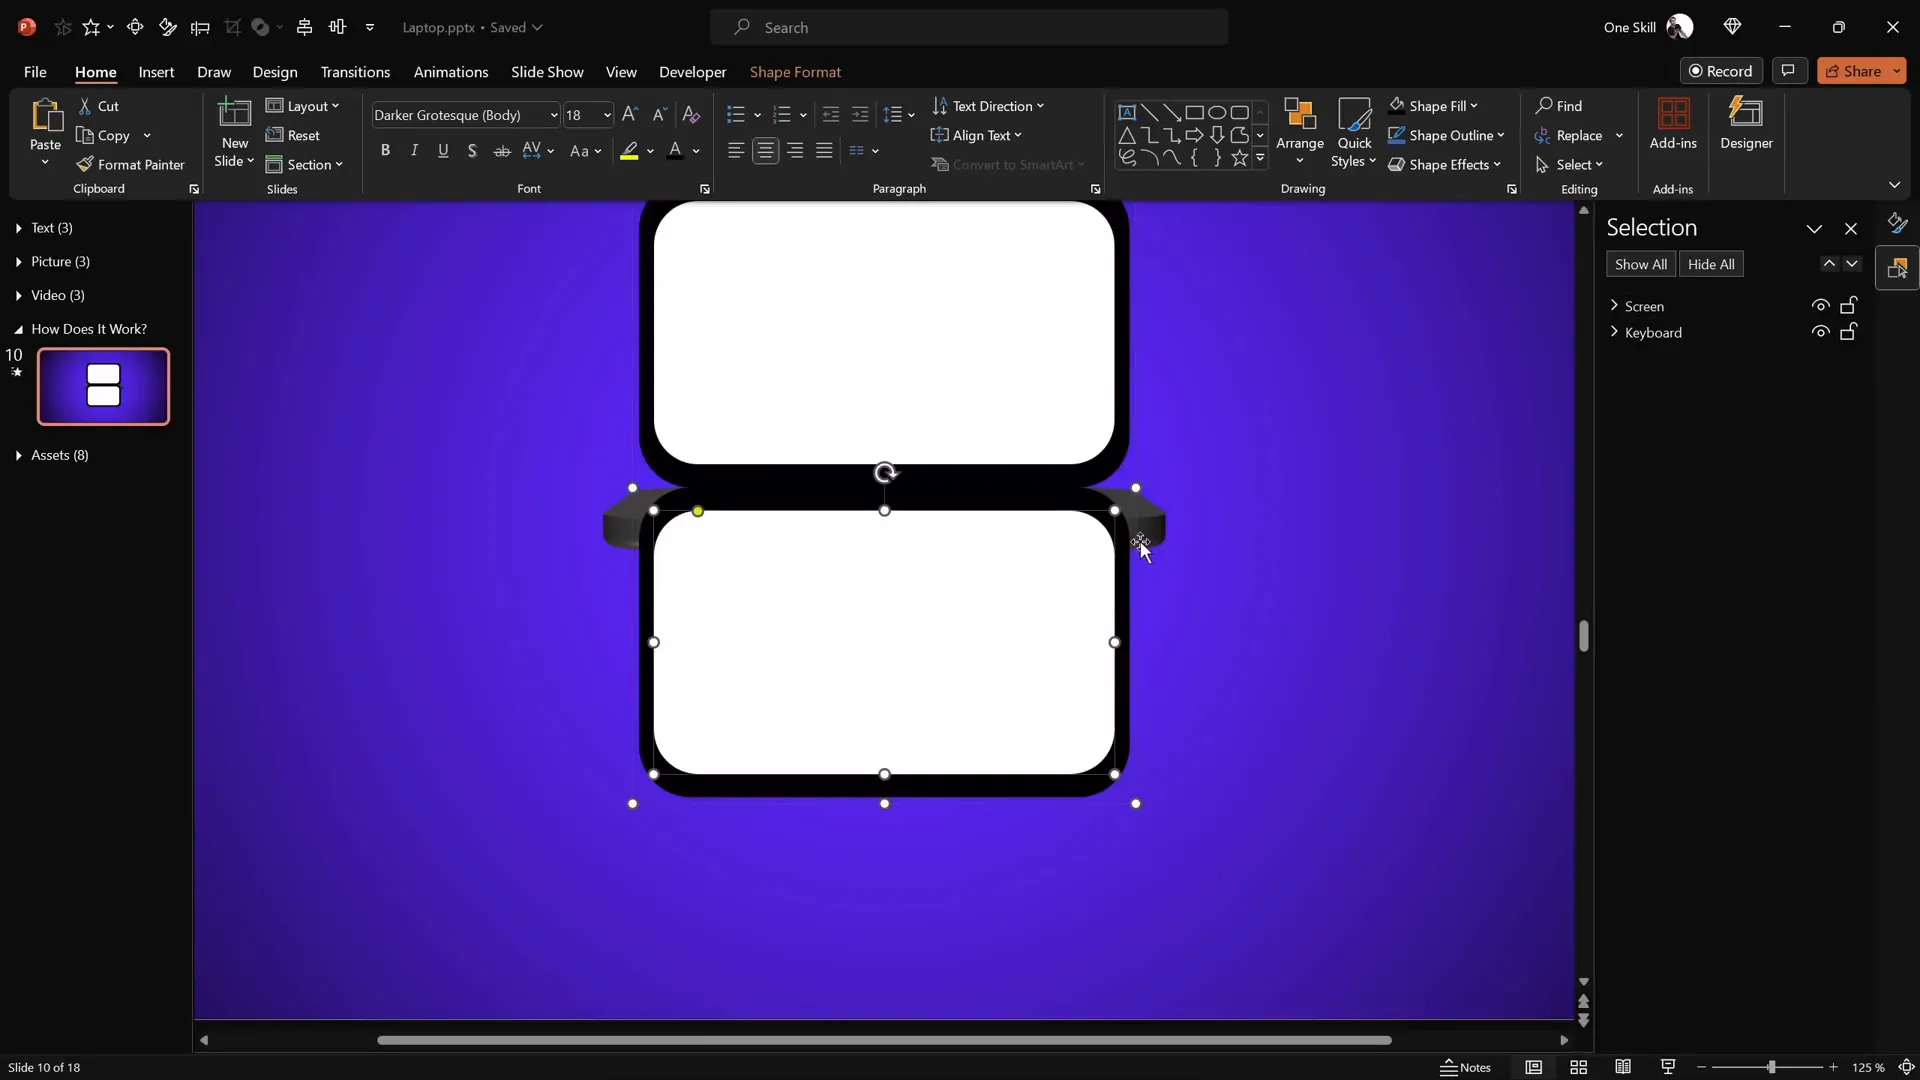
Aligning Elements and Creating the Closed Laptop State
Aligning Keyboard and Screen
Ensure both keyboard and screen are perfectly centered on the slide for a balanced look.
- Turn on slide guides.
- Select the screen group and align it to the middle of the slide.
- Select the keyboard group and align it to the middle as well.
- Turn off the guides.

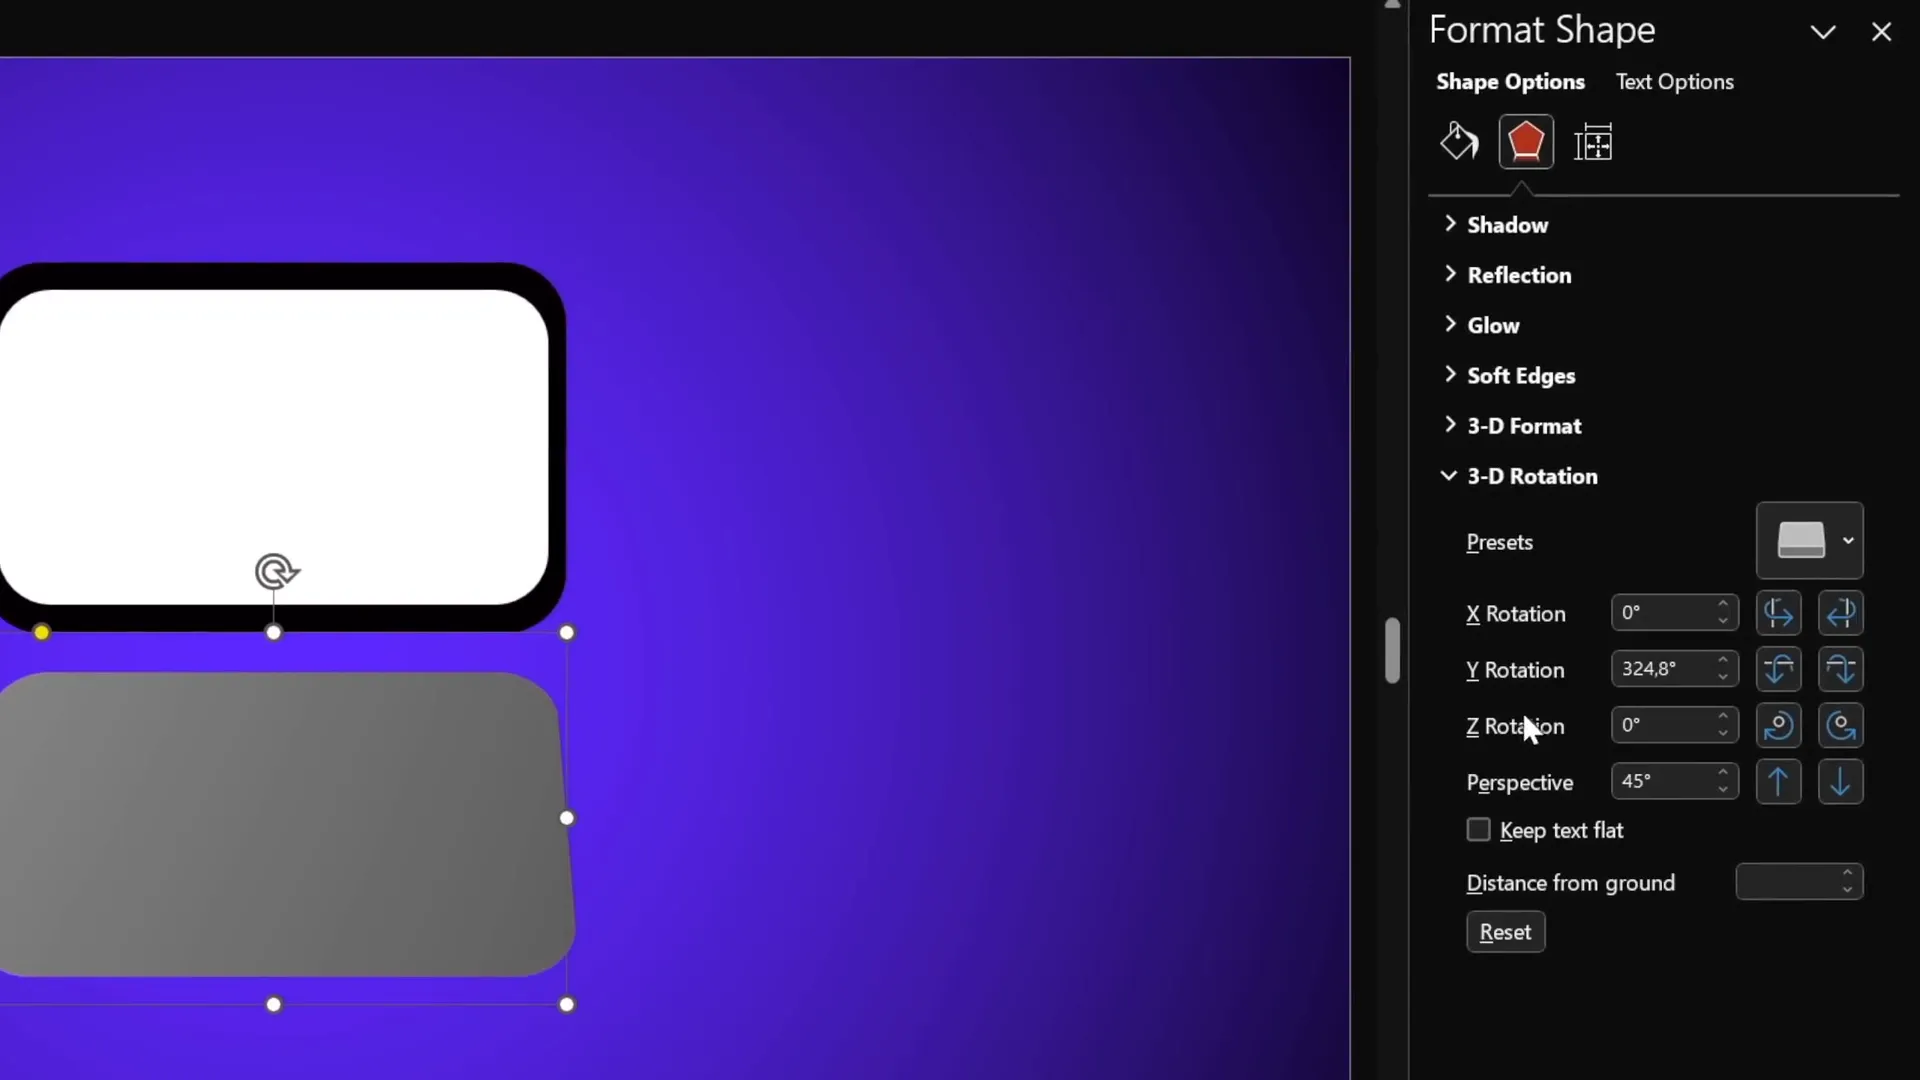
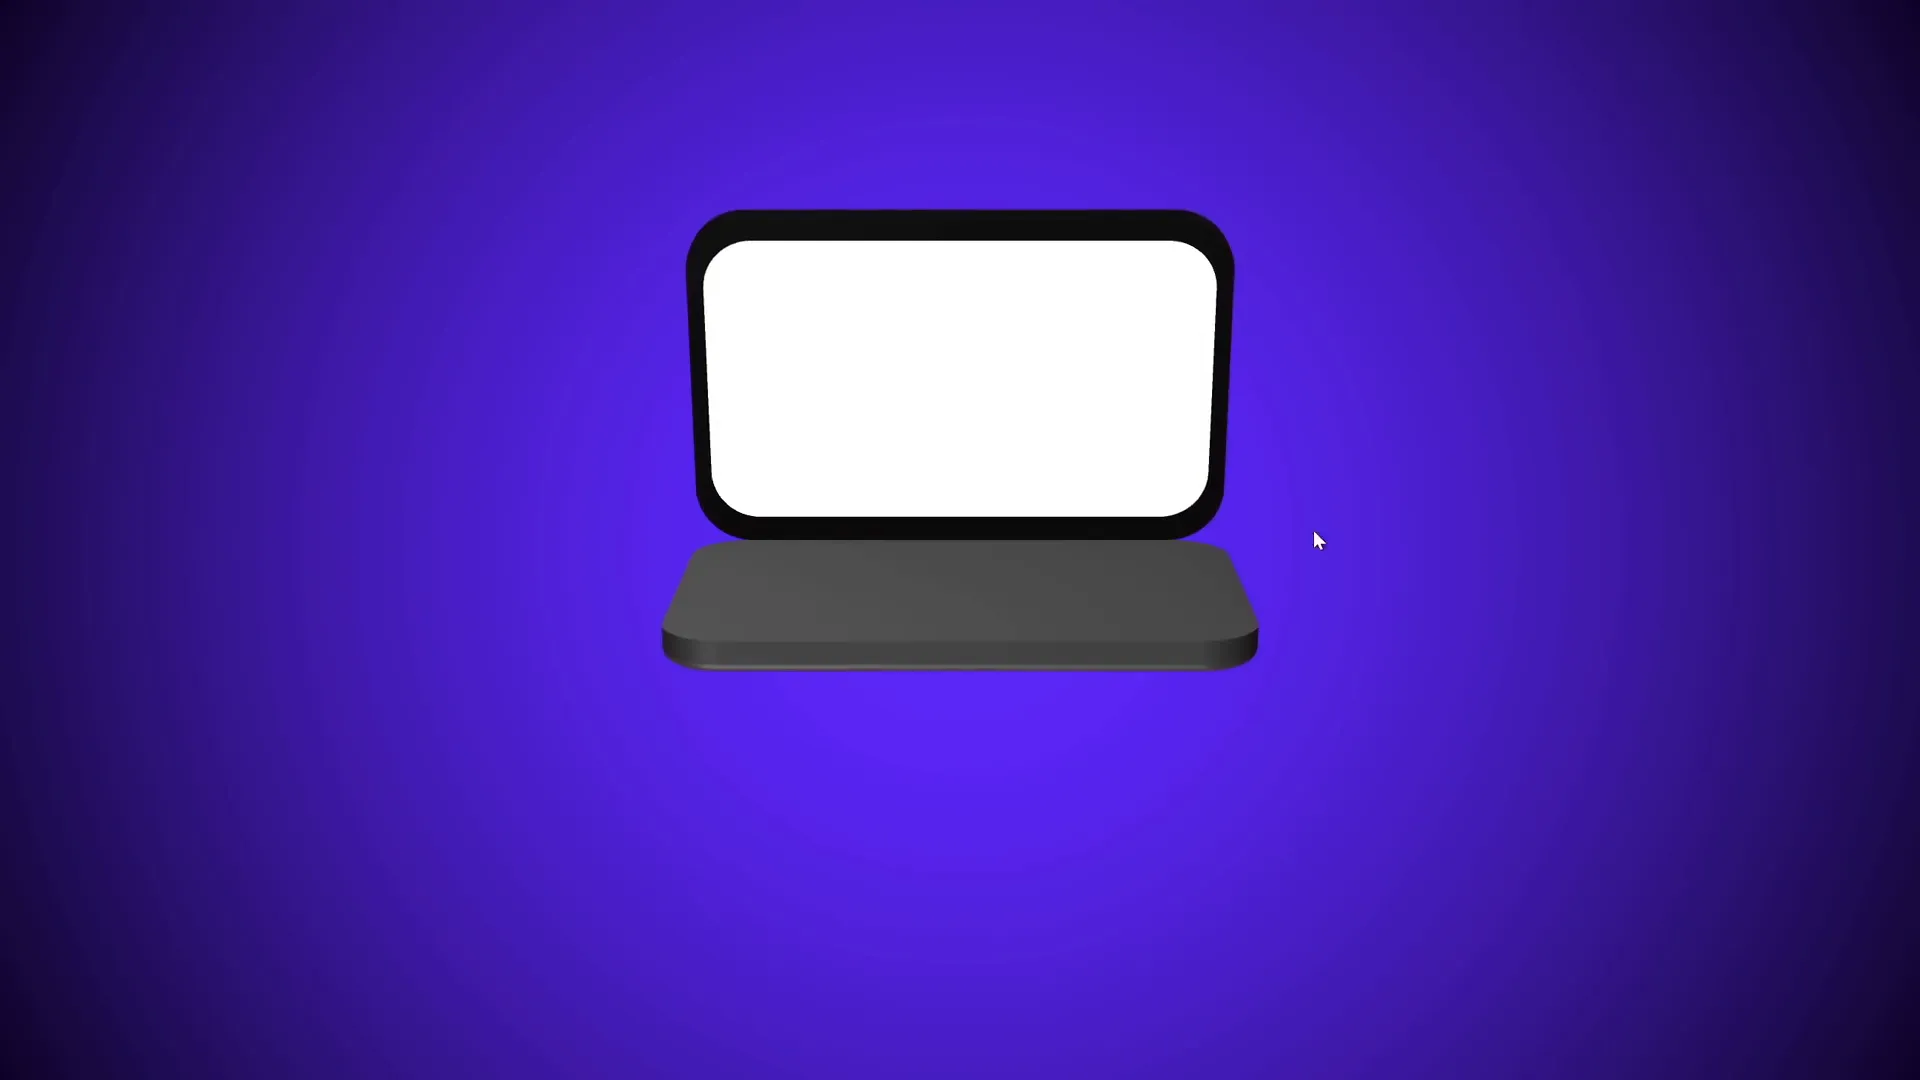
Creating the Closed Laptop Position
- Set the screen’s Y-axis rotation to 90 degrees to make it vertical.
- Set the keyboard’s Y-axis rotation to 270 degrees to position it flat.
This configuration represents the laptop fully closed.

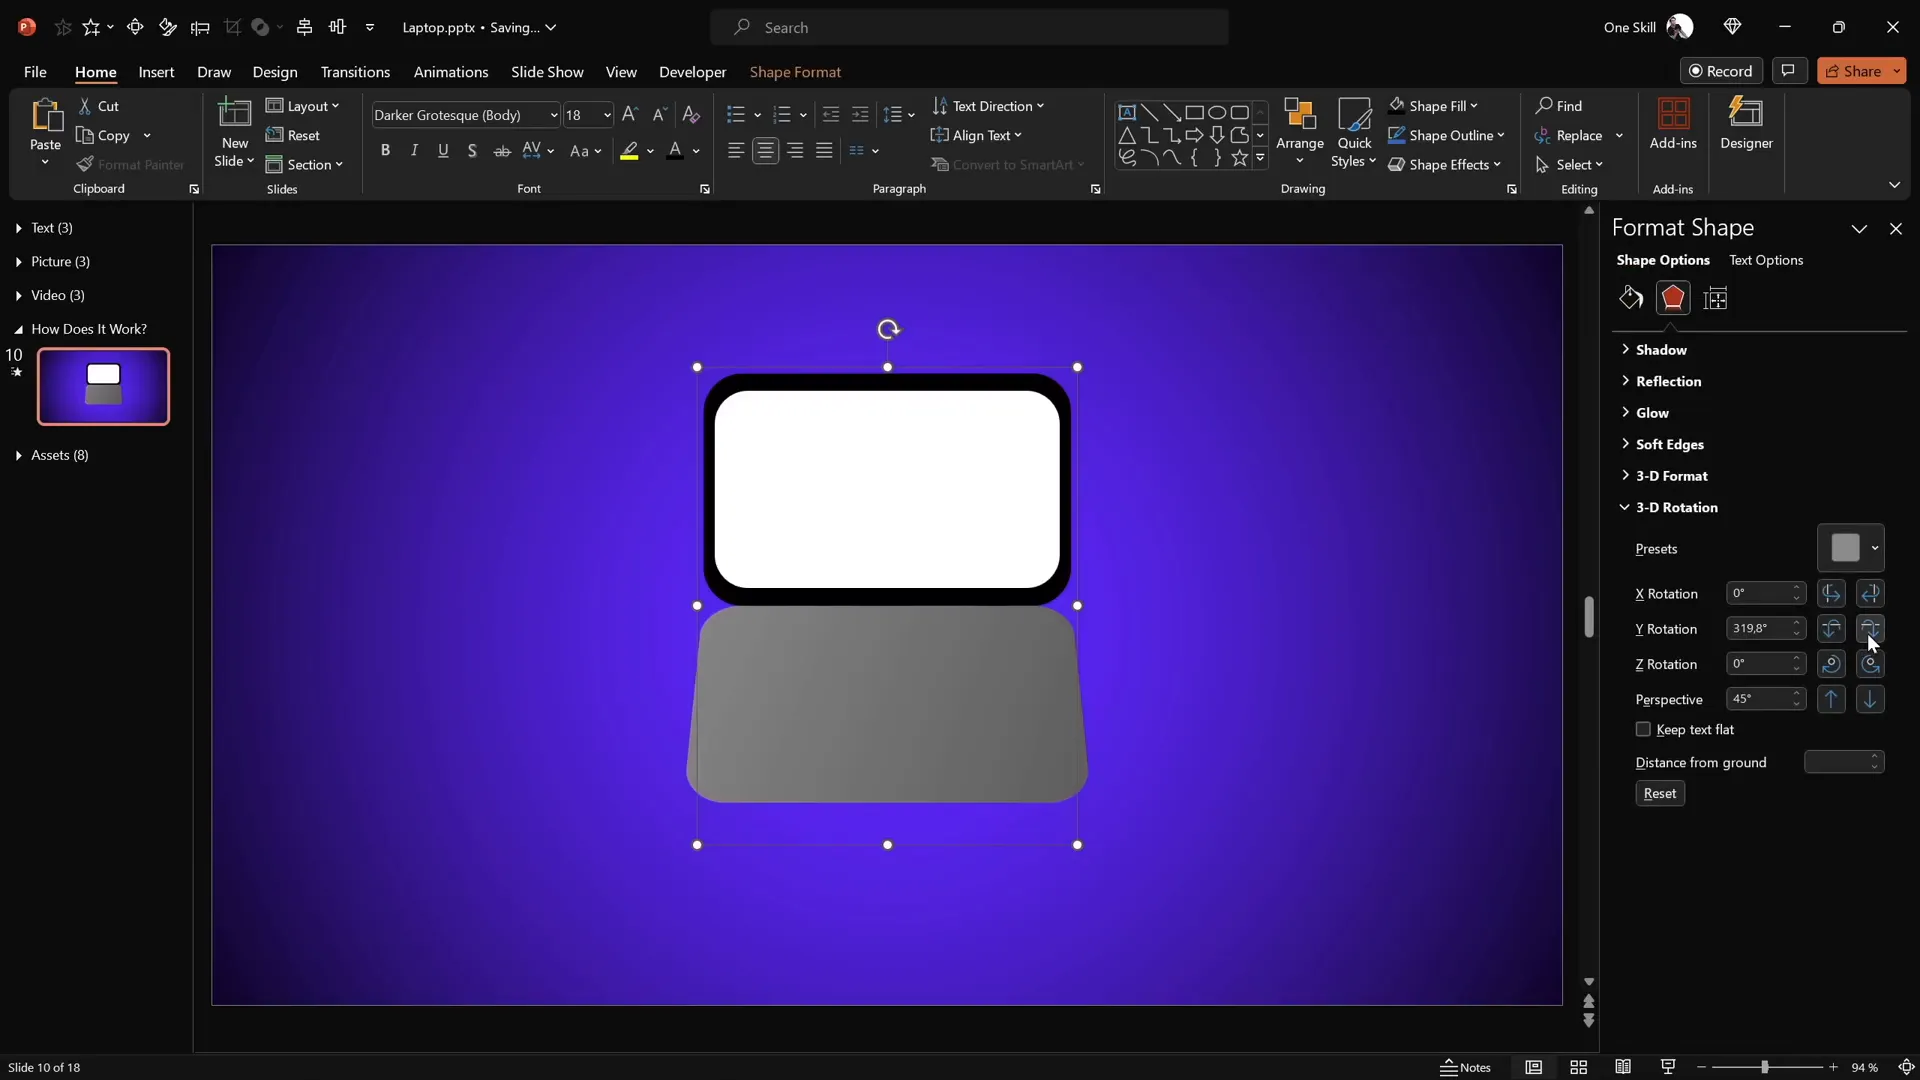
Using Morph Transition for Smooth Animation
PowerPoint’s Morph transition is key to animating the laptop opening smoothly.
Applying Morph Transition
- Duplicate the slide with the closed laptop.
- On the duplicate, set the screen’s Y rotation to 0 degrees (fully open).
- Set the keyboard’s Y rotation to around 290 degrees to simulate the opening angle.
- Apply the Morph transition between the two slides.
- Set the duration (e.g., 2 seconds) for a smooth effect.
When presenting, transitioning between these slides animates the laptop opening and closing seamlessly.

Creating a Realistic Laptop Using Photos
For a more authentic look, you can replace the simple shapes with actual photos of a laptop keyboard and screen.
Step 1: Insert Laptop Photo
- Use a top-view photo of a laptop (free resources like Freepik are excellent).
- Paste the photo onto your slide.
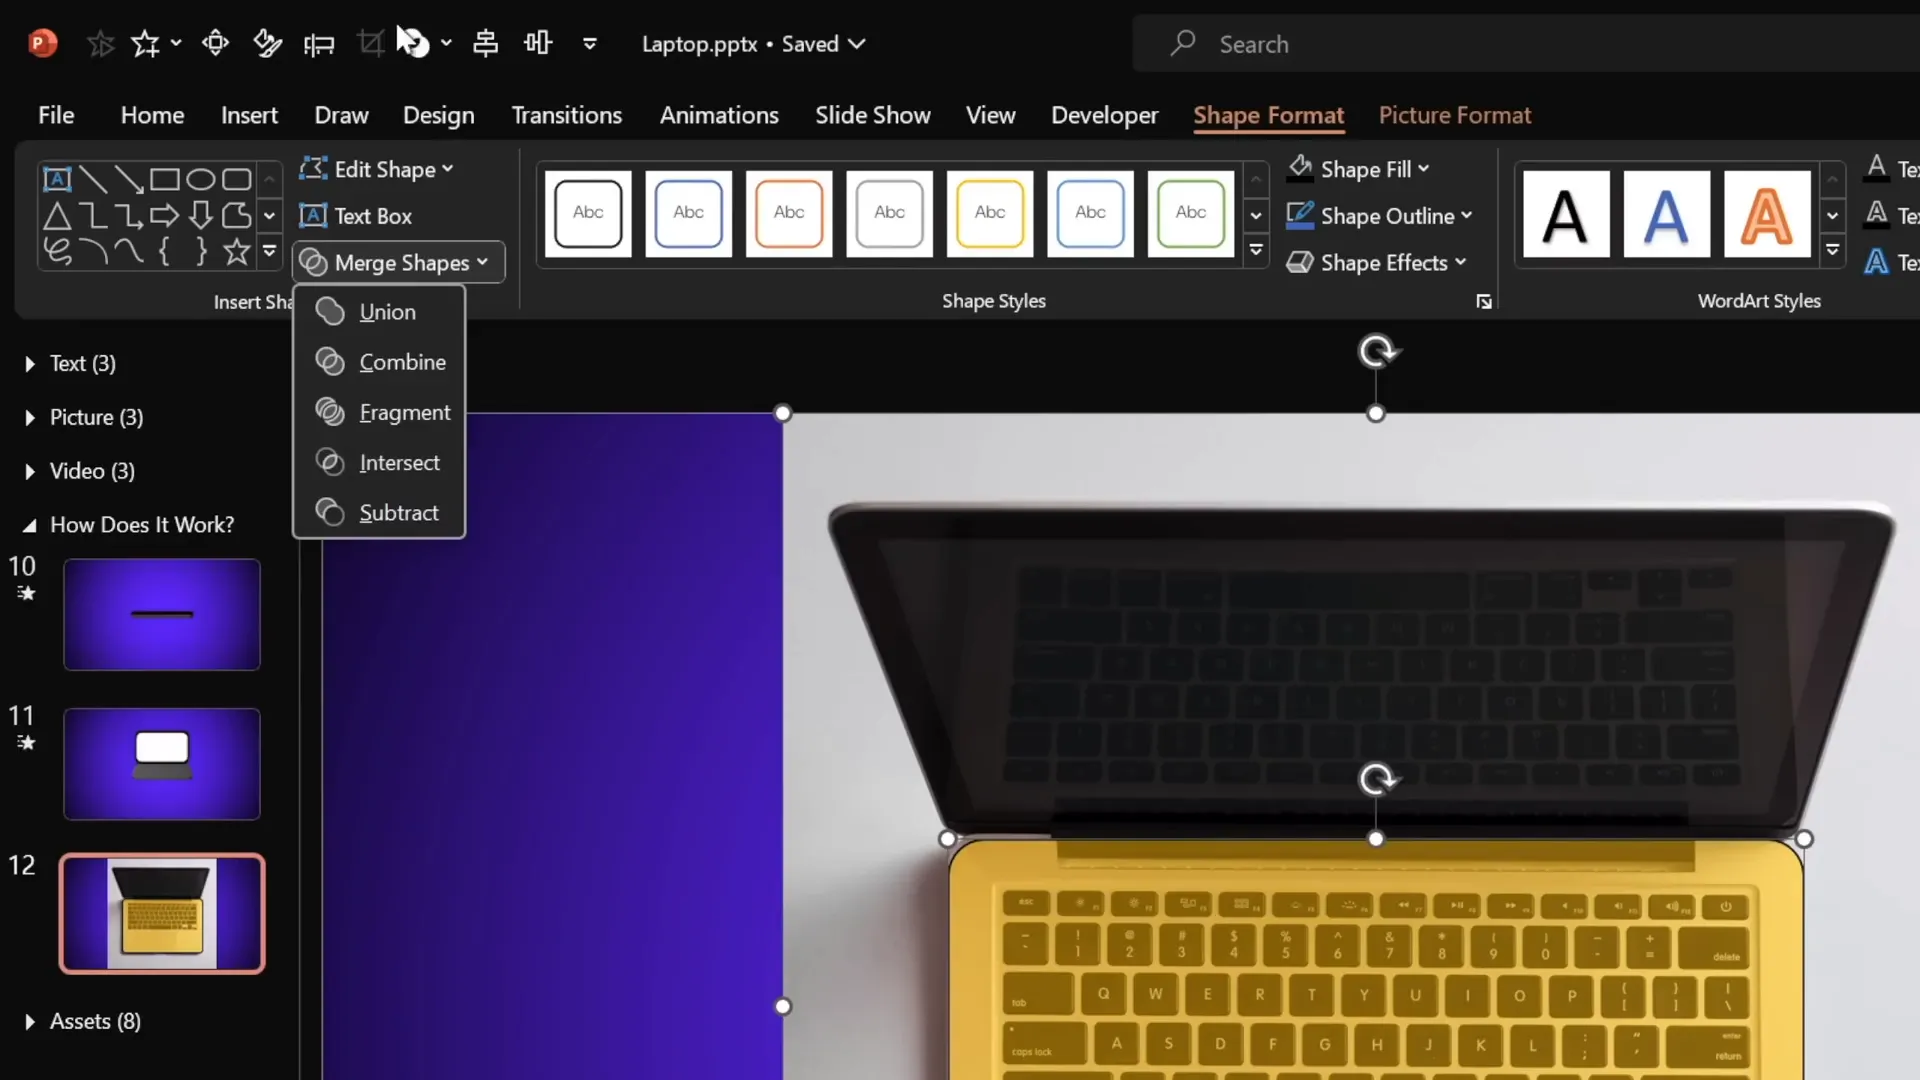
Step 2: Crop the Keyboard
- Insert a rounded rectangle shape to cover the keyboard area.
- Select both the photo and the rectangle, then use Merge Shapes > Intersect to crop the keyboard.
- If you want precision, prepare the shape in advance or adjust accordingly.
Step 3: Create Rotation Center for Photo Keyboard
- Insert a rectangle shape matching the keyboard’s dimensions.
- Align it to the middle of the slide, touching the keyboard’s edge.
- Group the keyboard photo and this rectangle.
- Set the rectangle’s fill and outline to none to keep it invisible.
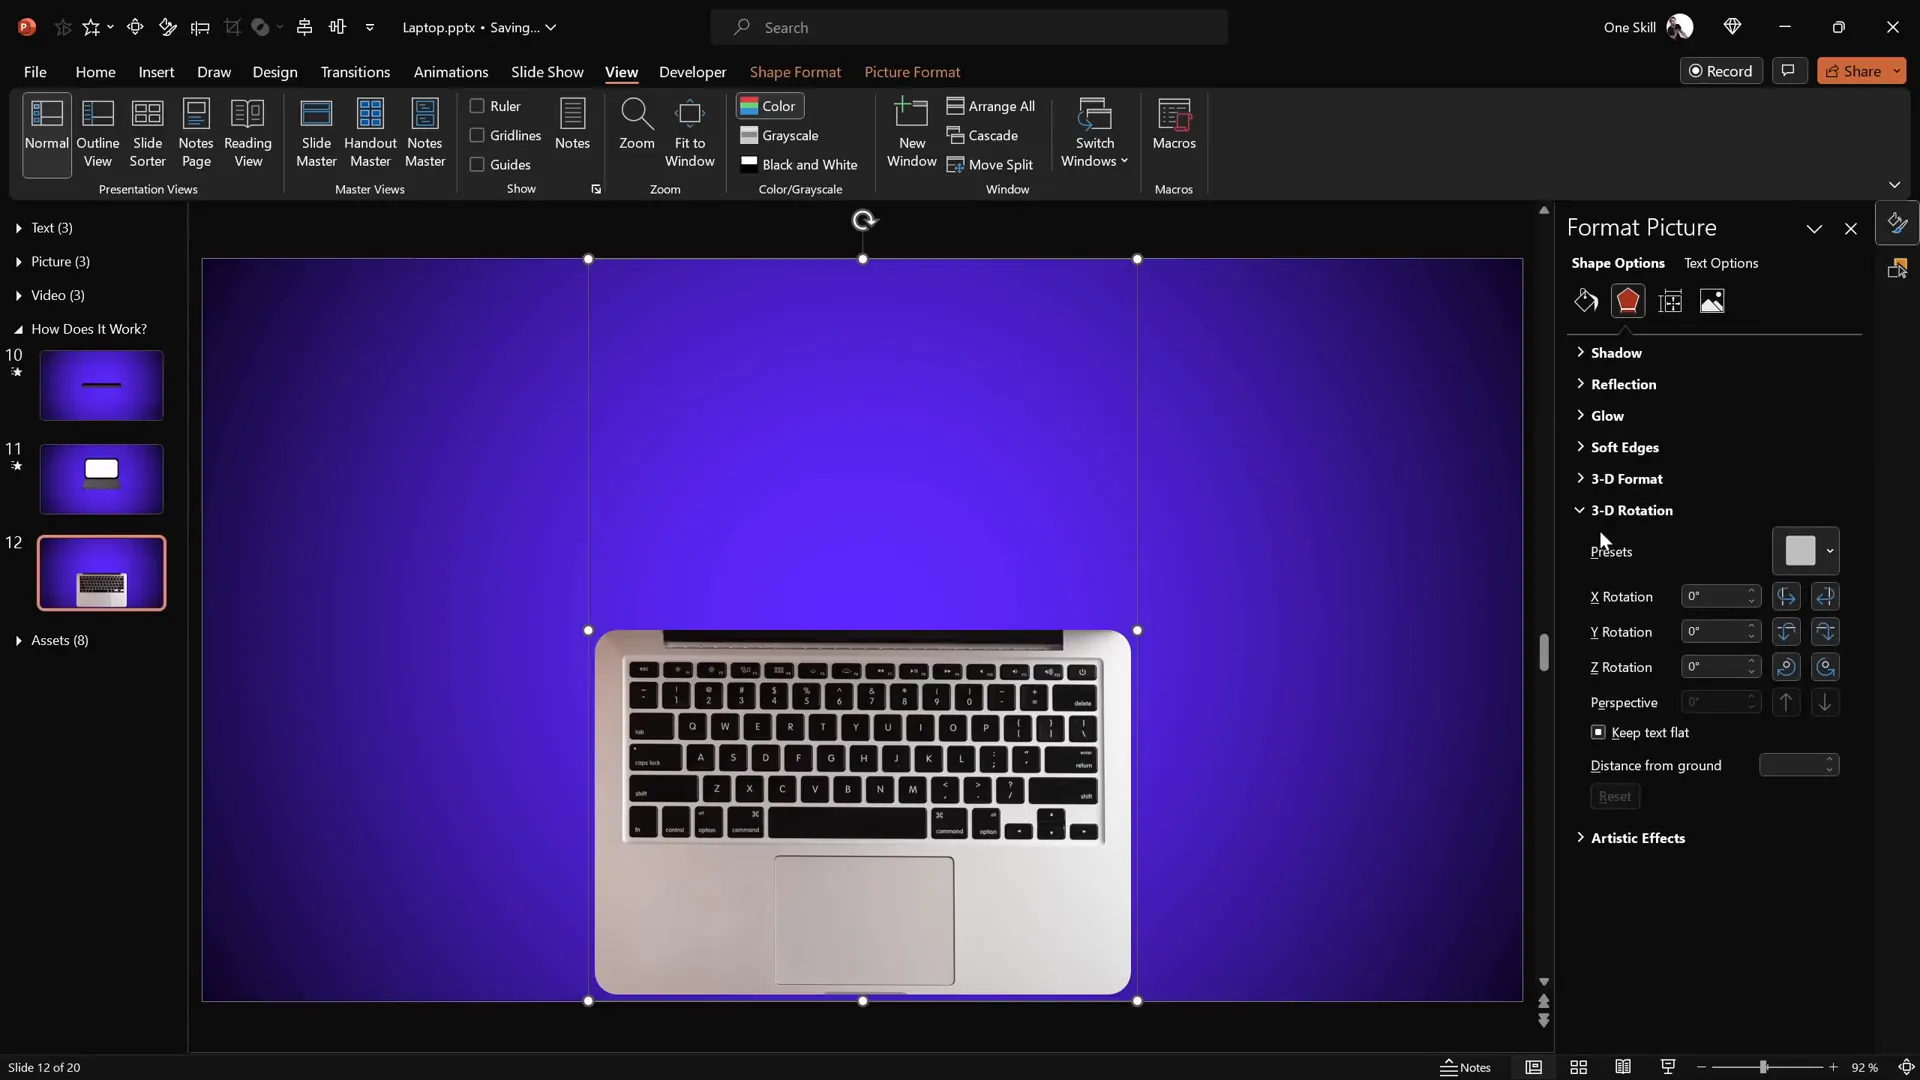
Step 4: Add 3D Rotation and Depth
- Apply the same perspective rotation preset used earlier.
- Add 3D depth (3 points) and bevel (5 points width and height) for smoothness.
Step 5: Prepare and Insert Screen Shapes
- Use rounded rectangles in black and white to create the screen placeholder.
- Group these shapes and set the black rectangle to the same dimensions as the keyboard crop.
- Create a new rotation center by duplicating and grouping the shapes similarly to the keyboard.
- Add the same 3D rotation, depth, and bevel effects.
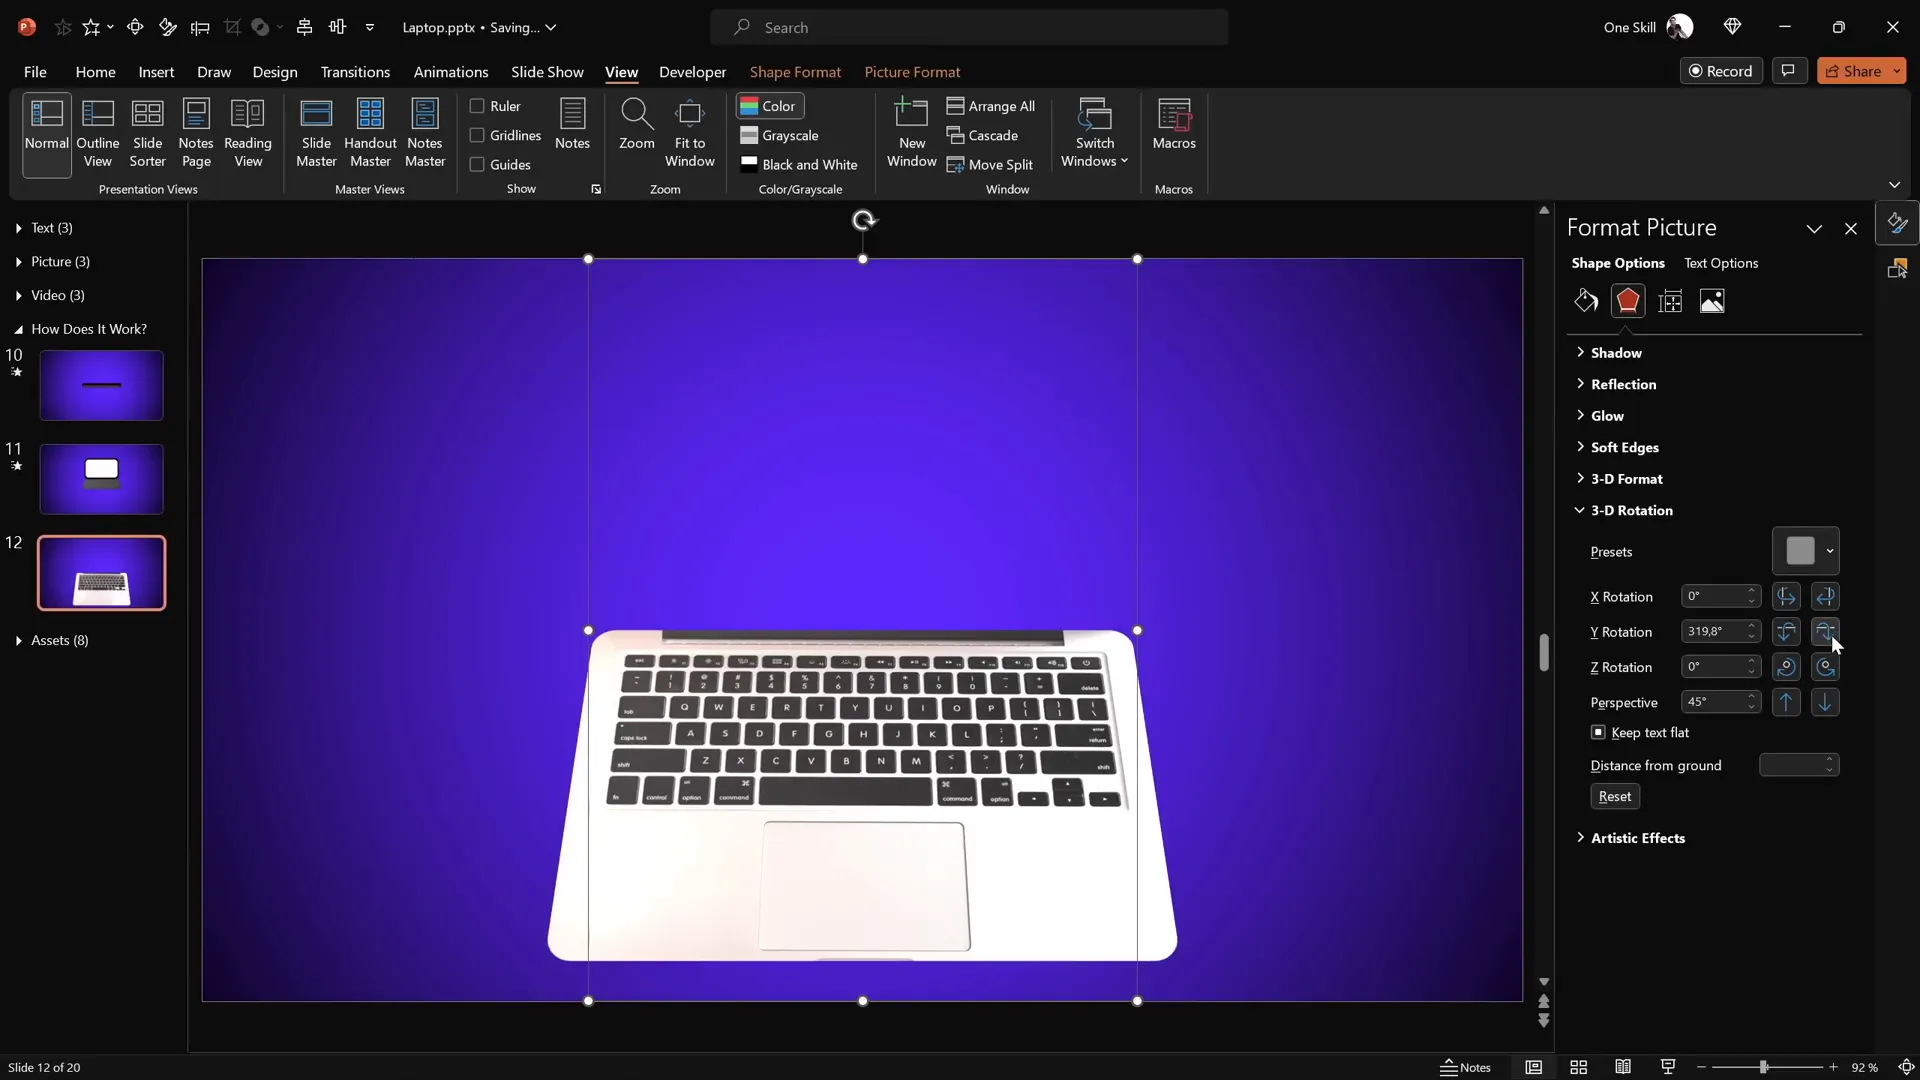
Step 6: Close and Open the Laptop
- Set the closed laptop state by rotating the screen to 90 degrees and keyboard to 270 degrees on the Y-axis.
- Duplicate the slide and set rotations to 0 degrees (screen) and 290 degrees (keyboard) for the open state.
- Apply morph transition between the slides.
Inserting Custom Text, Images, and Videos
One of the most exciting features of this animation is how you can customize the laptop screen with your own content.
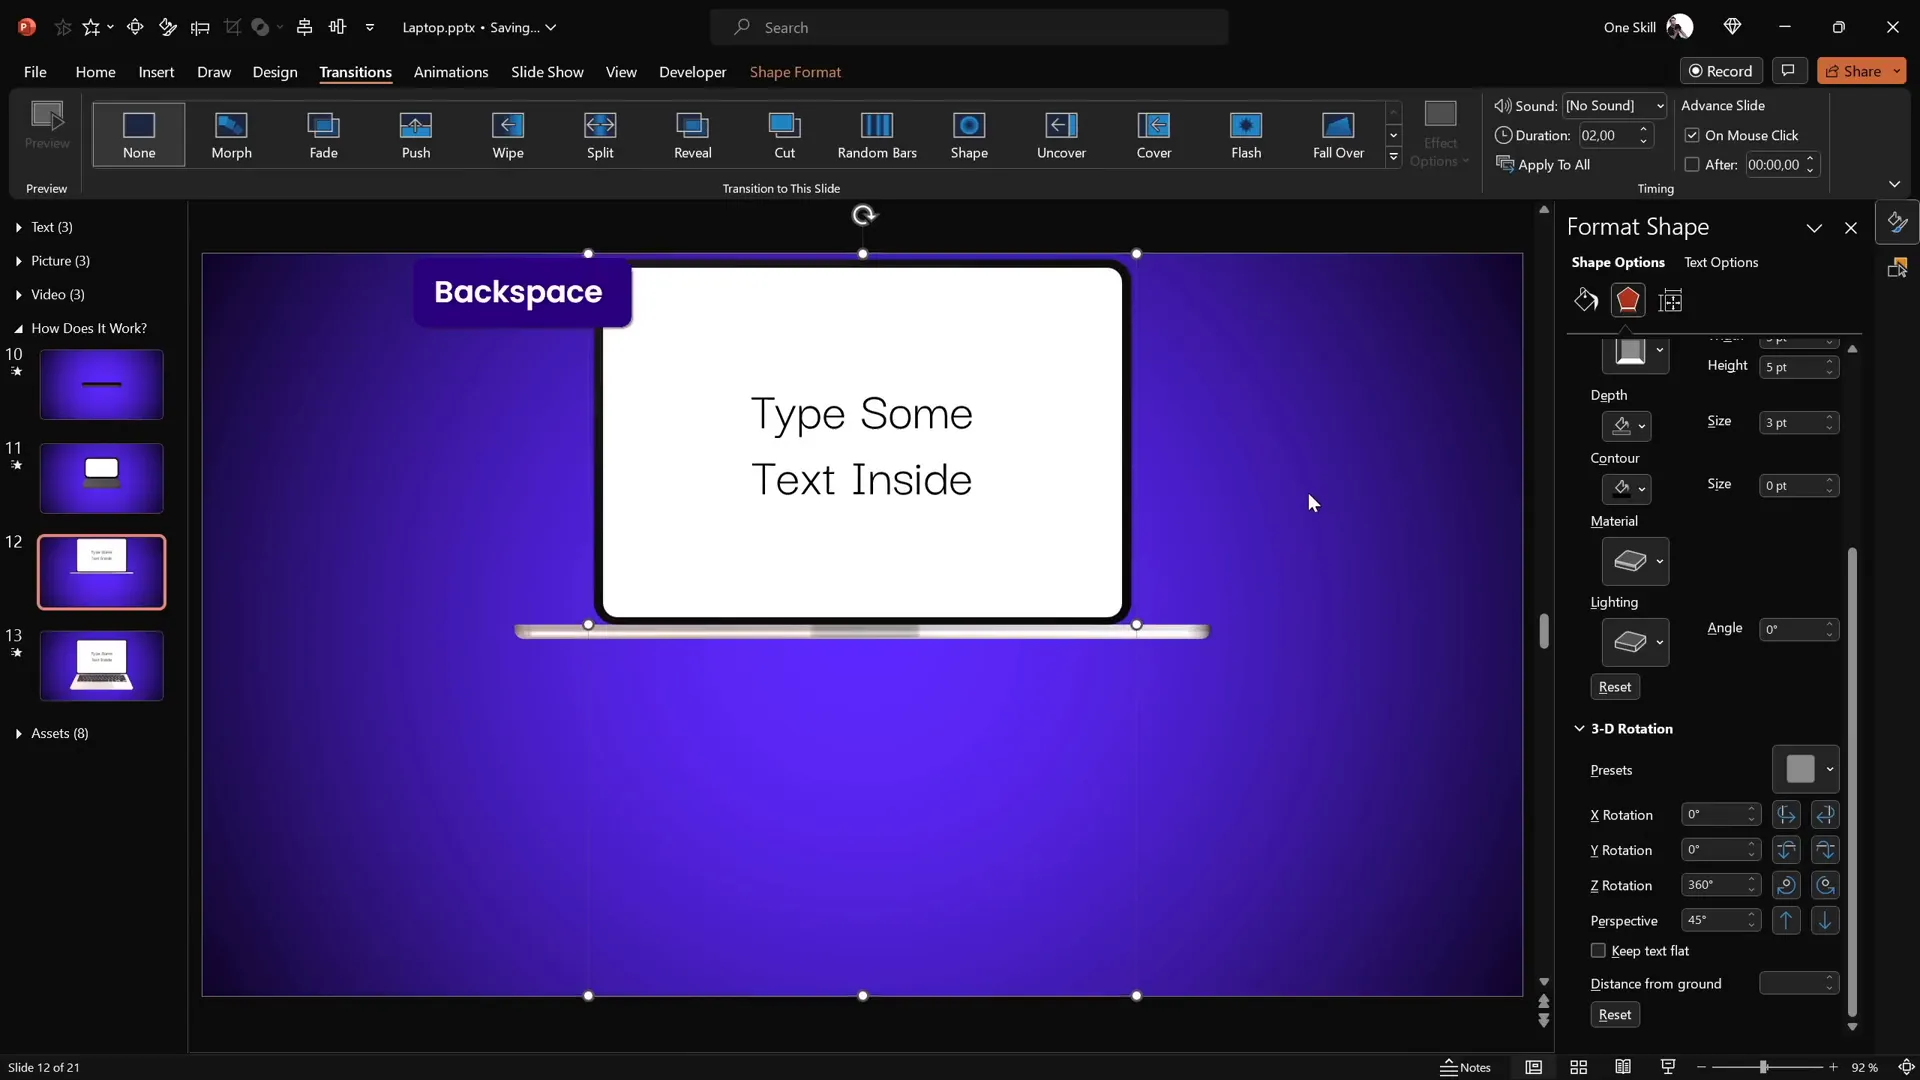
Adding Text
- Double-click the white screen shape to enter text mode.
- Type your desired content directly on the screen shape.
- Copy the text and paste it onto the corresponding screen shape on the open and closed slides to keep consistency.
- Adjust font color to white or any color that contrasts well with your background.
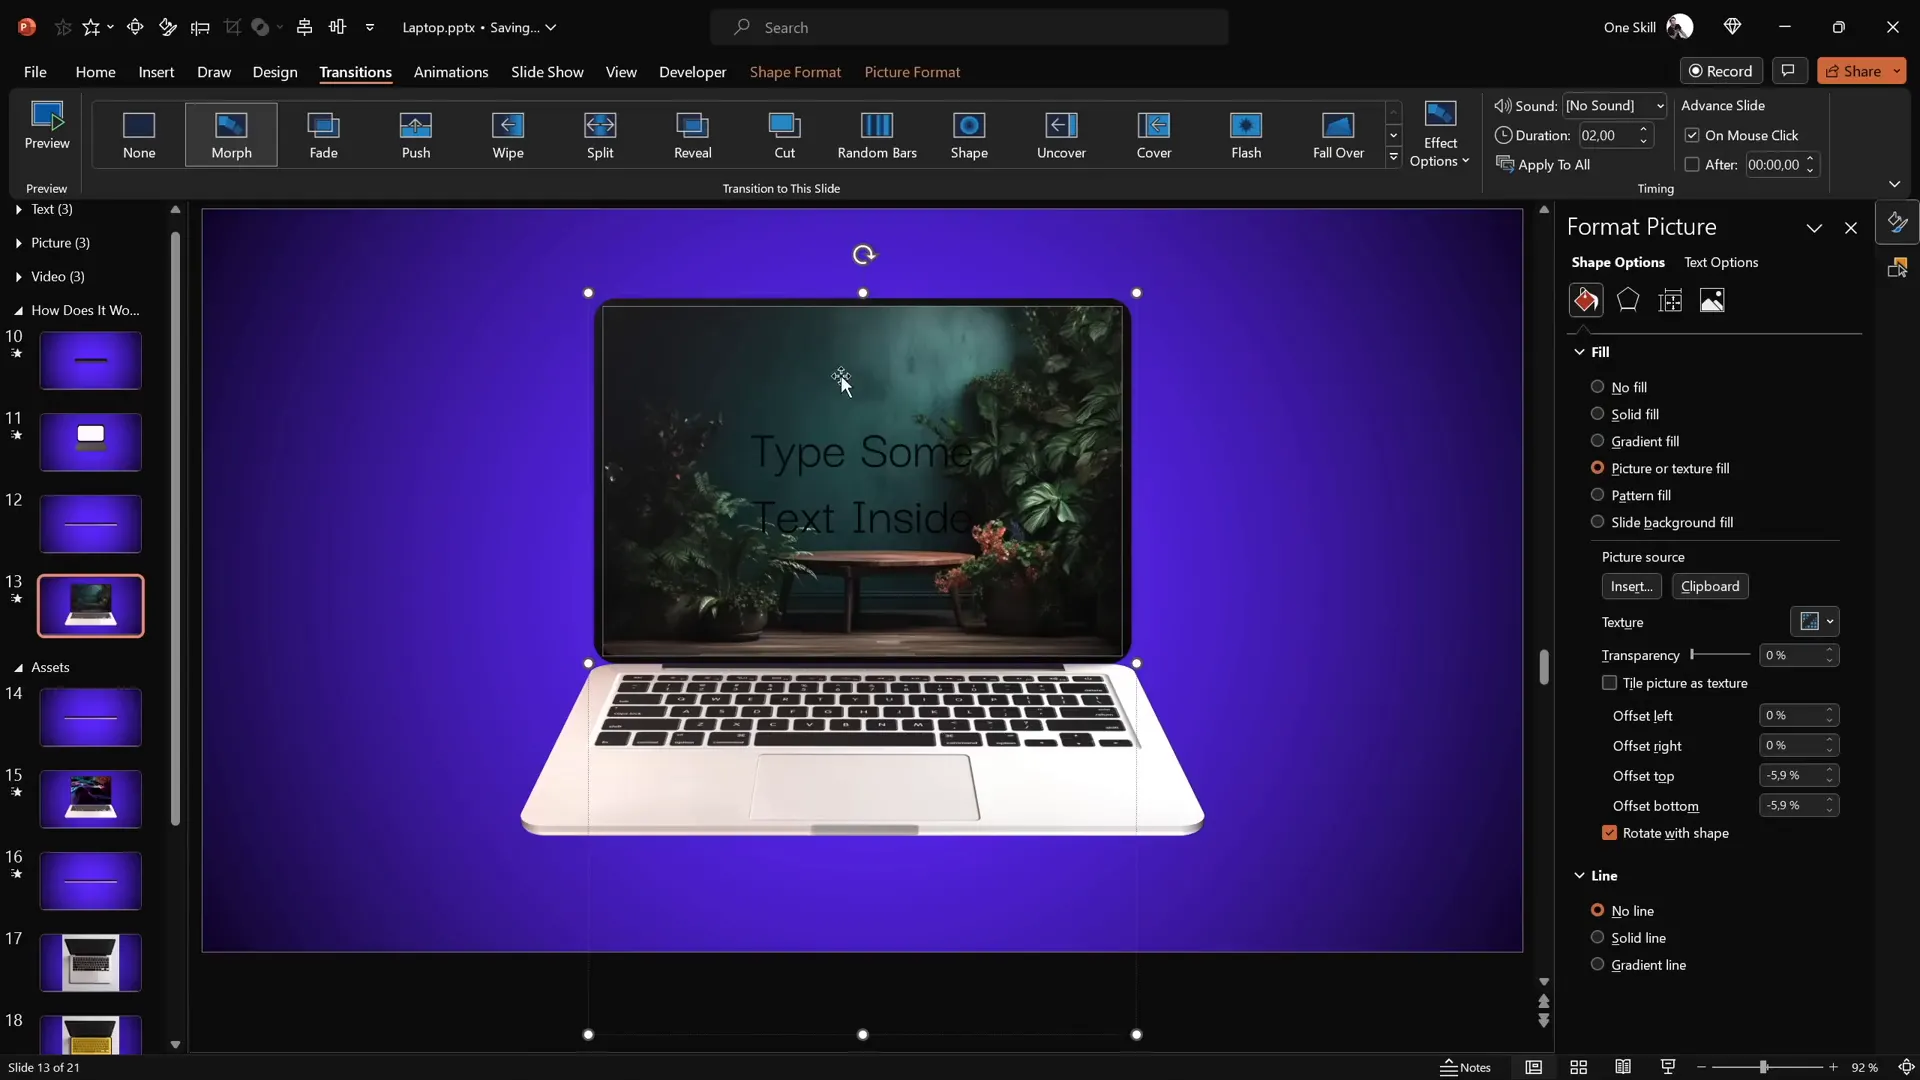
Inserting Pictures
- Copy the image you want to insert (e.g., from Freepik).
- Select the white screen shape.
- Go to Format Shape > Fill and select Picture or texture fill.
- Choose Clipboard to fill the shape with your copied image.
- Apply the same fill style to the corresponding screen shape on the other slide.
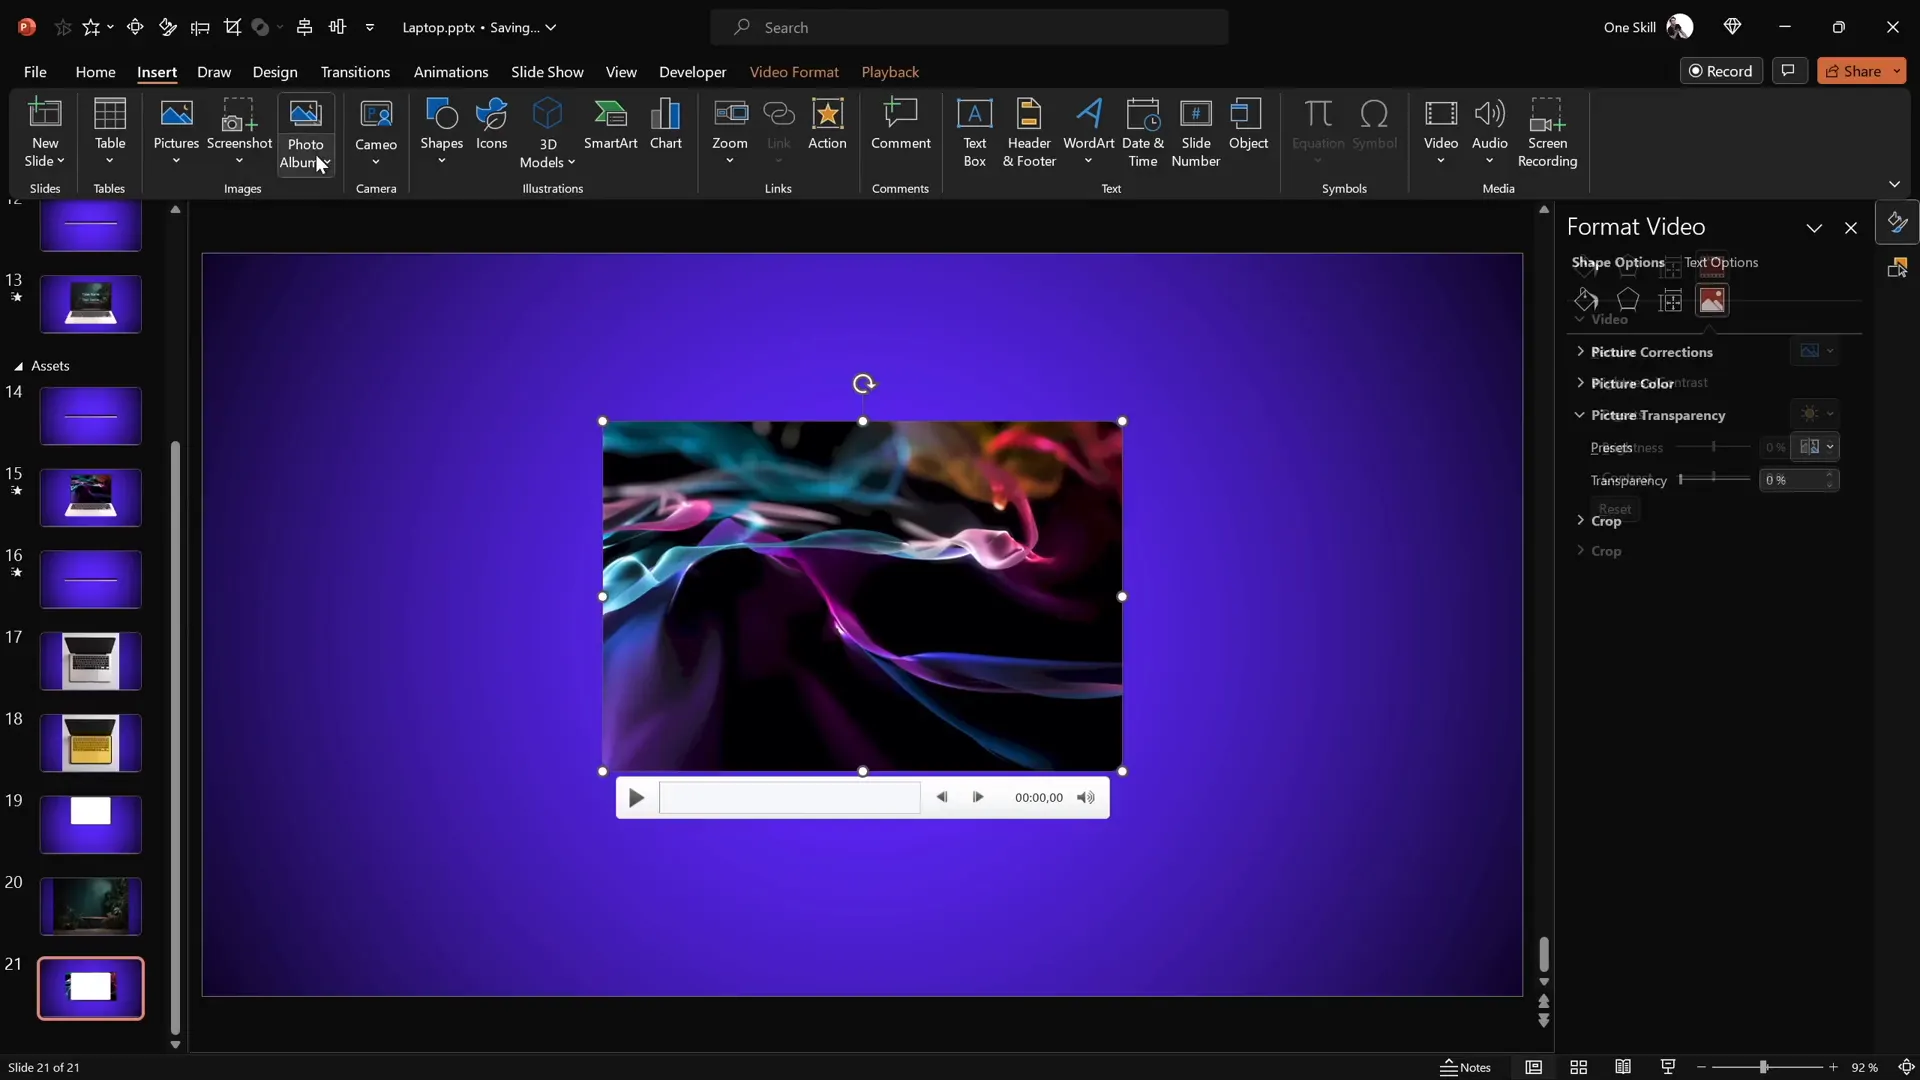
Embedding Videos
To add dynamic video content inside your laptop screen, follow these steps:
- Go to Insert > Video > Stock Videos (available in newer PowerPoint versions).
- Choose a video and insert it into the slide.
- Copy the white screen shape and paste it over the video.
- Align both video and shape to the middle and center of the slide.
- Select both, go to Merge Shapes > Intersect to crop the video to fit the laptop screen perfectly.
- Copy the cropped video and paste it as a picture fill inside the white screen shape on your slide.
- Paste the video itself over the screen shape and align precisely.
- Add animations: a fade-in effect starting with the previous animation and set the video to play automatically.
Frequently Asked Questions (FAQs)
Can I create this 3D laptop animation without using external 3D models?
Absolutely. This animation is built entirely using PowerPoint’s simple shapes, photos, 3D formatting, and morph transition without needing any external 3D models.
Is the morph transition necessary for this animation?
Yes. The morph transition smooths the rotation changes between slides, creating a seamless opening and closing animation for the laptop.
Can I insert my own images or videos into the laptop screen?
Yes, you can customize the laptop screen by inserting your own text, images, or even videos. The tutorial shows how to crop and fit these media perfectly into the laptop screen.
What versions of PowerPoint support these features?
Using Microsoft 365 or the latest versions of PowerPoint is recommended, especially to access stock videos and advanced 3D and morph features.
How do I create a new rotation center in PowerPoint?
By grouping a duplicate shape positioned adjacent to the original, you effectively create a new rotation pivot point, allowing rotation around edges instead of the center.
Can I adjust animation speed?
Yes. The morph transition duration can be adjusted (e.g., 2 seconds) to control the speed of the laptop opening and closing.
Conclusion: Elevate Your PowerPoint Presentations
Mastering Powerpoint presentation skills opens a world of creative possibilities beyond static slides. With a bit of ingenuity, you can simulate complex animations like a 3D laptop opening using simple shapes, photos, and PowerPoint’s built-in tools.
This tutorial has shown you how to:
- Build a laptop animation from scratch using rounded rectangles and photos.
- Create custom rotation centers to mimic realistic hinge movement.
- Add 3D depth and bevel effects for a polished look.
- Use the morph transition to animate smooth opening and closing.
- Customize the laptop screen with text, images, and videos.
By applying these techniques, your presentations will stand out with professional-grade animations that captivate your audience. Remember, the key to mastering PowerPoint animations is practice and exploration. Don’t hesitate to experiment with different shapes, rotation angles, and content to tailor animations that fit your unique style and message.
Now it’s your turn to create and impress. Harness these Powerpoint presentation skills and make your next presentation truly unforgettable!
Check out the full video: PowerPoint Presentation Skills: Creating 3D Laptop Animation ✨


