If you’re looking to elevate your PowerPoint presentation skills and captivate your audience with visually stunning animations, you’ve come to the right place. In this comprehensive guide, we’ll explore how to create a beautiful, customizable 3D laptop open animation entirely within Microsoft PowerPoint — no 3D modeling software required.
This tutorial will walk you through every step, from crafting simple shapes to adding realistic depth and perspective rotation, and even inserting your own text, pictures, or videos into the laptop screen. By the end, you’ll have powerful new techniques to add life and professionalism to your presentations.
Table of Contents
- Getting Started: Setting the Stage in PowerPoint
- Creating Basic Laptop Shapes and Grouping
- Mastering 3D Rotation and Custom Rotation Centers
- Adding Depth and Bevel Effects for Realism
- Aligning and Closing the Laptop Animation
- Animating with Morph Transition
- Incorporating a Realistic Laptop Photo
- Inserting Custom Text into the Laptop Screen
- Embedding Pictures into the Laptop Screen
- Adding Video Playback Inside the Laptop Screen
- Conclusion and Next Steps
- Frequently Asked Questions (FAQ)
Getting Started: Setting the Stage in PowerPoint
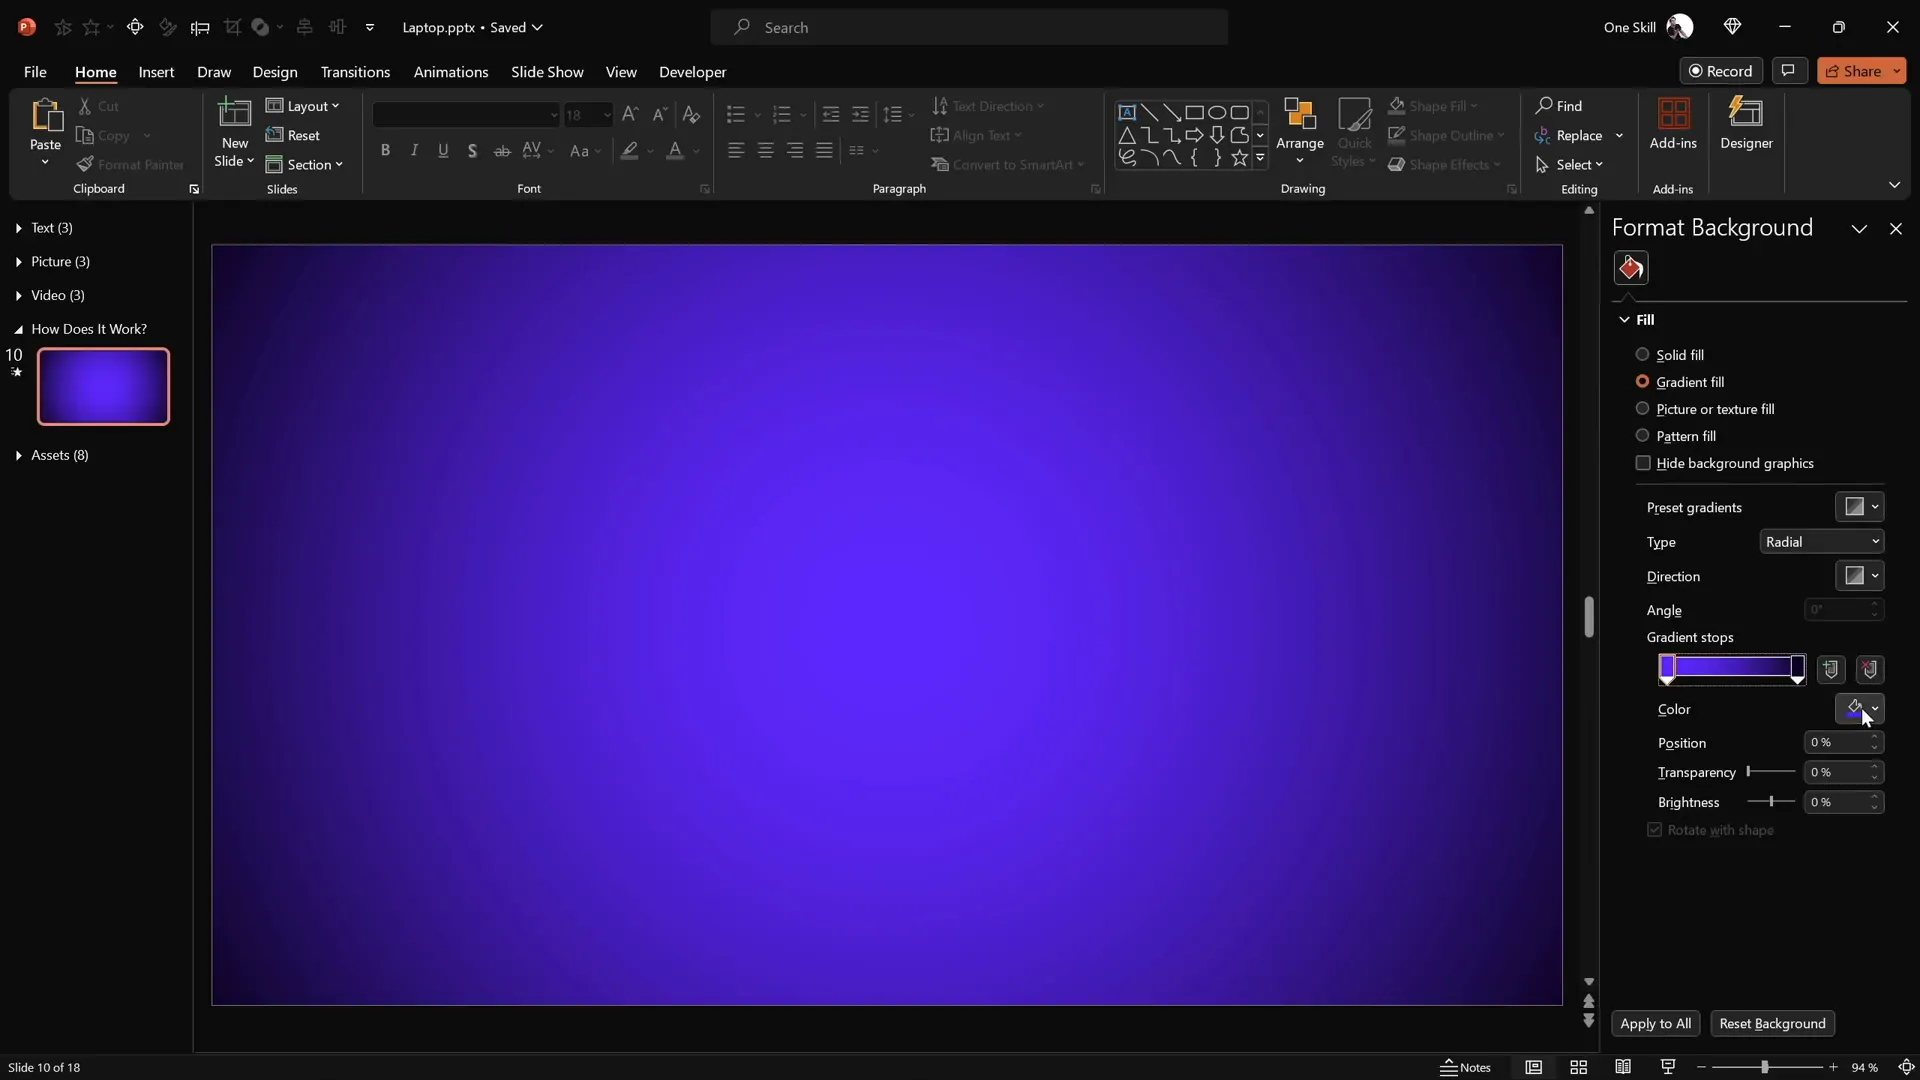
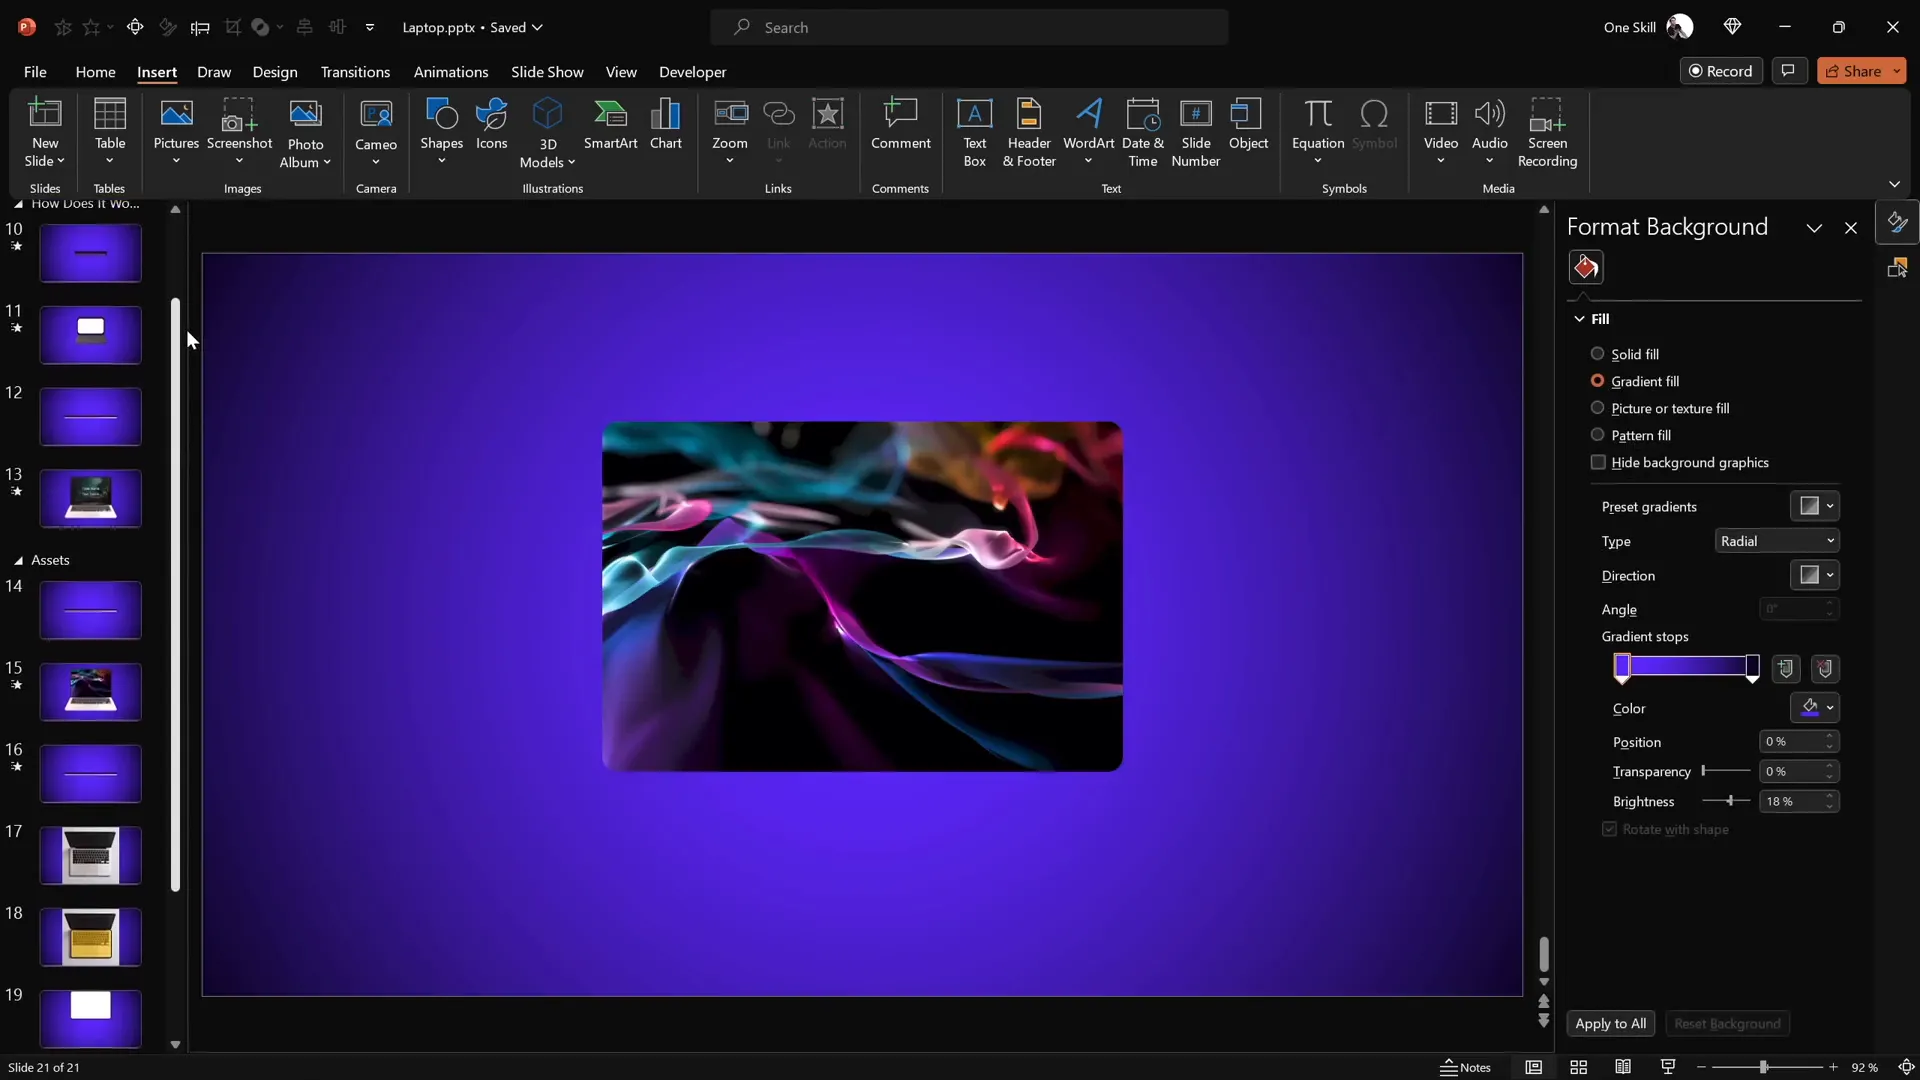
Before diving into the animation, it’s important to prepare your PowerPoint slide with the right background to enhance the visual appeal of your laptop animation. While the gradient background is optional, it adds a nice touch of polish.
Applying a Gradient Background
To replicate the aesthetic used in the animation:
- Right-click on the slide background and select Format Background.
- Choose Gradient Fill from the options.
- Set the gradient stops to the following hex color codes:
- First color:
#692DFF(a vibrant purple shade) - Second color:
#0D0002C(a very dark blue/black shade)
- First color:
This gradient creates a pleasing contrast for the laptop animation to stand out.
Creating Basic Laptop Shapes and Grouping
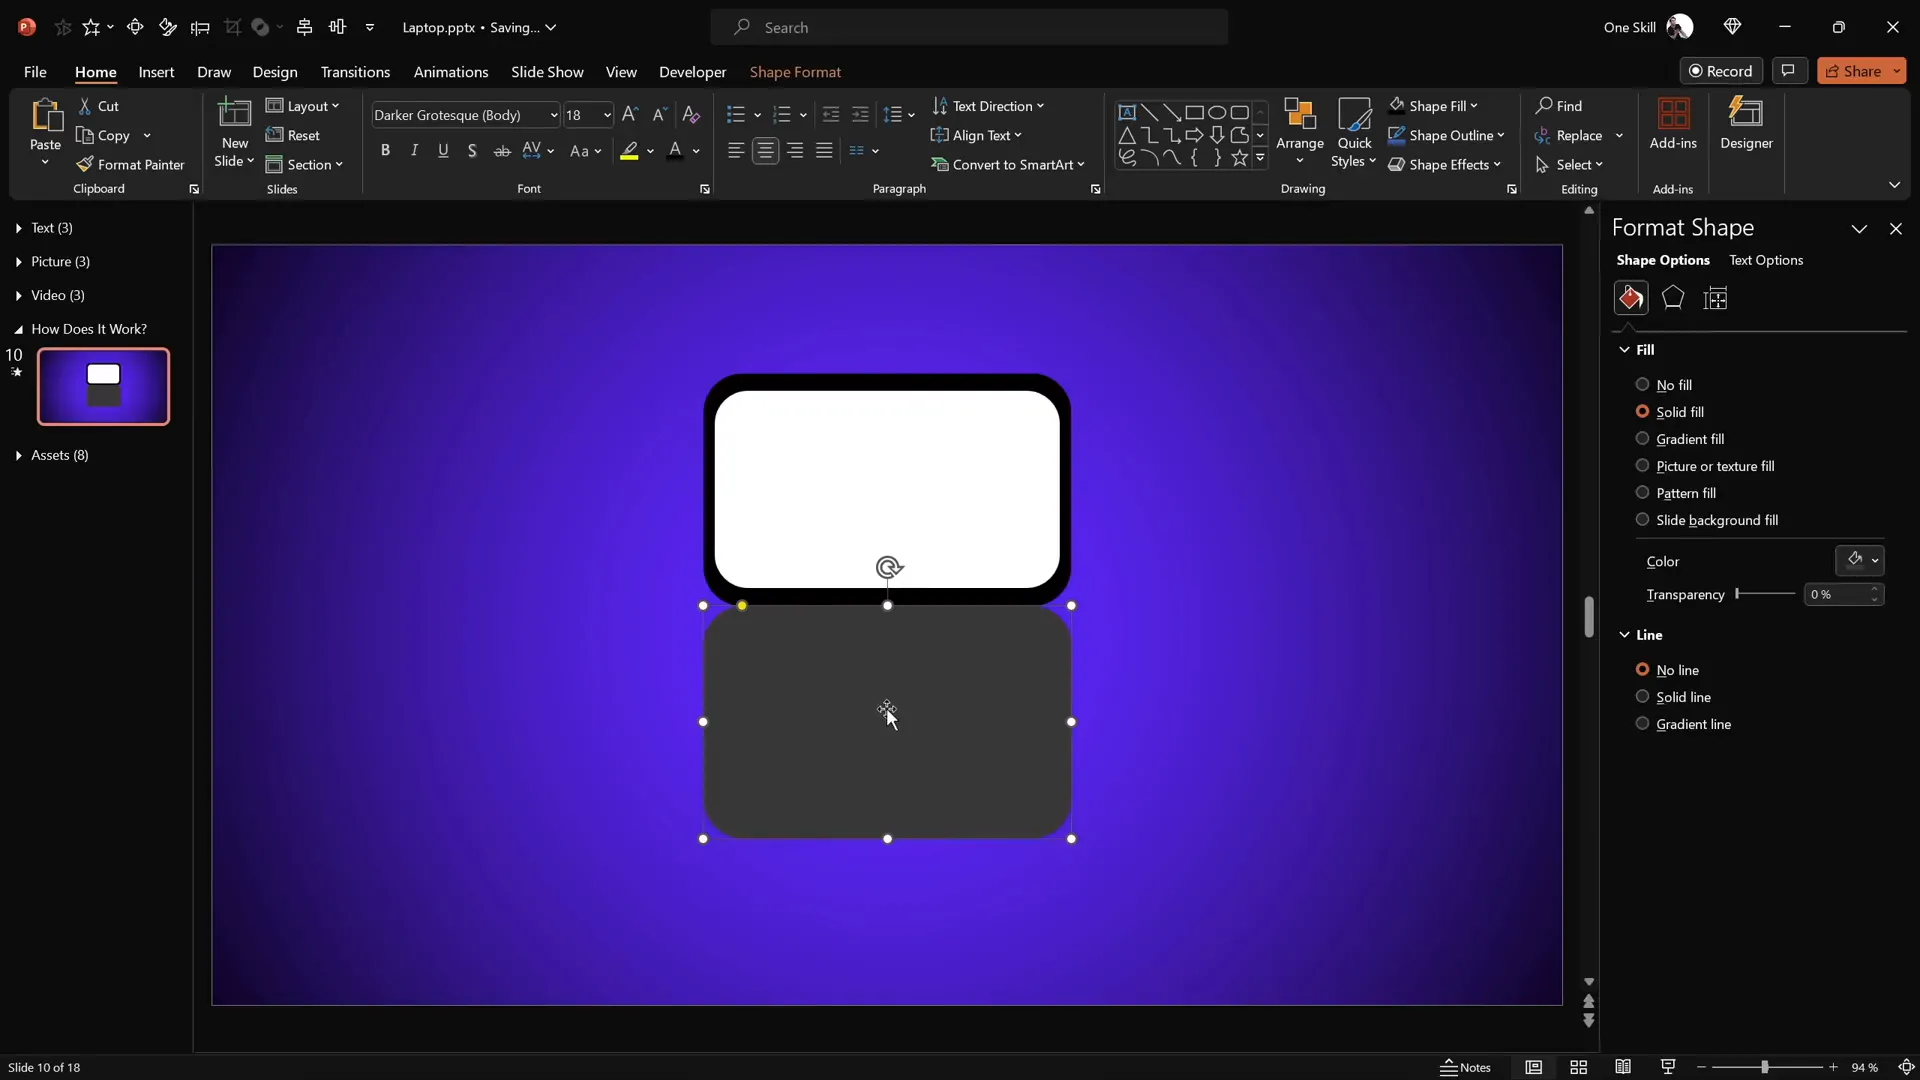
Next, we’ll build the laptop from simple shapes. The laptop consists of two major parts: the keyboard (base) and the screen. Here’s how to create them:
Step 1: Create the Keyboard (Base)
- Go to Insert > Shapes and select the Rounded Rectangle tool.
- Draw a rounded rectangle in the center of your slide. This will represent the laptop’s keyboard.
- Format the shape:
- Fill color: dark gray (choose a solid dark gray shade)
- No outline
- No transparency
Step 2: Create the Screen
- Duplicate the keyboard shape by holding
Ctrl + Shiftand dragging it upwards. - Change the fill color of this new shape to black.
- Position this black rectangle so that it aligns perfectly touching the top edge of the keyboard shape.
- Duplicate the black screen shape (
Ctrl+ drag), change the fill color to white, and resize it slightly smaller to fit inside the black screen shape. - Align the white shape in the center of the black screen shape to create a border effect.
- Select both the black and white screen shapes and group them (
Ctrl + G), naming this group “Screen.”
Mastering 3D Rotation and Custom Rotation Centers
Now comes the magic that makes the laptop open animation possible: 3D rotation with a custom rotation center. PowerPoint defaults to rotating shapes around their center, but to simulate the laptop opening, we want the keyboard and screen to rotate around their connecting edges.
Applying 3D Perspective Rotation
To start:
- Select the keyboard shape.
- Go to Format Shape > 3D Rotation.
- Choose any perspective preset under the “Perspective” section (e.g., “Perspective Relaxed Moderately”).
- Click and drag the Y-rotation handle to see the keyboard flip.
At this point, the keyboard rotates around its center, which is not what we want.
Creating a Custom Rotation Center
To fix this:
- Reset the rotation.
- Duplicate the keyboard shape and position the copy so that it touches the bottom edge of the original keyboard shape.
- Select both shapes and group them.
- Now, when you apply the same 3D perspective rotation preset, you’ll see the keyboard rotates around the edge where the two shapes meet.
- Hide the duplicate shape by selecting it and setting its fill to “No Fill” so only the original keyboard shape is visible.

This technique effectively creates a new rotation axis, essential for a realistic laptop opening effect.
Adding Depth and Bevel Effects for Realism
Flat shapes can look unrealistic, so adding 3D depth and bevel effects enhances the laptop’s look.
Adding Depth
- Select the keyboard shape.
- Go to Format Shape > 3D Format.
- Under “Depth,” add about 10 points to give the keyboard thickness.
Softening Edges with Bevels
- Still in the 3D Format options, scroll to “Bottom Bevel.”
- Set the width and height to 5 points each to create rounded edges.
Rotate the keyboard shape slightly to preview the rounded edges and depth effect.
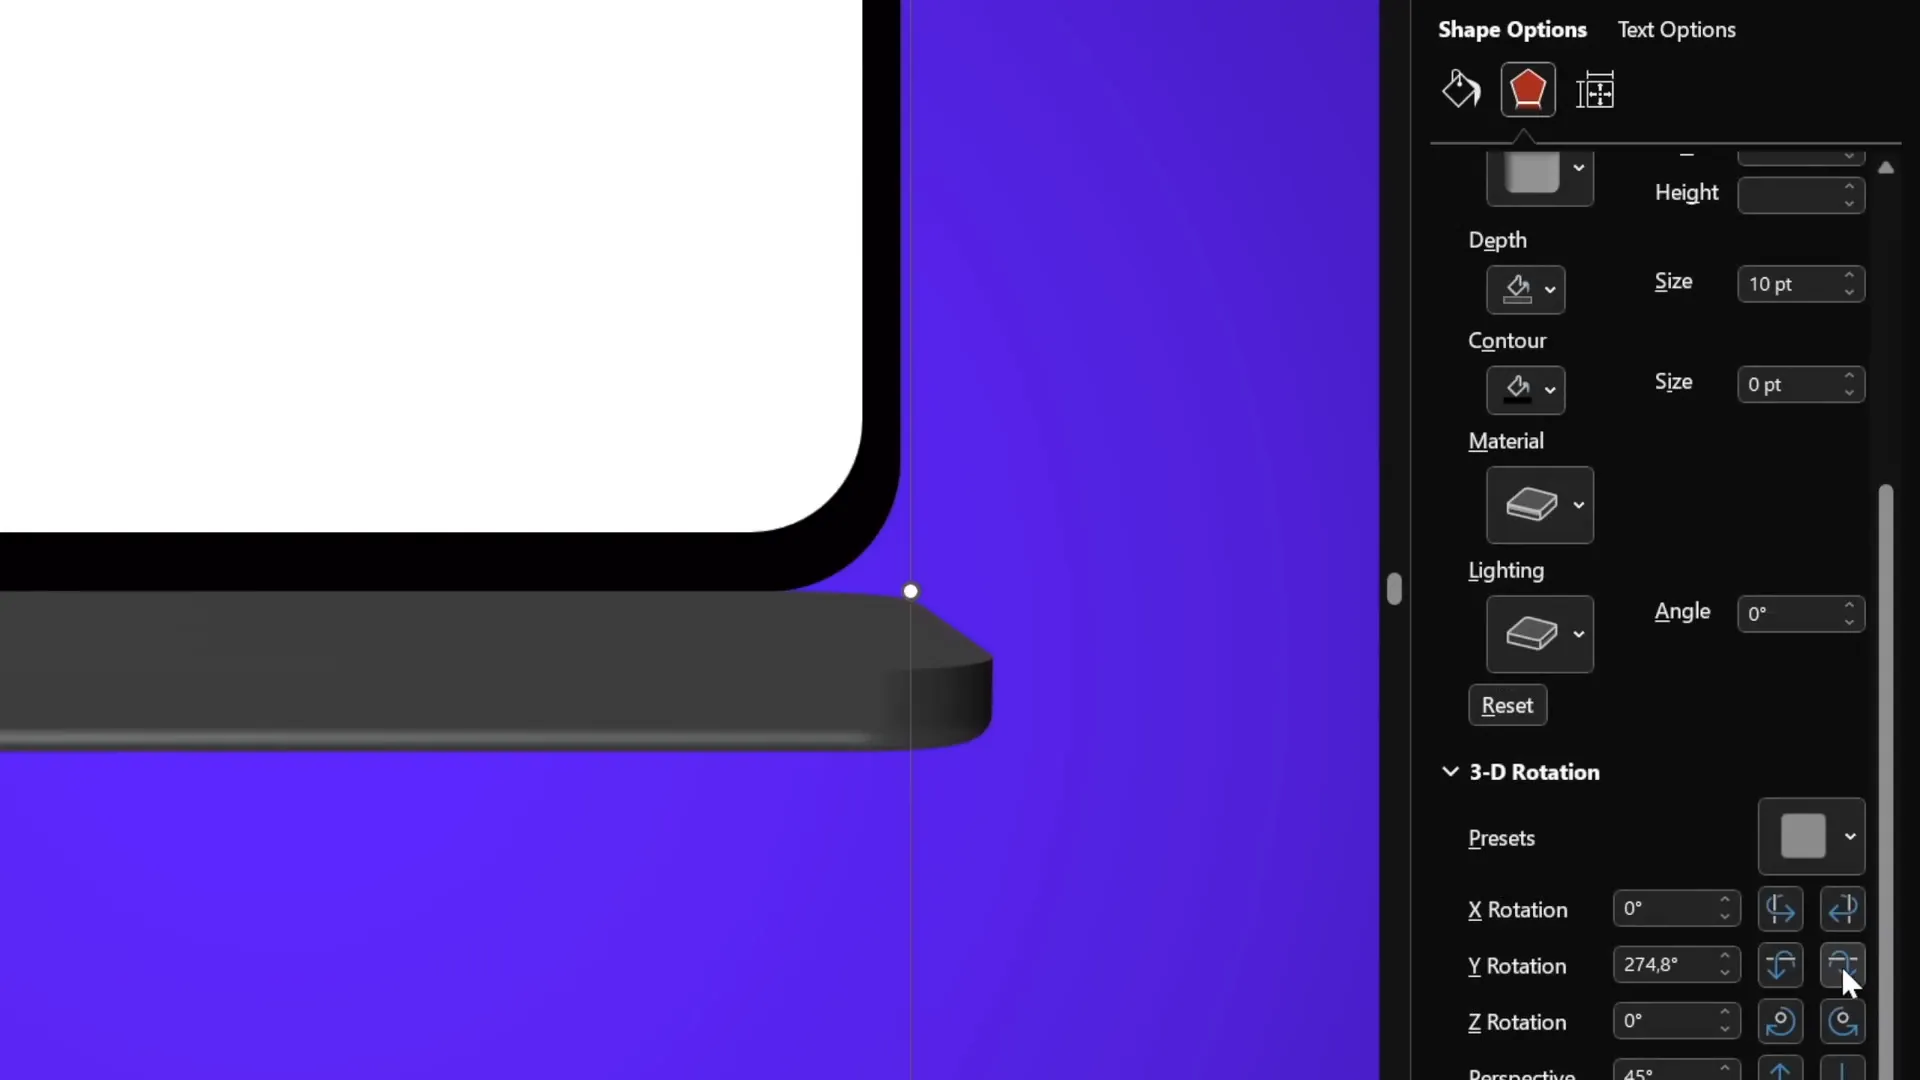
Repeat the same depth and bevel steps for the screen shapes to maintain consistency.
Aligning and Closing the Laptop Animation
Proper alignment ensures the laptop looks natural and centered on the slide.
Aligning the Laptop Parts
- Turn on slide guides to help with alignment.
- Select the screen group and align it to the center of the slide.
- Select the keyboard group and align it similarly to the center.
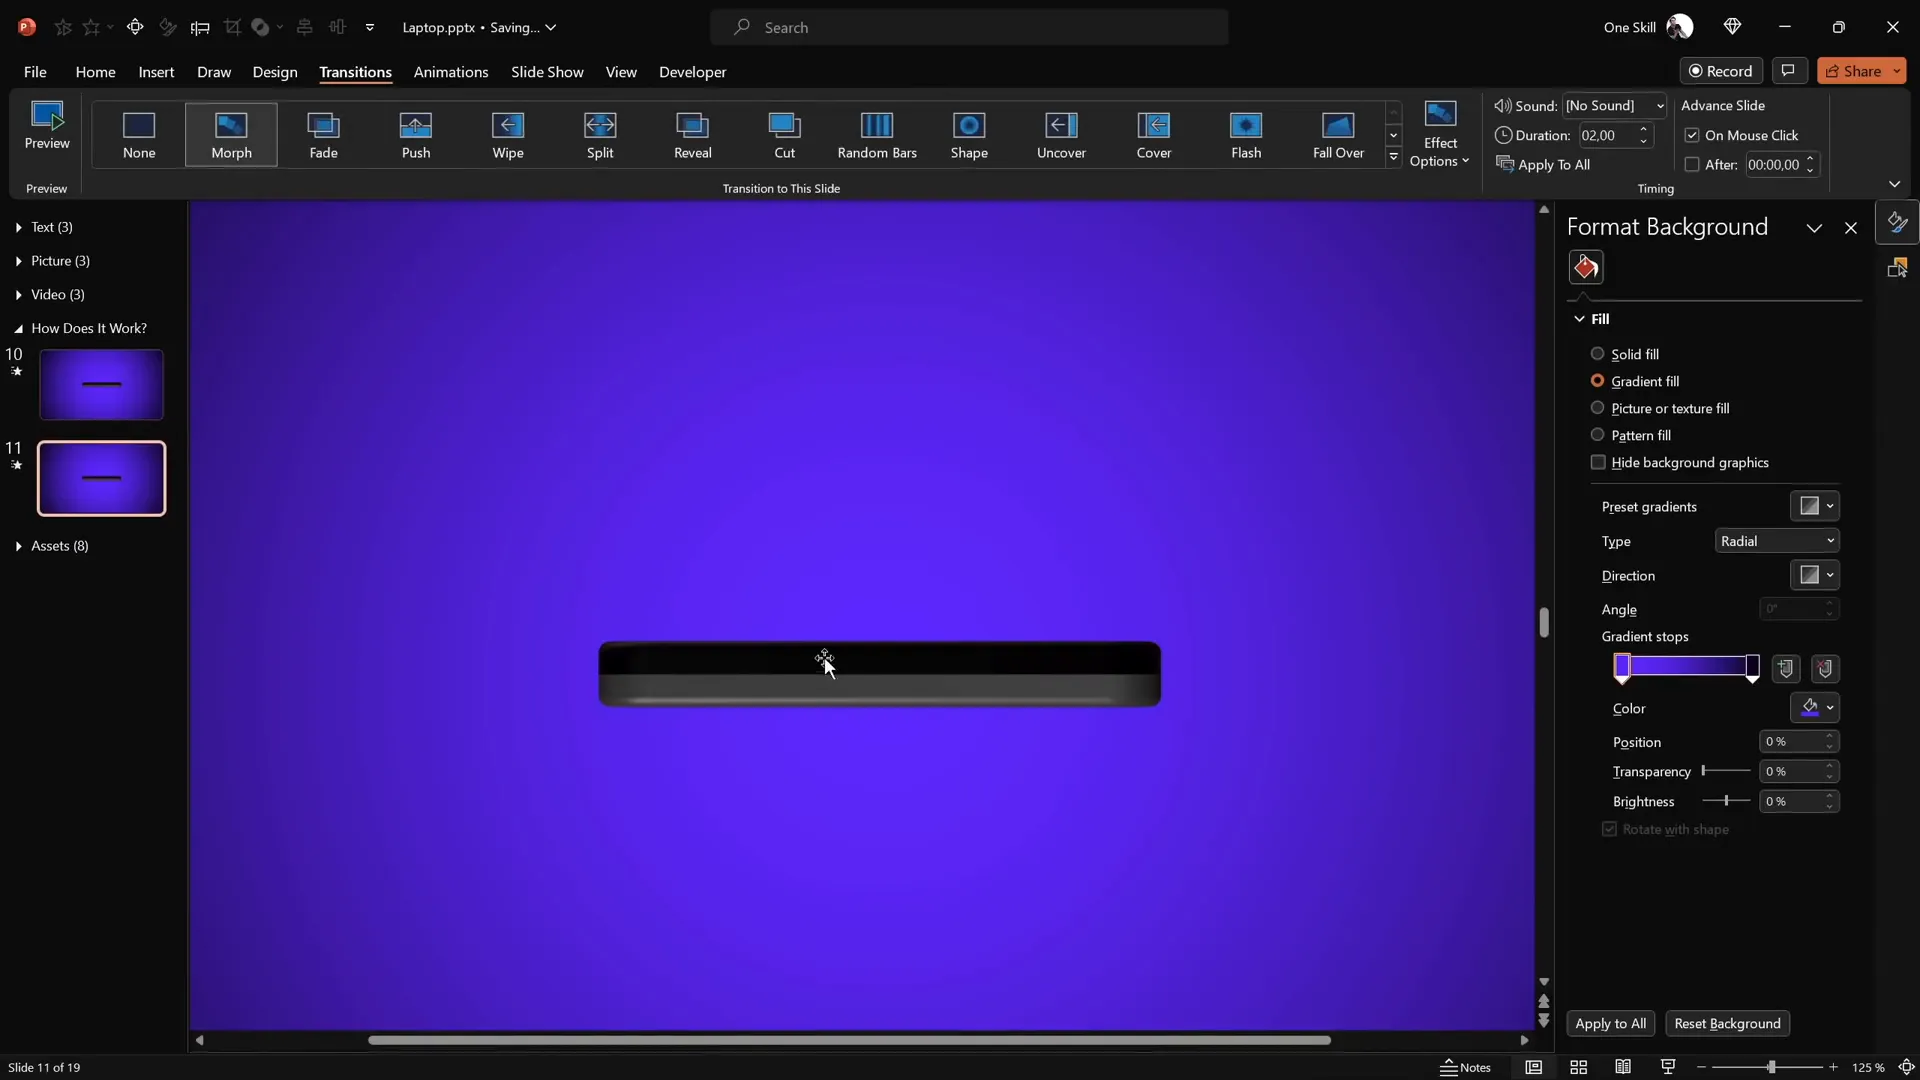
Setting the Laptop to Closed Position
To simulate a closed laptop:
- Set the screen’s Y-rotation to 90 degrees (rotated back flat).
- Set the keyboard’s Y-rotation to 270 degrees (rotated downwards).
Now the laptop appears fully closed on the slide.
Animating with Morph Transition
PowerPoint’s Morph transition does the heavy lifting to create smooth animations between slides.
Applying Morph Transition
- Duplicate the slide with the closed laptop.
- On the duplicate slide, set the Morph transition with a 2-second duration.
- Set the screen’s Y-rotation to 0 degrees (open position).
- Set the keyboard’s Y-rotation to 290 degrees (slightly lowered to appear open).
- Run the slideshow and watch the laptop smoothly open between slides.

This transition creates a professional and eye-catching laptop opening animation with minimal effort.
Incorporating a Realistic Laptop Photo
While simple shapes are great for basic animations, you can enhance realism by using a photo of a laptop.
Steps to Use a Laptop Photo
- Find a high-quality top-view laptop photo (e.g., from Freepik).
- Insert the photo onto your slide.
- Use the rounded rectangle shape to cover the keyboard area.
- Select both the photo and shape and use Merge Shapes > Intersect to cut out just the keyboard portion.
- Repeat for the screen portion if needed.
Alternatively, prepare the cut-out shapes in advance for more precision.

Setting Rotation Center for Photo Shapes
To animate these photo shapes, create a transparent rectangle matching the keyboard’s dimensions and group it with the keyboard photo to set a new rotation center.
Apply the same 3D rotation and depth effects as with the basic shapes.

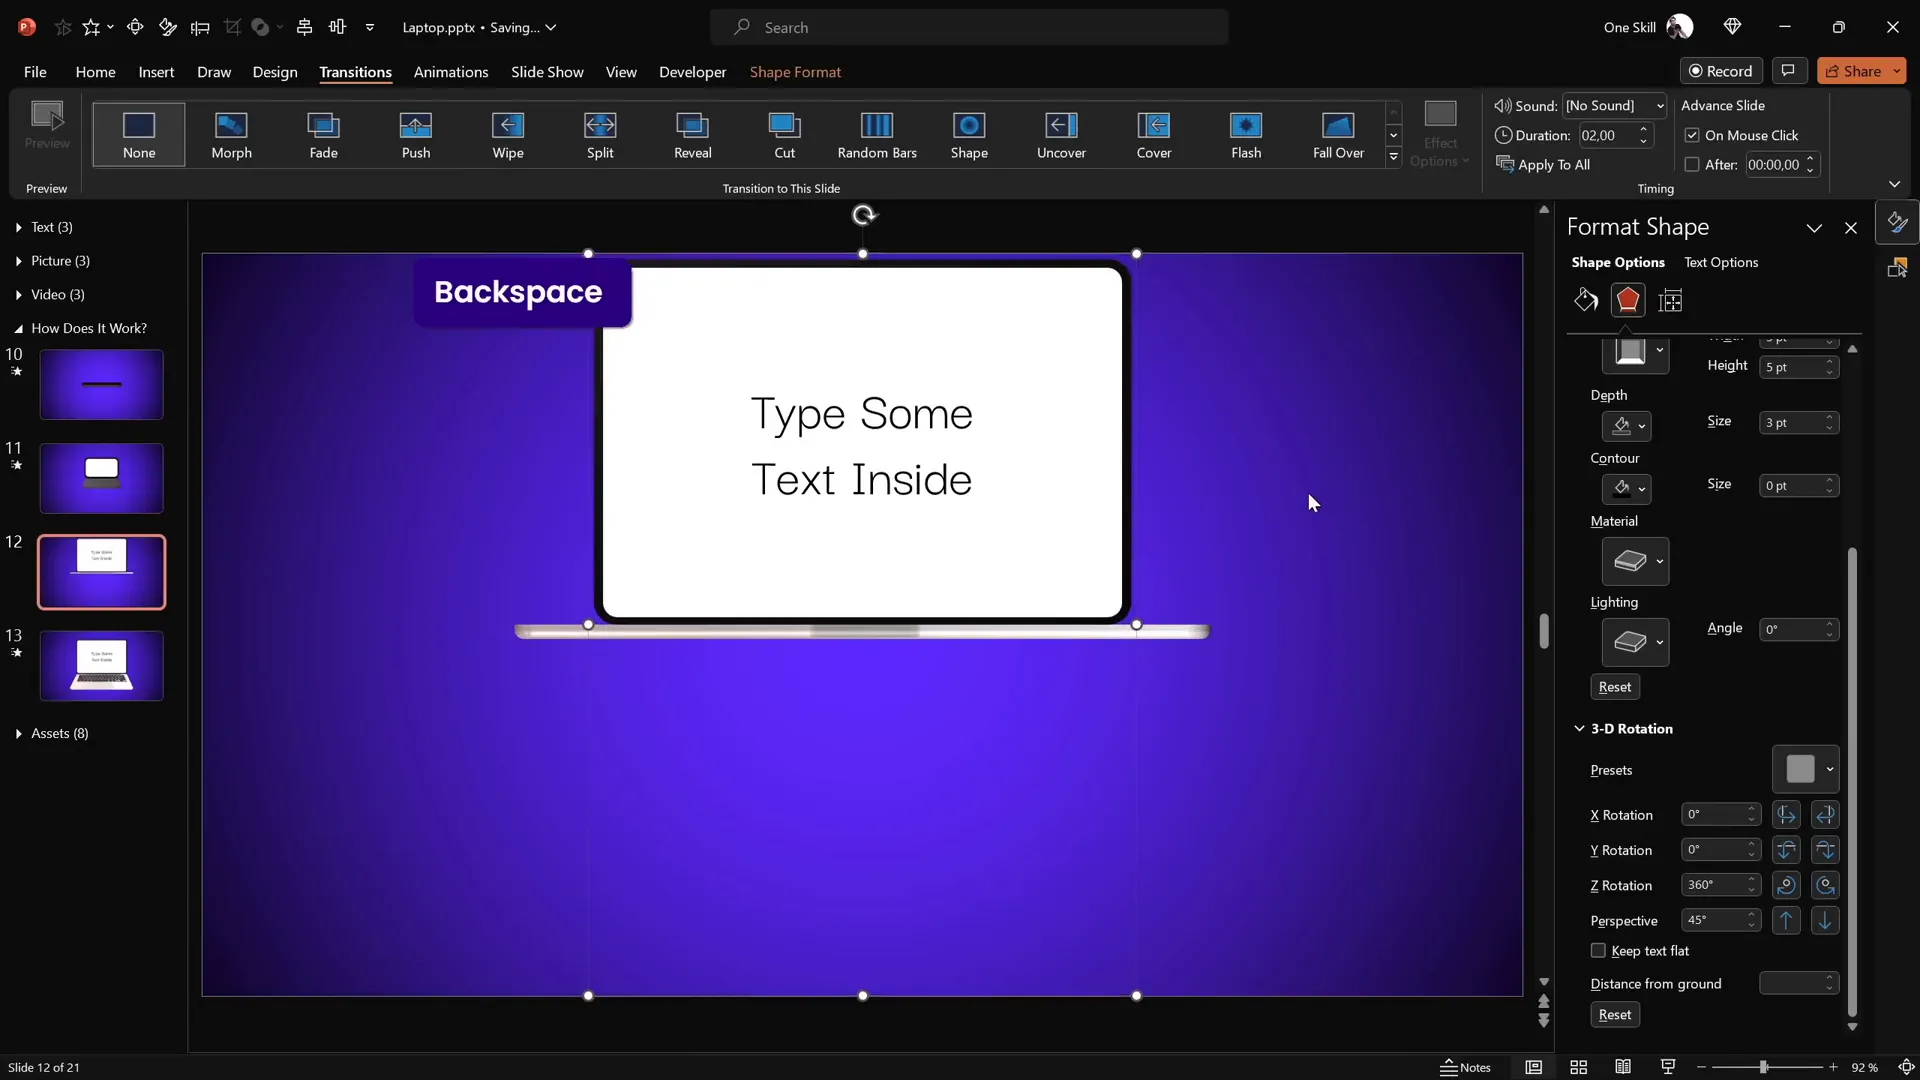
Inserting Custom Text into the Laptop Screen
One of the best features of this animation is the ability to insert your own text into the laptop screen, making it highly customizable.
How to Add Text
- Double-click the white rounded rectangle shape that forms the laptop screen.
- Type your desired text directly inside the shape.
- Format the text color and font as needed (e.g., white font for contrast).
- Copy the text and paste it onto the corresponding shape on the other slide to maintain consistency during animation.
This allows for dynamic presentations where the laptop screen content changes seamlessly with the opening animation.
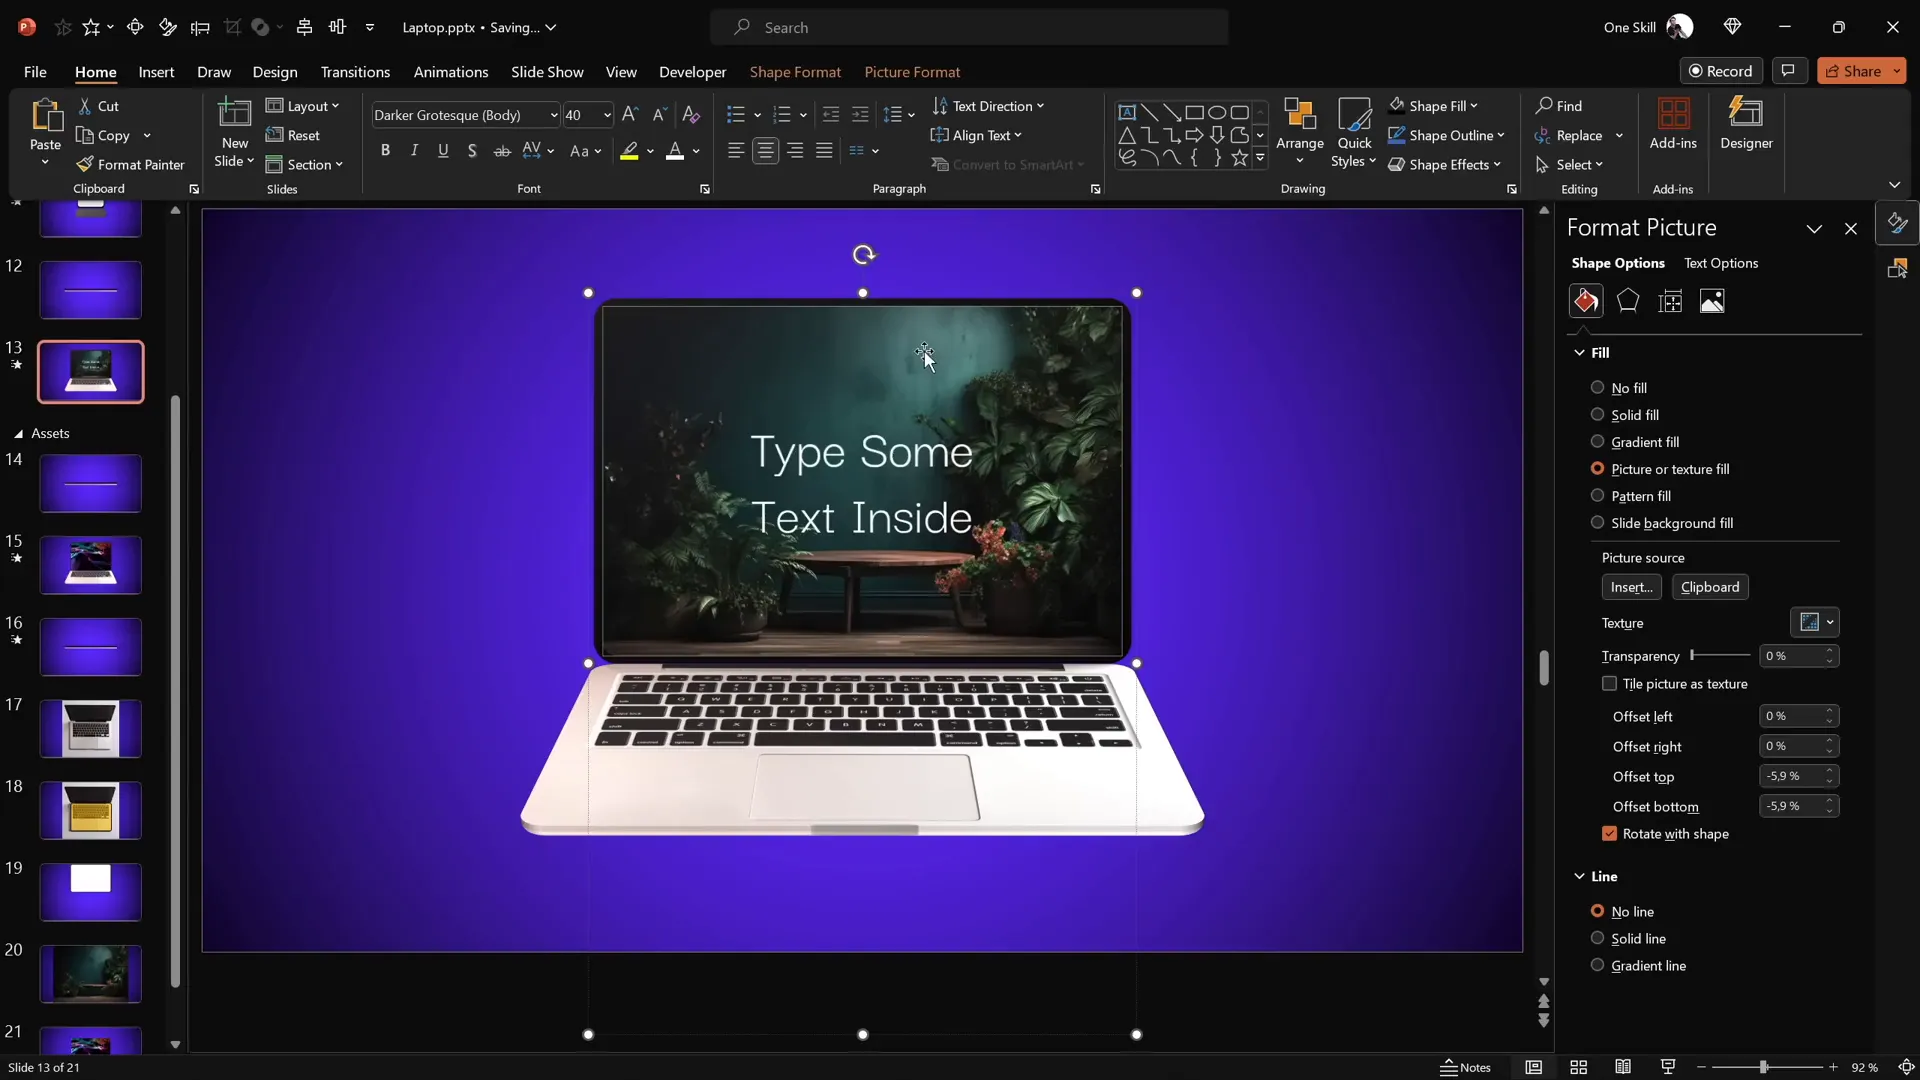
Embedding Pictures into the Laptop Screen
You can also insert images into the laptop screen to showcase photos, graphics, or product shots.
Steps to Embed Pictures
- Copy an image from your assets or external source.
- Select the white screen shape inside the laptop.
- Go to Format Shape > Fill > Picture or texture fill.
- Click Clipboard to insert the copied image as the fill.
- Adjust the picture’s position and scale as needed.
- Copy the fill style and paste it onto the corresponding screen shape on the other slide.
Adding Video Playback Inside the Laptop Screen
For an even more engaging presentation, you can embed videos that play inside the laptop screen.
How to Insert Video
- Go to Insert > Video > Stock Videos (available in PowerPoint 365).
- Select a video and insert it onto your slide.
- Crop and resize the video to exactly fit the white laptop screen shape.
- Align the video and shape centrally.
- Select both the video and the screen shape.
- Use Merge Shapes > Intersect to crop the video perfectly to the screen area.
- Copy the video and paste it as a picture fill into the white screen shape to serve as a static preview.
- Paste the actual video on top of the screen shape and align precisely.
Adding Animations to the Video
- Add a Fade animation to the video with a 1-second duration, starting with the previous animation.
- Set the video to start playing automatically with the previous animation.
This method creates a seamless video playback effect within the laptop animation.
Conclusion and Next Steps
Congratulations! You now know how to create a fully customizable 3D laptop open animation in PowerPoint using simple shapes, photos, and videos. This animation technique leverages PowerPoint’s 3D rotation, merge shapes, and morph transition features to create a professional and visually appealing effect without the need for complex 3D modeling software.
By mastering these skills, you can enhance your presentations with dynamic visuals that engage your audience and make your content stand out. Whether you want to showcase text, images, or videos inside the laptop screen, this tutorial provides you with the building blocks to do so creatively and effectively.
The world of PowerPoint presentation skills is vast and full of possibilities. Keep exploring, practicing, and experimenting with animation techniques to continually improve your presentation prowess.
For those interested in a more structured path to mastering PowerPoint animations, consider exploring dedicated courses like the Parpawn Animation Mastery course mentioned in the tutorial, which provides a step-by-step guide to becoming a PowerPoint animation pro.
Frequently Asked Questions (FAQ)
1. Is this laptop animation really made in PowerPoint?
Yes! This animation is created entirely in Microsoft PowerPoint 365 using basic shapes, 3D rotation, and morph transition effects. No external 3D modeling software is needed.
2. Can I customize the text and images inside the laptop screen?
Absolutely. The laptop screen is a shape where you can type text, insert pictures, or even embed videos, making the animation highly customizable for your presentation needs.
3. What PowerPoint version do I need to create this animation?
You will need Microsoft PowerPoint 365 or a recent version that supports 3D rotation and Morph transition features.
4. How do I make the laptop open and close smoothly?
By duplicating slides and applying the Morph transition with adjusted 3D rotation angles on the keyboard and screen shapes, PowerPoint creates a smooth opening and closing animation.
5. Can I use my own photos or videos in the laptop screen?
Yes, you can insert your own images or videos by filling the laptop screen shape with pictures or embedding videos and cropping them to fit perfectly.
6. How do I create a custom rotation center for shapes?
Duplicate the shape and position the duplicate adjacent to the original to extend its bounding box. Group them to shift the rotation axis to the desired edge.
7. Is the laptop animation compatible with all PowerPoint presentations?
Yes, but make sure your PowerPoint version supports the required features (3D rotation, Morph transition). Also, test the animation on the presentation device to ensure smooth playback.
8. Can I change the slide background or colors?
Yes, the gradient background is optional. You can customize colors and backgrounds to fit your branding or presentation theme.
9. How can I add more depth or realism?
Utilize 3D format options like depth and bevels to add thickness and rounded edges to shapes, making the laptop look more three-dimensional and realistic.
10. Where can I learn more about advanced PowerPoint animations?
Consider courses like Parpawn Animation Mastery or explore online tutorials and communities dedicated to PowerPoint animation skills.


