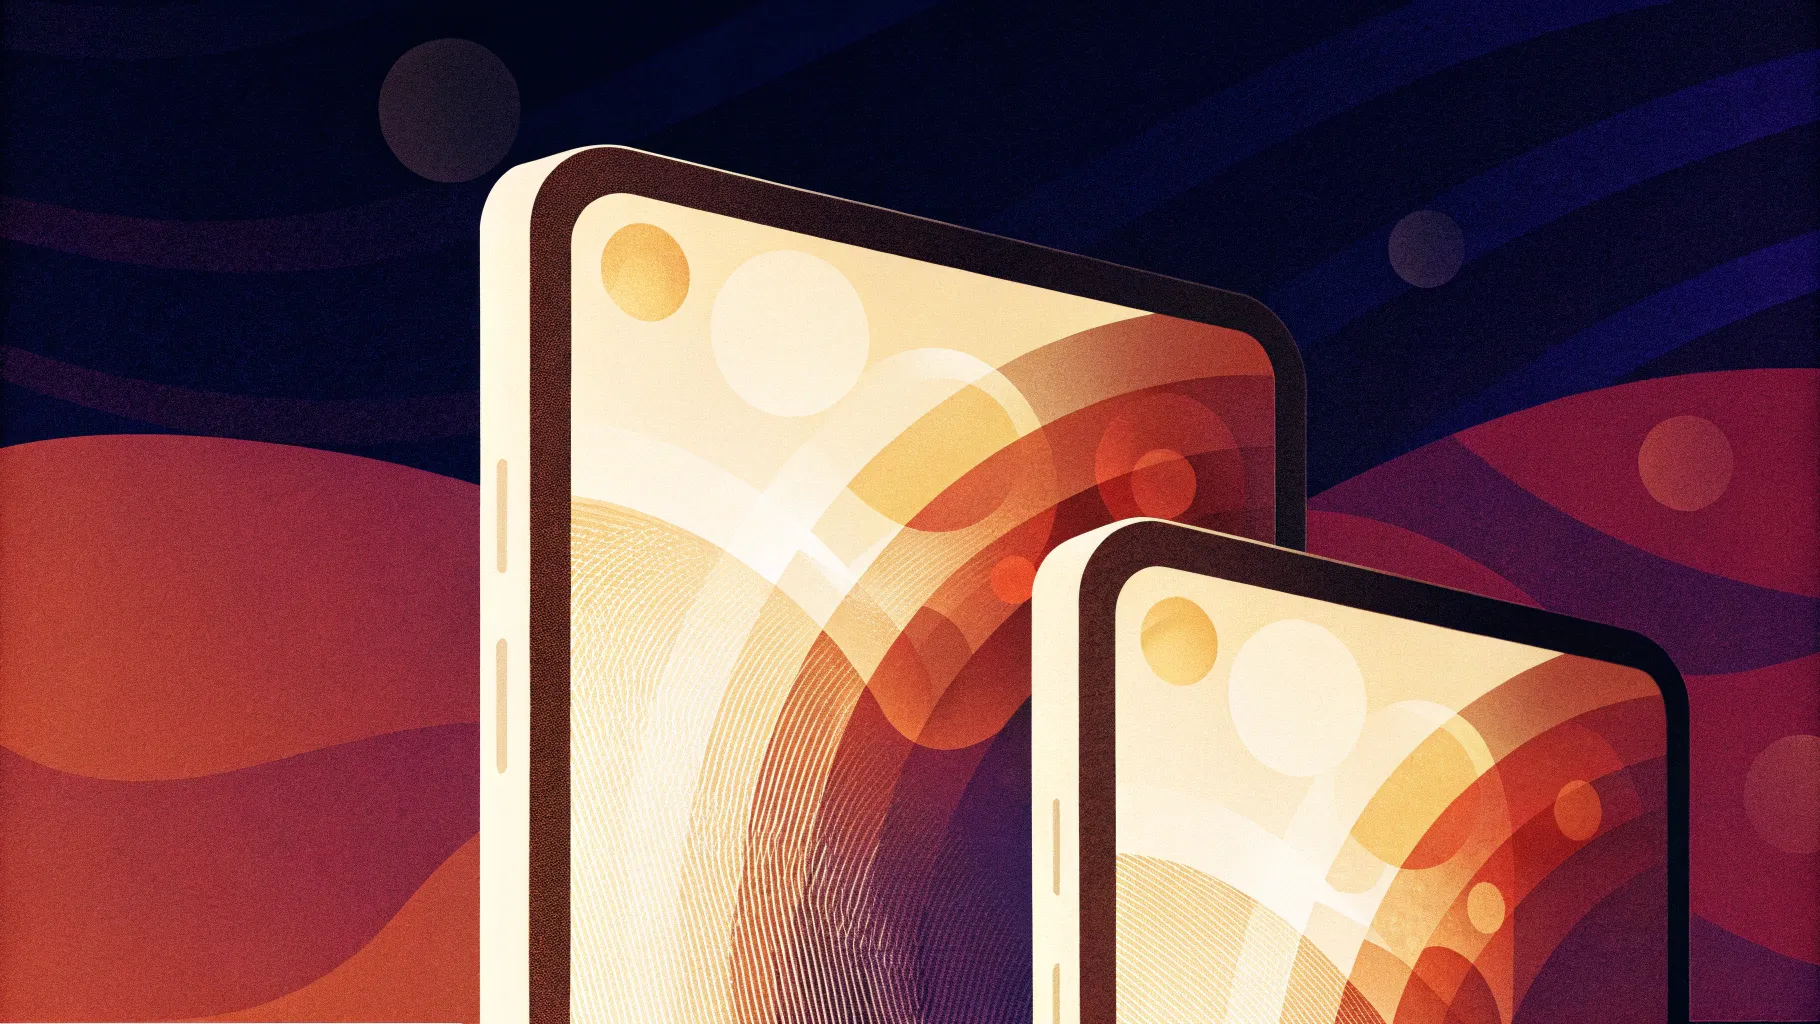
If you’re looking to elevate your PowerPoint presentation skills and impress your audience with modern, sleek designs, mastering the glassmorphic effect is a fantastic way to start. This effect, known for its frosty, translucent look combined with smooth animations, can make your slides pop with style and professionalism. In this comprehensive tutorial, we’ll walk you through creating an animated glassmorphic effect in PowerPoint using simple tools and techniques. Whether you’re a beginner or an advanced user, this guide will help you add a cutting-edge aesthetic to your presentations.
PowerPoint has evolved far beyond just bullet points and static slides. With features like gradient fills, picture effects, and morph transitions, you can create dynamic, visually stunning presentations that keep your audience engaged. Today, we’ll explore how to combine these features to craft a captivating animated glassmorphic effect step-by-step.
Table of Contents
- Understanding the Glassmorphic Effect
- Designing the Slide: Text and Circles
- Applying Picture Effects for Texture and Atmosphere
- Creating the Frosty Glassmorphic Circle
- Animating with Morph Transition
- Adding the Glow Effect for Extra Flair
- Tips for Enhancing Your Glassmorphic Design
- Frequently Asked Questions (FAQ)
- Conclusion
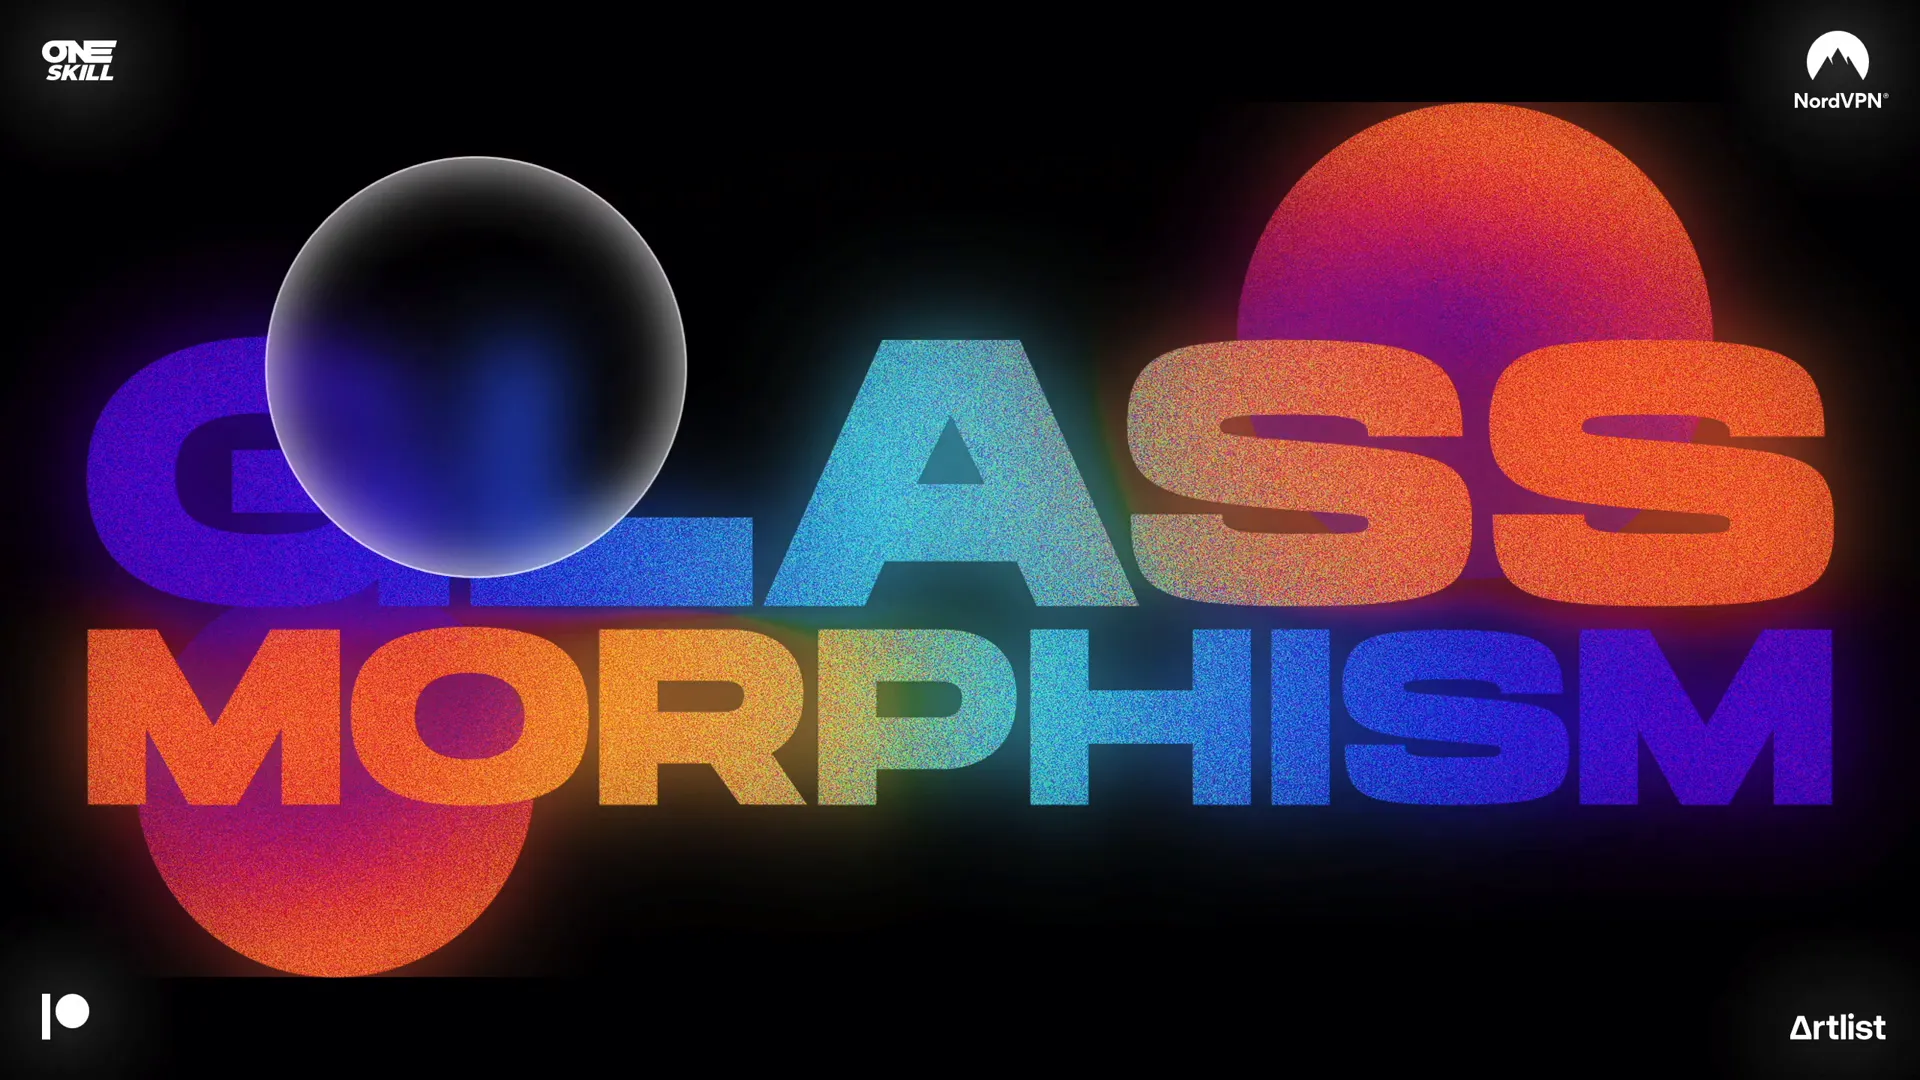
Understanding the Glassmorphic Effect
Glassmorphism is a design trend characterized by translucent, frosted glass-like surfaces layered over colorful backgrounds. It combines transparency, blur, and subtle shadows to create a depth effect that feels both modern and elegant.
In PowerPoint, achieving this effect involves layering shapes, applying gradient fills, and using picture effects such as blur and grain. The key is to mimic the frosty, semi-transparent quality of glass and animate it smoothly for an eye-catching presentation.
Why use glassmorphism in your presentations?
- Visual appeal: It adds a sophisticated, tech-savvy look.
- Focus: The translucent overlays help emphasize key content without overwhelming the viewer.
- Modern design: It keeps your presentations fresh and up-to-date with design trends.
Designing the Slide: Text and Circles
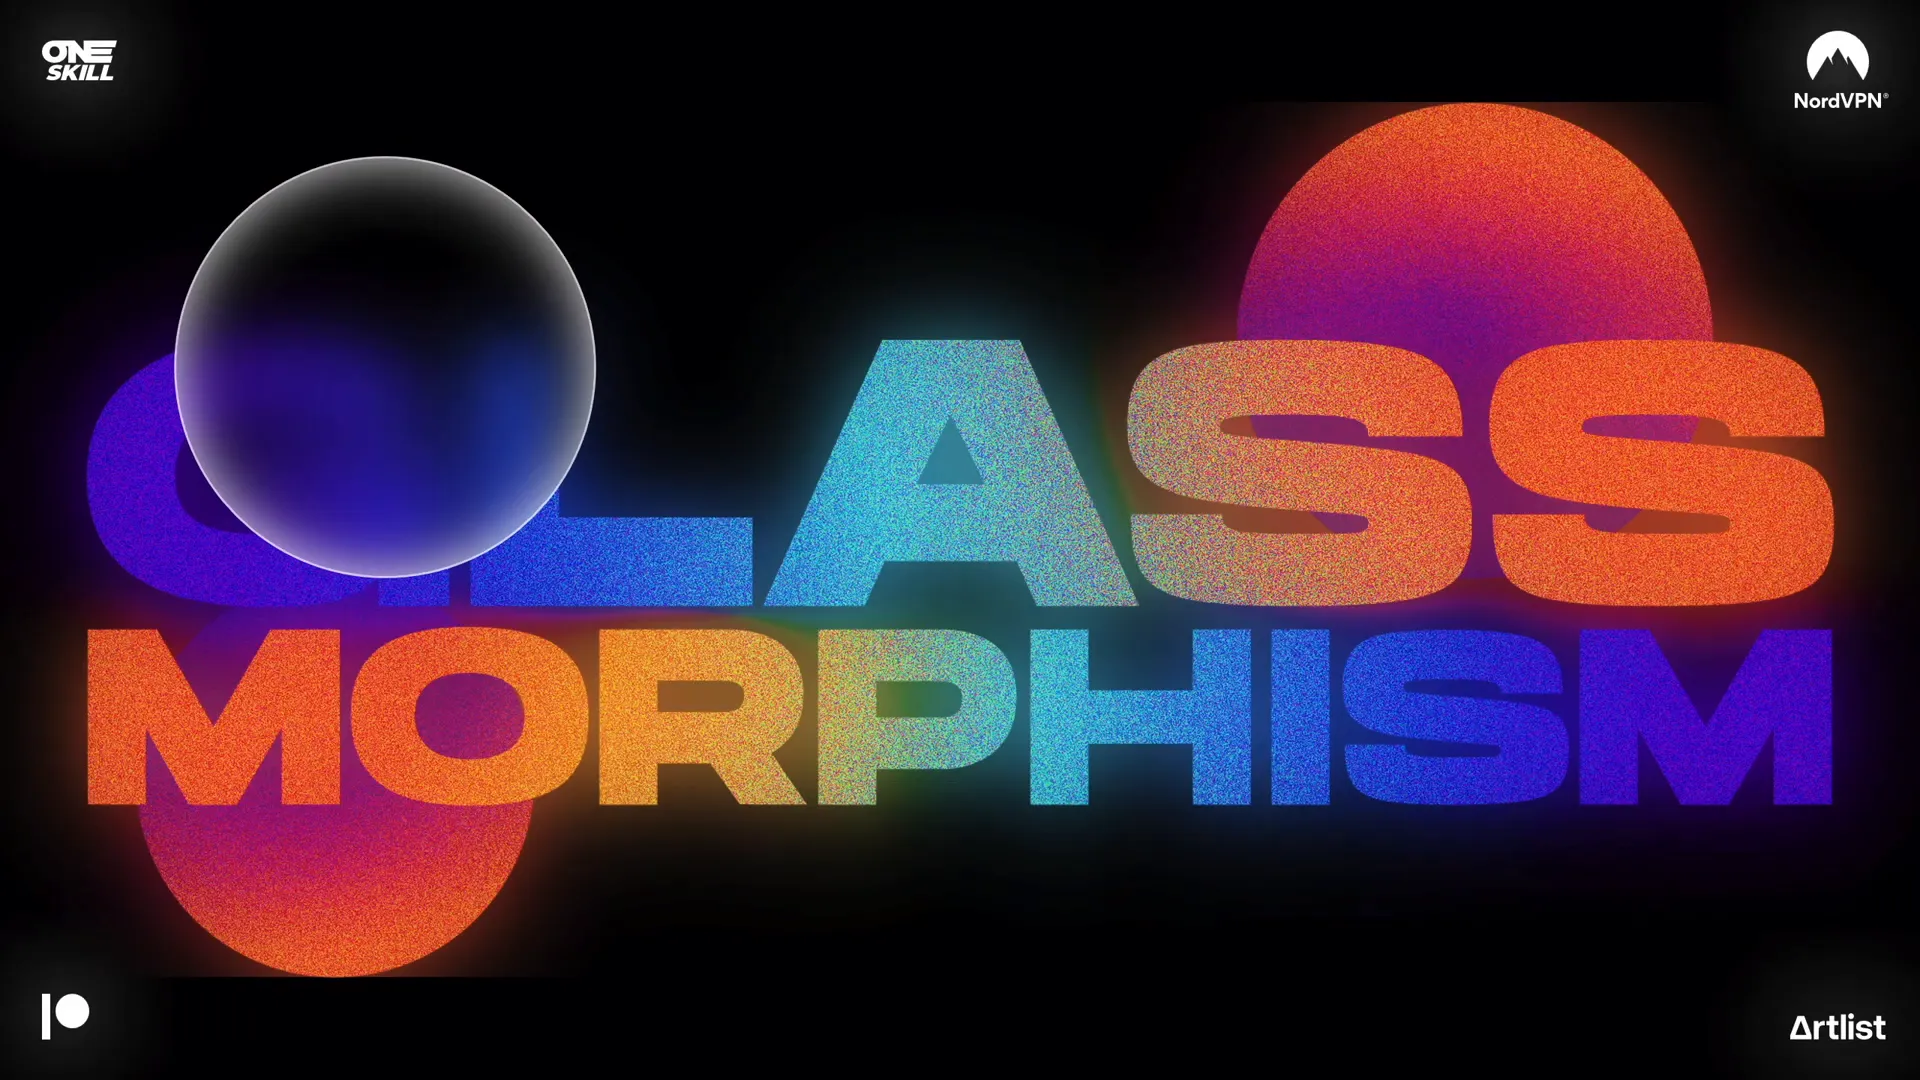
The foundation of the glassmorphic effect in PowerPoint is a simple slide design combining text and circular shapes filled with gradients. Here’s how to start:
1. Insert Text Boxes
- Insert two text boxes on your slide. The example uses a bold, stylish font called Hanson, which is free to download (link available in the video description).
- Set the font sizes: the first text box uses a large size of 190 pt, and the second one is slightly smaller at 125 pt.
- Fill the text with linear gradient colors to create a vibrant, colorful look:
- The top text box uses a gradient with four color stops.
- The bottom text box uses a gradient with five color stops for an even richer blend.
To speed up formatting, use PowerPoint’s Format Painter shortcut: Ctrl + Shift + C to copy the style, and Ctrl + Shift + V to paste it onto another text box.
2. Insert and Style Circles
- Draw two perfect circles by holding down the Shift key while dragging the shape.
- Apply a radial gradient fill to these circles. The radial gradient uses two color stops with specific hex color codes and transparency values to create a soft, glowing effect.
- Rotate the circles slightly and position them behind the text boxes.
- Duplicate the circle and place the second copy elsewhere on the slide for balance.
This combination of colorful text and glowing circles forms the core visual of the glassmorphic slide.
Applying Picture Effects for Texture and Atmosphere
Once the text and circles are in place, the next step is to convert the entire design into a picture and apply artistic effects to create texture and atmosphere.
Why convert to a picture?
Converting the grouped elements into a picture allows you to apply picture-specific effects such as film grain, saturation boosts, and color temperature adjustments, which are not available for individual shapes or text boxes.
Steps to apply picture effects:
- Select all elements (text boxes and circles) by holding Shift and clicking each one.
- Cut the selection (
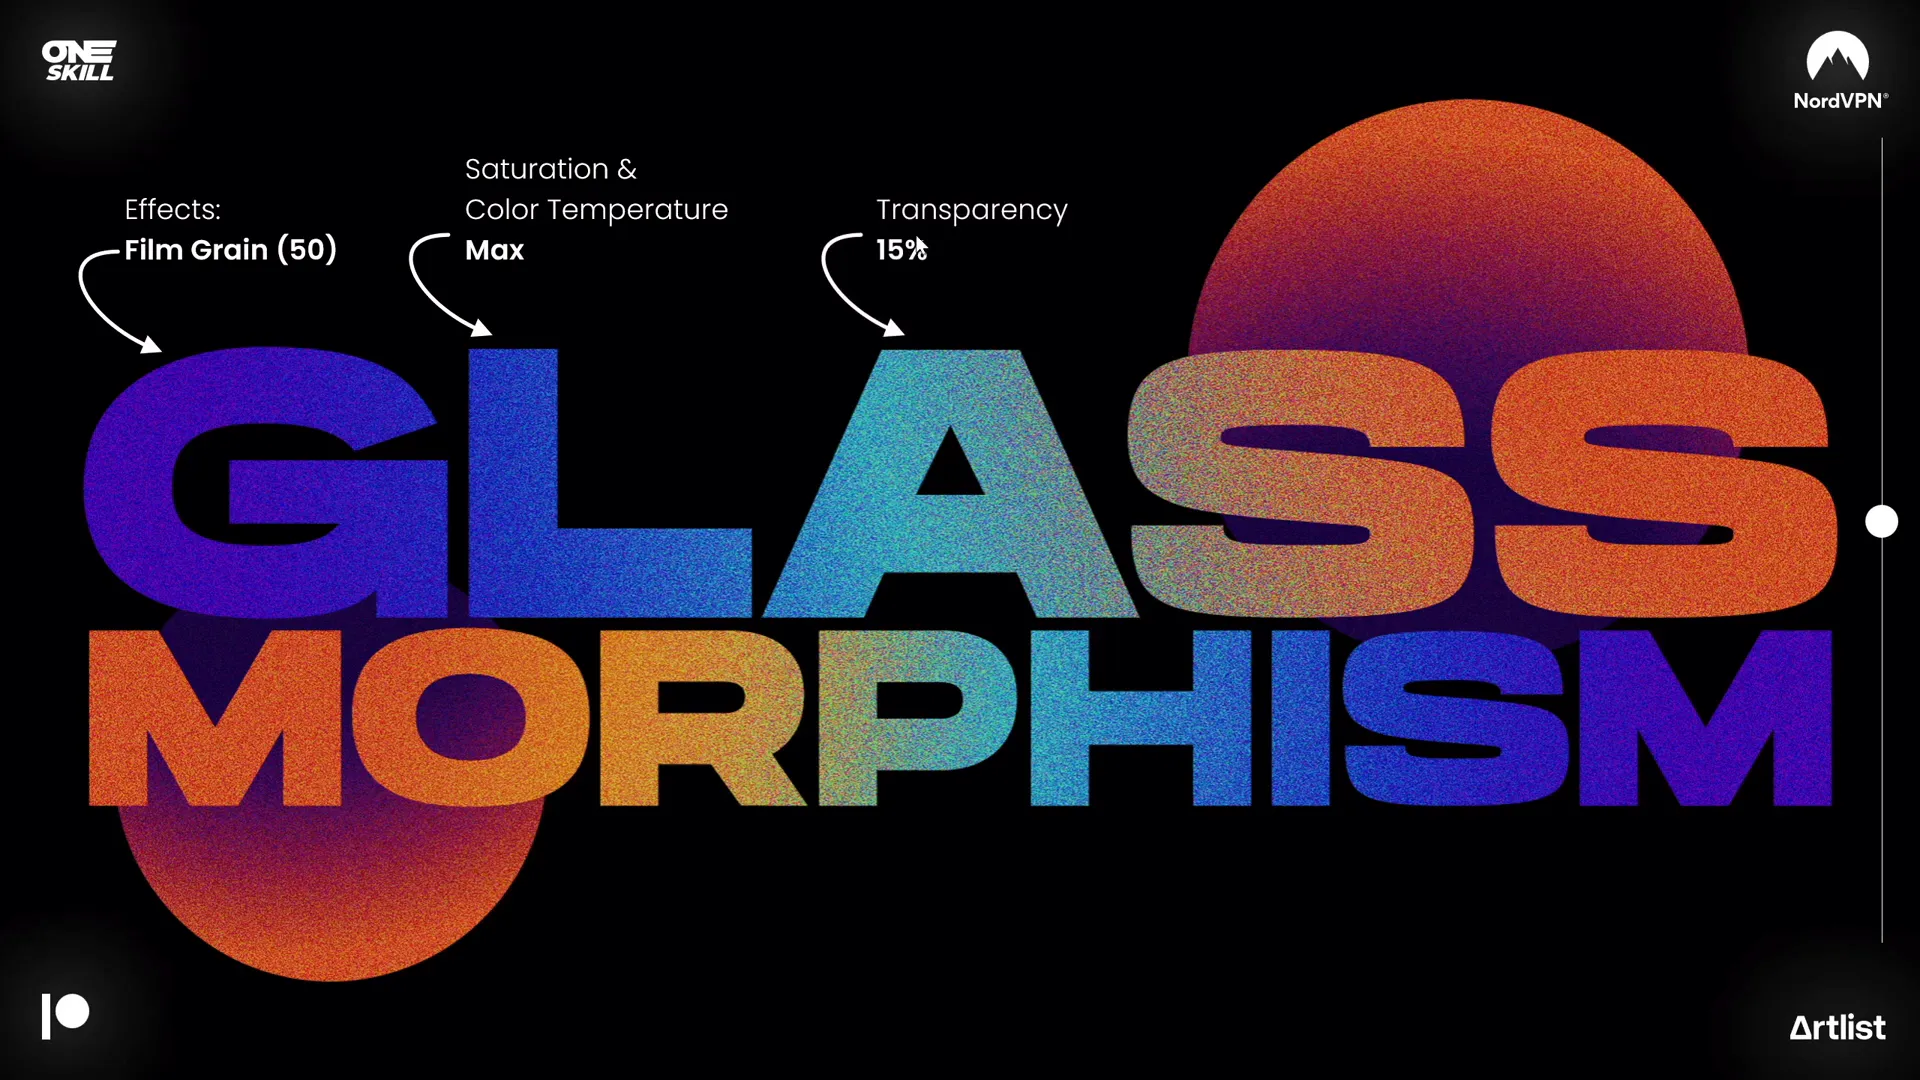
Ctrl + X) and then paste it back as a picture (Ctrl + V), making sure to paste as an image. - Go to the Artistic Effects menu and apply the Film Grain effect.
- Adjust the grain size (around 50) to add a subtle texture.
- Boost the saturation and color temperature to the maximum to enhance colors.
- Add a little transparency to soften the effect so it doesn’t look too intense.
This process adds a rich, grainy texture and vibrant colors that set the stage for the glassmorphic effect.
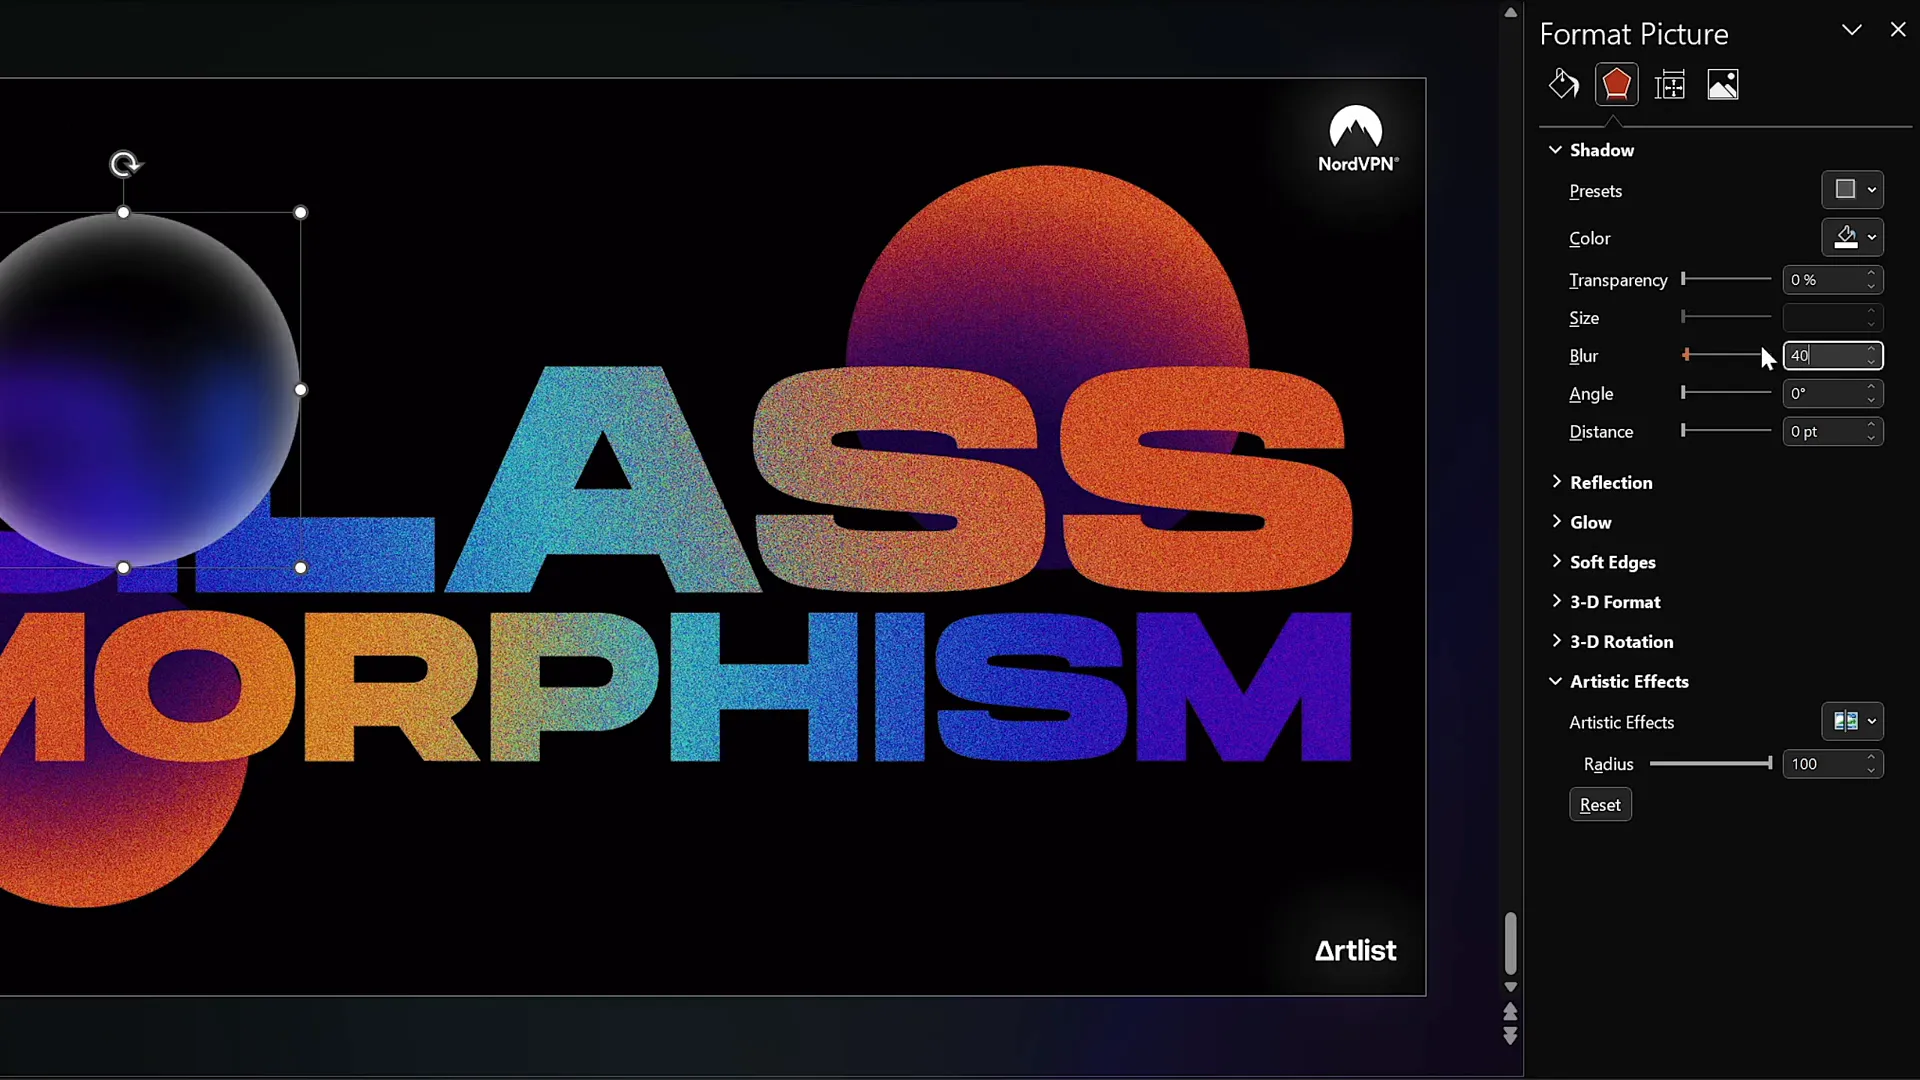
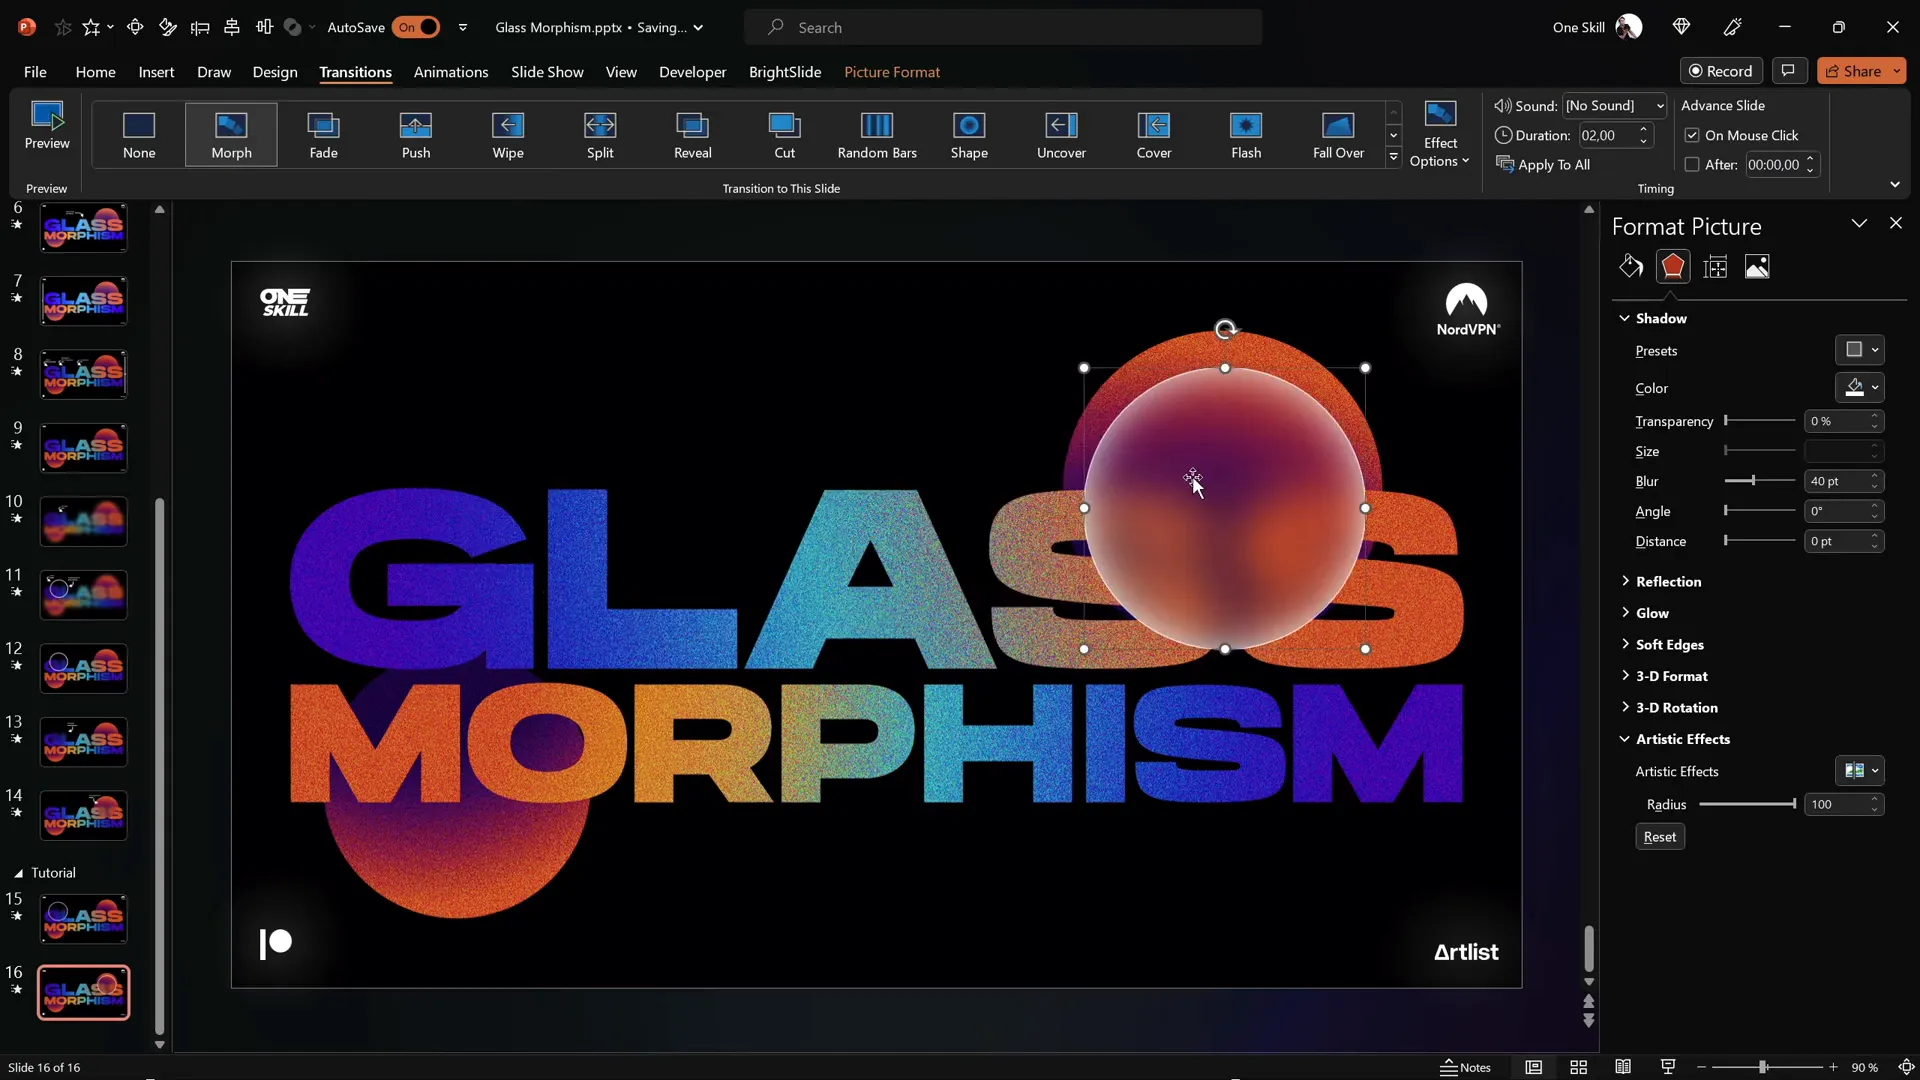
Creating the Frosty Glassmorphic Circle
Now that you have a picture with artistic effects, it’s time to create the iconic frosted glass circle that will be animated.
Steps to create the glassmorphic circle:
- Save the current slide as a picture. You can do this quickly by:
- Running the slide show and taking a screenshot (Print Screen key or Windows + Shift + S).
- Paste the screenshot back onto the slide and center it perfectly.
- Apply a maximum blur effect to this screenshot to create a soft, frosted background.
- Insert a circle shape anywhere on the slide.
- Select the blurred screenshot first, then the circle.
- Use the Merge Shapes feature and choose Intersect to crop the blurred picture to the shape of the circle.
- Add a white inside shadow to the circle to simulate frosty edges and depth.
- Add a subtle white outline to the circle with 1 pt width and 20% transparency for a delicate border.
This circle now looks like a frosted glass piece, seamlessly blending with the colorful slide background.
Animating with Morph Transition
One of the most powerful features in Microsoft 365 PowerPoint is the Morph Transition, which allows smooth animations between slides by automatically moving and transforming objects.
How to animate the glassmorphic circle:
- Duplicate your slide (
Ctrl + Dor right-click and select Duplicate). - On the duplicate slide, select the glassmorphic circle.
- Use the Crop tool to reposition the circle to a new location on the slide. Be sure to drag the subtle white line handles to move the circle without resizing.
- Apply the Morph transition to the second slide. This will animate the circle moving smoothly from its original position to the new one.
- Preview the animation in full screen mode to see the magic happen.
This simple trick creates an elegant animated glassmorphic effect that draws attention and adds professional polish to your presentation.
Adding the Glow Effect for Extra Flair
To make your glassmorphic design even more impressive, you can add a glowing effect that enhances the frosty feel.
How to add the glow:
- Duplicate the slide design picture (the grainy, colorful image) and place the copy directly on top of the original.
- Apply a maximum blur effect to the top copy.
- Send the blurred copy to the back so the grainy design sits on top, creating a glowing aura around the colors.
- Copy and paste this blurred design onto the second slide as well, centering it and sending it to the back.
The result is a soft, radiant glow that complements the glassmorphic circles and makes the entire slide design pop.
Tips for Enhancing Your Glassmorphic Design
Here are some additional pointers to maximize your PowerPoint presentation skills when working with glassmorphic effects:
- Use multiple circles: Don’t hesitate to insert several glassmorphic circles to create layered effects and visual interest.
- Experiment with opacity: Adjust transparency levels to balance visibility and subtlety.
- Choose harmonious colors: Select gradient colors that complement each other and the overall slide background.
- Maintain alignment: Use PowerPoint’s alignment tools to center and evenly space your elements.
- Leverage grouping: Group objects to manage your slide elements easily.
- Keep effects consistent: Apply similar picture effects across elements for a cohesive look.
- Test animations: Preview your morph transitions and adjust timing for smoothness.
- Use high-quality fonts: The Hanson font used here is stylish and readable. Choose fonts that align with your presentation’s tone.
Summary Table: Key PowerPoint Features for Glassmorphic Effect
| Feature | Purpose | Shortcut/Location | Tips |
|---|---|---|---|
| Gradient Fill | Colorful, smooth fills for text and shapes | Format Shape > Fill > Gradient Fill | Use multiple color stops and adjust transparency |
| Format Painter | Copy and paste styles quickly | Ctrl + Shift + C / Ctrl + Shift + V |
Great for consistent gradient fills |
| Artistic Effects (Film Grain, Blur) | Add texture and blur for frosty/glass look | Picture Format > Artistic Effects | Adjust intensity and transparency for subtlety |
| Merge Shapes (Intersect) | Crops pictures to shapes | Shape Format > Merge Shapes > Intersect | Select picture first, then shape |
| Morph Transition | Smooth animation between slides | Transitions > Morph | Duplicate slide, reposition object, then apply |
Frequently Asked Questions (FAQ)
Q1: What version of PowerPoint do I need to create this glassmorphic effect?
You need Microsoft PowerPoint for Microsoft 365 (formerly Office 365) on Windows. This version supports advanced features like Morph transition and the full suite of artistic effects.
Q2: Can I use any font for the text in the glassmorphic design?
Yes, but for best results, use clean, bold fonts that support gradient fills well. In the tutorial, the free Hanson font was used, but you can experiment with others that suit your style.
Q3: How do I make sure the animation runs smoothly?
Use the Morph transition between duplicated slides where the glassmorphic elements are repositioned. Preview your slideshow in full screen and adjust the transition duration if needed.
Q4: Can I add more than two circles to the design?
Absolutely! Adding multiple glassmorphic circles can enhance the depth and visual interest of your slide. Just be mindful of balance and avoid overcrowding.
Q5: Is the glassmorphic effect suitable for all types of presentations?
While the effect is visually appealing, it’s best suited for creative, marketing, or tech presentations where modern design aesthetics are appreciated. For formal or data-heavy presentations, use it sparingly to avoid distracting from content.
Conclusion
Mastering PowerPoint presentation skills means knowing how to use the platform’s features creatively and effectively. The animated glassmorphic effect is a striking design technique that can elevate your presentations by adding depth, texture, and movement.
By following this step-by-step tutorial, you can create a professional, animated glassmorphic slide design using simple shapes, gradient fills, picture effects, and the powerful Morph transition. This method requires no advanced graphic design software and can be accomplished entirely within PowerPoint.
Remember, the key to great slides is balance: combining eye-catching visuals with clear, readable content. Use the glassmorphic effect to highlight important areas without overwhelming your audience.
Feel free to experiment with different colors, fonts, and the number of glassmorphic elements to tailor the design to your brand or presentation theme.
For more tutorials like this and to download the example slides, check out the creator’s Patreon page linked in the video description. Also, explore helpful tools like NordVPN for online security and Artlist for music and sound effects to enhance your multimedia presentations.
Thank you for reading, and happy designing! Stay creative, stay inspired, and keep sharpening those PowerPoint presentation skills.