Elevate your Powerpoint presentation skills by incorporating dynamic, eye-catching animations that bring your slides to life. In this comprehensive guide, we will explore how to create striking scrolling bar animations, pulsing buttons, and vibrant scribble effects—all within PowerPoint. These techniques not only enhance the visual impact of your presentations but also captivate your audience, making your message more memorable and engaging.
This article is inspired by expert tips from One Skill PPT, a renowned creator in the PowerPoint animation space. Whether you are preparing a business pitch deck, a report, or a proposal, mastering these animations will give your presentations a modern, professional edge.
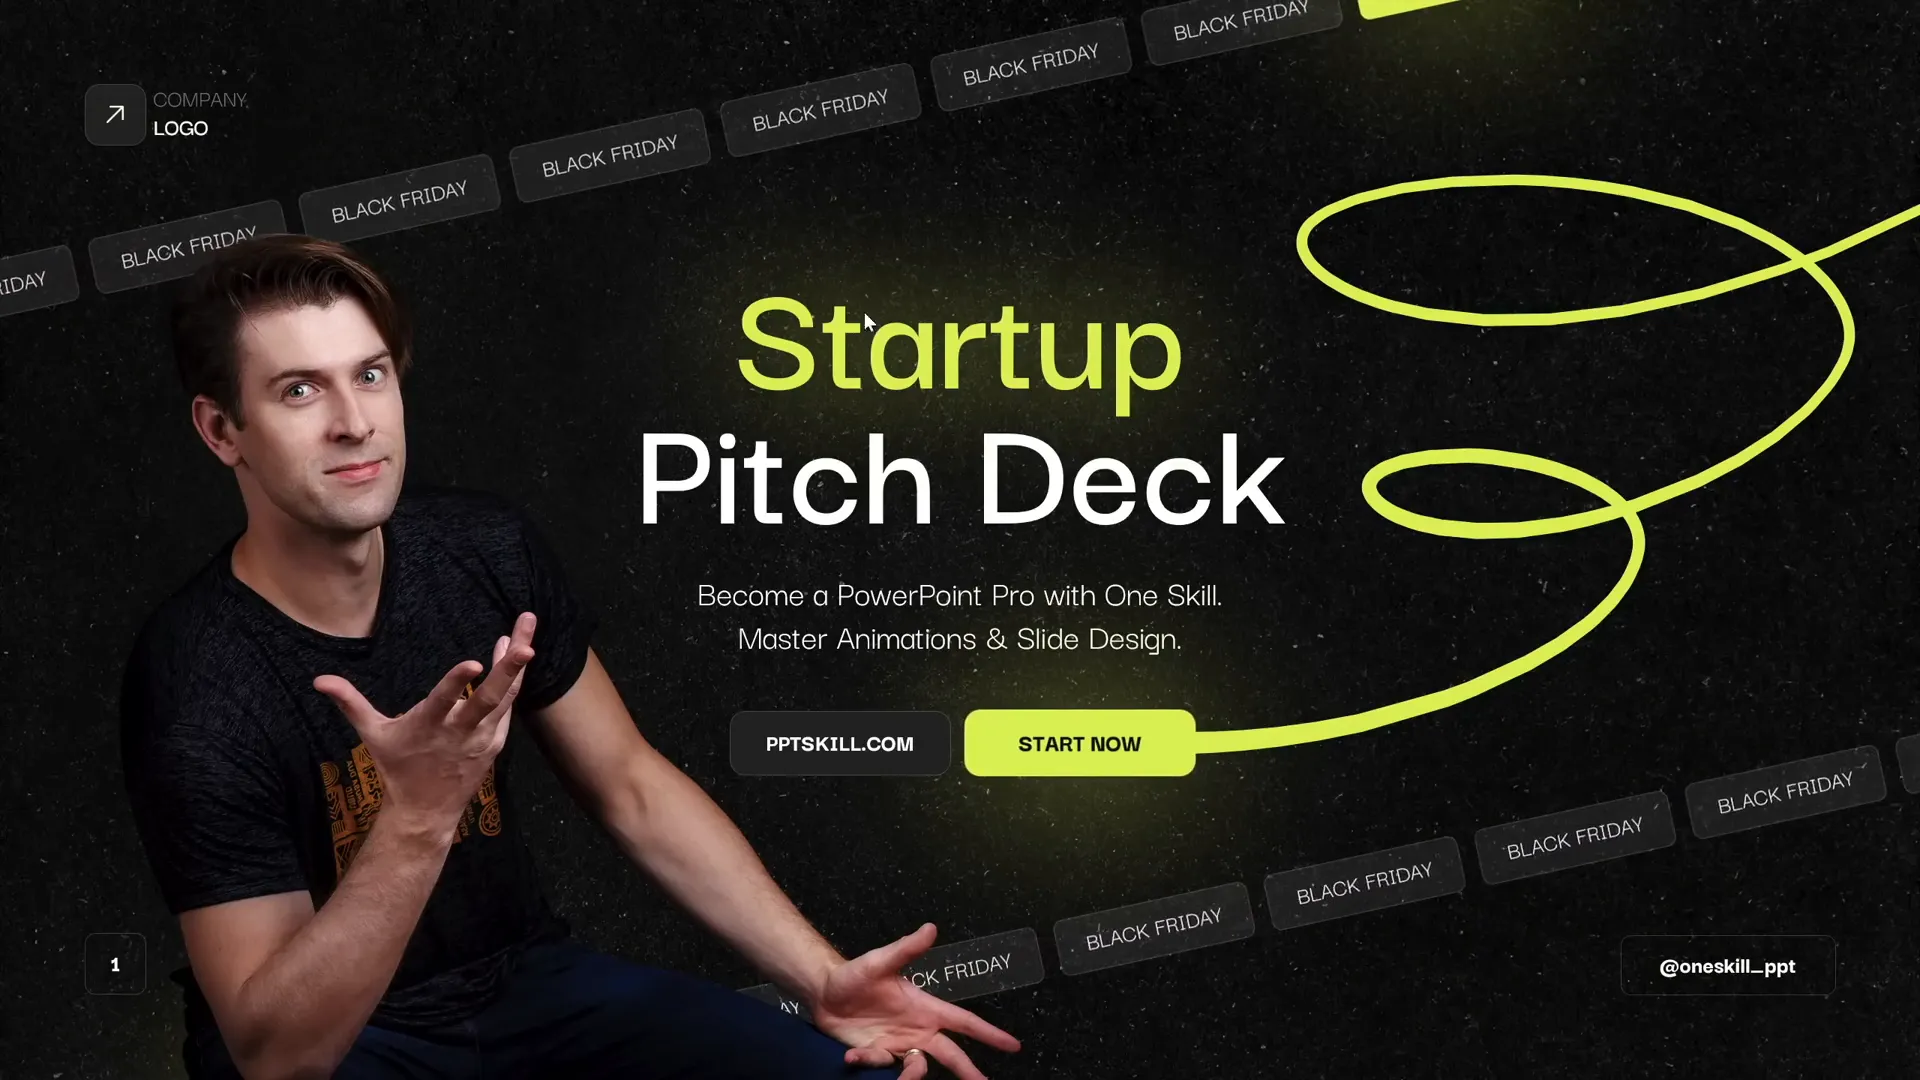
Table of Contents
- Why Animations Matter in PowerPoint Presentations
- Creating Beautiful Scrolling Bars
- Setting Up a Custom Slide Layout
- Designing Rounded Rectangles for Scrolling Bars
- Assembling and Animating the Scrolling Bars
- Tilting the Scrolling Bar for a Dynamic Look
- Creating a Second Scrolling Bar Moving in the Opposite Direction
- Adding Fade and Synchronizing Animations
- Animating Other Slide Elements: Photos, Buttons, and Scribbles
- Final Tips and Resources for Mastering PowerPoint Animations
- Frequently Asked Questions
Why Animations Matter in PowerPoint Presentations
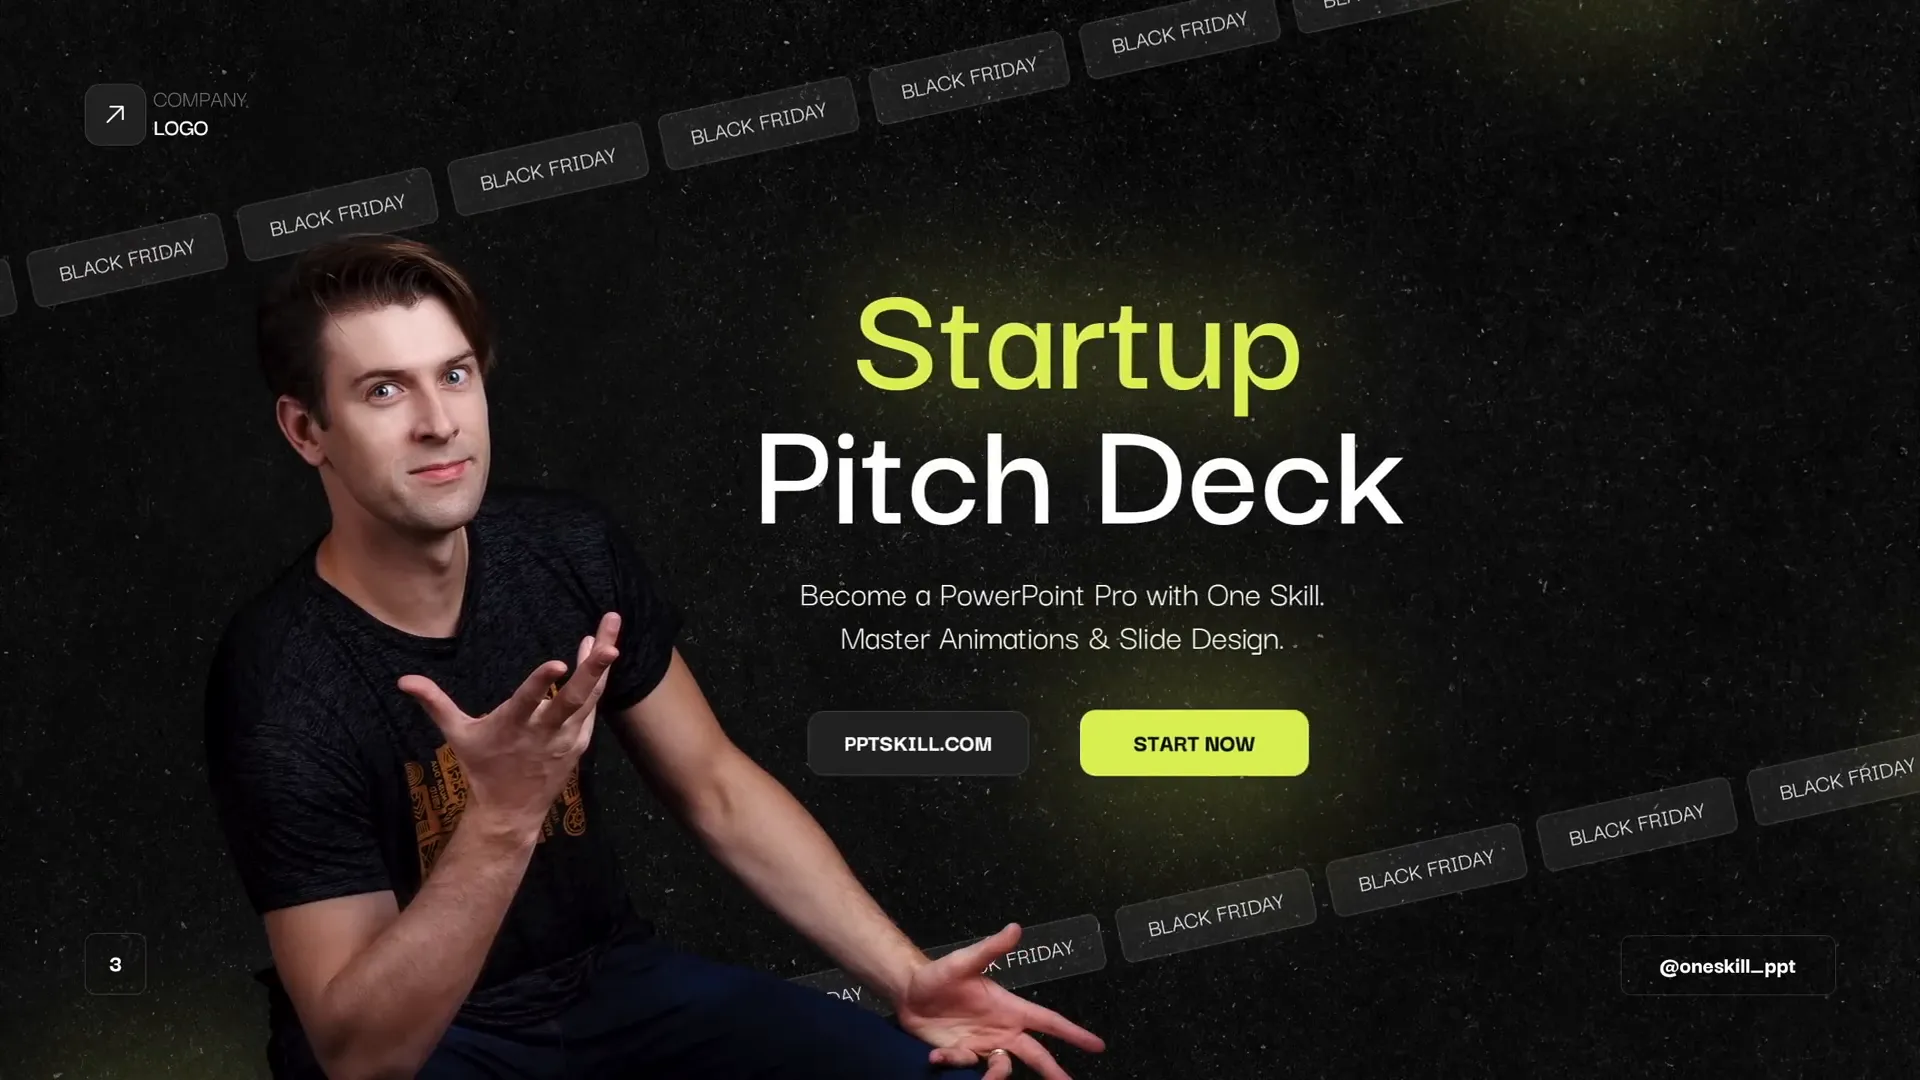
Animations are often underestimated in presentations. A slide with static content can appear dull and lifeless, much like a screenshot. Adding simple but engaging animations transforms your slides, making them dynamic and visually appealing. For example, consider a slide with animated scrolling bars, a pulsing call-to-action button, and a vibrant scribble effect. These elements create movement and interest, guiding the audience’s eyes and emphasizing key information.
Animations help break monotony, maintain audience attention, and convey professionalism. They can also subtly reinforce your message’s urgency or importance, such as a “Black Friday” scrolling bar that hints at a time-sensitive promotion.
Creating Beautiful Scrolling Bars
The scrolling bars at the top and bottom of a slide are excellent examples of how to use animation for a modern and sleek look. These bars can scroll horizontally, with one scrolling left and the other right, creating a visually balanced effect.
Here’s a step-by-step overview of how to build these scrolling bars:
- Construct the bars using multiple rounded rectangles aligned horizontally.
- Group the rectangles to create a seamless unit.
- Apply a motion path animation that moves the grouped rectangles horizontally.
- Duplicate and arrange groups to fill gaps and ensure continuous movement.
- Fine-tune the animation’s endpoint for a seamless looping effect.
- Optionally, rotate the group for a tilted scrolling bar effect.
Setting Up a Custom Slide Layout
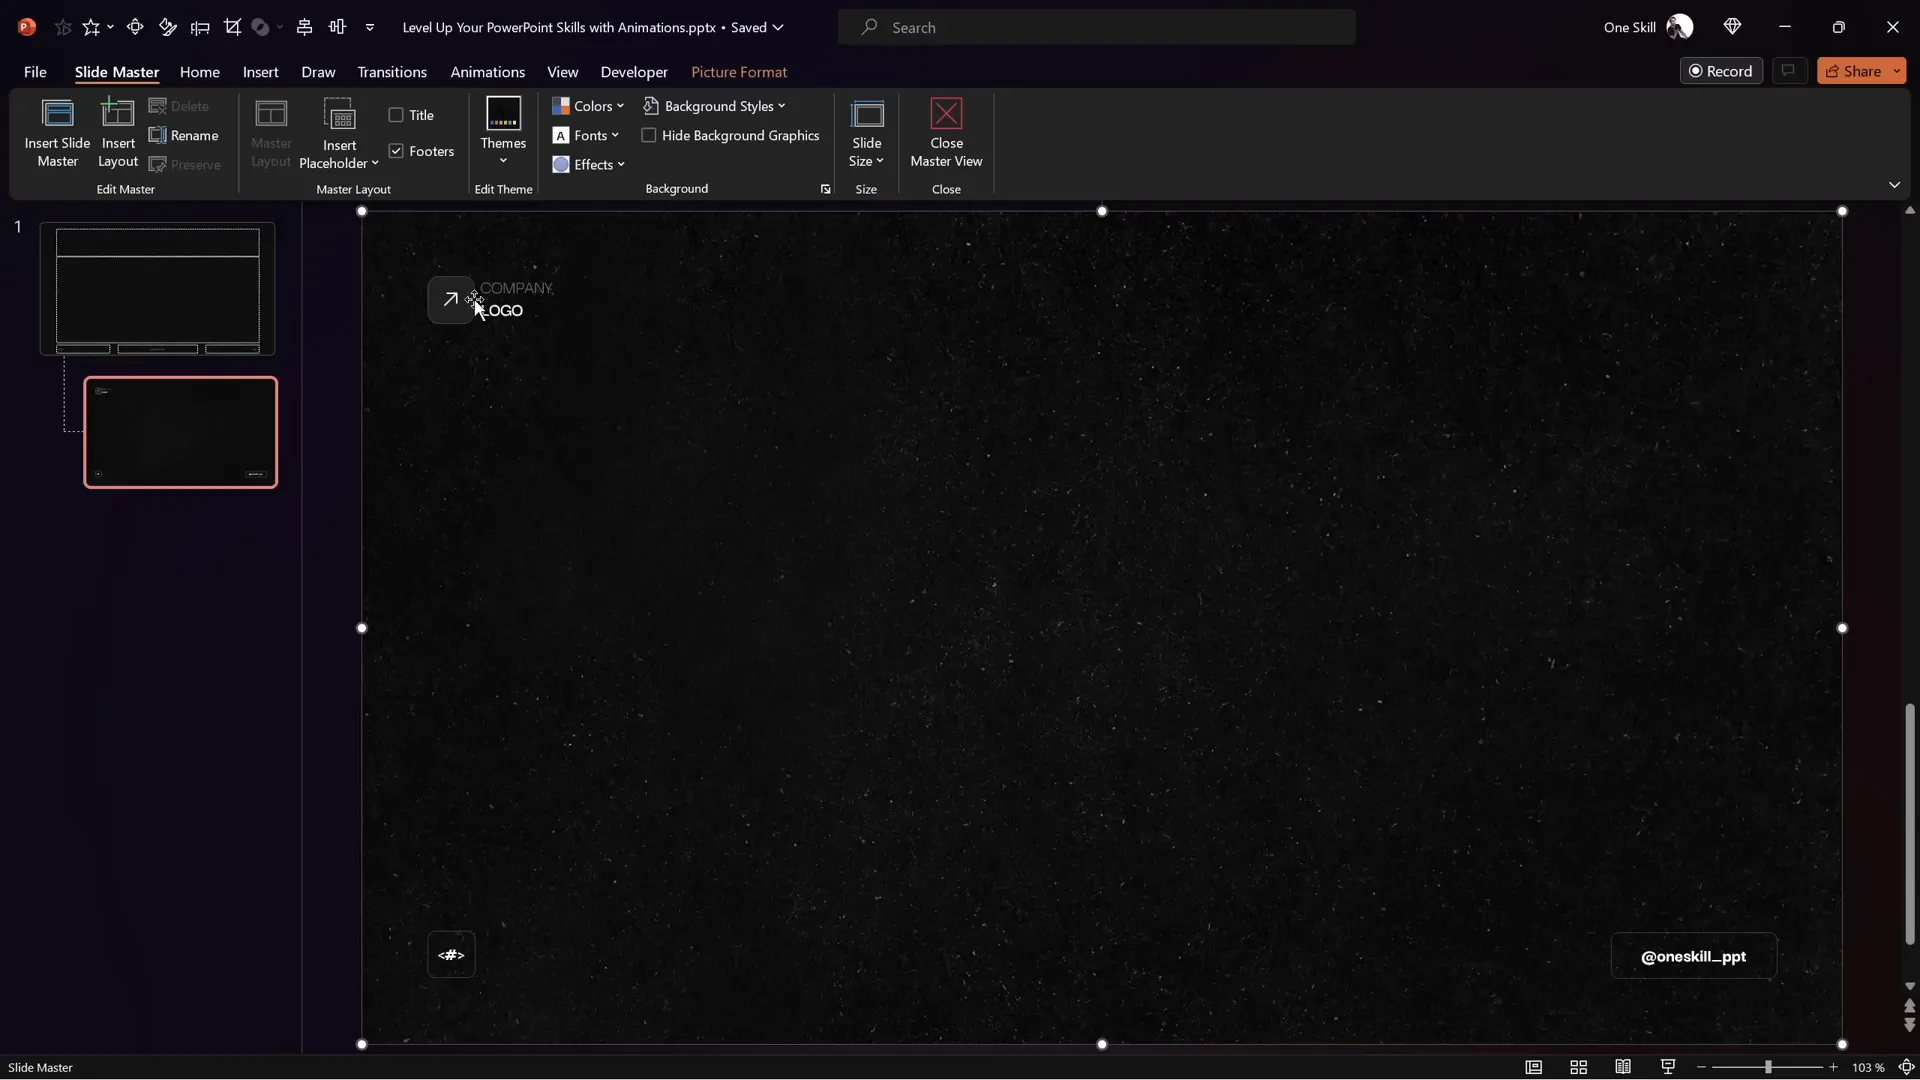
Before diving into shapes and animations, it’s essential to have a suitable slide background and layout. You might notice that the slide in our example features a dark textured background, a footer, slide numbers, and a company logo. This setup was created using PowerPoint’s Slide Master view, allowing you to:
- Set a consistent background image or texture for all slides.
- Customize footers with text, logos, and slide numbers.
- Ensure branding consistency across your presentation.
To customize the footer text on your slides, go to the Insert tab, click Header and Footer, and type your desired footer text. Applying it to all slides ensures uniformity.
Designing Rounded Rectangles for Scrolling Bars
The scrolling bars consist of multiple rounded rectangles with a semi-transparent look. Here’s how to create and style one:
| Step | Details |
|---|---|
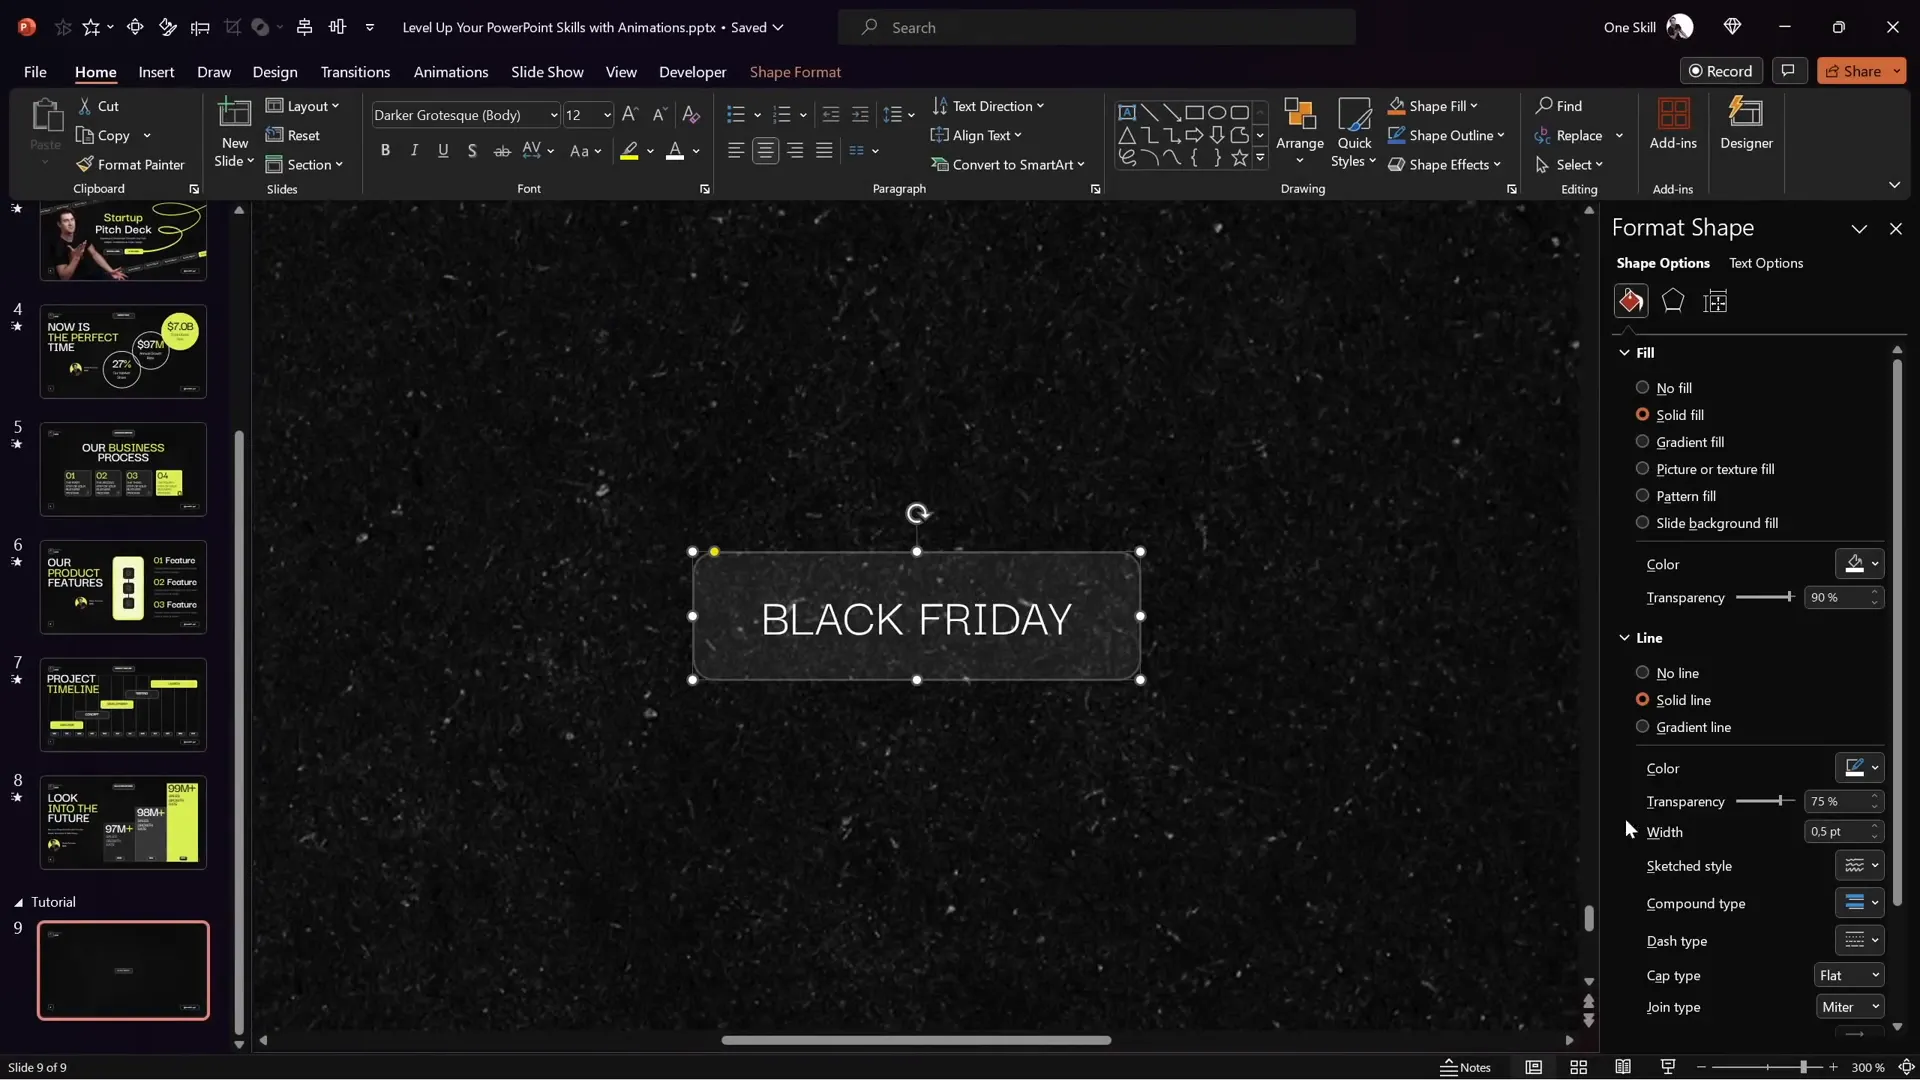
| Insert Shape | Go to Insert > Shapes and select the Rounded Rectangle tool. Draw a rectangle approximately 3.5 cm wide and 1 cm high. |
| Fill Color | Set the fill color to white with 90% transparency for a subtle effect. |
| Outline | Use a white solid line with 75% transparency and a thickness of 0.5 pt. |
| Font | Use the Darker Grotesque font at size 12, colored white. Type your desired text (e.g., “Black Friday”). |
| Alignment | Align the rectangle to the left side of the slide initially. |
Once you have the first rounded rectangle styled, duplicate it multiple times across the slide to fill the horizontal space. Use Ctrl + D to duplicate quickly.
Assembling and Animating the Scrolling Bars
After creating multiple rounded rectangles, the next step is to arrange them evenly and prepare for animation:
- Align the rightmost rectangle to the right edge of the slide.
- Select all rectangles and use the Distribute Horizontally feature to space them evenly.
- Group all rectangles into a single object (Ctrl + G).
- Duplicate the entire group and position it precisely to the right of the original group to fill gaps during animation.
- Make the leftmost rectangle in each group bright (less transparent) to serve as alignment markers for the animation path.
- Group both large groups together.
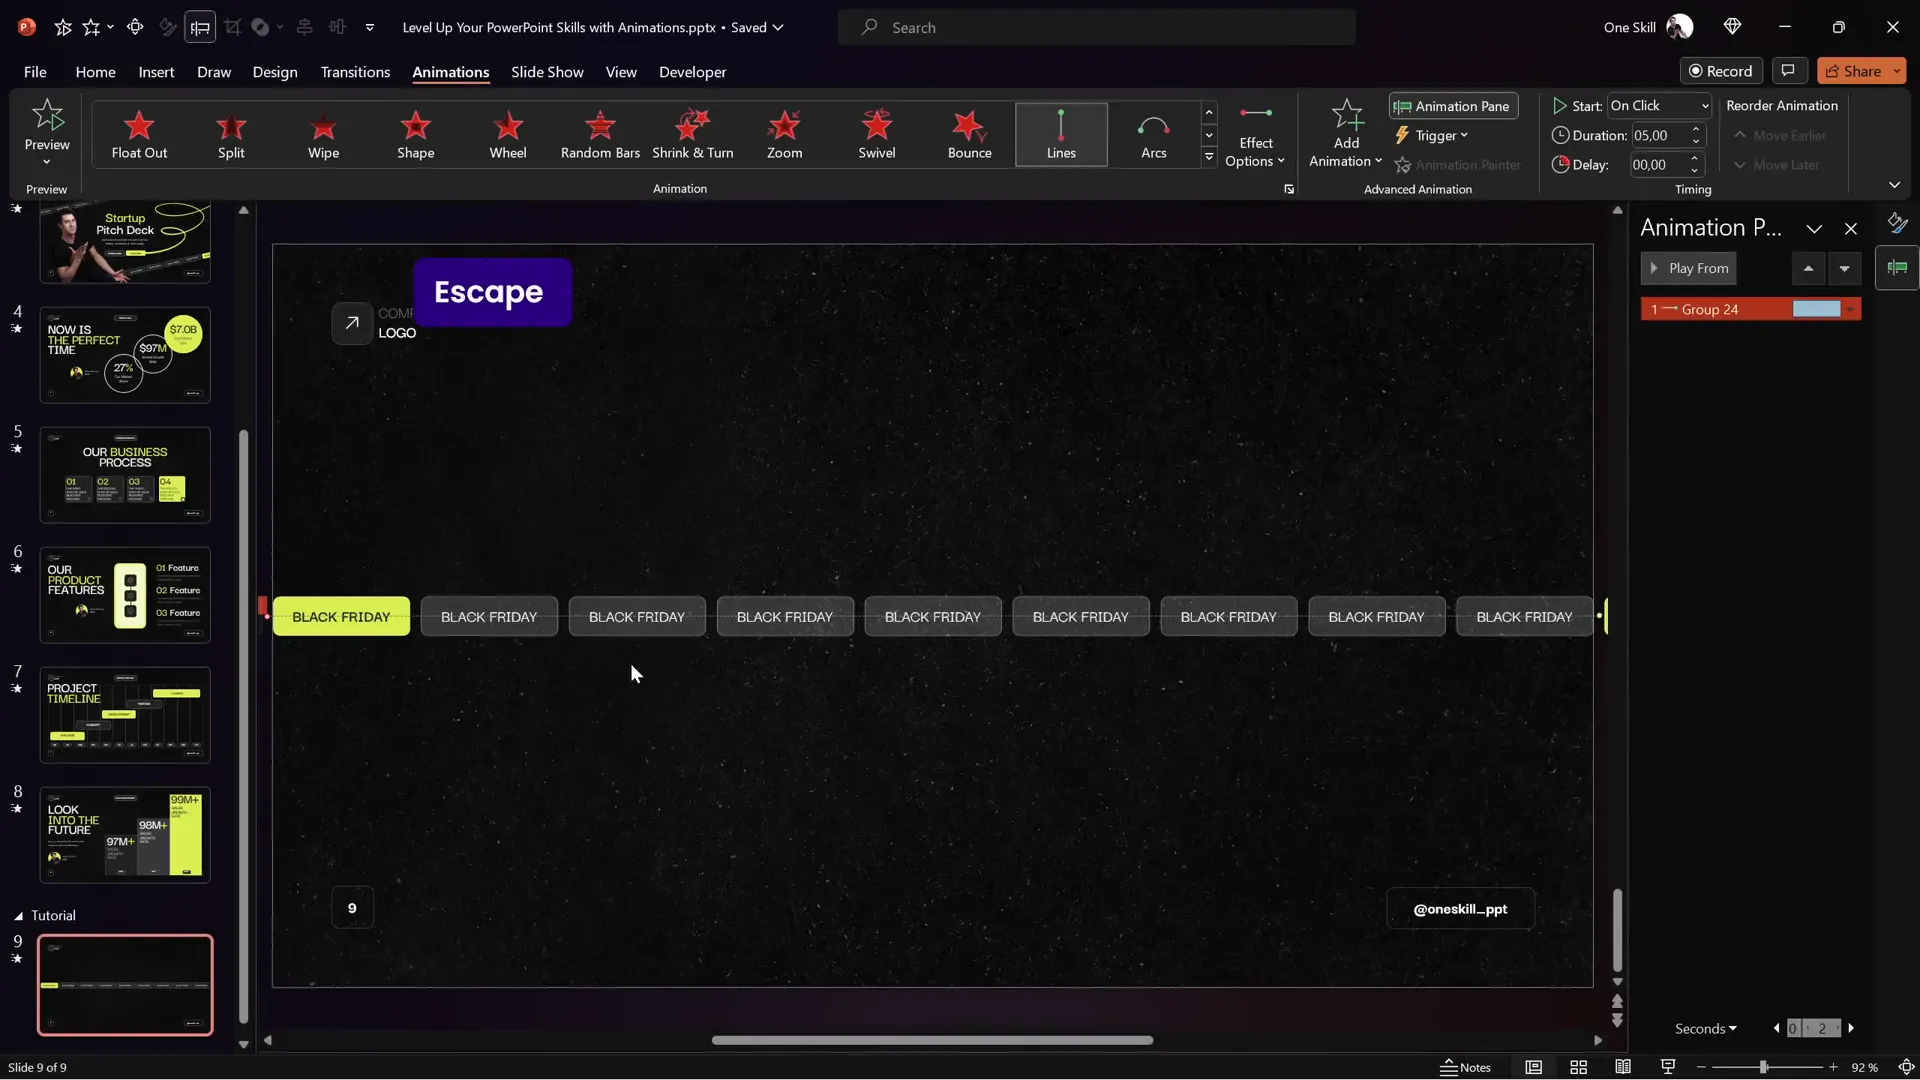
With the grouped rectangles ready, add a motion path line animation to move the entire group horizontally:
- Choose the Motion Path: Left direction for the top bar.
- Adjust the red endpoint bubble of the motion path so that the second bright rectangle overlaps perfectly with the first bright rectangle, creating a seamless loop.
- Set the animation to start On Click and adjust the duration (e.g., 5 seconds).
- Remove Smooth Start and Smooth End to keep the motion steady.
- Set the animation to Repeat Until End of Slide for continuous looping.
This precise alignment is crucial for creating the illusion of an infinite scrolling bar without visible jumps or gaps.
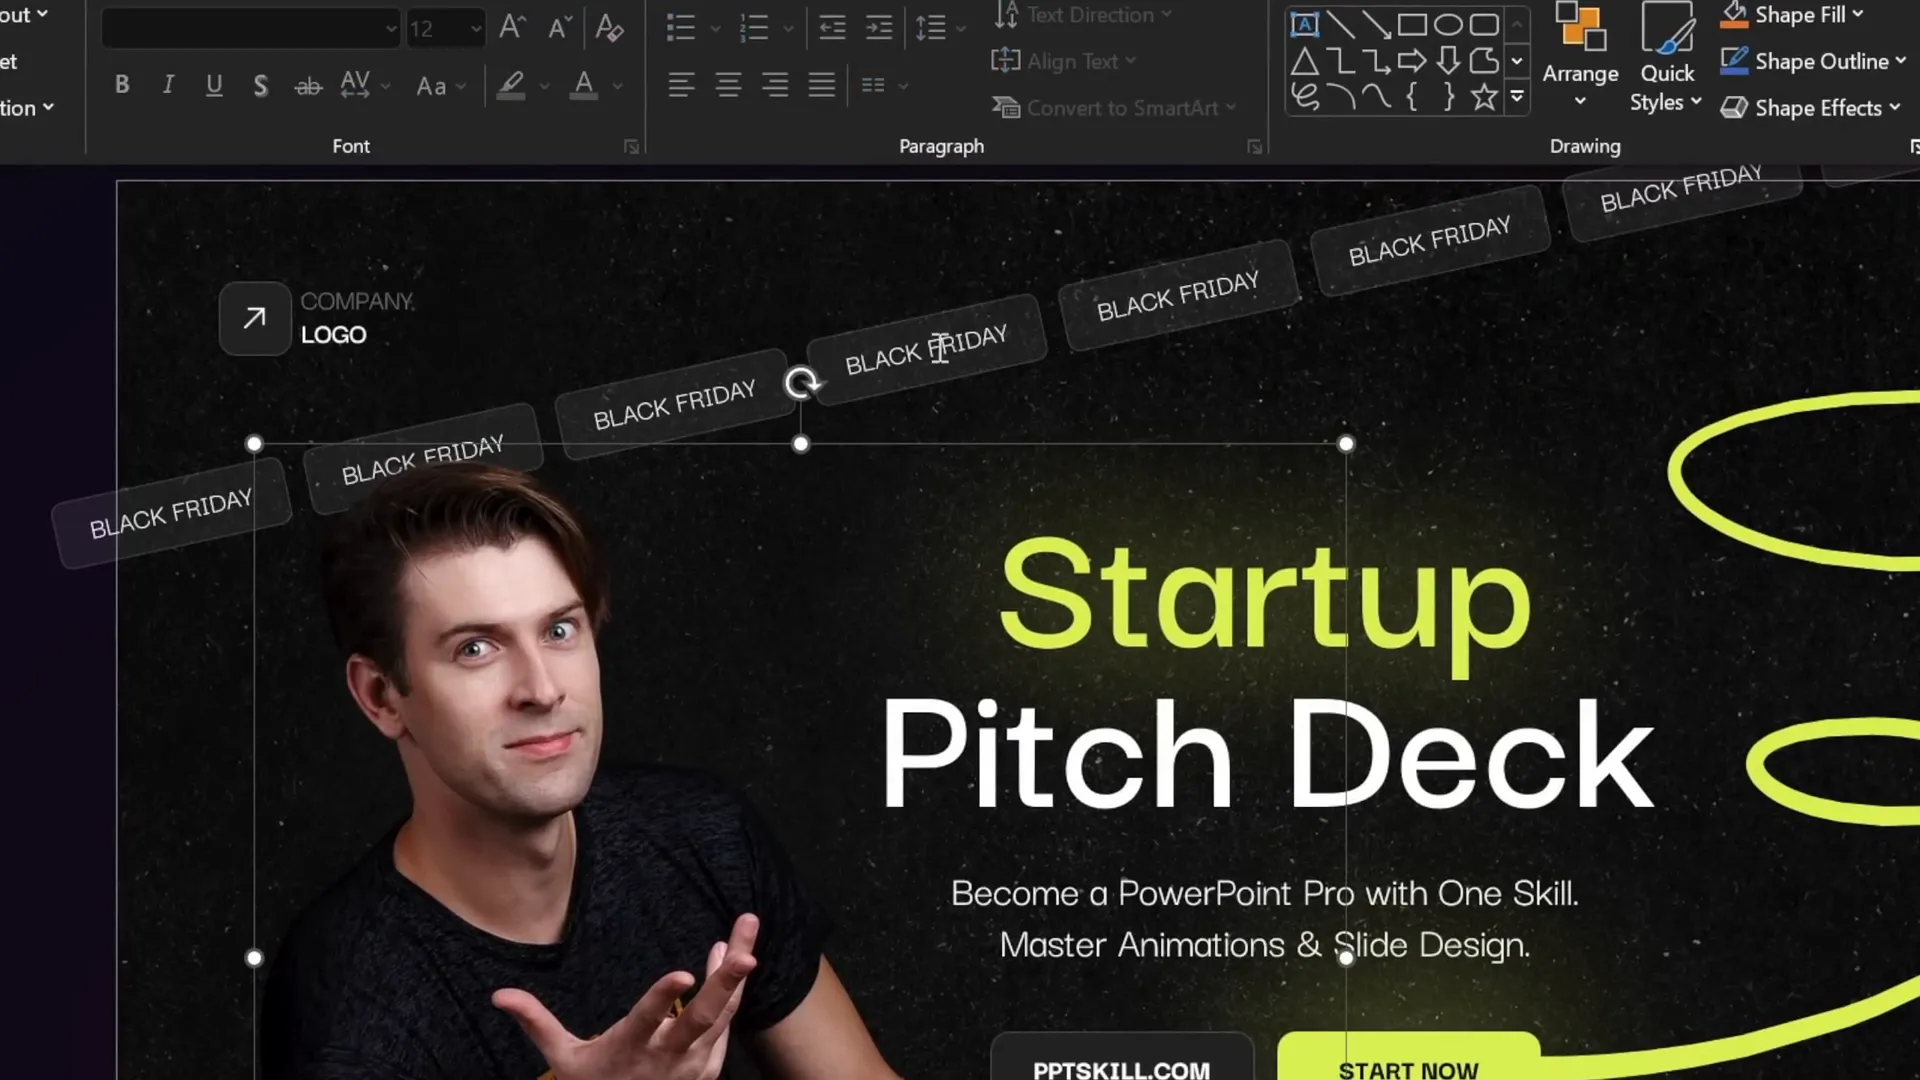
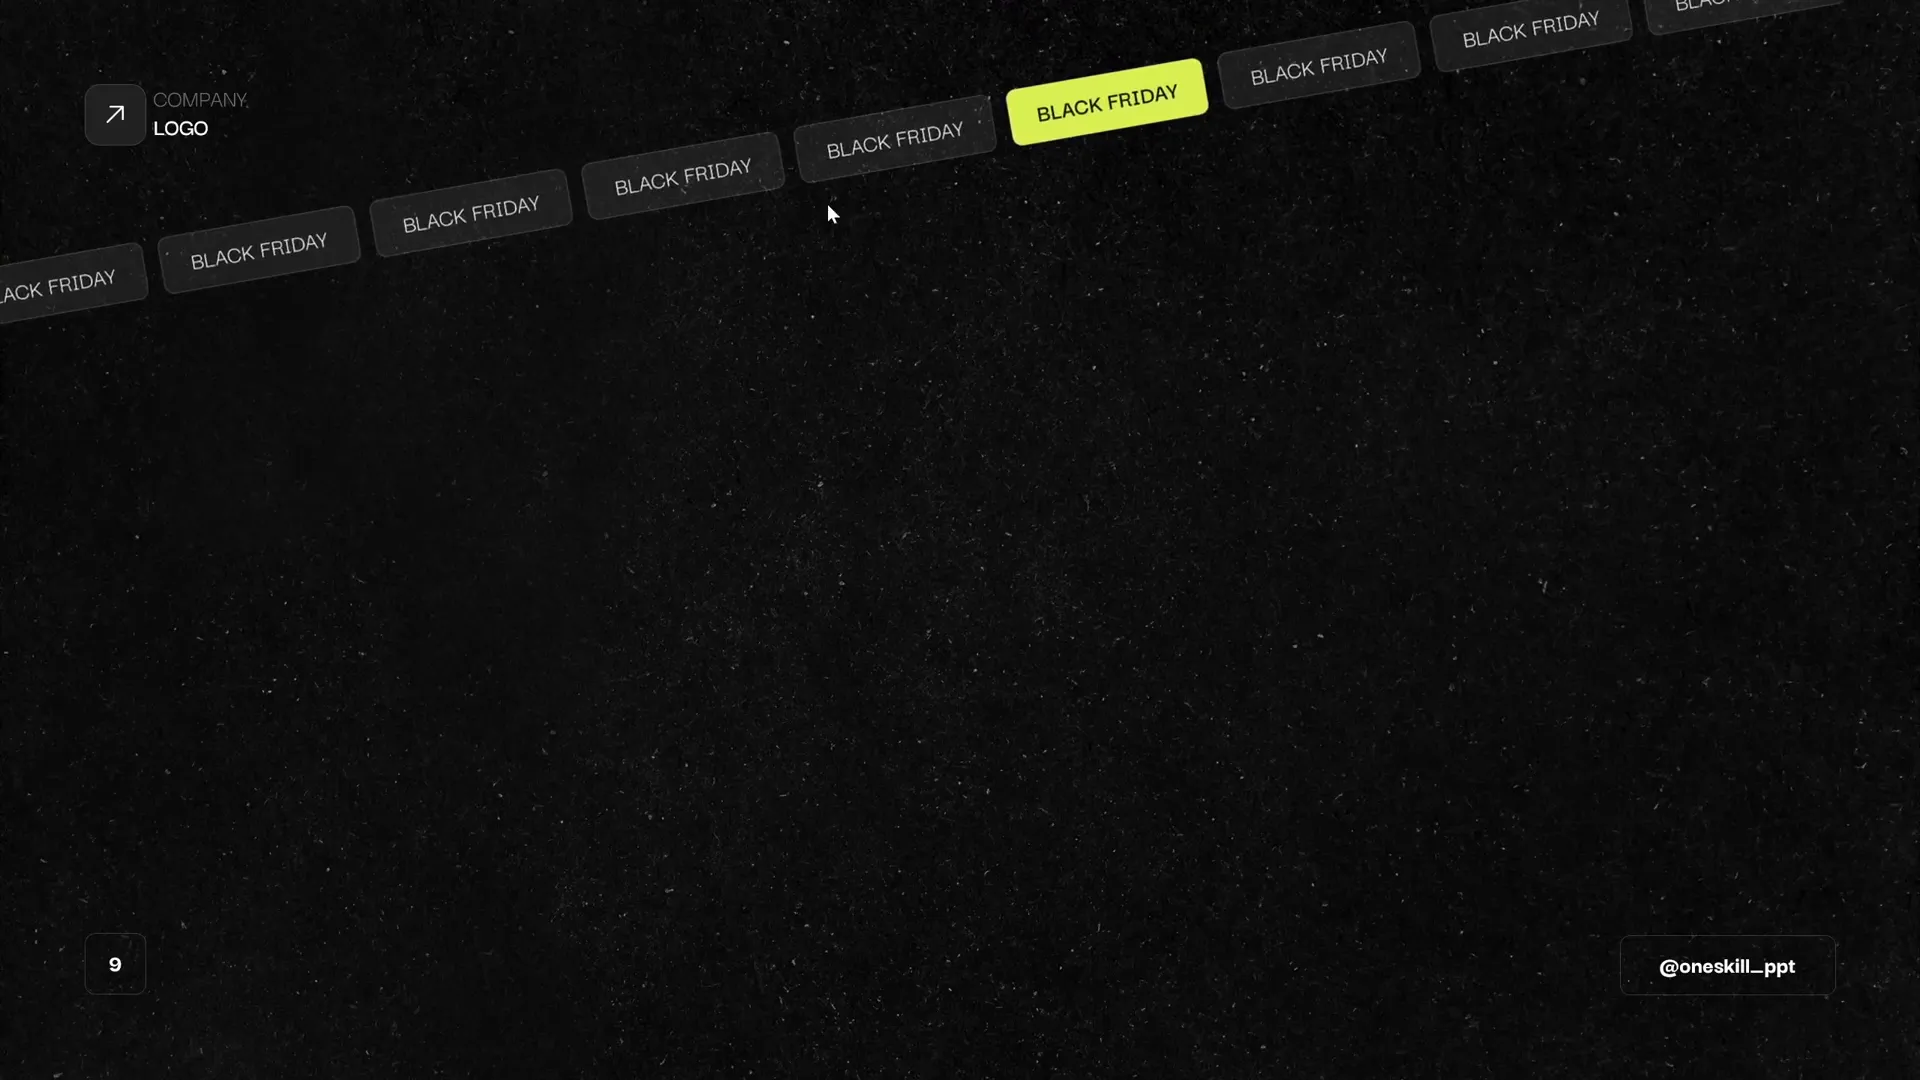
Tilting the Scrolling Bar for a Dynamic Look
To add more visual interest, you can rotate the scrolling bar to a tilted angle. This is done by selecting the grouped rectangles and using the rotation handle to tilt the entire group.
Important considerations when tilting:
- Ensure only the first group of rectangles (e.g., nine rectangles) is visible on the slide to avoid visual glitches.
- Adjust the motion path endpoint again to align the bright rectangles perfectly after rotation.
- Turn off snap-to-grid or smart guides if precise alignment is difficult.
Once rotated and aligned, the scrolling bar moves diagonally, adding a fresh, modern twist to the animation.
Creating a Second Scrolling Bar Moving in the Opposite Direction
For balance and symmetry, the bottom scrolling bar moves in the opposite direction of the top one. To create this:
- Duplicate the top scrolling bar group using Ctrl + Shift drag to keep it aligned.
- Move the duplicated group slightly to the left to avoid gaps when animating right.
- Ensure only the second group of rectangles is visible on the slide.
- Change the motion path direction to Right.
- Adjust the animation endpoint to align the bright rectangles for a seamless loop.
- Set the animation to Start With Previous so it plays simultaneously with the top bar.
This creates a visually pleasing effect where two scrolling bars move in opposite directions, enhancing the slide’s dynamic feel.
Adding Fade and Synchronizing Animations
To polish the entrance of your scrolling bars and other elements, add a subtle fade-in animation:
- Select both scrolling bar groups.
- Use the Add Animation button to apply a Fade effect without removing existing motion animations.
- Set the fade to start With Previous so it happens simultaneously with the motion path animations.
- Adjust timing so all animations launch with a single click.
This fade-in effect softens the appearance of the scrolling bars, making the slide feel cohesive and professional from the moment it appears.
Animating Other Slide Elements: Photos, Buttons, and Scribbles
Beyond scrolling bars, animating other slide elements adds further engagement and polish:
Animating Photos and Text
Apply a Flying In animation to photos and text elements, such as titles and subtitles:
- Set the direction to From Left.
- Choose a duration of about 2 seconds.
- Add a Bounce End effect of 1.5 seconds for a lively finish.
- Use the Animation Painter tool to quickly replicate the animation across multiple objects.
Creating a Pulsing Button
For a call-to-action button, such as “Start Now,” add a Grow/Shrink animation:
- Set the animation to start With Previous so it begins with other animations.
- Use a duration of 0.5 seconds.
- Adjust the growth size to about 105%.
- Enable Auto Reverse and set the animation to repeat Until End of Slide.
- Add a subtle Smooth Start and Smooth End (each 0.25 seconds) to soften the pulsing effect.
Drawing and Animating a Scribble
A scribble animation adds a fun, vibrant touch:
- Go to the Draw tab and select a pen color (e.g., bright lime neon).
- Choose the thickest pen thickness for smooth lines.
- Draw a scribble shape you like. Use Ctrl + Z to undo and retry until satisfied.
- Select the scribble and apply the Replay animation.
- Set the animation to start With Previous and adjust duration (e.g., 1.5 seconds).
- Add a delay equal to the duration of the previous animation (e.g., 2 seconds) to sync it properly after the button animation.
This scribble effect adds a handcrafted, energetic vibe that can emphasize creativity or innovation in your presentation.
Final Tips and Resources for Mastering PowerPoint Animations
Mastering Powerpoint presentation skills with animations can significantly elevate the professionalism and engagement of your slides. Here are some final tips:
- Practice precise alignment: Use bright rectangles or markers to help align motion paths and ensure seamless looping.
- Use groups: Group multiple elements to animate them as one unit, saving time and maintaining consistency.
- Adjust timing and repetition: Experiment with animation durations and set them to repeat until the end of the slide for continuous effects.
- Leverage Slide Master: Customize your slide layout once in Slide Master to maintain consistent branding and style.
- Use Animation Painter: Quickly copy animation settings between objects to keep animations uniform.
- Sync animations: Use delays and start triggers like “With Previous” or “After Previous” to coordinate complex animation sequences.
For those who find these concepts complex or want to deepen their skills, consider enrolling in specialized courses like the PowerPoint Animation Mastery Course. Starting from simple projects, this course builds your skills step-by-step until you become a confident PowerPoint animation pro.
Additionally, explore free resources such as:
- Free modern business slide templates with neon aesthetics.
- Fonts like Darker Grotesque to enhance typography.
- Stock photos and textures to enrich slide backgrounds.
Frequently Asked Questions
What are the benefits of adding animations to PowerPoint presentations?
Animations help to engage your audience, emphasize key points, make your slides visually appealing, and prevent your presentation from looking static or boring. They can also guide viewer attention and improve message retention.
How do I make a scrolling bar animation in PowerPoint?
Create multiple rounded rectangles arranged horizontally, group them, duplicate the group to cover gaps, and apply a motion path animation moving left or right. Adjust the motion path endpoint so the animation loops seamlessly. Repeat the process to create a scrolling bar in the opposite direction if desired.
Can I rotate or tilt the scrolling bar animation?
Yes! After grouping the rectangles, use the rotation handle to tilt the entire group. Ensure only the intended rectangles are visible to maintain the animation’s seamless appearance, and realign the motion path accordingly.
How can I animate a pulsing button effect?
Apply a Grow/Shrink animation to the button with a slight increase in size (e.g., 105%), enable Auto Reverse, and set it to repeat until the end of the slide. Adjust smooth start and end settings for a softer pulse.
What if I want to add a custom scribble animation?
Use the Draw tab to create a freehand scribble with a thick pen, then apply the Replay animation. Adjust timing and delays to sync it with other animations on the slide.
Where can I learn more about advanced PowerPoint animations?
Consider enrolling in courses like the PowerPoint Animation Mastery Course, which offers step-by-step lessons and free updates. Additionally, explore online tutorials and communities dedicated to PowerPoint skills.
How do I ensure my animations run smoothly and don’t cause distractions?
Keep animations simple and purposeful. Avoid overusing effects or making them too flashy. Use smooth timing, consistent styles, and synchronize animations to maintain flow. Preview your presentation multiple times to fine-tune the experience.
Can I use these animated slides for business presentations?
Absolutely! Animated slides with scrolling bars, pulsing buttons, and scribbles are perfect for pitch decks, reports, proposals, and any business presentations that benefit from a modern and dynamic look.
What fonts and resources are recommended for these animations?
The Darker Grotesque font is recommended for a clean, modern look. Use high-quality photos and textures for backgrounds, and consider neon color palettes for vibrant effects.
How do I loop animations continuously in PowerPoint?
In the animation settings, remove Smooth Start and Smooth End, and set the animation to repeat “Until End of Slide.” This creates a seamless loop effect for animations like scrolling bars.
Check out the full video: PowerPoint Presentation Skills: Scrolling Bar Animation! ✨


