
Creating engaging and visually appealing slides in PowerPoint can transform your presentations from ordinary to extraordinary. One of the most effective ways to present multiple options or ideas is through infographic slides that combine design and clarity. In this comprehensive tutorial, you’ll learn how to create a dynamic 5-option infographic slide with a puzzle-like design using PowerPoint’s built-in tools. This guide, inspired by expert techniques from POWERPOINT UNIVERSITY, will walk you through each step to master this PowerPoint slide design.
Whether you’re presenting business strategies, project phases, or product features, this infographic slide will help your audience understand your message clearly and memorably. Let’s dive into the process and create a stunning slide that stands out.
Table of Contents
- Preparing the Slide Background and Setting Guides
- Creating the Base Circle Shape
- Dividing the Circle into Five Equal Puzzle Pieces
- Designing the Puzzle-Like Shapes
- Adding the Central Oval and Final Touches
- Inserting Icons and Adding Text
- Applying Animations for Interactivity
- Frequently Asked Questions
- Conclusion
Preparing the Slide Background and Setting Guides
Before starting any design work, it’s essential to set up your slide properly to make the process easier and more precise. Here’s how to prepare your workspace:
- Add a new slide: Begin by inserting a blank slide in your presentation.
- Set a light background color: Choose any light color for the slide background. This helps the shapes and colors you add later to stand out clearly.
- Enable guides: Navigate to the View tab and enable guides. These will assist you in aligning shapes perfectly to the center and each other.
Having guides enabled is a simple yet powerful step to maintain symmetry and balance in your design.
Creating the Base Circle Shape
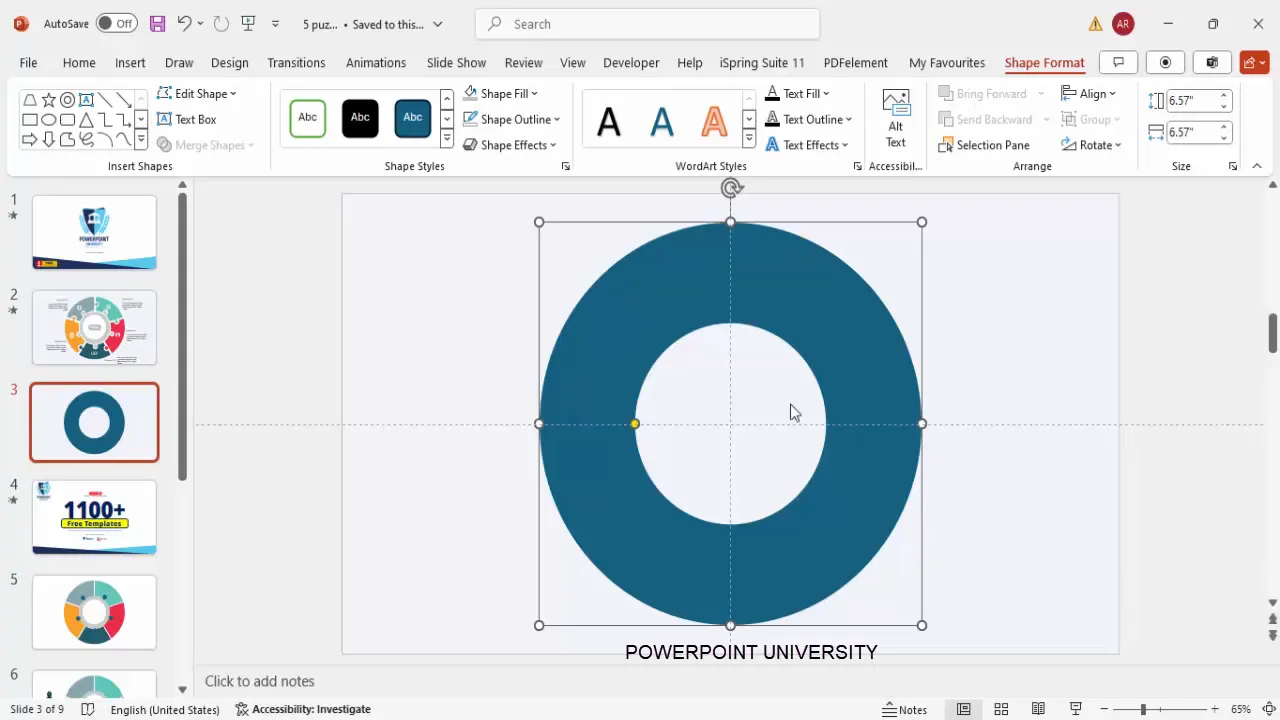
The foundation of the infographic slide is a large, hollow circle that will be divided into five equal parts. Follow these steps to create it:
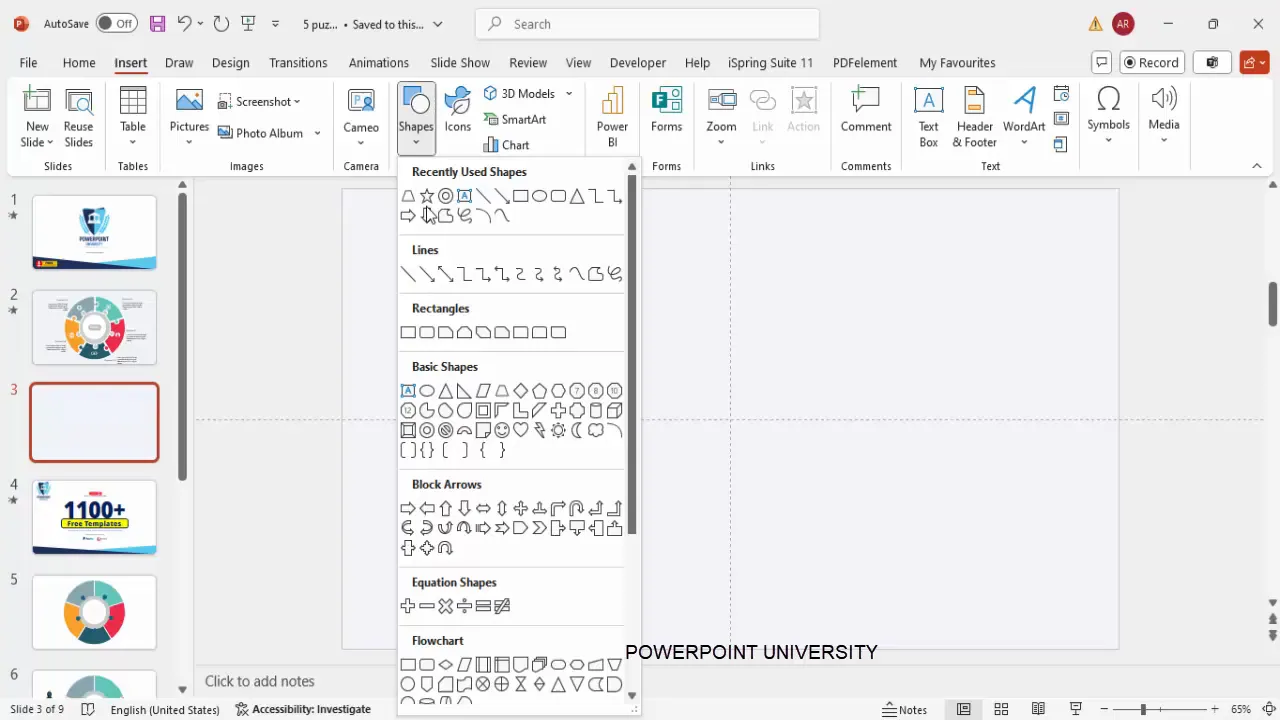
- Go to the Insert tab, select Shapes, and choose the Hollow Circle from the Basic Shapes section.
- Click on the slide to insert the circle.
- Remove the outline by selecting Shape Outline and choosing No Outline.
- Use the Align options to center the circle both horizontally and vertically on the slide by selecting Align Center and Align Middle.
- Hold down Ctrl + Shift together and drag one of the circle’s corners to enlarge it proportionally from the center. Adjust to your desired size and then release the keys.
This step ensures that the base circle is perfectly centered and sized to fit the infographic design you are about to create.
Dividing the Circle into Five Equal Puzzle Pieces
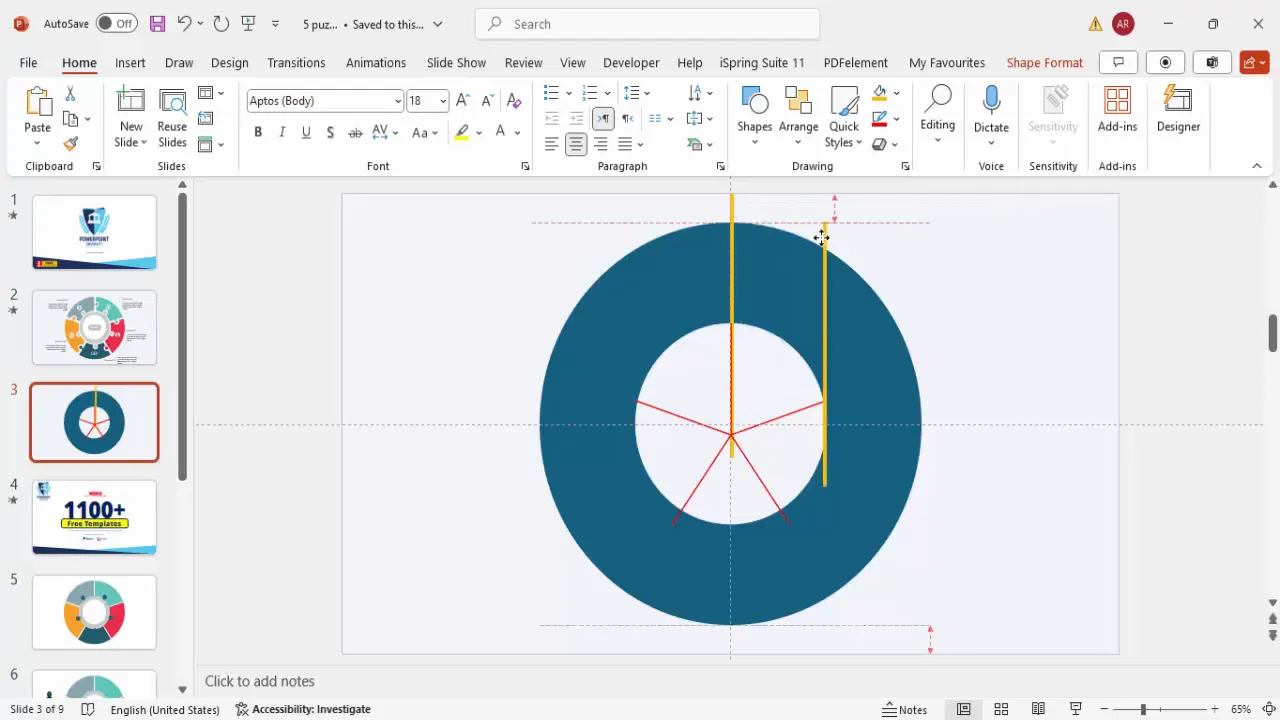
To create the five distinct options in the infographic, the hollow circle needs to be divided into five equal parts. Here’s how to accurately split the circle:
- Insert a small rectangle shape that will act as a cutting guide.
- Remove the rectangle’s outline and fill it with a distinctive color for visibility.
- Insert a 5-point star shape from the Stars and Banners section under the Shapes menu. Hold the Shift key while dragging to keep the star proportionate.
- Drag the small orange adjustment point inside the star to get a reference for the angles where you will slice the circle.
- Center-align the star over the circle using the guides.
- Place the rectangle aligned with one of the star’s points so that it extends beyond the circle’s perimeter. This rectangle will serve as a cutting line.
- Duplicate the rectangle four more times (using Ctrl + D) and rotate each copy by 72 degrees (using Alt + Right Arrow). Position them so that five rectangles radiate from the center like pie slices, dividing the circle into five equal parts.
This method uses the star shape as a precise angle guide, ensuring equal divisions. Although time-consuming, the results are visually balanced and professional.
Designing the Puzzle-Like Shapes
With the circle divided, the next step is to transform these segments into puzzle-like pieces to enhance visual interest. Follow these detailed steps:
- Delete the star shape used as a guide.
- Select the hollow circle and all five rectangle shapes simultaneously (hold Shift while clicking each one).
- Navigate to the Shape Format tab, select Merge Shapes, and click Fragment. This breaks the circle into five separate shapes.
- Delete the inner parts of the shapes that are not needed by clicking and deleting each one to leave five distinct puzzle pieces.
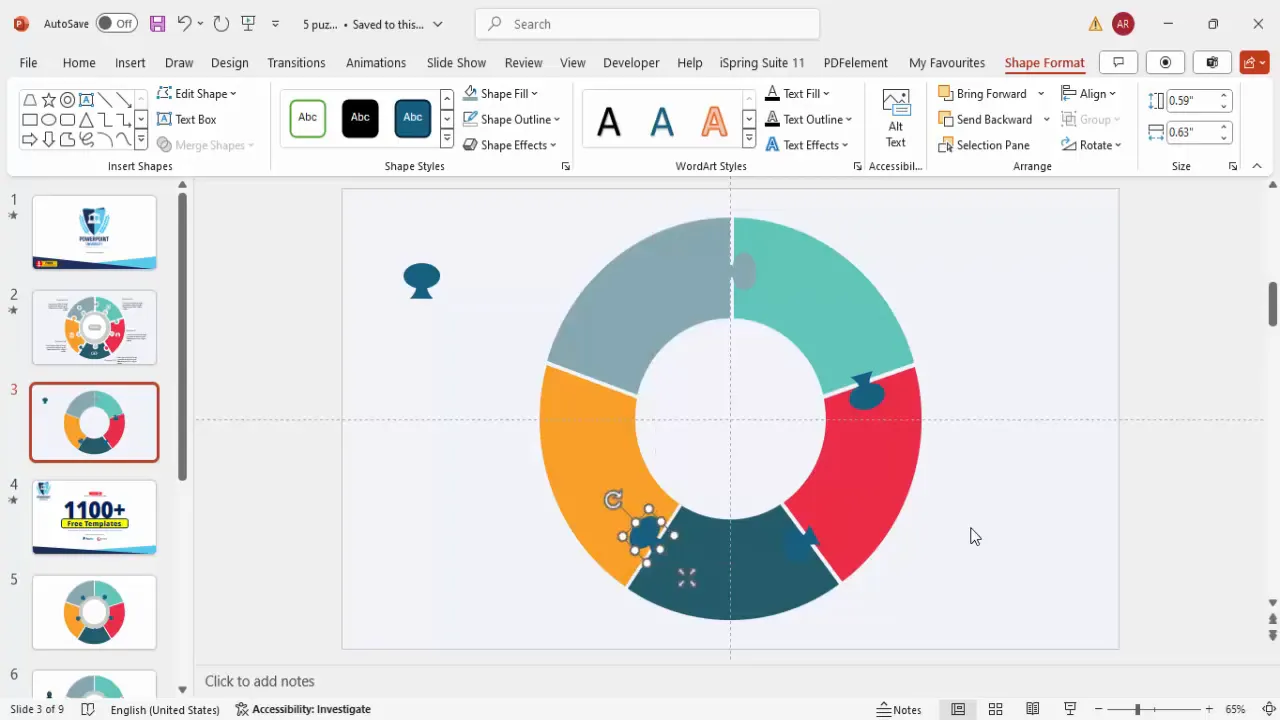
- Change the fill color of each piece to a different light color to visually distinguish the five options.
- Create a small oval shape for the puzzle tab and a trapezoid shape for the puzzle notch:
- Insert a small oval and a trapezoid shape.
- Right-click the trapezoid and select Edit Points. Adjust the points by dragging the small squares inward to shape the trapezoid into a notch.
- Select both shapes, remove outlines, and merge them using Union to create one puzzle tab shape.
- Duplicate this puzzle tab and position it on each piece’s edge where the pieces connect, rotating as necessary using Alt + Right Arrow to fit perfectly.
- Use the Subtract merge shape function to cut the tabs into the puzzle pieces where needed, creating the interlocking puzzle effect.
This step brings the infographic to life with a polished puzzle design that visually represents interconnected options.
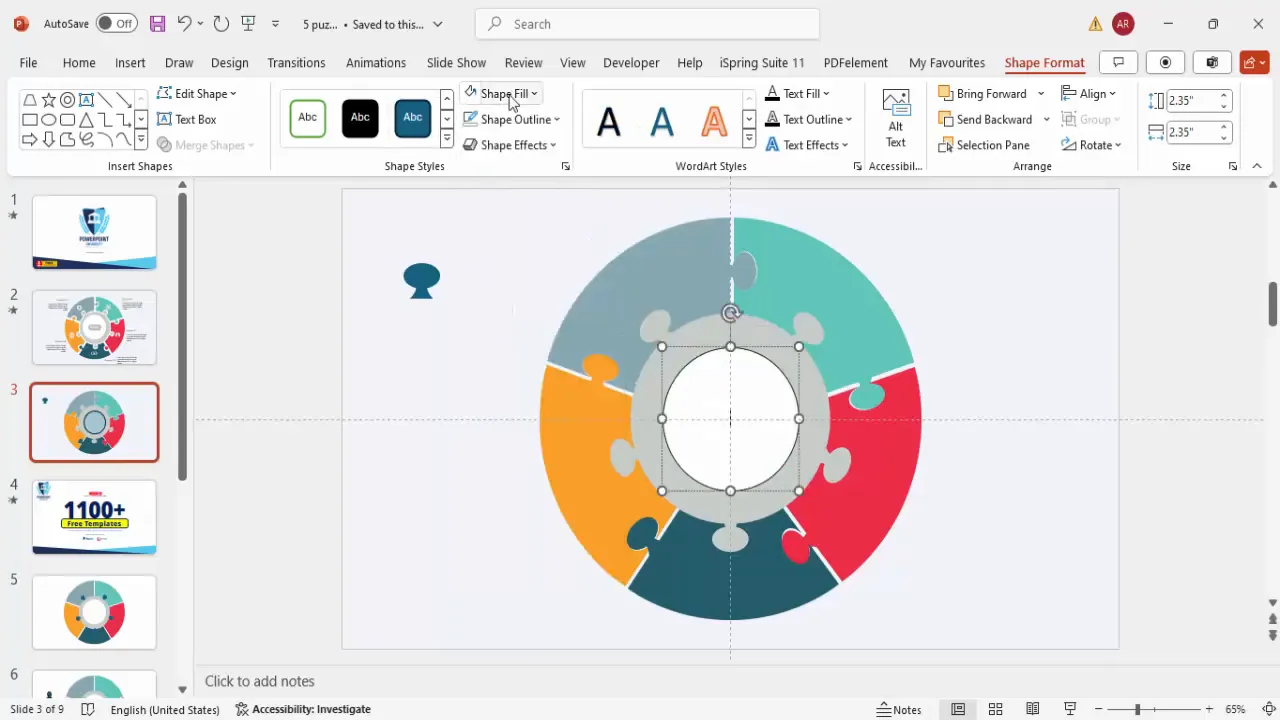
Adding the Central Oval and Final Touches
Now, add a central oval shape to complete the infographic and provide a space for the main title or theme of the slide:
- Insert an oval shape in the center of the puzzle pieces.
- Align it center and middle using the guides.
- Hold Ctrl + Shift and resize the oval to the desired size.
- Set the oval’s fill color to a light gray and remove the outline.
- Duplicate the oval shape multiple times and position duplicates on each puzzle piece for subtle design accents.
- Select all the gray ovals and merge them using the Union function to create a cohesive shape.
- Insert a larger white oval in the center, align it, and remove the outline. Add a white outline with increased width for a clean finish.
- Delete any extra shapes that overlap or clutter the design to maintain clarity.
These finishing touches enhance the slide’s aesthetics and provide a clear focal point for the title.
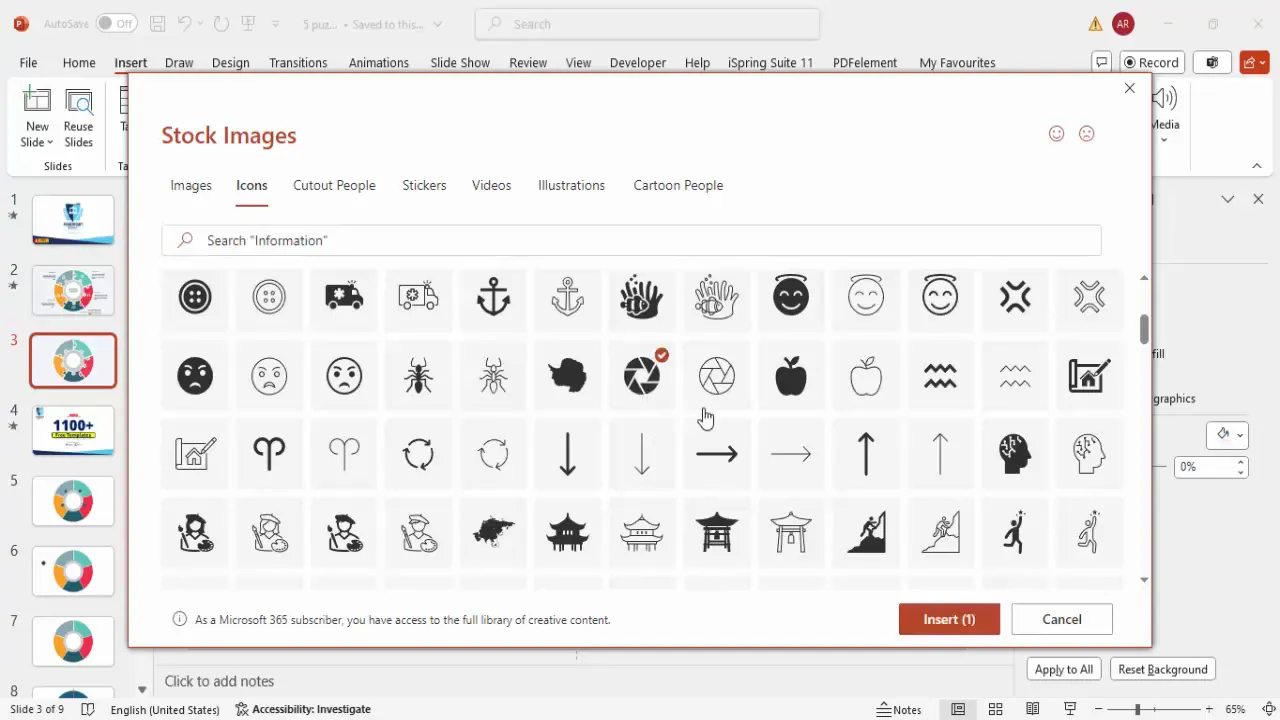
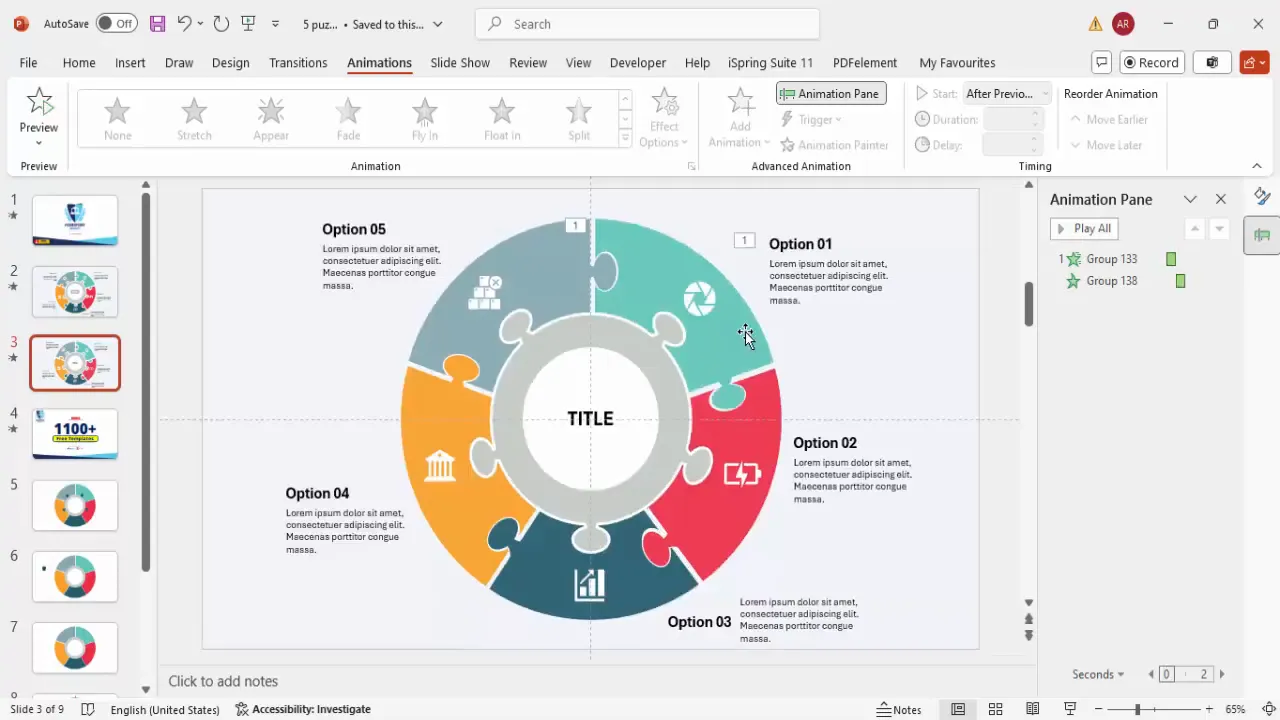
Inserting Icons and Adding Text
Icons and text bring meaning to the infographic pieces, making the slide informative and engaging. Here’s how to do it:
- Go to the Insert tab and select Icons.
- Choose relevant icons that represent each of the five options. For example, business-related icons for corporate presentations or thematic icons matching your content.
- Insert the icons and resize them to approximately 0.7 inches in both height and width.
- Change the icon color to white or any color that contrasts well with the background shapes.
- Position each icon centrally within the corresponding puzzle piece.
- Add a text box in the center oval for the main title. Make sure the text is bold, centered, and large enough to be easily readable.
- Insert text boxes for each option, labeling them “Option 1,” “Option 2,” etc.
- Below each option title, add descriptive text or placeholder text (e.g., Lorem Ipsum) with a smaller font size (e.g., 12 pt) to provide more details.
- Adjust the text box positions to ensure none of the content is cut off during presentation.
- Group the icons and text boxes for each option separately for easier management.
Icons paired with concise text make the infographic slide easy to understand and visually appealing.

Applying Animations for Interactivity
Animations add interactivity and professionalism to your slide, allowing each option to appear sequentially and maintain audience focus. Here’s how to apply animations effectively:
- Open the Animations tab and enable the Animation Pane.
- Select the first puzzle piece group and apply the Wipe animation effect, setting it to wipe from the left.
- Add a Stretch animation effect to the same group, setting it to happen After Previous.
- Use the Animation Painter tool to copy these animations to the second puzzle piece group.
- Modify the wipe direction for the second piece to come from the top.
- Repeat the process for the third, fourth, and fifth pieces, adjusting wipe directions such as from bottom or right to create variety.
- For the central title, apply the Zoom entrance effect with the animation set to happen After Previous.
- Preview the animations to ensure smooth transitions and that each option appears clearly one by one, ending with the main title.
Animations guide your audience’s attention and make the presentation dynamic without overwhelming the content.
Frequently Asked Questions
1. Can I customize the colors of the puzzle pieces?
Absolutely! You can choose any fill colors you prefer for the five puzzle pieces to match your brand or theme. Light colors work best for readability when combined with white icons and text.
2. Is this infographic slide suitable for other numbers of options?
While this tutorial focuses on five options, the same principles can be adapted for other numbers. You would need to adjust the division of the circle accordingly using polygons or guides for equal parts.
3. Can I use my own icons instead of PowerPoint’s built-in icons?
Yes, you can insert custom images or icons by using the Insert Picture feature. Just ensure they are high quality and visually consistent with the design.
4. How do I ensure animations work smoothly during my presentation?
Practice your slide show in Slide Show mode and use the Animation Pane to fine-tune the timing and sequence of animations. Avoid too many animations to keep the flow professional.
5. Can I add hyperlinks to each puzzle piece for interactive navigation?
Yes, you can add hyperlinks to each option so that clicking on a puzzle piece takes you to another slide or external resource, enhancing interactivity.
Conclusion
Mastering PowerPoint slide design with creative infographic slides like this 5-option puzzle layout can elevate your presentations and captivate your audience. By combining precise shape manipulation, thoughtful color choices, meaningful icons, and smooth animations, you create a professional and engaging visual story.
Remember, the key to effective PowerPoint slide design is balancing aesthetics with clarity. This tutorial empowers you to do just that by breaking down complex shapes into manageable steps and leveraging PowerPoint’s powerful tools.
Don’t hesitate to experiment with colors, icons, and animation styles to tailor the slide to your unique presentation needs. With practice, you’ll be able to create stunning infographic slides that communicate your message clearly and leave a lasting impression.
Happy designing!
Check out the full video: Create a 5-option Option Infographic Slide in PowerPoint


