
Creating powerful and visually appealing PowerPoint slides quickly is a skill that every presenter and designer should master. In this comprehensive guide, I’ll walk you through how I designed five beautiful PowerPoint slides in just ten minutes. Inspired by Louis’ challenge, this tutorial focuses on practical techniques, smart shortcuts, and design principles to help you speed up your workflow without sacrificing quality.
Whether you’re preparing a business presentation, educational content, or creative pitch, these actionable tips will help you produce professional slides rapidly while maintaining a stylish and modern look. Let’s dive into the process of efficient PowerPoint slide design that balances speed and aesthetics.
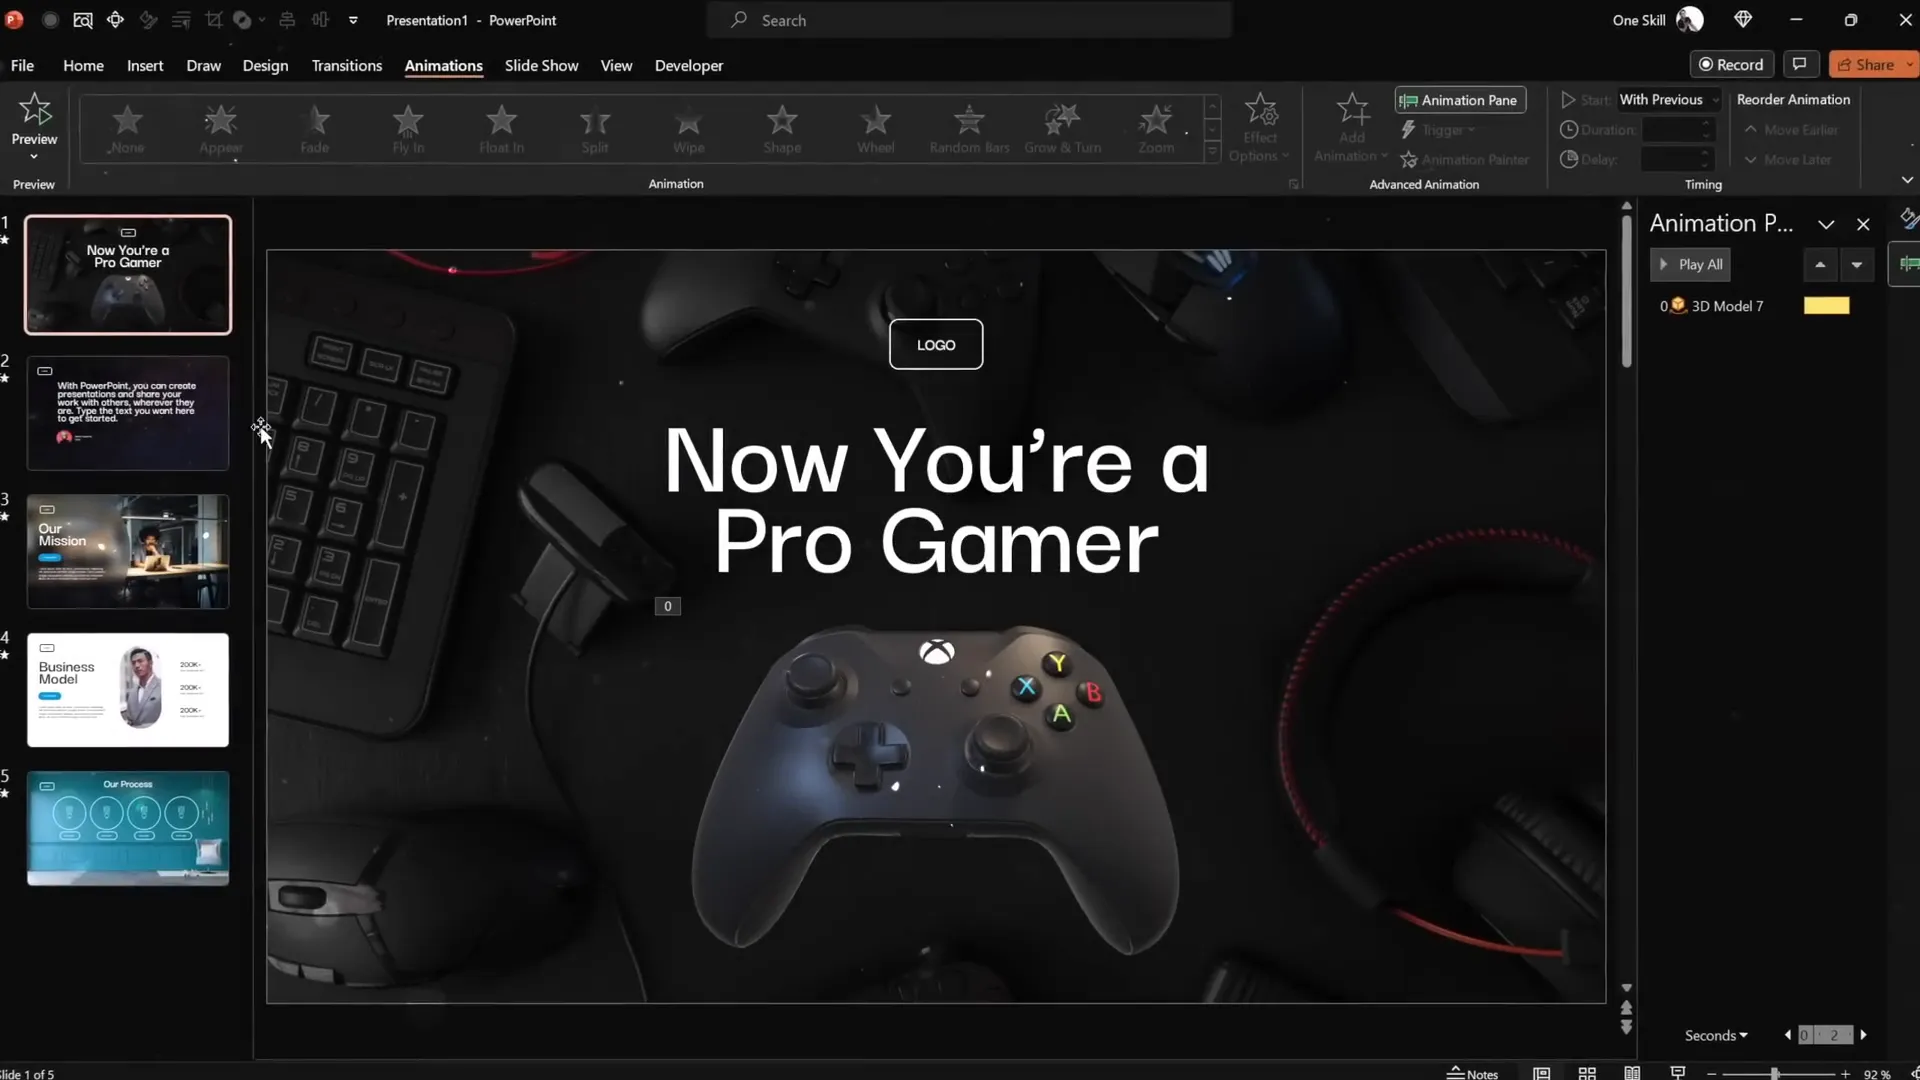
Table of Contents
- Preparation and Quick Access Toolbar Customization
- Slide 1: Gamer-Themed Slide with 3D Animation
- Slide 2: Fullscreen Video Background with Quote and Portrait
- Slide 3: Glassmorphic Effect Slide
- Slide 4: Business Model Slide with KPIs
- Slide 5: Process Infographic on Wall Background
- Final Touches: Transitions and Animations
- Frequently Asked Questions
- Conclusion
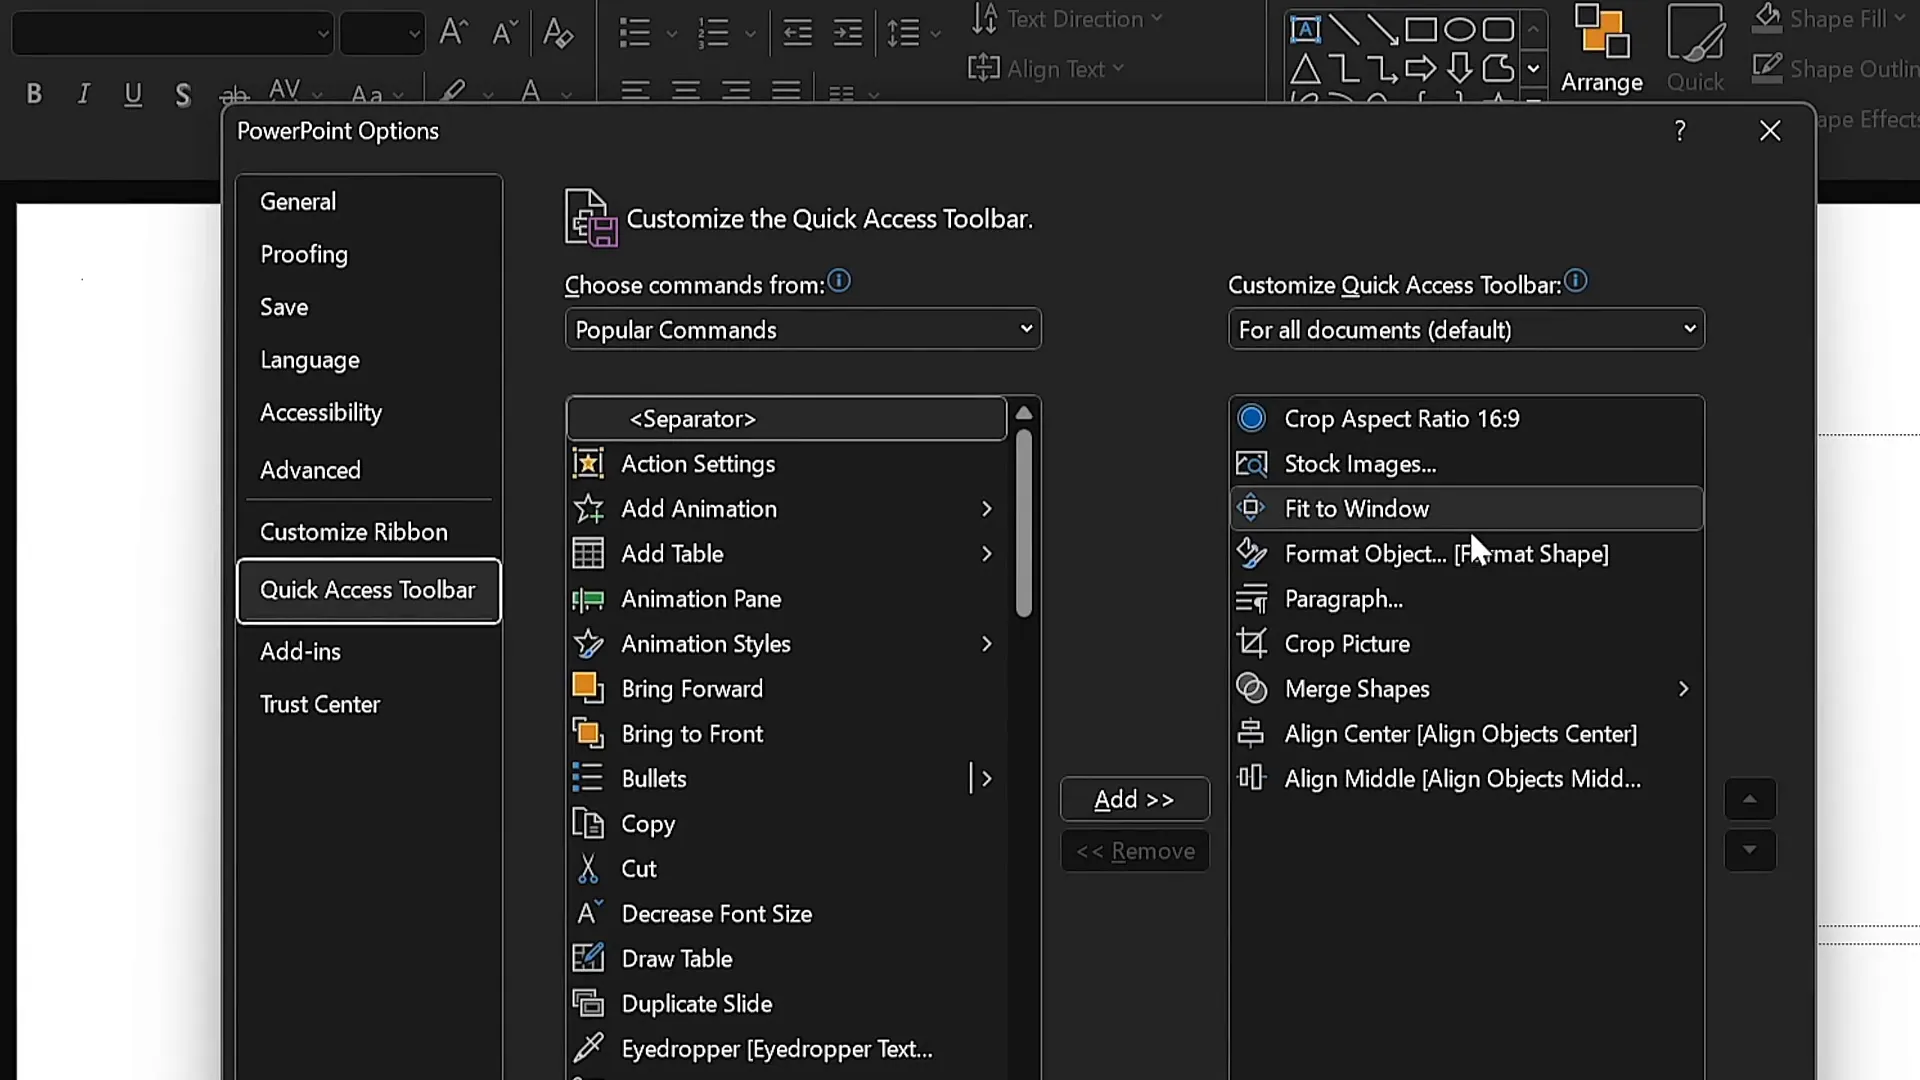
Preparation and Quick Access Toolbar Customization
Before jumping into slide design, setting up your workspace efficiently is crucial to speed up your workflow. I customized the Quick Access Toolbar in PowerPoint by adding frequently used commands, enabling me to access them instantly using keyboard shortcuts.
Here’s how I configured it for optimal speed:
- Stock Photos Access (Alt + 2): Quickly open PowerPoint’s stock photo library to insert high-quality images.
- Format Shape Pane (Alt + 4): Open and adjust shape properties without navigating menus.
- Shape Selection: Easily select and modify shapes on the slide.
Holding down the Alt key highlights the shortcut numbers, allowing me to insert images or open panes with just a couple of keystrokes. This setup is a game-changer for anyone looking to create slides rapidly.
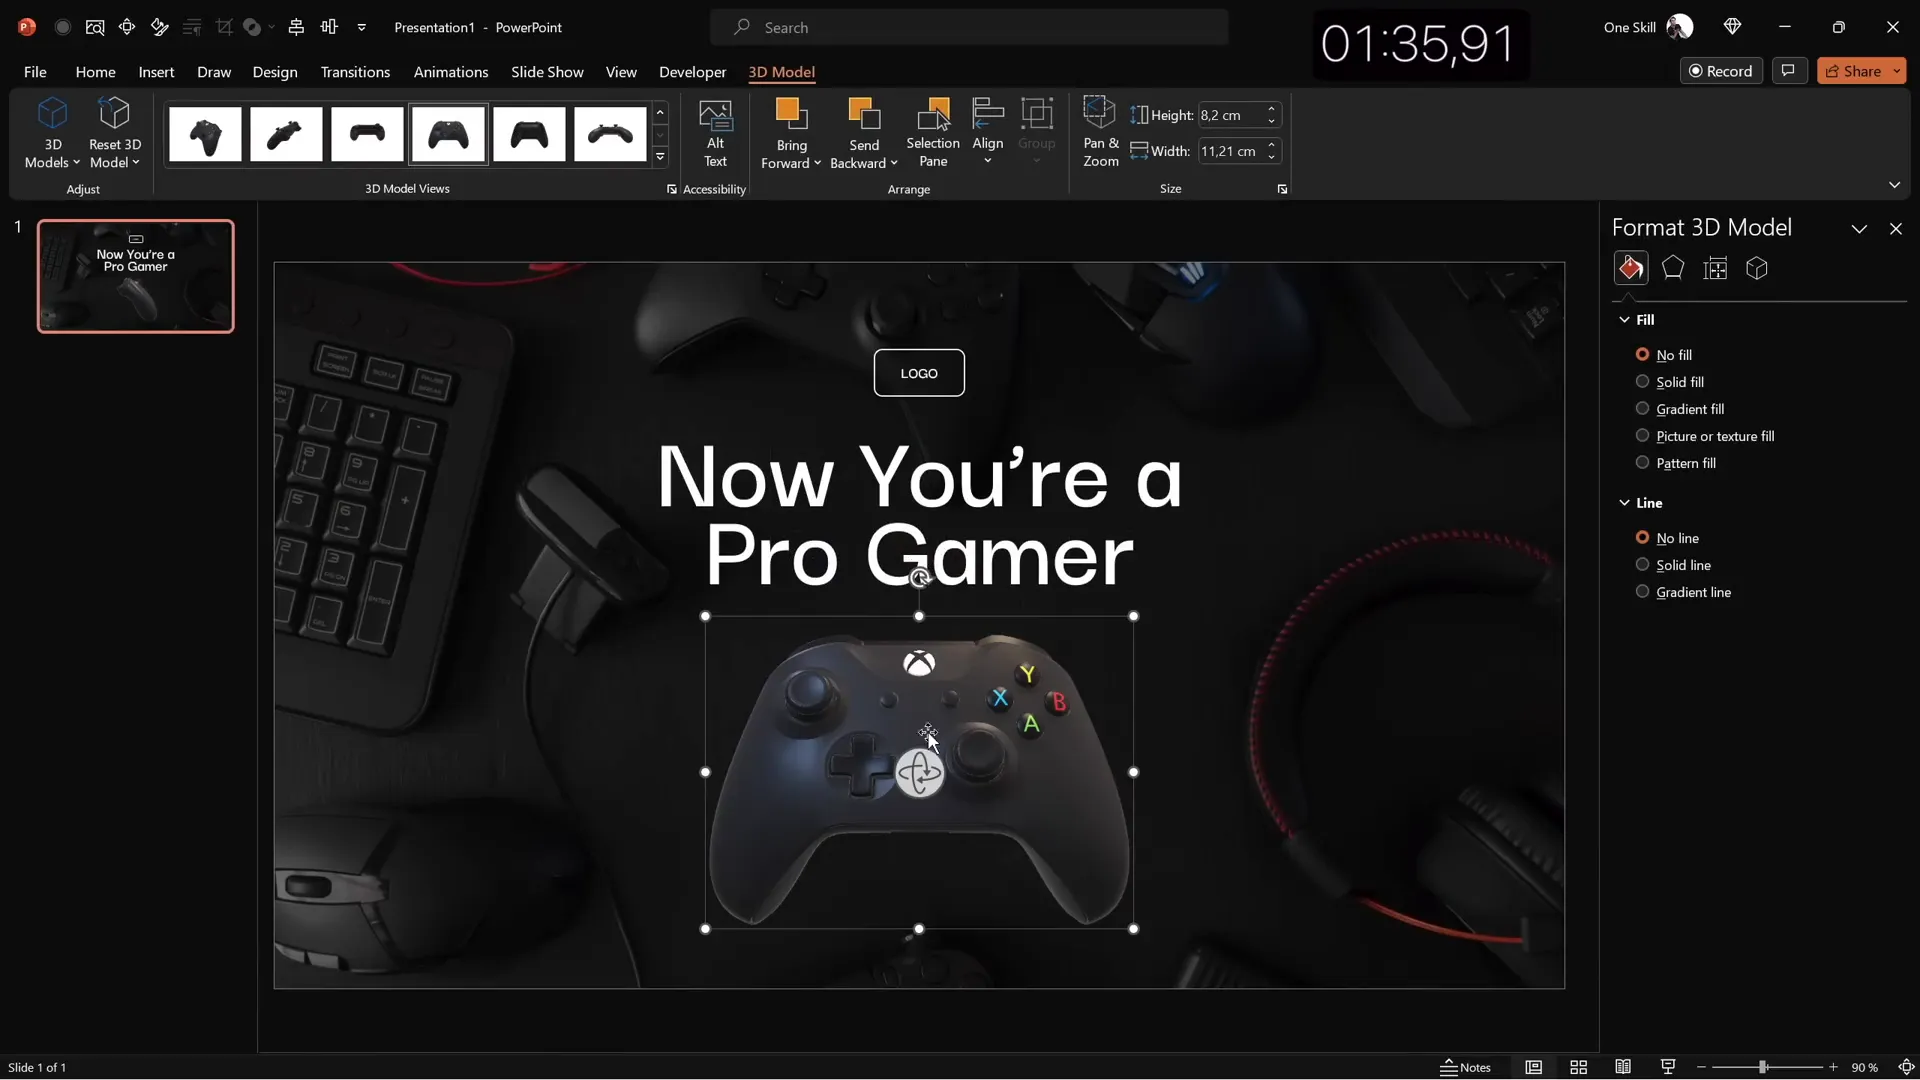
Slide 1: Gamer-Themed Slide with 3D Animation
For the first slide, I chose a gamer theme to showcase how to integrate visuals and dynamic elements quickly. Here’s the step-by-step process:
- Choose a Color Palette and Font: I selected a fresh color palette and paired it with the Darker Grotesque font family, opting for the semi-bold style to make the title pop.
- Insert a Blank Layout: Starting with a clean slate helps build the slide from scratch without constraints.
- Add a Background Image: I picked a striking stock photo relevant to gaming, cropped it to the slide’s aspect ratio, and resized it to cover the full slide.
- Adjust Image Brightness: To make the text stand out, I reduced the photo’s brightness by 50%, creating a darker background.
- Add Slide Title: Typed “Now you are a pro gamer” in white to contrast with the darkened background, increased font size to 80, and adjusted line spacing to 0.6 for a clean look.
- Create a Simple Logo: Inserted a rounded rectangle, typed “logo,” and styled it with a transparent fill and white 1pt border.
- Insert 3D Model: Searched for a dark-colored controller model and inserted it. Positioned it towards the bottom and applied a “swing” 3D animation with strong intensity lasting 3 seconds.
- Balance Elements: Adjusted placement to ensure visual harmony and alignment.
This slide combines bold typography, a cinematic photo background, and engaging 3D animation to create a modern and dynamic look perfect for gaming or tech presentations.
Slide 2: Fullscreen Video Background with Quote and Portrait
The second slide introduces a captivating full-screen video background, ideal for emphasizing important quotes or key messages.
- Insert Full-Screen Video: I searched for a dark, looping abstract video and inserted it to cover the entire slide, adding motion and energy.
- Reuse Elements: Copied the logo and slide title from the first slide to maintain consistency and save time.
- Align Title Left: Adjusted the title alignment to the left and decreased font size for better balance with the video background.
- Insert Quote Text: Copied a passage of text from a PowerPoint template and formatted it to match the slide’s style. Centered the text for emphasis.
- Add Portrait Photo: Inserted a small portrait photo below the quote as a visual credit to the quote’s author.
- Crop and Shape Photo: Cropped the photo to a 1:1 aspect ratio, then cropped it into a circle for a polished look.
- Create Text Box for Author Info: Added a text box below the photo with the author’s name, surname, and job title (e.g., CEO). Used a smaller font size (14pt) and medium weight font for readability.
- Align Elements: Centered the text box and photo together, ensuring the entire block was visually balanced in the middle of the slide.
This slide is perfect for presentations that require highlighting testimonials, quotes, or important statements with a sophisticated multimedia background.
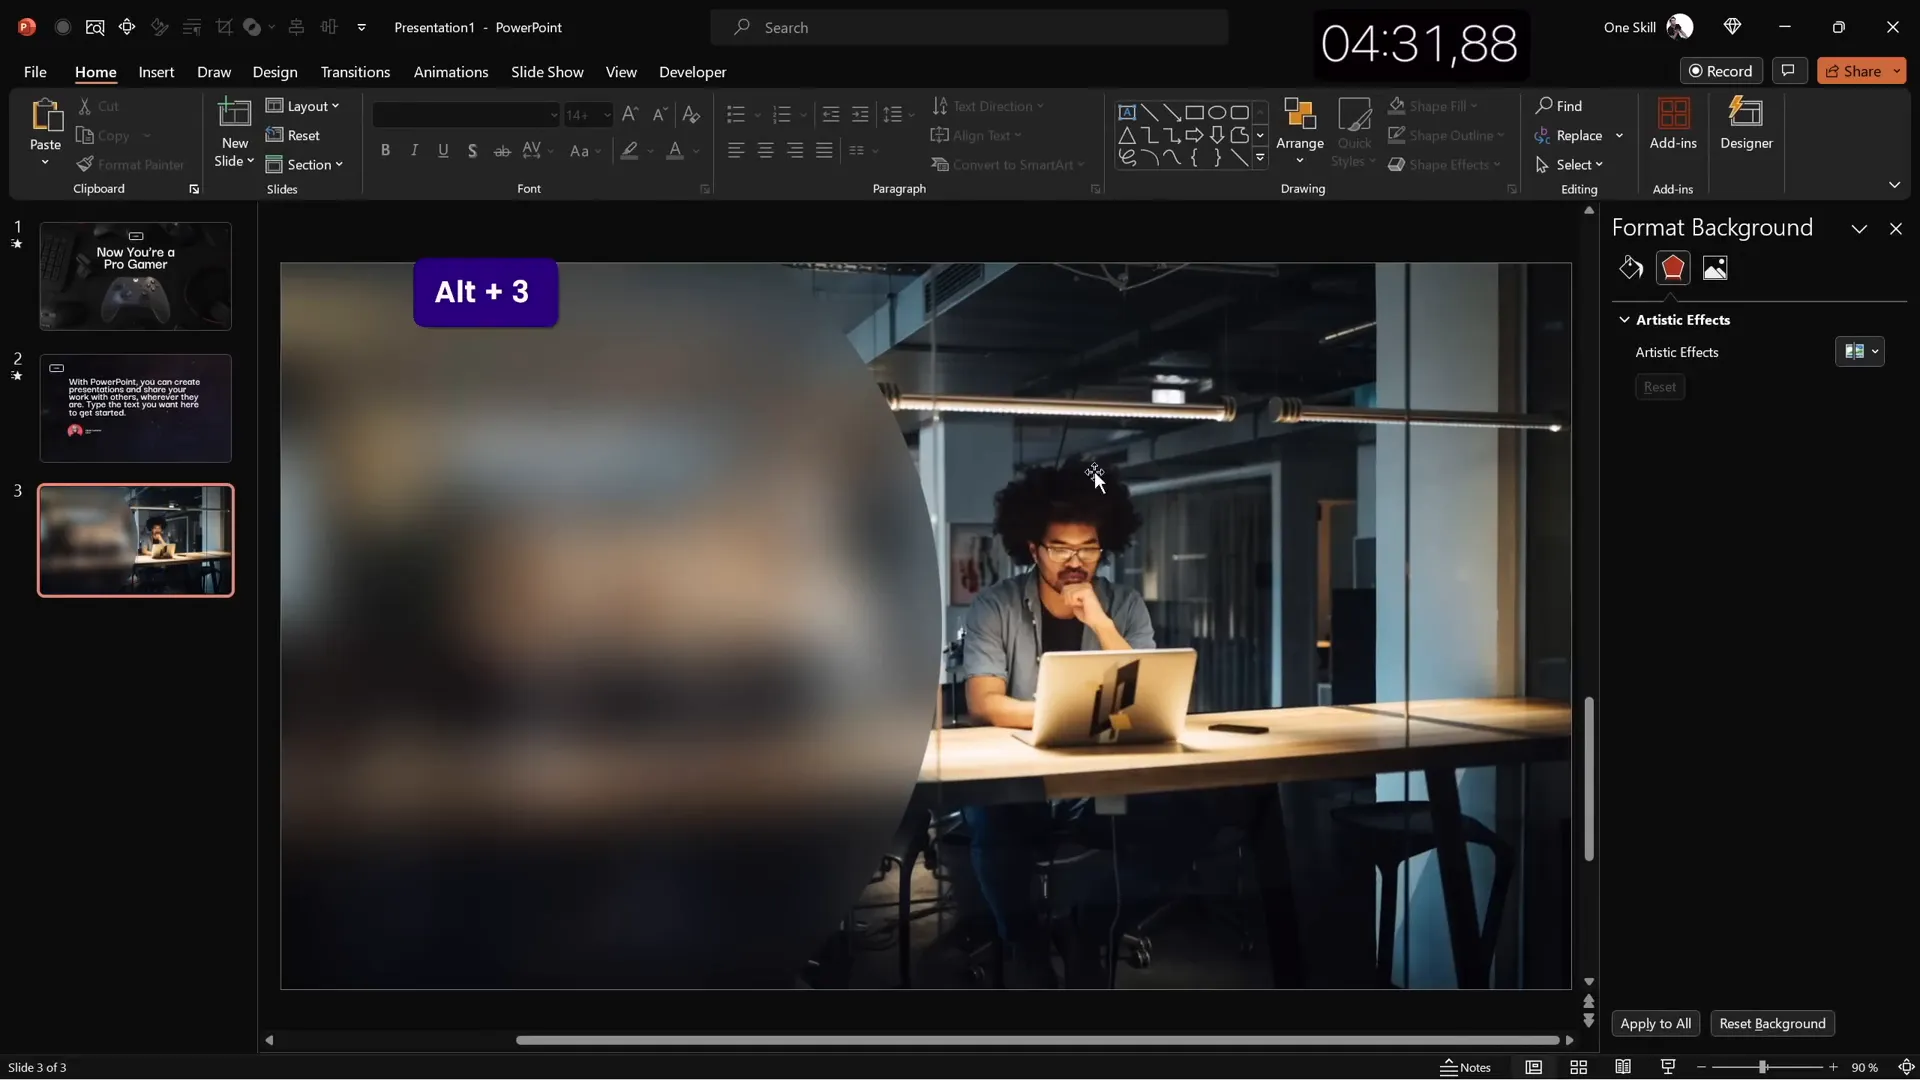
Slide 3: Glassmorphic Effect Slide
Glassmorphism is a trendy design style characterized by translucent, frosted-glass-like layers. This slide demonstrates how to implement that effect in PowerPoint quickly.
- Select Background Photo: Chose a beautiful photo of a late office working environment to set a professional tone.
- Duplicate and Blur Background: Made a copy of the photo and applied maximum blur to it.
- Set Blurred Photo as Background: Pasted the blurred version as the slide’s background to create depth.
- Insert Original Photo: Positioned the original photo in the center of the slide.
- Create Glassmorphic Shape: Inserted a large circle on the left side, filled it with the slide background fill (translucent), and removed the outline.
- Add Text Elements: Copied the logo and slide title, aligned them to the left within the glassmorphic circle.
- Insert Slide Title: Typed “Our Mission” and aligned the text left for consistency.
- Add Paragraph Text: Used the PowerPoint formula
=lorem(1)to generate placeholder text, formatted with a smaller font size (16pt) and line spacing of 0.8 for readability. - Create Learn More Button: Reused the logo shape, resized it, and added the text “Learn More.” Applied a vibrant color fill with no transparency and a blurred shadow matching the button color for a subtle 3D effect.
The glassmorphic effect adds a modern, elegant layer to the slide, making it visually appealing while emphasizing the mission statement and call to action.
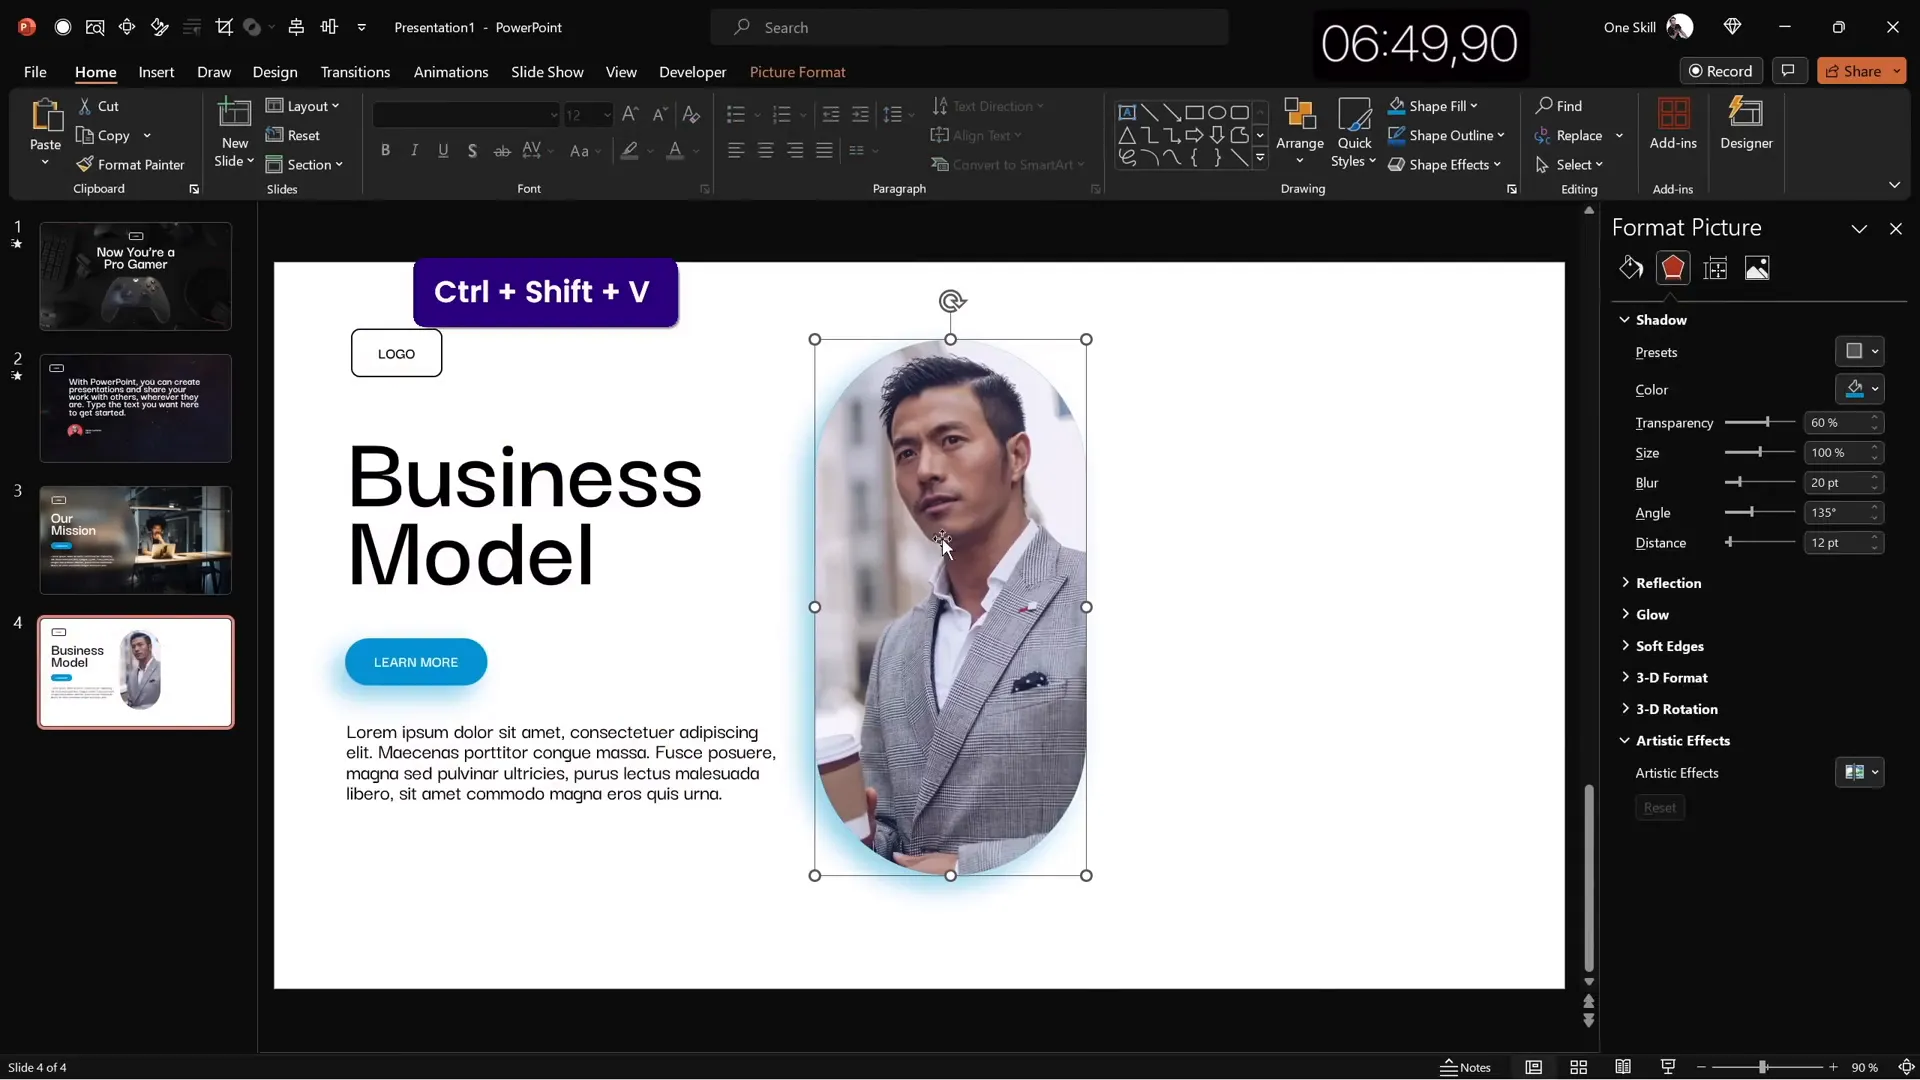
Slide 4: Business Model Slide with KPIs
The fourth slide is designed for business presentations, featuring a strong visual focus on key performance indicators (KPIs) alongside an engaging image placeholder.
- Reuse Elements from Previous Slide: Copied the glassmorphic elements but changed text colors to black for a lighter background.
- Change Slide Title: Updated the title to “Business Model.”
- Insert Rounded Rectangle Placeholder: Added a large rounded rectangle in the center to serve as an image container.
- Fill Shape with Photo: Inserted a stock photo of a man holding a coffee cup inside the shape.
- Crop Photo to Shape: Used the “Intersect” merge shape command to perfectly fit the photo inside the rounded rectangle.
- Add Shadow to Photo: Copied the button’s blue shadow, applied it to the photo, and blurred it heavily for a subtle floating effect.
- Add White Border: Added a 3pt white outline around the photo to enhance separation from the background.
- Create KPIs Section: Added multiple text boxes on the right side for KPIs, resizing and formatting with a lighter gray font and 16pt size.
- Group and Align KPIs: Grouped the KPI text boxes and distributed them vertically with equal spacing, aligning them to the middle right of the slide.
This slide layout perfectly balances imagery and data, making it ideal for business reviews, strategy sessions, and investor presentations.
Slide 5: Process Infographic on Wall Background
The final slide is an infographic-style layout that visually communicates a process using icons and numbered steps.

- Insert Full-Screen Wall Photo: Chose a textured wall photo as a backdrop, resizing it to fill the slide.
- Copy Elements from Previous Slides: Reused the logo and title elements for consistency.
- Type Slide Title: Set the title as “Our Process” and positioned it centrally near the top.
- Create Circles for Steps: Inserted multiple circles styled like the logo (transparent fill, white outline) to represent each step.
- Add Icons: Inserted white icons (e.g., lightbulb) inside each circle to symbolize different stages.
- Add Step Labels: Created small text boxes inside or near each circle with step numbers and brief descriptions.
- Group and Distribute: Grouped all bubble elements and distributed them evenly across the slide horizontally for a clean infographic look.
- Adjust Title Size: Reduced the slide title font size to 50pt to create more room for the infographic.
This slide is a great example of how to transform simple shapes and icons into a meaningful visual story within minutes.

Final Touches: Transitions and Animations
After designing the slides, I applied some finishing touches to enhance the presentation’s flow and engagement without wasting precious time.
- Slide Transitions: Applied Uncover transition to slides 2 through 5 for a consistent feel, and a Fade transition to the first slide for a smooth start.
- Text Animations: Added an Appear animation to the quote text on slide 2, animating it by letter with a delay of 0.03 seconds for a dynamic reveal.
- Group Animations: Grouped multiple elements (such as the business KPIs) and applied a Fly In animation to introduce them smoothly.
These subtle animations and transitions help maintain audience attention and give your presentation a polished and professional feel.

Frequently Asked Questions
How can I speed up my PowerPoint slide design process?
Customize your Quick Access Toolbar with frequently used commands, use keyboard shortcuts, reuse elements across slides, and leverage built-in PowerPoint features like stock photos, 3D models, and formulas for placeholder text.
What is the glassmorphic effect, and how can I create it in PowerPoint?
Glassmorphism is a design style that uses translucent, blurred layers to mimic frosted glass. You can create it by placing a blurred background image, then overlaying a shape filled with the slide background fill (translucent) and no outline. Adding content inside the shape completes the effect.
How do animations improve my PowerPoint presentation?
Animations guide the audience’s focus, create a dynamic flow, and make content more engaging. Use simple animations like appear or fly in to emphasize key points without overwhelming viewers.
What are KPIs, and how should I display them on slides?
Key Performance Indicators (KPIs) are measurable values that demonstrate how effectively objectives are being met. Display KPIs in clearly formatted text boxes, grouped and aligned neatly, usually next to visuals or charts for easy comprehension.
Can I use videos as slide backgrounds?
Yes, inserting full-screen looping videos can add energy and interest to your slides. Ensure the video doesn’t distract from your message by adjusting the opacity or choosing subtle abstract videos.
Conclusion
Designing professional and eye-catching PowerPoint slides quickly is entirely possible with the right techniques and tools. By customizing your workspace, leveraging PowerPoint’s stock assets, and applying consistent design principles, you can create engaging presentations in a fraction of the time.
From dynamic gamer slides with 3D animations to elegant glassmorphic effects and business-focused KPI layouts, this tutorial demonstrates how to balance speed and quality effectively. Remember, practice and preparation are key—start by setting up your Quick Access Toolbar, then challenge yourself to design slides within time limits to build your skills.
For anyone looking to master PowerPoint slide design, incorporating these strategies will boost your confidence and efficiency, helping you deliver presentations that captivate and inform.
Stay creative, keep experimenting, and most importantly, have fun designing!
Check out the full video: 5 SLIDES in 10 Minutes!🔥TUTORIAL🔥


