
Creating engaging and visually striking slides quickly is a skill every presenter and designer should master. Whether you’re preparing for a business pitch, a creative presentation, or educational content, the ability to craft beautiful PowerPoint slides efficiently can save you hours and elevate your message. In this comprehensive guide, I will walk you through how I designed five unique and captivating PowerPoint slides in just ten minutes, sharing practical tips, techniques, and workflow hacks that can transform your slide design process.
This tutorial draws inspiration from the creative challenge set by Louis, who inspired me and other PowerPoint enthusiasts to create five slides within ten minutes. By customizing my PowerPoint workspace and applying smart design principles, I managed to produce five diverse slides that showcase different design styles and multimedia elements. Let’s dive into the step-by-step process and explore how you too can master fast, effective PowerPoint slide design.
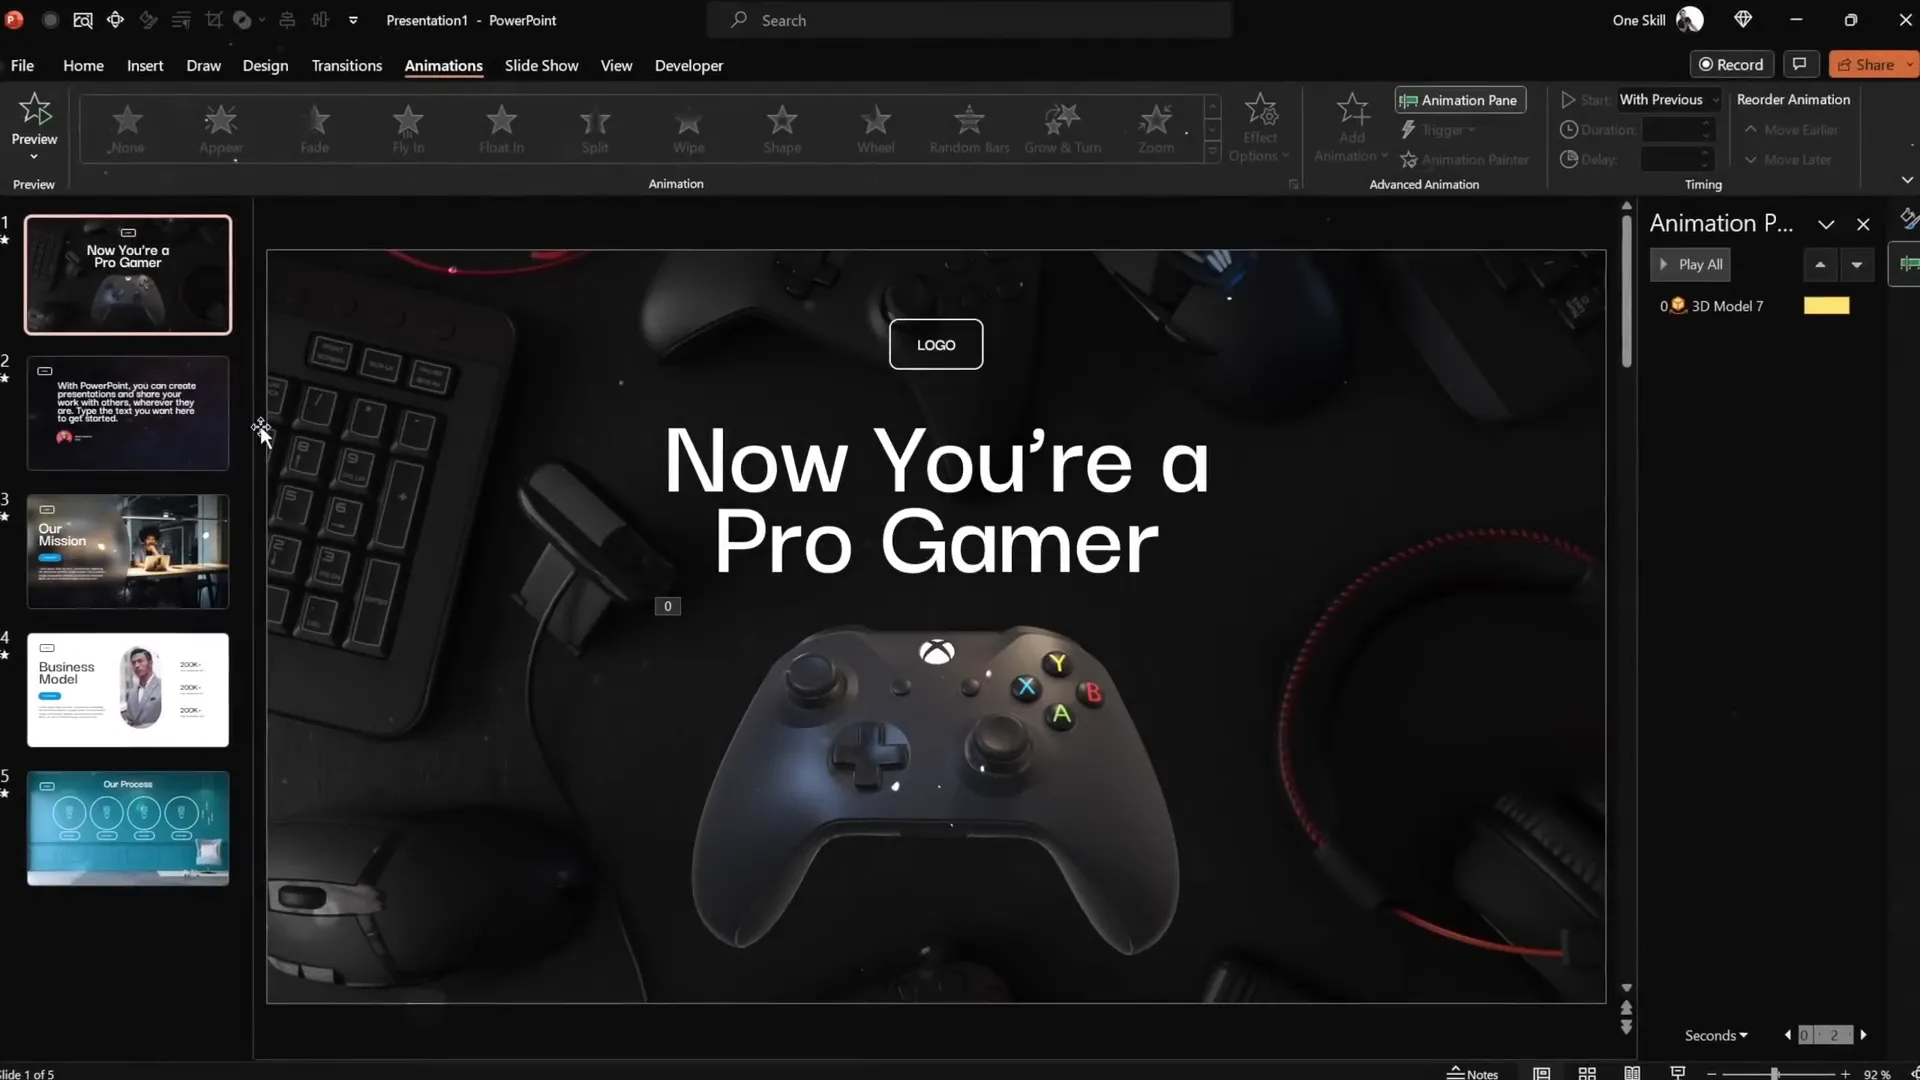
Table of Contents
- Customizing Your PowerPoint Workspace for Speed
- Slide 1: Pro Gamer Theme with 3D Model and Animation
- Slide 2: Full-Screen Looping Video with Quote and Portrait
- Slide 3: Glassmorphic Effect with Blurred Background
- Slide 4: Business Model Slide with Image Mask and KPIs
- Slide 5: Infographic Process Slide with Iconography
- Final Touches: Animations and Transitions
- Frequently Asked Questions (FAQ)
- Conclusion
Customizing Your PowerPoint Workspace for Speed
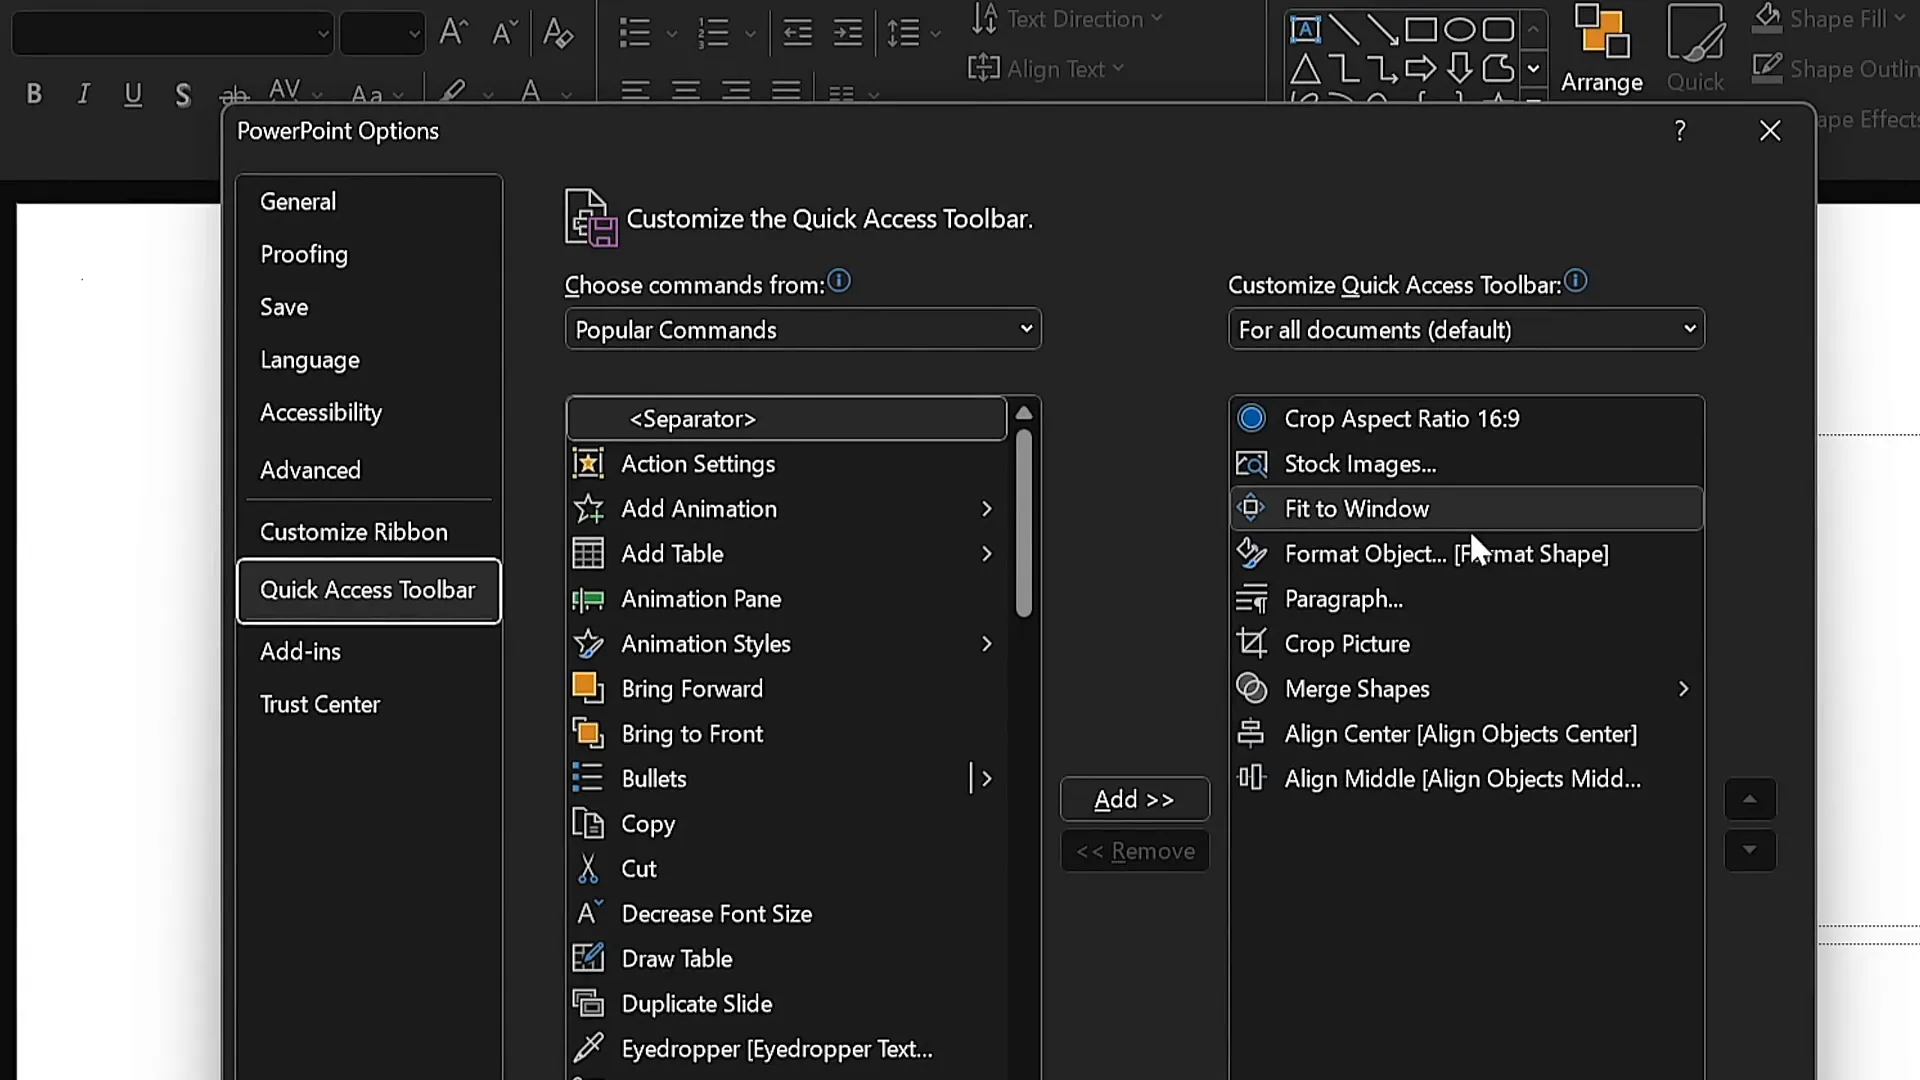
Before starting any design project, setting up your workspace to maximize efficiency is crucial. I customized my Quick Access Toolbar in PowerPoint to include the commands I frequently use, allowing me to access them with simple keyboard shortcuts. This setup shaved valuable seconds off my workflow and helped me stay focused on design rather than hunting for tools.
Here’s how I optimized my Quick Access Toolbar:
- Added commands like Insert Stock Photos, Select Shape, and Format Shape Pane.
- Enabled keyboard shortcuts using the Alt key. For example, pressing Alt + 2 opens the stock photos pane instantly.
- Mapped other commands to easy-to-remember numbers for quick access without interrupting the creative flow.
This setup is a game-changer for anyone looking to speed up their PowerPoint slide design. I highly recommend customizing your Quick Access Toolbar with your most-used commands.
Slide 1: Pro Gamer Theme with 3D Model and Animation
For the first slide, I chose a bold and dynamic “Pro Gamer” theme. Here’s the workflow I followed:
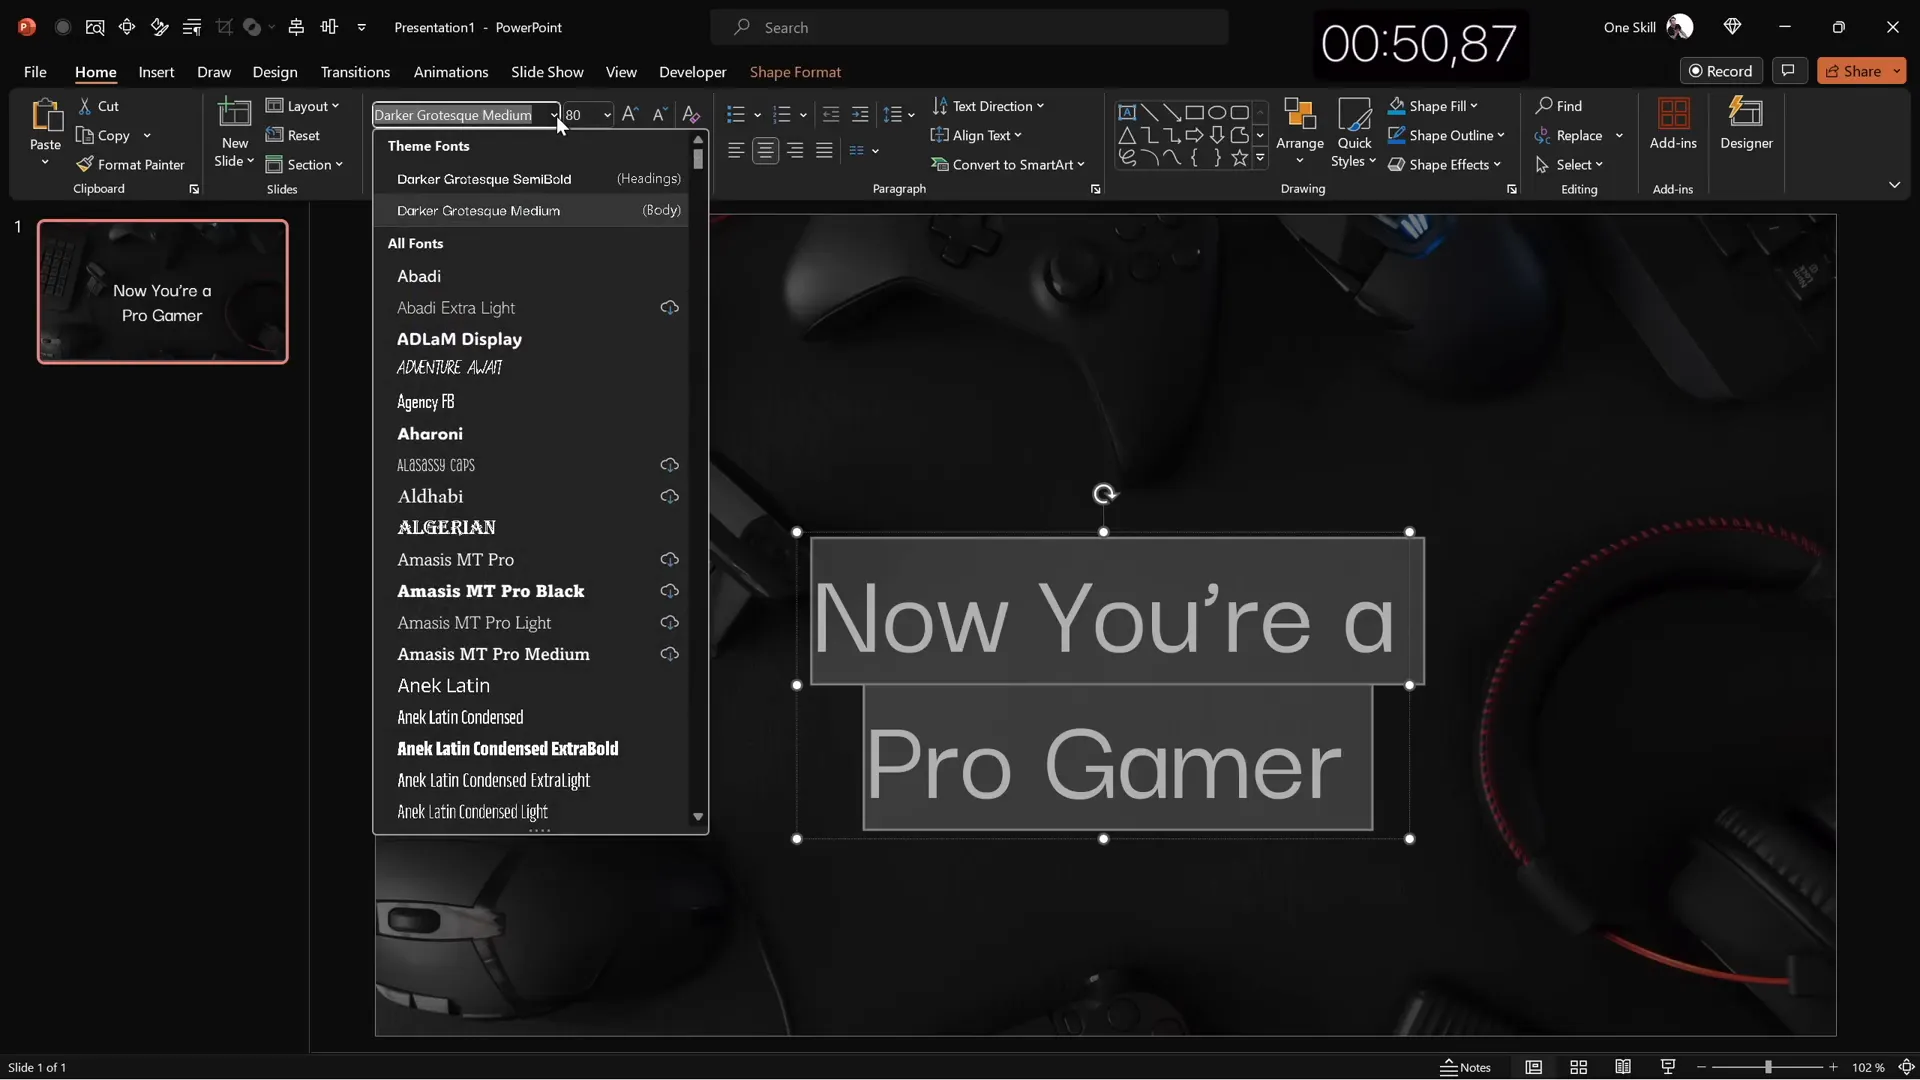
- Set the color palette and font: I selected a fresh color palette that complemented the theme and chose Darker Grotesque Semi Bold as the font for a strong, modern look.
- Background image: I inserted a striking stock photo related to gaming and cropped it to fit the slide’s aspect ratio perfectly.
- Adjust brightness: To make the text pop, I darkened the photo by reducing brightness by 50%.
- Slide title: Typed “Now you are a pro gamer” in white, increased the font size to 80pt, and adjusted line spacing to 0.6 for a sleek look.
- Logo creation: Created a simple transparent logo using a rounded rectangle with a white outline and the same font.
- 3D model: Inserted a dark 3D controller model, positioned it thoughtfully, and applied a strong swing animation lasting 3 seconds to add visual interest.
- Final arrangement: Adjusted the placement of all elements to ensure balance and harmony.
This slide blends modern typography with 3D animation, making it an eye-catching opener for presentations related to gaming, technology, or entertainment.
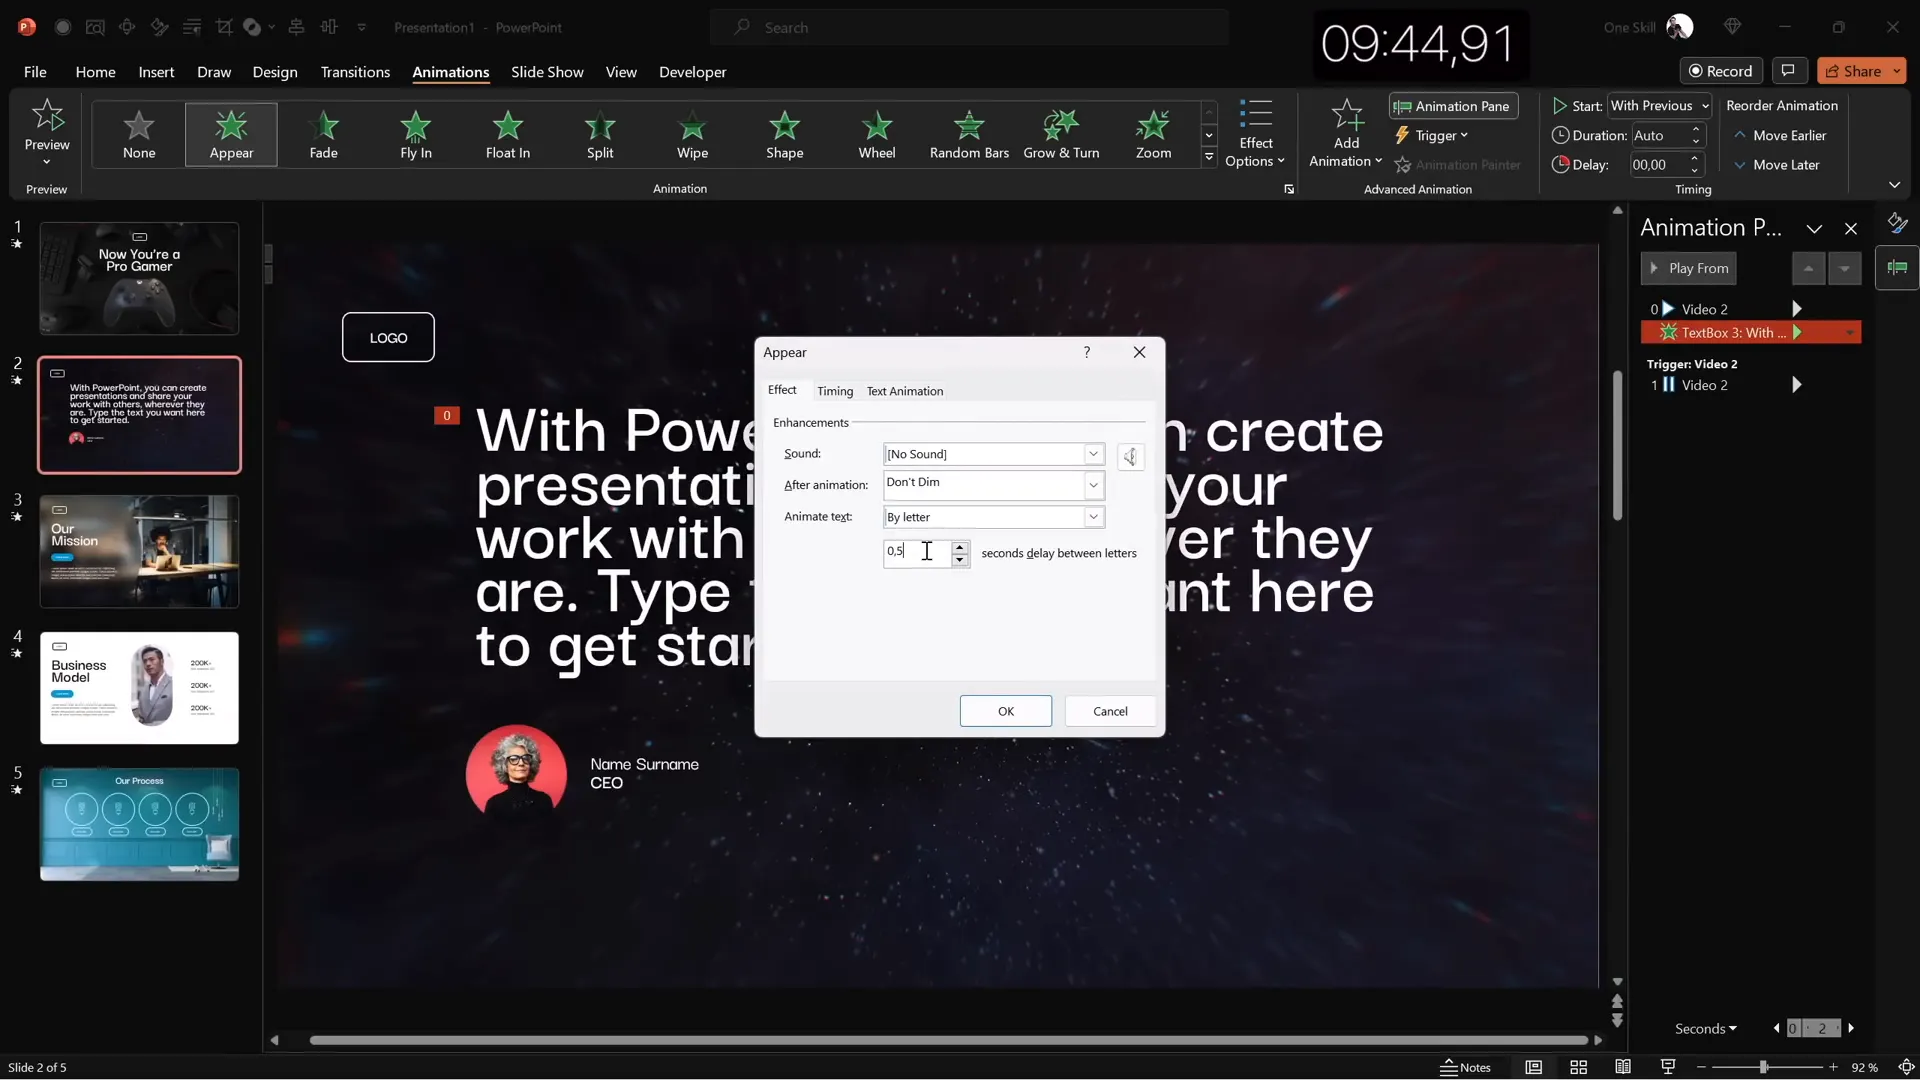
Slide 2: Full-Screen Looping Video with Quote and Portrait
The second slide uses a full-screen looping video as a background, creating a dynamic and immersive experience. Here’s how I built it:
- Insert video: I searched for a dark, abstract looping video from PowerPoint’s stock media and inserted it to cover the entire slide.
- Reuse elements: To save time, I copied the logo and slide title from the first slide and aligned the title to the left with a smaller font size.
- Text content: Pulled a passage of text from a PowerPoint template to simulate a quote or important message, ensuring consistent formatting.
- Portrait photo: Added a cropped, circular portrait photo below the text to give credit to the quote’s author, resizing and aligning it centrally.
- Caption text: Created a small text box below the photo to include the name, surname, and job title (e.g., CEO), using the Darker Grotesque Medium font at 14pt.
This slide design works exceptionally well for emphasizing quotes, testimonials, or key messages with a visually appealing video background that keeps the audience engaged.
Slide 3: Glassmorphic Effect with Blurred Background
For the third slide, I experimented with the trendy glassmorphic design effect, which creates a frosted glass look, adding depth and sophistication. Here’s the step-by-step process:
- Select background photo: Chose a professional office photo to suit the business theme and covered the entire slide.
- Create blurred background: Made a copy of the photo and applied maximum blur.
- Set blurred photo as background: Copied the blurred image and pasted it as the slide background, then deleted the original photo to keep the slide clean.
- Insert glassmorphic shape: Added a large circle to the left side of the slide and filled it with the slide background fill color, ensuring no outline.
- Add text elements: Pasted the logo and slide title, aligned them left, and typed the title “Our Mission.”
- Insert body text: Used the PowerPoint
=lorem(1)formula to generate placeholder text for the mission statement, formatted with 16pt font and line spacing of 0.8. - Create a call-to-action button: Reused the logo shape, resized it, typed “Learn More,” and applied a vibrant color fill with a blurred shadow for emphasis.
The glassmorphic effect adds a modern and polished feel to your slide, making it perfect for mission statements, about us pages, or any content where you want to highlight transparency and clarity.

Slide 4: Business Model Slide with Image Mask and KPIs
Next, I designed a business-focused slide featuring a photo placeholder with a creative mask and key performance indicators (KPIs). Here’s how I approached it:
- Reuse elements: Pasted the elements from the previous slide but switched the text color to black for better contrast on a lighter background.
- Change slide title: Updated the slide title to “Business Model.”
- Insert rounded rectangle: Added a large rounded rectangle in the center of the slide as a photo mask.
- Choose photo: Inserted a stock photo of a man holding a coffee cup, resized and sent it to the back.
- Merge shapes: Selected both the photo and the rounded rectangle, used the “Intersect” merge shape function to crop the photo into the rounded rectangle shape.
- Add shadow: Pasted a blurred shadow from the button onto the photo for depth.
- Add white border: Applied a subtle white line of 3pt around the photo for a clean finish.
- Create KPIs: On the right side, created three vertically stacked text boxes representing KPIs with titles and descriptions, formatted in a lighter font and 16pt size.
- Align elements: Distributed KPIs evenly with consistent spacing and aligned all elements for a balanced composition.
This slide is ideal for business presentations where you want to showcase your business model visually alongside important metrics.

Slide 5: Infographic Process Slide with Iconography
The final slide is an infographic-style design illustrating a process using circles and icons on a textured wall background. Here’s how I created it:

- Insert background photo: Selected a photo featuring a textured wall to serve as an interesting backdrop.
- Copy elements: Reused the logo and slide title elements from previous slides.
- Slide title: Typed “Our Process” and positioned it centrally near the top.
- Create circles: Inserted simple circles styled with the logo’s outline format and no fill.
- Add icons: Searched for and inserted a white light bulb icon inside each circle to represent ideas or steps.
- Group and duplicate: Grouped the first circle and icon with a text label (“Step One”), then duplicated to create four evenly spaced circles horizontally.
- Adjust spacing: Used PowerPoint’s alignment and distribution tools to space the circles evenly across the slide.
- Final layout: Tweaked the slide title size and position to ensure enough space for the infographic elements.
This infographic slide is perfect for visualizing step-by-step processes, workflows, or project stages in a clean and visually appealing way.

Final Touches: Animations and Transitions
With the five slides designed, I added some finishing touches to enhance the presentation’s flow and engagement:
- Slide transitions: Applied the “Fade” transition to the first slide and “Uncover” transitions to slides two through five for smooth movement between slides.
- Text animations: Added an “Appear” animation to the text on slide two, set to start with the previous animation and animated by letter with a delay of 0.03 seconds per letter for a dynamic effect.
- Group animations: Grouped multiple elements on the last slide and applied a “Fly In” animation to bring them onto the screen elegantly.
These subtle animations and transitions add polish and professionalism without overwhelming the audience.
Frequently Asked Questions (FAQ)
How can I customize my PowerPoint Quick Access Toolbar for faster slide design?
To customize the Quick Access Toolbar, click the small dropdown arrow at the top left of PowerPoint and select “More Commands.” From there, add your frequently used commands like Insert Stock Photos, Format Shape Pane, or Select Shape. Assign keyboard shortcuts by holding the Alt key and noting the numbers that appear, allowing quick access to these tools during design.
What is the glassmorphic effect and how do I create it in PowerPoint?
Glassmorphism is a design trend that mimics frosted glass by combining transparency, blur, and layered elements. In PowerPoint, you can create this effect by blurring a background image, setting it as the slide background, and overlaying semi-transparent shapes filled with the slide background fill color but without outlines. This creates a modern, soft-focus look that adds depth and sophistication.
Can I use videos as full-screen backgrounds in PowerPoint slides?
Yes, PowerPoint allows you to insert videos that cover the entire slide. Simply insert a video, resize it to fill the slide, and set it to loop or play automatically. This technique adds dynamic movement and can make your slides more engaging, especially when paired with text or other design elements.
How do I merge shapes with photos in PowerPoint?
To merge shapes with photos, insert both the shape (e.g., rounded rectangle) and the photo, then select both by holding Shift. Navigate to the “Shape Format” tab, click “Merge Shapes,” and choose “Intersect.” This crops the photo into the shape, allowing for custom photo masks and creative layouts.
What are the best fonts for professional PowerPoint slide design?
Choosing the right font is essential. I recommend using modern, clean fonts like Darker Grotesque for a professional and contemporary look. Avoid default fonts like Calibri and Cambria, which can feel generic. Use semi-bold or medium weights for titles and body text, and maintain consistent font sizes and spacing for readability.
How can I speed up my PowerPoint slide design process?
Speed up your workflow by customizing the Quick Access Toolbar, using keyboard shortcuts, duplicating slides and elements, reusing templates, and preparing your slide master ahead of time. Also, leverage PowerPoint’s built-in stock photos, icons, and 3D models to quickly add high-quality visuals without searching externally.
Conclusion
Mastering PowerPoint slide design is about balancing creativity with efficiency. By customizing your workspace, leveraging PowerPoint’s powerful features like stock media, 3D models, animations, and shape merging, you can create stunning slides in a fraction of the time. The five slides I created in ten minutes demonstrate how diverse your slide designs can be—from animated gaming themes and video backgrounds to glassmorphic effects and business infographics.
Practice these techniques regularly to build your confidence and speed. Remember, the key to great slides is clarity, visual harmony, and purposeful design that supports your message. With some preparation and smart use of PowerPoint’s tools, you can impress your audience without spending hours in front of your screen.
For those interested, there are many excellent resources available, including templates and animation courses, to help you elevate your PowerPoint skills further. Keep designing, stay creative, and enjoy the process!
Check out the full video: 5 SLIDES in 10 Minutes!🔥TUTORIAL🔥


