
Welcome to this comprehensive guide on creating an awesome pitch deck presentation using PowerPoint’s slide zoom feature. Whether you’re a business professional, entrepreneur, or designer, this tutorial will empower you to craft a visually compelling and interactive pitch deck that captivates your audience. Throughout this detailed walkthrough, you’ll discover how to design a dynamic home slide with clickable icons, integrate beautiful images using Adobe Stock, and apply smooth slide zoom transitions that elevate your presentation’s flow.
This tutorial draws inspiration from the expert insights shared by One Skill PowerPoint, who demonstrates every step to build a pitch deck with engaging animations and clickable slide zooms using PowerPoint Microsoft 365 for Mac. If you want to create a professional and interactive pitch deck presentation, this article will serve as your complete roadmap.

Table of Contents
- Why Use Slide Zooms in PowerPoint for Your Pitch Deck?
- Step 1: Finding Beautiful Photos with Adobe Stock Integration
- Step 2: Setting Up a Full-Screen Photo Slide Layout
- Step 3: Designing the Home Slide with Interactive Elements
- Step 4: Adding and Linking Pitch Deck Slides with Slide Zooms
- Additional Tips and Tricks
- Frequently Asked Questions (FAQs)
- Conclusion
Why Use Slide Zooms in PowerPoint for Your Pitch Deck?
The slide zoom feature in PowerPoint allows you to create clickable thumbnails or icons on a central slide that zoom into detailed slides and then return smoothly back to the main slide. This technique is perfect for pitch decks as it helps you:
- Organize your presentation content visually
- Engage your audience with interactive navigation
- Maintain a clean design by avoiding cluttered slides
- Control the flow of your presentation dynamically
However, keep in mind that this feature is available in PowerPoint 2019 and Microsoft 365 versions. In this tutorial, we use PowerPoint Microsoft 365 for Mac, but the steps are very similar on Windows versions as well.
Step 1: Finding Beautiful Photos with Adobe Stock Integration
Visual appeal is crucial in any pitch deck. To ensure your presentation looks polished and professional, you need high-quality images. Fortunately, Adobe Stock offers a vast library of photos, vectors, videos, audio, templates, and even 3D assets that you can use.
What makes this process seamless is the Adobe Stock add-in for PowerPoint, which lets you search and insert photos directly inside PowerPoint without switching apps.
Installing the Adobe Stock Add-in
- Open PowerPoint and navigate to the Insert tab.
- Click on Get Add-ins.
- Search for Adobe Stock in the add-ins marketplace.
- Select the Adobe Stock add-in and click Add.
- Once added, the Adobe Stock icon will appear in your Insert menu.
- Click the icon and sign in with your Adobe account or create a new one.
By the way, if you visit stock.adobe.com, you can get 10 free Adobe Stock images to kickstart your creative projects. The link is also provided in the video description of the original tutorial.
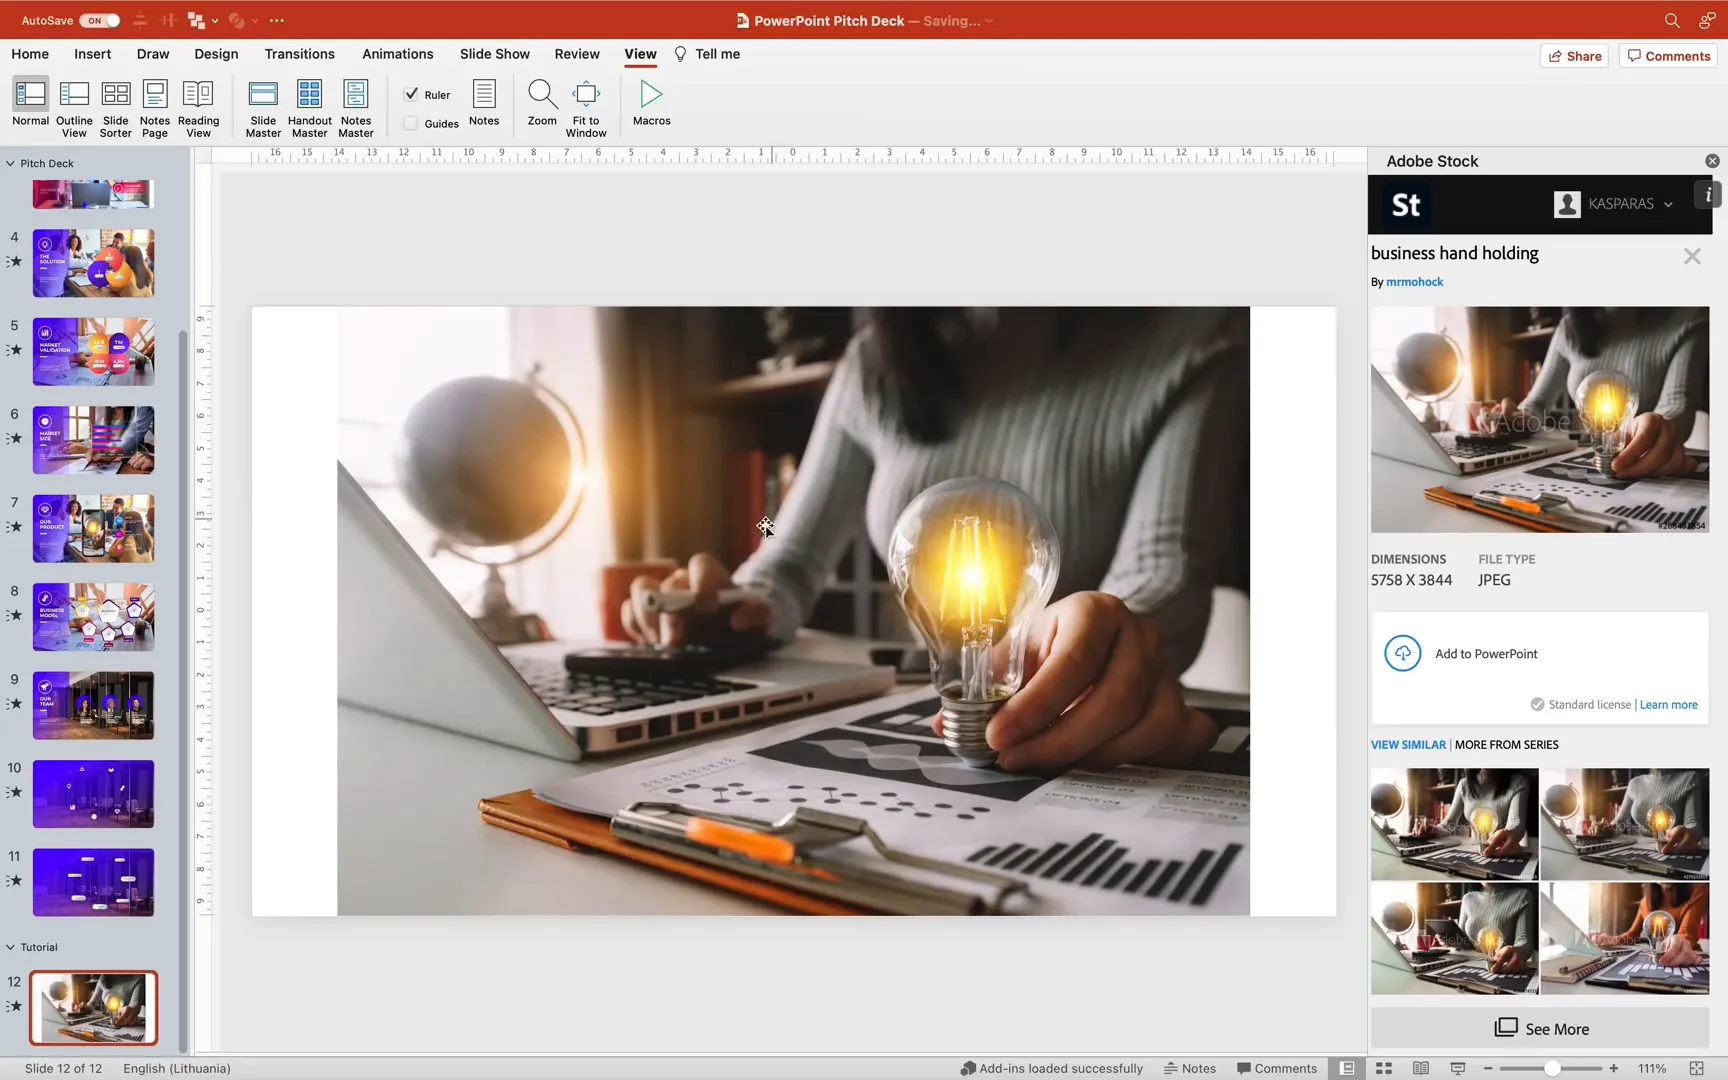
Searching for the Perfect Image
For the home slide of your pitch deck, you want an image that symbolizes a business idea. A classic choice is a light bulb, representing innovation and creativity.
The Adobe Stock add-in lets you search with very specific keywords to narrow down the perfect image. For example, use a phrase like:
Business woman holding a light bulb with a laptop computer in morning light
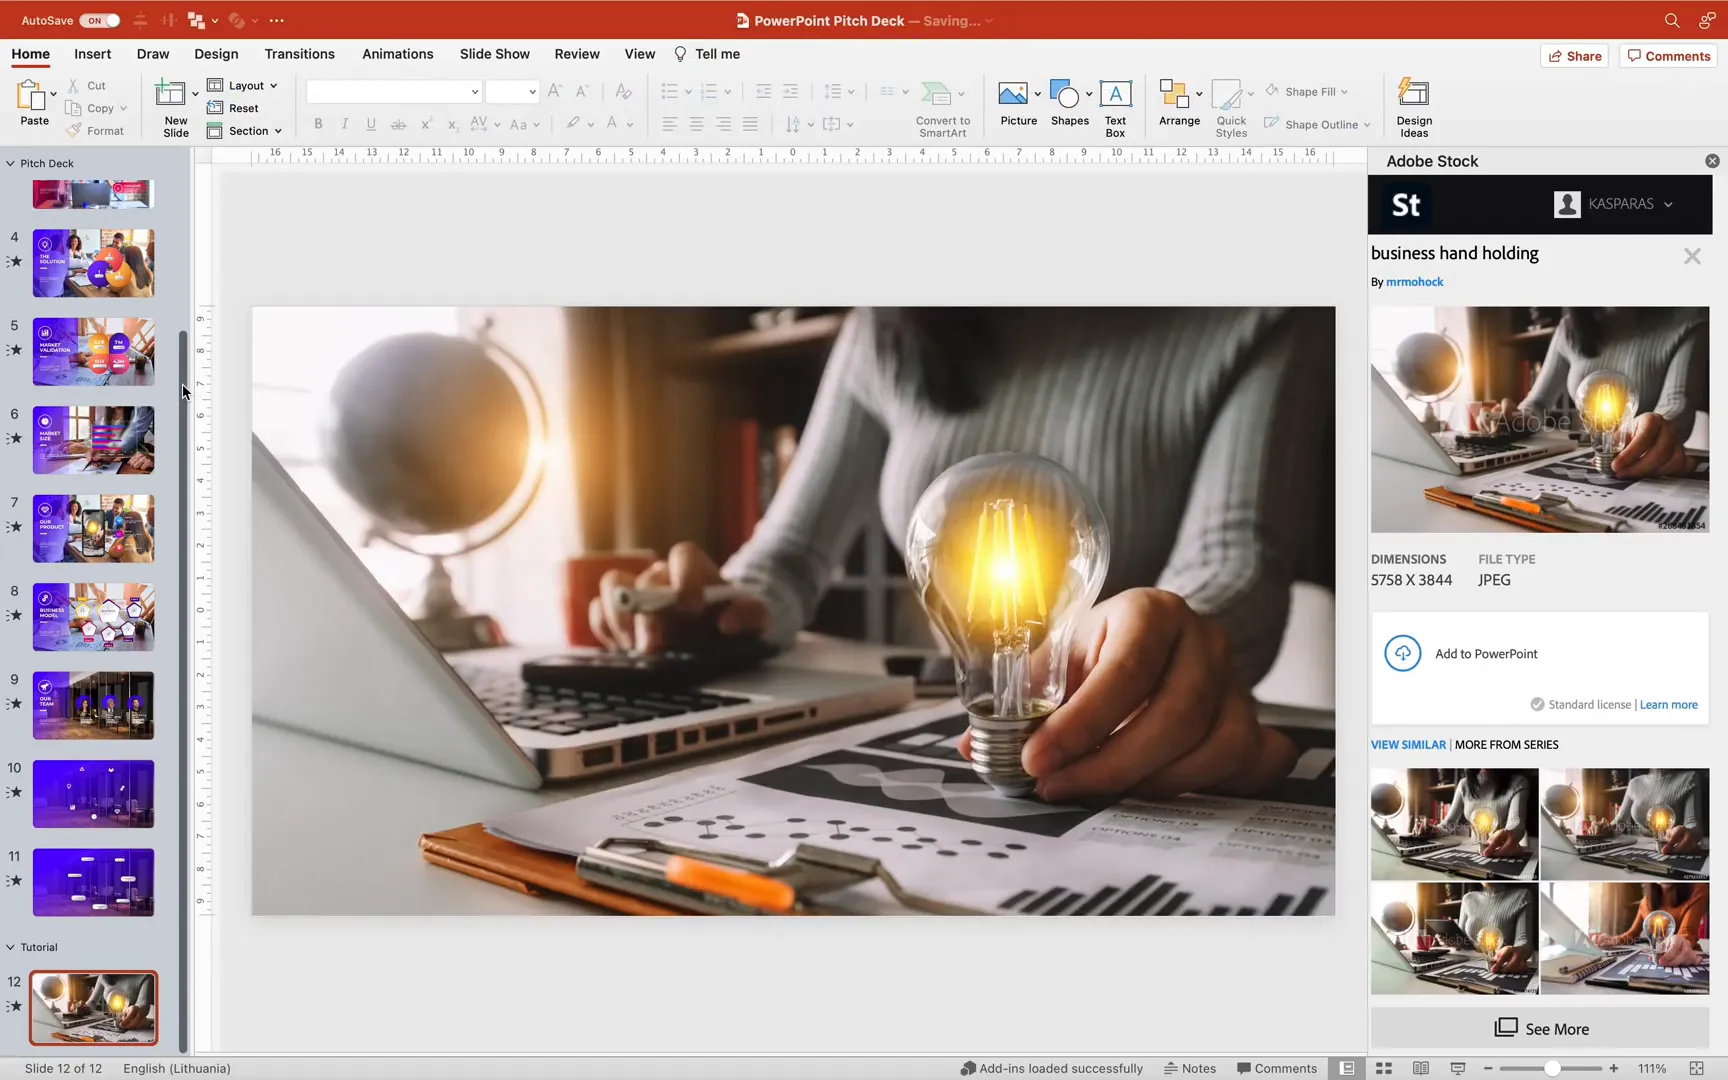
Paste this phrase into the Adobe Stock search bar inside PowerPoint. You will see multiple results. Choose the photo that resonates best with your pitch deck’s theme and insert it directly into your slide.
Adjusting the Image to Fit the Slide
Sometimes the inserted photo will have white gaps on the sides. To fix this and make the image cover the entire slide:
- Select the photo and go to the Picture Format tab.
- Click Aspect Ratio and choose 16:9 to match the slide dimensions.
- Click the Crop button again to finalize the crop.
- Hold down the Control key (or Command on Mac) and resize the image from the center until it covers the whole slide.
Now you have a stunning full-slide photo background for your home slide.
Step 2: Setting Up a Full-Screen Photo Slide Layout
Since your pitch deck will have multiple slides with beautiful photos, it’s efficient to create a custom slide layout that automatically formats photos to cover the entire slide. This saves you time from manually adjusting each photo.
Creating the Slide Layout
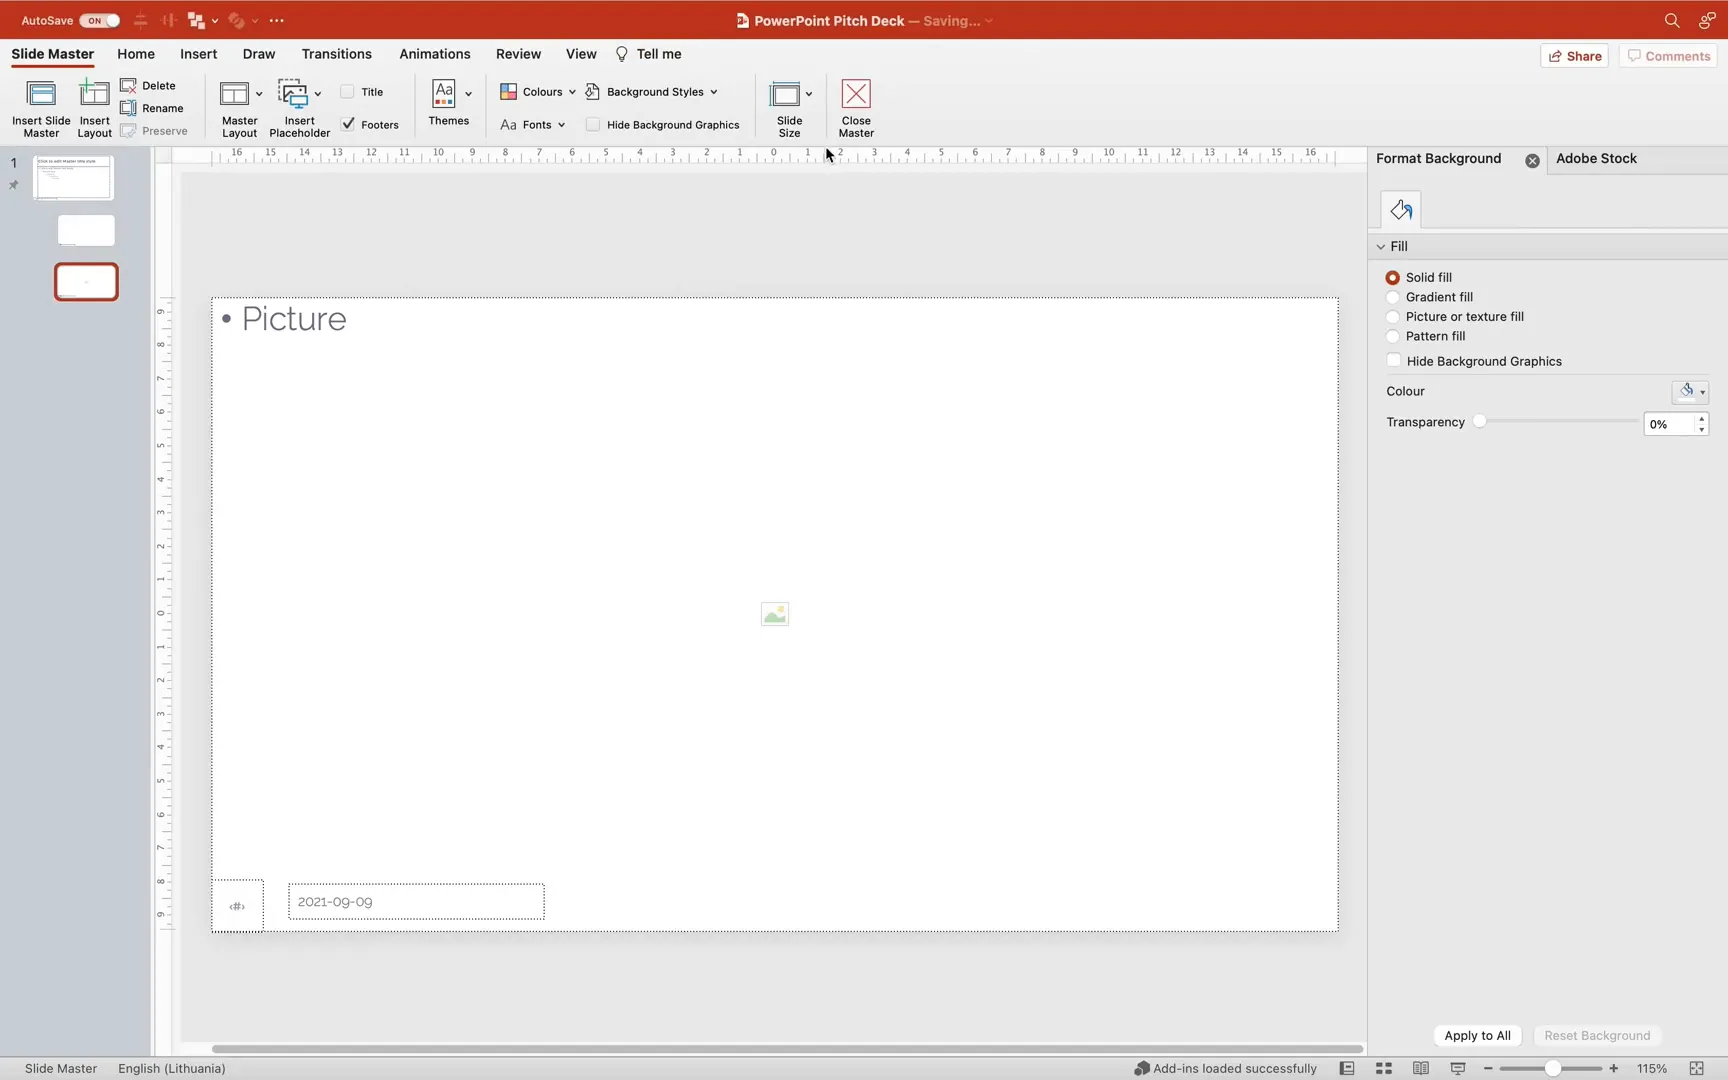
- Go to View and select Slide Master.
- Insert a new slide layout.
- Delete the default title placeholder.
- Go to Insert Placeholders and select Picture Placeholder.
- Place the picture placeholder at the top-left corner and drag it to cover the entire slide.
- Rename the slide layout to something like Full Screen Photo.
- Exit Slide Master to return to normal view.
- On a blank slide, apply this new Full Screen Photo layout.
Now, when you insert photos from Adobe Stock or anywhere else, they will automatically fill the whole slide perfectly.
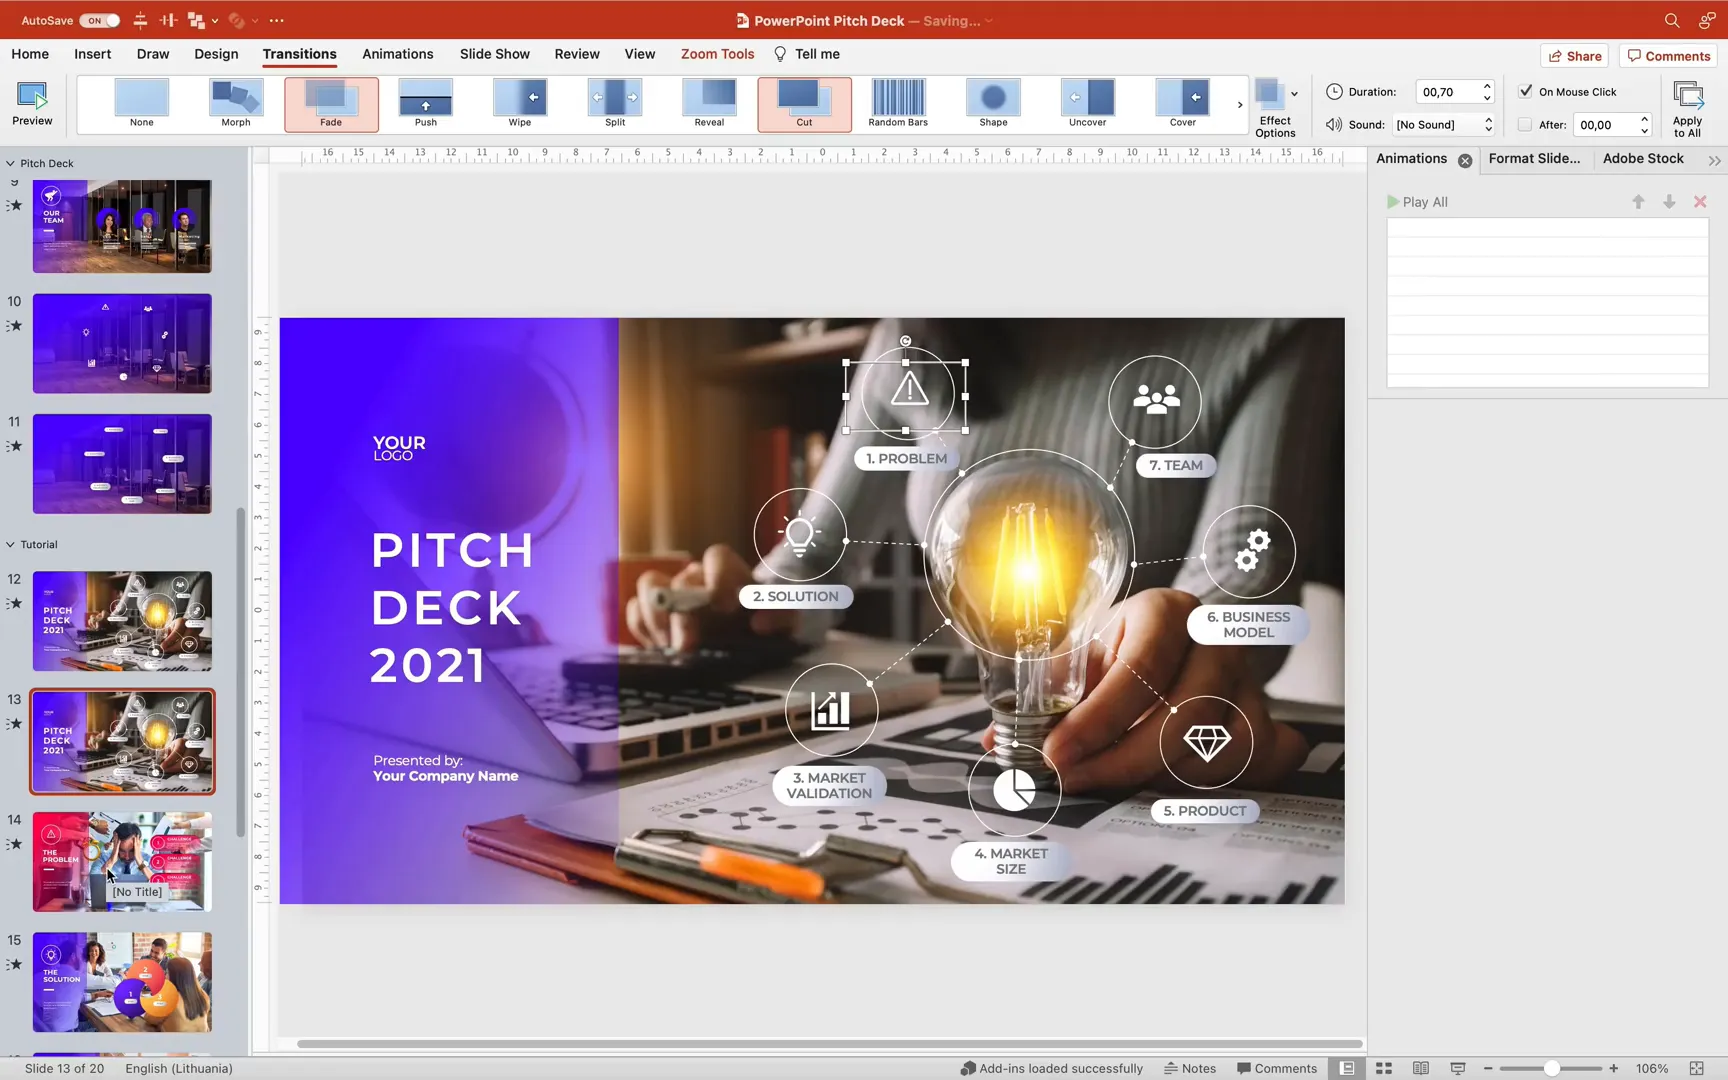
Step 3: Designing the Home Slide with Interactive Elements
The home slide is the centerpiece of your pitch deck. It contains clickable icons and zones that link to other slides using slide zooms. Let’s break down how to build this engaging slide.
Adding a Gradient Rectangle on the Left
This rectangle serves as a sidebar for titles or introductory text. To create it:
- Go to Insert > Shapes and select the rectangle tool.
- Draw a rectangle that touches the top, bottom, and left edges of the slide.
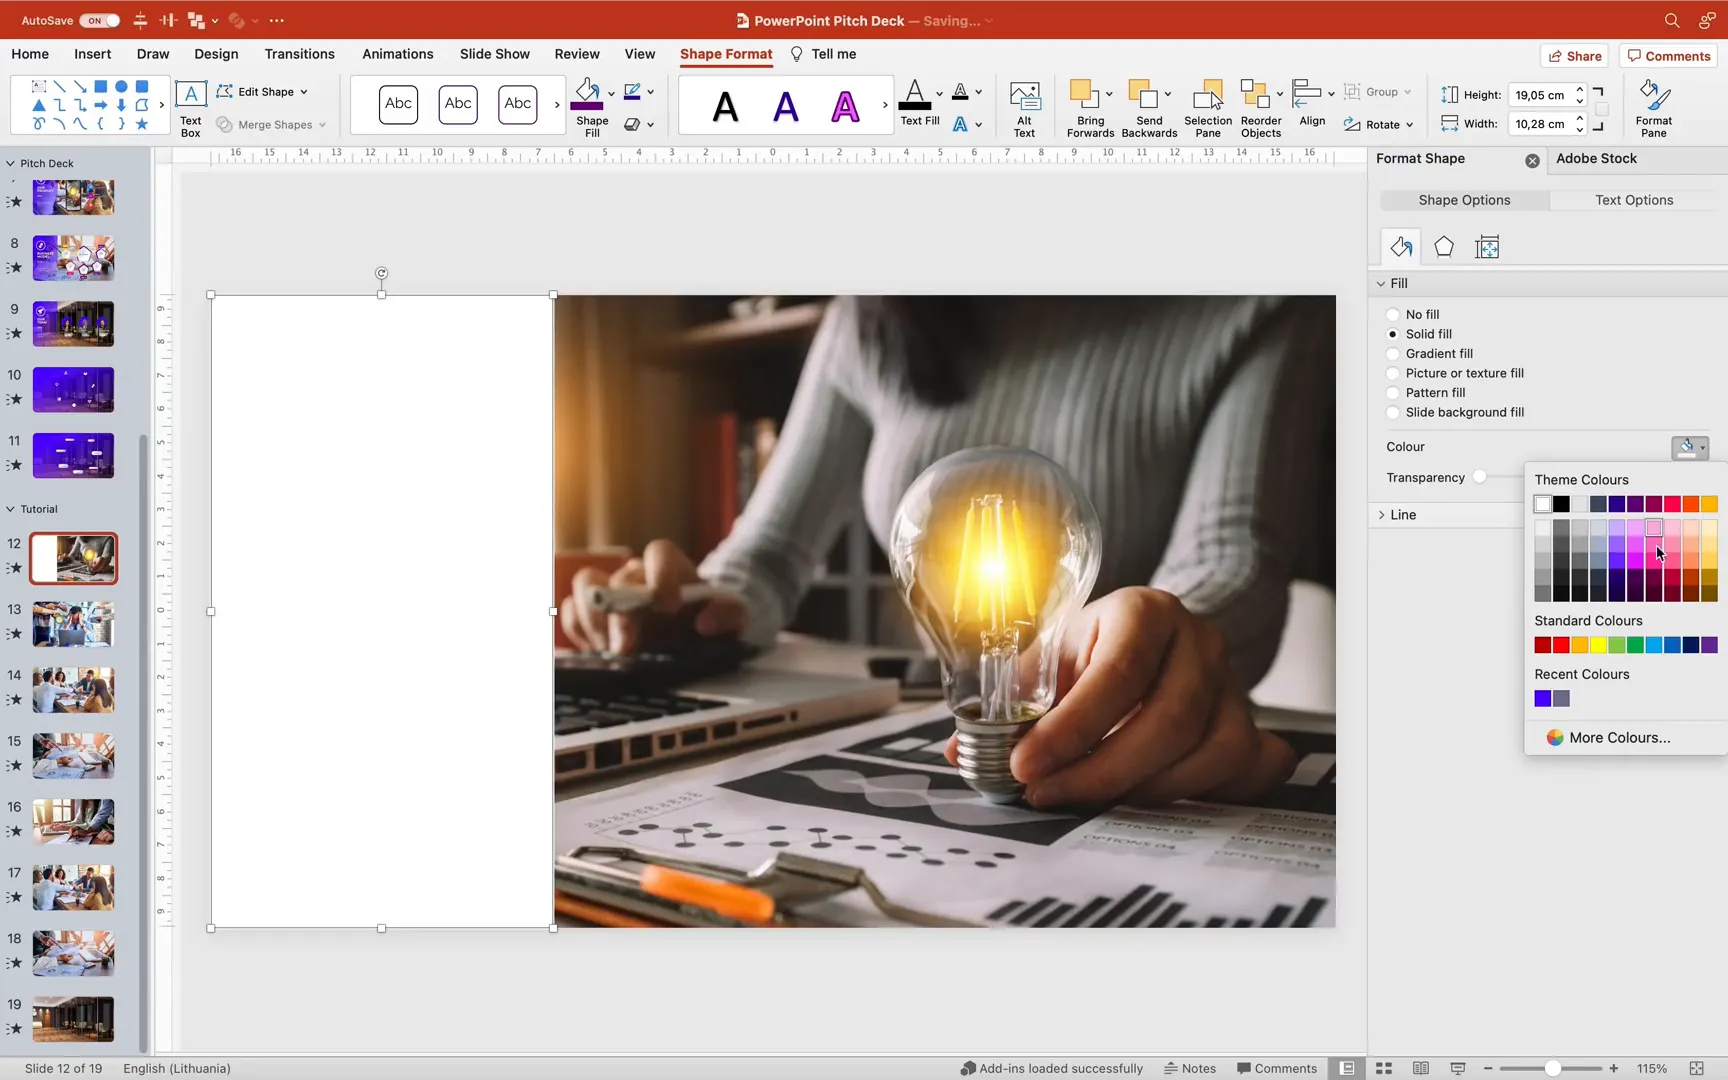
- By default, the fill may be a solid color. To change it to a gradient:
- Right-click the rectangle and choose Format Shape.
- Select Gradient Fill.
- Add two gradient stops:
- First stop at 20% position with 0% transparency (fully opaque).
- Second stop at 100% position with 100% transparency (fully transparent).
- This creates a smooth fade effect from solid color to transparent.
This subtle gradient adds depth and focus to your sidebar.
Adding Animations to the Rectangle and Text
Animations make your slide dynamic and professional. For the gradient rectangle:
- Select the rectangle and go to the Animations tab.
- Add a Fly In animation.
- Set the direction to From Left.
- Open the Animation Pane to adjust settings.
- Set the animation to start With Previous and duration to 2 seconds.
- Add a Bounce End effect to give it a lively finish.
- If the bounce reveals the slide edge, slightly resize the rectangle to the left to hide it.
Next, add text boxes with your slide titles or introductory text. You can copy and paste pre-made text boxes or create new ones with different font sizes and line spacing for hierarchy.
Group the text boxes and use the Animation Painter to copy the rectangle’s flying animation to the text group. Add a slight delay (0.2 seconds) to the text animation to create a staggered effect.

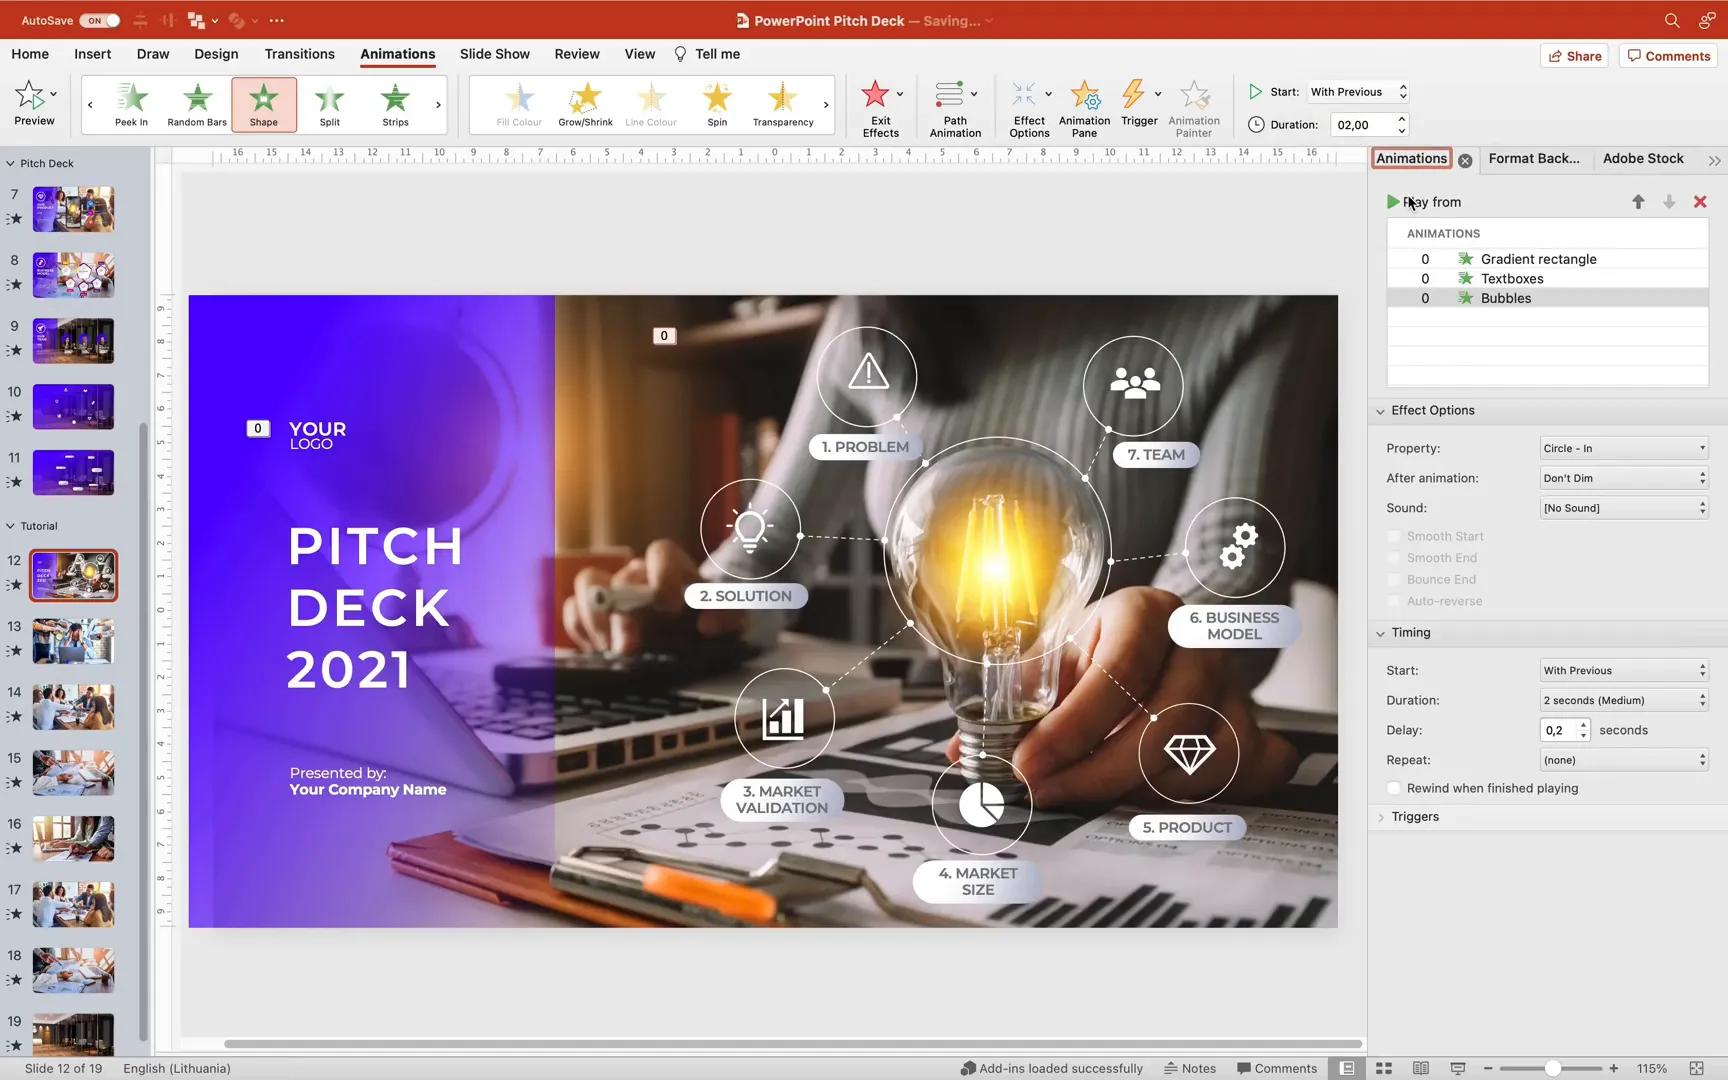
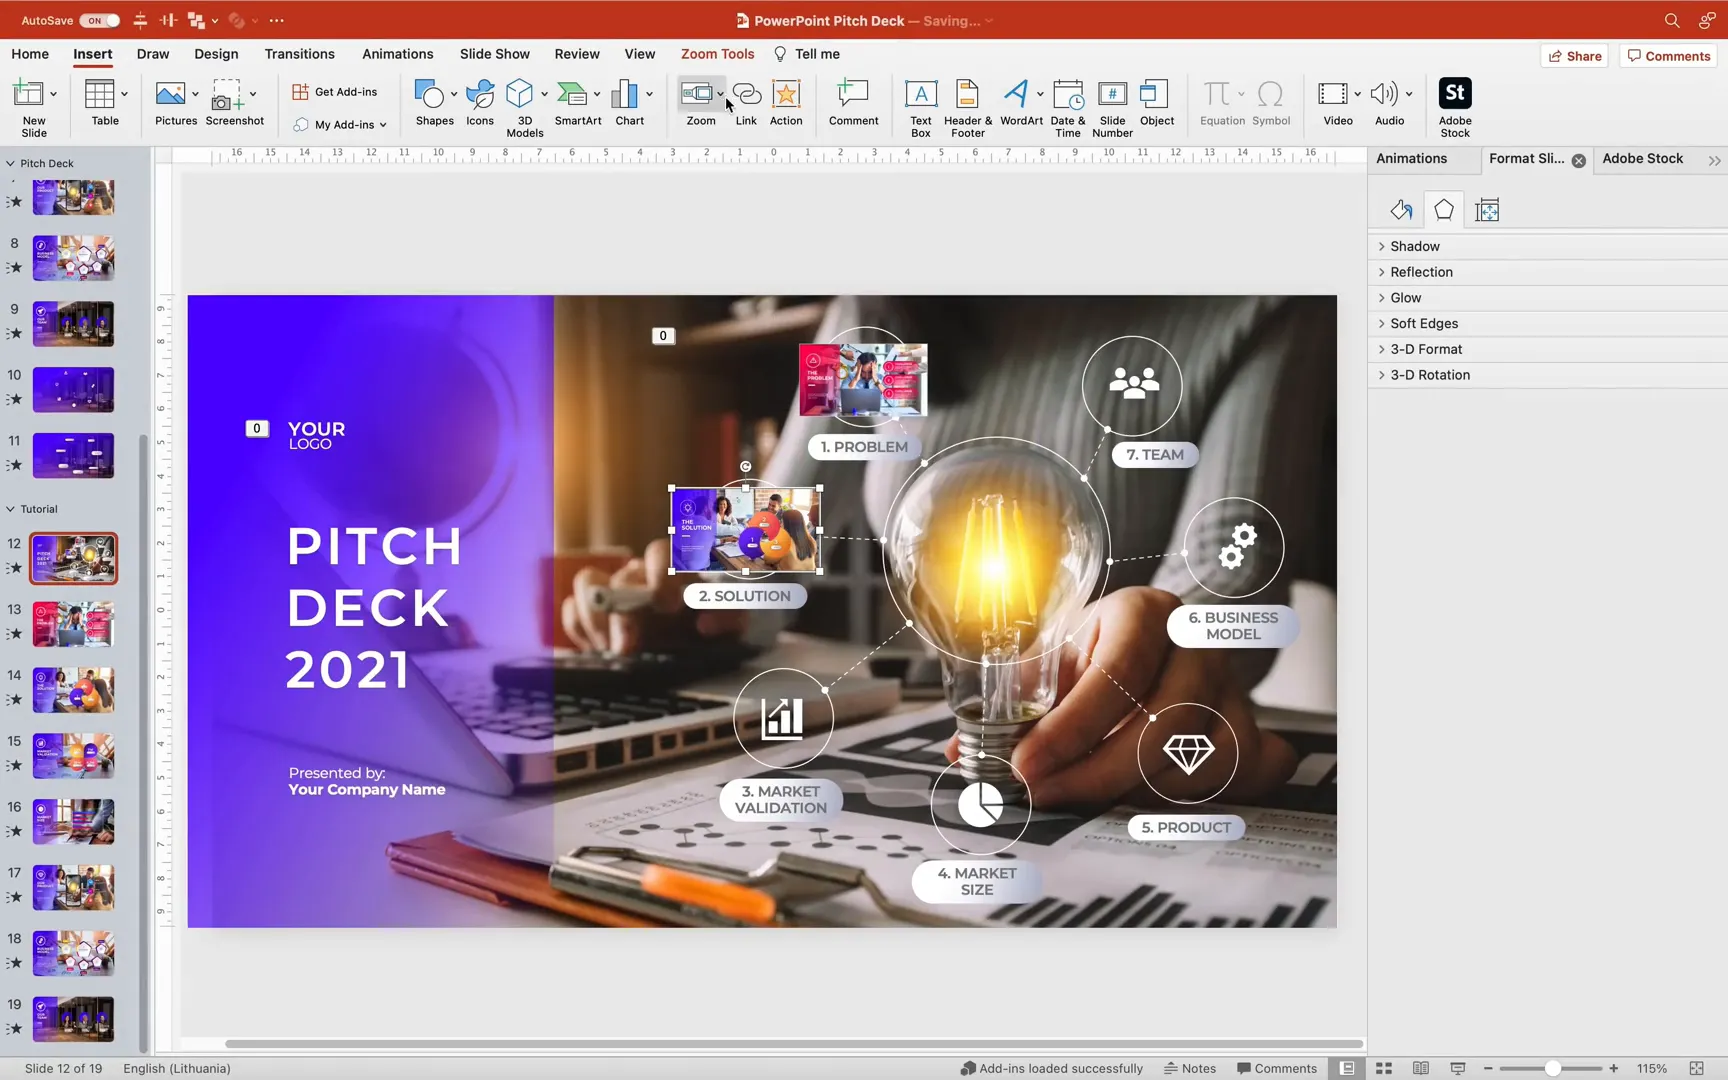
Creating Circles with Icons Around the Central Image
To emphasize key points or features in your pitch deck, add circles with icons arranged around the central image (e.g., the light bulb).
- Insert a circle shape using the Oval Tool while holding the shift key to keep it perfect.
- Format the circle with No Fill and a white outline for contrast.
- Because thin line-only circles are hard to select, add a fully transparent fill. This trick makes it easier to click and move the circles without affecting the visual.
For the smaller circles around the icons:

- Duplicate the larger circle and resize it to about 3 cm by 3 cm.
- Place these smaller circles around your icons.
To connect the smaller circles to the bigger circle, draw arrows:
- Use the arrow tool and snap the ends to the green connection points on both circles.
- Format the arrows with white color, 1 pt line width.
- Choose a fun arrow style, like medium-sized bubbles.
- Change the line style to dashed for visual interest.
- Adjust the rotation of the circles and arrows to achieve perfect alignment.
You can reuse these smaller circles and dashed arrows for all icons, creating a cohesive and elegant design.

Adding Titles to Each Icon
Next, add titles next to each icon using rounded rectangles with gradient fills. These labels explain what each icon represents and add hierarchy to your slide.
Group all circles and titles into one big group called Bubbles. Apply a Zoom Entrance animation to this group. In the effect options, set it to zoom out so the group zooms in and then zooms out smoothly.
Step 4: Adding and Linking Pitch Deck Slides with Slide Zooms
With your home slide designed, it’s time to add the other pitch deck slides and link them interactively using slide zooms.
Copying Content to New Slides
To save time, copy the content from your home slide (except for the background photo) and paste it onto the other slides. This keeps the design consistent.
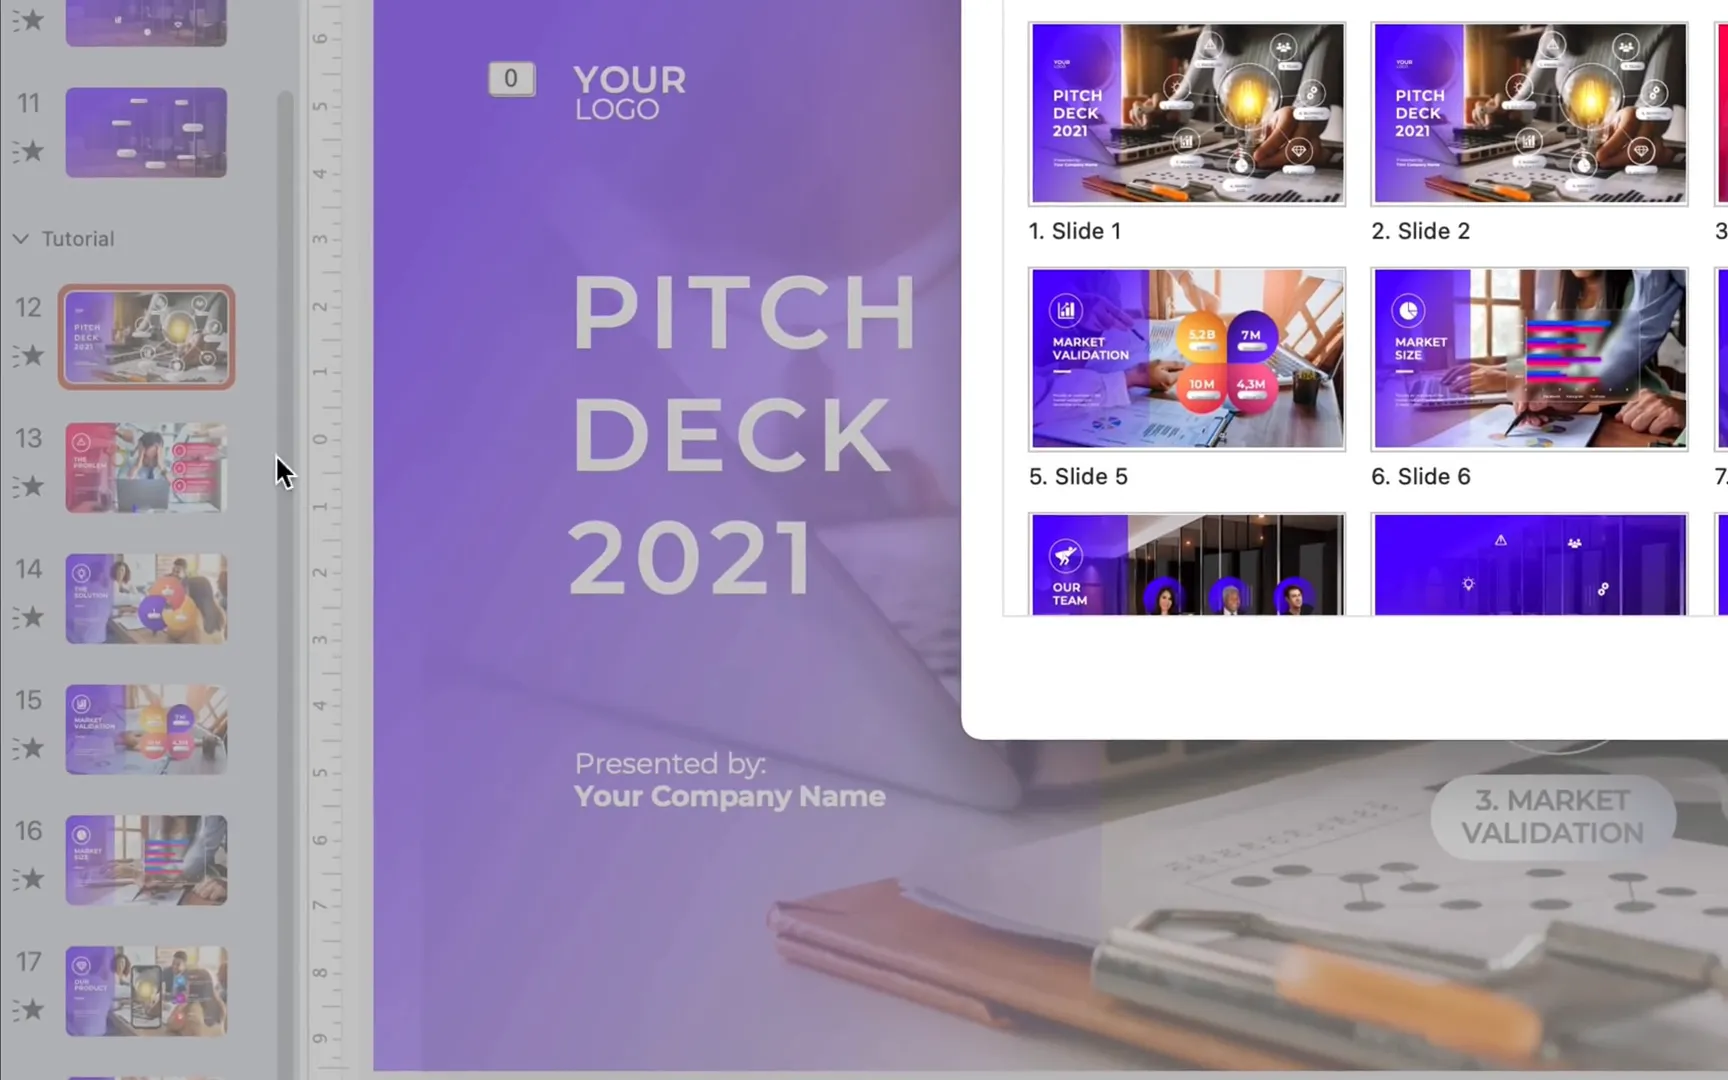
Inserting Slide Zooms
- Go to Insert tab and click Zoom > Slide Zoom.
- A list of all slides will appear.
- Select the slide you want to link to (e.g., slide 13) and click Insert.
- Repeat this process for all icons on your home slide.
When you click on a slide zoom during the presentation, it will zoom into the linked slide and then return back to the home slide.
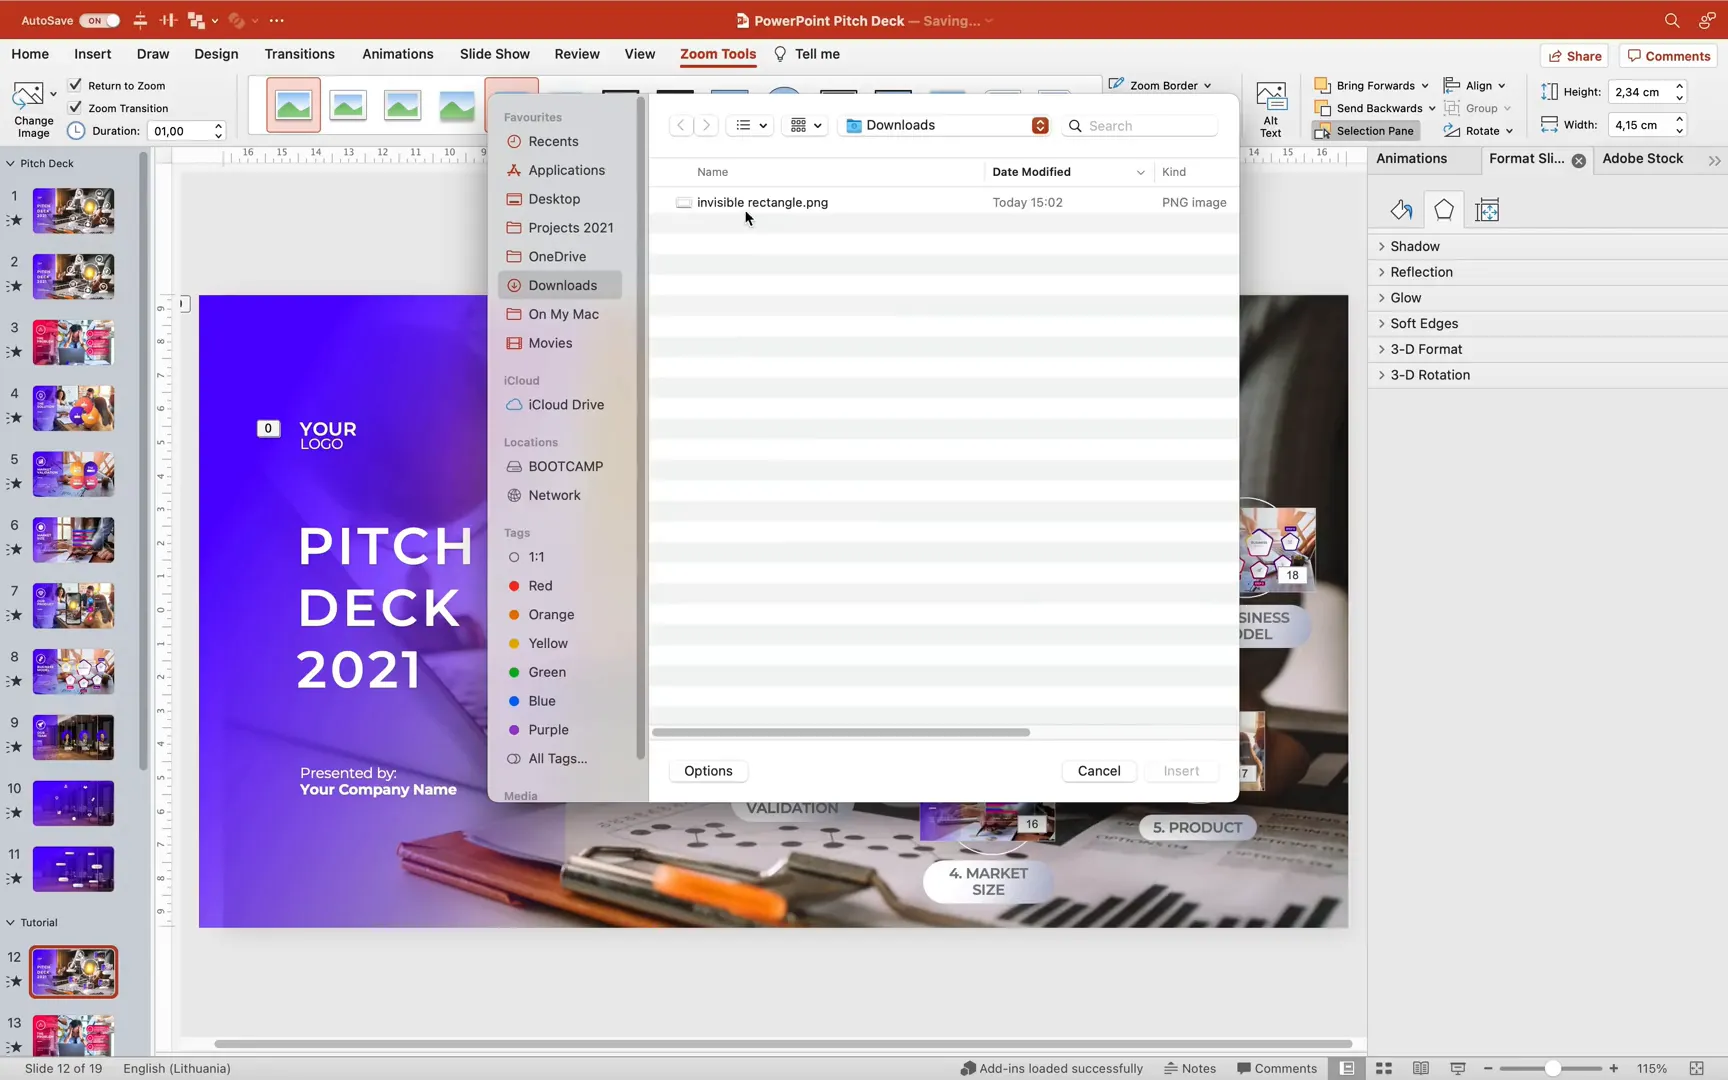
Creating Invisible Slide Zooms
By default, slide zooms display a thumbnail image. But for a cleaner look where only the icons are visible, create invisible slide zooms:
- Insert a rectangle shape covering the whole slide.
- Fill it with a solid color (e.g., black).
- Adjust the transparency to 100% (fully transparent).
- Right-click the rectangle and save it as a PNG picture to preserve transparency.
- Delete the rectangle from the slide.
- Select the slide zoom, enable Return to Zoom option.
- Change the slide zoom image to the transparent PNG you saved.
- Remove the border from the slide zoom.
Now your slide zooms are invisible and blend perfectly with your icons.
Testing Slide Zooms and Animations
Click on each icon to test the slide zoom. You should zoom smoothly into the detailed slide and then back to the home slide. The home slide animations will repeat each time you return.
To avoid repetitive animations becoming distracting, create two versions of the home slide:
- One slide with all animations for the initial introduction.
- A duplicate slide without animations for subsequent returns.
Set up an automatic transition from the animated home slide to the static home slide after zero seconds. This way, the animations play only once at the start, and the presentation remains smooth afterward.
Additional Tips and Tricks
- Using Transparent Fill for Selection: Adding transparent fills to shapes that only have outlines makes it easier to select them during editing.
- Animation Painter: Use this tool to quickly copy animations from one object to another for consistency.
- Grouping Objects: Group related elements to move and animate them as one unit.
- Adobe Stock Free Trial: Utilize the free 10 images offer from Adobe Stock to enhance your presentations without extra cost.
- Explore PowerPoint Icons: Microsoft 365 offers a rich set of icons accessible via the Insert > Icons menu, perfect for pitch decks.
Frequently Asked Questions (FAQs)
What versions of PowerPoint support slide zooms?
Slide zooms are available in PowerPoint 2019 and Microsoft 365 versions on both Windows and Mac platforms.
Can I use my own photos instead of Adobe Stock?
Absolutely! You can insert any image into the full-screen photo layout. Adobe Stock is recommended for convenience and high-quality visuals.
How do I make slide zooms invisible?
Create a fully transparent PNG shape covering the slide, then set it as the slide zoom image and remove borders.
Can I add animations to my home slide?
Yes, adding entrance animations to shapes and text can create a professional and dynamic feel. Just be mindful to duplicate slides to prevent repetitive animations during navigation.
Is the Adobe Stock add-in free?
The add-in is free to install, but downloading Adobe Stock images typically requires licensing. However, Adobe offers 10 free stock images for new users.
Conclusion
Creating an interactive pitch deck with clickable slide zooms in PowerPoint is a powerful way to engage your audience and present your ideas professionally. By leveraging high-quality photos from Adobe Stock, designing a clean and dynamic home slide, and using slide zooms to navigate your presentation, you can build a memorable and effective pitch deck.
Remember to utilize the full-screen photo layout to save time on formatting, apply animations thoughtfully for impact, and use invisible slide zooms to maintain a clean design. With these techniques, your presentations will stand out and communicate your message with confidence.
Keep practicing and exploring PowerPoint’s features to enhance your skills. Stay happy, stay healthy, and happy presenting!
Check out the full video: PowerPoint Slide Zoom Tutorial 🔥Pitch Deck 🔥


