
PowerPoint slides are a powerful way to convey complex information visually and engagingly. One of the most effective infographic designs you can create is a padlock infographic slide, especially when you want to illustrate four distinct options or steps in a secure, locked-down format. This article will guide you step-by-step on how to create a professional, colorful, and interactive 4-step padlock infographic slide in Microsoft PowerPoint.
Whether you are a business professional, educator, or marketer, this tutorial will help you design a slide that not only looks impressive but also communicates your message clearly. Let’s dive into the process of creating this infographic, inspired by a detailed tutorial from POWERPOINT UNIVERSITY, a leading source of free PowerPoint templates and creative design ideas.
Table of Contents
- Designing the Padlock Base
- Creating the Four Color Segments
- Designing the Padlock Shackle with 3D Effect
- Adding Keyholes for Each Option
- Inserting Icons and Descriptive Text
- Applying Shadow Effects for Depth
- Grouping and Aligning Elements
- Adding Interactive Animations
- Frequently Asked Questions
- Conclusion
Designing the Padlock Base
The foundation of your infographic is the padlock base, which represents the body of the lock. To create this, follow these steps carefully:
- Enable Guides: Go to the View tab in PowerPoint and enable Guides. This will help you align your shapes precisely.
- Insert Rounded Rectangle: Navigate to Insert > Shapes and select the Rounded Corner Rectangle. Draw this shape roughly on your slide.
- Set Shape Dimensions: With the rectangle selected, go to Shape Format and set both height and width to 3.5 inches. This ensures a perfect square base with rounded edges.
- Adjust Corner Curvature: Drag the small orange adjustment handle on the shape to reduce the corner curve, making it subtle and professional.
- Remove Outline: Set the shape’s outline to No Outline for a clean look.
- Center the Shape: Use Align Center and Align Middle to place the shape perfectly on your slide.
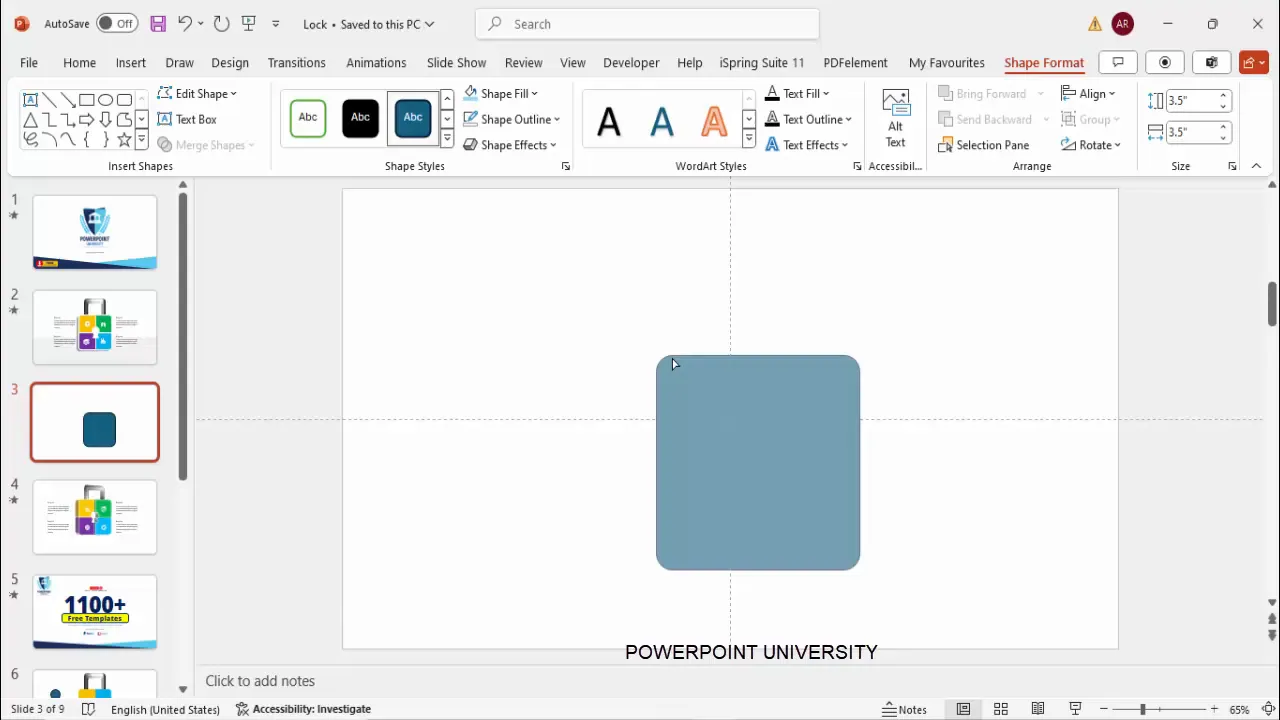
This creates a simple yet essential base for your padlock infographic. The next step is to divide this base into four colorful segments representing each option.
Creating the Four Color Segments
To visually differentiate the four options, we’ll divide the padlock base into four colorful quadrants. Here’s how:
- Draw a Rectangle for One Segment: Insert a standard Rectangle shape and draw it so that it covers exactly one-quarter of the rounded rectangle base.
- Color the Rectangle: Fill this rectangle with a distinct color (e.g., purple) to mark your first segment.
- Create Intersection Shape: Select the rounded rectangle base, hold the Shift key, and select the colored rectangle. Then, under Shape Format > Merge Shapes, choose Intersect. This trims the rounded rectangle to show only the overlapped quarter.
- Color the Segment: Fill this intersected shape with your desired color, such as green.
- Duplicate and Transform: Hold Ctrl + Shift and drag the segment down to duplicate it. Change its color (e.g., blue), then use Rotate > Flip Vertical to orient the shape.
- Position and Color Remaining Segments: Repeat the process for the remaining two segments. Flip horizontally and assign different colors (e.g., orange and purple) to complete the four quadrants.
- Align the Segments: Move the four segments so they align perfectly side by side, forming the full padlock body with four colorful parts.
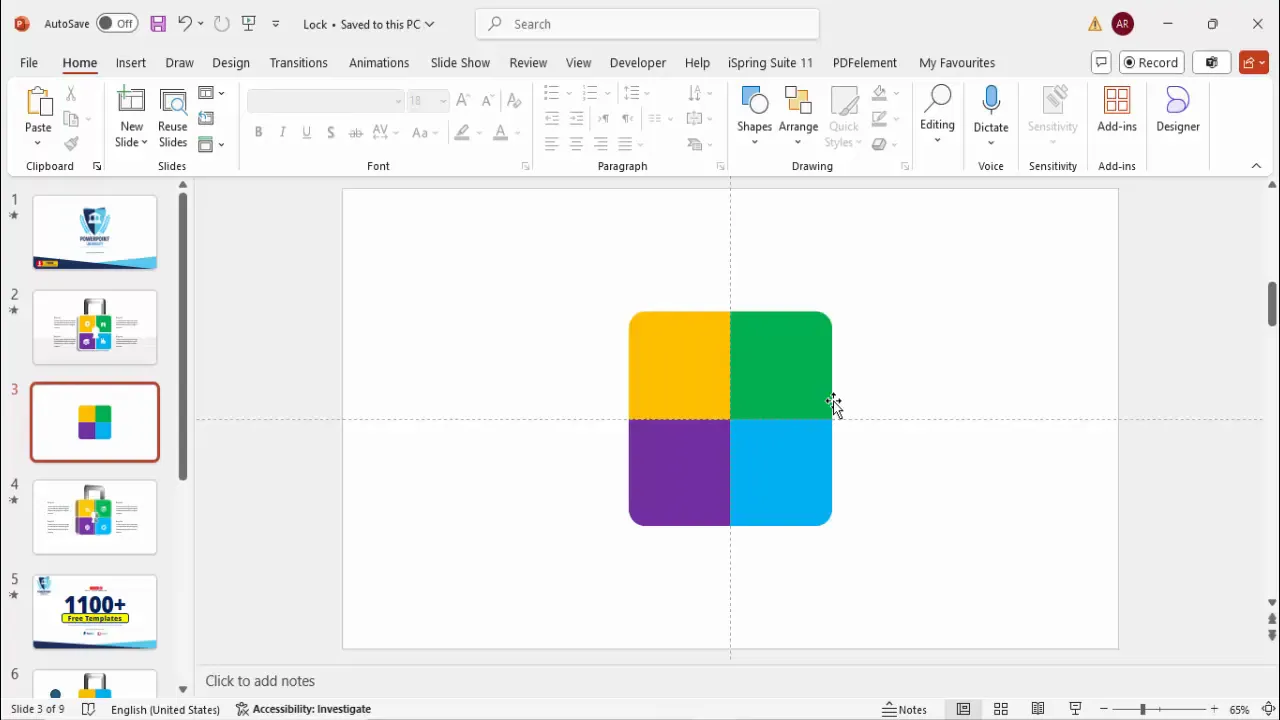
This colorful segmented base gives a vibrant and clear visual representation for each of the four options you intend to present.
Designing the Padlock Shackle with 3D Effect
The shackle is the curved part of the padlock that completes the visual metaphor. To create a realistic, 3D-looking shackle:
- Insert Rounded Rectangle for Shackle: Draw a rounded corner rectangle to represent the shackle’s outer curve.
- Duplicate and Resize: Press Ctrl + D to duplicate this shape. Hold Shift and resize the duplicate to be smaller and position it exactly at the center of the original.
- Adjust Curvature: Drag the orange adjustment handle to make the corners less curved for a more natural shackle shape.
- Subtract Inner Shape: Select both shapes, then use Merge Shapes > Subtract to create a hollow shackle shape.
- Cut the Bottom Part: Insert a rectangle to cover the bottom part of the shackle where it meets the padlock body. Select both the shackle and rectangle and apply Merge Shapes > Subtract to cut the bottom.
- Remove Outline: Set all shape outlines to No Outline for a polished look.
- Send Shackle Behind: Position the shackle behind the padlock base by using Send to Back.
- Add 3D Bevel: Right-click the shackle, choose Format Shape > Effects > 3D Format, and apply a rounded Top Bevel. Adjust the bevel height and width to create a subtle 3D effect.
- Apply Gradient Fill: Fill the shackle with a gradient, typically from black to gray, to enhance the three-dimensional look.
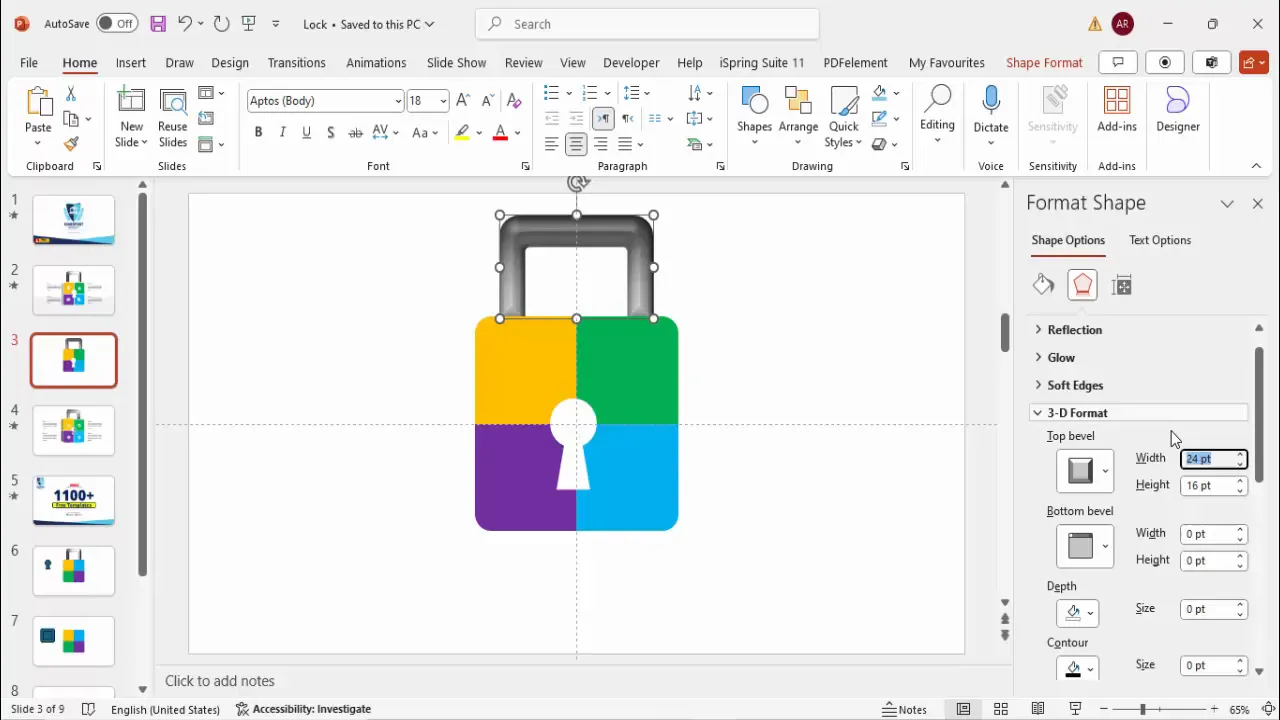
This 3D shackle adds depth and realism to your infographic, making it visually striking and professional.
Adding Keyholes for Each Option
Each of the four segments will have a keyhole symbolizing a locked option. Here’s how to create and add them:
- Create Keyhole Shape: Insert an Oval shape while holding Shift to make a perfect circle. Position it at the center of the segment.
- Add Trapezoid: Insert a small Trapezoid shape below the oval to form the keyhole’s shaft.
- Union Shapes: Select both the oval and trapezoid, then use Merge Shapes > Union to combine them into a single keyhole shape.
- Remove Outline: Set the outline to No Outline for a clean icon.
- Color the Keyhole: Fill the keyhole with a light color that contrasts with the segment color.
- Duplicate Keyholes: Press Ctrl + D three times to create four keyholes total. Align each keyhole to the center of each segment.
- Cut Keyholes Out of Segments: Select each segment and its corresponding keyhole, then apply Merge Shapes > Subtract to create a cut-out effect, making the keyholes look embedded.
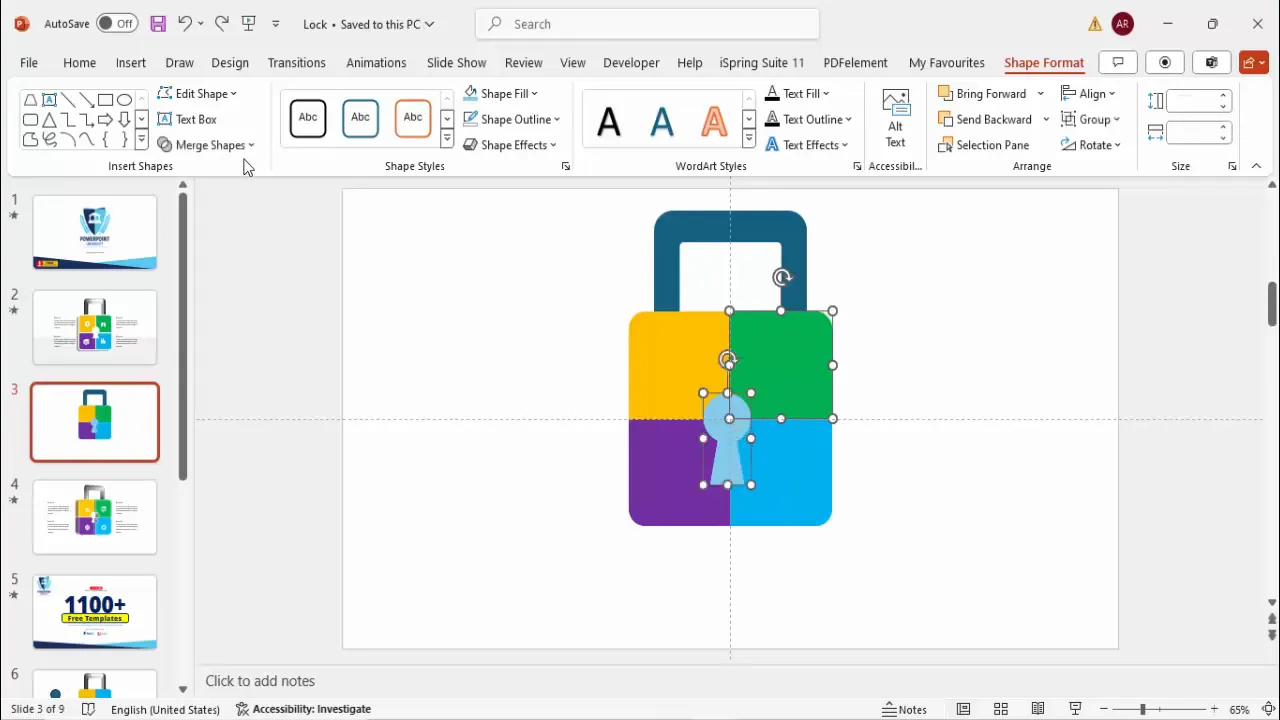
These keyholes visually reinforce the concept of locked options or steps, making your infographic intuitive and engaging.
Inserting Icons and Descriptive Text
Icons and text labels enhance the communication power of your PowerPoint slides. Here’s how to add them effectively:
- Insert Icons: Go to Insert > Icons and choose icons that symbolically represent your options. For example, select an alarm clock, map, shutter, or any relevant icon.
- Place Icons: Resize and position each icon on top of the corresponding colored segment.
- Change Icon Color: Fill the icons with white or a color that contrasts well with the segment background for visibility.
- Add Title and Detail Text: Insert a text box with a concise title (e.g., “Key One”, “Key Two”) and a smaller text box below for detailed descriptions.
- Format Text: Use bold formatting for titles and a subtle gray color for detailed text. Keep font size readable (around 16 pt for titles).
- Duplicate Text Boxes: Copy and paste the text boxes for consistency across all four segments, adjusting content as needed.
- Align Text: Align text boxes left or right depending on your layout preference, ensuring they are visually balanced.
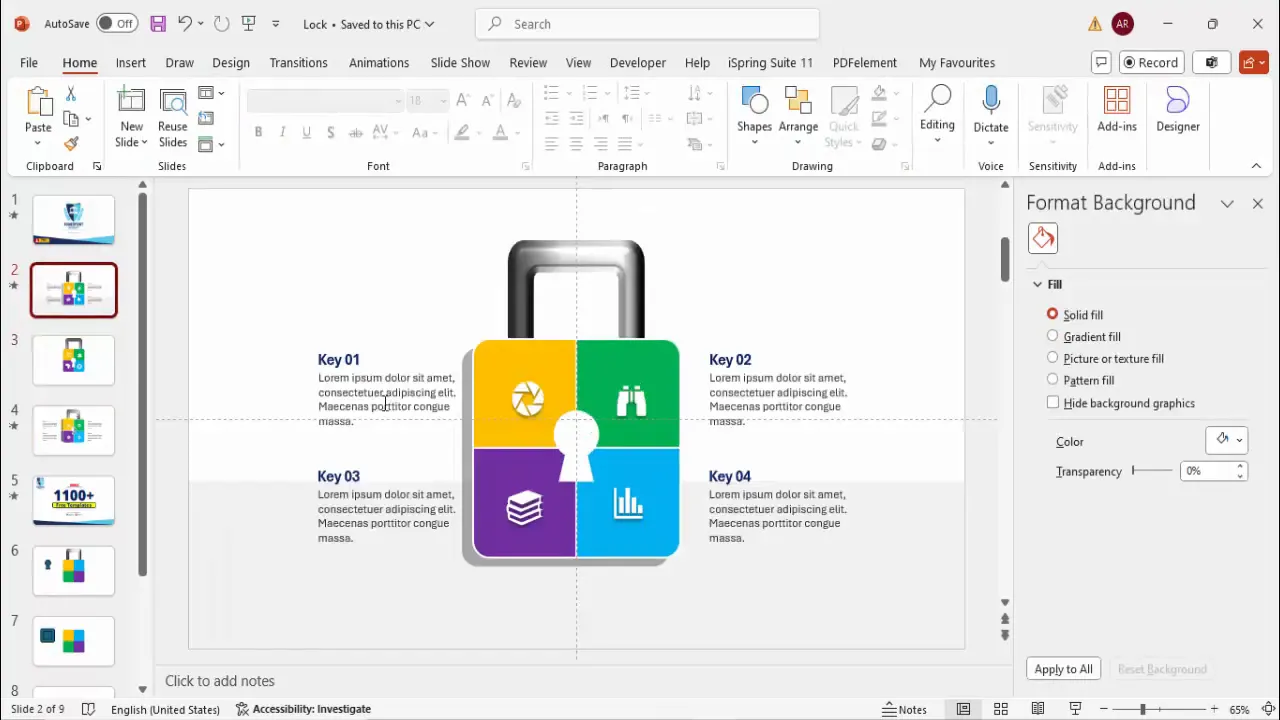
Adding these visual and textual elements makes your slide informative and easy to understand, improving audience engagement.
Applying Shadow Effects for Depth
Shadows can give your infographic a subtle depth and separation from the background, making it pop. Here’s how to apply them:
- Insert Rounded Rectangle: Draw a rounded rectangle behind your text boxes.
- Remove Outline: Set the shape outline to No Outline.
- Fill with Black and Adjust Transparency: Fill the shape with black and increase transparency to around 50-70% for a subtle shadow effect.
- Apply Soft Edges: Go to Shape Format > Effects > Soft Edges and increase the soft edges to blur the shadow.
- Cut Out Text Area: To prevent the shadow from covering the text, draw a smaller rectangle over the text area, select both shapes, and apply Merge Shapes > Subtract.
- Send Shadow to Back: Position the shadow shapes behind the text for a layered look.
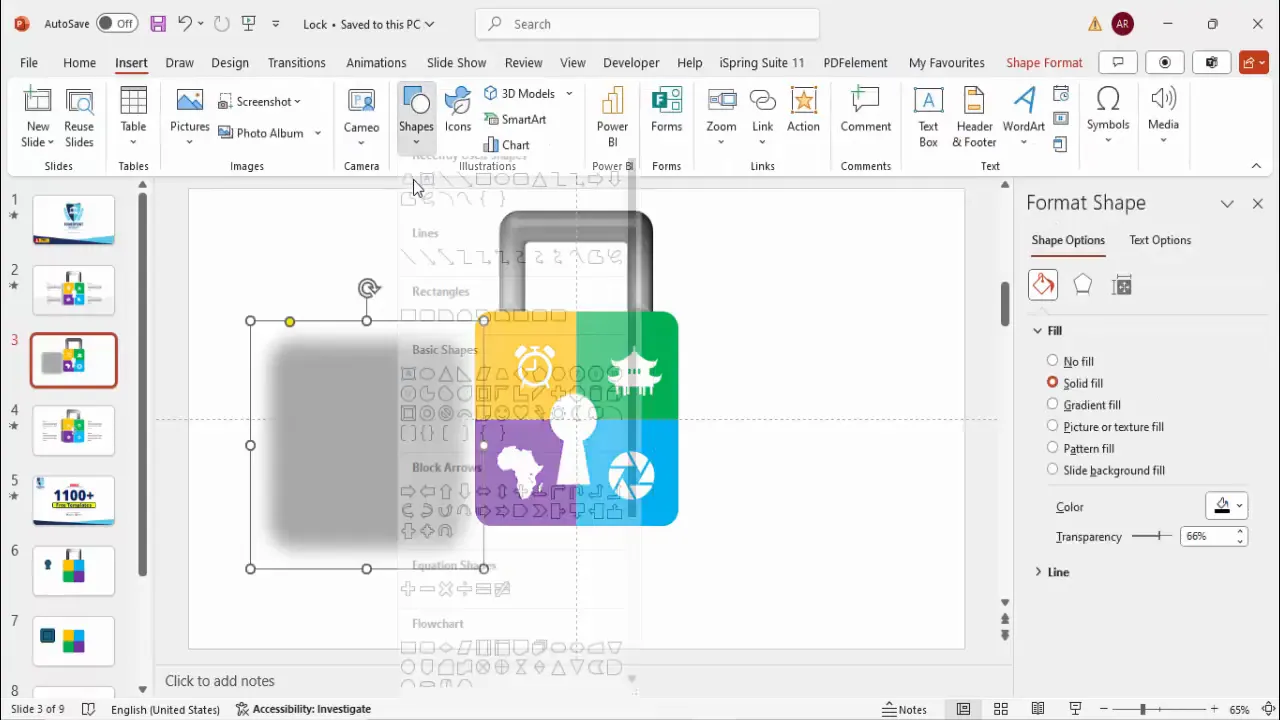
These shadow effects add professionalism and visual interest without overwhelming the slide.
Grouping and Aligning Elements
To manage your design efficiently and ensure consistent alignment, grouping is essential. Here’s how to do it:

- Group Related Elements: Select all parts of each padlock segment (colored shape, keyhole, icon, text) and press Ctrl + G to group them. This makes moving and resizing easier.
- Align Groups: Use the Align tools to distribute the four groups evenly across the slide.
- Group Text Boxes: Group title and detail text boxes separately for better animation control.
Grouping keeps your slide organized and simplifies editing, especially when adding animations.
Adding Interactive Animations
Animations can make your padlock infographic interactive and engaging. Here’s a simple way to add animations for the four options:
- Enable Animation Pane: Go to the Animations tab and open the Animation Pane to control animation order.
- Group Text and Shapes: Group each option’s shapes and text separately to animate them as one unit.
- Add Entrance Animations: Select each group and apply entrance animations such as Appear, Peek In, or Fade.
- Set Animation Order: Arrange animations so that the four padlock segments appear sequentially (1, 2, 3, 4).
- Add Shadow Animation: Apply a Fade animation to shadow effects, set to start After Previous for smooth layering.
- Customize Timings: Adjust animation timing and delay for a polished flow.
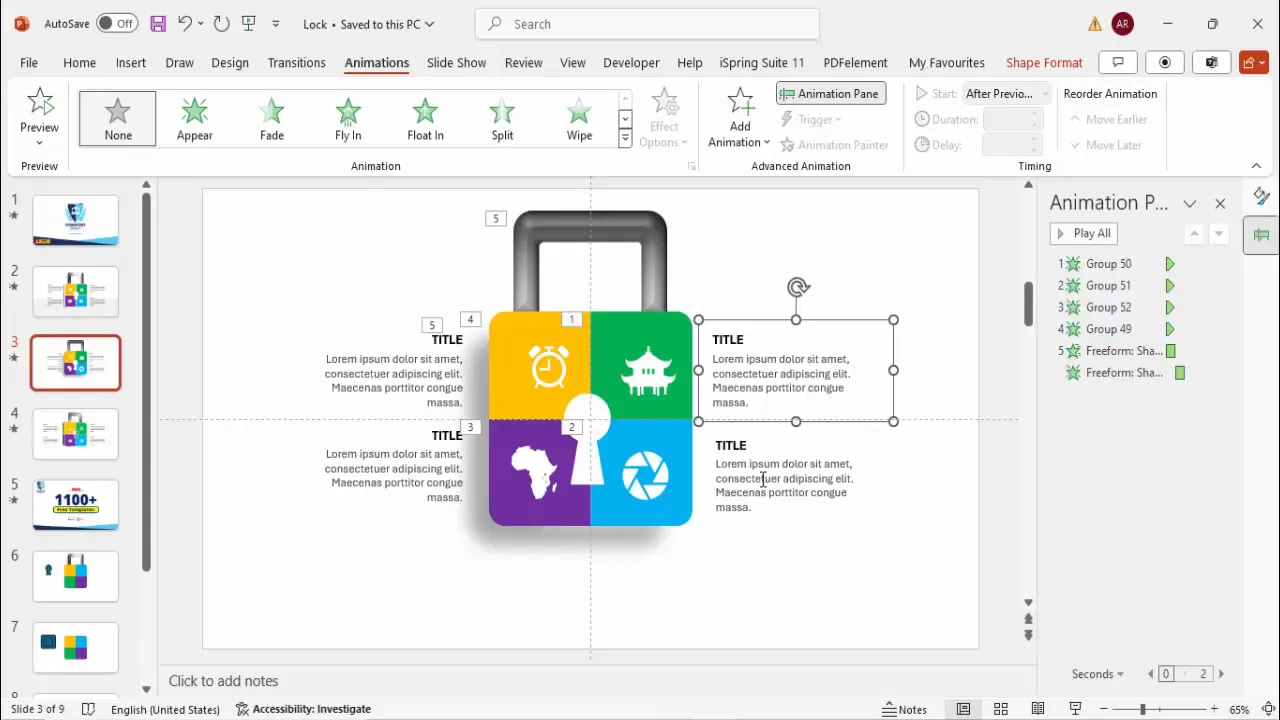
Animating your slide enhances viewer attention and makes your presentation more dynamic.
Frequently Asked Questions
What is the best way to ensure the padlock infographic looks professional?
Use consistent shapes, colors, and fonts. Enable guides for precise alignment, remove unnecessary outlines, and apply subtle shadows and 3D effects to add depth without clutter.
Can I customize the colors of the padlock segments?
Absolutely! Use your brand colors or theme colors to keep the slide consistent with your presentation style. The tutorial shows how to easily change colors for each segment.
How do I make the padlock interactive for presentations?
Use PowerPoint’s animation pane to add entrance effects to each segment and text. You can trigger animations on click to reveal each step or option sequentially.
Is this padlock infographic suitable for business presentations?
Yes, the padlock design is ideal for illustrating security, protection, or stepwise options in a business context. Its clean and colorful design ensures clarity and engagement.
Can I download free templates based on this design?
Many resources, including POWERPOINT UNIVERSITY, provide free downloadable templates that you can customize for your own use.
Will this design work on older versions of PowerPoint?
Most of the shapes and animations used are compatible with PowerPoint 2013 and later. Some 3D effects may vary slightly in appearance but the core design remains functional.
Conclusion
Creating a 4-step padlock infographic slide in PowerPoint is an excellent way to present multiple options in a visually appealing and organized manner. By following the detailed steps of designing the padlock base, dividing it into colorful segments, adding a 3D shackle, embedding keyholes, inserting meaningful icons and text, applying shadow effects, and finally animating the slide, you can craft a professional and engaging slide that captures your audience’s attention.
This infographic is versatile and can be tailored to numerous presentation topics, from security workflows to stepwise project plans. Remember that the key to effective PowerPoint slides lies in clarity, alignment, and visual storytelling. Use the grouping and animation tips to keep your slide manageable and interactive.
Experiment with colors, icons, and text to match your brand identity and presentation tone. And most importantly, practice your slide transitions and animations to deliver a smooth and confident presentation.
Unlock the potential of your PowerPoint presentations with this creative padlock infographic design!
Check out the full video: Create 4 Step Padlock Infographic Slide in PowerPoint


