
Creating engaging and visually appealing PowerPoint slides is an essential skill for professionals, educators, and marketers alike. Whether you’re presenting a business proposal, educational content, or creative ideas, having a polished presentation-slides-tips-for-creating-engaging-visuals” target=”_blank”>slide design can make all the difference. In this comprehensive tutorial, you’ll learn how to design an impressive photographic slide layout with up to eight options in PowerPoint. This method combines creative shape manipulation, color coordination, and animation techniques to deliver a professional-quality presentation slide that captures attention and communicates your message clearly.
This step-by-step guide will walk you through creating a sophisticated paper-like slide design with multiple clickable options, complete with shadow effects, icons, titles, and detailed descriptive text. By the end, you will be equipped to build dynamic slides that enhance your presentation’s impact and keep your audience engaged.

Table of Contents
- Introduction to PowerPoint Slides Design
- Preparing Your Slide and Workspace
- Creating the Paper Shape with Holes
- Adding Lines, Shadows, and Color Effects
- Designing the Option Steps with Text and Icons
- Duplicating and Customizing Multiple Options
- Animating Your Slide for Interactive Presentation
- Final Adjustments and Layout Tips
- Frequently Asked Questions (FAQ)
- Conclusion
Introduction to PowerPoint Slides Design
PowerPoint remains one of the most popular tools for creating presentations, primarily because of its versatility and ease of use. However, designing slides that stand out and effectively communicate your message requires more than just adding text and images. It involves understanding the design principles and using PowerPoint’s features creatively.
In this tutorial, we focus on creating an 8-option photographic slide design — a layout that allows you to present multiple options, steps, or categories in a visually structured manner. This design mimics a “paper” with holes on both sides and includes shadow effects to add depth. The options are clickable and reveal detailed text, making it perfect for step-by-step processes, product features, or segmented information.
Whether you want to create a full 8-step slide or a simpler 4-option version, this guide will provide you with the techniques to build and animate your slides professionally.
Preparing Your Slide and Workspace
Before diving into the actual design, it’s essential to set up your slide and workspace for precision and ease of use. Here’s how to get started:
- Add a New Slide: Start by inserting a new blank slide in your PowerPoint presentation.
- Set Background Color: Change the slide background to a light color to make your shapes and text stand out.
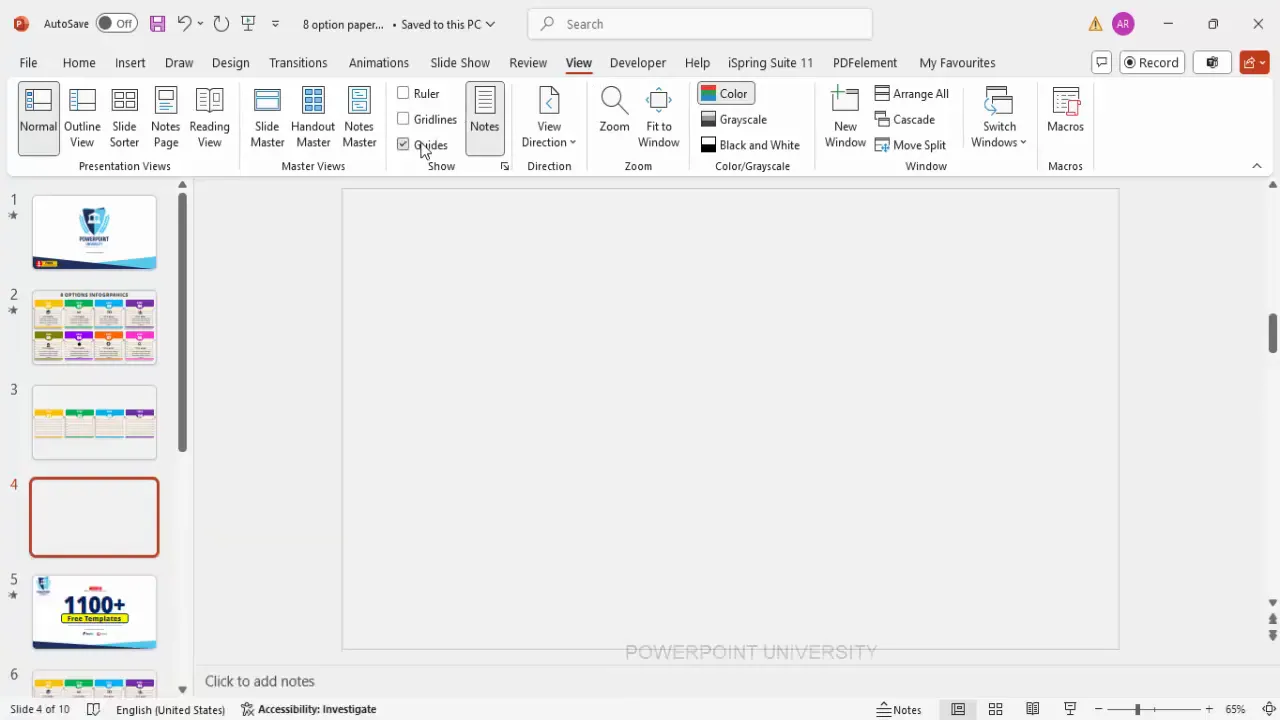
- Enable Guides: Go to the View tab and enable Guides. These help you align your objects precisely.
These simple steps provide a clean canvas and tools to maintain alignment and consistency throughout your design process.
Creating the Paper Shape with Holes
The core of this slide design is a paper-like shape with holes on both sides, giving it a unique and creative look. Follow these detailed steps to build this shape:
Step 1: Draw the Base Rectangle
- Go to Insert > Shapes, select the Rectangle shape.
- Draw a small rectangle approximately the size you want for your paper base.
- Remove the outline by selecting No Outline in the shape format options.
- Align the rectangle to the center both horizontally and vertically using the Align Center and Align Middle options.
Step 2: Cut the Top Part of the Rectangle
- Insert an Oval shape that covers the top area you want to cut from the rectangle.
- Change the color temporarily to distinguish it from the base rectangle.
- Select both the rectangle and the oval while holding the Shift key.
- Go to Shape Format > Merge Shapes and choose Subtract. This cuts the oval shape from the rectangle.
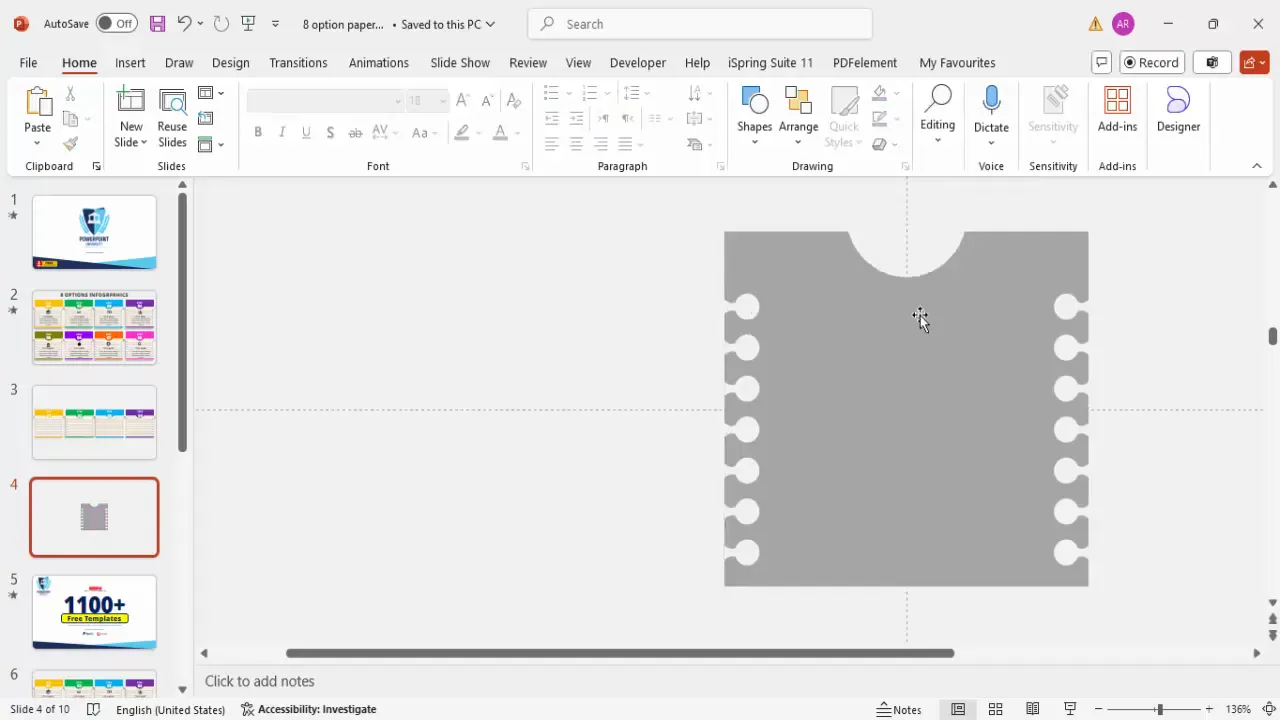
Step 3: Create the Holes on Both Sides
- Insert a new Oval shape for the hole and set No Outline.
- Insert a Trapezoid shape, rotate it 90 degrees to the right, and set the same fill color as the oval with no outline.
- Bring the trapezoid close to the oval to create a keyhole shape.
- Right-click the trapezoid, select Edit Points, and adjust the points to create a smooth curved edge resembling a keyhole.
- Select both the oval and the trapezoid, and use Merge Shapes > Union to combine them.
- Resize and position this keyhole shape so that it extends beyond the edges of the rectangle on one side.
- Duplicate this keyhole, align duplicates vertically with equal spacing, and group them.
- Duplicate the group, flip it horizontally, and position it on the opposite side of the rectangle.
Step 4: Fragment the Shapes to Finalize the Paper Design
- Select all shapes (rectangle and keyhole groups).
- Go to Shape Format > Merge Shapes and select Fragment.
- Delete unnecessary fragments, leaving you with a paper shape featuring holes on both sides.
Adding Lines, Shadows, and Color Effects
Now that you have the base paper shape, it’s time to add the details that make the slide visually appealing and professional.
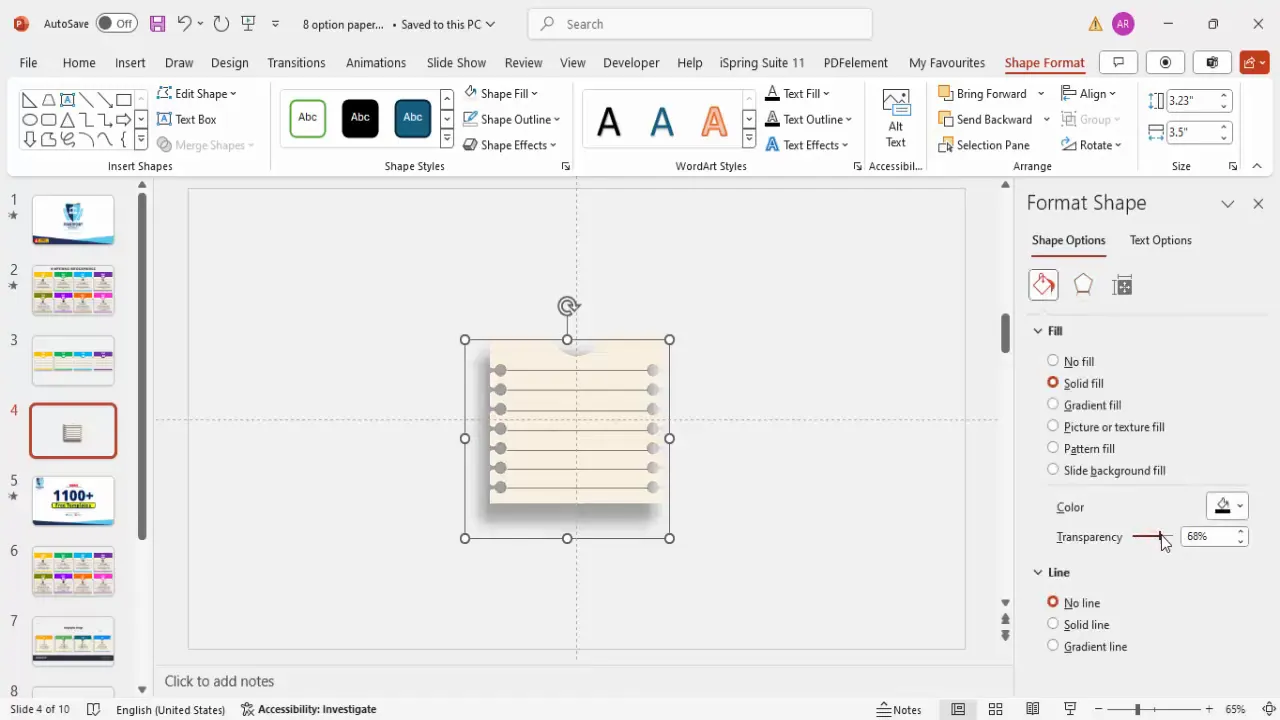
Adding Connecting Lines
- Insert a Line shape from one edge of the paper to the other, connecting the holes.
- Change the line color to gray for subtlety.
- Duplicate the line and position it for each hole on the paper.
Applying Shadow Effects
- Create a rectangle the same size as the paper shape and remove its outline.
- Right-click and select Format Shape.
- Set the fill color to black and increase transparency to around 50%.
- Under Effects, apply soft edges and increase the size to create a shadow effect.
- Send this shadow shape to the back to create depth behind the paper.
Color Filling
- Fill the paper shape with any light color of your choice to complement your presentation theme.
- Duplicate and adjust smaller rectangles on top of the paper to create layered effects.
- Group these shapes for easy manipulation.
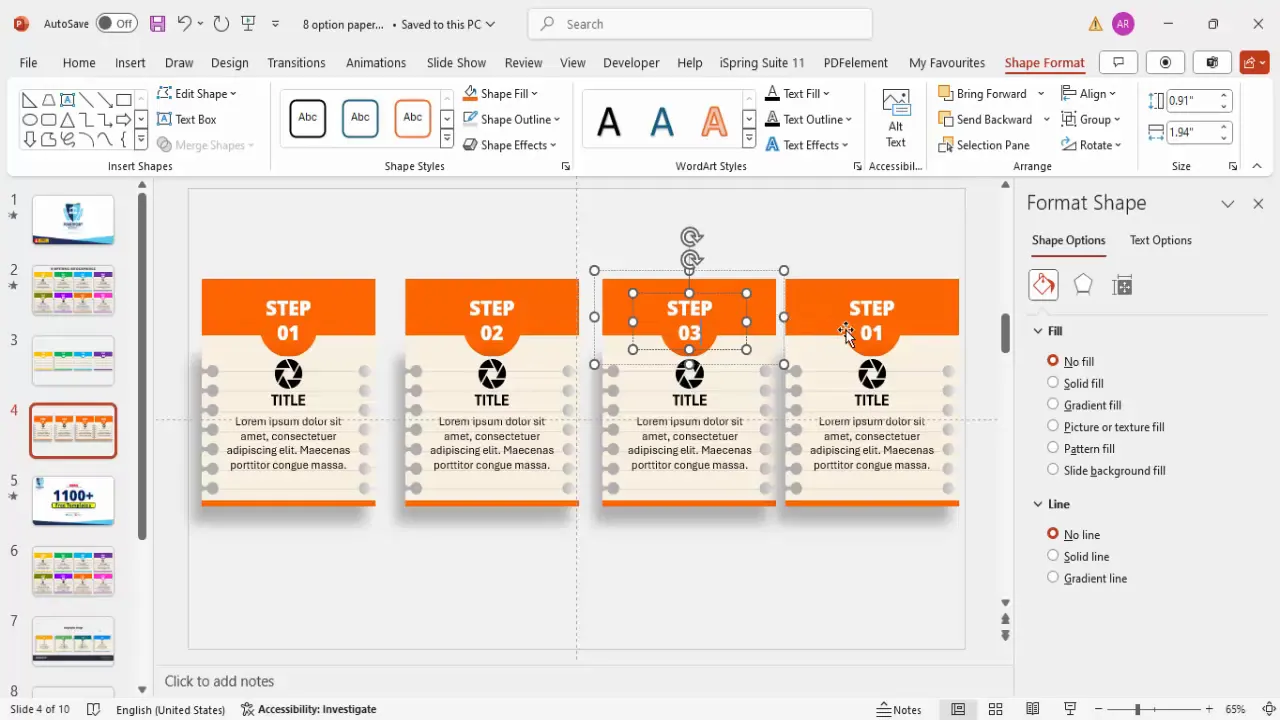
Designing the Option Steps with Text and Icons
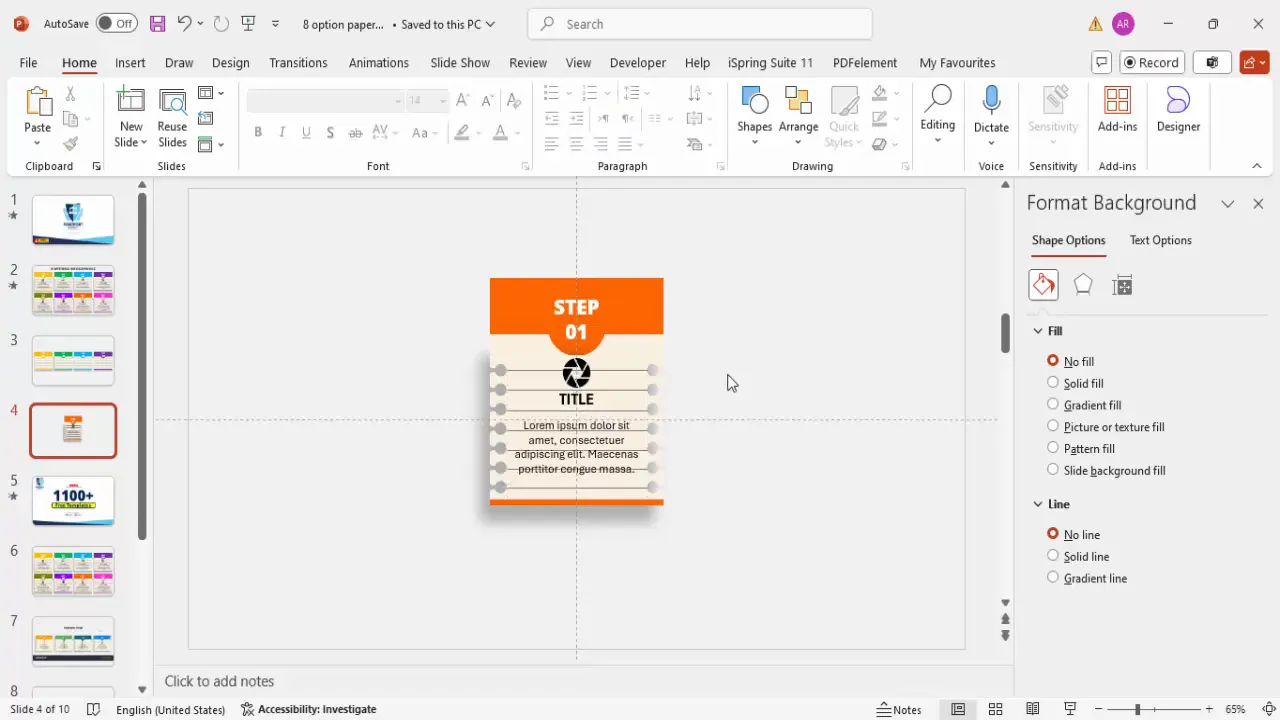
The slide design revolves around presenting multiple options or steps. Each option consists of a step number, an icon, a title, and detailed text. Here’s how to design these elements:
Step 1: Adding the Step Number
- Insert a Text Box and type “Step 01” or your desired step identifier.
- Center-align the text and apply a bold font such as Open Sans Extra Bold.
- Increase the font size and set the font color to white for contrast.
Step 2: Adding Icons
- Go to Insert > Icons and select an icon relevant to your step or option.
- Insert the icon and resize it to fit proportionally inside the step shape.
- Center the icon within the step number box or next to it as per your design preference.
Step 3: Adding Titles and Descriptions
- Insert a new text box for the title, type your title, and apply a bold font style.
- Center-align the title and position it below or beside the step number and icon.
- Insert another text box for detailed description text (Lorem Ipsum can be used as placeholder).
- Reduce the font size for the description to around 12 pt and center-align the text.
- Arrange the text boxes neatly to maintain visual balance and readability.
Duplicating and Customizing Multiple Options
Once you have designed one option step, you can efficiently duplicate and customize it for the remaining steps. This saves time and ensures consistency.
Grouping Elements for Easy Duplication
- Select the shapes that form the step number and icon and press Ctrl + G to group them.
- Similarly, group the title and detailed text boxes.
Using the Repeat Function
- Select the entire grouped step and press F4 to repeat the last action. This duplicates the group with the same formatting.
- Move the duplicated step to your desired position on the slide.
Customizing Each Step
- Change icons for each step by selecting the icon group, going to Graphic Format > Change Graphics, and choosing a new icon.
- Adjust colors by changing the fill of step shapes and text colors to create variety and emphasize different options.
- Modify the title and description text for each step to reflect your actual content.
You can create as many steps as needed, such as 4 or 8 options, by duplicating and customizing the grouped elements.
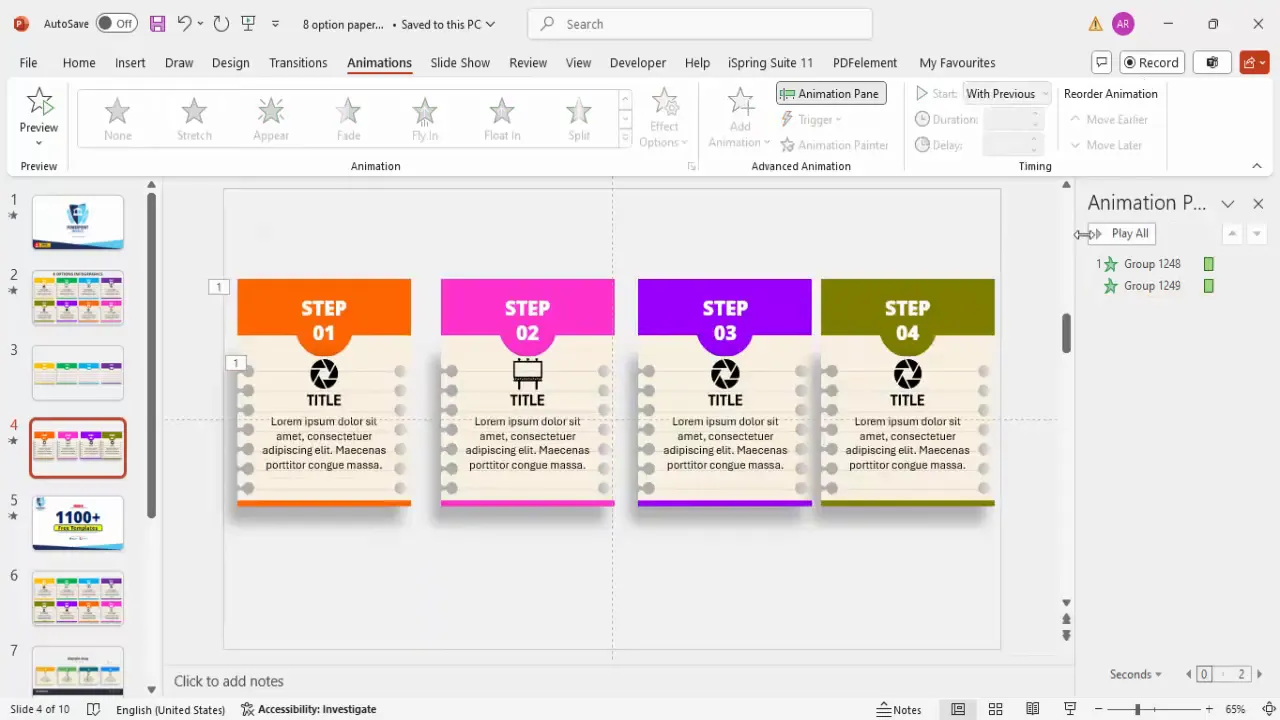
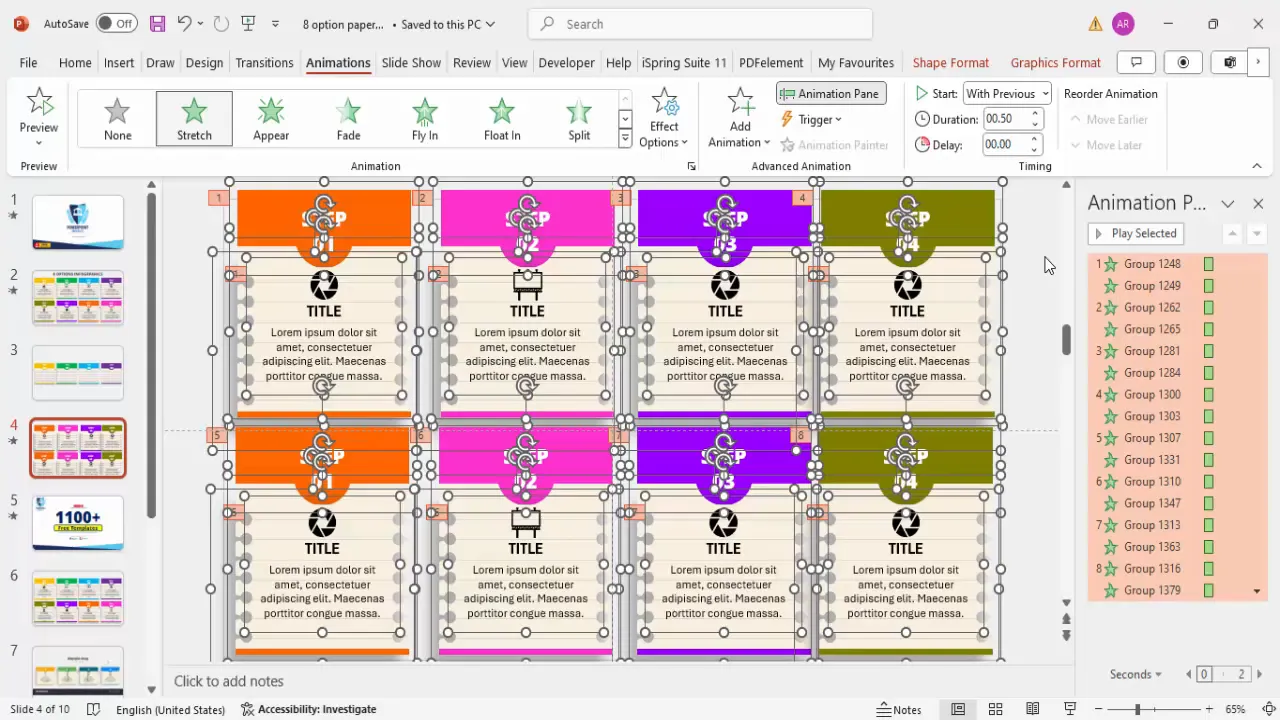
Animating Your Slide for Interactive Presentation
Adding animations brings your slide to life and helps guide your audience through each option step-by-step.

Enabling the Animation Pane
- Go to the Animations tab and open the Animation Pane to control your animations.
Applying Stretch Animations
- Select the grouped step shapes.
- Click Add Animation > More Emphasis Effects and choose Stretch.
- Set the stretch direction (e.g., from bottom for one shape, from top for another).
- Configure timing to Start With Previous or On Click based on your preference.
Using Animation Painter for Efficiency
- Apply the animation to one step.
- Select the animated object, click the Animation Painter tool, and then click on other steps to copy the animation effect.
Sequencing Animations
- Arrange animations in the Animation Pane so they play in order, guiding your audience step-by-step.
- Test the slide in presentation mode to ensure smooth transitions and clear visibility.
Final Adjustments and Layout Tips
After creating your options and applying animations, fine-tune your layout for the best visual balance and readability.
- Adjust Size and Position: If the slide feels crowded, reduce the height or width of your grouped steps and reposition them.
- Duplicate for Additional Rows: If you want to display options in multiple rows (top and bottom), duplicate the entire group and place it accordingly.
- Ensure Equal Spacing: Use the Align > Distribute Vertically and Align > Distribute Horizontally tools to make sure spacing between elements is consistent.
- Check Color Contrast: Make sure your text is readable against the background colors.
- Preview the Slide: Run the slide in presentation mode and click through your options to verify the flow and appearance.
Frequently Asked Questions (FAQ)
How can I make this paper design with holes reusable for other presentations?
You can save the completed paper shape as a PowerPoint template or export it as a picture. To reuse it, simply insert the saved template or image into new presentations and add your custom content.
Can I create more or fewer than eight options using this design?
Absolutely! The design is flexible. You can create as many or as few options as needed by duplicating or removing the grouped step elements. Adjust the size and spacing accordingly to maintain visual balance.
What fonts and colors work best for this slide design?
Use bold, clean fonts like Open Sans Extra Bold for step numbers and titles to ensure readability. Choose colors that contrast well with the background, such as white text on dark shapes or dark text on light backgrounds. Use consistent color schemes to maintain professionalism.
How do I make the options clickable to reveal detailed text?
While PowerPoint doesn’t support clickable objects to reveal text natively, you can simulate this effect using animations triggered by clicks. Set each option’s detailed text to appear on click, allowing you to reveal information step-by-step.
Is it possible to use this design for mobile or small screen presentations?
Yes, but keep in mind that smaller screens may require larger fonts and simplified layouts. You might want to reduce the number of options per slide or create multiple slides to avoid overcrowding.
Can I customize the icons used in the steps?
Definitely. PowerPoint offers a wide range of icons you can insert and customize. You can also import custom icons or images to match your presentation’s theme or branding.
Conclusion
Mastering PowerPoint Slides Design allows you to create compelling, professional presentations that engage your audience and communicate your message effectively. This tutorial demonstrated how to design an 8-option photographic slide layout with a unique paper design, complete with holes, shadow effects, icons, and animations.
By carefully preparing your slide, creating custom shapes, adding detailed text and icons, and animating your elements, you can build slides that are not only visually appealing but also interactive and easy to navigate.
Remember, the key to great PowerPoint design is consistency, clarity, and creativity. Use the techniques outlined here to elevate your presentations and leave a lasting impression.
For more creative PowerPoint templates and tutorials, consider exploring free resources and supporting channels dedicated to helping you become a PowerPoint pro.
Check out the full video: Make PPT like a Pro


