
Creating a captivating PowerPoint presentation can often feel like a daunting task, especially when you want to deliver information clearly while keeping your audience engaged. Whether you are a business professional, educator, or student, mastering the art of PowerPoint slides design is essential for making your message memorable and impactful.
In this comprehensive guide, I will walk you through the step-by-step process of designing an interactive and visually appealing slide deck in PowerPoint. This tutorial breaks down how to build a dynamic presentation with clickable options that expand to reveal detailed content, images, and smooth transitions — all within PowerPoint itself.
By the end of this article, you will have the skills to create a professional slide deck featuring:
- A sleek, transparent glass-effect background
- Custom icons aligned with each presentation section
- Interactive expandable slides with morph transitions
- Well-organized content blocks with images and text
Let’s dive into the detailed process and elevate your PowerPoint slides design to the next level.
Table of Contents
- Setting Up the Slide Background and Guides
- Creating the Transparent Glass-Effect Box
- Adding Icons and Labels for Each Option
- Duplicating Slides and Creating Expandable Content
- Inserting Images and Detailed Text
- Applying Morph Transitions for Smooth Animations
- Best Practices and Frequently Asked Questions
Setting Up the Slide Background and Guides
The first step in crafting an attractive PowerPoint slide deck is setting the foundation — your slide background and layout guides.
Start by adding a new blank slide in your PowerPoint presentation. I recommend using a dark-colored background as it helps the transparent elements and icons stand out vividly.
To do this:
- Right-click on the slide and select Format Background.
- Choose a solid fill and pick a dark color of your choice (e.g., dark gray or black).
- Next, enable guides by navigating to the View tab and checking the Guides box. This will help you align your shapes and icons precisely.
Using guides ensures consistent spacing and alignment across your slide deck, which is a key element of polished PowerPoint slides design.
Creating the Transparent Glass-Effect Box
One of the most visually striking features of this slide deck is the glass-effect box that holds each menu option.
Here’s how to create this effect:
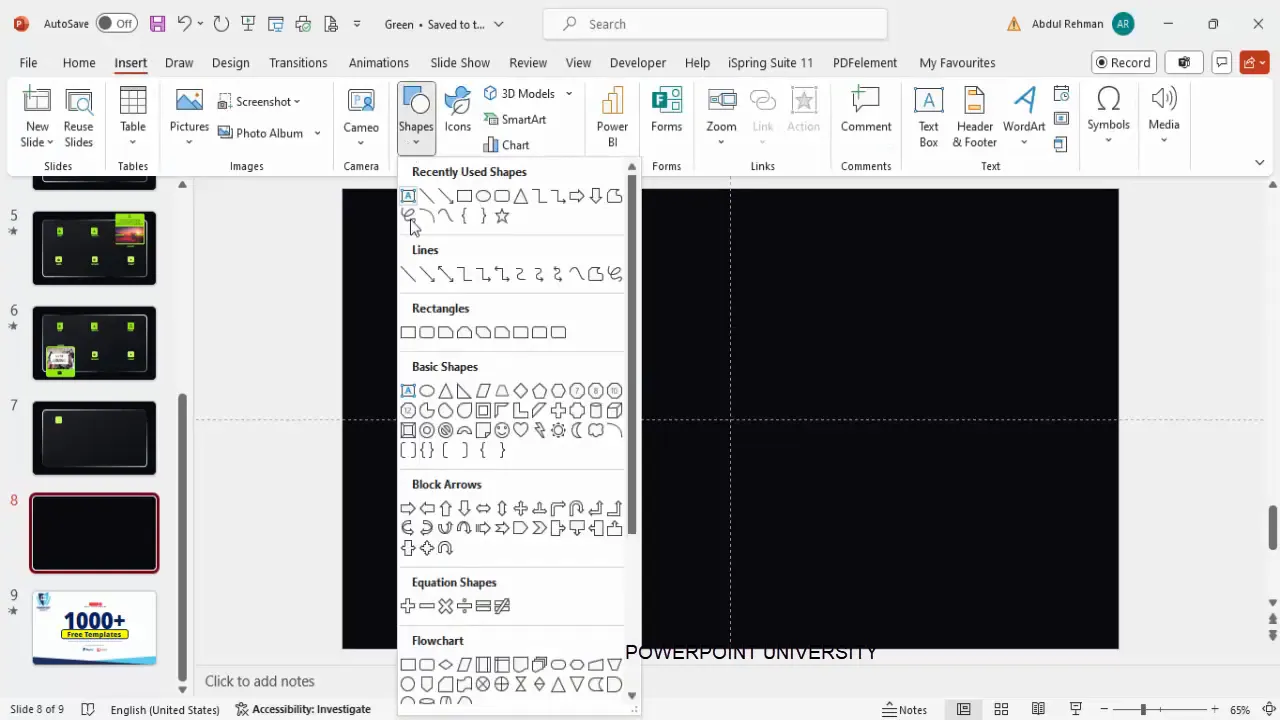
- Go to Insert > Shapes, and select the Rounded Rectangle shape.
- Draw a rectangle of your preferred size on the slide. You can adjust the size later depending on your design needs.
- To control the roundness of the corners, drag the small orange handle on the shape’s edge outward to decrease the curvature for a subtle rounded look.
- Set the Shape Outline to white.
- Set the Shape Fill initially to white as well.
Now, to create the signature glass or transparent effect:
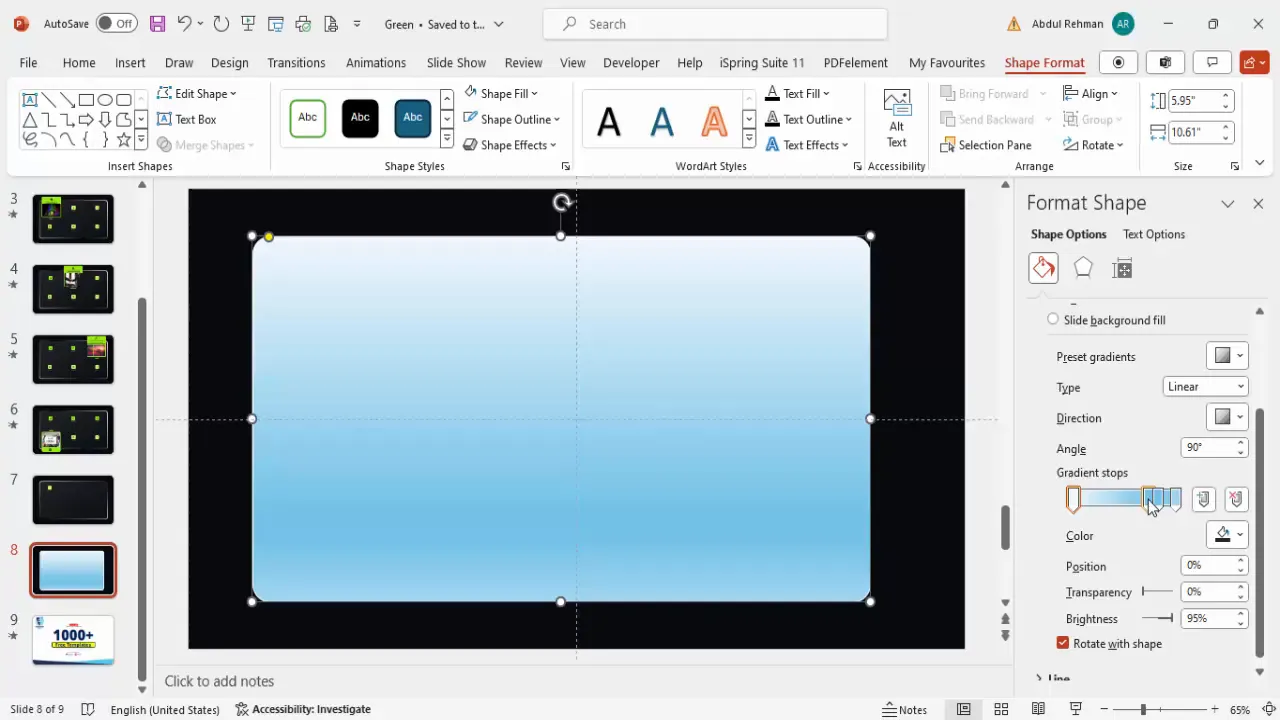
- Right-click the shape and select Format Shape.
- Under the Fill options, select Gradient Fill.
- By default, PowerPoint provides four gradient stops. Remove two stops so that only two remain.
- Set the first gradient stop color to white with approximately 80% transparency.
- Set the second gradient stop color to a light gray or white with 90-95% transparency.
- Adjust the gradient direction to your liking to enhance the glassy appearance.
This creates a subtle translucent box that looks modern and professional, adding depth to your slide.
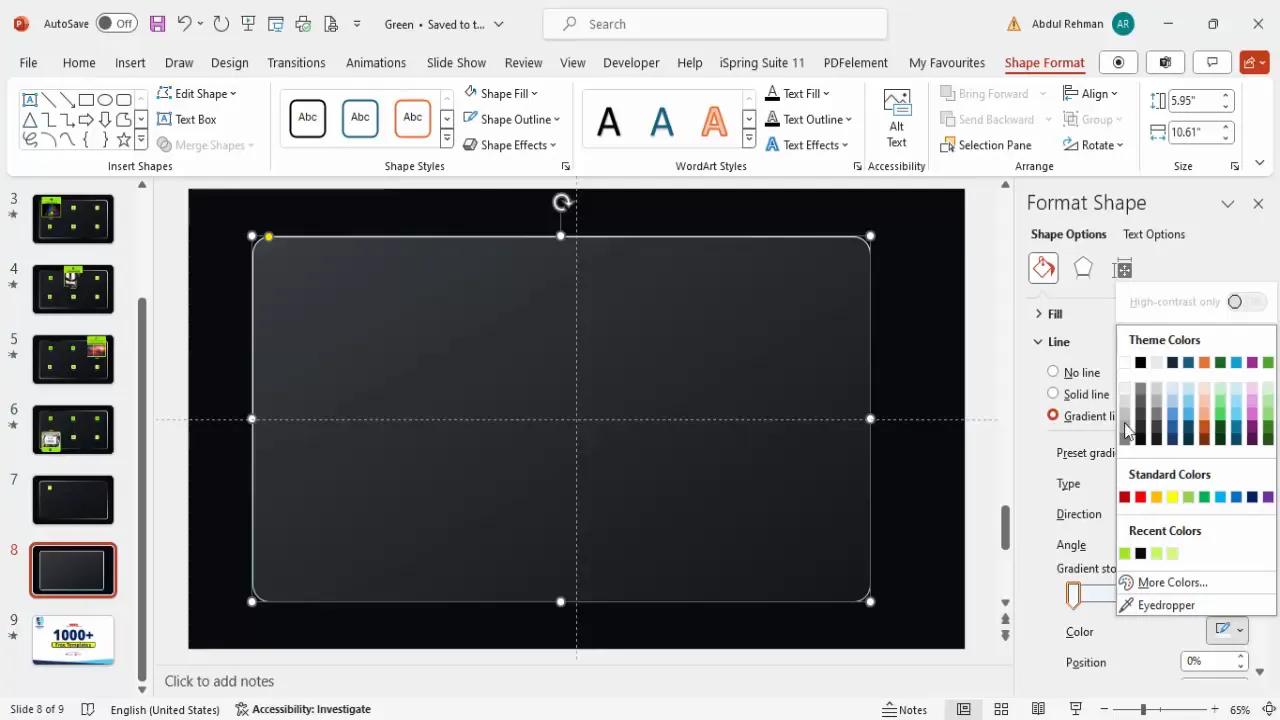
To make the outline or border of the box even more dynamic, apply a gradient to the line:
- With the shape selected, go to Format Shape > Line > Gradient Line.
- Add two gradient stops: one white and one blue or gray, depending on your color scheme.
- Adjust the gradient direction to create a subtle color transition on the border.
This gradient border complements the glass effect and enhances visual interest.
Adding Icons and Labels for Each Option
With the background and glass-effect box ready, the next step is to add the interactive menu options. Each option consists of an icon and a label.
Follow these steps to add the first menu option:
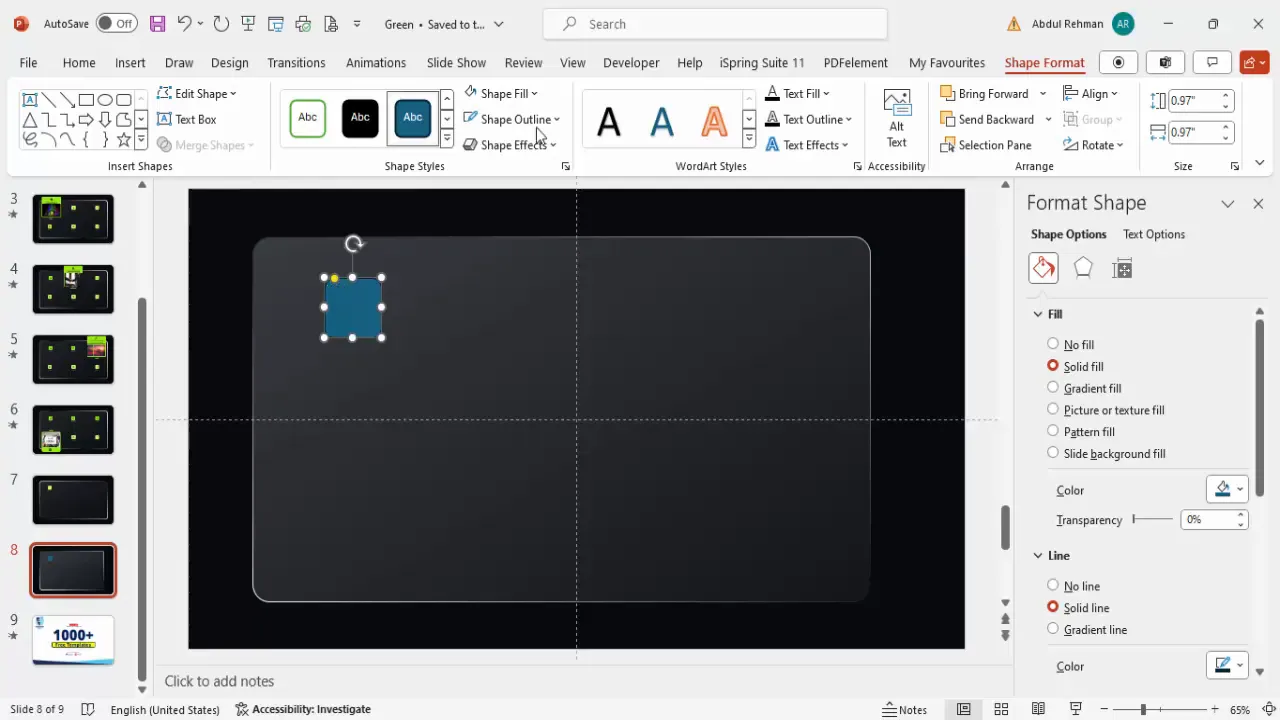
- Insert a smaller rounded rectangle shape to serve as the icon background. Hold the Shift key while dragging to create a perfect square.
- Remove the outline for this smaller shape by selecting No Outline.
- Fill the shape with a light color that fits your theme, such as light green.
- Go to Insert > Icons and search for a relevant icon that matches your menu option’s theme (e.g., a target icon for “Objective”).
- Insert the icon, set its color to black or a contrasting shade, and resize it to about 0.3 to 0.5 inches for clarity.
- Center-align the icon within the square shape.
- Insert a text box below or beside the icon and type the label (e.g., “Objective”).
- Set the font color to a light gray or white, reduce the font size to about 12 pt, and center-align the text.
Repeat these steps to create additional menu options such as “Where We Are” and “Our Clients.” You can change the icons for each according to the section’s theme by selecting the icon and using the Graphics Format > Change Graphic feature.
To organize the menu options neatly, select all the icon groups and use Ctrl+Shift while dragging to duplicate and position multiple options evenly.
Duplicating Slides and Creating Expandable Content
To create an engaging, interactive presentation, each menu option will expand to reveal more detailed content when clicked. This requires duplicating the base slide and modifying the duplicated version.
Here’s how to do it:
- Right-click the slide thumbnail in the slide pane and select Duplicate Slide.
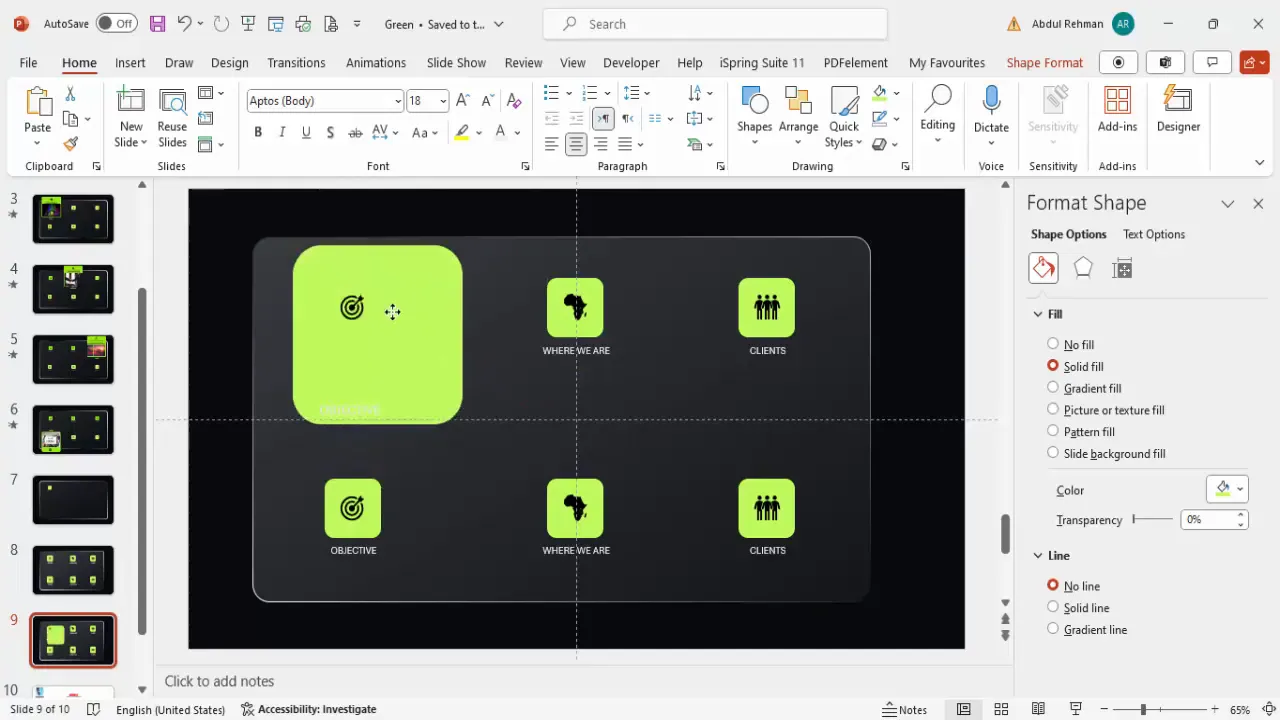
- On the duplicated slide, select the menu option’s glass-effect box and increase its size to emphasize it.
- Increase the font size of the label text from 12 pt to around 16 pt for better visibility.
- Resize the icon to about 0.7 inches to make it more prominent.
- Adjust the shape’s corner roundness to be less curved for a more rectangular, expanded look.
- Reposition the enlarged box and icon to the top or center of the slide.
This approach allows you to create a smooth transition from a compact menu to an expanded detailed view for each option.

Inserting Images and Detailed Text
With the expanded box prepared, you can now add supporting images and detailed text to provide more information.
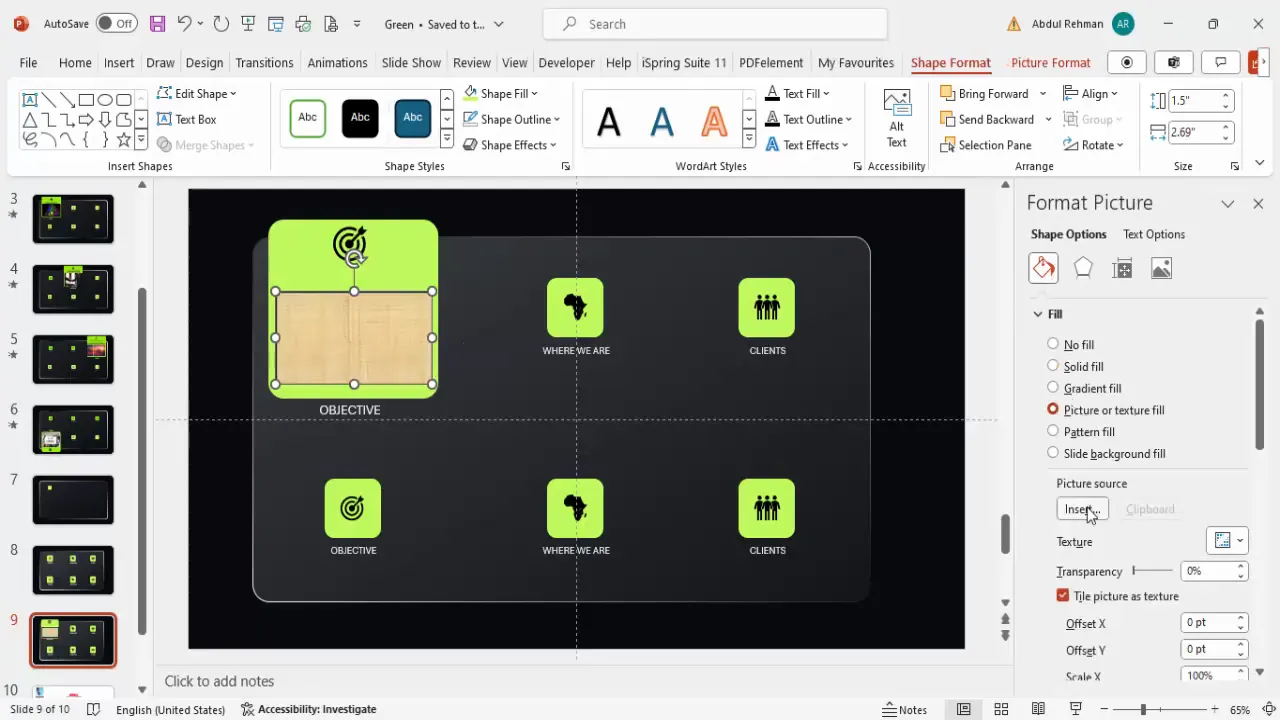
To insert an image inside the enlarged box:
- Select the enlarged shape, right-click and choose Format Shape.
- Under Fill, select Picture or Texture Fill.
- Click Insert and choose to add an image either from your local device or search for online pictures.
- For example, search for an image related to the menu option, such as “objective.”
- Insert the selected image to fill the shape background.
To add detailed text:
- Insert a text box below or beside the image.
- Add the descriptive content you want to share.
- Center-align the text and adjust font size and weight to fit the design.
- Optionally, insert additional shapes (e.g., rounded rectangles) to frame the text or images for a cleaner look.
- Remove outlines from these supporting shapes for a sleek appearance.
This combination of images and text enhances the storytelling capability of your slide deck.
Applying Morph Transitions for Smooth Animations
One of the most powerful features to bring your PowerPoint slides design to life is the Morph transition. This transition creates seamless animations between slides, perfect for the expanding and contracting effect of menu options.
To apply Morph transitions:
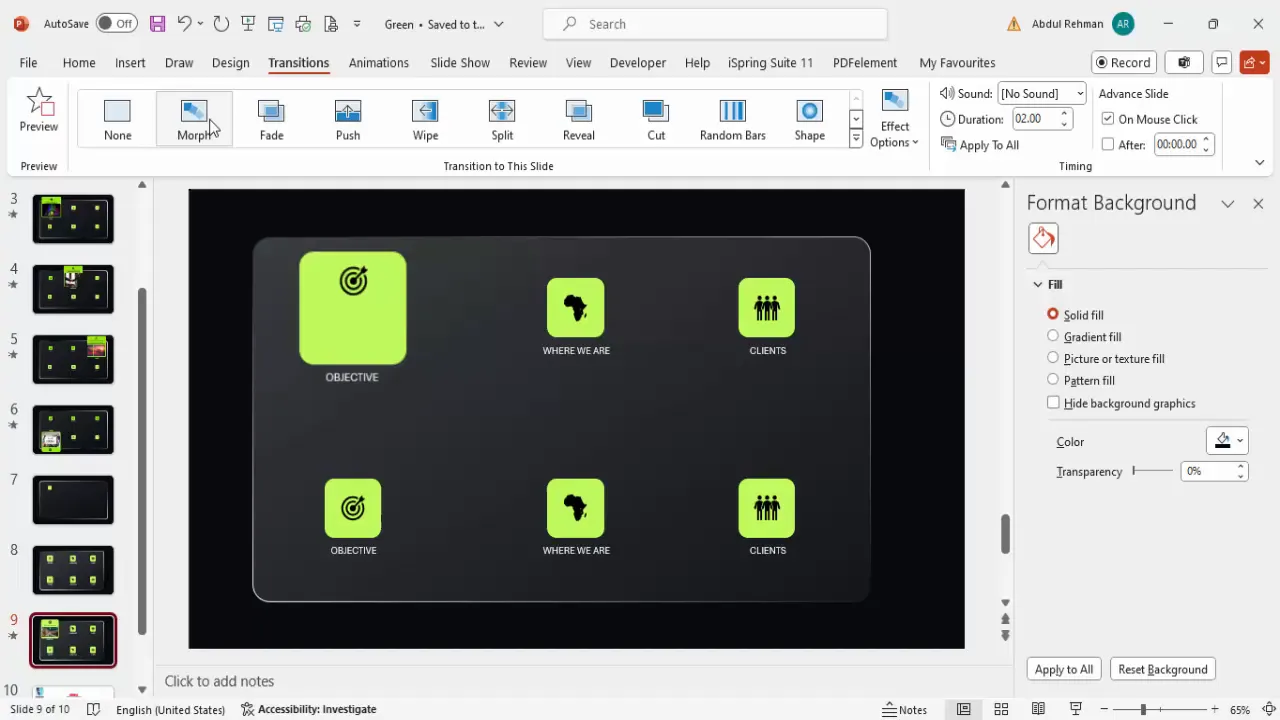
- Select the expanded slide in the slide pane.
- Go to the Transitions tab.
- Select Morph from the transition options.
- Adjust the duration of the transition to speed it up or slow it down. I recommend setting it around 0.75 seconds for a smooth yet snappy effect.
Now, when you play the slideshow and click on the menu option, it will appear to expand smoothly from the smaller box to the larger detailed view.
To create the effect of returning to the original menu, duplicate the expanded slide again and resize the shapes back to their original smaller sizes. Apply the Morph transition to this slide as well to animate the contraction.
Summary Table: Key Steps for Interactive PowerPoint Slide Deck
| Step | Action | Purpose |
|---|---|---|
| 1 | Set dark background and enable guides | Establishes a clear, professional canvas and layout alignment |
| 2 | Create rounded rectangle with glass-effect gradient fill | Builds stylish, translucent containers for menu options |
| 3 | Add icons and labels inside smaller rounded rectangles | Visual and textual identification of menu choices |
| 4 | Duplicate slide and enlarge selected menu option | Prepares expanded view for detailed content |
| 5 | Insert images and descriptive text in enlarged box | Enhances engagement with visual storytelling |
| 6 | Apply Morph transition and adjust duration | Creates smooth, professional animation between states |
| 7 | Duplicate expanded slide and revert sizes for closing effect | Allows interactive navigation back to menu |
Best Practices for PowerPoint Slides Design
Here are some tips to maintain professionalism and clarity in your PowerPoint slides design:
- Consistency: Use uniform font types, sizes, and colors throughout your deck to create a cohesive look.
- Alignment: Utilize guides and grids to keep objects perfectly aligned, enhancing readability.
- Minimalism: Avoid overcrowding slides with too much text or too many images; keep content concise and focused.
- Color Palette: Choose colors that contrast well with your background and fit your brand or presentation theme.
- Readable Fonts: Use fonts that are easy to read from a distance; avoid overly decorative fonts.
- Use of Icons: Icons help convey concepts quickly and visually; ensure they are relevant and consistent in style.
- Transitions and Animations: Use effects like Morph sparingly for smoothness, avoiding distractions from content.
Frequently Asked Questions (FAQ)
Q1: How do I make my PowerPoint slides interactive like in this tutorial?
By duplicating slides and resizing key elements combined with the Morph transition, you can create the illusion of interactive expanding and collapsing content. Assigning navigation links or instructing users to click or use arrow keys enhances interactivity.
Q2: Can I use any icons in PowerPoint?
Yes, PowerPoint offers a vast built-in icon library accessible via Insert > Icons. You can also import custom icons if you want a unique style. Make sure icons are simple, clear, and consistent in color and size.
Q3: What is the best slide background color for transparency effects?
Dark backgrounds such as black, navy, or dark gray work best for transparent glass-effect shapes because they provide high contrast and make the translucent elements pop.
Q4: How do I speed up or slow down slide transitions?
Under the Transitions tab, adjust the Duration setting to your desired speed. For smooth morphing, around 0.75 seconds is optimal.
Q5: Can I add more than three menu options?
Absolutely! You can duplicate and arrange as many menu options as needed, making sure to keep the layout clean and balanced. Use guides to maintain consistent spacing.
Final Thoughts
Mastering PowerPoint slides design is a blend of creativity and technical know-how. By following this tutorial’s step-by-step approach, you can build professional, engaging, and interactive slide decks that captivate your audience and communicate your message effectively.
Remember, the key is to start with a solid foundation — a well-designed background and layout — then build your content with clear icons, labels, and complementary images. Use PowerPoint’s powerful Morph transition to add polish and interactivity without needing external tools.
With practice, you’ll find these techniques indispensable for crafting presentations that stand out and leave a lasting impression.
Ready to get started? Open PowerPoint now, and start designing your next impressive slide deck!
Check out the full video: How to make an Engaging Slide Deck in PowerPoint


