
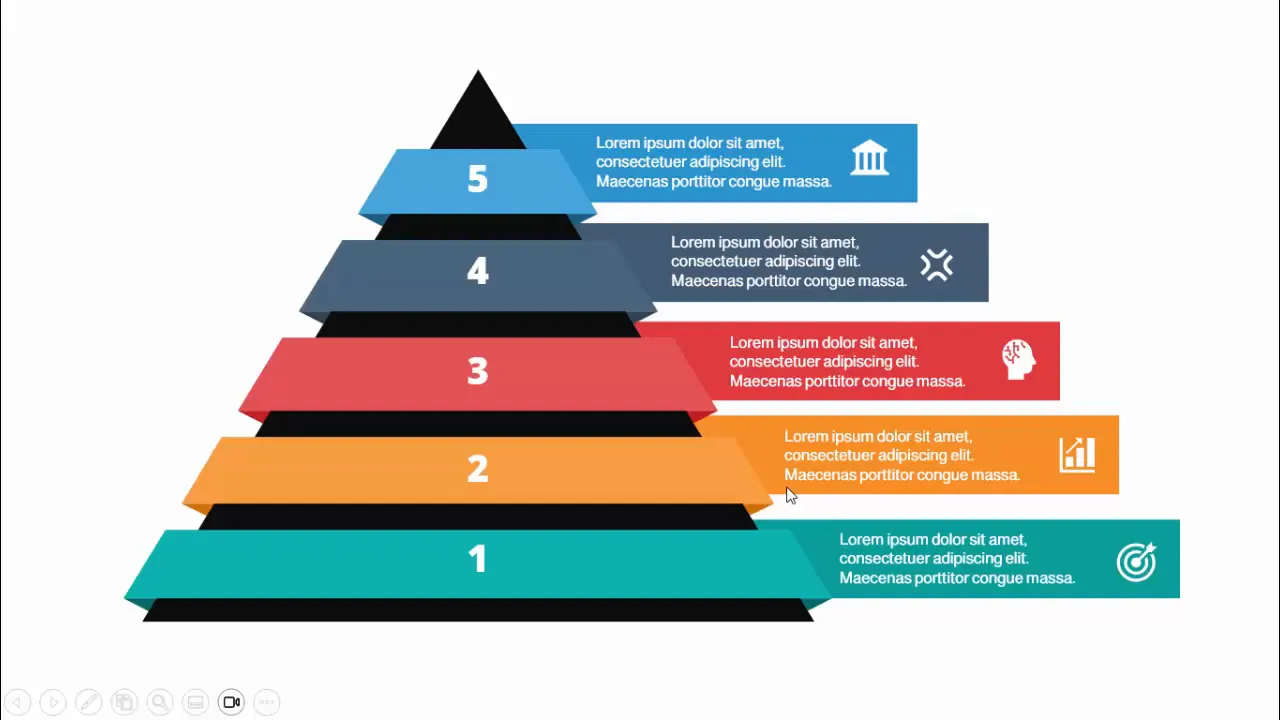
When it comes to creating impactful presentations, visuals play a crucial role in capturing your audience’s attention and conveying your message clearly. One of the most effective and visually appealing ways to organize information is through pyramid diagrams. In this comprehensive guide, you’ll learn how to create a professional pyramid slide with five customizable options using PowerPoint. This step-by-step tutorial will walk you through designing a dynamic pyramid shape, dividing it into equal segments, and adding text and icons to make your presentation informative and engaging.
This tutorial is inspired by expert techniques from POWERPOINT UNIVERSITY, renowned for providing over a thousand free PowerPoint templates and design tips. Whether you are preparing a business presentation, educational content, or corporate slides, mastering this pyramid design will elevate your PowerPoint slides design skills and help you deliver your message with clarity and style.
Table of Contents
- Why Use Pyramid Diagrams in PowerPoint Slides Design?
- Getting Started: Setting Up Your Slide
- Creating the Pyramid Shape
- Dividing the Pyramid into Equal Parts
- Coloring and Styling the Pyramid
- Adding Depth and 3D Effects
- Encircling the Pyramid with Rectangles
- Adding Text and Icons to Your Pyramid Options
- Customization Tips for Different Needs
- Frequently Asked Questions (FAQs)
- Conclusion
Why Use Pyramid Diagrams in PowerPoint Slides Design?
Pyramid diagrams are a powerful visual tool used to represent hierarchical relationships, processes, or layered information. They help audiences quickly grasp complex ideas by breaking them down into structured levels.
- Visual Clarity: The pyramid shape naturally guides the viewer’s eye from the base to the apex, making it ideal for showing progression or priority.
- Organized Information: Divide your content into distinct sections for better readability.
- Flexibility: Pyramid diagrams can accommodate varying numbers of options or categories, making them suitable for diverse presentation needs.
- Professional Appeal: They add a polished look to your slides, enhancing audience engagement.
Mastering pyramid designs enhances your overall PowerPoint slides design skills, allowing you to create visually compelling and meaningful presentations.
Getting Started: Setting Up Your Slide
Before diving into creating the pyramid, it’s essential to set up your PowerPoint slide for precise design work. This involves adding a new slide and enabling guides to help with alignment and positioning.
- Add a New Slide: Start by inserting a blank slide where you will build your pyramid design.
- Enable Guides: Go to the View tab and enable Guides. These help you align objects centrally both horizontally and vertically.
Using guides ensures that your pyramid and subsequent shapes are perfectly centered and aligned, which is crucial for a professional look.
Creating the Pyramid Shape
Now, let’s create the basic pyramid shape. The pyramid is essentially a triangle that will be divided into equal parts to represent different options or levels.
- Insert a Triangle Shape: Go to Insert > Shapes and select the basic Triangle shape.
- Draw the Triangle: Click and drag to draw the triangle on your slide. Make it large enough to accommodate your content.
- Align the Triangle: Use the guides to center align the triangle both horizontally and vertically.
- Remove Outline: Select the triangle, go to Shape Outline and choose No Outline for a cleaner look.
- Apply Transparency: Right-click the triangle, select Format Shape, and set the fill transparency to about 20%. This light fill helps you visualize and work with overlapping shapes during editing.
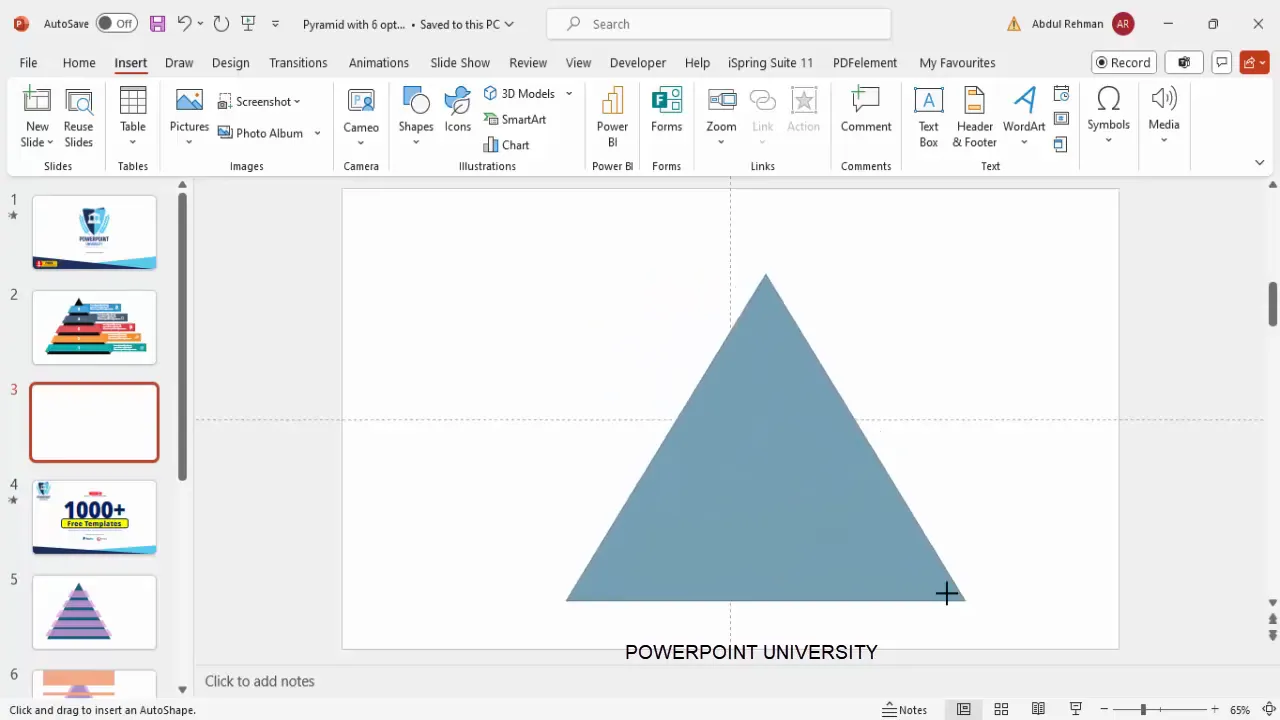
This semi-transparent triangle serves as the base shape for your pyramid design.
Dividing the Pyramid into Equal Parts
The key to a functional pyramid diagram is dividing the shape into equal sections or levels representing different options or categories. Here’s how to split the triangle into five equal parts:
- Duplicate the Triangle: Select the original triangle and press
Ctrl + Dto duplicate it. You will work mainly with the front triangle. - Create Rectangles for Division: Insert rectangles that will act as cutting guides. Draw a rectangle that is wider than the triangle and position it at the bottom.
- Set Rectangle Format: Remove the outline and set the fill color to a light green with 30% transparency for visibility.
- Duplicate Rectangles: Press
Ctrl + Dto create four more rectangles, stacking them vertically along the triangle. Adjust their heights so that they divide the triangle into five equal horizontal segments. - Select Shapes for Fragmenting: Select the front triangle and all the rectangles together (using
Shift + Click). - Fragment the Shapes: Go to Shape Format > Merge Shapes > Fragment. This action cuts the triangle into separate pieces where the rectangles intersect.
- Delete Unnecessary Parts: After fragmentation, delete the extra shapes around the pyramid, leaving only the five segmented parts of the pyramid.
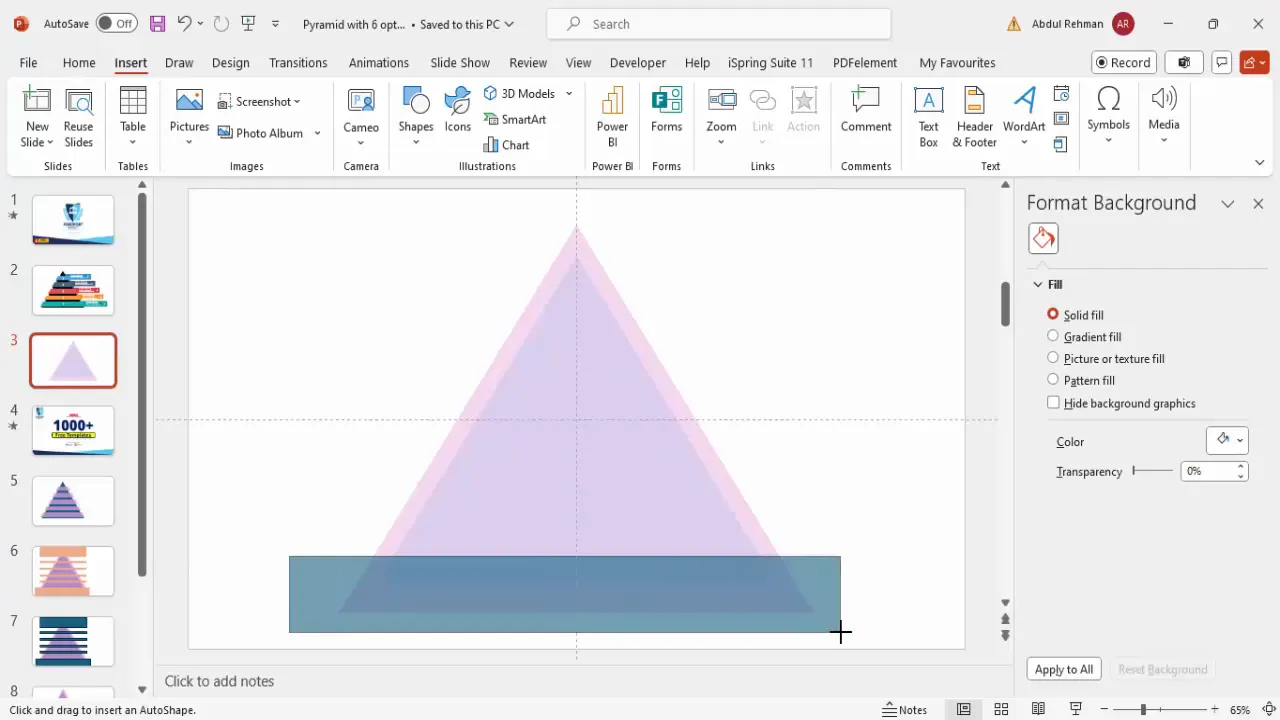
You now have a pyramid divided into five equal sections, ready to be styled and populated with content.
Coloring and Styling the Pyramid
With the pyramid segmented, the next step is to apply colors and effects to make each section distinct and visually appealing.
- Select Each Segment: Click on each pyramid segment individually.
- Apply Solid Fill Colors: Choose contrasting colors for each segment to differentiate them clearly. For example, use blue, orange, red, brown, or any color scheme that fits your brand or presentation theme.
- Set Transparency to Zero: Ensure the transparency of each segment is set to 0% for solid color blocks.
- Maintain Consistent Style: Use similar color saturation levels to keep a professional and cohesive look.
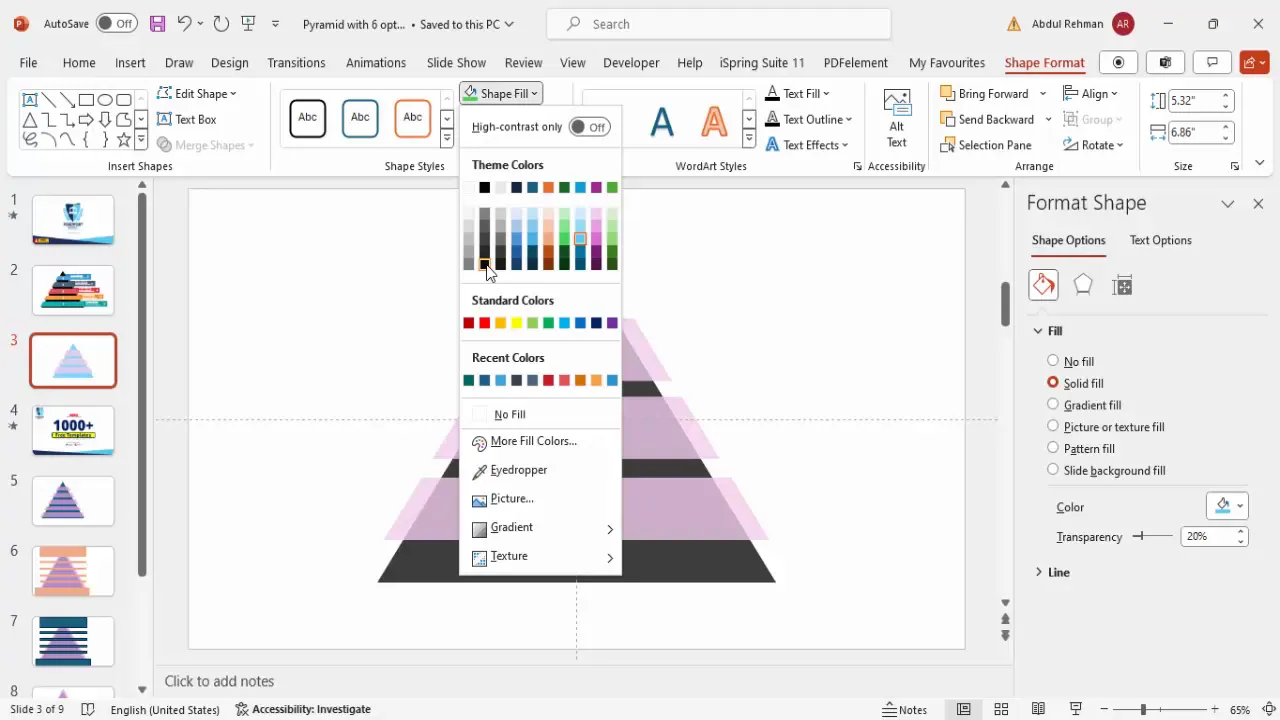
Color coding the pyramid levels helps the audience easily identify and understand each option or category.
Adding Depth and 3D Effects
To enhance the pyramid’s visual appeal and give it a sense of depth, you can add subtle effects that simulate a 3D look.
- Create a Right Triangle Shape: Insert a small right triangle from Insert > Shapes.
- Format the Triangle: Remove the outline and rotate it by flipping vertically and horizontally to position it as a shadow or depth effect behind the pyramid.
- Resize and Position: Adjust the size so that it slightly peeks from behind the pyramid’s edges.
- Send to Back: Right-click and choose Send to Back to place the triangle behind the pyramid shape.
- Duplicate and Position: Duplicate this shape multiple times and position it around the pyramid’s edges to create a twisting or turning effect, simulating depth.
- Match Colors: You can color these shapes to match or complement the pyramid’s front colors, adjusting shades to create a shadow effect.
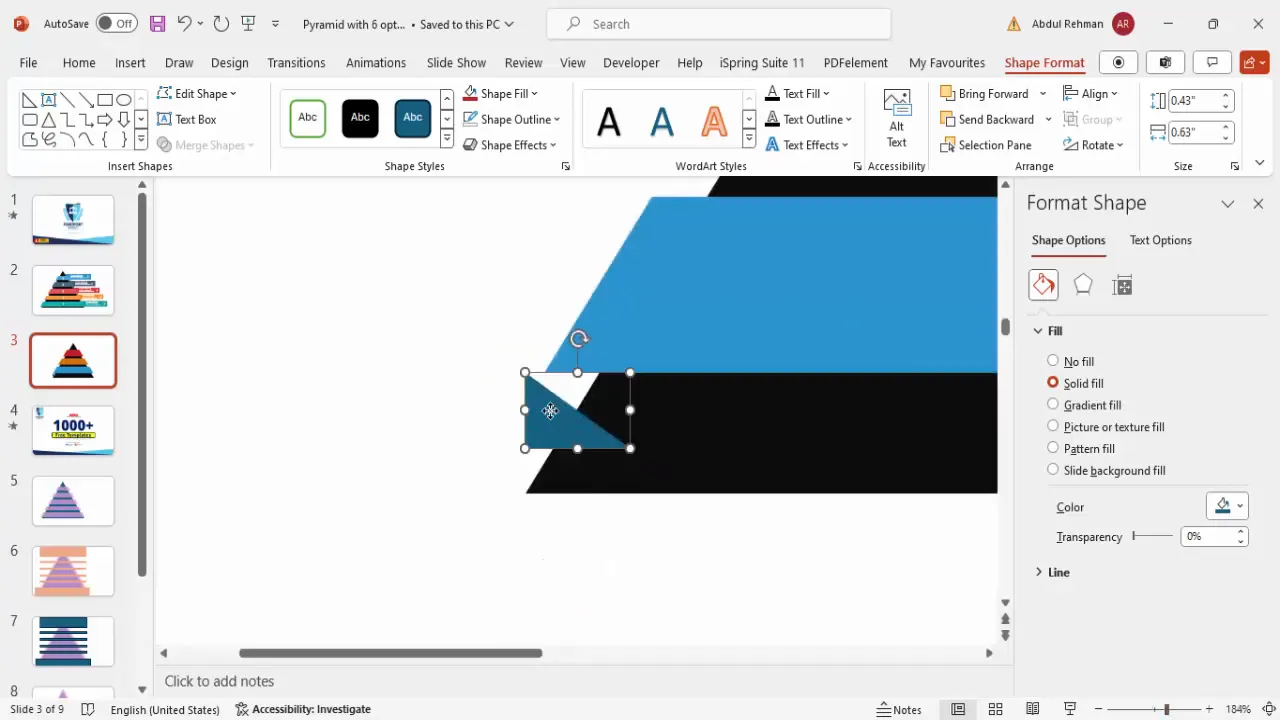
This creative use of shapes adds a professional polish that makes your pyramid slide stand out.
Encircling the Pyramid with Rectangles
To further enhance the pyramid design and provide space for additional information like options or descriptions, you can add rectangles around the pyramid’s sides.
- Insert Rectangles: Add three rectangles around the pyramid, ensuring each rectangle is slightly larger than the pyramid’s segments.
- Remove Outlines: Set the shape outline to No Outline for a clean look.
- Adjust Colors: Use the eyedropper tool to pick colors from the pyramid segments and apply darker shades to the rectangles for contrast.
- Send Rectangles to Back: Send these rectangles behind the pyramid shape to create a layered effect.
- Position the Pyramid: Select all objects and move the pyramid slightly to the left to balance the slide’s composition and make room for text boxes.
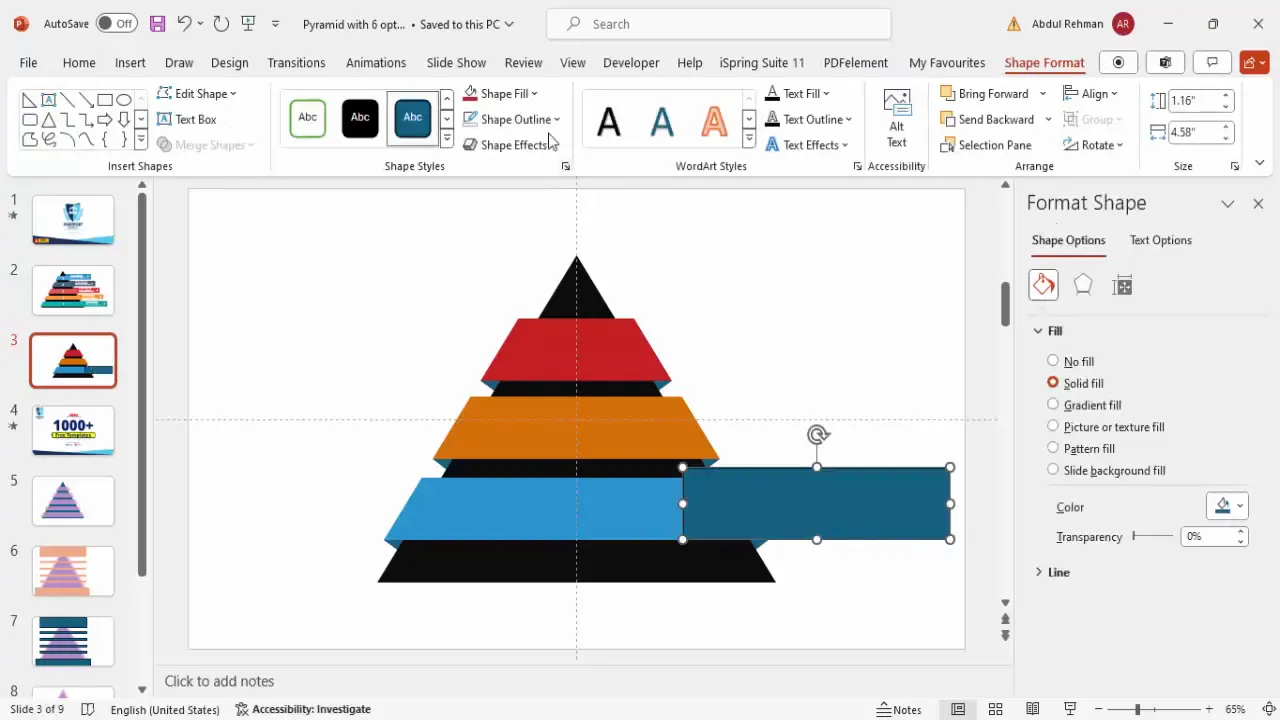
This approach organizes your slide layout and visually connects the pyramid with its corresponding content areas.

Adding Text and Icons to Your Pyramid Options
Now that your pyramid and surrounding shapes are ready, it’s time to add descriptive text and icons for each option to communicate your message effectively.
- Insert Text Boxes: Add a text box inside or near each rectangle to label your options (e.g., Option 1, Option 2, Option 3).
- Format Text: Use a bold font like Open Sans Extra Bold or any modern sans-serif font. Set font color to white for contrast against the dark rectangle background.
- Size and Align Text: Center-align the text and increase the font size to make it prominent, around 40 pt or larger.
- Duplicate Text Boxes: Use
Ctrl + Dto quickly duplicate and rename for other options. - Insert Icons: Go to Insert > Icons and choose relevant icons that match your options or topics. Insert them beside or above the text.
- Resize and Color Icons: Adjust icon size to about 0.5 inches in height and width. Change the icon fill color to white for visibility against colored backgrounds.
- Add Detailed Text: Below the main option label, insert smaller text boxes (font size 12-14 pt) for detailed descriptions or explanations.
- Duplicate and Position: Duplicate the detailed text boxes for each option and align them consistently.
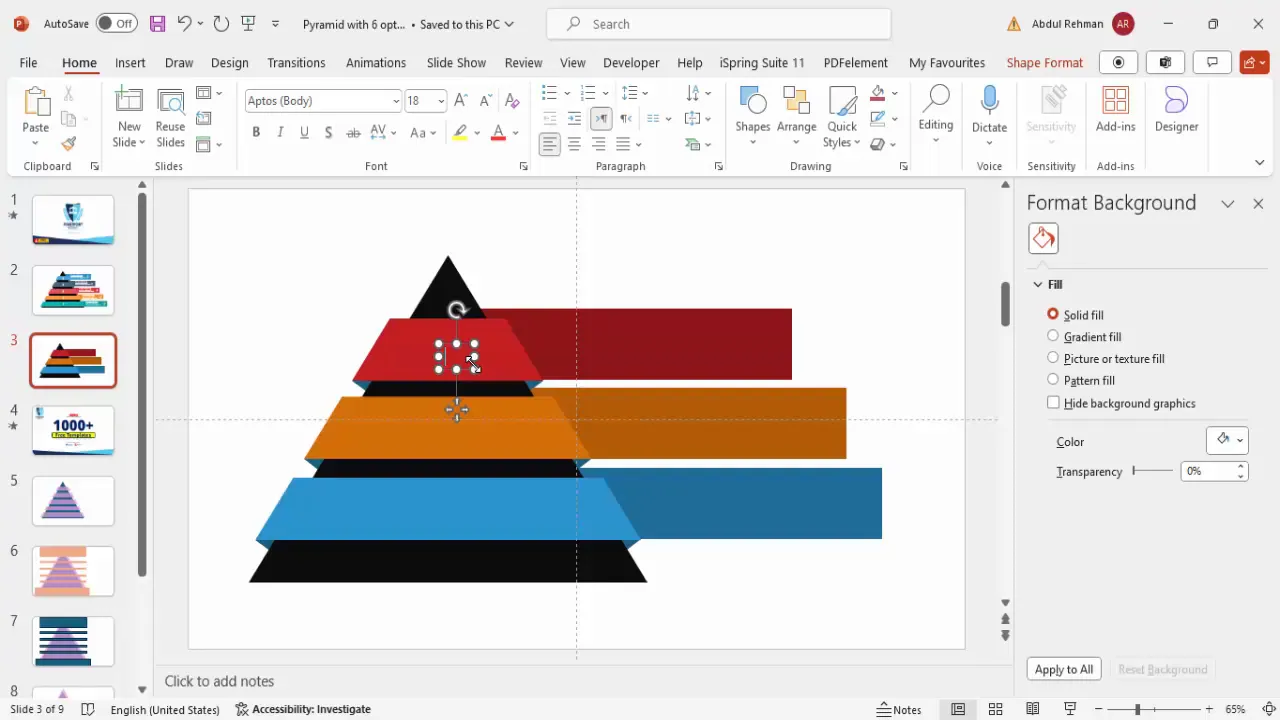
Using a combination of clear text labels and meaningful icons makes your pyramid slide engaging and easy to understand.
Customization Tips for Different Needs
One of the great features of this pyramid design is its flexibility. Depending on your presentation’s purpose, you can easily adjust the number of options or the style.
- Adjust Number of Options: By changing the height of the dividing rectangles, you can create fewer or more pyramid segments. For example, reduce height for five options or increase for three options.
- Color Schemes: Customize the color palette to match your brand colors or presentation theme. Use consistent color combinations for a professional look.
- Icons Selection: Choose icons that convey the essence of each option clearly and visually.
- Text Style: Experiment with fonts and sizes to maintain readability while fitting your slide layout.
- Additional Effects: Consider adding subtle animations or transitions to each pyramid segment for dynamic presentations.
By tailoring these elements, you can create pyramid slides that fit any topic and presentation style.
Frequently Asked Questions (FAQs)
What is the best way to divide a pyramid into equal sections in PowerPoint?
The most efficient way is to use rectangles as cutting guides, place them over the triangle, and use the Fragment option found under Shape Format > Merge Shapes. This method creates precise, equal parts easily.
Can I create a pyramid with fewer than five options?
Absolutely. Adjust the number and size of the rectangles used for fragmentation to create three, four, or any number of segments you need.
How do I ensure my pyramid design looks professional?
Use consistent alignment, complementary colors, and clean fonts. Avoid clutter by limiting text and using icons to visually support your message.
Can I animate the pyramid segments?
Yes, PowerPoint supports animations. You can add entrance or emphasis effects to each segment to guide your audience’s focus during your presentation.
Where can I find free PowerPoint templates and icons?
Many sources offer free templates and icons, including the official Insert > Icons feature in PowerPoint and websites like Flaticon or Freepik. Additionally, channels like POWERPOINT UNIVERSITY provide free downloadable templates.
Conclusion
Creating a pyramid slide with five options in PowerPoint is a valuable skill for anyone looking to improve their PowerPoint slides design. This tutorial has provided you with a detailed, step-by-step process to build a visually appealing and highly customizable pyramid diagram. From setting up your slide and creating the base triangle to dividing it into segments, applying colors, adding depth effects, and incorporating text and icons, you now have a comprehensive roadmap to craft professional pyramid slides.
Remember, the key to effective PowerPoint slides design is clarity, consistency, and creativity. Use the pyramid diagram to organize your ideas logically and present them in a way that captivates your audience. Don’t be afraid to experiment with colors, fonts, and layouts to best suit your presentation’s purpose.
For those looking to expand their design skills further, exploring free templates and practicing these techniques regularly will make your presentations stand out and leave a lasting impression.
Happy designing!
Check out the full video: Create Pyramid design with 5-option slide in PowerPoint


