

If you’re searching for a fast and effective way to design beautiful PowerPoint slides without sacrificing quality, you’re in the right place. In this detailed tutorial, we’ll walk through the process of creating five unique and visually appealing slides in just 10 minutes. Inspired by a challenge from Louis and demonstrated by One Skill PPT, this guide will help you speed up your workflow, master essential PowerPoint features, and learn design tricks that can transform your presentations.
Whether you’re a beginner or an experienced presenter, this tutorial will show you how to efficiently leverage PowerPoint’s tools to create professional slides quickly. Along the way, we’ll cover customizing the Quick Access Toolbar, using stock photos and 3D models, applying animations, and designing with modern effects like glassmorphism. By the end, you’ll have five polished slides ready to impress your audience.
Table of Contents
- Preparation: Customizing Your Quick Access Toolbar
- Slide 1: Gamer-Themed Slide with 3D Animation
- Slide 2: Full-Screen Video Background with Quote
- Slide 3: Glassmorphic Effect Slide
- Slide 4: Business Model Slide with KPIs
- Slide 5: Infographic Slide with Iconic Steps
- Finishing Touches: Transitions and Animations
- Frequently Asked Questions (FAQ)
- Conclusion
Preparation: Customizing Your Quick Access Toolbar
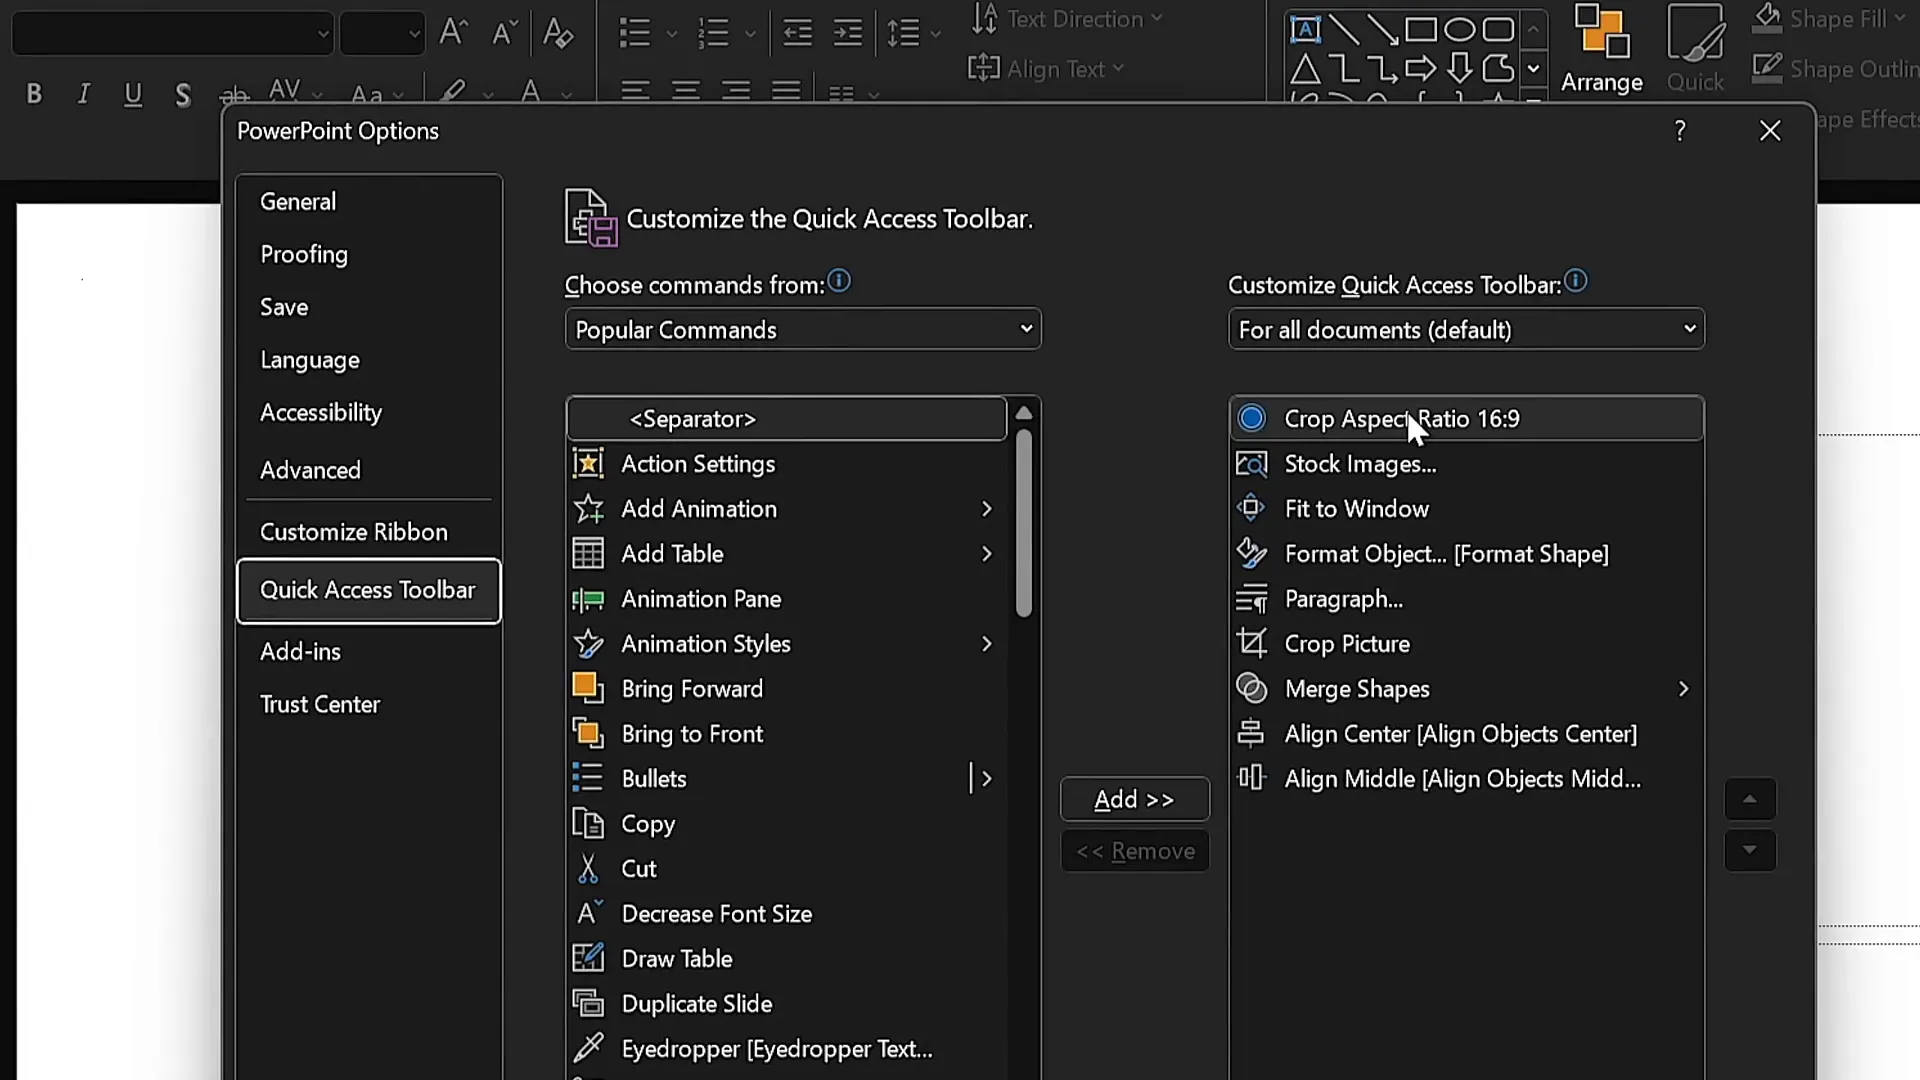
Before diving into slide creation, One Skill PPT emphasizes the importance of optimizing your workspace. Customizing the Quick Access Toolbar in PowerPoint can dramatically speed up your workflow, especially when working under a tight time limit like this 10-minute challenge.
Here’s how One Skill PPT set up the toolbar for maximum efficiency:
- Added commonly used commands such as opening stock photos, formatting shapes, and inserting 3D models.
- Used keyboard shortcuts with the
Altkey to quickly access these commands. For example, pressingAlt + 2opens the stock photos pane, andAlt + 4opens the Format Shape pane.
This setup allows you to keep your hands on the keyboard and quickly switch between tools without searching through menus. Here’s a quick tip:
| Command | Shortcut (Alt + Number) | Purpose |
|---|---|---|
| Stock Photos | Alt + 2 | Quickly insert high-quality stock images |
| Format Shape Pane | Alt + 4 | Edit shape properties like fill, outline, and effects |
| Insert 3D Models | Custom Shortcut (if assigned) | Add 3D models for dynamic visuals |
By mastering these shortcuts, you can focus more on creative design rather than navigating menus.
Slide 1: Gamer-Themed Slide with 3D Animation
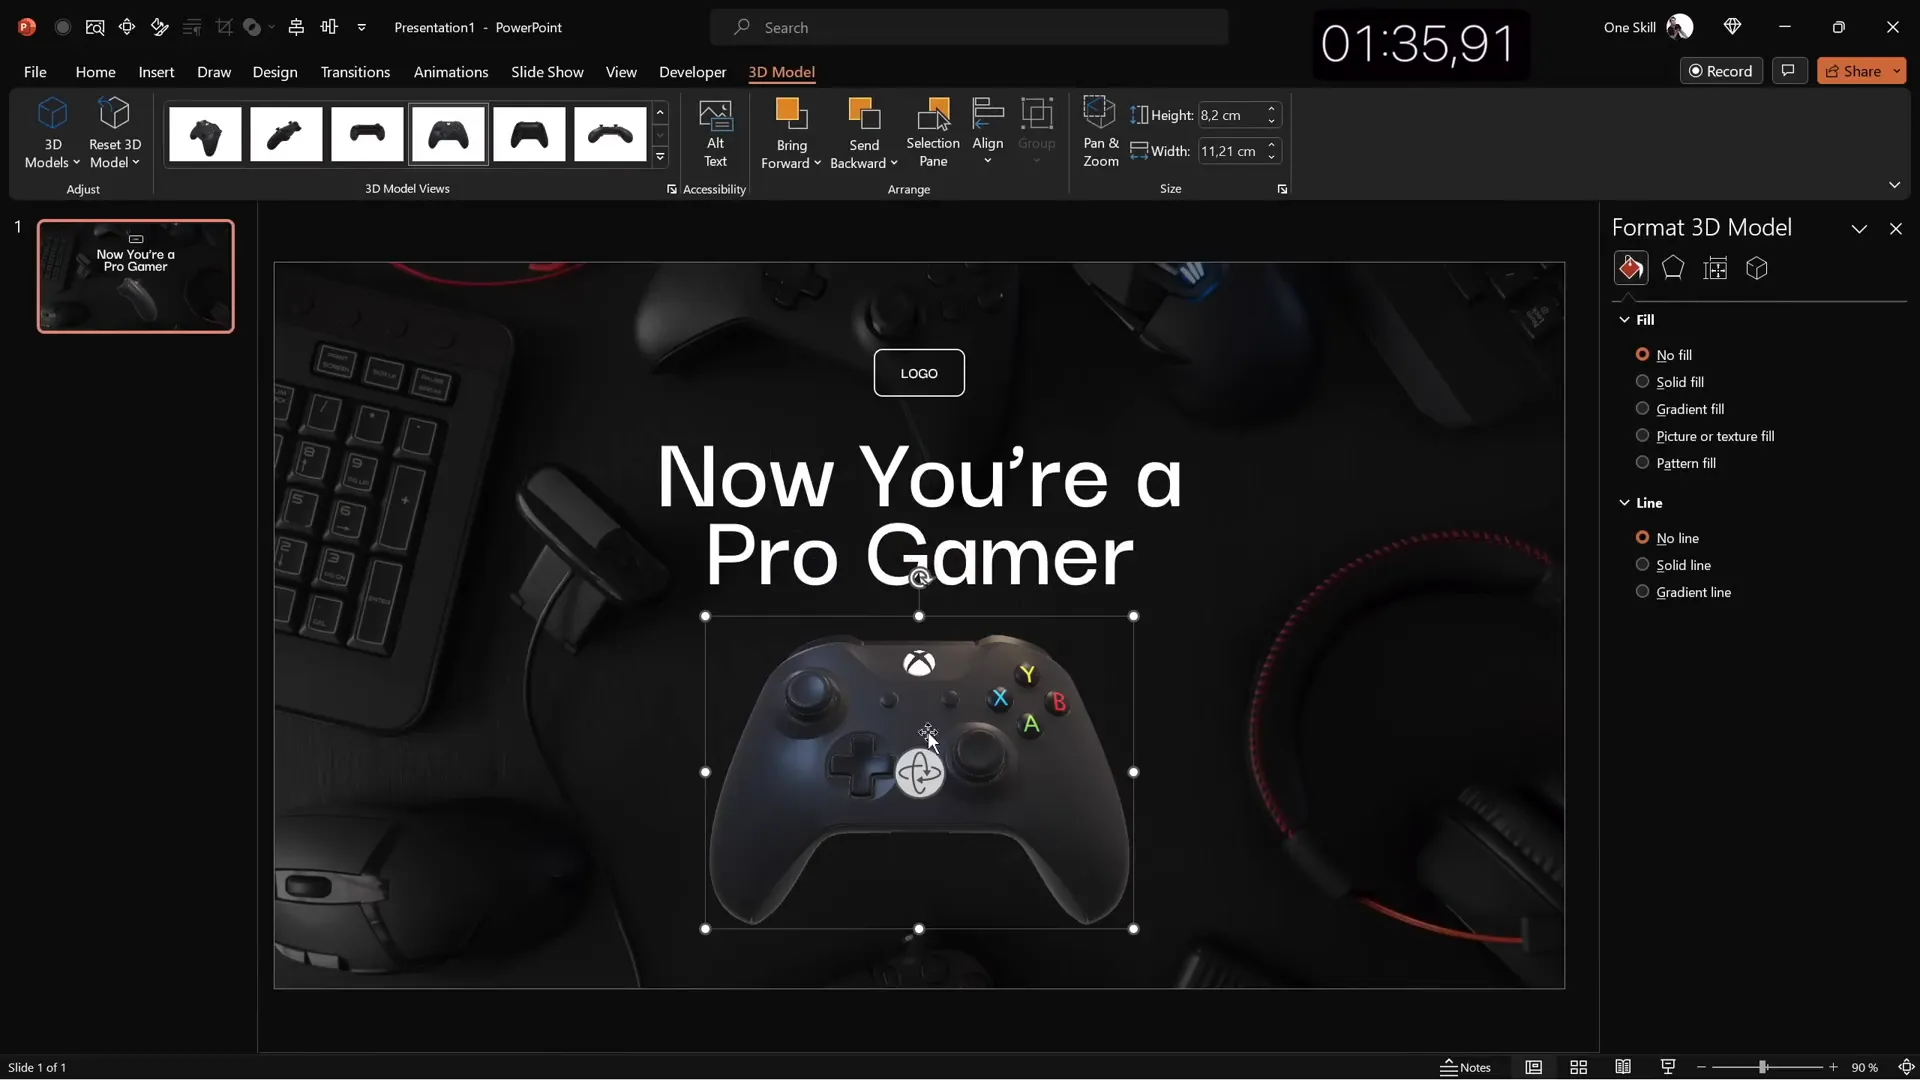
For the first slide, the goal was to create a visually striking slide devoted to gamers, featuring a dynamic 3D model and a bold title.
Step-by-Step Process:
- Slide Master Setup: Enter Slide Master view and select a new color palette (e.g., a vibrant set) and a modern font pair like Darker Grotesque.
- Layout: Choose a blank slide layout to start with a clean canvas.
- Background Image: Insert a beautiful stock photo as the slide background. Crop and resize it to fill the slide entirely, then reduce brightness by 50% to make foreground elements pop.
- Title Text: Insert a slide title in white font with a large size (around 80pt) and set line spacing to 0.6 for a sleek look. The title text here is “Now you are a pro gamer.”
- Logo Creation: Create a simple logo using a rounded rectangle shape with transparent fill and a 1pt white outline. Add the word “Logo” in Darker Grotesque Semi Bold.
- 3D Model: Search and insert a 3D model of a game controller. Position it near the bottom of the slide, apply a preset style, and add a “Swing” 3D animation with strong intensity, set to start with the previous animation and lasting three seconds.
- Final Adjustments: Align all elements vertically to achieve a balanced composition.
This slide combines a dark moody background with bright typography and a dynamic 3D element, perfect for engaging an audience interested in gaming.
Slide 2: Full-Screen Video Background with Quote
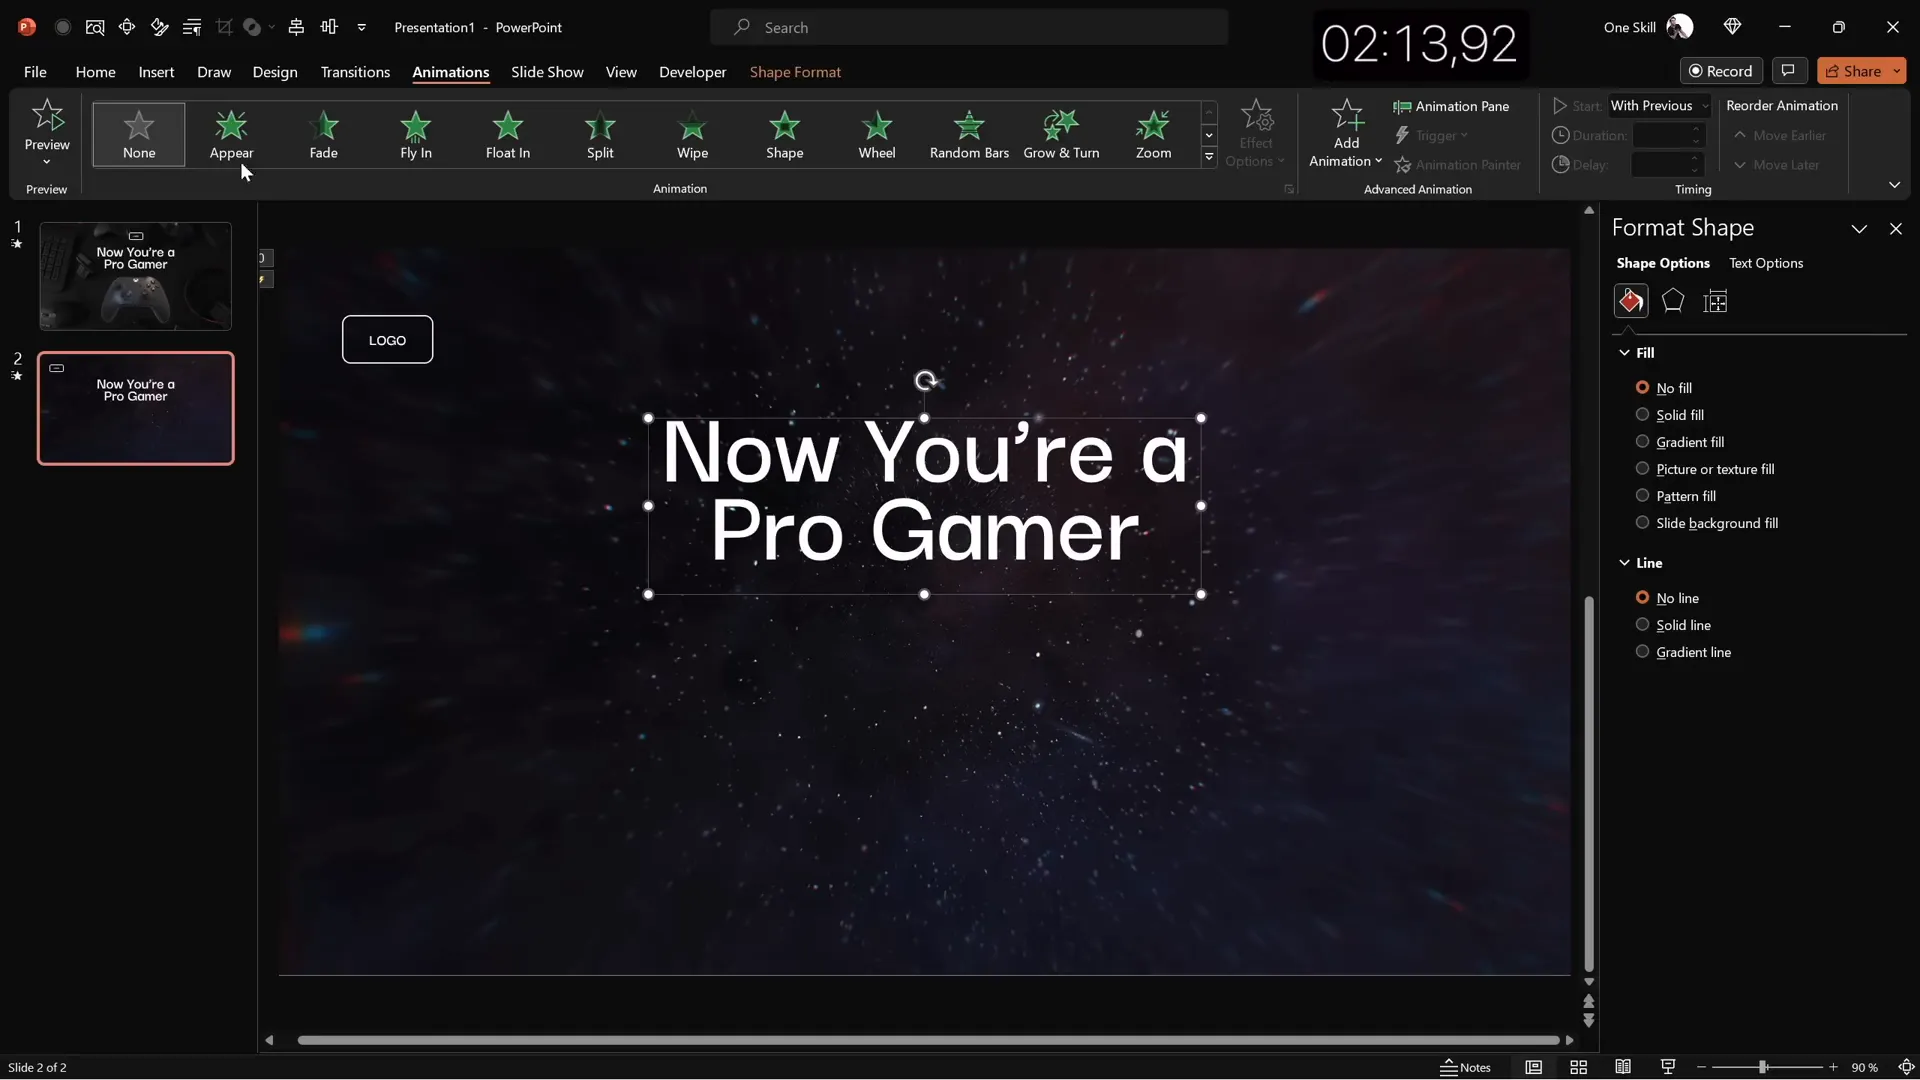
The second slide takes a different approach by using a looping full-screen video as the background, paired with a quote and a small portrait image for attribution.
Step-by-Step Process:
- Insert Video: Search for and insert a dark, abstract looping video that covers the entire slide.
- Reuse Elements: Copy the logo and slide title from the first slide to maintain consistency. Align the title to the left and reduce font size for better balance.
- Quote Text: Open a PowerPoint template with sample text, then copy and paste a few lines to use as a quote. Center-align the text and ensure formatting matches the slide’s theme.
- Portrait Image: Insert a small portrait photo below the quote to credit the author. Crop the image to a 1:1 aspect ratio and then crop it into a circle.
- Caption Text: Add a text box below the portrait with the name, surname, and job title of the quoted individual. Use a smaller font size (around 14pt) and a medium-weight font for clarity.
- Alignment: Ensure the portrait and caption are centered and aligned with the quote text.
This slide is ideal for emphasizing impactful quotes or testimonials with a modern video background that adds motion and depth.
Slide 3: Glassmorphic Effect Slide
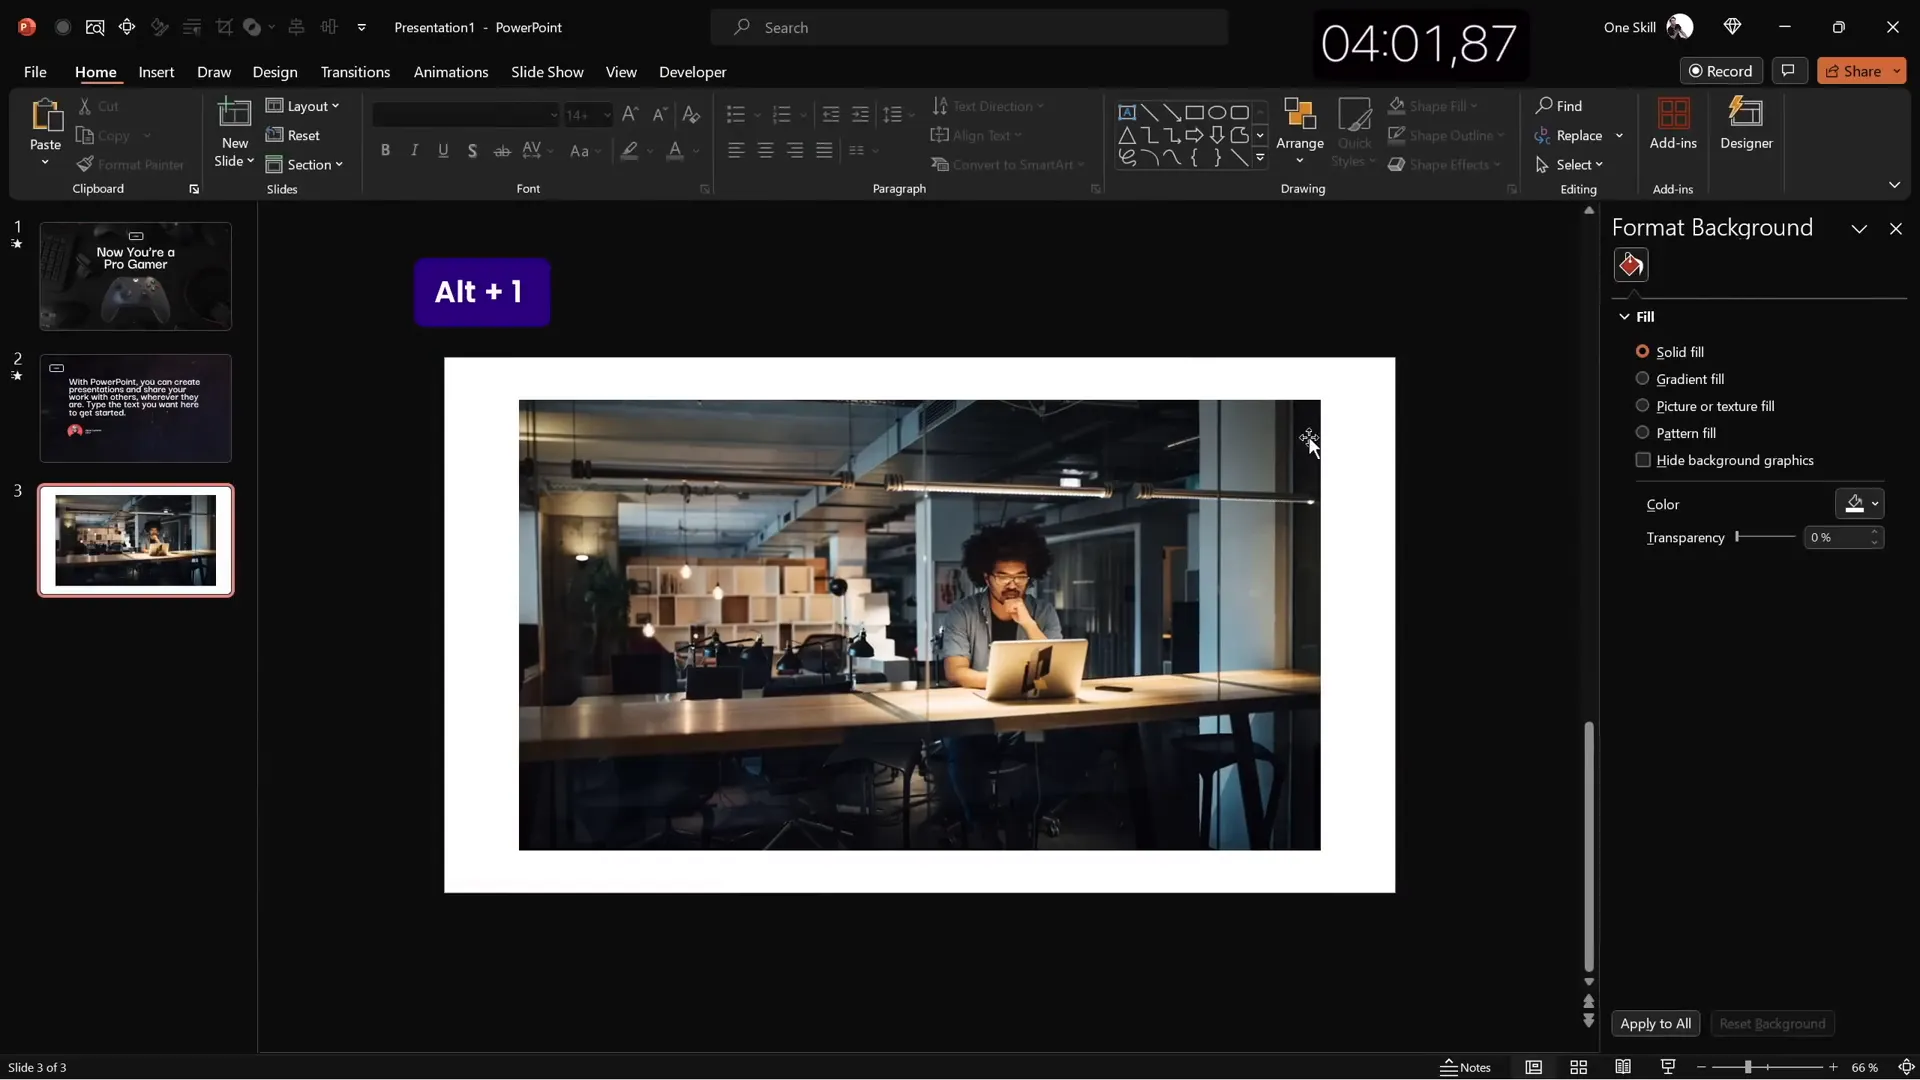
Glassmorphism is a trendy design style that uses blurred backgrounds with semi-transparent shapes to create a frosted glass look. This slide showcases how to achieve that effect in PowerPoint.
Step-by-Step Process:
- Background Photo: Insert a high-quality photo (e.g., an office working scene) covering the entire slide.
- Blurred Background Copy: Duplicate the photo and apply maximum blur to the copy.
- Set Blurred Photo as Background: Copy the blurred photo, delete the original, then paste the blurred photo as the slide background.
- Insert Circle Shape: Add a huge circle shape positioned to the left side of the slide. Fill it using the “Slide Background Fill” option to create the glass effect, and remove the outline.
- Text Elements: Copy the logo and slide title from previous slides, position them to the left, and align text left. Change the slide title to “Our Mission.”
- Body Text: Use the PowerPoint built-in Lorem Ipsum formula
=lorem(1)to insert placeholder text. Adjust font size to 16pt and line spacing to 0.8 for readability. - Light Guides: Enable light guides to align elements precisely in the center and middle of the slide.
- Button Creation: Create a call-to-action button by reusing the logo shape, type “Learn More,” and fill it with a vibrant color. Add a blurred shadow of the same color for depth.
The glassmorphic effect adds a modern, elegant touch to your slide designs and works well for mission statements or important messages.
Slide 4: Business Model Slide with KPIs
The fourth slide is designed to present a business model overview, featuring a central image placeholder and key performance indicators (KPIs) on the side.
Step-by-Step Process:
- Reuse Elements: Paste the glassmorphic slide’s elements but change text colors to black for better contrast.
- Slide Title: Change the title to “Business Model.”
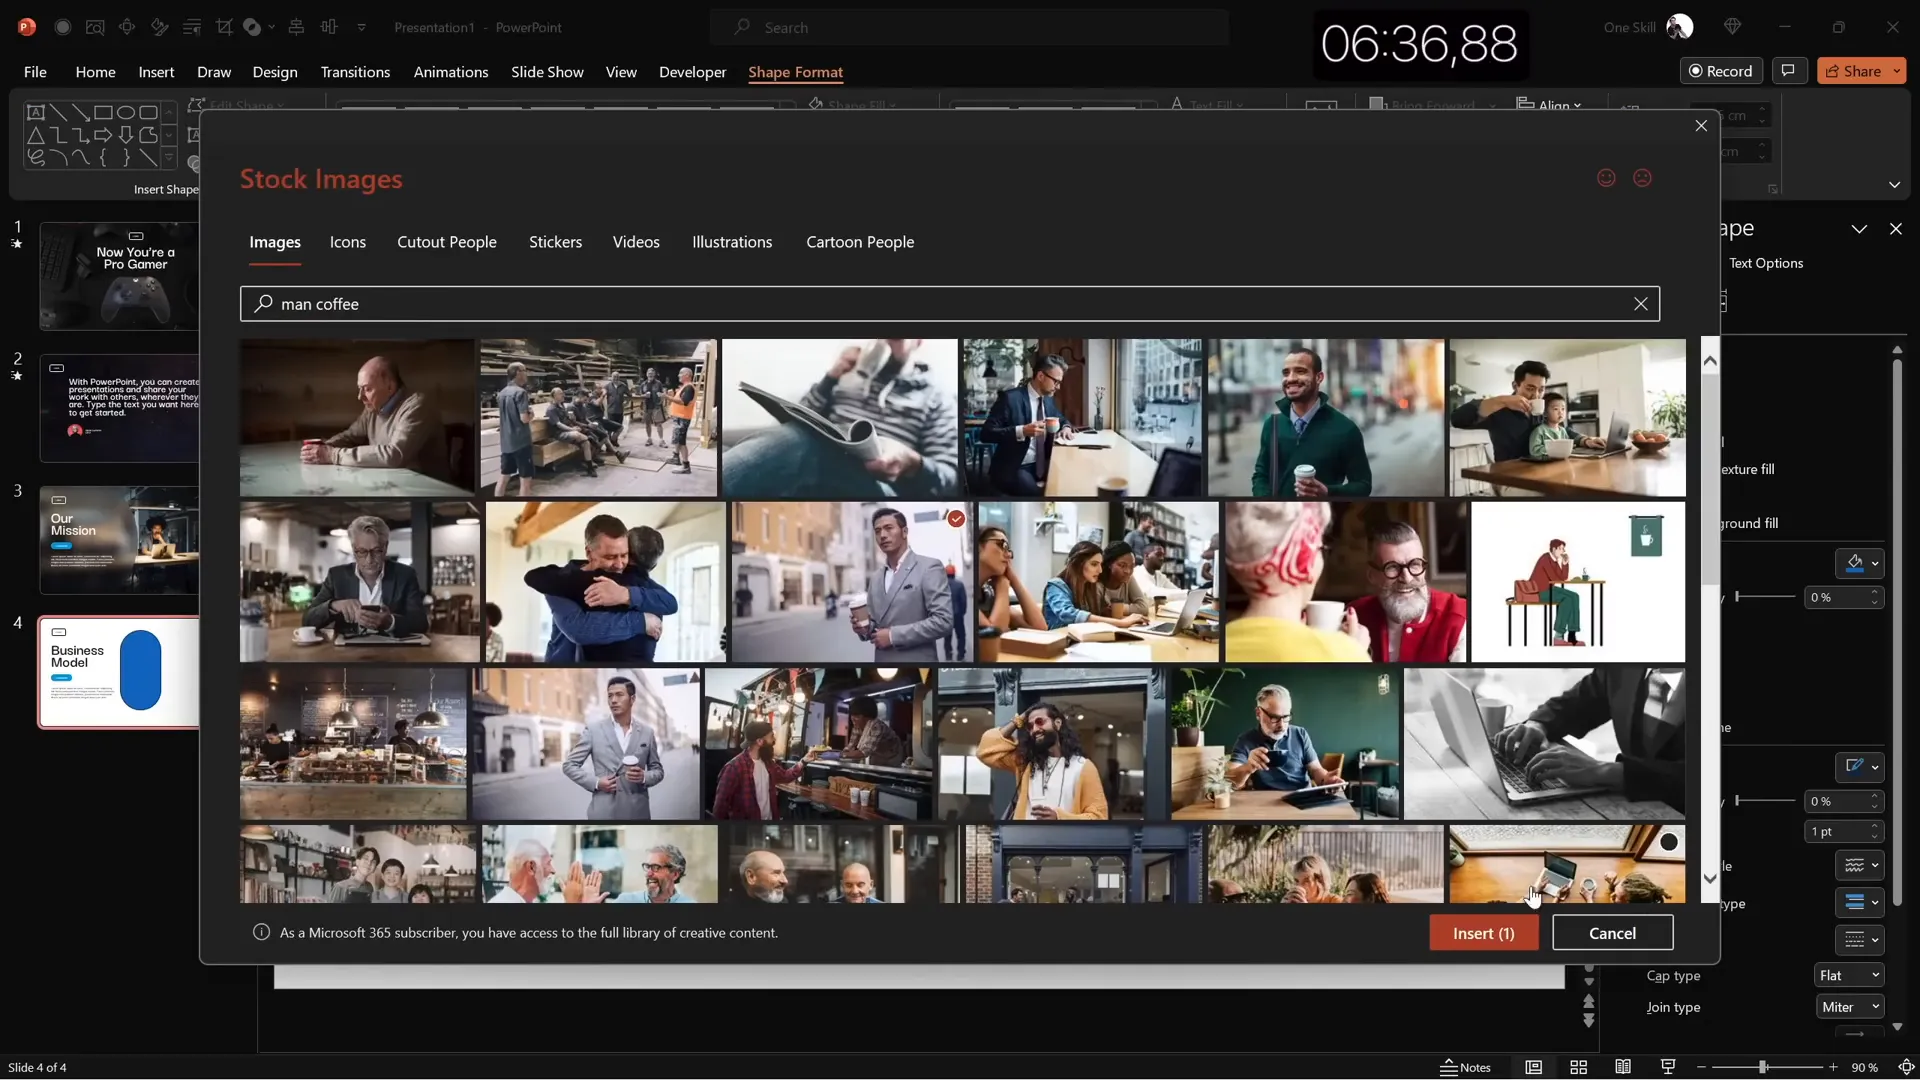
- Image Placeholder: Insert a large rounded rectangle shape in the center of the slide.
- Insert Photo: Open stock photos and insert an image (e.g., a man holding a coffee cup). Resize and send the photo to the back.
- Merge Shapes: Select both the photo and the rounded rectangle, use the “Merge Shapes” > “Intersect” option to crop the photo into the shape.
- Shadow Effect: Copy the button’s shadow and paste it under the photo for a subtle glow.
- Photo Outline: Add a thin white line (3pt) around the photo to enhance its visual separation.
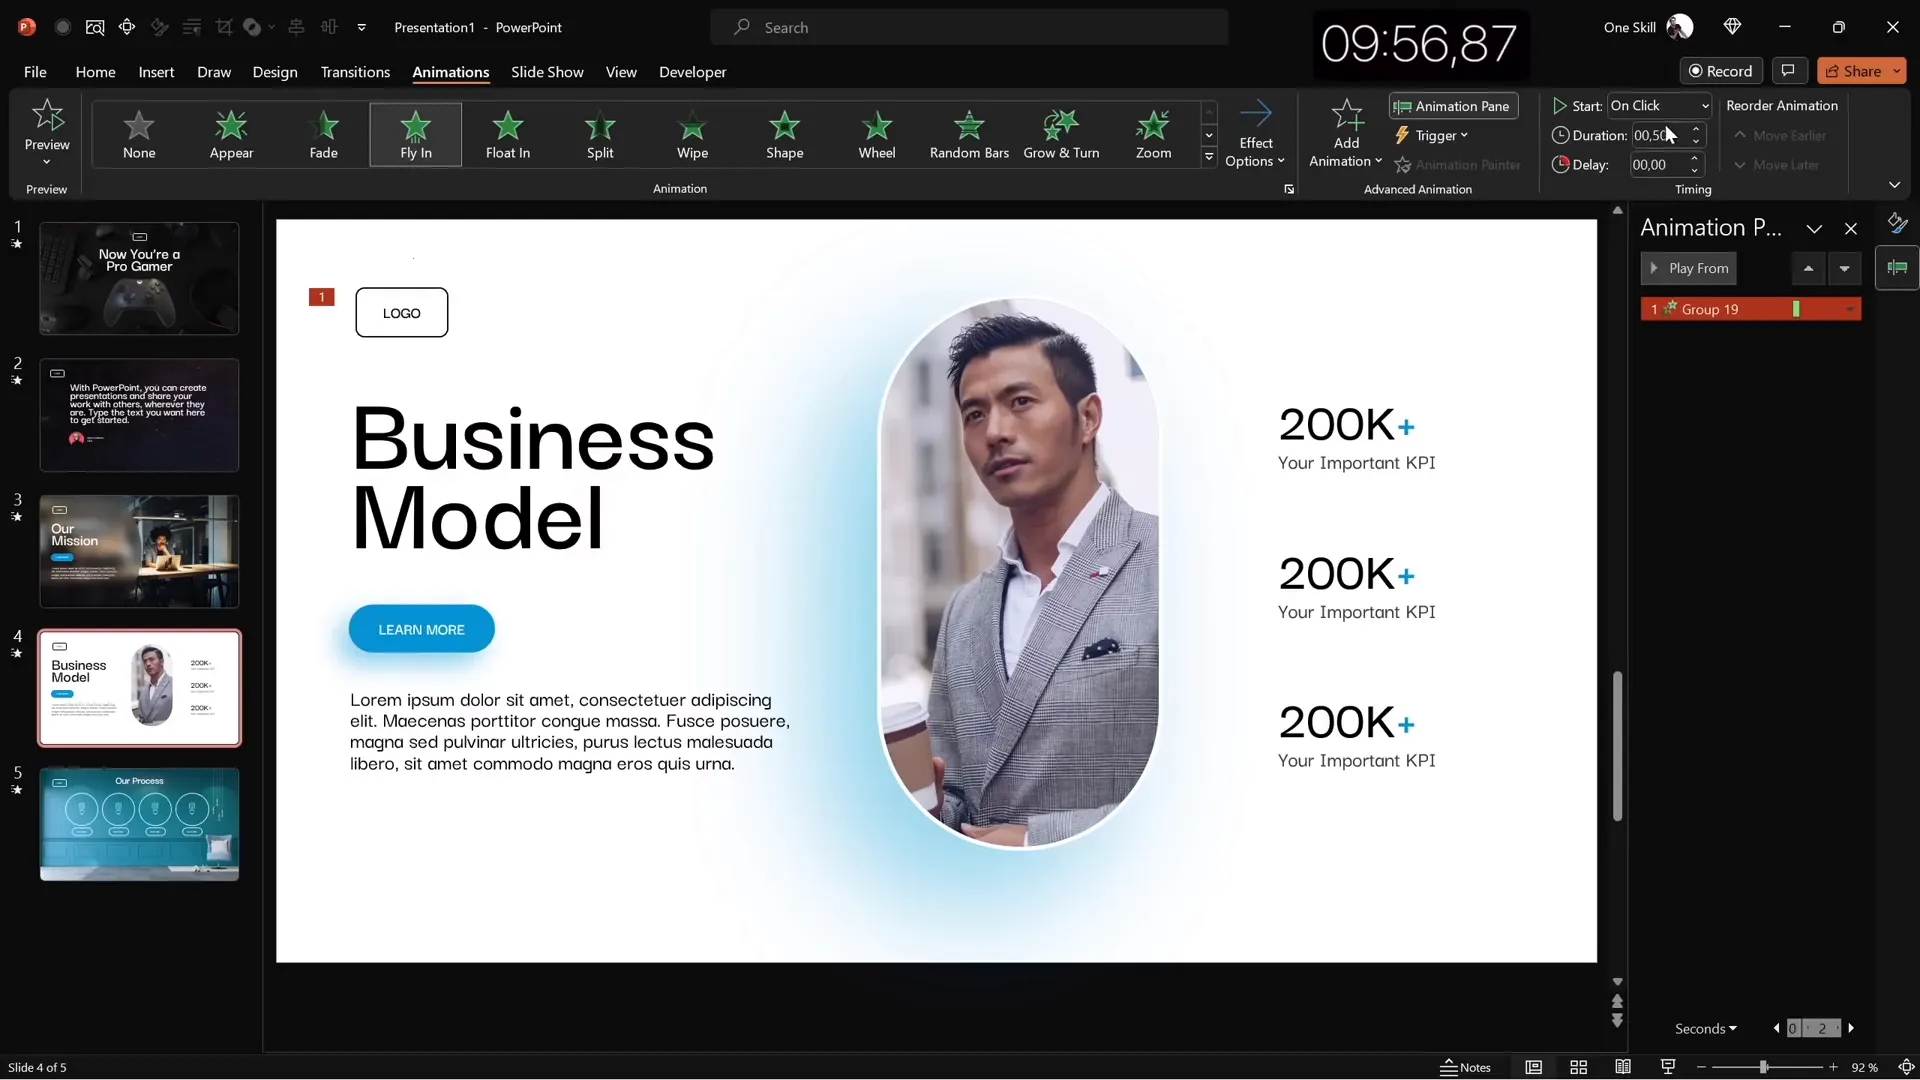
- KPIs: Create text boxes for KPIs on the right side. Use two text boxes per KPI: one for the value and one for the label. Use a lighter font color for labels.
- Group & Align: Group each KPI’s text boxes and duplicate to create three KPIs. Distribute them vertically and align centrally.
This slide is perfect for summarizing important business metrics alongside an engaging image.
Slide 5: Infographic Slide with Iconic Steps
The final slide is an infographic style design, illustrating a multi-step process using circles and icons.
Step-by-Step Process:
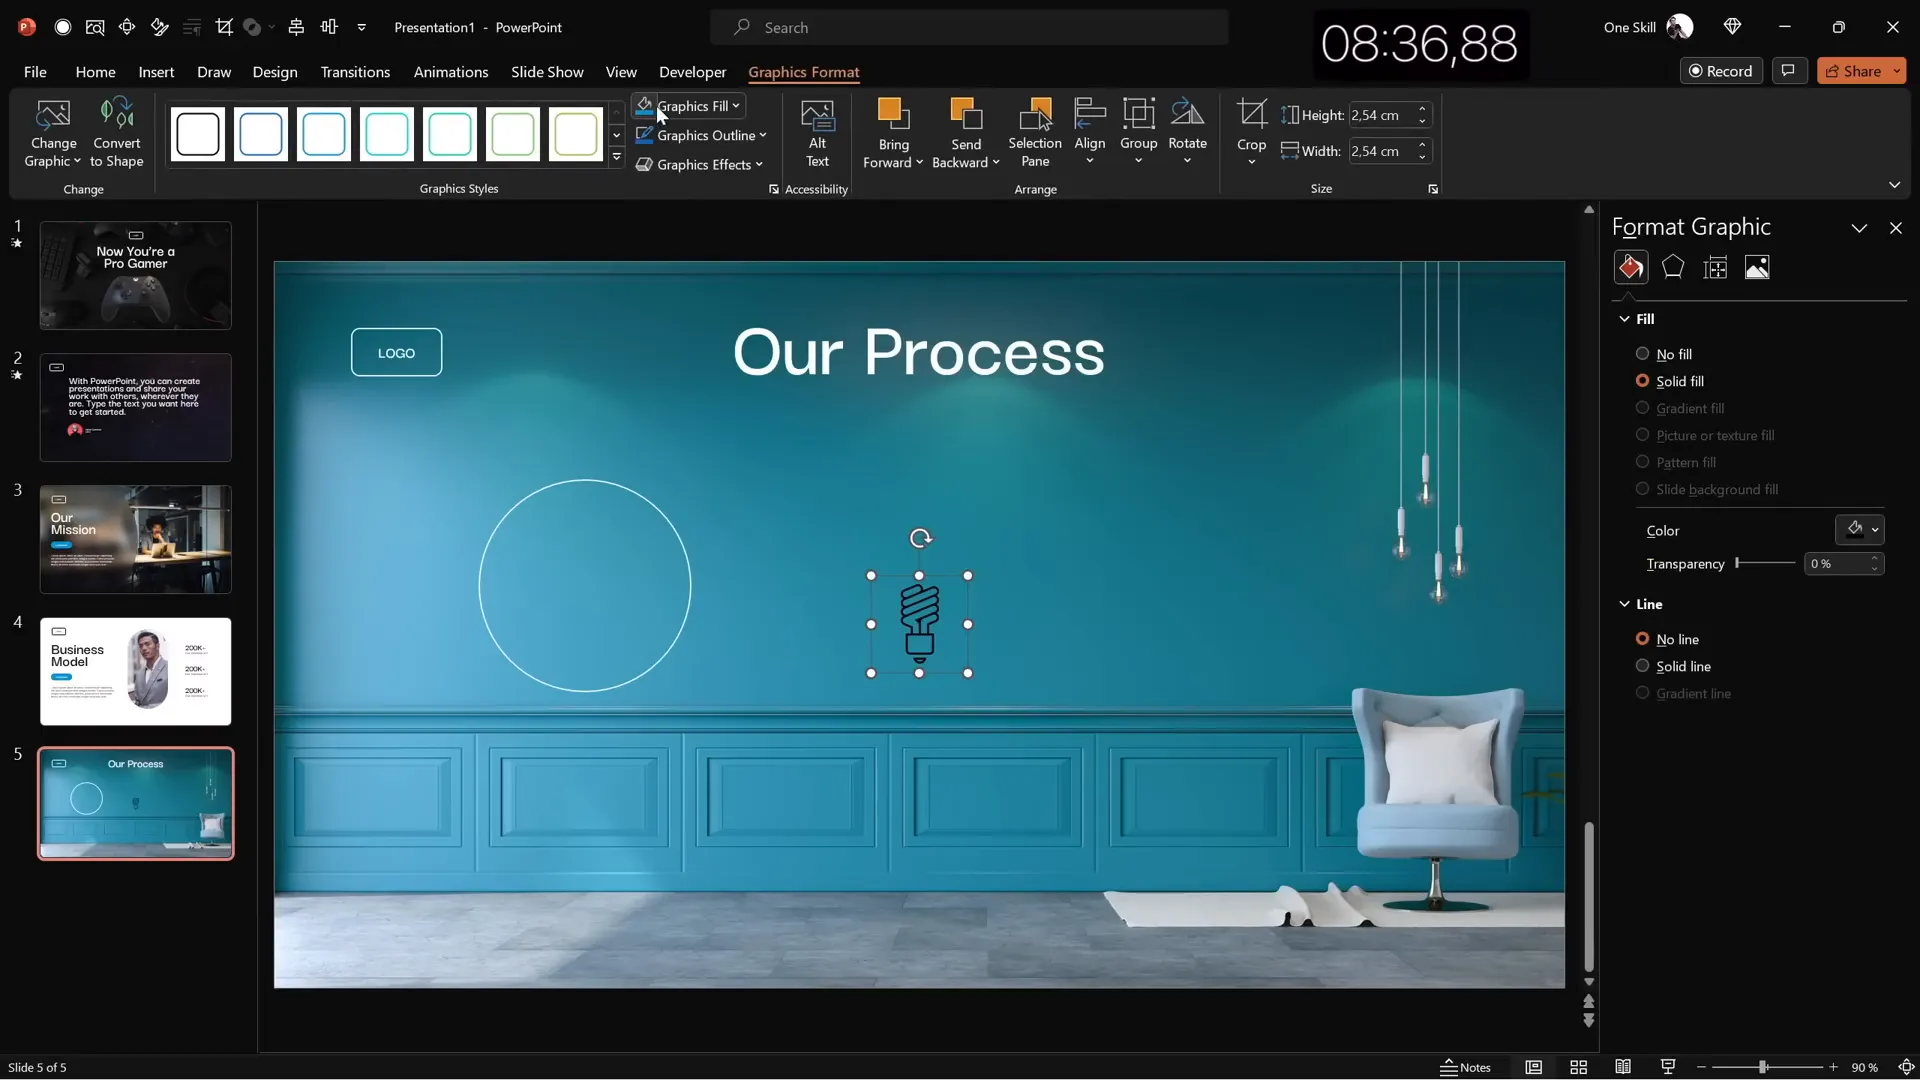
- Background Photo: Insert a full-screen photo of a textured wall, adjusting cropping to fill the slide.
- Reuse Elements: Copy and paste elements from previous slides like the logo and slide title. Change the title to “Our Process.”
- Create Circles: Insert a simple circle and style it using the logo’s formatting (white outline, transparent fill).
- Insert Icon: Search for and insert a white bulb icon, aligning it center within the circle.
- Label Circles: Add a text box inside or near each circle to indicate steps (e.g., “Step One”). Increase the width of the text box to fit the text nicely.
- Group and Duplicate: Group each circle, icon, and label. Duplicate to create four steps, then distribute them evenly across the slide horizontally.
- Adjust Title: Resize or reposition the slide title to ensure balance and adequate space for the infographic.
This slide serves as a clean and visually engaging way to communicate processes or workflows.
Finishing Touches: Transitions and Animations
With all five slides designed, it’s time to add polish through transitions and animations to enhance viewer engagement and flow.
Transitions
- Apply the Fade transition to the first slide to softly introduce the presentation.
- Use the Uncover transition for slides 2 through 5 to create dynamic reveals.
Animations
- Add an Appear animation to the main text box on the second slide. Set it to start with the previous animation and animate by letter with a delay of 0.03 seconds per letter for a smooth typing effect.
- Group multiple objects on slides and apply a Fly In animation for a coordinated entrance.
Although the 10-minute limit meant not all animations could be perfected, these quick enhancements add professional flair to the presentation.
Frequently Asked Questions (FAQ)
How can I customize the Quick Access Toolbar to speed up slide creation?
Customize your Quick Access Toolbar by adding frequently used commands such as stock photos, shape formatting, and 3D models. Assign keyboard shortcuts (Alt + Number) to quickly access these tools without navigating menus, which saves precious time during slide creation.
What is the glassmorphic effect, and how can I create it in PowerPoint?
Glassmorphism is a design style featuring blurred backgrounds with translucent shapes resembling frosted glass. In PowerPoint, you can create this by duplicating a background photo, applying a strong blur to the copy, setting it as the background, and placing a transparent shape filled with slide background fill on top.
How do I insert and animate 3D models in PowerPoint slides?
Use the Insert tab to search for 3D models directly in PowerPoint. Once inserted, position the model, choose presets, and apply 3D animations such as “Swing” with desired intensity and timing to add dynamic visual interest.
Can I use videos as slide backgrounds in PowerPoint?
Yes! PowerPoint allows you to insert videos that can cover the entire slide. Choose looping and muted videos for subtle motion backgrounds that enhance your slide’s atmosphere without distracting from the content.
How do I merge shapes and photos for creative image placeholders?
Select the photo and shape, then use the “Merge Shapes” > “Intersect” feature to crop the photo into the shape. This technique creates custom photo placeholders that fit your slide design perfectly.
What are the best fonts to use for professional PowerPoint slides?
Fonts like Darker Grotesque provide a modern, clean, and professional look. Use semi-bold or medium weights for titles and body text respectively. Always ensure your font choice complements your brand and maintains readability.
How can I make my PowerPoint slides look cohesive?
Use consistent color palettes, font pairs, and layout structures across all slides. Reuse elements like logos and buttons to maintain uniformity. Align objects properly and use master slides to apply consistent styles throughout.
Is it possible to create professional slides quickly without sacrificing design quality?
Absolutely! By customizing your workspace, using templates, stock photos, and PowerPoint’s built-in tools efficiently, you can create polished slides rapidly. Practicing speed challenges like this 10-minute, five-slide tutorial can help improve your workflow.
Conclusion
Creating professional and engaging PowerPoint slides doesn’t have to be a time-consuming process. As demonstrated by One Skill PPT in this inspiring 10-minute challenge, with the right preparation, shortcuts, and design techniques, you can produce five stunning slides that cater to different presentation needs—from gaming themes and video backgrounds to glassmorphic effects and business infographics.
This tutorial covered key steps such as customizing the Quick Access Toolbar, choosing color palettes and fonts, inserting and formatting photos and videos, applying animations, and using modern effects like glassmorphism. Each slide was designed with a purpose and style, providing examples you can adapt for your own presentations.
Remember, speed and quality can coexist with practice and smart use of PowerPoint’s features. Don’t hesitate to experiment with layouts, multimedia, and animations to find what works best for your message and audience.
If you want to explore more PowerPoint tips and download professionally designed templates, check out resources like One Skill PPT’s Patreon page or consider enrolling in advanced courses such as the PowerPoint Animation Mastery Course.
Happy designing, and may your next presentation captivate and impress with beautifully crafted slides!


