
Creating engaging presentations is an essential skill in today’s digital world. Whether you’re presenting business data, project timelines, or historical progressions, an animated timeline can dramatically improve your audience’s understanding and retention. If you’re searching for an easy yet impressive way to create animated timelines in PowerPoint, this comprehensive guide is for you.
Using PowerPoint’s morph transition, you can craft smooth, dynamic timeline animations that captivate viewers and elevate your presentation’s professionalism. This tutorial will walk you through building a fully animated morph timeline step-by-step, complete with stylish background images, moving timeline markers, and illustrative icons. By the end, you’ll have all the tools and tips needed to master these Powerpoint Video effects and wow your audience.
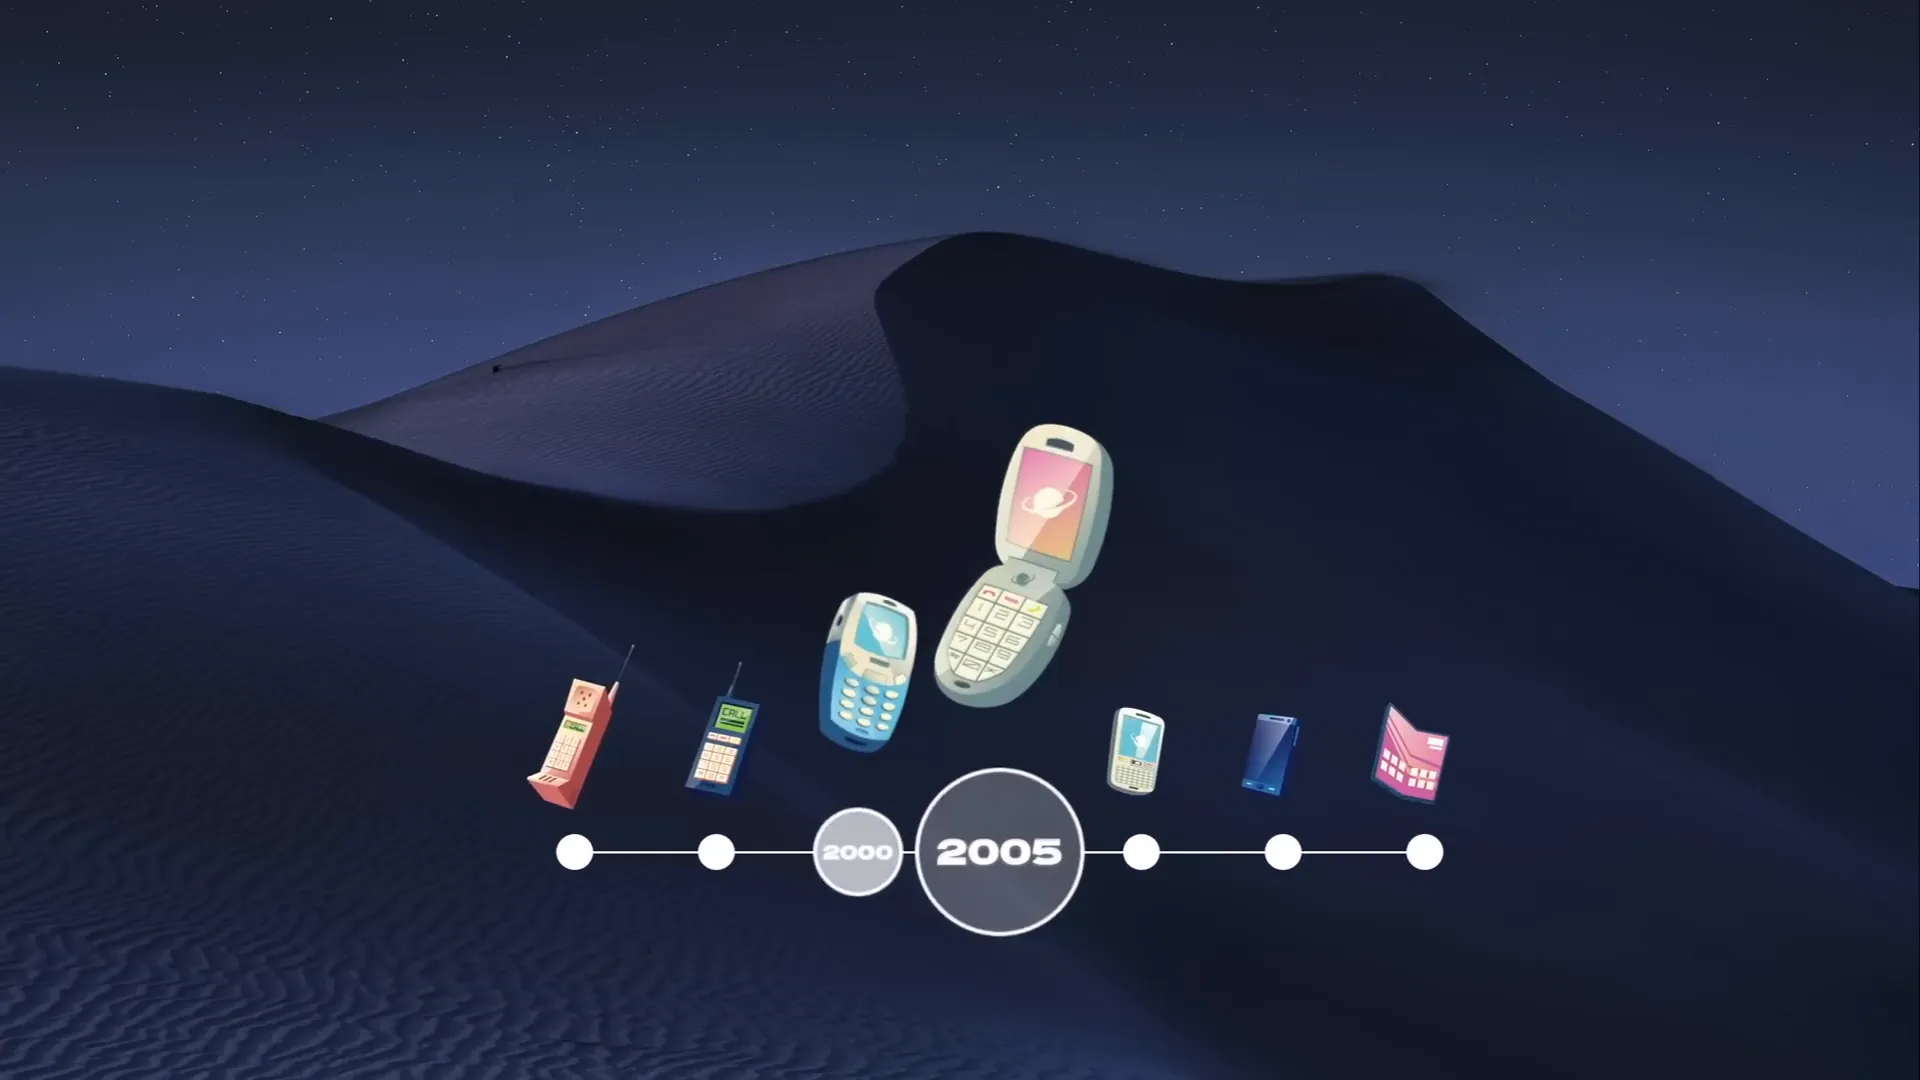
Table of Contents
- Getting Started: Setting Up Your PowerPoint Workspace
- Creating the Background and Timeline Base
- Adding and Aligning Timeline Markers
- Labeling Timeline Dates
- Applying the Morph Transition for Smooth Animation
- Highlighting the Active Timeline Date
- Incorporating Illustrations for Visual Appeal
- Adding Hyperlinks for Interactive Navigation
- Frequently Asked Questions (FAQ)
- Conclusion and Next Steps
Getting Started: Setting Up Your PowerPoint Workspace
Before diving into the creative process, start fresh with a clean slate. Open PowerPoint and create a new presentation. For this timeline project, set your slide layout to Blank to avoid unnecessary placeholders that might interfere with your design.
Next, activate the slide guides to help you locate the center and align elements precisely. This is crucial for creating a balanced and professional-looking timeline.
Having a well-organized workspace will save you time and ensure your timeline elements are perfectly positioned.
Creating the Background and Timeline Base
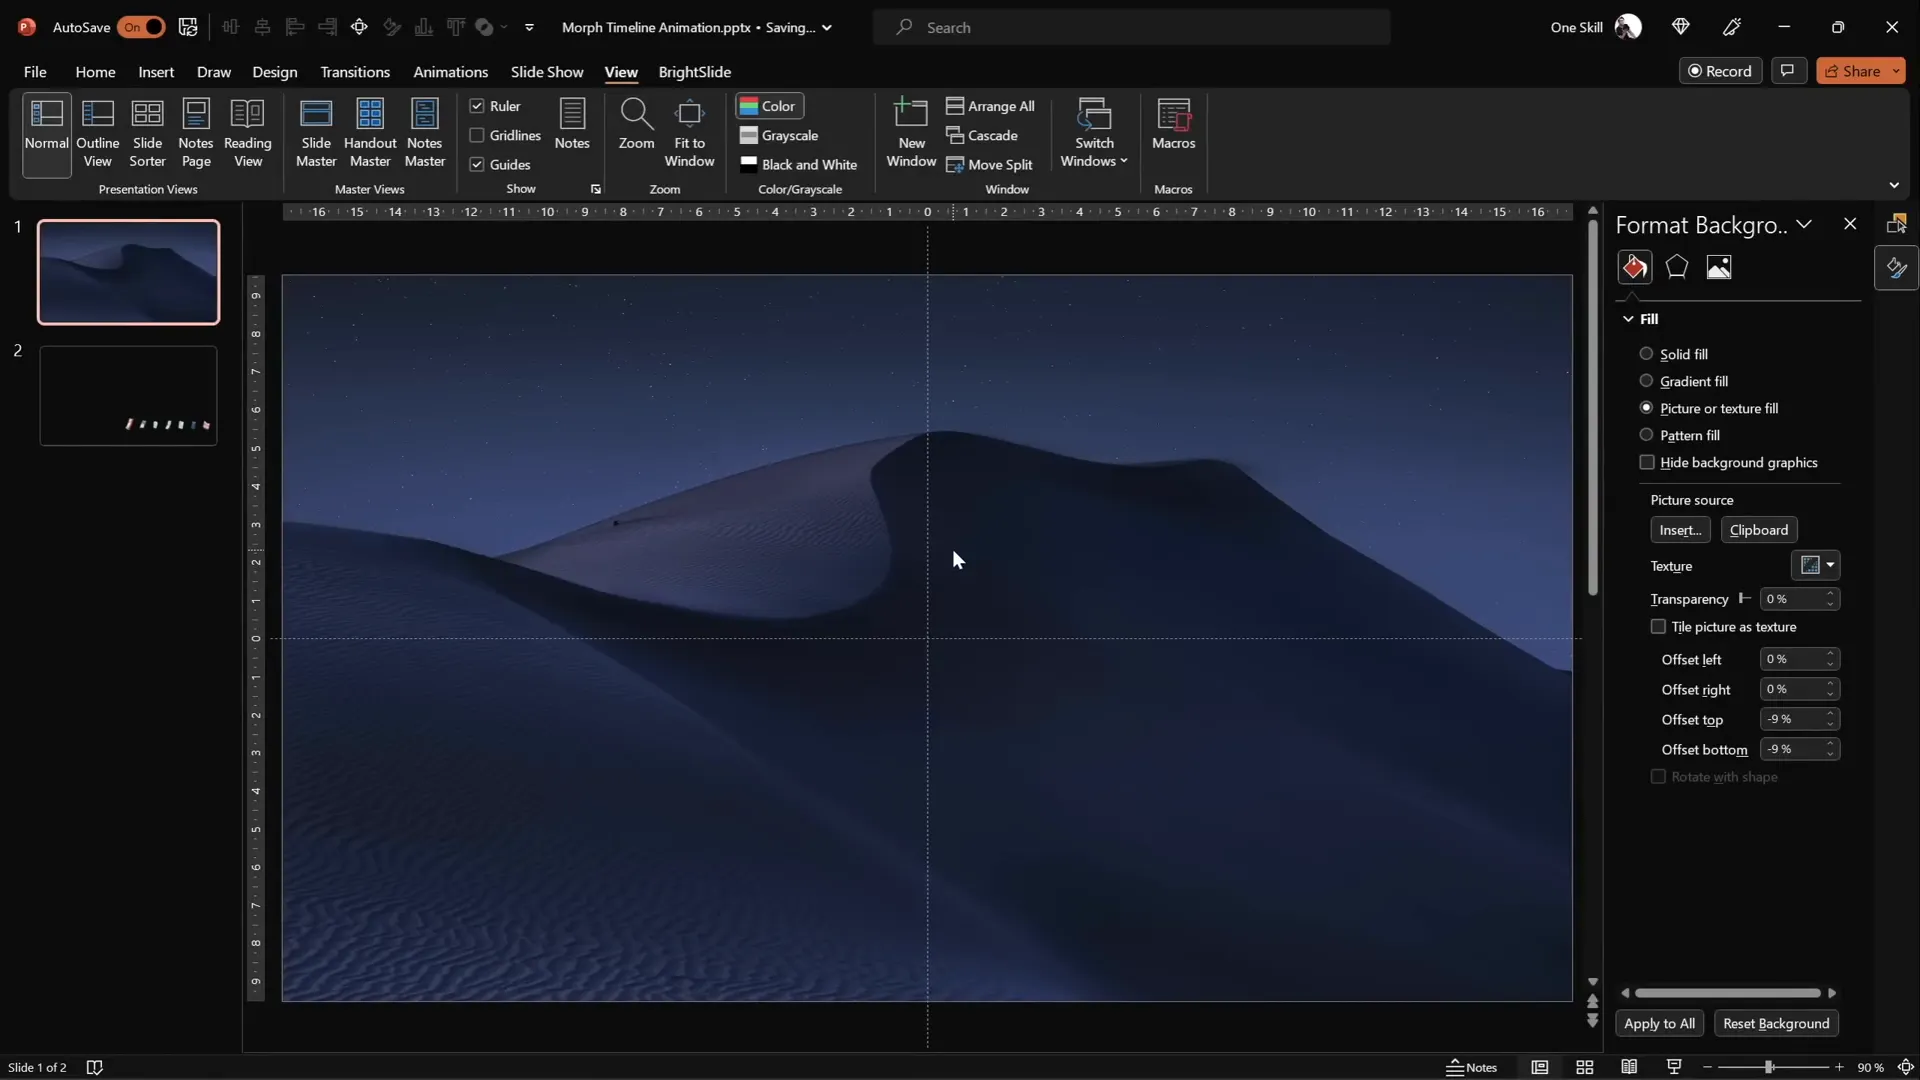
A visually appealing background sets the tone for your timeline and makes the whole slide more engaging. Instead of simply inserting a full-screen image, use the Fill Options to paste a background image onto your slide. This allows other elements, such as timeline markers, to utilize the slide background fill feature effectively.
For high-quality, free-to-use images, websites like Unsplash offer beautiful photos. For this timeline, choose an image that complements your theme without overpowering the content.
To add the background:
- Copy your chosen image from your browser or file.
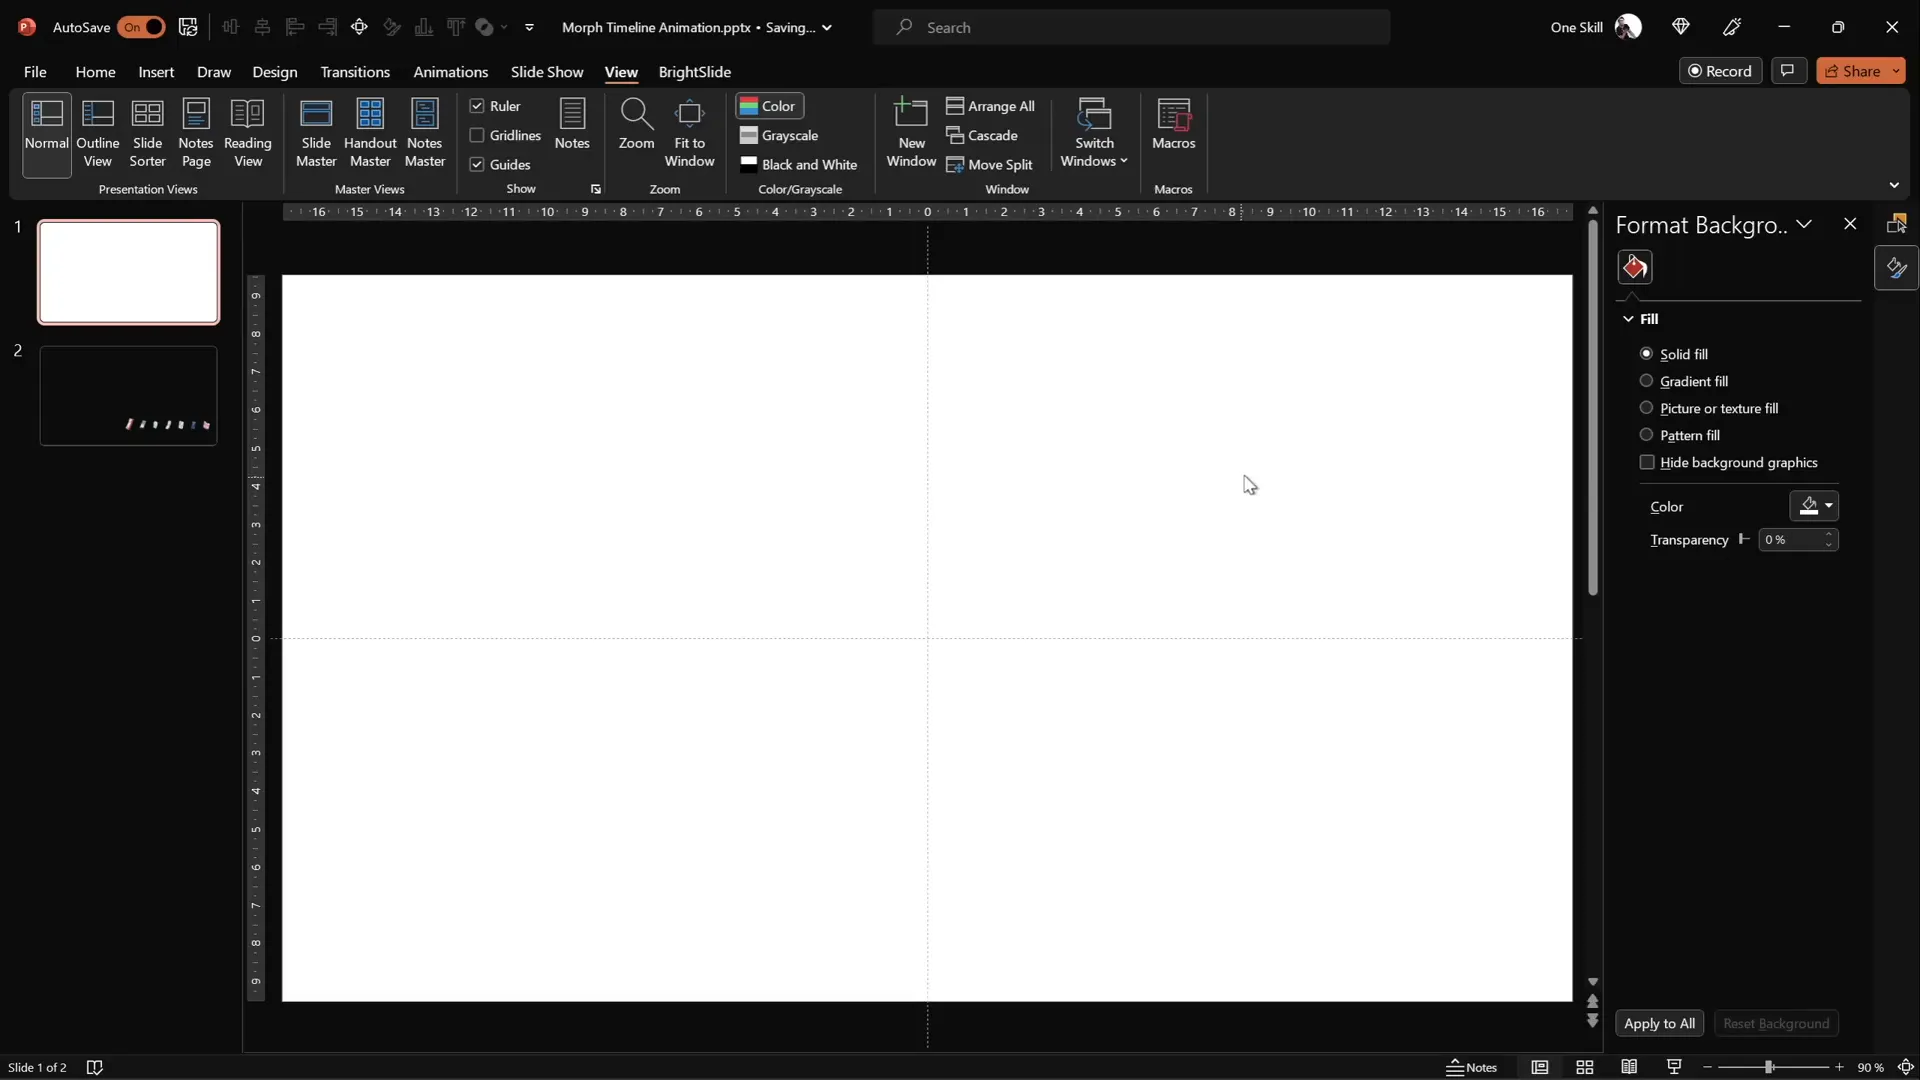
- In PowerPoint, right-click the slide background and select Format Background.
- Choose Picture or texture fill.
- Click Clipboard to paste the image as the background.
Once the background is set, add a simple horizontal line near the bottom right corner of the slide to serve as the baseline for your timeline markers. Hold Shift while drawing to ensure the line is perfectly straight. Set the line length to approximately 15 centimeters and the thickness to 1 point for a clean, elegant look.

Adding and Aligning Timeline Markers
The timeline markers are the visual points along your timeline that represent key dates or events. To create these:
- Insert seven circles (or ovals) along the timeline line. Hold the Shift key while drawing to make perfect circles.
- Set each circle’s size to 0.6 centimeters in both height and width for uniformity.
- Position the first circle left of the timeline line’s center.
- Copy the circle by holding Ctrl + Shift and dragging it to the right side of the line.
- Repeat copying until you have seven circles spaced evenly.
To ensure even spacing between the circles:
- Select all seven circles.
- Go to the Align options and choose Distribute Horizontally.
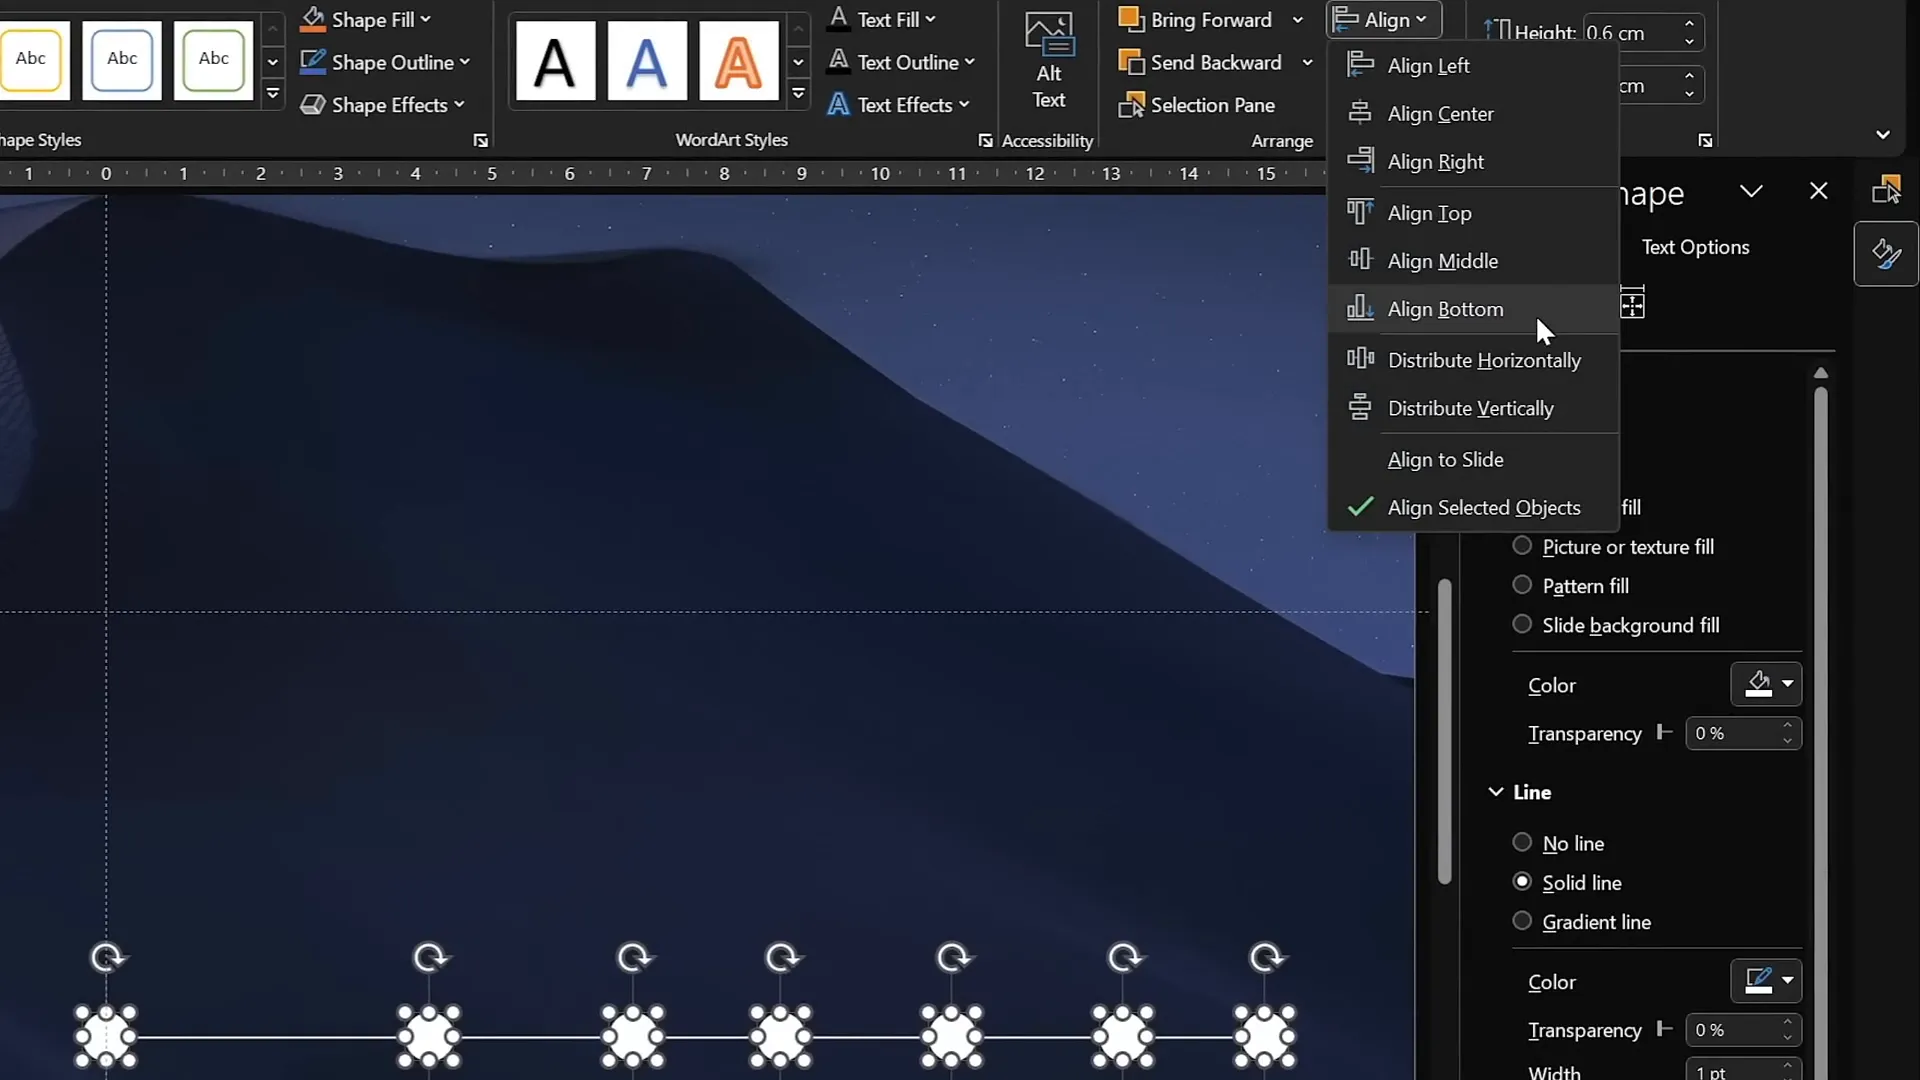
These evenly spaced markers form the backbone of your animated timeline.
Labeling Timeline Dates
Next, add dates or years inside each timeline marker to provide context. For this example, the timeline covers years from 1980 to 2020.
Steps to add labels:
- Create text boxes within each circle.
- Type the years, starting with 1980 on the left and ending with 2020 on the right.
- Use the font Hanson at size 5 for initial visibility.
- Initially, keep the text color black so you can easily see the input.
- After entering all dates, select all text boxes and change the text color to white to make the text invisible for now.
This invisibility is intentional and will be reversed later with the morph animation magic.
For better management, rename each circle in the selection pane with clear names like !!Oval1, !!Oval2, etc. The double exclamation marks at the beginning help keep these objects at the top of the selection list, making them easier to find.
Applying the Morph Transition for Smooth Animation
PowerPoint’s morph transition is a powerful feature that animates the smooth movement of objects from one slide to another. It creates the illusion of continuous motion without complex animations.
Here’s how to apply it to your timeline:
- Set the slide transition of your first slide to Move, which is essentially the morph effect.
- Adjust the slide transition duration to 0.75 seconds for a quick but smooth animation.
- Duplicate your first slide multiple times to create frames of the timeline animation.
- On each duplicated slide, select all timeline circles and the baseline line, then move them one step to the left to simulate the timeline progression.
- Use the original slide’s circles as guides to align the moved circles perfectly.
- After the final adjustment, delete the original guide circles to avoid clutter.
When you run the slideshow, the circles will smoothly move left, creating an animated timeline effect.
Highlighting the Active Timeline Date
To draw attention to the current or active year in the timeline, enlarge the corresponding circle and reveal the year text inside it.
Steps to highlight the active date:
- On each slide, select the circle representing the active year.
- Resize the circle by dragging a corner handle while holding Ctrl + Shift to resize from the center proportionally.
- Set the circle fill to No Fill to keep it transparent but visible.
- Increase the font size of the year inside the circle to 24 for better visibility.
- Fill the circle with a light background color to hide any underlying elements, such as the baseline line.
- Copy the style of this active circle using Ctrl + Shift + C.
- Paste the style onto the other active circles on subsequent slides using Ctrl + Shift + V.
This technique ensures that the active timeline year stands out dynamically as the timeline progresses.

Incorporating Illustrations for Visual Appeal
Adding relevant illustrations or icons can enhance the storytelling aspect of your timeline. For example, in a technology timeline, icons of phones evolving over the years add context and visual interest.
You can find free phone illustrations and other vector graphics on sites like Freepik.
Steps to add illustrations:
- Import phone illustrations into your slide.
- Rename each illustration in the selection pane with double exclamation marks followed by the corresponding year for easy identification (e.g.,
!!Phone1980). - Position all illustrations just above the timeline line, aligning them with their respective years.
- Resize and rotate the illustrations slightly for a natural, dynamic look.
- Duplicate these illustrations across your timeline slides and move them one step to the left on each subsequent slide to match the timeline animation.
When played, these illustrations will animate along with the timeline markers, creating a cohesive and visually appealing timeline presentation.
Adding Hyperlinks for Interactive Navigation
To increase interactivity, you can add hyperlinks to timeline markers. This allows users to jump directly to specific slides or sections within your presentation.
How to add hyperlinks:
- Select a timeline circle or object you want to link.
- Press Ctrl + K or right-click and choose Hyperlink.
- Link to Place in This Document and select the target slide number.
- Repeat for other timeline circles as needed, such as linking the first circle to the last slide and vice versa for easy navigation.
This simple addition transforms your timeline into an interactive navigation tool, enhancing the user experience.
Frequently Asked Questions (FAQ)
What is the PowerPoint morph transition, and why is it useful for timelines?
The morph transition animates smooth movement of objects from one slide to another, creating a seamless animation effect without complex keyframes. It’s perfect for timelines because you can shift timeline markers and elements easily, making your presentation dynamic and engaging.
Can I use any images or illustrations with the morph transition?
Yes! You can use any images or vector illustrations. Just ensure they have consistent names across slides and are positioned carefully so the morph transition can animate them correctly.
How do I ensure my timeline markers are evenly spaced?
Use the Align feature in PowerPoint. Select all circles, then choose Distribute Horizontally to space them evenly along the timeline baseline.
Can I customize the timeline for different time spans or events?
Absolutely. Adjust the number of circles, dates, and illustrations to suit your timeline’s scope. The morph transition works well with any number of slides and elements as long as naming and positioning are consistent.
Is it necessary to use the double exclamation marks when naming objects?
While not mandatory, using double exclamation marks at the beginning of object names helps keep important shapes and illustrations at the top of the selection pane. This makes managing elements easier, especially in complex presentations.
Can I add other animations in combination with morph?
Yes, but be cautious. Morph works best when it is the primary transition effect. Adding too many animations can cause conflicts or reduce smoothness. Experiment and preview your slides to ensure everything works harmoniously.
Where can I find free resources like fonts, images, and illustrations?
Great resources include:
Conclusion and Next Steps
Mastering Powerpoint Video effects like the morph transition opens up a world of creative possibilities for your presentations. Building an animated timeline not only makes your content more engaging but also helps communicate complex chronological information clearly and effectively.
This step-by-step guide covers everything from setting up your workspace, creating backgrounds, adding and aligning timeline markers, to animating with morph transitions and enhancing interactivity with hyperlinks. Along the way, incorporating illustrations adds a professional polish that elevates your storytelling.
Don’t hesitate to experiment with different designs, colors, and animation speeds to make the timeline uniquely yours. Remember, practice is key to mastering PowerPoint’s powerful animation tools.
For further learning, explore additional PowerPoint tutorials and templates to expand your skills. With consistent effort, you’ll be creating captivating, polished presentations in no time.
Happy presenting!
Check out the full video: ANIMATED PowerPoint Morph Timeline ✨ Free Download


