
How to Create a Stunning Sales Funnel Diagram in PowerPoint A Step-by-Step Guide
Creating clear and engaging diagrams in PowerPoint is essential for communicating complex business processes effectively. One of the most powerful visuals you can add to your presentations is a sales funnel diagram. It helps illustrate the customer journey from initial interest to final purchase, making it easier for your audience to grasp key marketing and sales concepts.
In this comprehensive tutorial, I’ll walk you through the entire process of designing a dynamic sales funnel diagram using only PowerPoint’s built-in tools. By the end of this guide, you’ll be able to craft a professional, animated funnel diagram that can elevate your business presentations and reports.
This tutorial is inspired by expert tips from POWERPOINT UNIVERSITY, a leading resource for PowerPoint templates and tutorials. Let’s dive in and learn how to create impressive diagrams in PowerPoint to showcase your sales funnel like a pro.
Table of Contents
- Understanding the Sales Funnel Concept
- Setting Up Your PowerPoint Slide
- Building the Funnel Shape Using Basic Shapes
- Creating the 3D Platform or Ramp
- Adding Funnel Stages and Text
- Inserting Icons to Represent Consumers
- Applying Color Themes to Different Funnel Stages
- Animating the Sales Funnel Diagram
- Frequently Asked Questions
- Conclusion
Understanding the Sales Funnel Concept
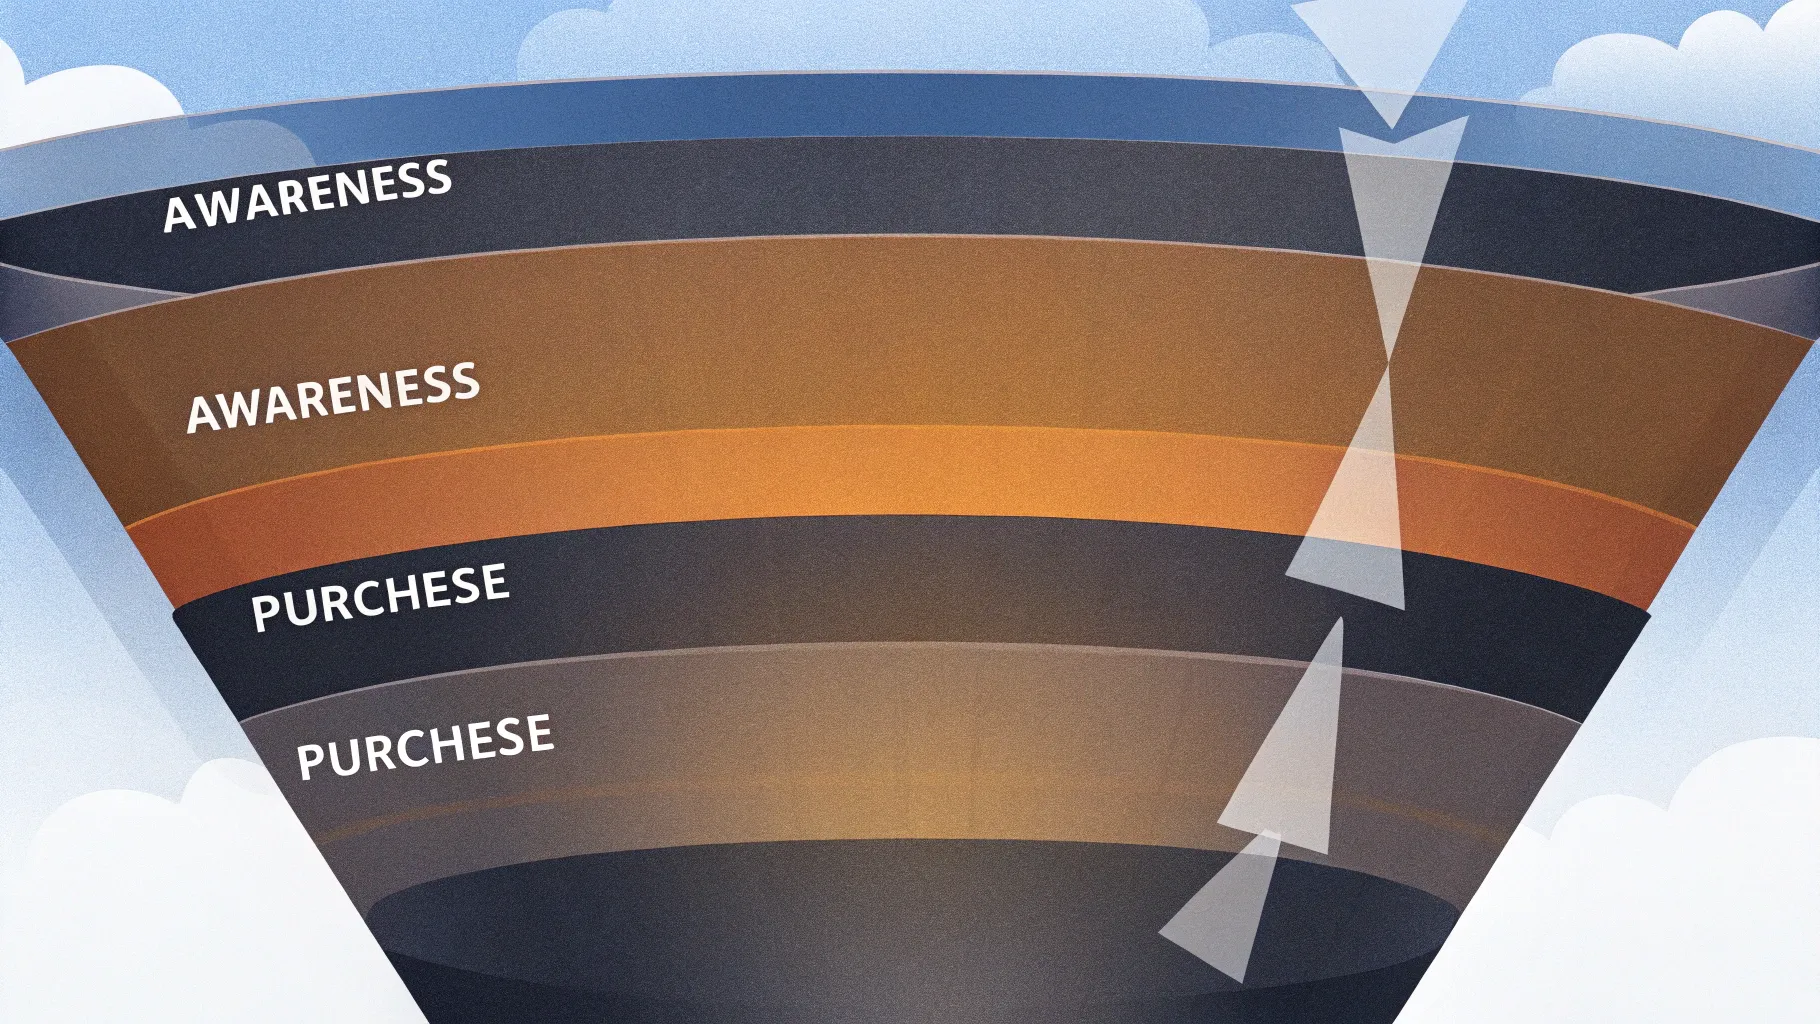
Before we get into the technical steps, it’s important to understand what a sales funnel diagram represents. The sales funnel visually maps the customer journey through various stages, typically including:
- Interest: Initial attraction or curiosity about a product or service.
- Decision: The prospect weighs options and considers taking action.
- Action: The prospect engages with the product or service.
- Purchase: The final step where the customer buys the product.
- New Customer: Post-purchase phase showing customer acquisition.
Each stage narrows down the audience, which is why the funnel shape is wider at the top and narrows toward the bottom, symbolizing the decreasing number of prospects as they move through the journey.
Setting Up Your PowerPoint Slide
To start building your sales funnel diagram, you first need to set up your PowerPoint slide properly for precision and alignment.
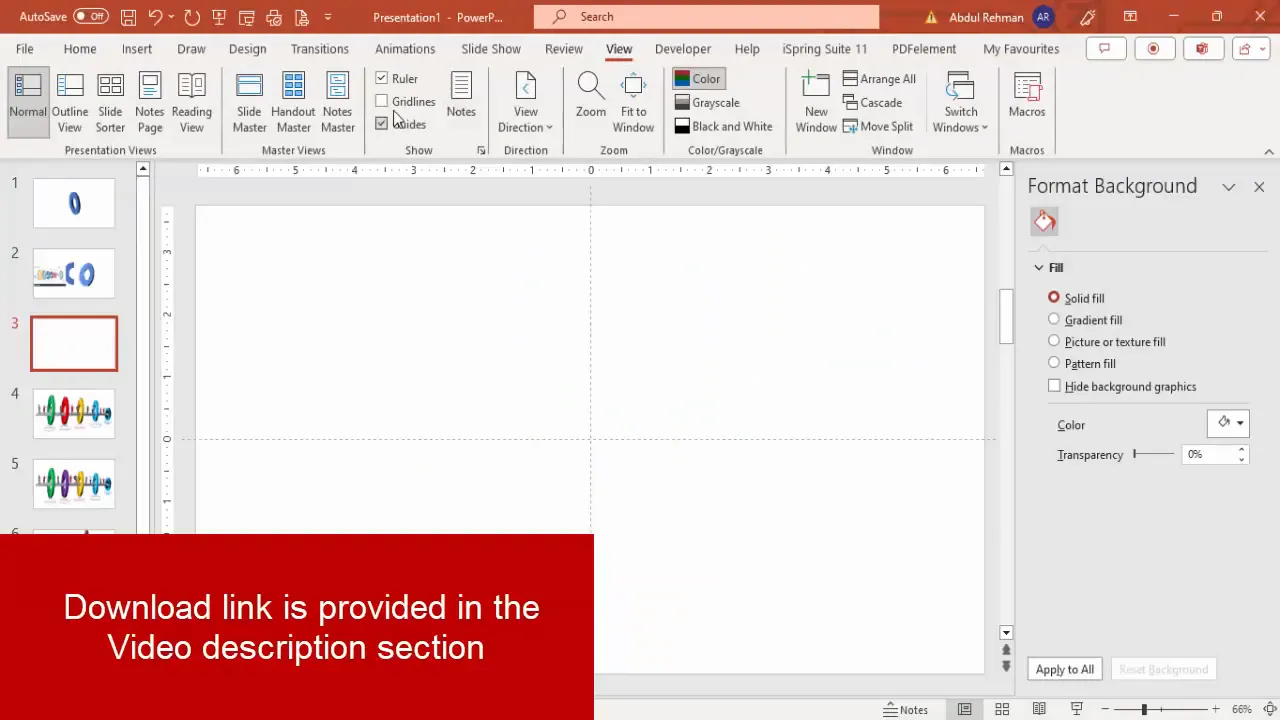
Step 1: Add a New Slide and Enable Guides
- Open PowerPoint and add a new blank slide to your presentation.
- Go to the View tab and enable Guides. These guides help you align shapes and elements neatly.
Enabling guides is a simple but essential step to maintain consistency and symmetry in your diagram, especially when building complex shapes like a funnel.
Building the Funnel Shape Using Basic Shapes
The foundation of your sales funnel diagram is the funnel shape itself. We’ll create it using PowerPoint’s basic shapes and 3D effects.
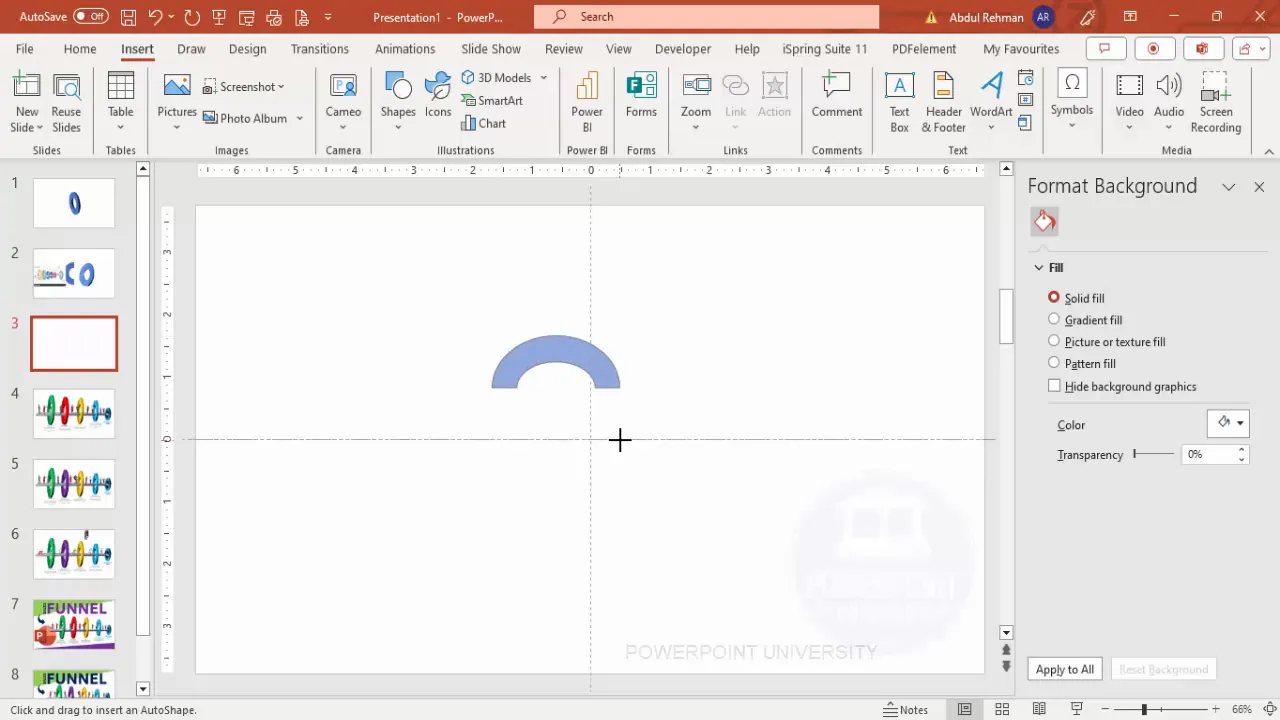
Step 2: Create the Funnel Body with Semicircle Shapes
Follow these steps to build the funnel’s curved body:
- Go to Insert > Shapes and select the Block Arc shape.
- Hold the Shift key while drawing to create a perfect semicircle shape.
- Remove the outline by setting Shape Outline to No Outline.
- Rotate the semicircle 90° to the right via Shape Format > Rotate.
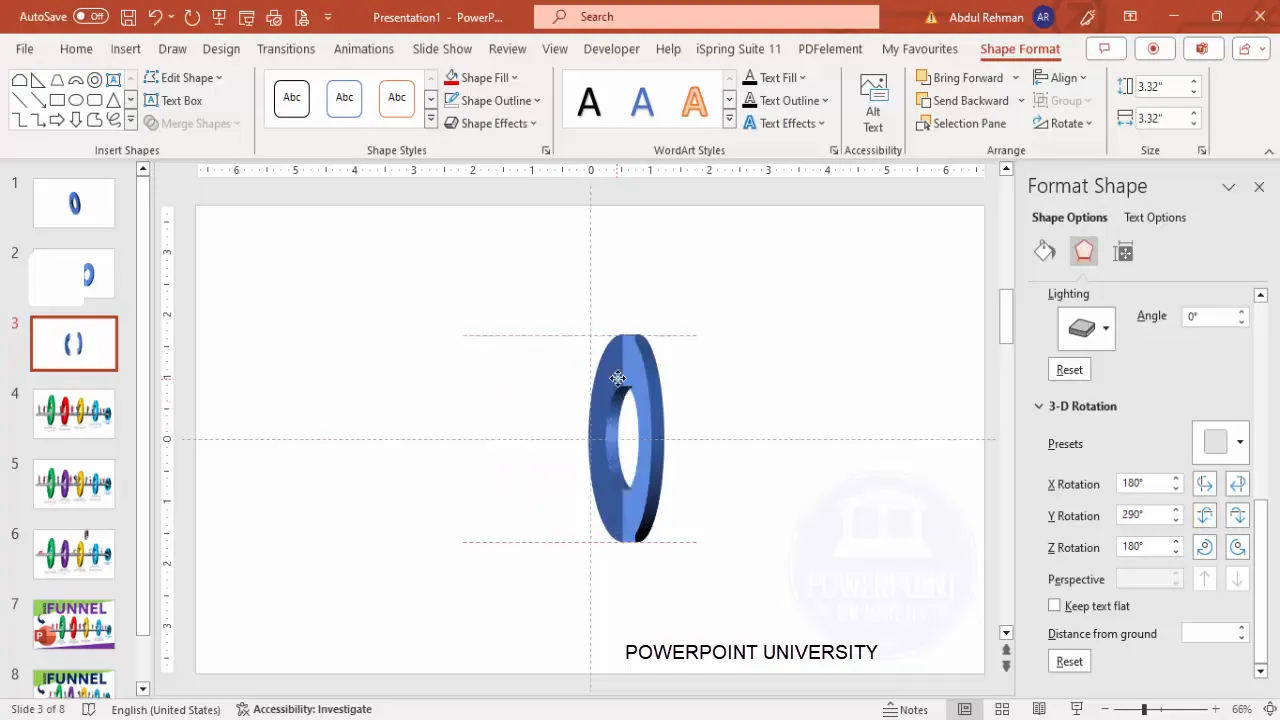
- Apply a 3D rotation effect: navigate to Shape Effects > 3D Rotation > Off Axis 1 Left.
- Adjust the rotation settings: set the Y Rotation to 75°, and the other rotation angles to 0°.
- Increase the 3D depth to 16 points under 3D Format > Depth.
This semicircle will form one segment of your funnel.
Step 3: Duplicate and Rotate to Form a Circular Funnel
- Duplicate the semicircle by pressing Ctrl + D.
- Select the duplicated shape and rotate it on the Y-axis by 360 degrees to align it properly.
- Send the duplicated shape to the back (Right-click > Send to Back).
- Align both shapes carefully to create a circular funnel shape.
- Select both shapes and group them with Ctrl + G for easier resizing and manipulation.
- Resize the funnel body by holding Ctrl + Shift and dragging a corner handle to scale proportionally.
This process creates the 3D funnel body that forms the core of your diagram.
Creating the 3D Platform or Ramp
Next, create the platform or ramp where the funnel stages will be displayed. This adds depth and context to the funnel.
Step 4: Draw the Platform Base
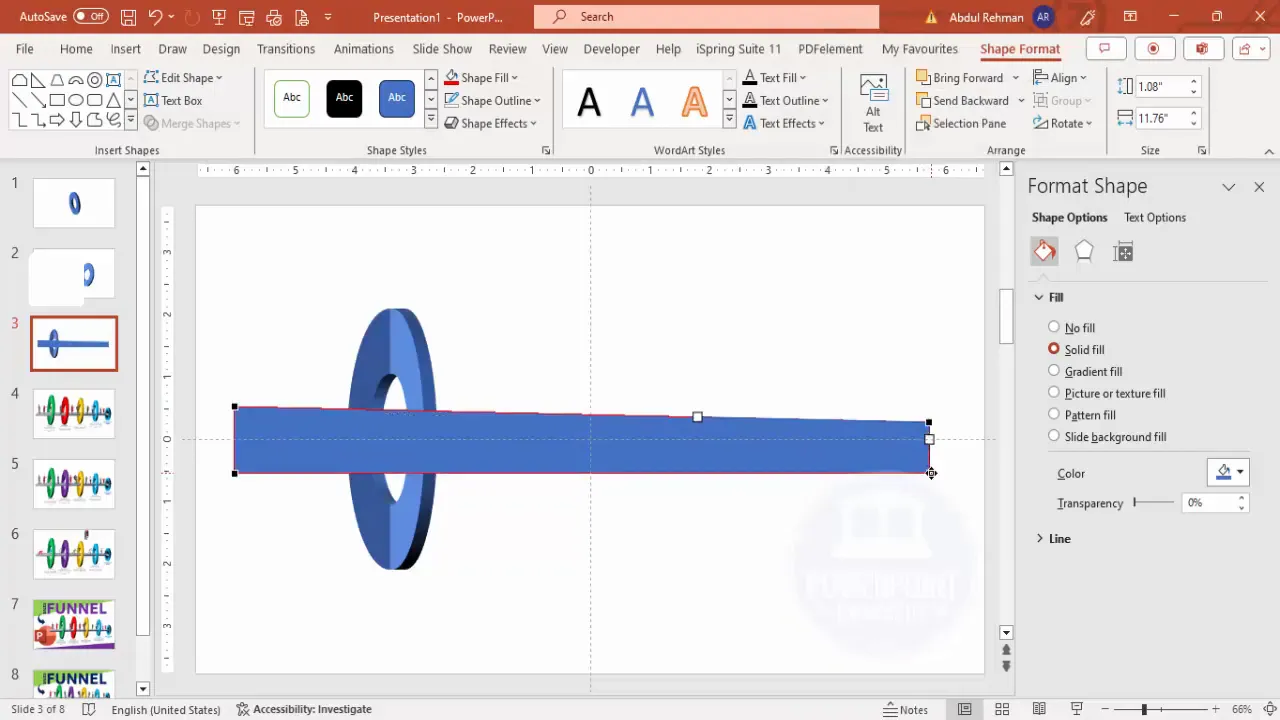
- Insert a rectangle shape (Insert > Shapes > Rectangle).
- Draw a straight rectangle horizontally across the slide.
- Remove the outline (No Outline).
- Right-click the rectangle and select Edit Points.
- Narrow the platform by dragging the side points downward to create a trapezoidal shape that tapers at the edges.
This tapering effect simulates perspective for the platform.
Step 5: Apply 3D Rotation and Depth to Platform
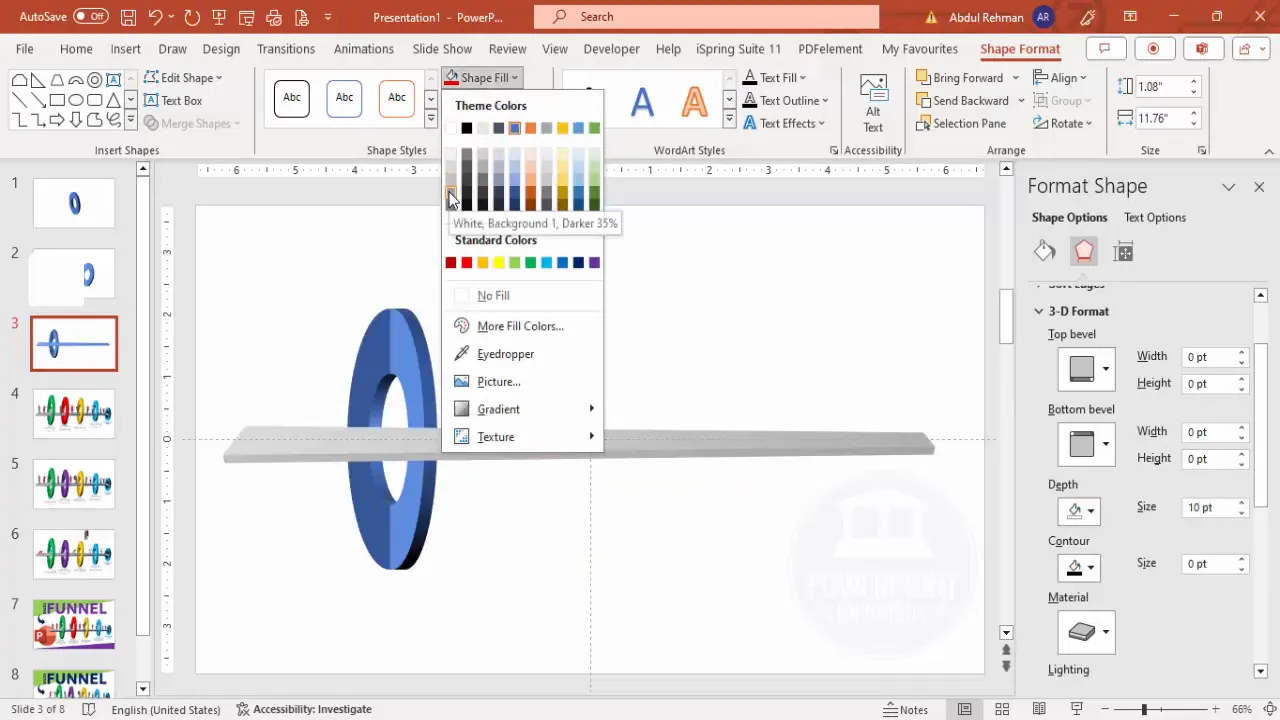
- Apply a 3D rotation effect: Shape Effects > 3D Rotation > Perspective Relax Moderately.
- Adjust the Y Rotation to create a slight angle that matches the funnel’s perspective.
- Set the 3D depth to 10 points or more depending on your preference.
- Fill the shape with a light gray color to differentiate it from the funnel.
These effects give the platform a realistic 3D look.
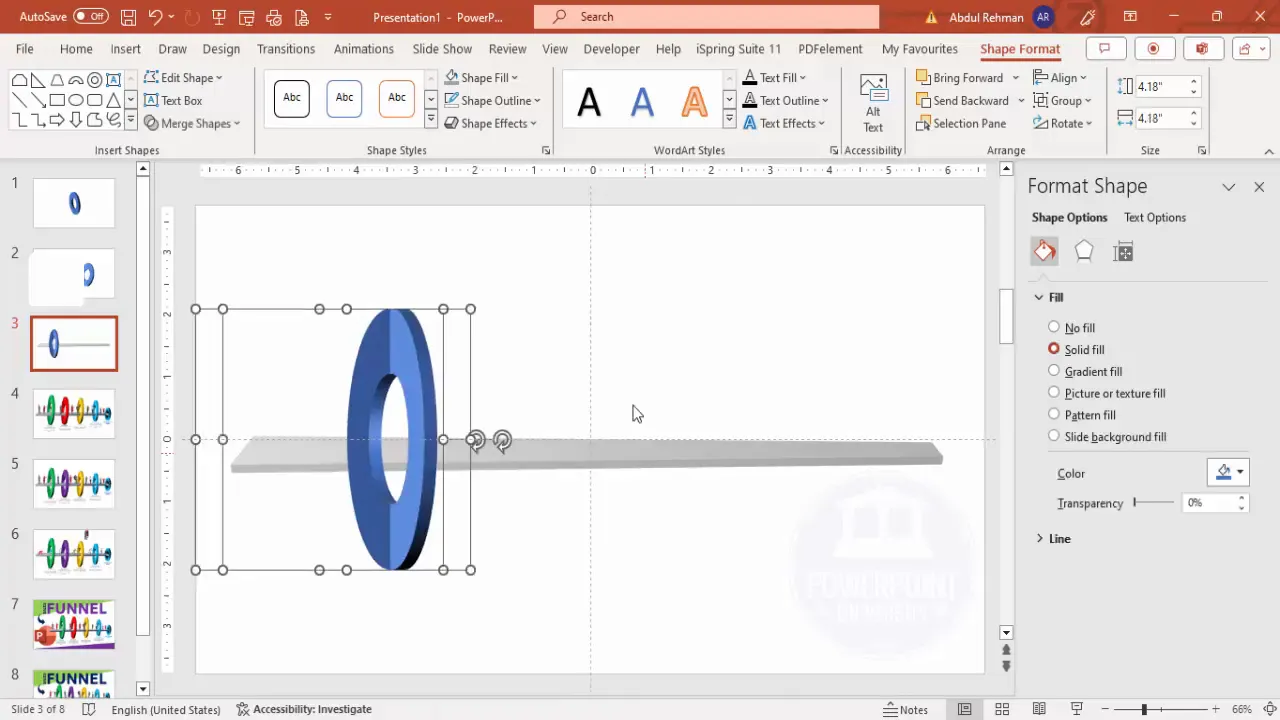
Step 6: Align the Platform with the Funnel Body
To make the platform appear as if it is connected to the funnel:
- Ungroup the funnel shape (Right-click > Ungroup), then select the dark blue part and send it to the back.
- Position the platform so it appears to be the runway or ramp coming out of the funnel’s hole.
- Select both the funnel and platform shapes and move or resize them as needed to maintain alignment.
This step ensures the funnel and platform visually connect, enhancing the diagram’s realism.
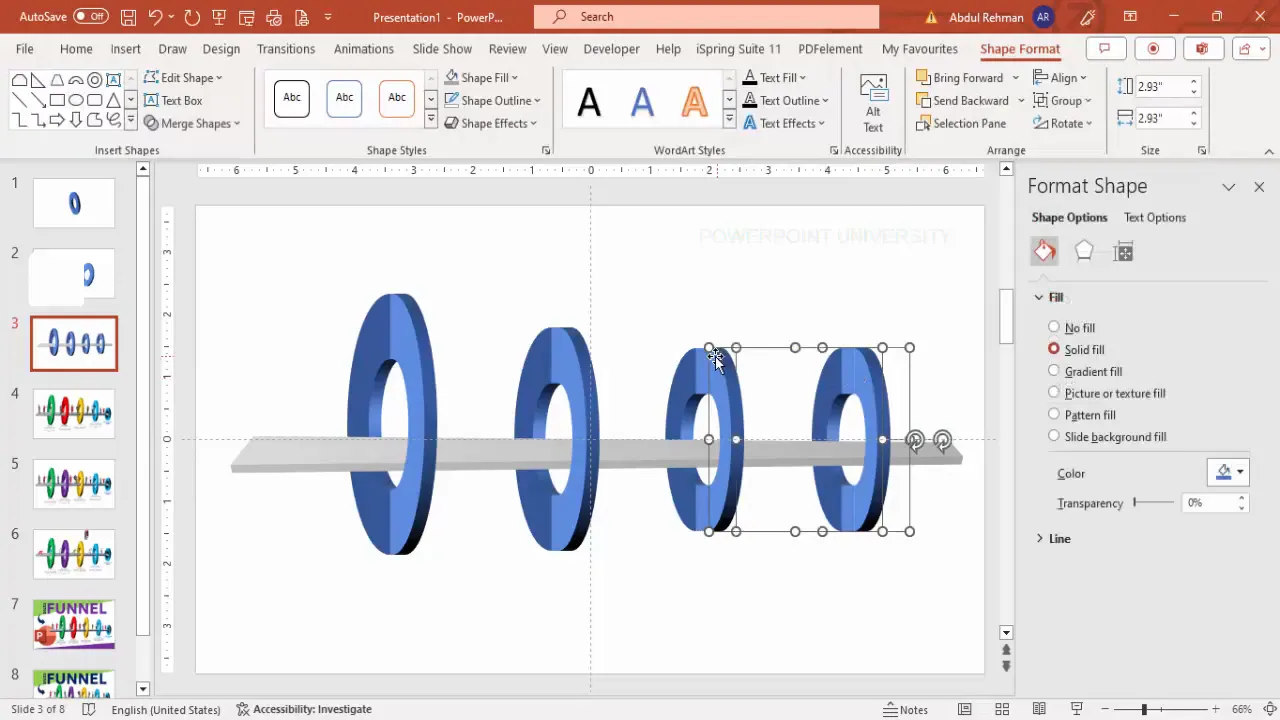
Step 7: Duplicate and Resize Funnel Layers
To create the funnel stages, duplicate the funnel shape multiple times and resize them progressively:
- Hold Ctrl + Shift and drag the grouped funnel shape to duplicate it.
- Send each duplicated shape to the back to layer them behind the previous one.
- Resize each duplicate smaller than the previous to create a narrowing funnel effect.
- Repeat this process to create four funnel layers, representing different stages.
Adjust spacing and alignment carefully to maintain a smooth funnel flow.
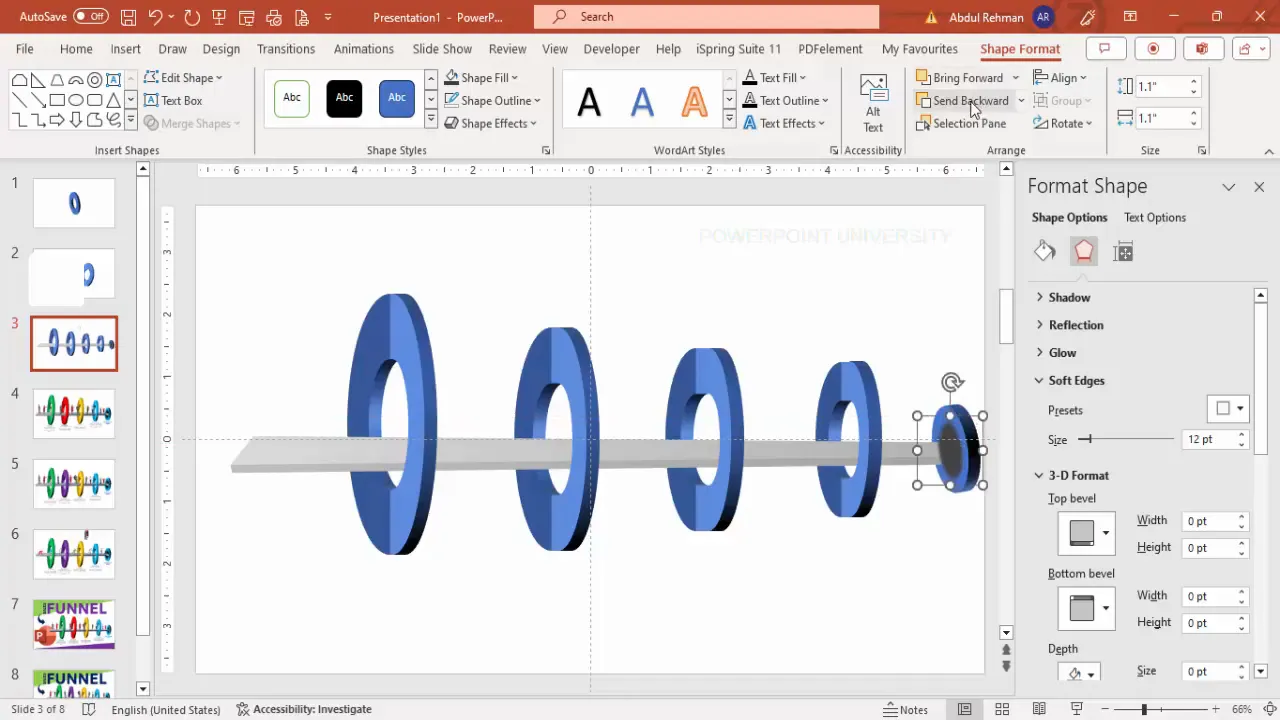
Step 8: Add the Funnel’s Hole and Shadow
Finally, add a hole shape and shadow effect at the funnel’s narrowest point to complete the 3D look:
- Insert an oval shape holding the Shift key to make it a perfect circle.
- Fill it with a dark gray color and remove its outline.
- Apply the same 3D rotation effect used earlier (Off Axis 1 Left).
- Add soft edges to the oval for a shadow effect, increasing its size and positioning it below the funnel’s narrow end.
- Send the oval shape to the back.
This detail adds depth and realism to your funnel diagram.
Create Slides in Seconds with ExpertSlides AI |
|
Generate AI Presentations today: |
| TRY NOW! |
Adding Funnel Stages and Text
With the funnel shape complete, it’s time to add the stages and explanatory text to clearly communicate each phase of the sales process.
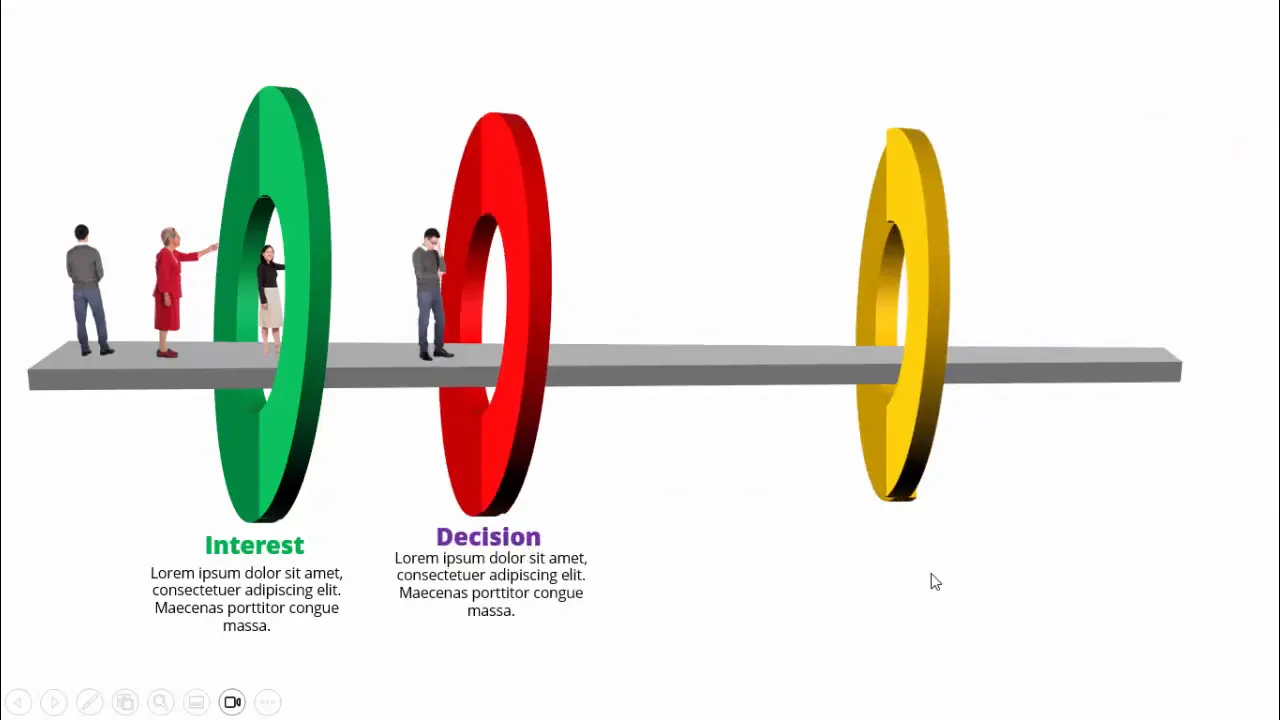
Step 9: Insert Titles and Descriptions for Each Stage
- Insert text boxes for each funnel stage using Insert > Text Box.
- Type the stage names such as “Interest,” “Decision,” “Action,” and “Purchase.”
- Center-align the text and make the font bold for emphasis.
- Add smaller text boxes below the titles for detailed descriptions or notes.
- Format the description text with a smaller font size and gray color for subtlety.
- Duplicate the text boxes for all funnel stages by selecting them and pressing Ctrl + D.
- Position the text boxes aligned with each funnel layer.
Here’s an example of how you might structure the text:
| Stage | Description |
|---|---|
| Interest | Prospects show curiosity about your product or service. |
| Decision | Prospects evaluate options and consider next steps. |
| Action | Prospects engage with your offering. |
| Purchase | Prospects convert into paying customers. |
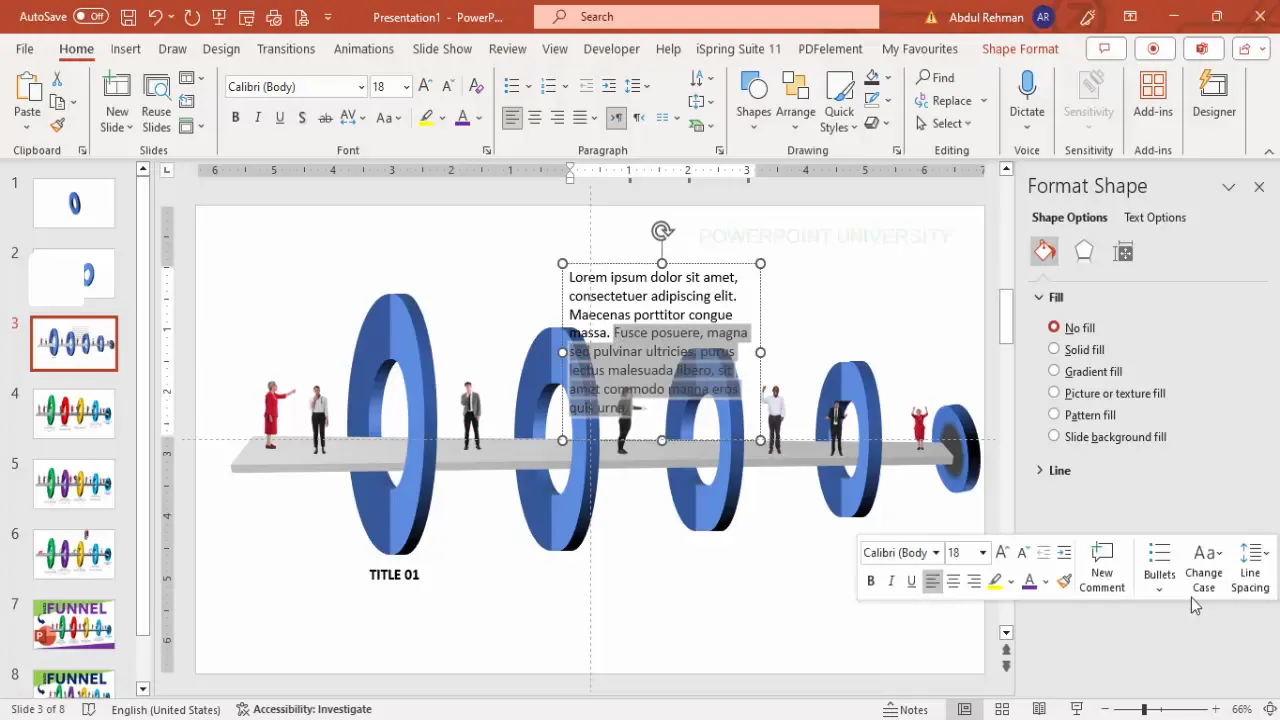
Inserting Icons to Represent Consumers
To visually represent prospects or customers within the funnel, you can add icons of people at different stages.
Step 10: Add People Icons Using PowerPoint’s Icon Library
- Go to Insert > Icons.
- Search for “people” or navigate to the “Cut Out People” category.
- Select multiple icons representing different consumers or prospects.
- Click Insert to add them to your slide.
- Resize the icons by holding the Shift key to maintain proportion.
- Position the icons at various funnel stages to represent the flow of consumers.
- Flip or rotate icons as needed to create a natural, engaging layout.
- Add multiple icons at the entrance and exit points of the funnel to simulate consumer movement.
This visual cue helps audiences quickly understand the funnel’s customer journey.
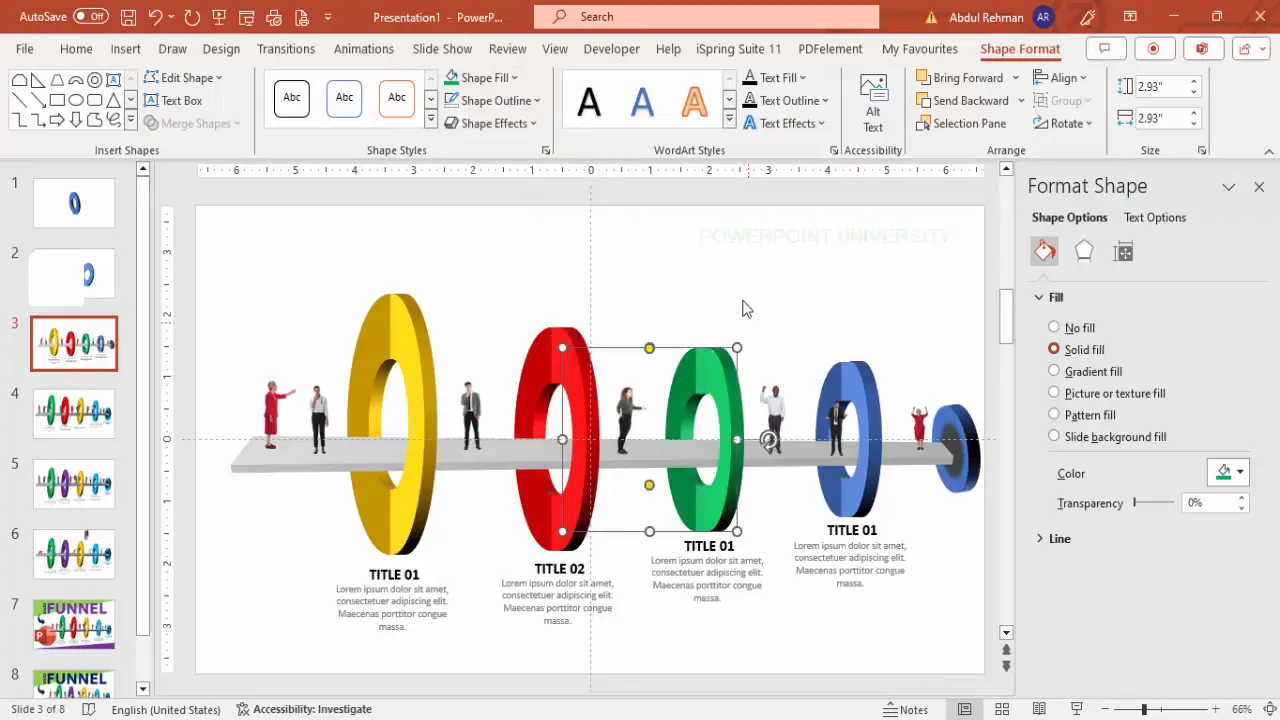
Applying Color Themes to Different Funnel Stages
Color coding each funnel stage increases readability and visual appeal.
Step 11: Customize Fill Colors for Each Funnel Layer
- Select the shapes corresponding to each funnel stage.
- Go to Shape Format > Shape Fill.
- Apply distinct colors for each stage to differentiate them clearly. For example:
- Stage 1 (Interest): Orange
- Stage 2 (Decision): Red
- Stage 3 (Action): Green
- Stage 4 (Purchase): Purple
- Choose colors that align with your brand or presentation style.
- For the platform and funnel hole, use neutral colors like gray to maintain focus on the funnel stages.
Color differentiation helps your audience scan and understand the diagram effortlessly.
Animating the Sales Funnel Diagram
Animations add a dynamic element that can enhance your presentation by guiding viewers step-by-step through the sales funnel.
Step 12: Enable the Animation Pane
Start by opening the animation pane for precise control over animation timing:
- Go to the Animations tab.
- Click on Animation Pane to open the side panel.
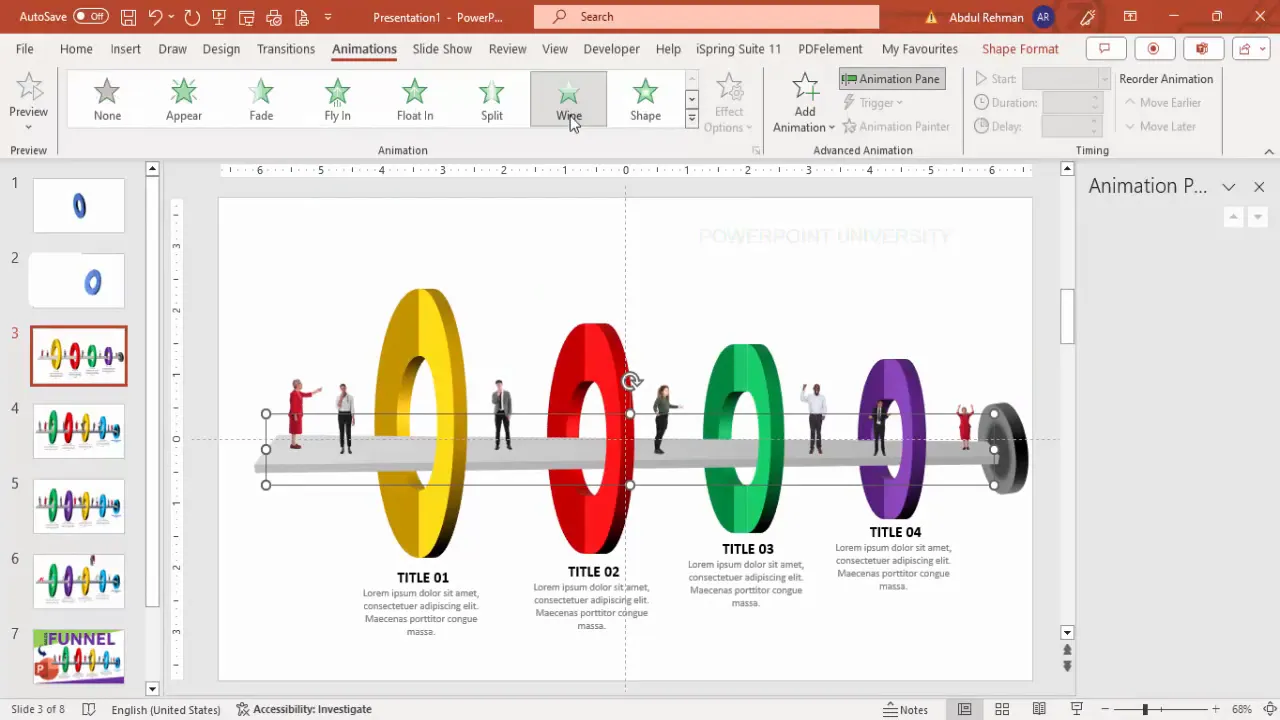
Step 13: Animate the Platform
- Select the platform shape.
- Apply the Wipe animation effect.
- Set the direction to From Left so the platform slides in smoothly.
Step 14: Animate Funnel Stages
- Select the first two funnel layers and apply the Fly In animation from the left.
- Repeat for the next two funnel layers with the same Fly In effect.
- Apply a Basic Zoom effect to the funnel hole shape, set to trigger After Previous.
Step 15: Animate the Text Boxes
- Group the text boxes for each funnel stage.
- Apply the Stretch animation effect from the top.
- Set each text animation to trigger With Previous or After Previous for smooth sequencing.
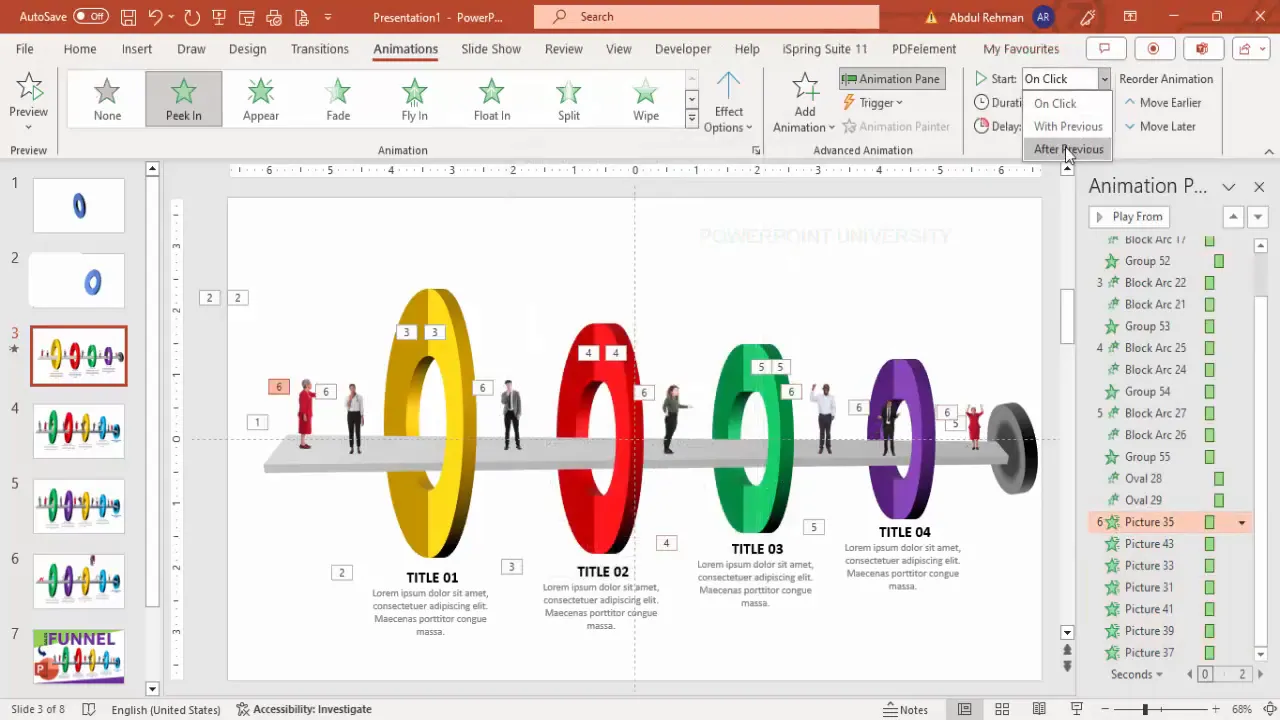
Step 16: Animate the People Icons
- Select all people icons.
- Apply the Peek In animation effect.
- Set the animation to start After Previous to synchronize with the funnel stages.
When played, these animations will sequentially introduce the platform, funnel stages, descriptive text, and consumer icons — creating an engaging storytelling flow.
Frequently Asked Questions
Q1: Can I download a ready-made sales funnel PowerPoint template?
Yes! Many resources, including POWERPOINT UNIVERSITY, offer free downloadable sales funnel templates that you can customize to fit your needs.
Q2: How do I make sure my funnel diagram looks professional?
Consistency is key. Use aligned guides, appropriate color schemes, and limit text to key points. Avoid clutter and use animations sparingly to maintain professionalism.
Q3: Can I customize the funnel stages beyond the four standard ones?
Absolutely! PowerPoint’s flexibility allows you to add more layers or stages by duplicating and resizing funnel shapes. Just adjust colors and text accordingly.
Q4: Are there shortcuts to speed up creating diagrams in PowerPoint?
Using Ctrl + D to duplicate shapes and Ctrl + Shift to resize proportionally can save significant time. Grouping elements also helps manage complex diagrams.
Q5: How can I share my animated funnel diagram?
You can save your PowerPoint as a video, share the .pptx file, or present live. Animations work best when viewed within PowerPoint or exported formats that support animation.
Conclusion
Mastering the creation of diagrams in PowerPoint like the sales funnel diagram is a valuable skill for marketers, sales professionals, educators, and business presenters. This step-by-step guide has shown you how to build a visually appealing, color-coded, and animated sales funnel diagram from scratch using PowerPoint’s native tools.
By following this method, you can create custom diagrams tailored to your brand and message, enhancing your presentations with clarity and visual impact. Remember, good design is about clear communication, so keep your diagrams clean, focused, and engaging.
If you want to fast-track your presentations, consider downloading ready-made templates from trusted sources like POWERPOINT UNIVERSITY, which offers over a thousand free templates with easy editability.
Now, it’s your turn to create stunning sales funnel diagrams that captivate your audience and boost your presentation quality!
Check out the full video: PowerPoint Sales Funnel Diagram


