
If you want to take your PowerPoint presentations to the next level and truly master the tools in PowerPoint, you’ve come to the right place. Whether you’re a beginner or an experienced user, understanding powerful tips and tricks can significantly enhance your slide design, animations, and overall presentation flow.
In this comprehensive guide, we’ll cover the top 20 tips shared by One Skill PPT, a renowned PowerPoint expert, that will help you transform your slides into visually engaging and professionally polished presentations. From creating stunning glassmorphic effects to advanced animation techniques and slide master usage, this article dives deep into practical tools and strategies that you can apply right away.
Let’s jump in and explore these game-changing PowerPoint tips.
Table of Contents
- Tip 1: Create the Glassmorphic Effect
- Tip 2: Insert Photos and Videos into Any Custom Shape
- Tip 3: Use Slide Grids for Perfect Alignment
- Tip 4: Apply the Duotone Effect to Images
- Tip 5: Master Text and Line Spacing
- Tip 6: Convert Text into Vector Shapes for Creative Designs
- Tip 7: Use Color Shadows to Enhance Visuals
- Tip 8: Leverage the Slide Master for Global Changes
- Tip 9: Add Gradient Fill to Text
- Tip 10: Create Modern Gradient Charts
- Tip 11: Animate Objects in the Slide Master
- Tip 12: Extend Animation Duration Beyond Limits
- Tip 13: Customize Rotation Centers for Animations
- Tip 14: Combine GIFs with PowerPoint Animations
- Tip 15: Loop Multiple Animations Using Bookmark Triggers
- Tip 16: Perfect Morph Transitions with Naming
- Tip 17: Animate Crop Changes with Morph
- Tip 18: Create Auto-Updating Donut Charts
- Tip 19: Divide Donut Charts into Equal Parts
- Tip 20: Essential PowerPoint Shortcuts
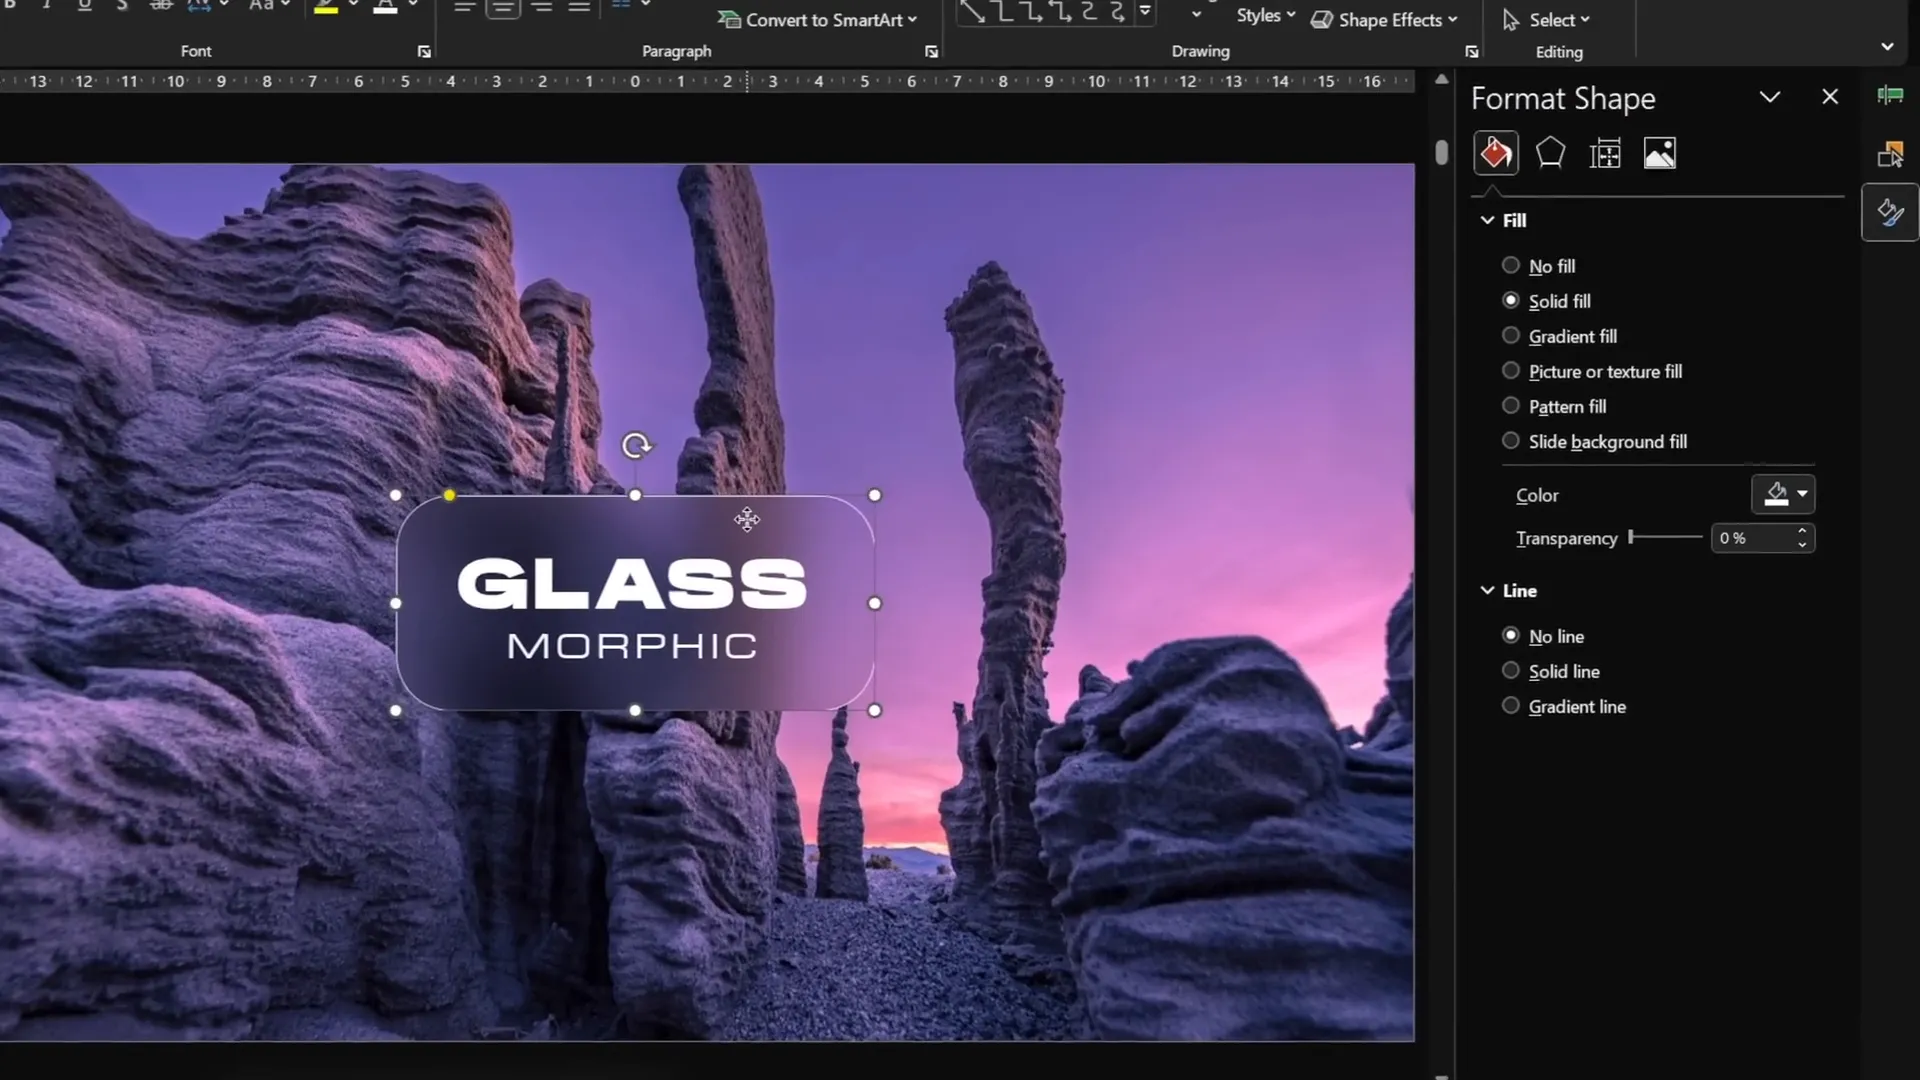
Tip 1: Create the Glassmorphic Effect
The glassmorphic effect is a trendy design style that gives shapes on your slides a frosted glass look with blurred backgrounds and soft shadows. It adds a modern and elegant touch to any presentation.
Here’s how to quickly create this effect on a shape in PowerPoint:
- Start with a background photo and a shape (e.g., a rounded rectangle) with no fill and a thin outline placed over the photo.
- Select the photo, go to Format Picture > Artistic Effects, and apply the Blur effect with the maximum blur radius (100).
- Right-click the blurred photo and choose Copy.
- Reset the photo to its original state.
- Change the slide background fill from solid color to Picture, and choose the Clipboard option to paste the blurred photo as the background.
- Place the photo so the blur aligns with the shape.
- Select the shape and set its fill to Slide Background Fill. The shape will now have a glassmorphic blurred effect.
- Optionally, add a white inside shadow to the shape to create a frosty and more realistic look.
This method allows you to add the glassmorphic effect to any shape on your slides, enhancing your design with minimal effort.
Tip 2: Insert Photos and Videos into Any Custom Shape
PowerPoint allows you to place images or videos inside standard shapes like circles or squares, but what if you want more complex custom shapes? This tip shows you how to do just that.
Steps to insert a photo or video into any shape:
- Create your custom shape using PowerPoint’s Curve Tool or combine multiple shapes using Merge Shapes (Union, Subtract, Intersect).
- Insert your photo or video and resize it to cover the custom shape completely.
- Send the photo or video to the back (Right-click > Send to Back).
- Select the photo/video, hold Shift, select the custom shape, and use Merge Shapes > Intersect. This clips the media to the shape.
- For videos on dark backgrounds, add a gradient line around the shape to make it stand out.
For template creators, it’s recommended to create custom picture placeholders in the Slide Master. This allows users to quickly insert or replace images by clicking the placeholder button, streamlining the editing process.
To create a custom picture placeholder:
- In Slide Master view, unite your custom shapes into one shape.
- Insert a picture placeholder covering the shape.
- Send the placeholder to back, select both the placeholder and shape, and choose Intersect.
- Exit Slide Master, apply your new layout, and insert images easily.
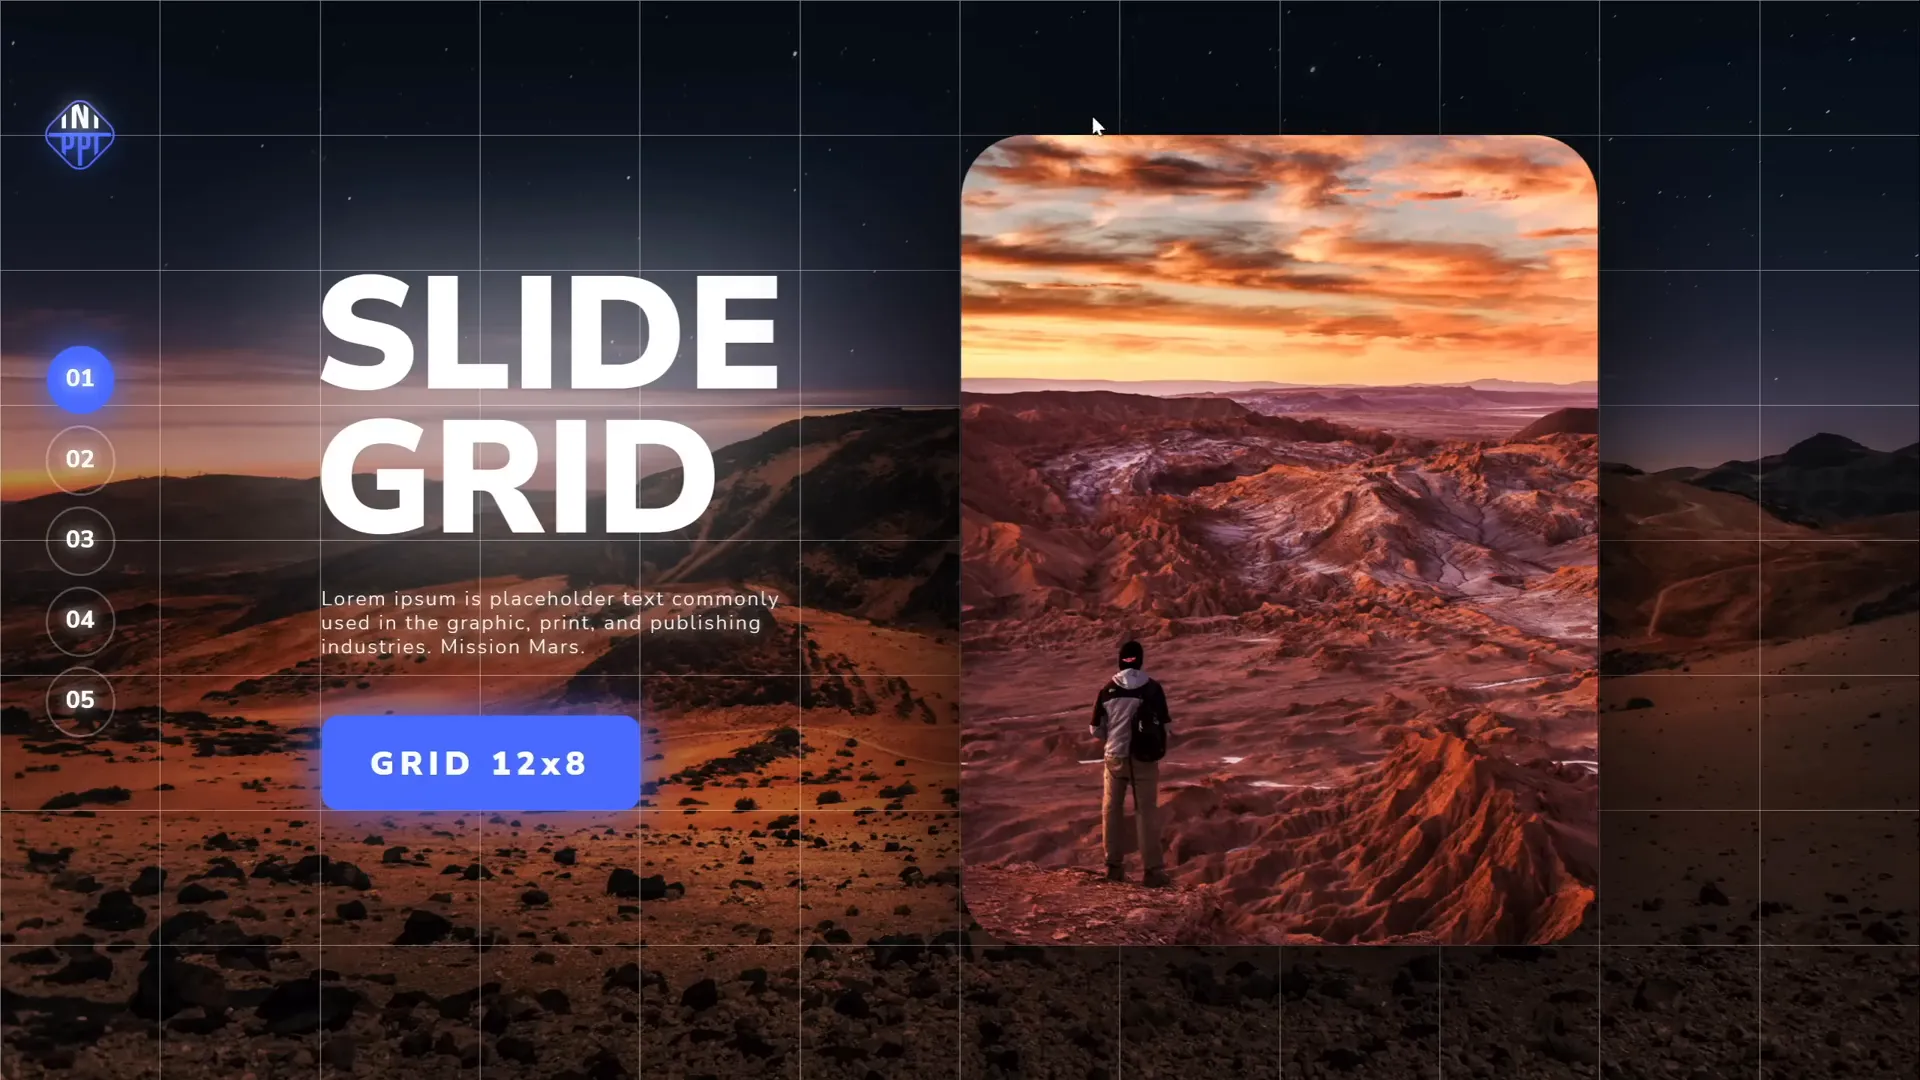
Tip 3: Use Slide Grids for Perfect Alignment
Good alignment is key to professional-looking slides. Slide grids help you position elements consistently and maintain balance on your slides.
Here’s why grids matter:
- They ensure equal spacing around images and text.
- They keep titles, logos, and buttons aligned neatly.
- They prevent elements from floating freely or touching slide edges awkwardly.
How to create a slide grid (e.g., 12 columns by 8 rows):
- Insert rectangles for columns that span the slide height and arrange 12 of them side by side without gaps.
- Select all columns and group them.
- Insert rectangles for rows that span the slide width and arrange 8 of them stacked vertically.
- Select all rows and group them.
- Select both groups (columns and rows) and group them into a single grid.
- Remove the fill and adjust line transparency for better visibility.
- Toggle the grid visibility using the selection pane when needed.
Use this grid to align all slide elements for a polished and cohesive look.
Tip 4: Apply the Duotone Effect to Images
Duotone is a stylish effect where an image is recolored using two colors, usually one dark and one bright, to create a visually appealing look.
PowerPoint doesn’t have a built-in duotone filter, but you can easily create duotone images using a free online tool: duotone.shapefactory.co.
How to create and use duotone images:
- Pick two colors (one bright and one dark) for good contrast.
- Upload or search for a photo on the website.
- Apply your chosen colors to generate the duotone effect.
- Download the duotone image and insert it into your PowerPoint slides.
Bonus tip: If colleagues ask how you created the effect, use the free Chrome extension Scribe to record step-by-step guides automatically and share them quickly.

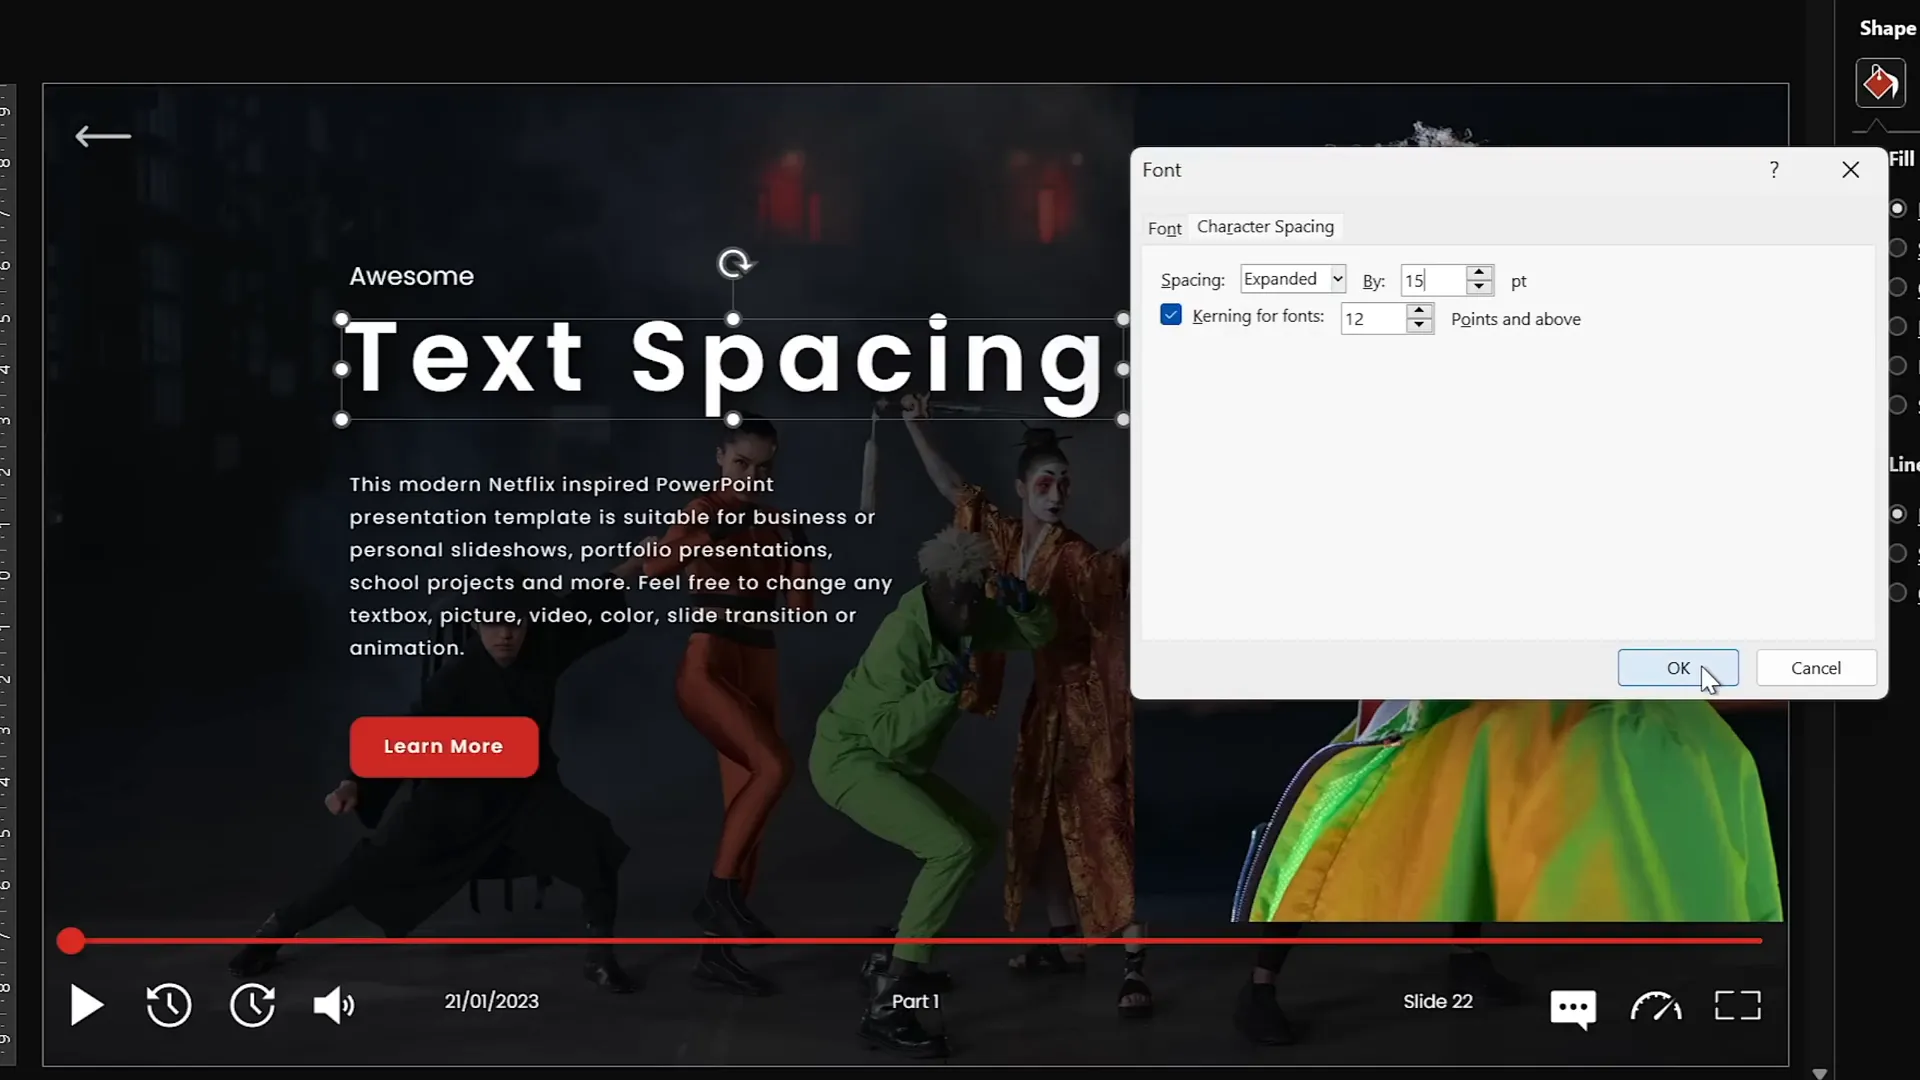
Tip 5: Master Text and Line Spacing
Adjusting text and line spacing can dramatically improve readability and aesthetics of your slides.
Letter spacing (character spacing) and line spacing (leading) are both adjustable:
| Adjustment | Effect | How to Adjust |
|---|---|---|
| Letter Spacing | Controls space between characters | Home > Font > Character Spacing > More Spacing > Expanded (e.g., 15 pt for wide spacing) |
| Line Spacing | Controls space between lines of text | Home > Paragraph > Line Spacing Options > Multiple (e.g., 0.8 for tighter spacing) |
Example: For paragraph text, normal spacing may be too tight and loose spacing too wide. Using “Expanded” letter spacing with a small value (like 1 pt) helps letters breathe without excessive gaps.
For line spacing, avoid default presets like 1.5 which may be too large; instead, use “Multiple” with a value less than 1 (e.g., 0.8) for a tighter, cleaner look.
Tip 6: Convert Text into Vector Shapes for Creative Designs
Sometimes you want to cut or manipulate text shapes creatively. PowerPoint lets you convert text into vector shapes and combine them with other shapes.
How to convert and cut text:
- Create your editable text box.
- Create a shape (e.g., using the freeform tool) to use as a cutting mask.
- Select the text box, hold Shift, then select the shape.
- Go to Merge Shapes and choose an option such as Subtract to cut the shape from the text.
If you want to convert the entire text box into a vector shape without cutting:
- Duplicate the text box and align both perfectly.
- Select both, then use Merge Shapes > Union.
Example project: Split text into two parts by cutting with a shape. Use Intersect to keep the bottom part for one slide and the top part for another, then arrange them side by side for a stylish effect.
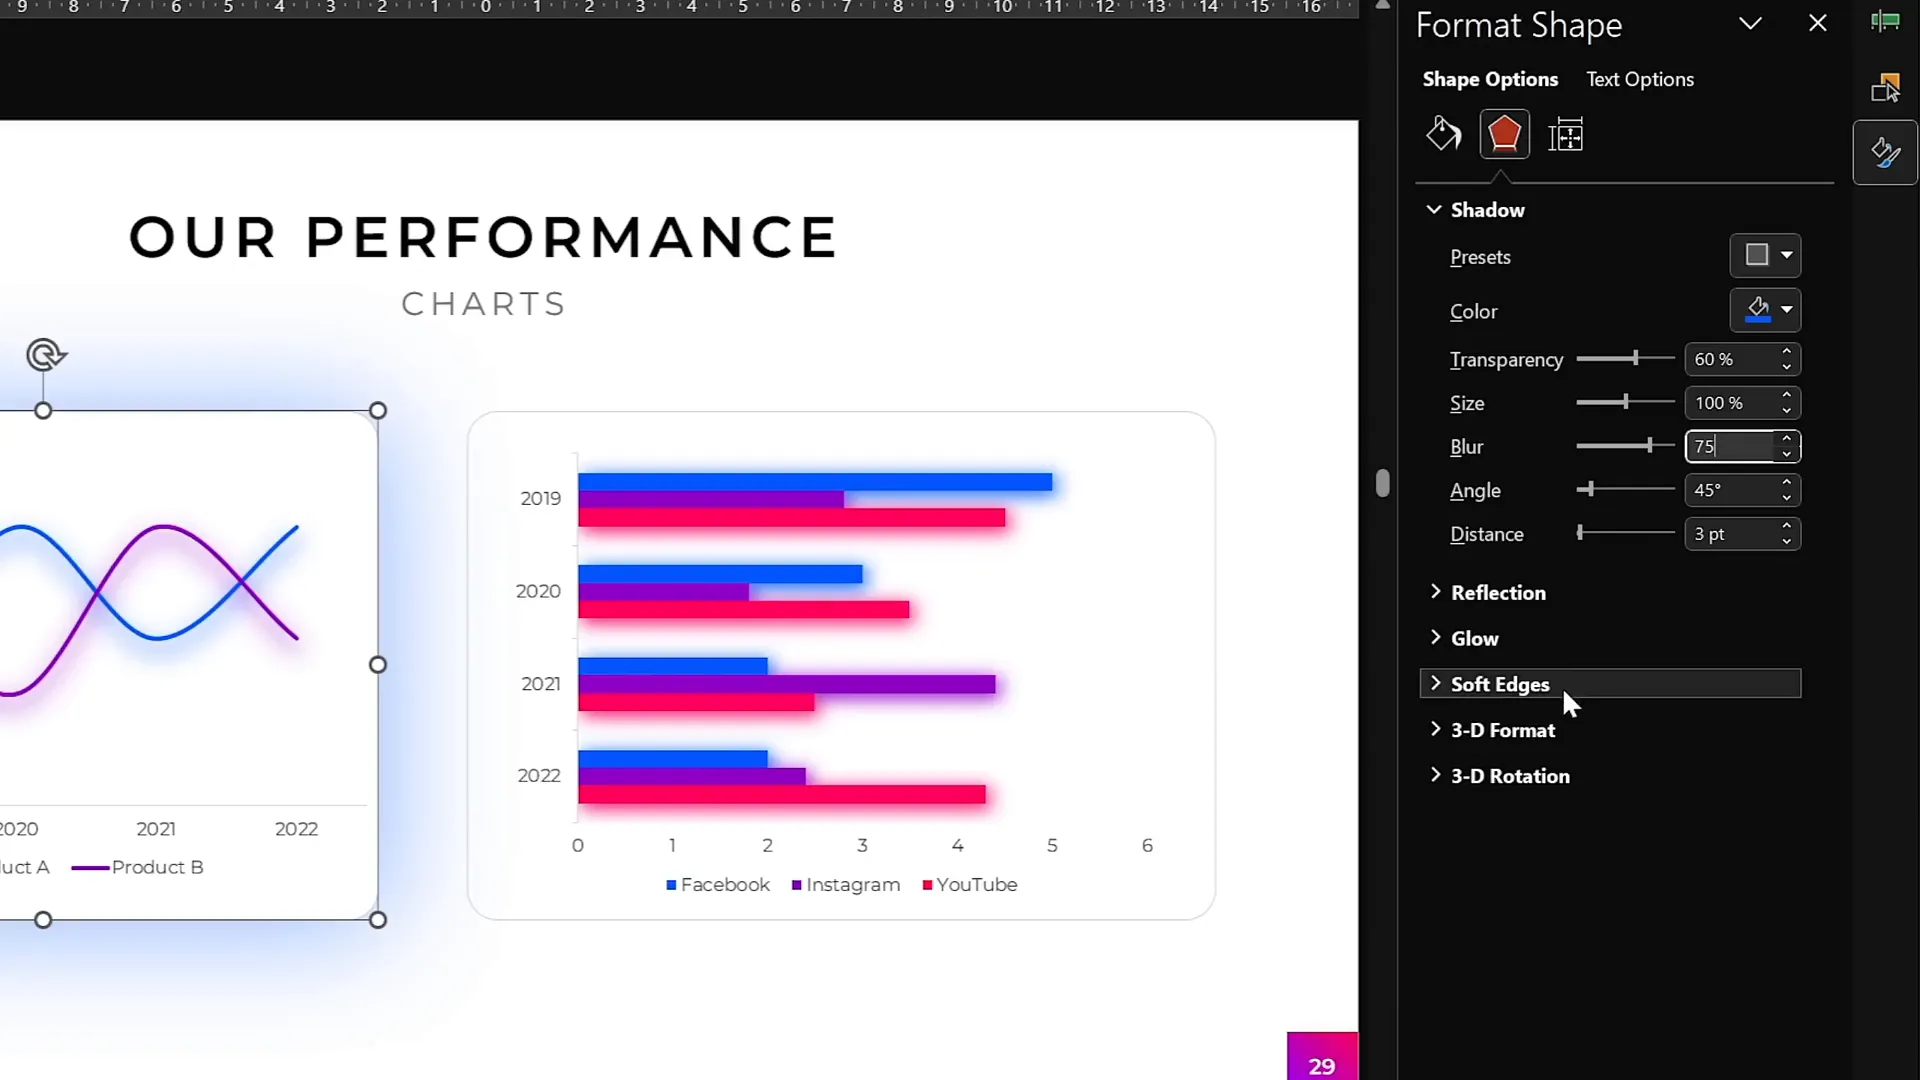
Tip 7: Use Color Shadows to Enhance Visuals
By default, PowerPoint shadows are black, but you can customize shadow colors to create interesting and soft colorful shadows that highlight slide elements.
How to add colorful shadows:
- Select the shape or chart you want to enhance.
- Go to Format Shape > Shadow options.
- Choose an Outer Shadow preset.
- Change the shadow color from black to any color you want.
- Increase blur radius (e.g., 75 pt) for softness.
- Adjust distance and transparency for subtlety.
This technique is great for making charts and shapes pop without harsh shadows.
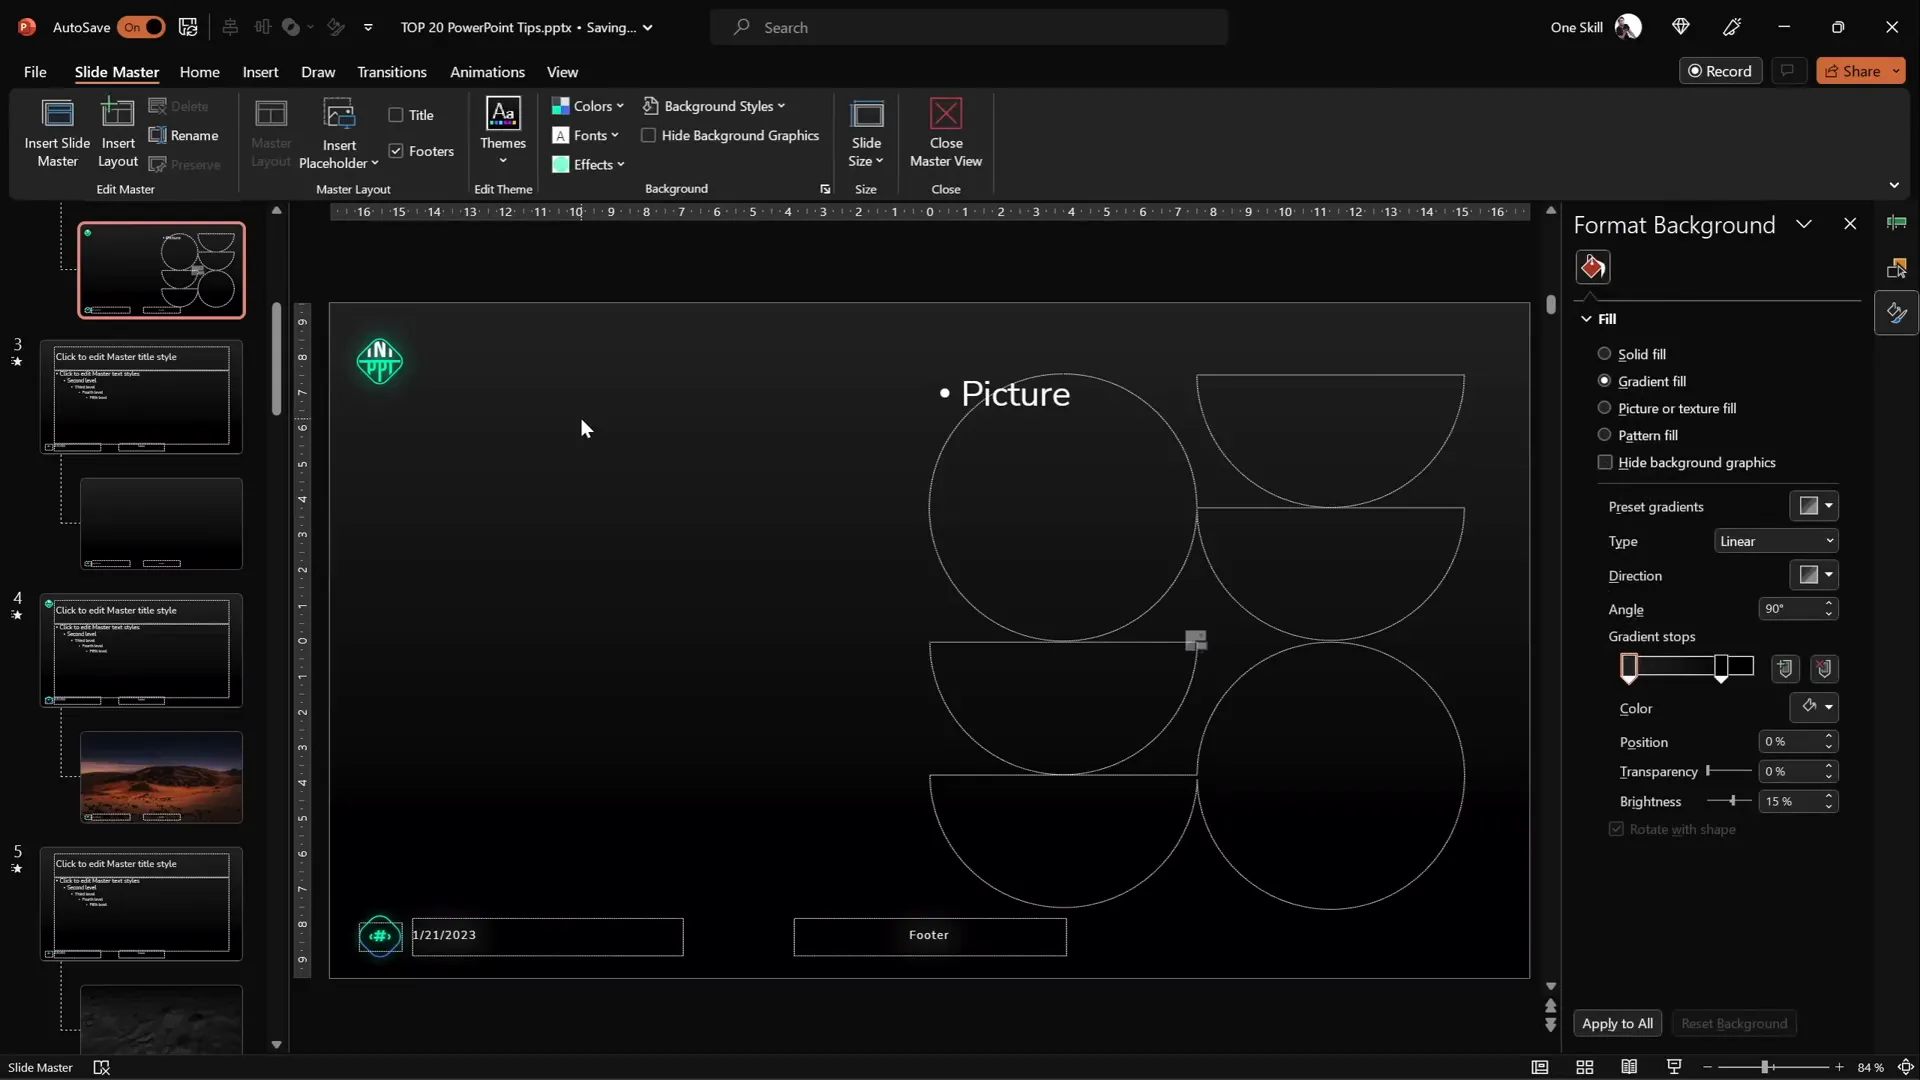
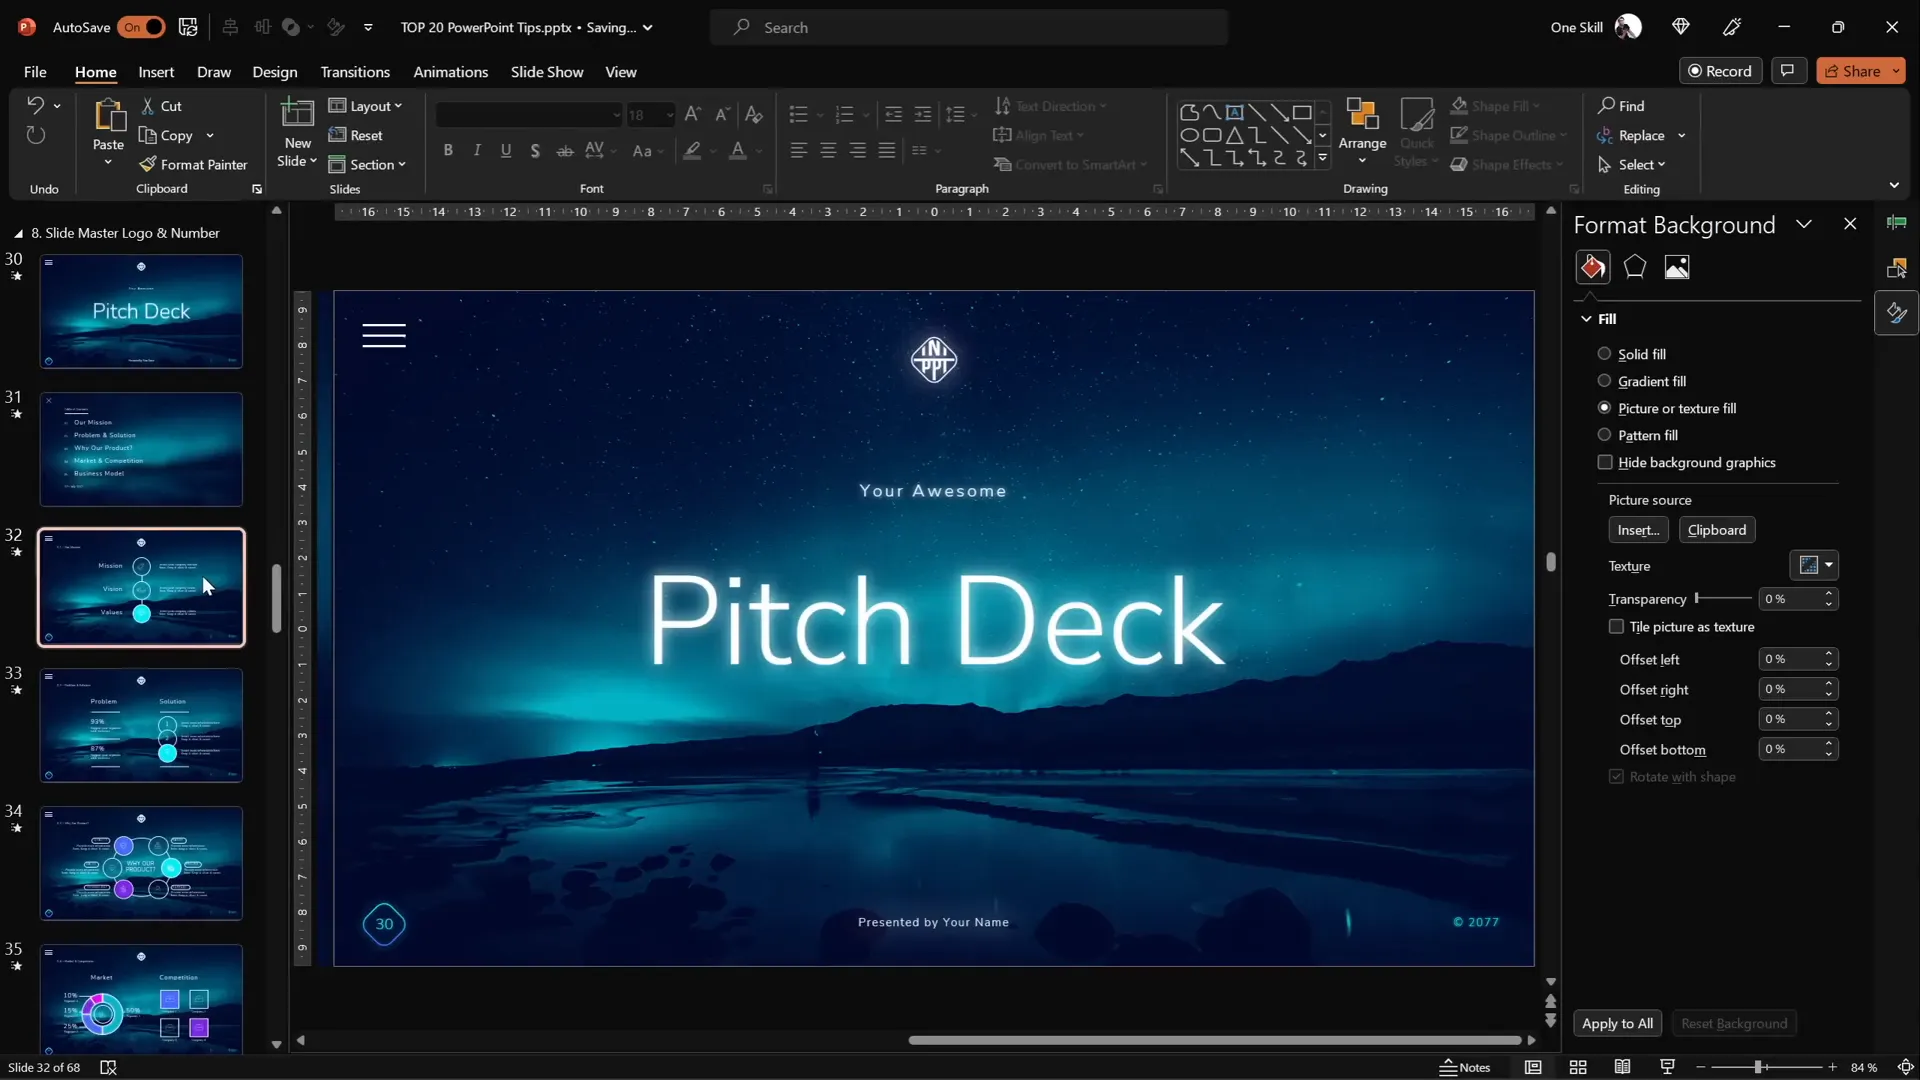
Tip 8: Leverage the Slide Master for Global Changes
The Slide Master is a powerful tool for making global edits that affect all slides using a particular layout.
Benefits of Slide Master include:
- Insert logos or watermarks that appear on all slides.
- Customize slide numbers with shapes and positioning.
- Add consistent footers, backgrounds, or animations.
How to use Slide Master:
- Go to View > Slide Master.
- Make your changes (e.g., insert logo, adjust slide number style or position).
- Close Slide Master to apply changes to all slides.
Quick access to Slide Master: Hold Shift and click on the slide layout icon.
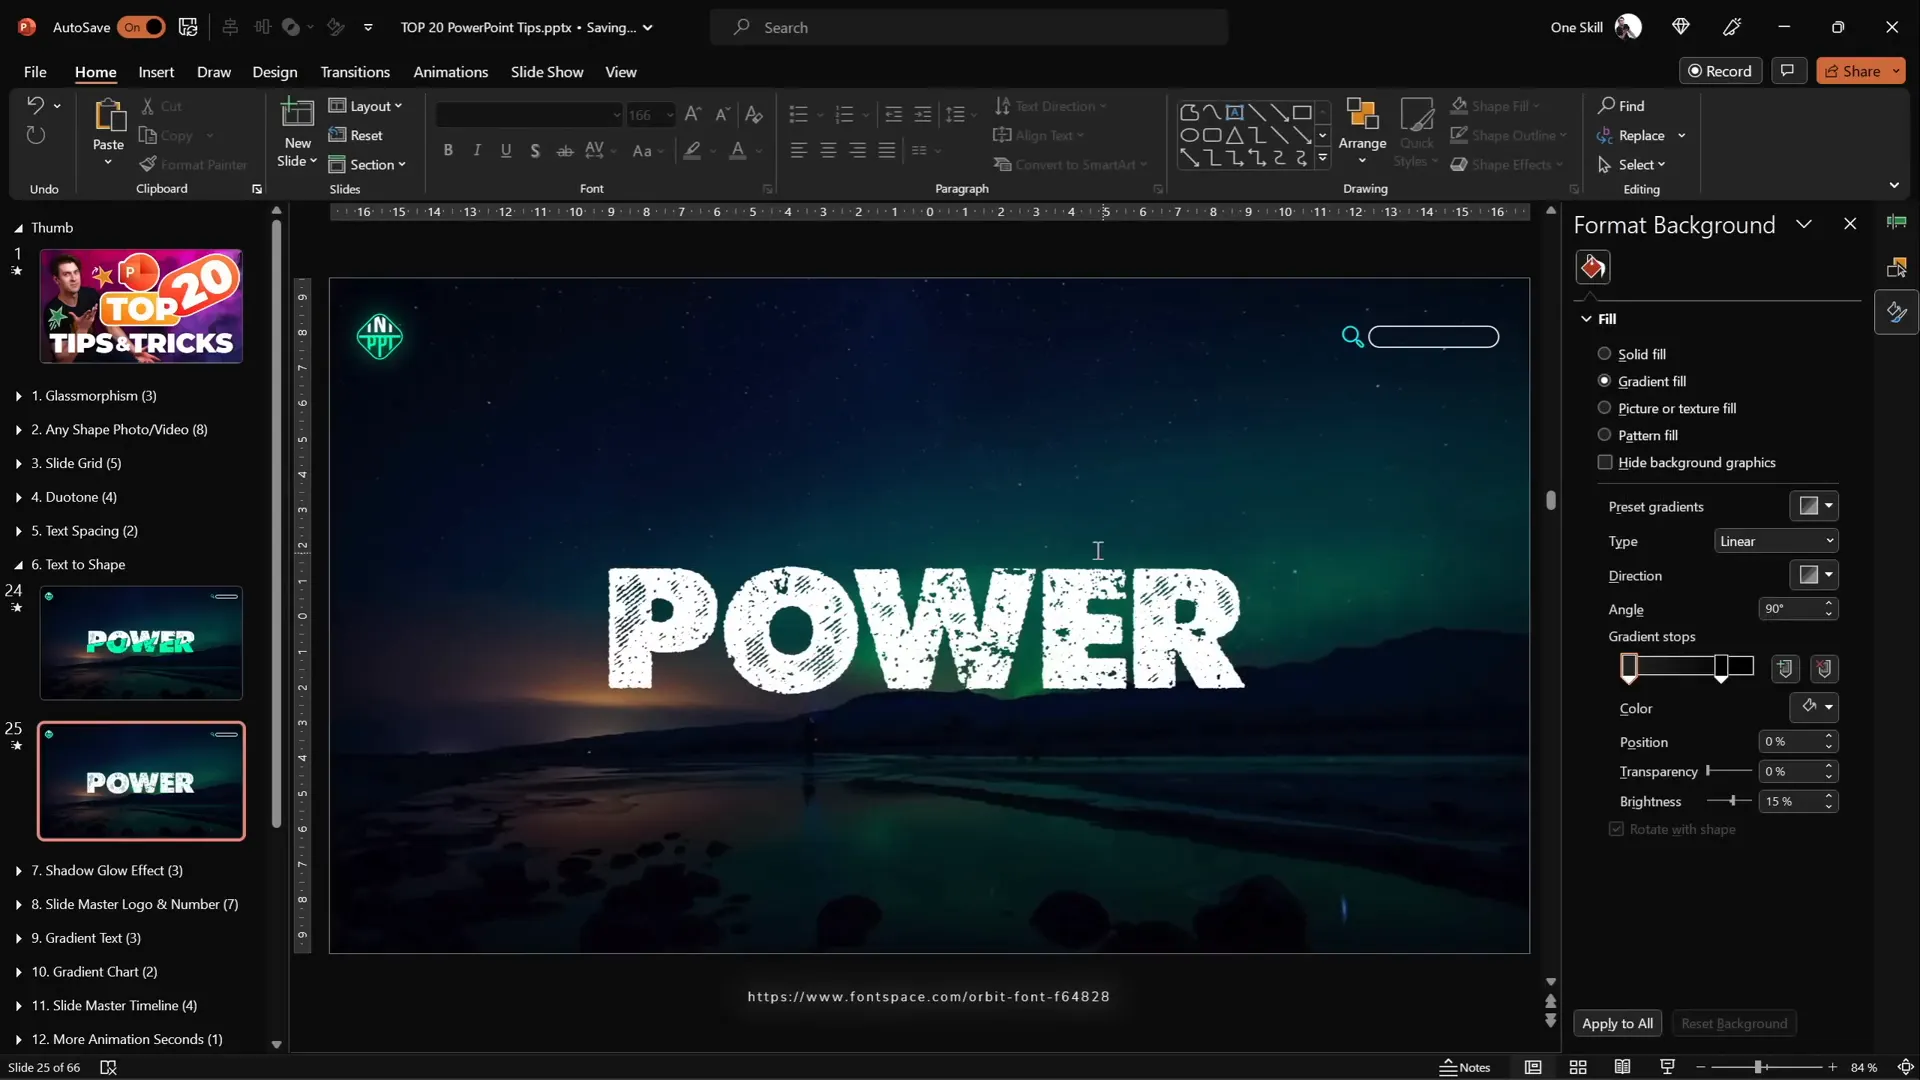
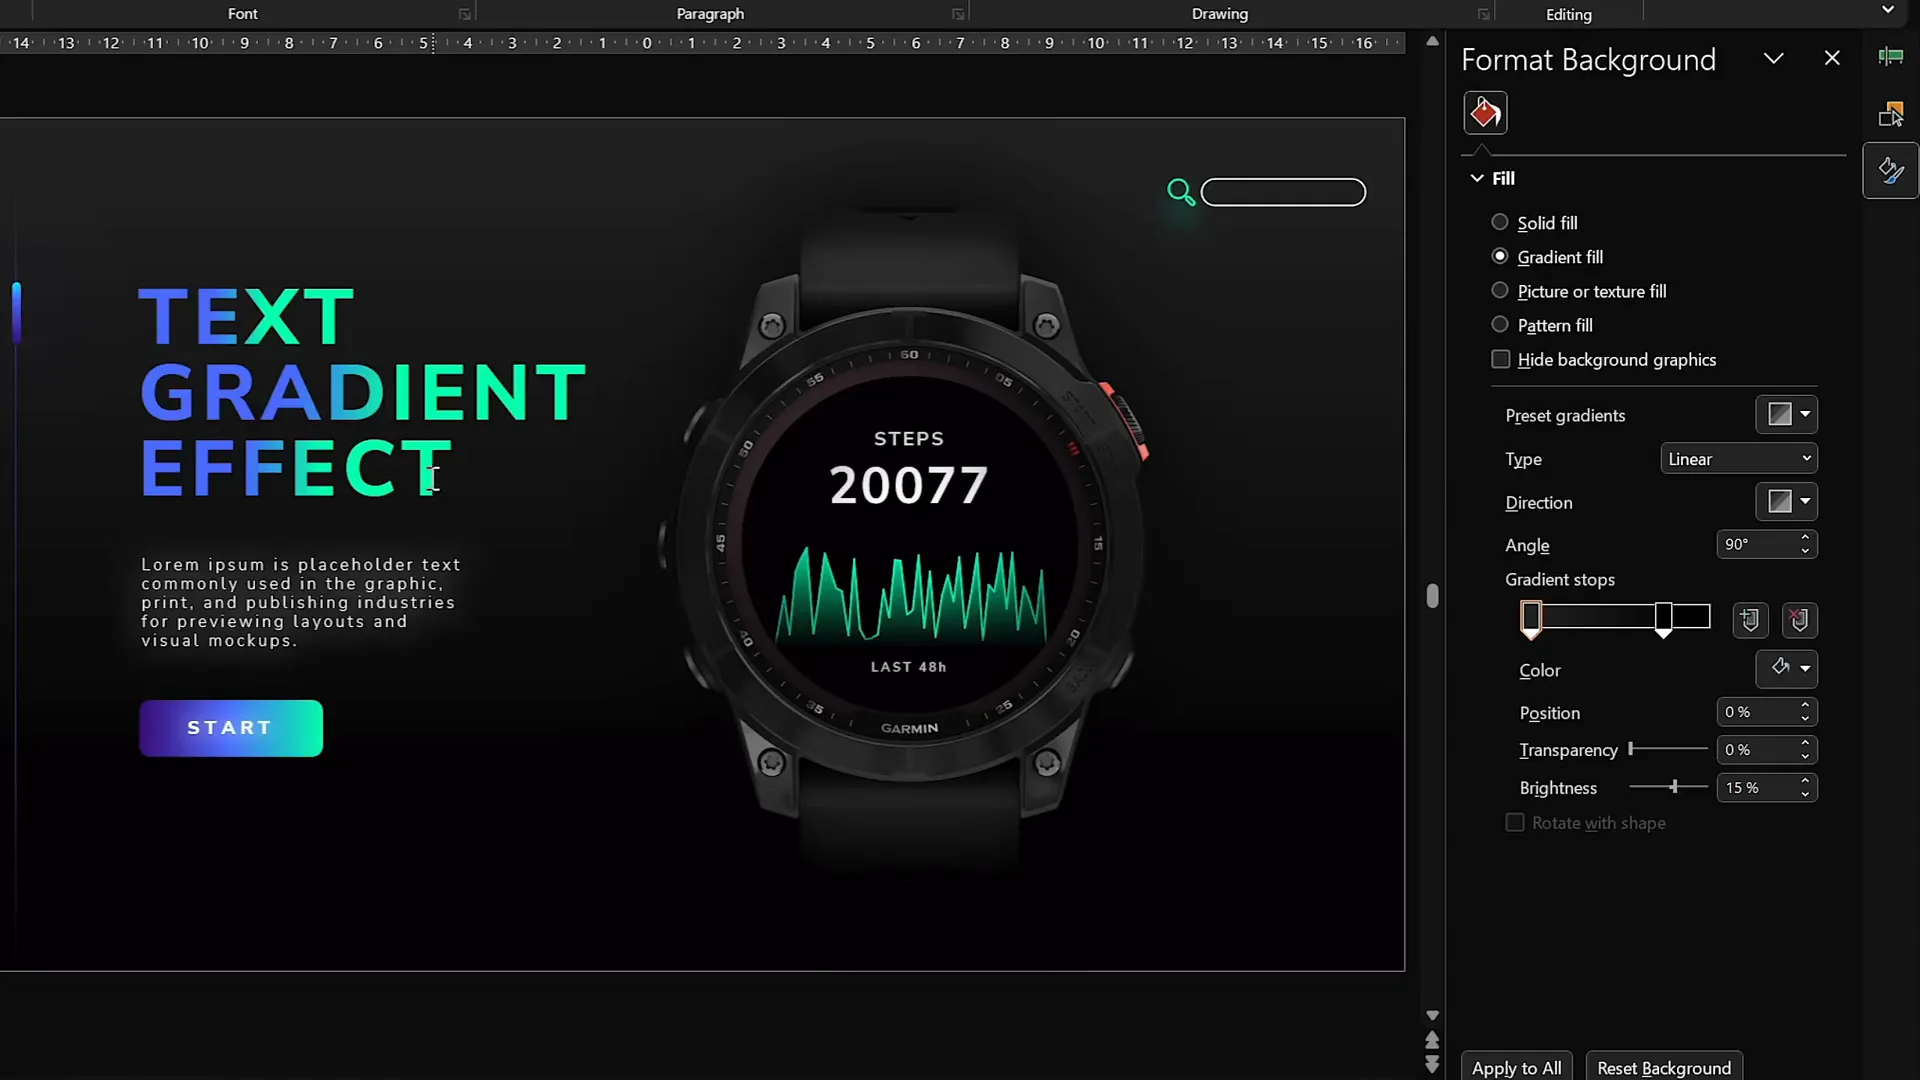
Tip 9: Add Gradient Fill to Text
Gradient text adds a modern and eye-catching effect to your slide titles or key words.
How to apply gradient fill to text:
- Select the text.
- Go to Text Fill > Gradient Fill.
- Add multiple color stops and adjust their positions for the desired gradient.
- Optionally, keep one word white and add a white glow shadow to make it stand out.
- Play with transparency stops to create fade effects.
This technique can add subtle or bold flair depending on your color choices and opacity adjustments.
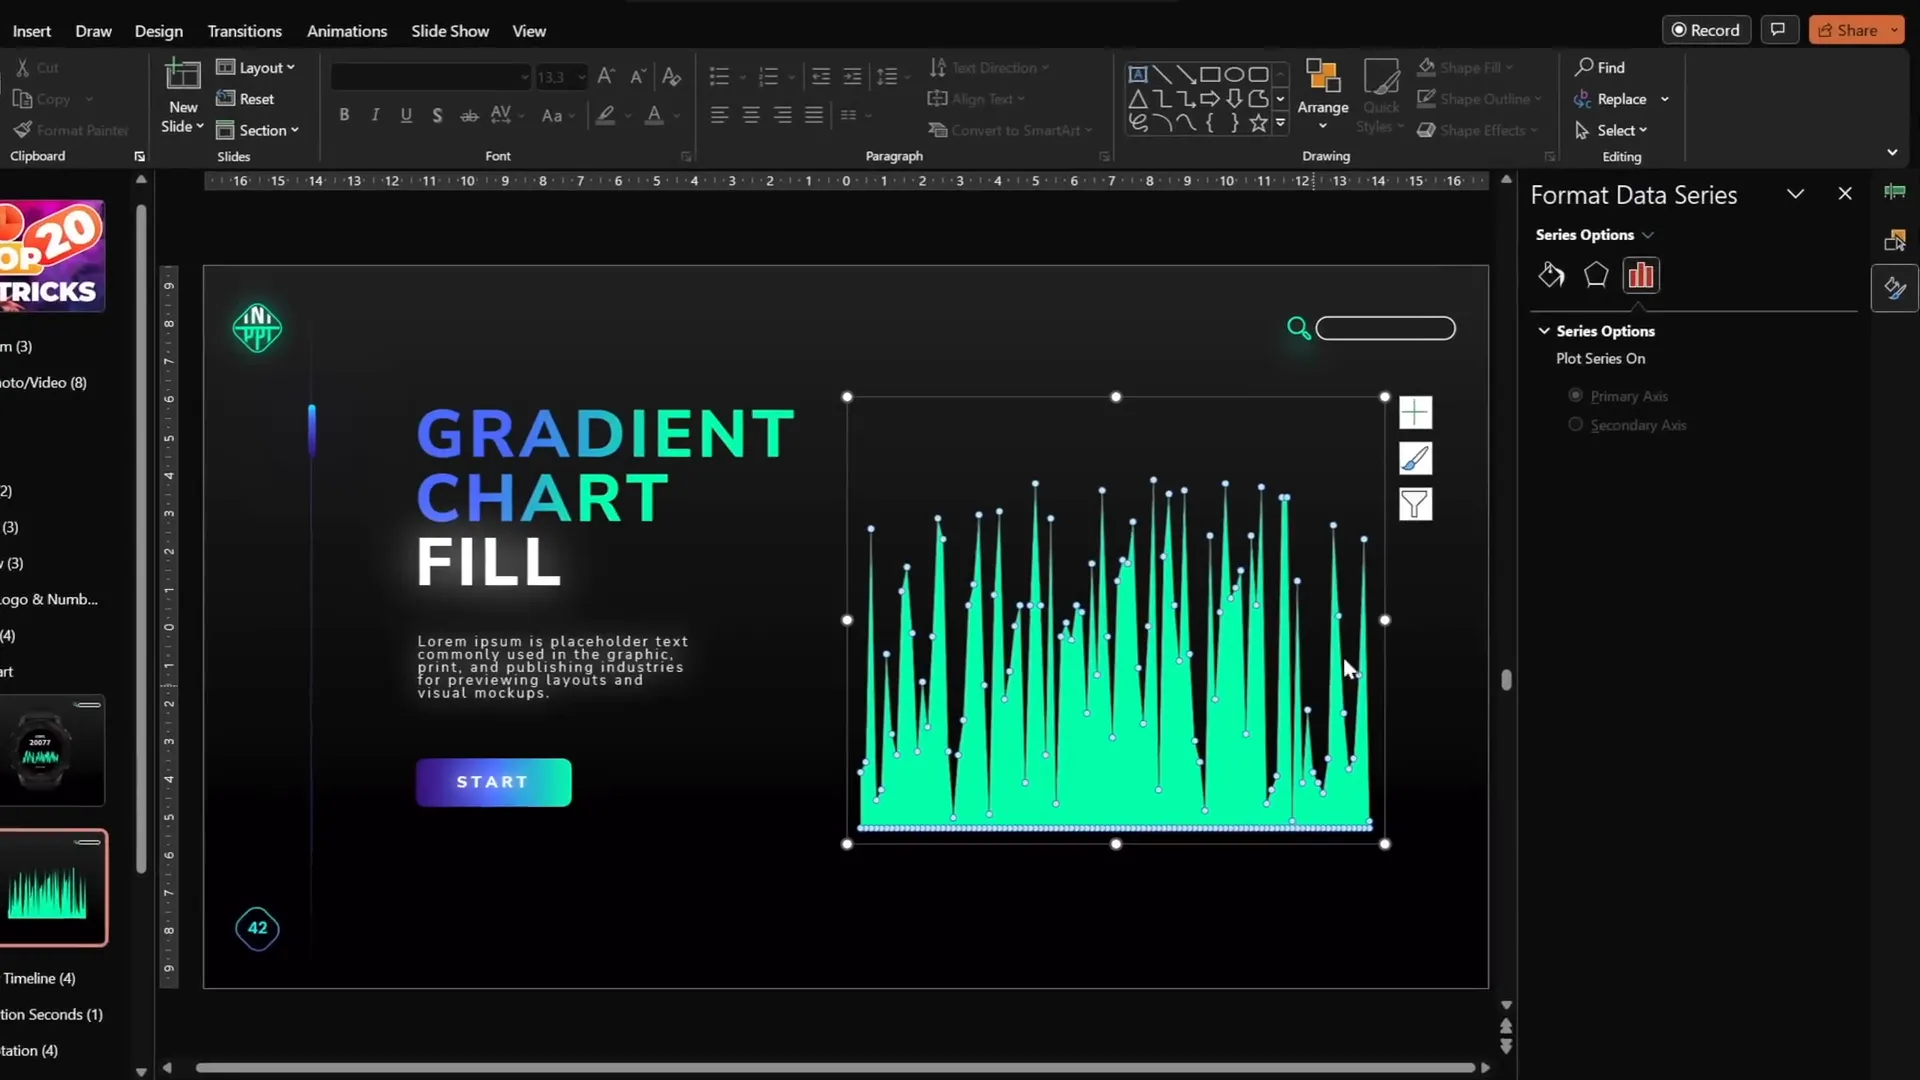
Tip 10: Create Modern Gradient Charts
PowerPoint’s charts can be enhanced with gradient fills to look more contemporary and visually appealing.
Steps to create a gradient-filled area chart:
- Insert an Area Chart.
- Resize and clean up the chart by removing unnecessary elements (title, axes, gridlines).
- Edit data: Keep only one data series, generate random numbers using the formula
=RANDBETWEEN(1,100)for dynamic data. - Select the chart series and apply a gradient fill with one color fully opaque and another fully transparent.
- Add a gradient outline line with similar transparency settings.
This approach gives you sleek, modern charts that are easy to update and customize.
Tip 11: Animate Objects in the Slide Master
Animations can be added not only on normal slides but also in the Slide Master, creating repeatable animations across multiple slides.
Why use Slide Master animations?
- Animations added here play on all slides using that layout.
- You get two animation timelines: one for Slide Master and one for normal slides.
- This is great for persistent effects like a playback icon or decorative animations.
Example: Adding an animated fox image that moves across slides using a custom layout in Slide Master.
How to add animations in Slide Master:
- Go to View > Slide Master.
- Insert and animate objects as usual.
- Exit Slide Master.
- Apply the layout with animations to slides to see the effect.

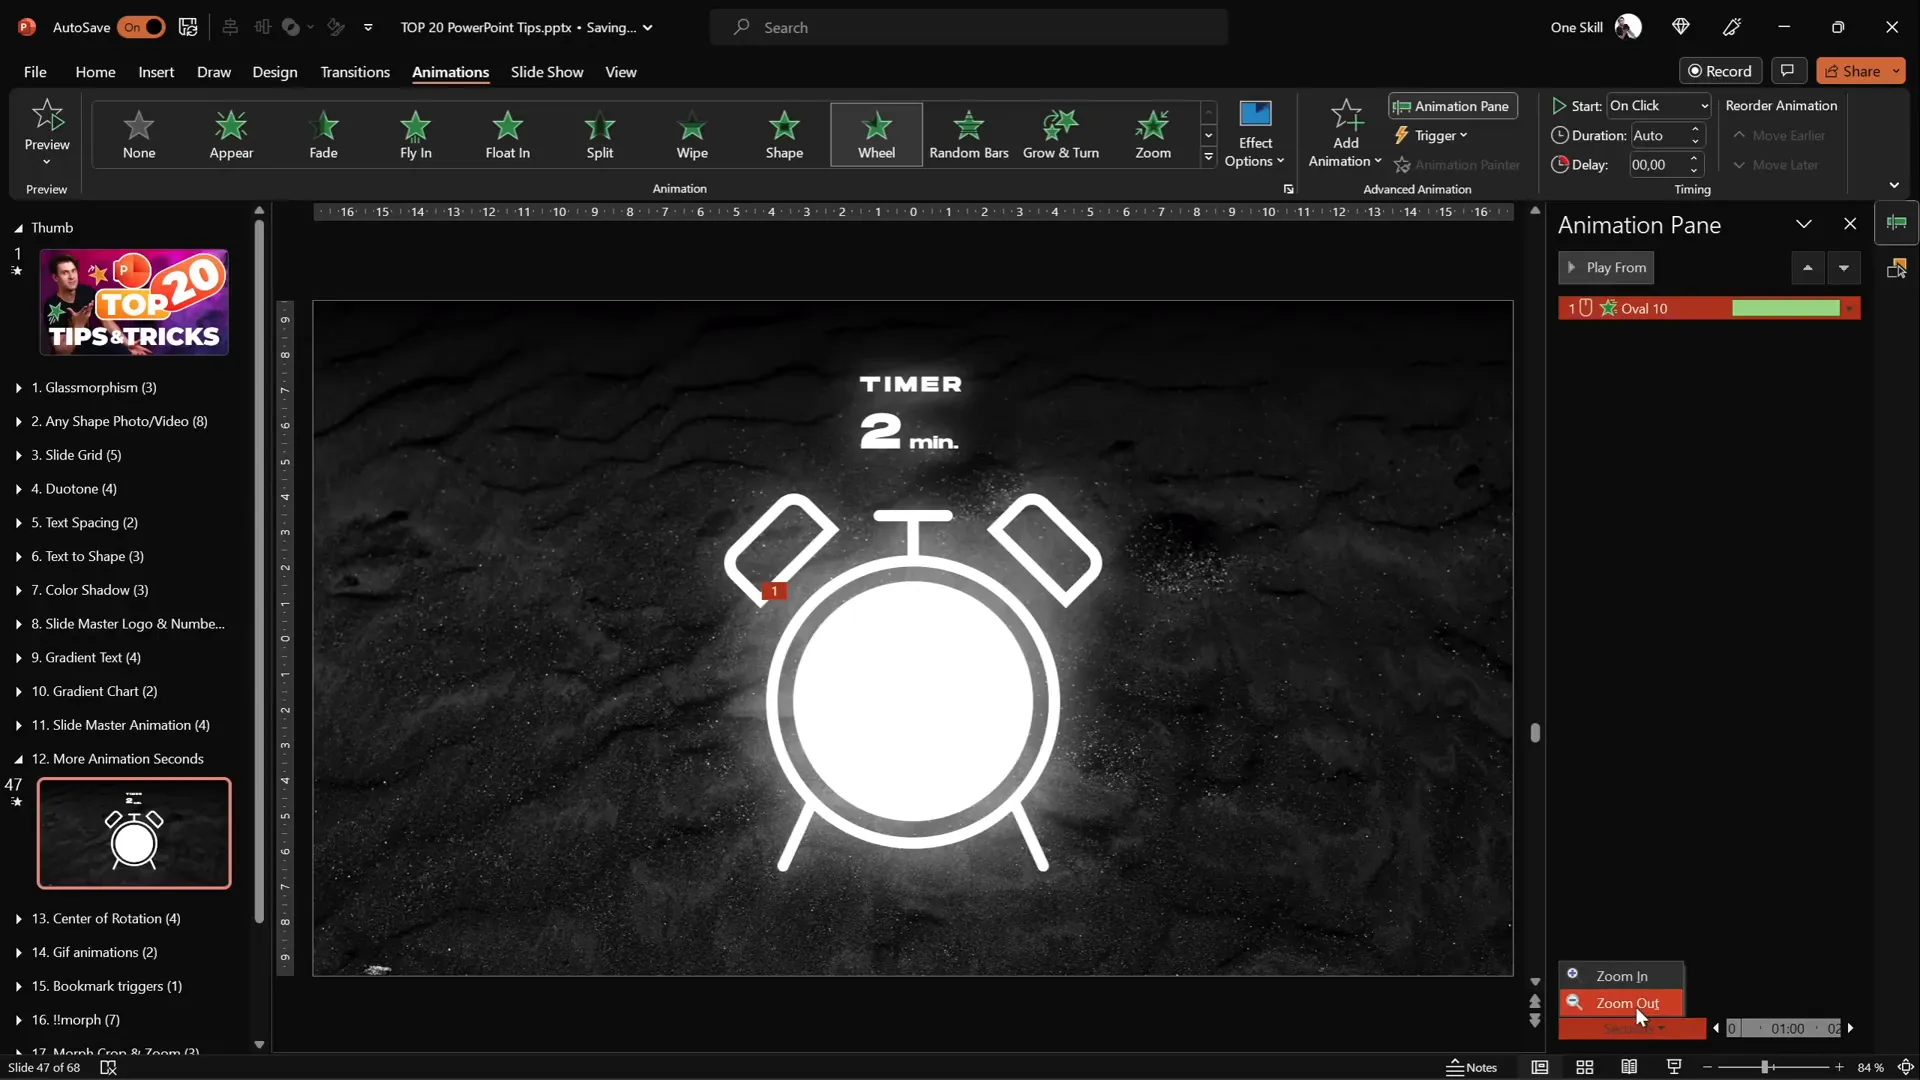
Tip 12: Extend Animation Duration Beyond Limits
PowerPoint’s animation duration input limits you to 59 seconds by default, but you can extend animations beyond this limit.
How to create long animations (e.g., a 2-minute timer):
- Apply the animation (e.g., wheel spin) to the object.
- Double-click the animation in the Animation Pane to open settings.
- Under the Timing tab, manually enter the desired duration in seconds (e.g., 120 seconds).
- Click OK; the duration field will show “Auto” but the animation length will be as specified.
This allows smooth long-duration animations like timers or progress indicators.
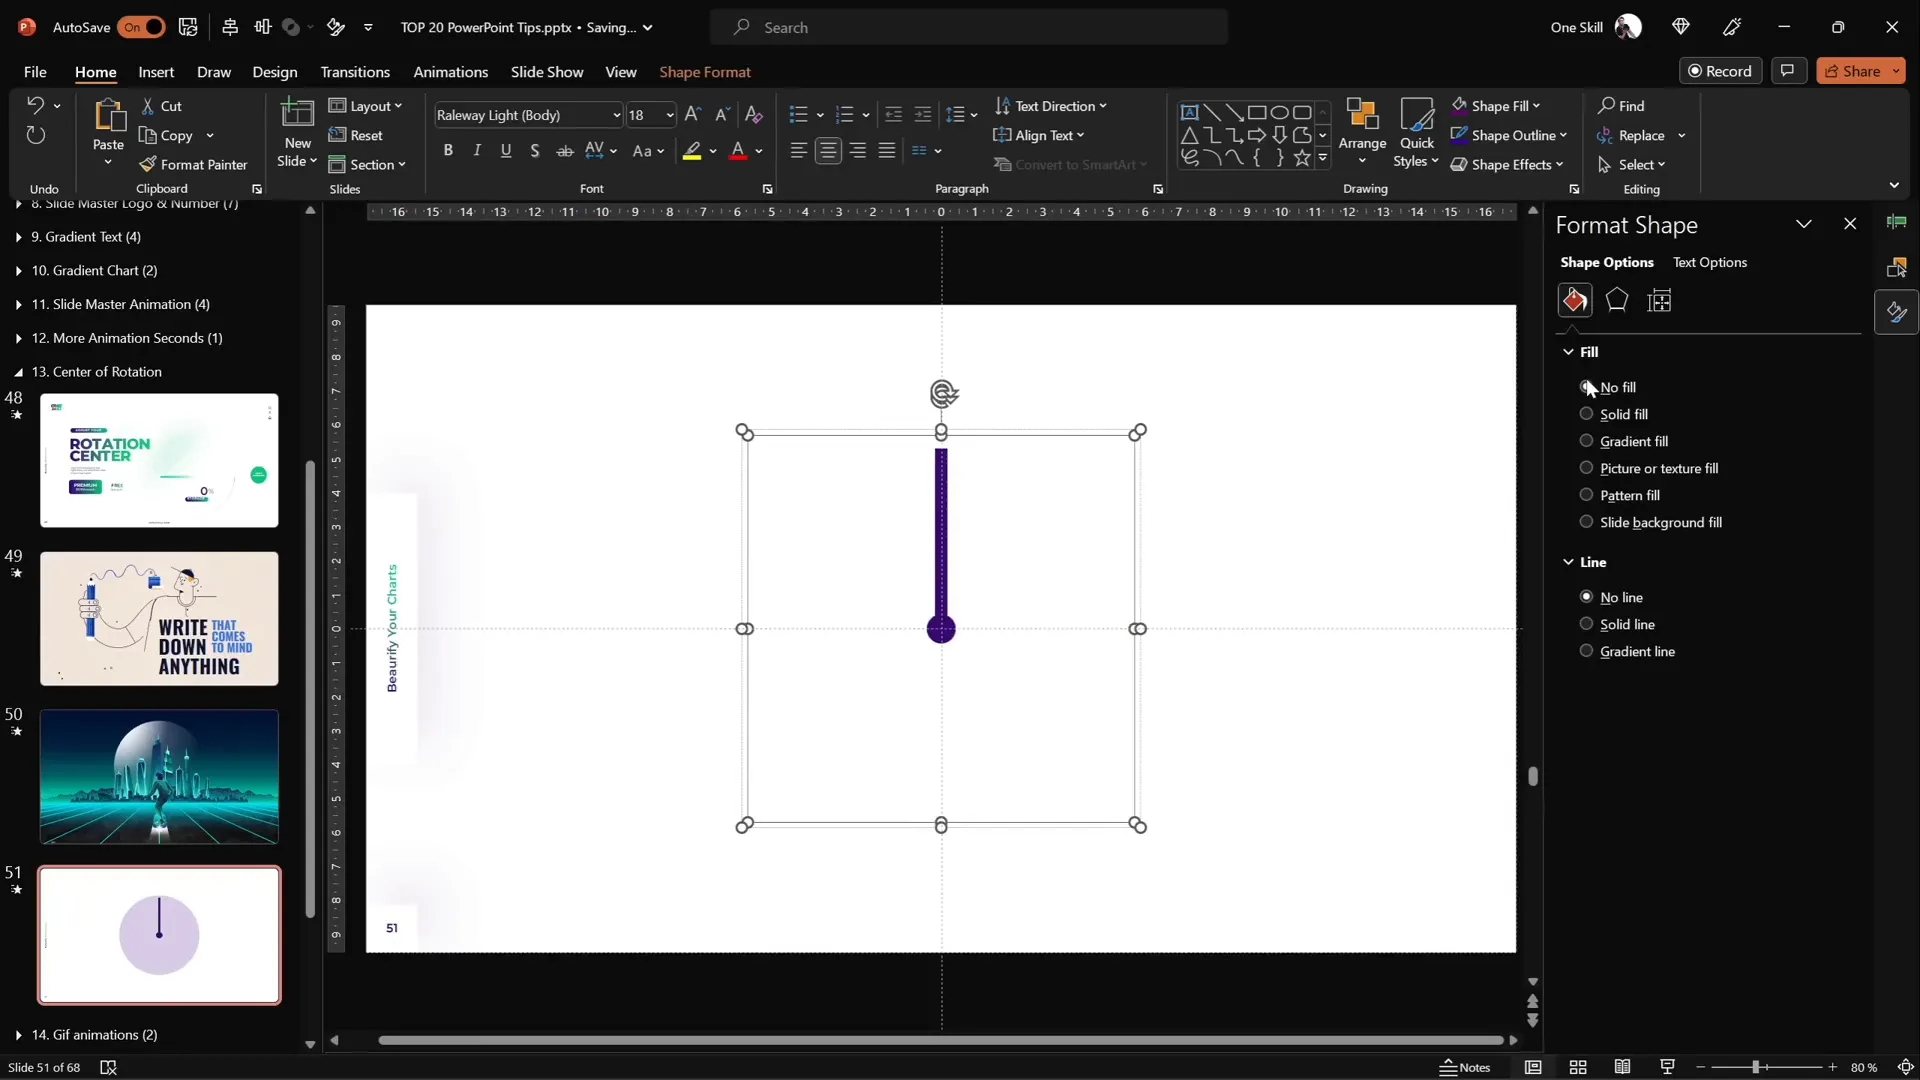
Tip 13: Customize Rotation Centers for Animations
By default, objects rotate around their center point, but sometimes you want to rotate around a custom pivot point (e.g., a shoulder joint for an arm).
Steps to create a custom rotation center:
- Select the objects to rotate and group them.
- Insert a large shape (e.g., a big circle) behind the objects, aligned so the desired pivot is the center of the big shape.
- Select all shapes, including the big shape, and group them.
- Remove the fill of the large shape to make it invisible.
- Now when you rotate the group, it will pivot around the custom point.
This technique is essential for realistic rotation animations.
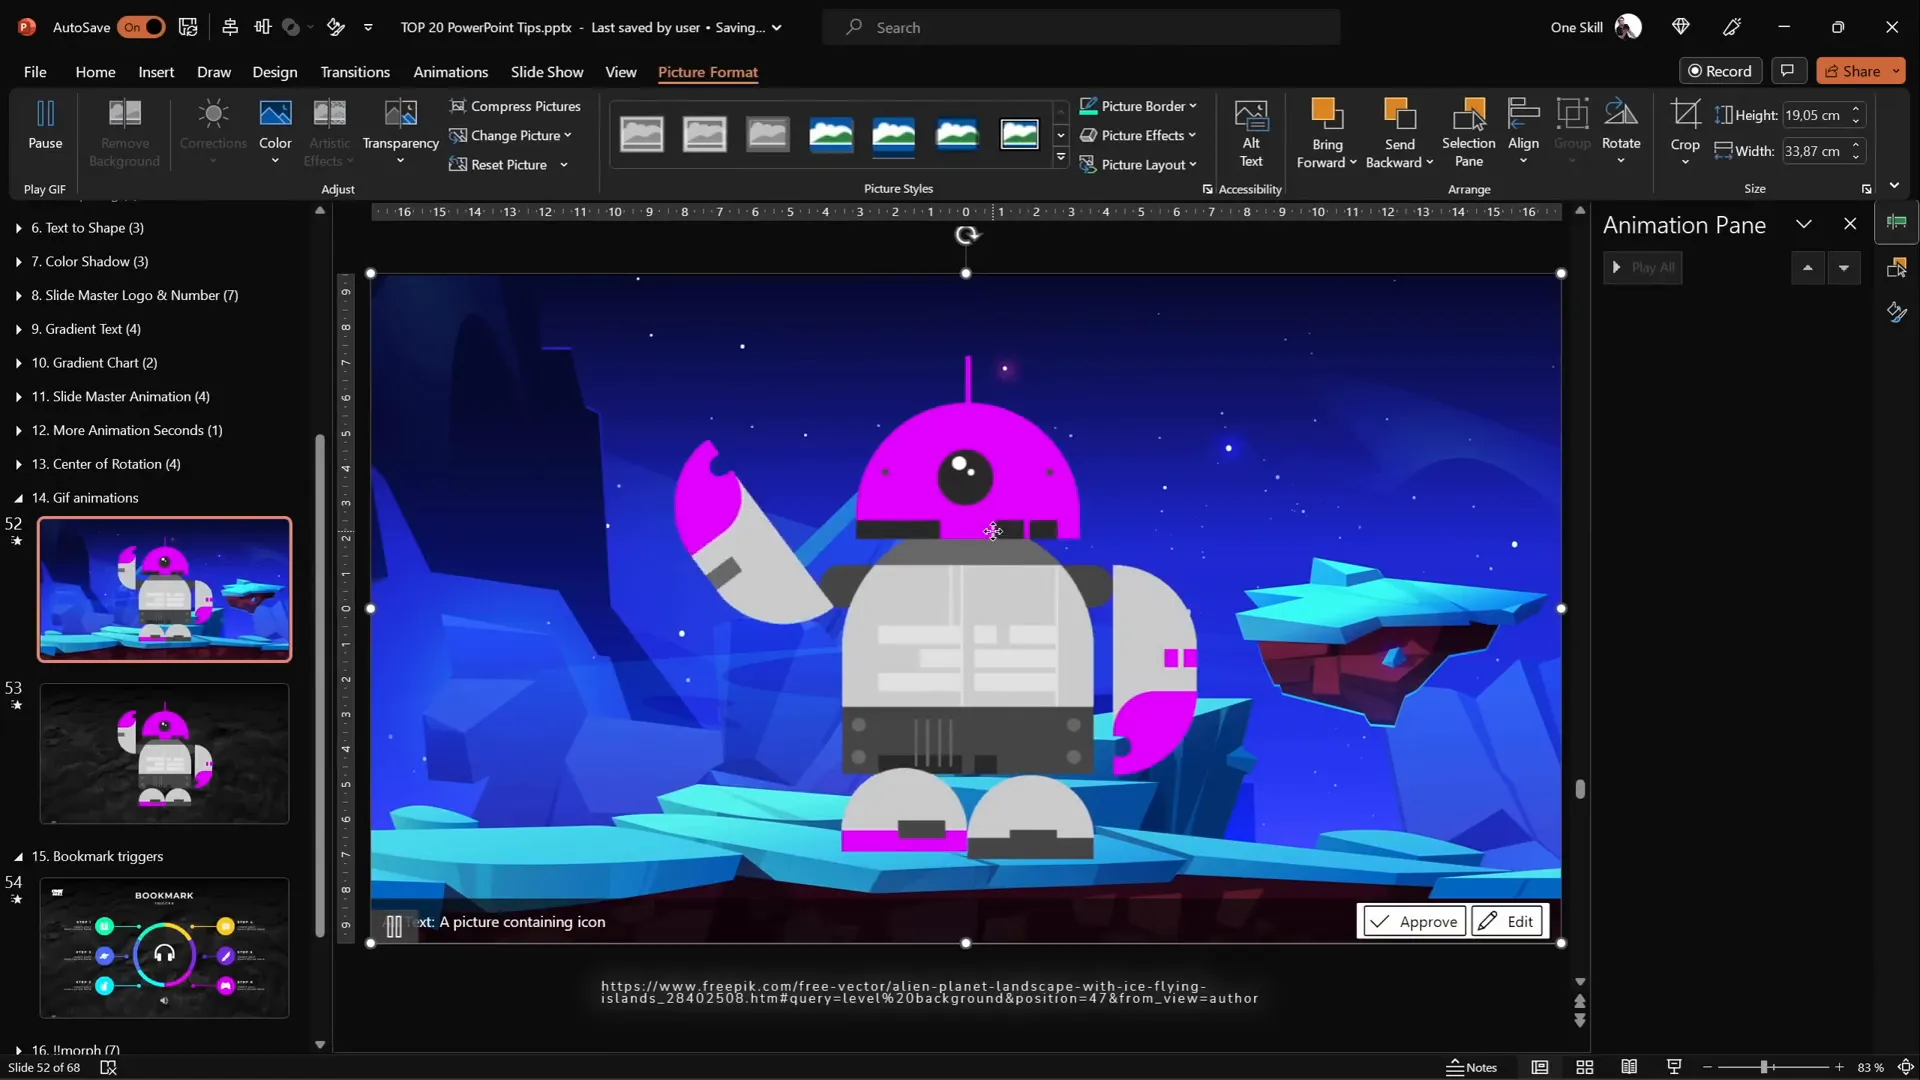
Tip 14: Combine GIFs with PowerPoint Animations
Complex animations can be hard to create using PowerPoint alone. Combining GIF animations with PowerPoint motions can create dynamic effects.
Example: A robot with waving arms and moving legs animated using GIFs and PowerPoint animations.
How to do it:
- Find or create a GIF with desired animation.
- Insert the GIF into your slide.
- Add PowerPoint animations (e.g., motion paths) to the GIF itself for additional movement.
- Use Convert to Shape and grouping to manipulate parts if needed.
- Export slides as animated GIFs using PowerPoint’s export feature for sharing.
Note: Ensure your slide transition is set to None to keep GIF animations smooth.
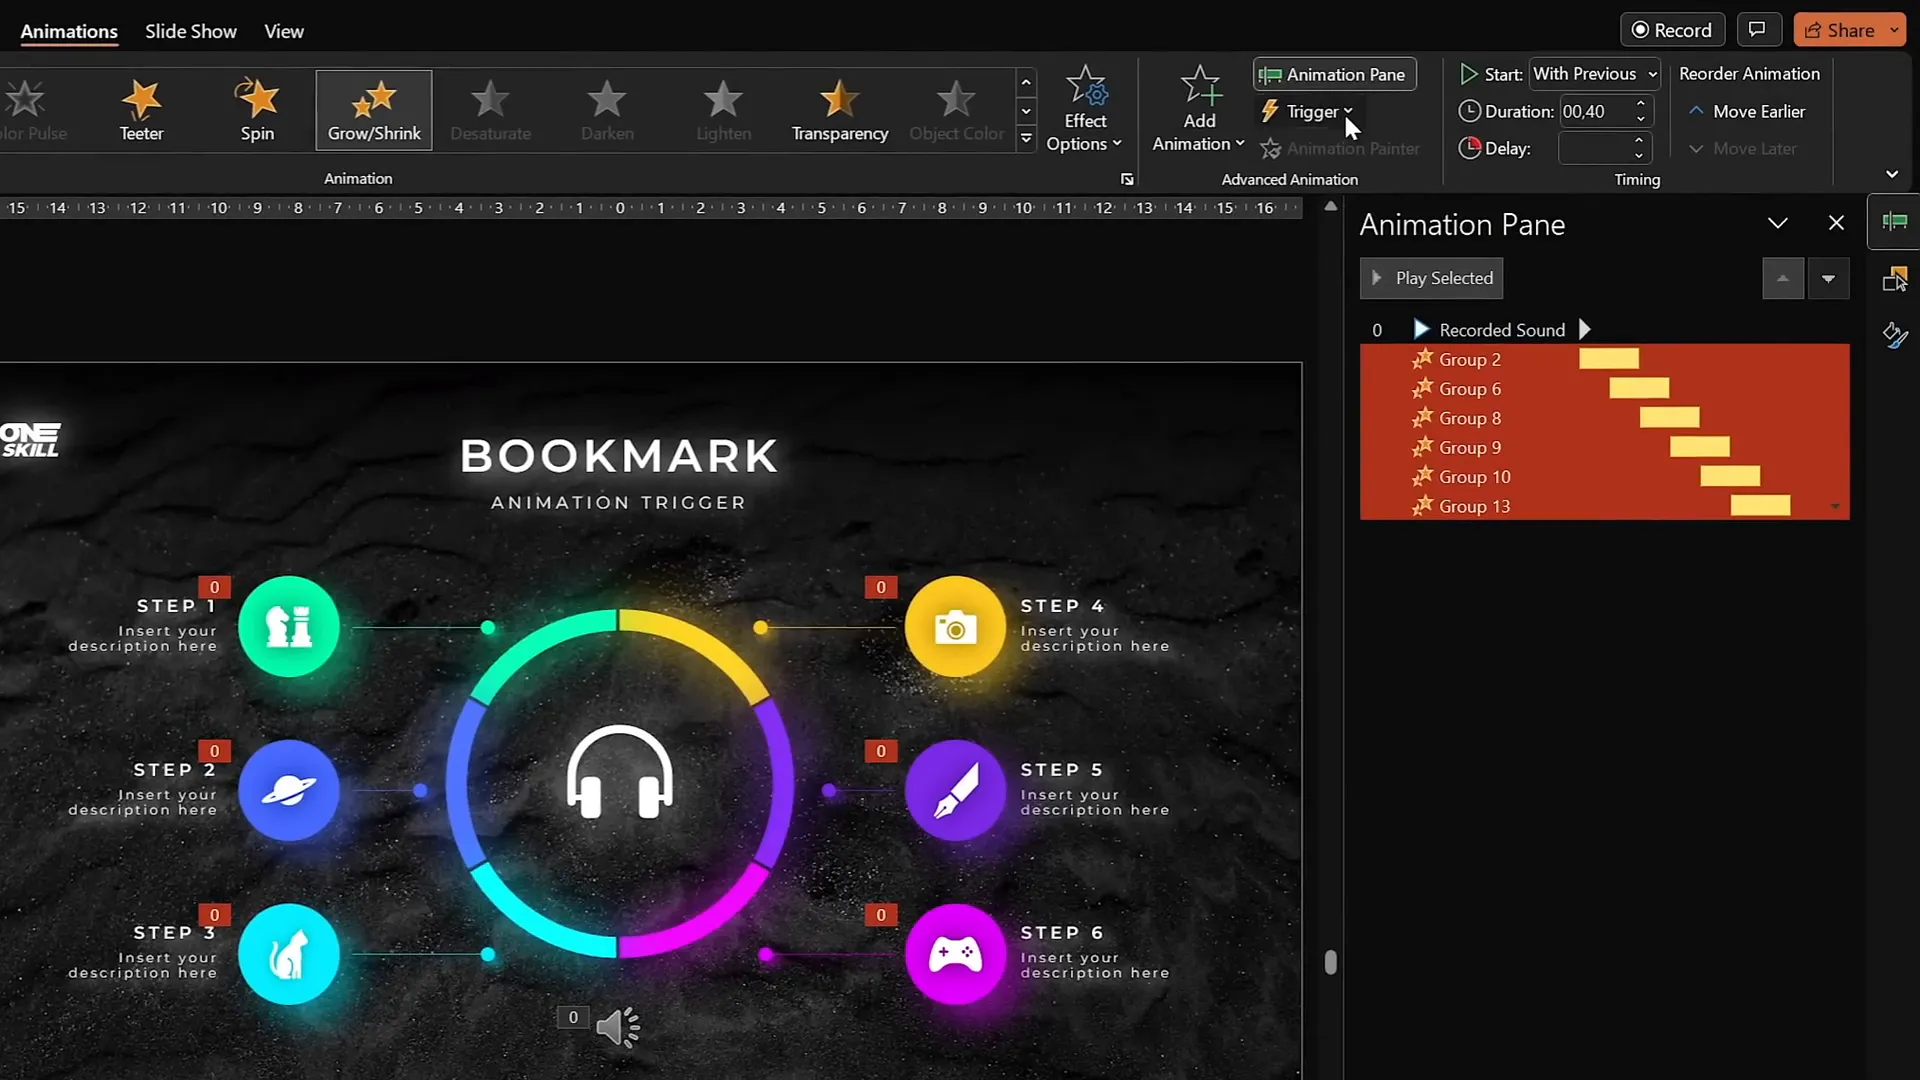
Tip 15: Loop Multiple Animations Using Bookmark Triggers
Bookmark triggers are powerful for looping animation sequences in PowerPoint, especially when animations have delays.
How to loop animations with bookmark triggers:
- Apply animations to objects that you want to loop (e.g., pulsing bubbles).
- Record a silent audio clip slightly longer than the total animation duration.
- Insert the audio clip and set it to Play Automatically and loop until stopped.
- Add a bookmark to the audio at the start (Add Bookmark button).
- Set each animation’s trigger to start On Bookmark at the bookmark you added.
- When the audio loops, it triggers the animations to loop in the correct sequence.
This method ensures smooth, ordered repetition of animations without timing glitches.
Tip 16: Perfect Morph Transitions with Naming
The Morph transition in PowerPoint can create smooth animations between slides, but sometimes it fails to recognize objects for morphing.
To fix this:
- Open the Selection Pane (Arrange > Selection Pane).
- Rename the objects you want to morph with identical names, starting with double exclamation marks (e.g.,
!!phone). - Use the same naming convention on both slides for the objects.
This signals PowerPoint to treat these as the same object and perform a smooth morph transition.
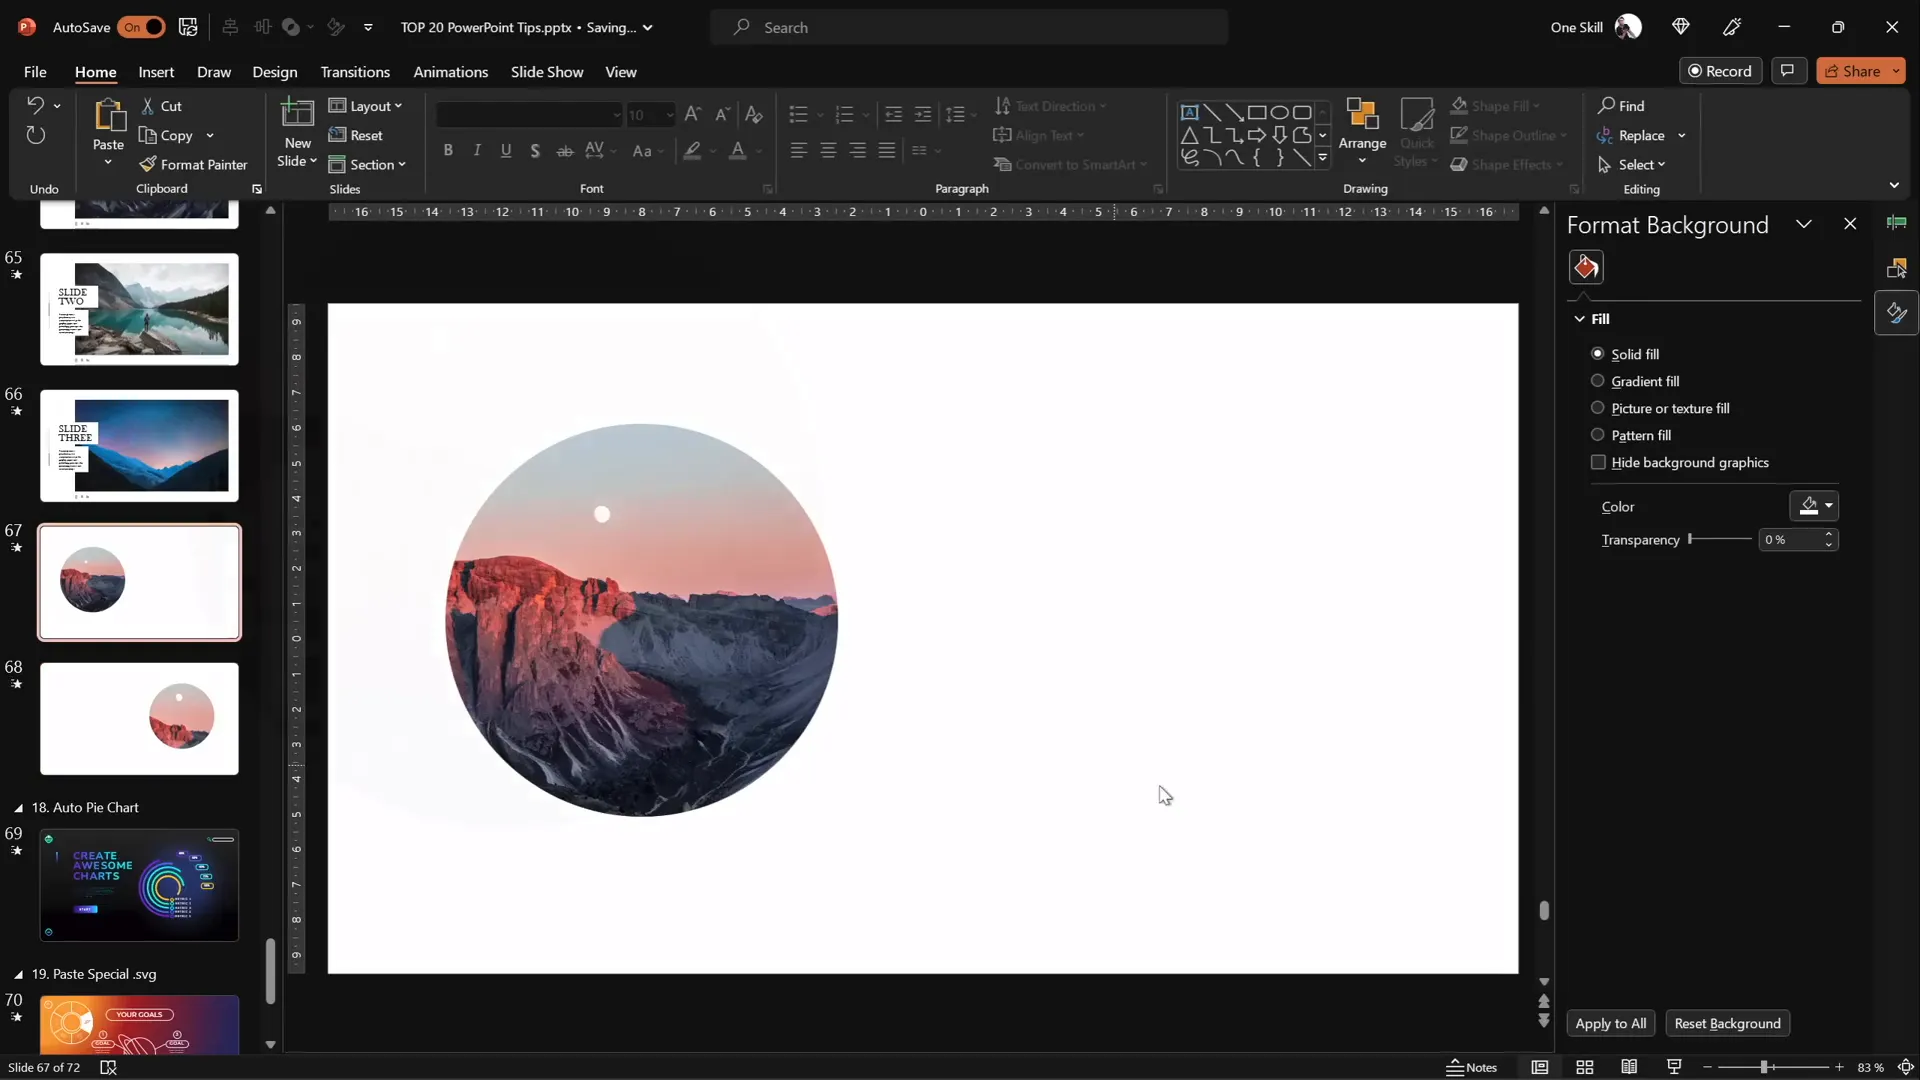
Tip 17: Animate Crop Changes with Morph
You can animate photos by combining the Morph transition with the Crop tool.
How:
- Insert a photo cropped into a shape (e.g., circle).
- Duplicate the slide and move the photo to a new position.
- On the duplicate slide, adjust the crop size or position.
- Apply the Morph transition between these slides.
This creates a smooth animation of the photo moving and zooming simultaneously.
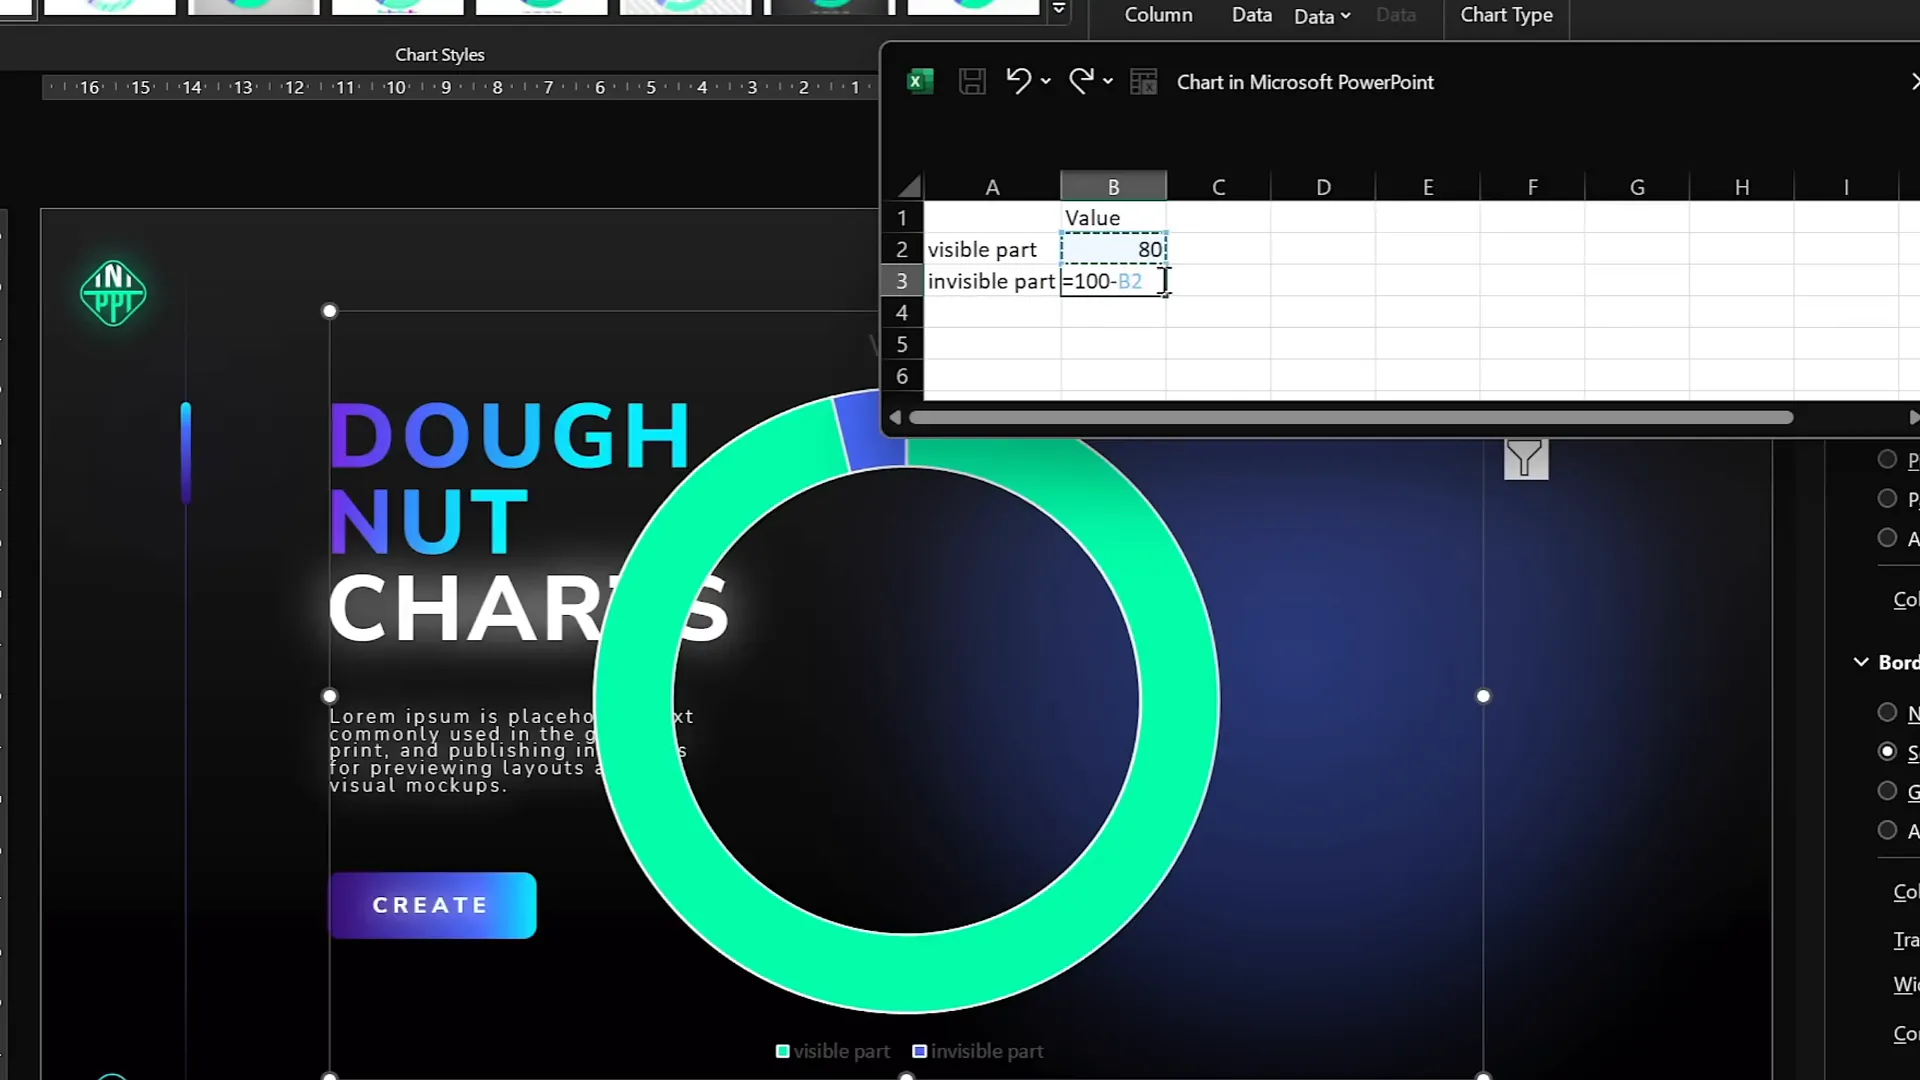
Tip 18: Create Auto-Updating Donut Charts
Donut charts can be made dynamic and easy to update using formulas in the data table.
How to create an auto-updating donut chart:
- Insert a donut chart.
- Keep only two rows: Visible Part and Invisible Part.
- Enter a value for the visible part (e.g., 80).
- For the invisible part, use the formula
=100 - [visible part cell]so it automatically updates. - Adjust styles and add shadows for visual appeal.
This method ensures your donut chart always sums to 100 and updates automatically when you change the visible part.
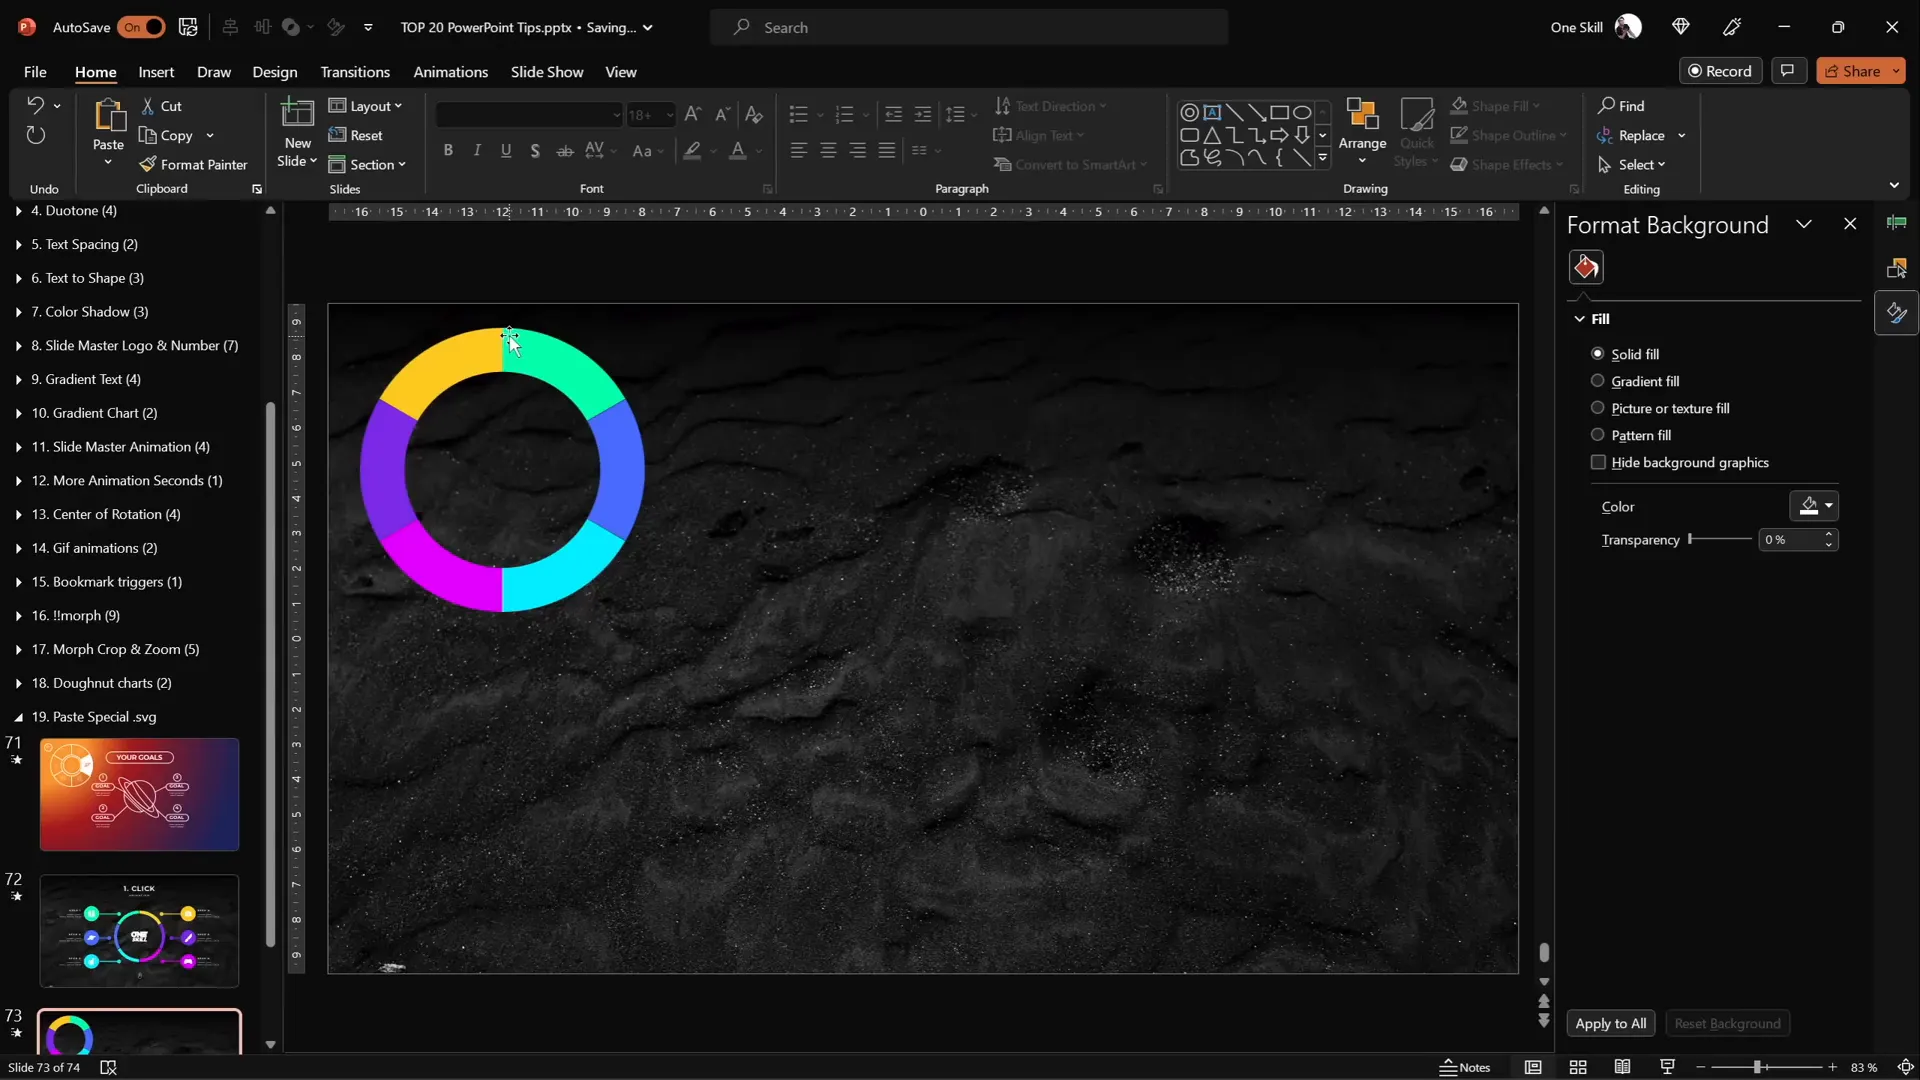
Tip 19: Divide Donut Charts into Equal Parts
For UI designs or infographics, dividing a donut chart into equal segments is often necessary.
How to do it:
- Insert a donut chart.
- Set the data rows equal to the number of desired parts (e.g., 6 rows for 6 parts).
- Set all values equal (e.g., 10 each) so the chart divides evenly.
- Remove chart titles and legends for a clean look.
- Adjust hole size as needed.
- To edit individual parts, convert the chart to SVG via Paste Special.
- Convert SVG to shapes and ungroup to access parts.
- For gaps between parts, subtract narrow rectangles from the donut shape and fragment with a square to isolate parts.
Tip 20: Essential PowerPoint Shortcuts
PowerPoint shortcuts save time and improve workflow efficiency. Here are some favorites:
| Shortcut | Function | Description |
|---|---|---|
| Ctrl + A | Select All | Selects all objects on the slide. Hold Shift and click to deselect specific items. |
| Ctrl + G | Group | Groups selected objects for easier moving and formatting. |
| Ctrl + C / Ctrl + V | Copy / Paste | Copy and paste objects. |
| Ctrl + Drag | Duplicate | Hold Ctrl and drag an object to quickly duplicate it. |
| Ctrl + Shift + Drag | Duplicate in Straight Line | Hold Ctrl + Shift and drag to duplicate an object along a straight line. |
| Ctrl + Shift + Resize | Resize from Center | Hold Ctrl + Shift to resize shapes proportionally from the center. |
| Ctrl + Shift + C / Ctrl + Shift + V | Copy / Paste Formatting | Copy and paste styles between objects. |
| Ctrl + Shift + . (period) | Increase Font Size | Quickly increase font size in text boxes. |

Frequently Asked Questions (FAQ)
Q1: What is the glassmorphic effect and why use it in PowerPoint?
A: Glassmorphism is a design trend that mimics frosted glass by blurring the background behind transparent shapes. It adds a modern, elegant look to your slides and helps highlight content without overwhelming the background.
Q2: Can I insert videos into custom shapes in PowerPoint?
A: Yes! By placing your video behind a custom shape and using the Merge Shapes > Intersect function, you can clip videos to any shape, making your slides more dynamic and creative.
Q3: Why should I use slide grids?
A: Slide grids help maintain consistent alignment, balance, and spacing throughout your presentation. This results in a professional and polished appearance that’s easy for your audience to follow.
Q4: How do bookmark triggers help with animations?
A: Bookmark triggers linked to audio clips let you loop complex animation sequences in a controlled order, even if the animations have delays. This technique makes looping animations smoother and more synchronized.
Q5: What is the benefit of adding animations in the Slide Master?
A: Animations added in Slide Master apply across all slides using that layout, saving time and ensuring consistency for repeating animated elements like logos or progress indicators.
Conclusion
Mastering the tools in PowerPoint can dramatically improve your presentation quality and efficiency. From design effects like glassmorphism and duotone to advanced animation techniques like bookmark triggers and slide master animations, these 20 tips cover a wide range of powerful tricks to elevate your slides.
By incorporating these tips into your workflow, you’ll create presentations that look polished, professional, and engaging—whether it’s for business, education, or creative projects.
Ready to take your presentations further? Explore these tips, experiment with the tools, and watch your slides transform from basic to brilliant.
Don’t forget to download the tutorial slides linked in the original video description to practice these techniques hands-on.
Thank you for reading, and happy presenting!


