
Welcome to an exciting journey into crafting stunning and interactive PowerPoint presentations! This comprehensive guide will walk you through the step-by-step process of creating a fully functional and clickable interactive menu using animated icons, hyperlinks, and the powerful morph transition in PowerPoint. Inspired by a popular request to create a PowerPoint presentation about India, this tutorial is designed to empower you to enhance your slides with beautiful animations and intuitive navigation.
Whether you are a seasoned PowerPoint user or just starting out, you will find valuable tips, tricks, and techniques to elevate your presentations to the next level. Ready to dive in? Let’s get started!
Table of Contents
- Table of Contents
- Preparing Your Slide Background
- Creating a Photo Mask with Blur Effect
- Designing Clickable Circles for Navigation
- Adding an Arrow Indicator for Active Sections
- Setting Up Slides and Morph Transitions
- Incorporating Animated Icons from Lordicon
- Positioning Animated and Static Icons
- Adding Content and Animations to Slides
- Final Tips and User Experience Enhancements
- Frequently Asked Questions
Table of Contents
- Preparing Your Slide Background
- Creating a Photo Mask with Blur Effect
- Designing Clickable Circles for Navigation
- Adding an Arrow Indicator for Active Sections
- Setting Up Slides and Morph Transitions
- Incorporating Animated Icons from Lordicon
- Positioning Animated and Static Icons
- Adding Content and Animations to Slides
- Final Tips and User Experience Enhancements
- Frequently Asked Questions
Preparing Your Slide Background
Every great presentation starts with a visually appealing background. For this project, we begin by setting the slide background to a dark color to create contrast and make the content stand out.
Start with a fresh blank slide in PowerPoint. Change the slide background fill to black. This choice not only looks elegant but also provides a perfect canvas for adding vibrant elements like photos, icons, and text.
By opting for a dark background, the colors in your photos and icons will pop, making your presentation more engaging and professional.
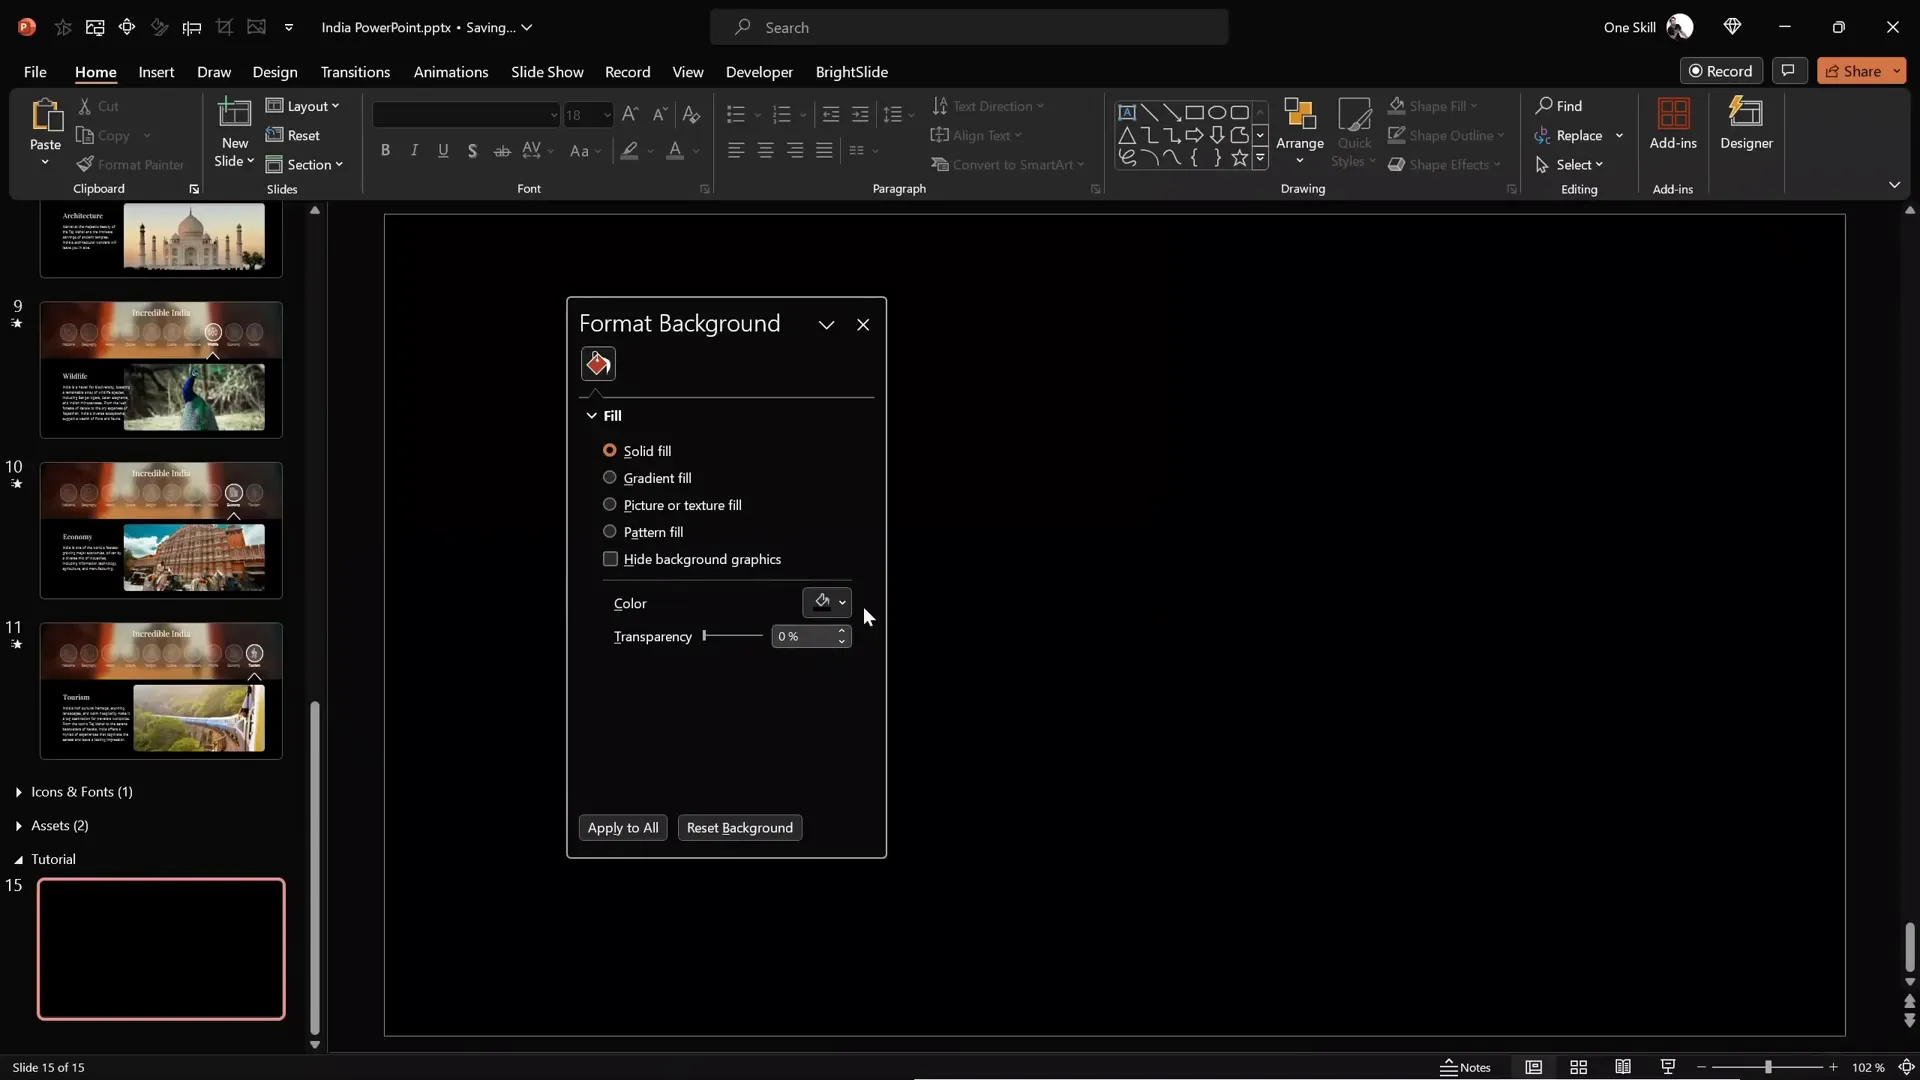
Creating a Photo Mask with Blur Effect
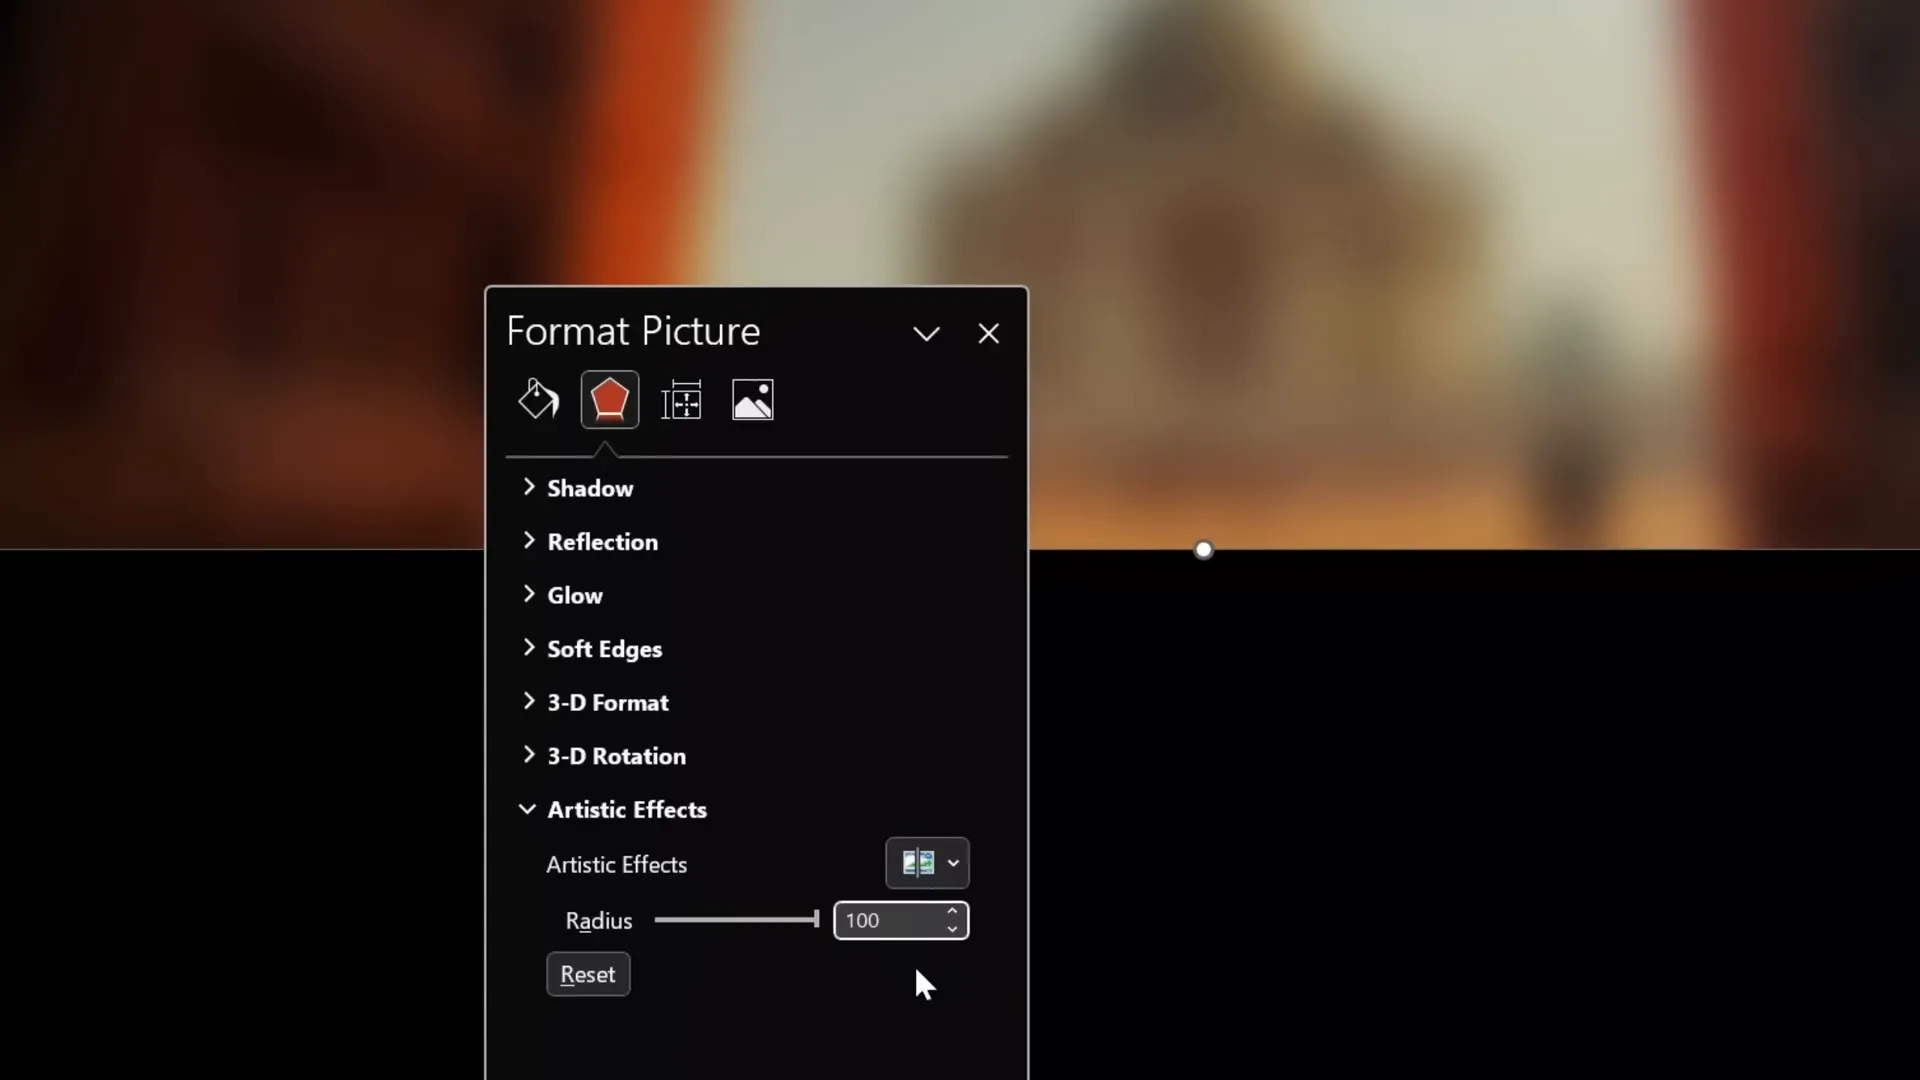
To add a stylish and modern touch, we will create a blurry photo section at the top of the slide. This technique involves using a rectangular shape as a photo mask and applying artistic effects to the photo itself.
Here’s how to do it:
- Insert a rectangle shape by navigating to Insert > Shapes > Rectangle.
- Draw the rectangle aligned to the top-left corner of the slide, ensuring it covers the entire width of the slide.
- Set the height of the rectangle to 8 centimeters.
- Find a beautiful photo to use as the background for this section. For this presentation about India, a stunning photo of the Taj Mahal works perfectly.
- Paste the photo onto the slide and send it to the back so the rectangle is visible on top.
- Select the rectangle and add transparency so the photo beneath becomes visible through the shape.
- Adjust the photo’s position by dragging it upward or downward inside the rectangle area until you are happy with the visible section.
- Select both the photo and the rectangle (hold Shift to select both), then go to Shape Format > Merge Shapes > Intersect. This crops the photo precisely to the rectangle’s shape.
- Adjust the photo’s brightness to -20% and contrast to +20% to create a muted background effect, making text easier to read.
- Apply a blur effect from the Artistic Effects menu, setting it to the maximum (100 points).
This process results in a beautiful, blurred photo mask that serves as an elegant backdrop for your slide title or introductory text, improving readability and aesthetic appeal.
The font used for text over this photo is Playfair Display, a classy serif font that complements the elegant background. You can download it from Google Fonts for free.
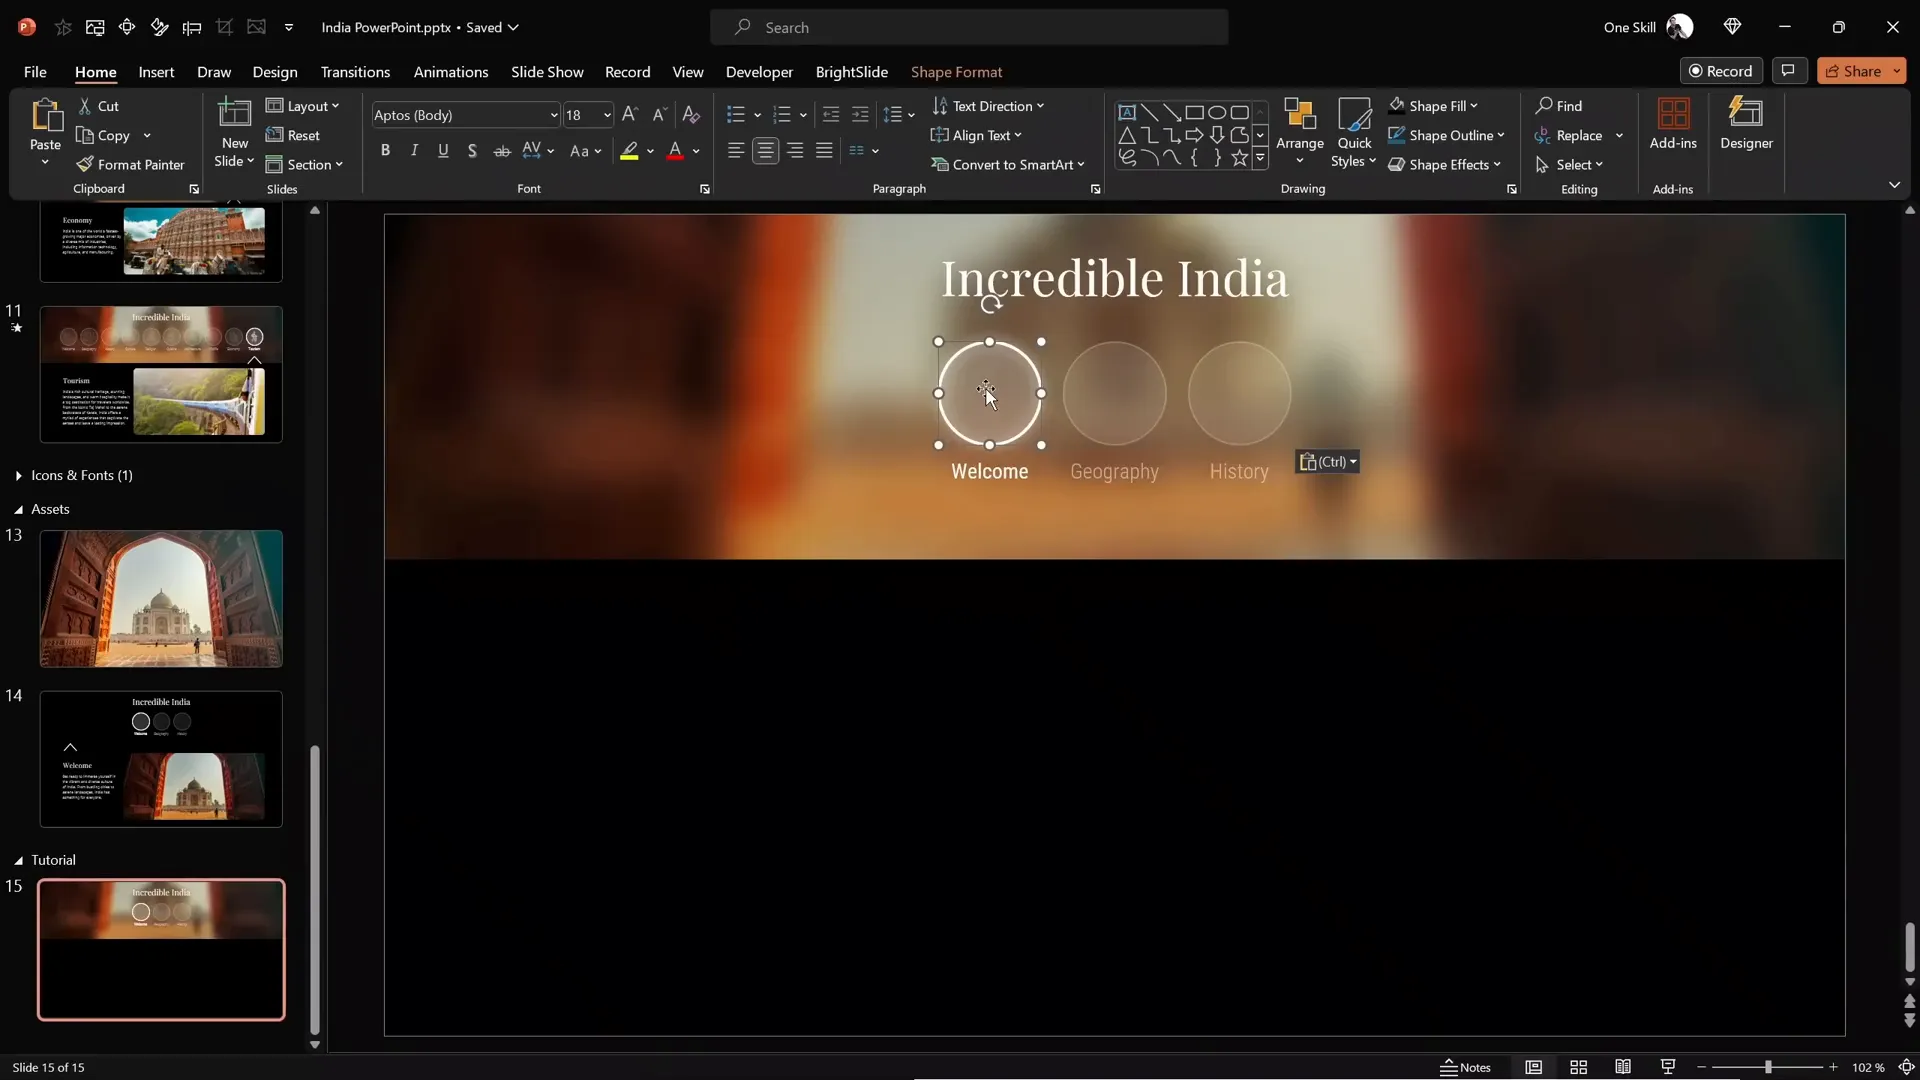
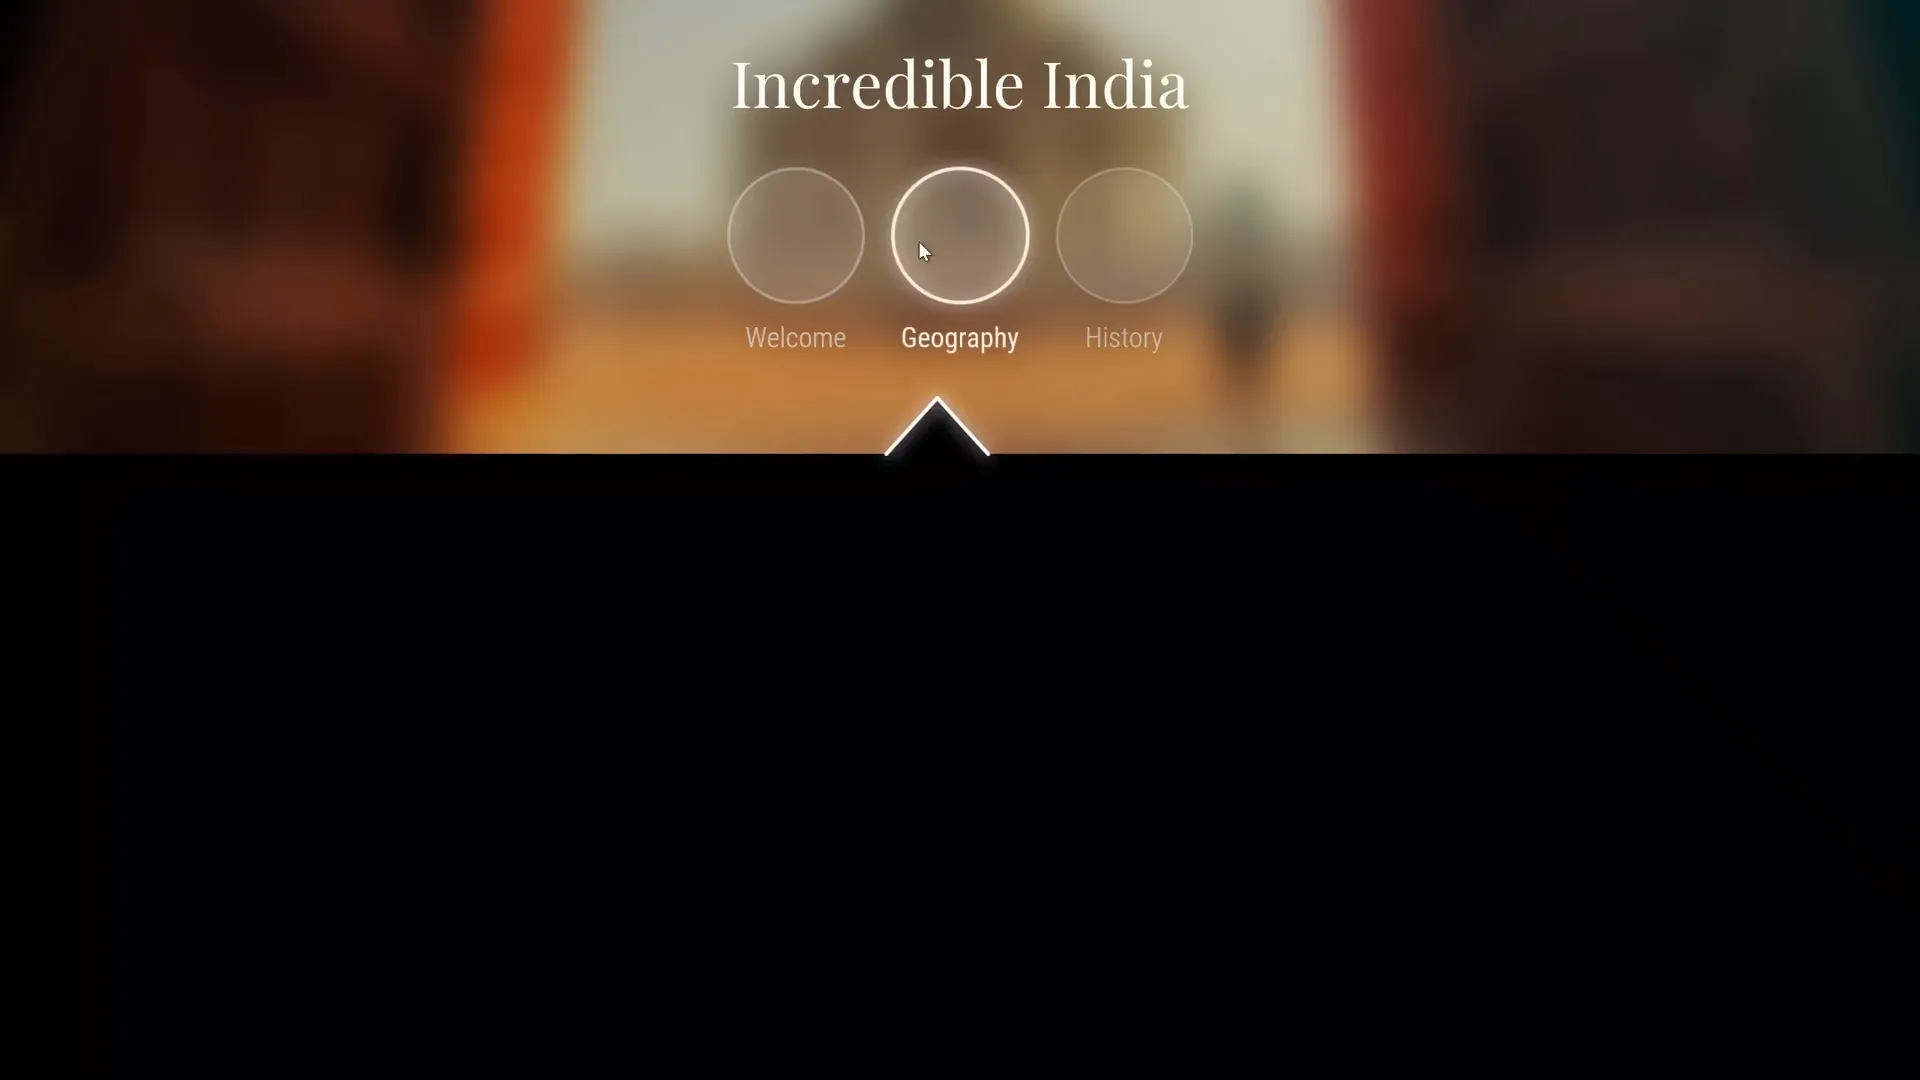
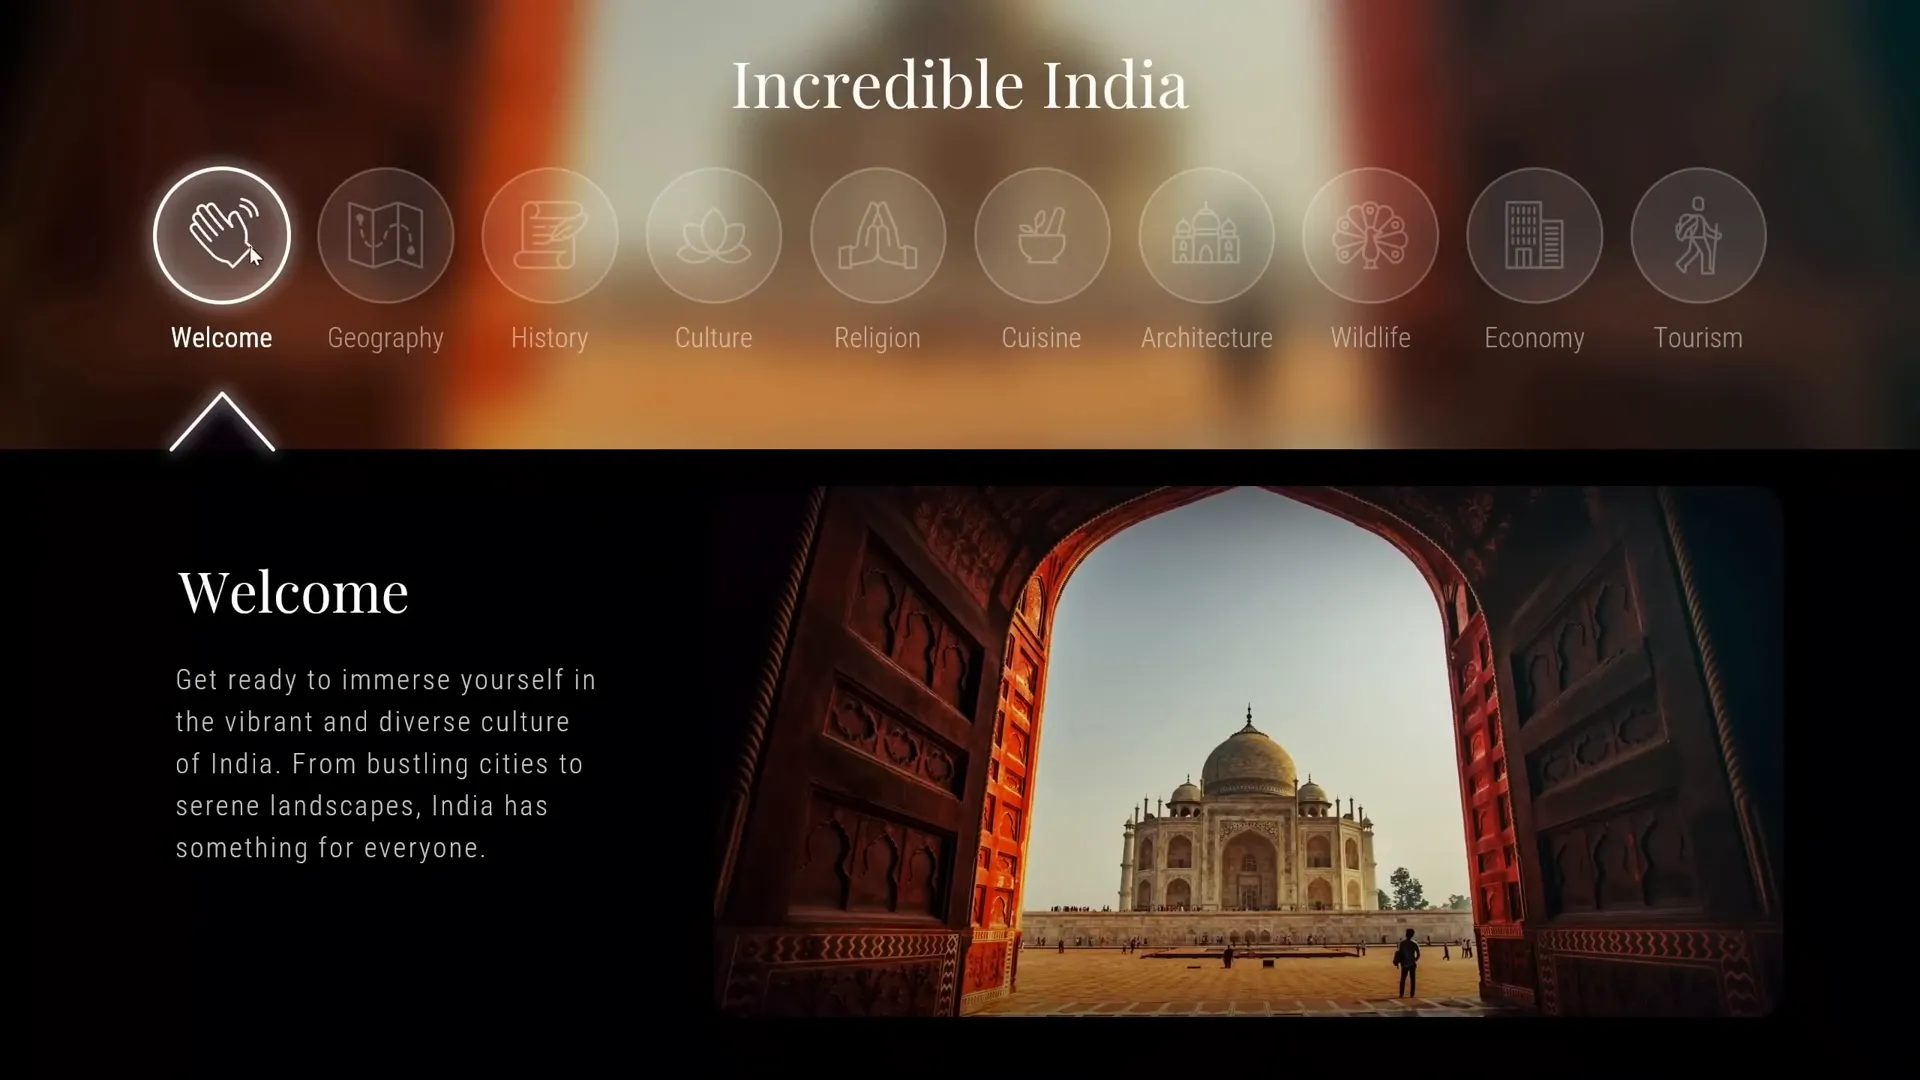
Designing Clickable Circles for Navigation
To create an interactive menu, we will use circles as clickable buttons that navigate between different slides. These circles will visually indicate the active section and inactive sections by using different styles.
Instead of drawing each circle manually, you can save time by copying pre-designed circles from a previous slide or template. Here’s a breakdown of the circle design:
- Active Circle: White solid fill with 90% transparency, white outline with 2-point thickness, and a glowing effect created by a white shadow with zero transparency and 10 points blur.
- Inactive Circles: White solid fill with 90% transparency, but no glow. The outline is white with 1-point thickness and 75% transparency.
Text within inactive circles is set to 50% transparency, subtly indicating that these sections are not currently active.
Each circle is named specifically in the selection pane with double exclamation marks at the start of their names (e.g., !!Circle1) to ensure smooth morph transitions between slides. This naming convention helps PowerPoint correctly track the shapes during animations.
Adding an Arrow Indicator for Active Sections
To further highlight the active section, we add a small arrow that points to the active circle. This arrow is a group of shapes consisting of two lines and a triangle, styled with white lines and a glowing shadow effect.
Here’s how to create the arrow:
- Draw two white lines, each with a 2-point width.
- Create a simple white triangle to serve as the arrowhead.
- Add a white shadow with 10 points blur to each element to create a glowing effect.
- Group all elements into one object for easy positioning.
- Position the arrow at the bottom edge of the photo section, center-aligned with the currently active circle.

Setting Up Slides and Morph Transitions
To make the interactive menu functional, you need a slide for each clickable circle. For example, if you have three circles, create three slides.
Here’s the process:
- Create two additional slides so you have three slides in total.
- Apply the Morph transition to all these slides for smooth animated transitions.
- Set the transition duration to 0.7 seconds for a natural effect.
- Link each circle to its corresponding slide using hyperlinks: select a circle, go to Insert > Link, then choose the slide number.
- Copy the entire menu from the first slide and paste it onto the subsequent slides.
- Adjust the active circle and arrow position on each slide to reflect the current section.
- Use the format painter to quickly change the formatting of the circles and text boxes to switch active/inactive states.
- Check the selection pane on all slides to ensure the circles maintain their specific names starting with double exclamation marks for morph transition compatibility.
This setup allows users to click on any circle to navigate directly to the corresponding slide with a smooth morph transition animation.
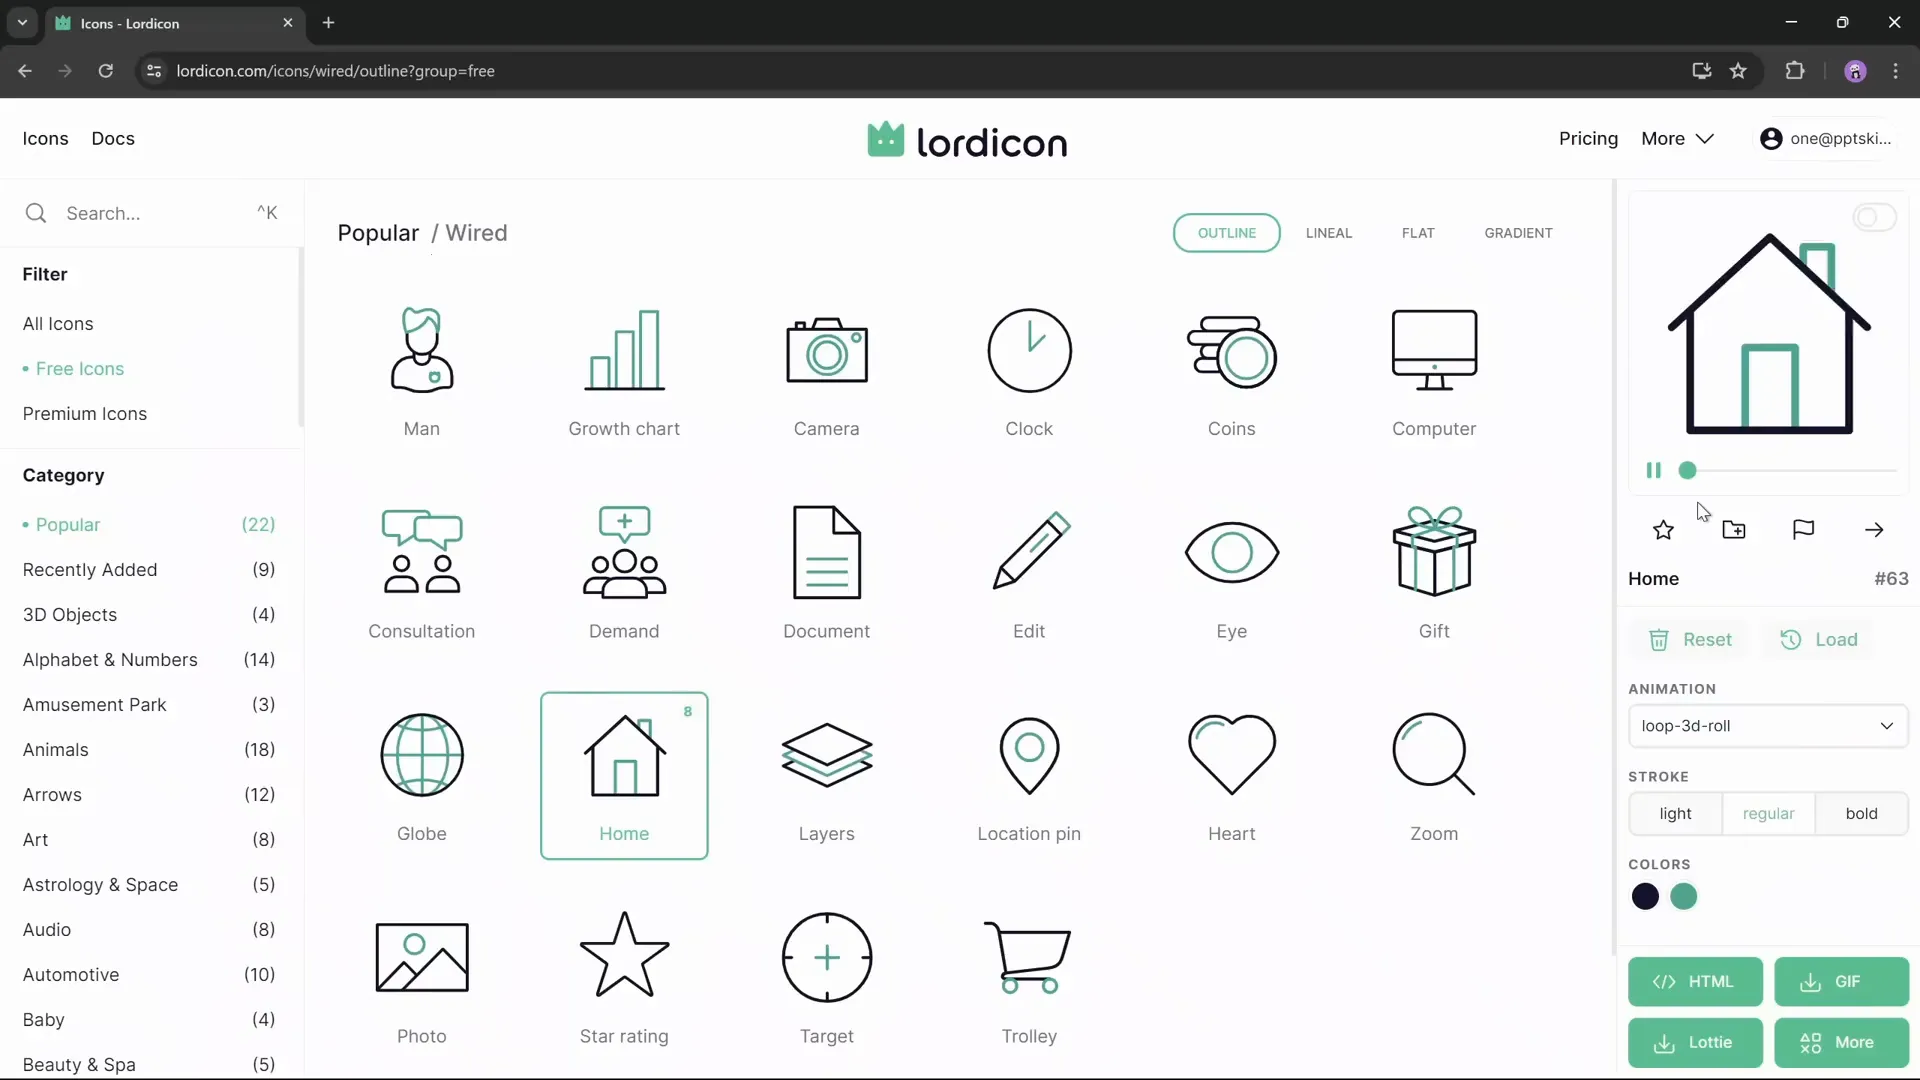
Incorporating Animated Icons from Lordicon
Static icons are great, but animated icons bring your presentation to life. For this project, we use Lordicon, a fantastic resource offering over 20,000 carefully crafted animated icons.
Lordicon provides a mix of free and premium icons, available in multiple styles such as white outline, filled, and more. Here’s how to pick and customize icons for your presentation:
- Browse the icon library and filter for free icons if you prefer.
- Select an icon, such as a home icon, to represent a section.
- Explore different animation options from the dropdown menu. For example, you can choose a spinning effect or morphing animations.
- Adjust the icon’s line thickness and colors. For dark backgrounds, set the icon color to white for maximum visibility.
- Use the dark preview background to see how the icon will look in your slide environment.
- Export the icon as a GIF for the animated version and as a PNG for the static inactive state.
Repeat this process for each icon you want to include in your interactive menu.
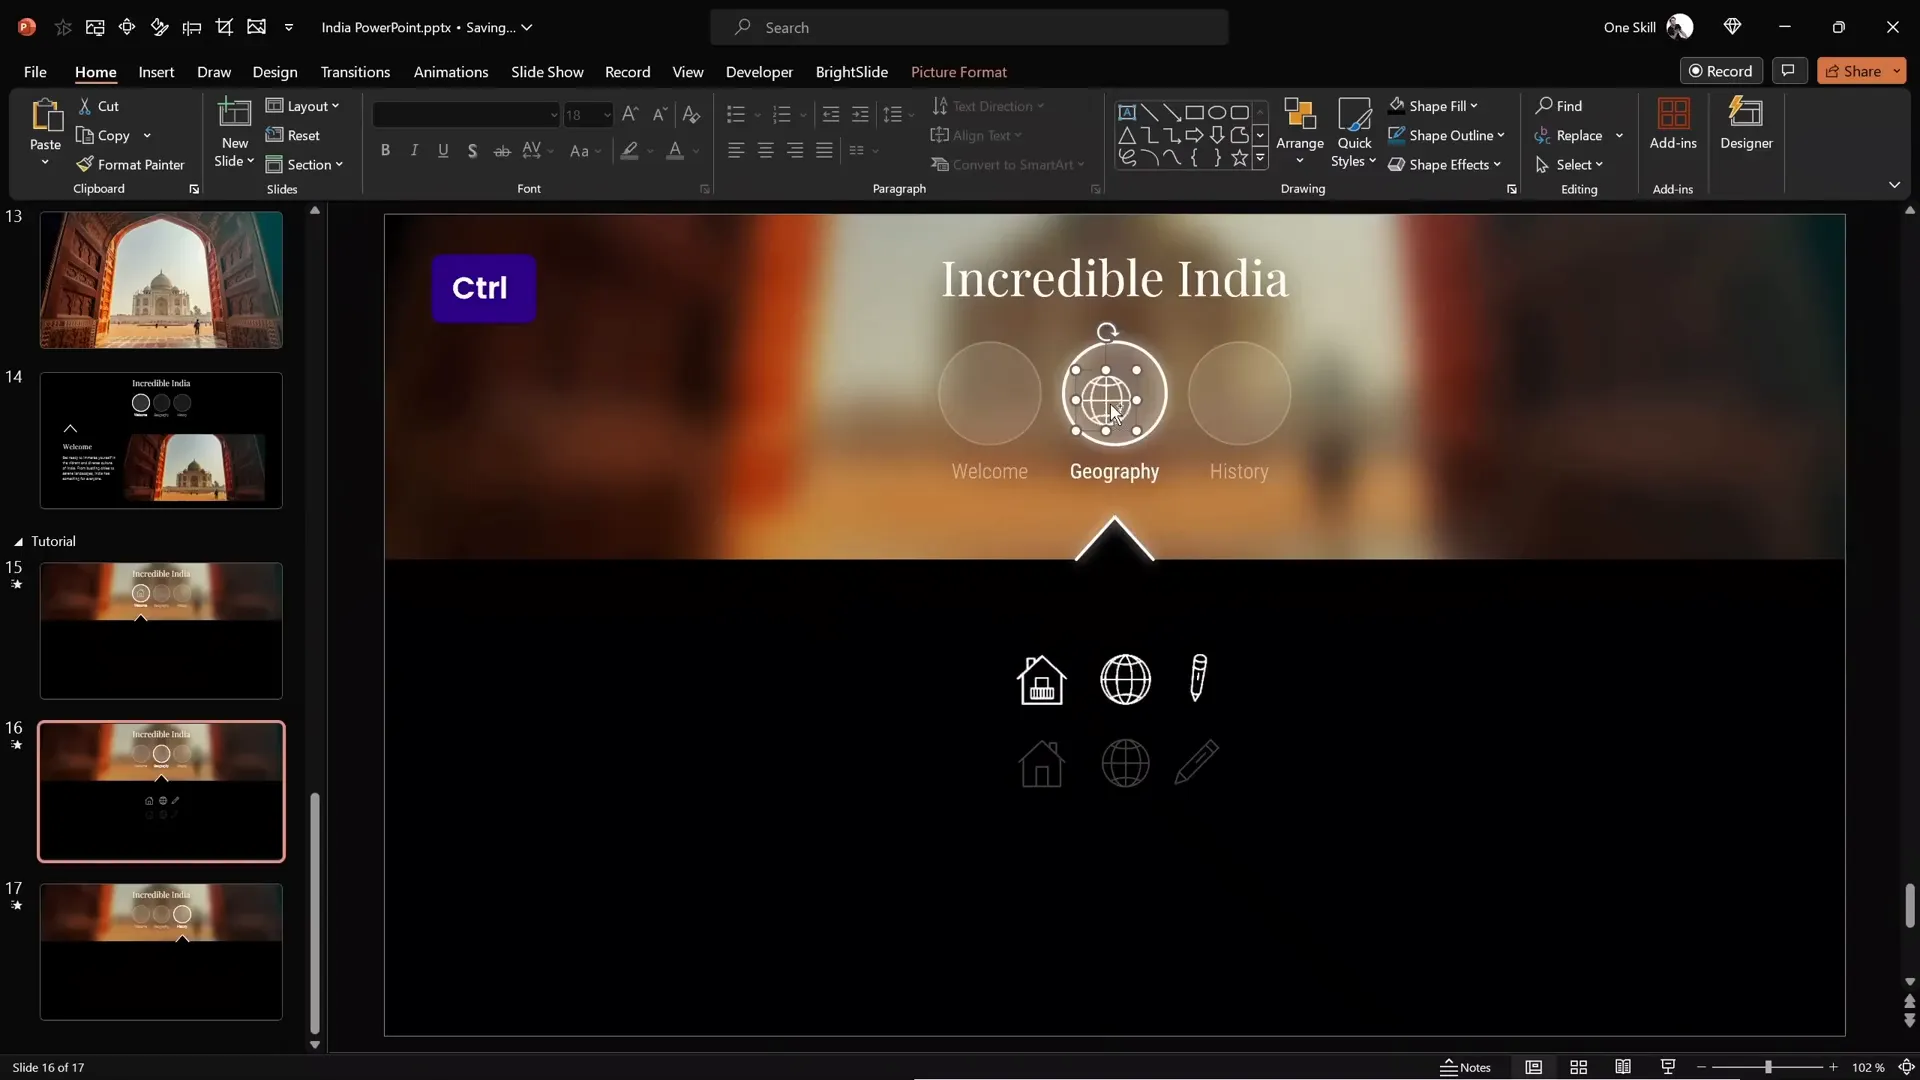
Positioning Animated and Static Icons
Back in PowerPoint, insert all GIF (animated) and PNG (static) icons onto your slides by going to Insert > Pictures > This Device.
Resize all icons to a consistent size, such as 1.4 centimeters, for a uniform look.
Arrange the icons so that animated GIFs are positioned on top and the corresponding static PNGs are right below them. This arrangement allows easy toggling between active (animated) and inactive (static) states.
Set the transparency of the inactive PNG icons to around 75% to make them visually distinct from the active animated icons.

Assign specific names to each icon in the selection pane, starting with double exclamation marks (e.g., !!icon1, !!icon2). Use the same names for both animated and static icons to ensure morph transitions behave correctly.
Position the animated icon inside the active circle and place the inactive icons in the other circles. Bring all circles to the front so they remain clickable and do not interfere with the icons.
Repeat this process on all slides, moving the animated icon to the active circle and placing semi-transparent PNGs in the inactive circles.
Using keyboard shortcuts and tools like the free BrightSlide PowerPoint add-in can speed up alignment and positioning.
Adding Content and Animations to Slides
With your interactive menu and animated icons in place, it’s time to add meaningful content to each slide.
Copy and paste text boxes and photos from your existing slides or create your own. In this example, two text boxes and a photo are used on each slide to provide information related to the selected section.
Apply animations such as wipe effects to the content to create dynamic entrances and enhance viewer engagement. These animations can be customized for timing and direction to suit your style.
For more in-depth animation techniques, consider exploring dedicated tutorials on PowerPoint animation.

Final Tips and User Experience Enhancements
Once everything is set up, run your presentation in full screen mode and test the clickable circles. Each circle should smoothly navigate to its corresponding slide with the morph transition animating the movement of circles, arrow, and icons.
Here are some additional tips for an excellent user experience:
- Consistency: Keep your icon sizes, circle styles, and fonts consistent across all slides.
- Accessibility: Use high contrast between text/icons and backgrounds for easy readability.
- Navigation: Ensure all links are correctly assigned and test them multiple times.
- Performance: Avoid overcrowding slides with too many animations to maintain smooth playback.
- Customization: Feel free to add as many clickable buttons with animated icons as needed for your presentation topic.
By following these steps, you can create interactive PowerPoint presentations that look professional, engage your audience, and allow intuitive navigation.
Frequently Asked Questions
Can I use this tutorial with older versions of PowerPoint?
This tutorial is designed for Microsoft 365 due to the use of the Morph transition and support for animated GIFs. While some steps may work in older versions, features like Morph may not be available.
Where can I get the animated icons used in this tutorial?
The animated icons come from Lordicon, which offers a vast library of free and premium animated icons. You can customize and download icons in GIF and PNG formats for your projects.
How do I ensure smooth morph transitions between slides?
Give your shapes and icons specific and consistent names across slides, preferably starting with double exclamation marks (e.g., !!Circle1, !!icon1). This helps PowerPoint correctly identify and animate objects during morph transitions.
Can I add more clickable circles beyond three?
Absolutely! You can create as many clickable buttons as you need by duplicating the setup across multiple slides. Just maintain consistent naming and formatting for smooth morph transitions.
Are there any recommended fonts and photos?
Yes! For fonts, Playfair Display is used for titles and headings, while Roboto Condensed works well for body text. For photos, consider using high-quality images from sources like Unsplash. Links to these resources are often available for free.
What is the best way to manage multiple animations on slides?
Use the Animation Pane in PowerPoint to organize and time your animations effectively. Group related animations and use triggers when appropriate to control the flow and interactivity of your presentation.
How can I improve alignment and positioning efficiency?
Utilize keyboard shortcuts and free PowerPoint add-ins like BrightSlide to quickly align, distribute, and size objects, saving time and ensuring precision.
Is it possible to export the presentation as a video with animations?
Yes, you can export your PowerPoint presentation as a video. However, interactive elements like clickable circles and hyperlinks won’t function in video format. For full interactivity, present directly from PowerPoint.
Can I customize the colors of icons and circles?
Definitely! Both the animated icons from Lordicon and the PowerPoint shapes can be customized. Adjust colors, transparency, and effects to match your branding or presentation theme.
Where can I learn more about advanced PowerPoint animation techniques?
Explore specialized tutorials and courses on PowerPoint animation. Many creators offer free and paid lessons that cover a wide range of animation effects, transitions, and interactive features.
By mastering these techniques, you’ll be able to create impressive and interactive presentations that captivate your audience and communicate your message effectively.
Check out the full video: INCREDIBLE PowerPoint with Animated Icons ✅ Free Slides!


