
Welcome to your comprehensive guide to mastering Microsoft PowerPoint, designed specifically for beginners looking to harness the full potential of this powerful presentation software. Whether you’re a student, teacher, professional, or just someone eager to create stunning presentations, this article will walk you through every essential step—from understanding the layout to delivering your final presentation with confidence.
Throughout this guide, you’ll find detailed explanations, practical tips, and actionable advice to help you become proficient in PowerPoint. You’ll learn how to create, edit, and save presentations, format text and objects, build tables and charts, insert images and drawings, add transitions, and even export your work for sharing or printing. Let’s dive in and transform you into a PowerPoint expert!

Table of Contents
- Understanding the PowerPoint Layout
- Creating Your First Presentation
- Saving Your Presentation
- Opening and Editing Existing Presentations
- Changing Slide Orientation and Size
- Formatting Text in Your Presentation
- Constructing Tables in PowerPoint
- Creating Charts in PowerPoint
- Adding Objects: Word Art, Text Boxes, and Pictures
- Drawing and Using Shapes in PowerPoint
- Refining Your Presentation with Backgrounds, Transitions, and Themes
- Printing and Exporting Your Presentation
- Delivering Your Presentation
- Frequently Asked Questions (FAQ)
- Final Thoughts
Understanding the PowerPoint Layout
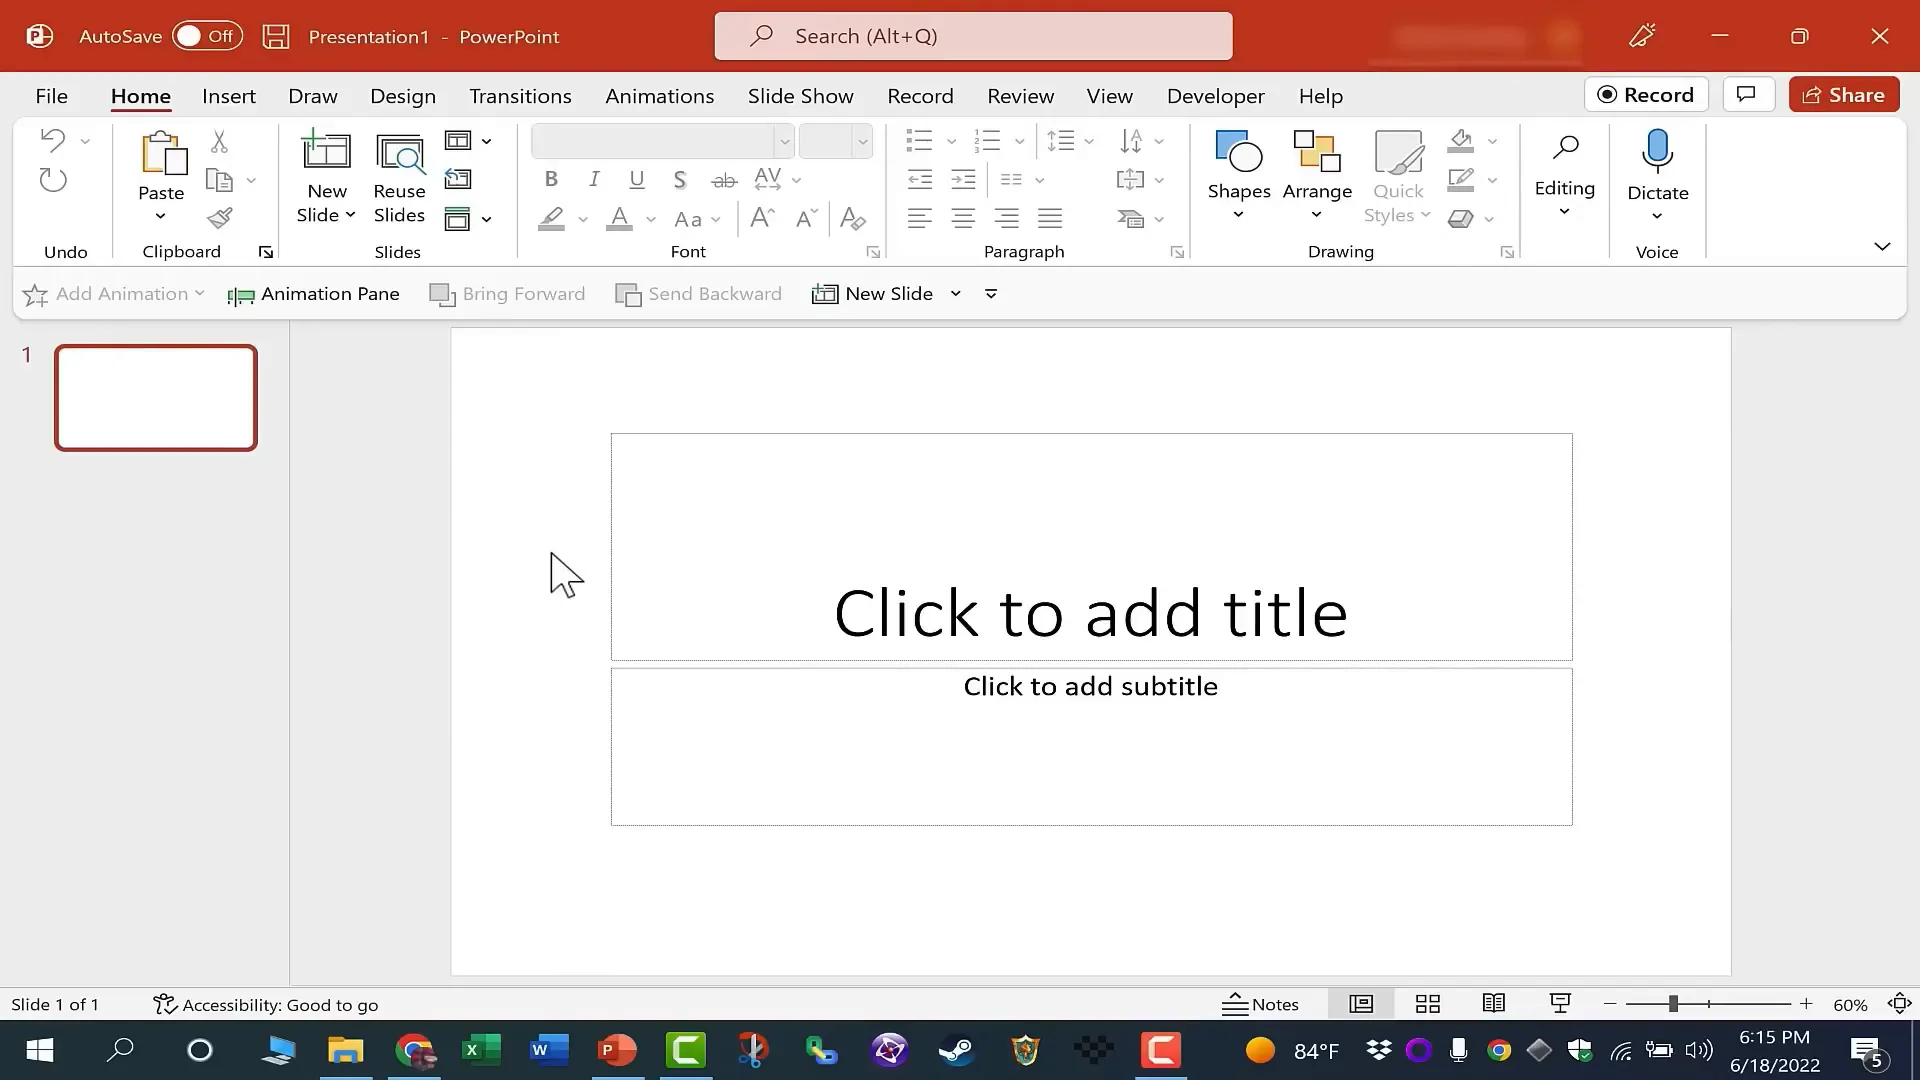
Before diving into creating presentations, it’s crucial to familiarize yourself with the Microsoft PowerPoint interface. When you open PowerPoint, the central area of the screen displays your current slide, usually starting with the title slide. On the left-hand side, you’ll find thumbnails of all your slides, providing an overview and easy navigation through your presentation.
At the top of the screen, you will notice several tabs such as Home, Design, Animations, Review, and others. Clicking on any tab changes the tools displayed below it in an area called the Ribbon. Each ribbon is organized into groups; for example, the Insert ribbon contains groups like illustrations, images, tables, and text.
Sometimes, not all options fit within the ribbon groups. In such cases, Microsoft provides a small button known as the dialog launcher or “launch button,” typically found in the bottom right corner of a group. Clicking this button opens additional settings related to that group.
Other important elements of the layout include:
- Quick Save Button: Located in the upper left corner, this button allows you to save your work quickly.
- Search Bar: At the top center, you can search for commands, settings, or help topics.
- Close Button: In the upper right corner, this closes the PowerPoint application.
- Zoom Slider: Found in the lower right corner, this lets you zoom in or out on your slide.
- View Buttons: Adjacent to the zoom slider, these buttons allow you to switch between views such as slideshow, reading, slide sorter, normal, and notes view.
Understanding these components sets the foundation for efficient navigation and use of PowerPoint.
Creating Your First Presentation
Starting a new presentation in PowerPoint is straightforward. When you launch the program, you’re greeted with a screen showing recent documents and an option to create a new blank presentation. You can also choose from a variety of premade themes or templates, which provide pre-designed layouts and color schemes to give your presentation a polished look quickly.
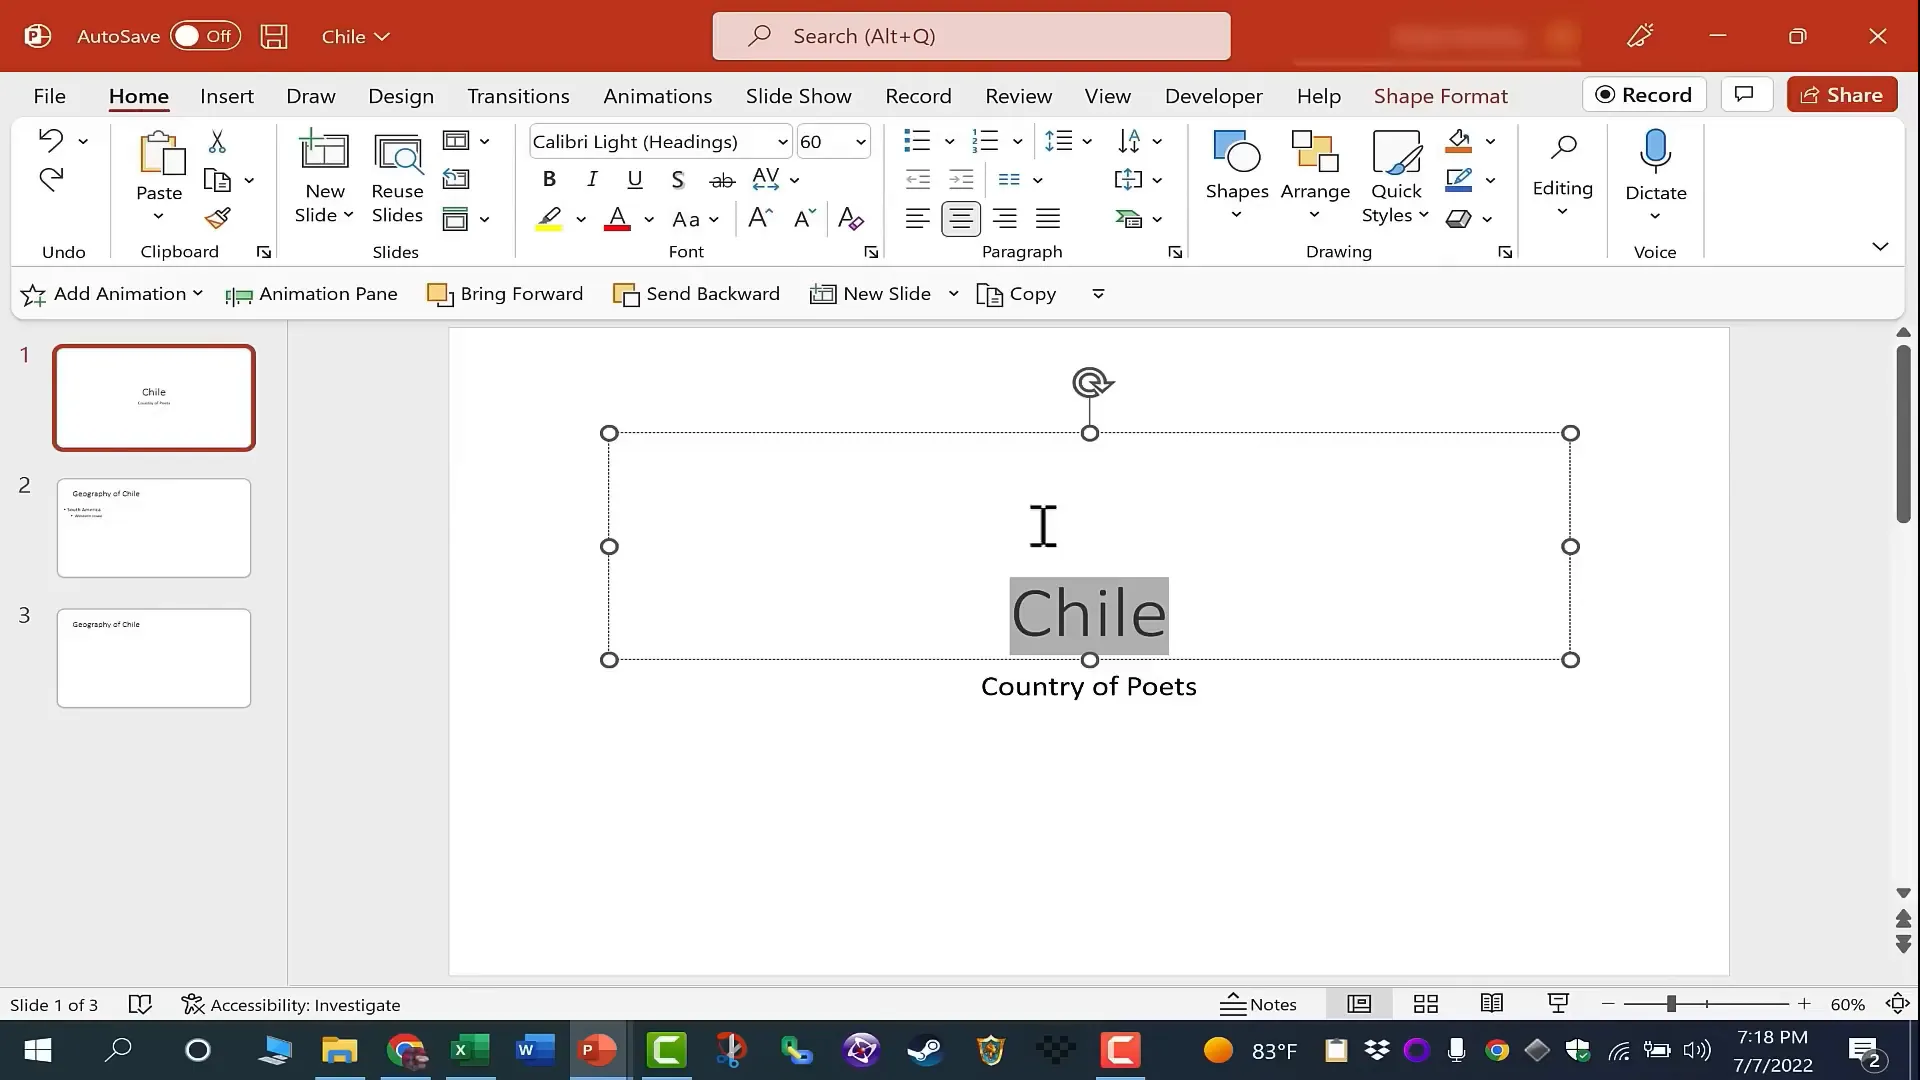
For this guide, we’ll create a blank presentation and build it step-by-step. Imagine you are a Spanish teacher creating a presentation about Chile. Click on the title slide and enter your main title, such as Chile. Below that, add a subtitle, for example, Chile: Country of Poets. This simple title slide introduces your topic and sets the tone.
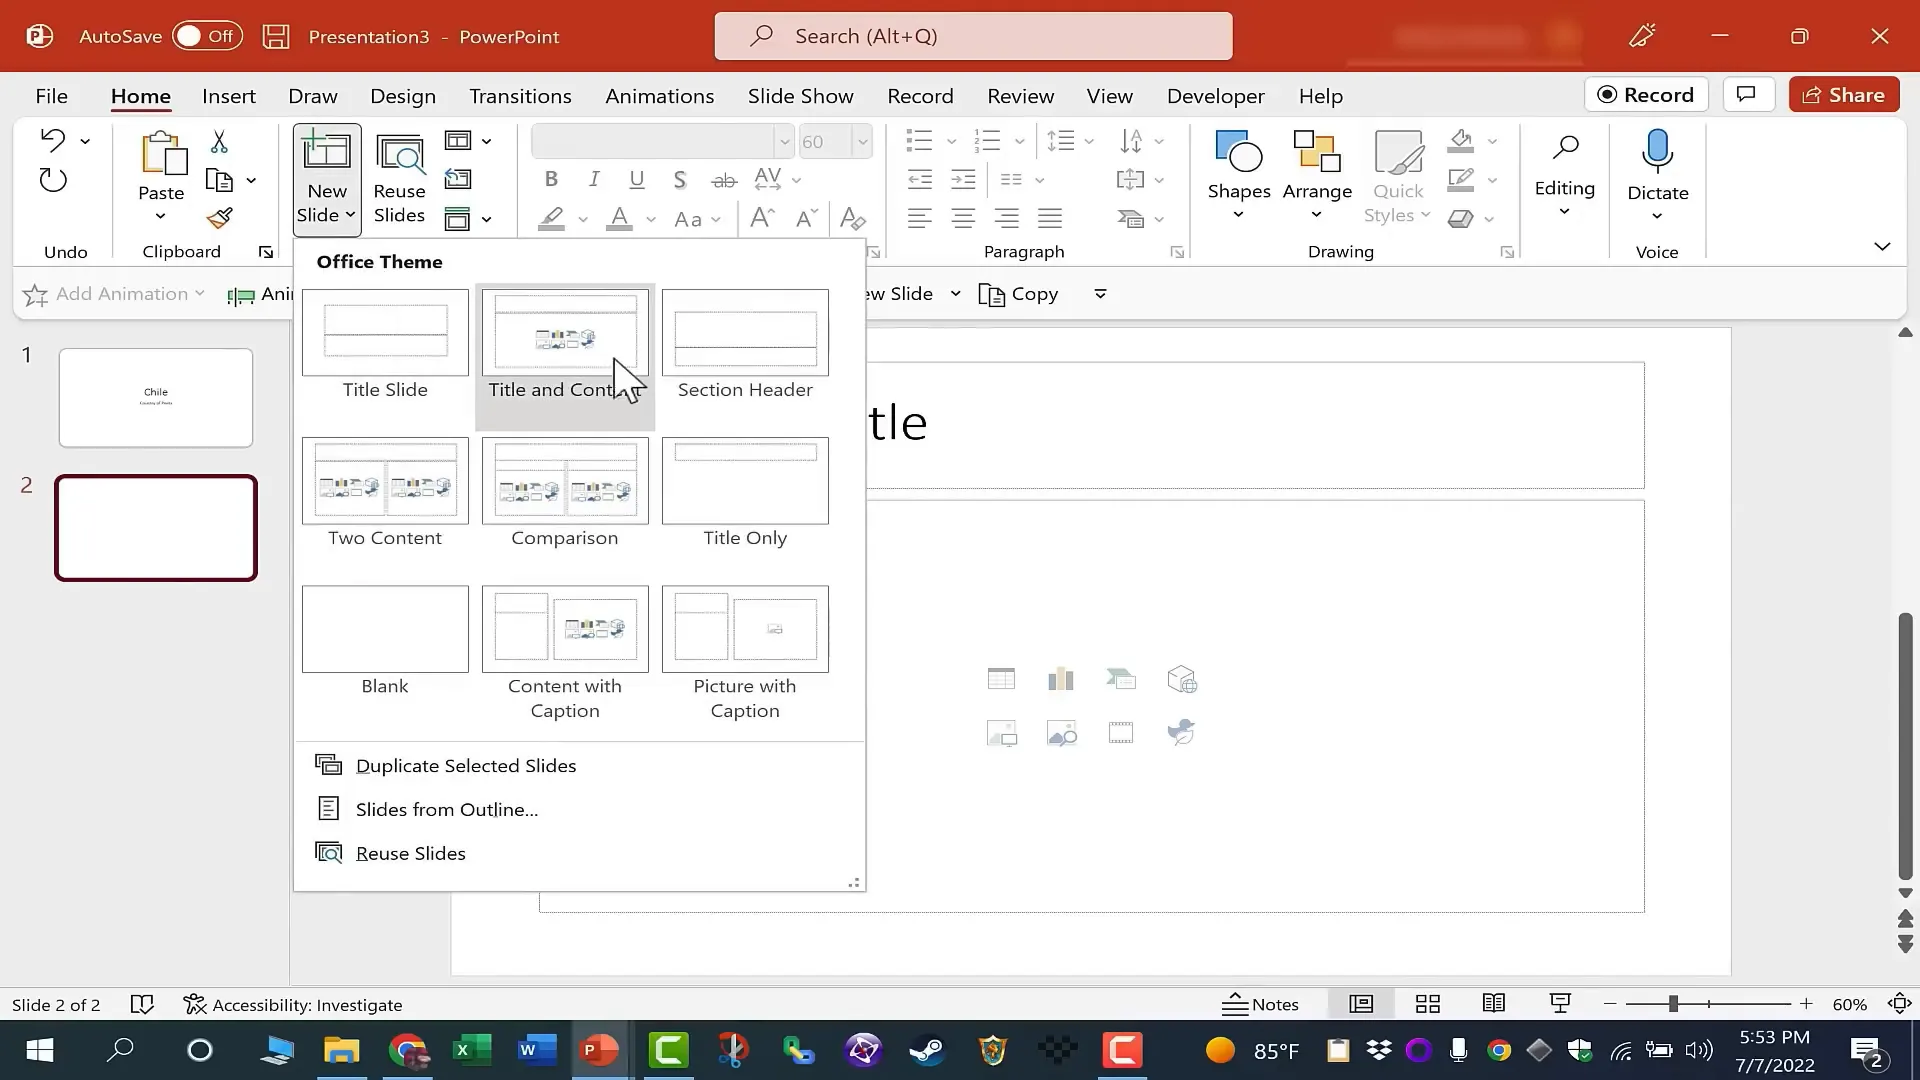
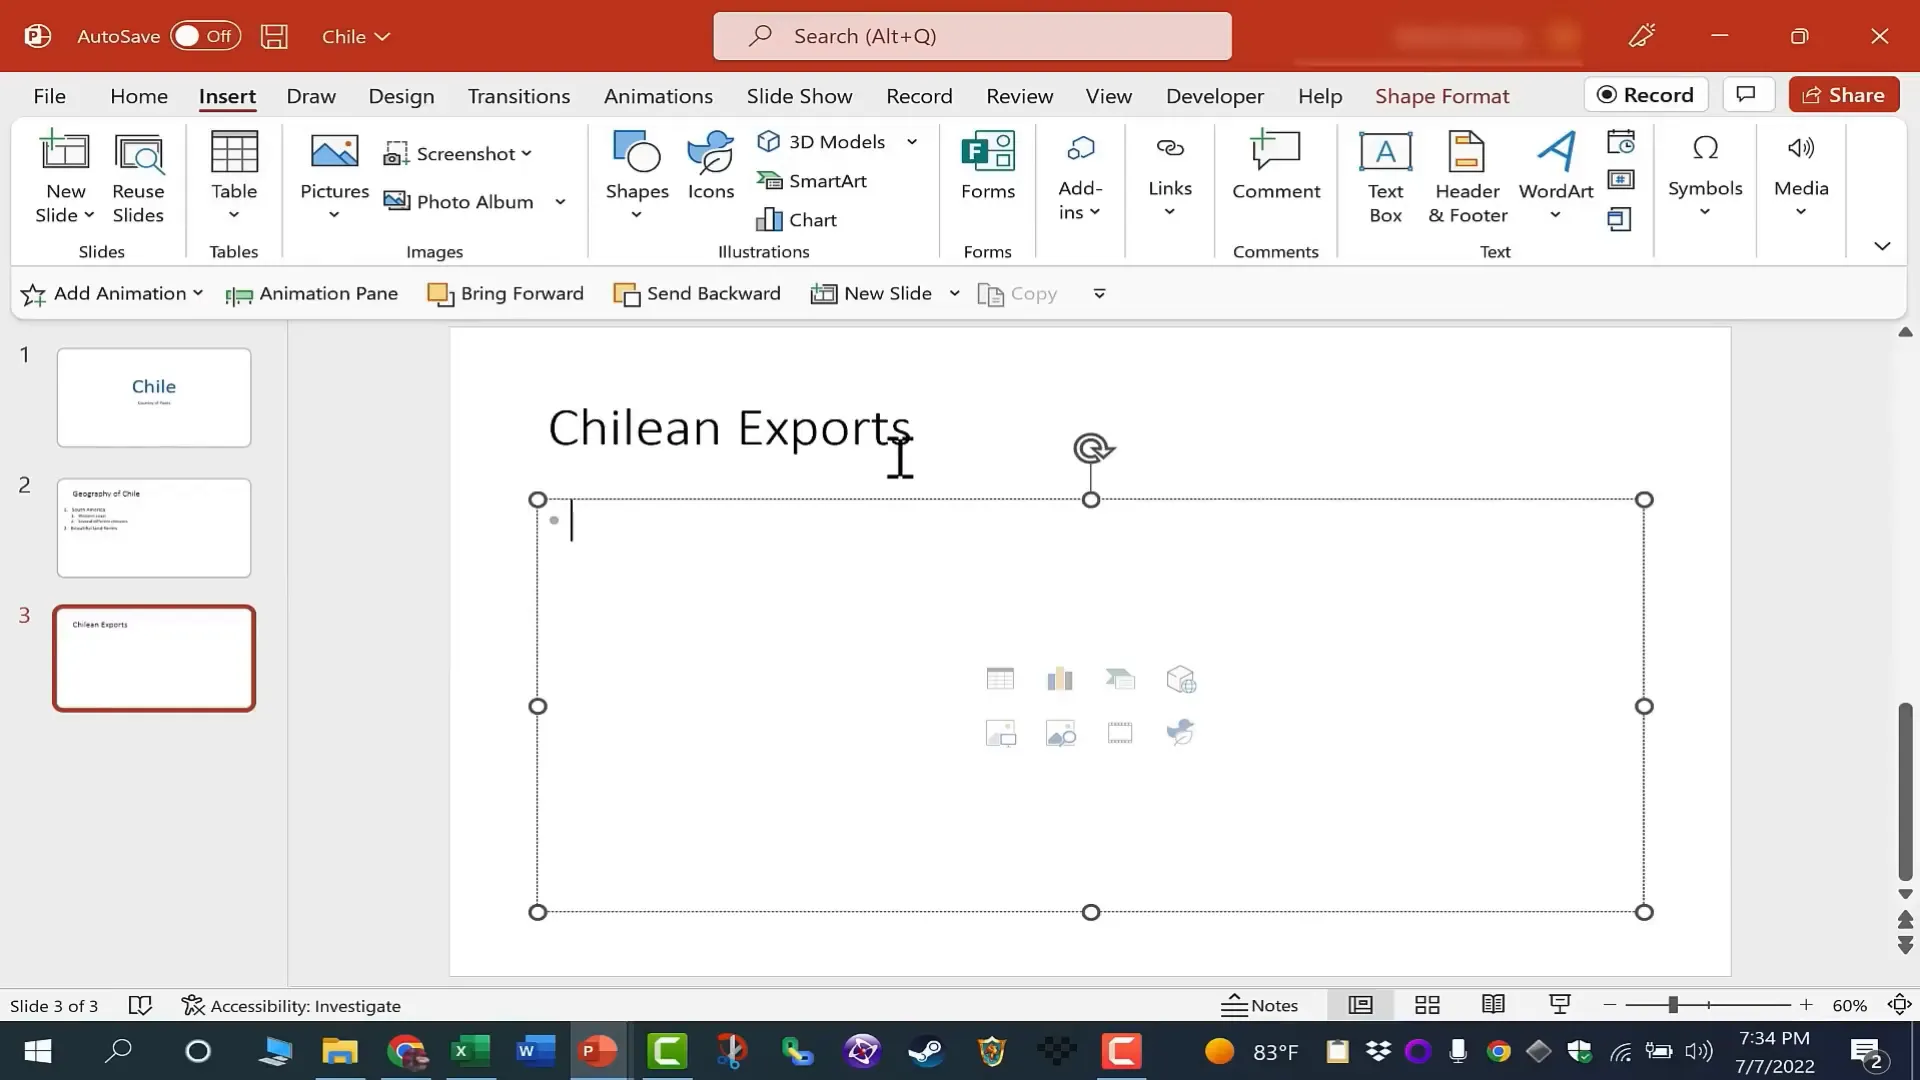
Next, it’s time to add content slides. Navigate to the Home tab, and in the Slides group, click New Slide. The default layout is “Title and Content,” which provides a title box and a large content box for text, images, or other objects.
You can add as many slides as you need. If you click the lower half of the New Slide button, a dropdown menu appears, letting you select different slide layouts such as:
- Section Header
- Two Content
- Comparison
- Title Only
- Blank
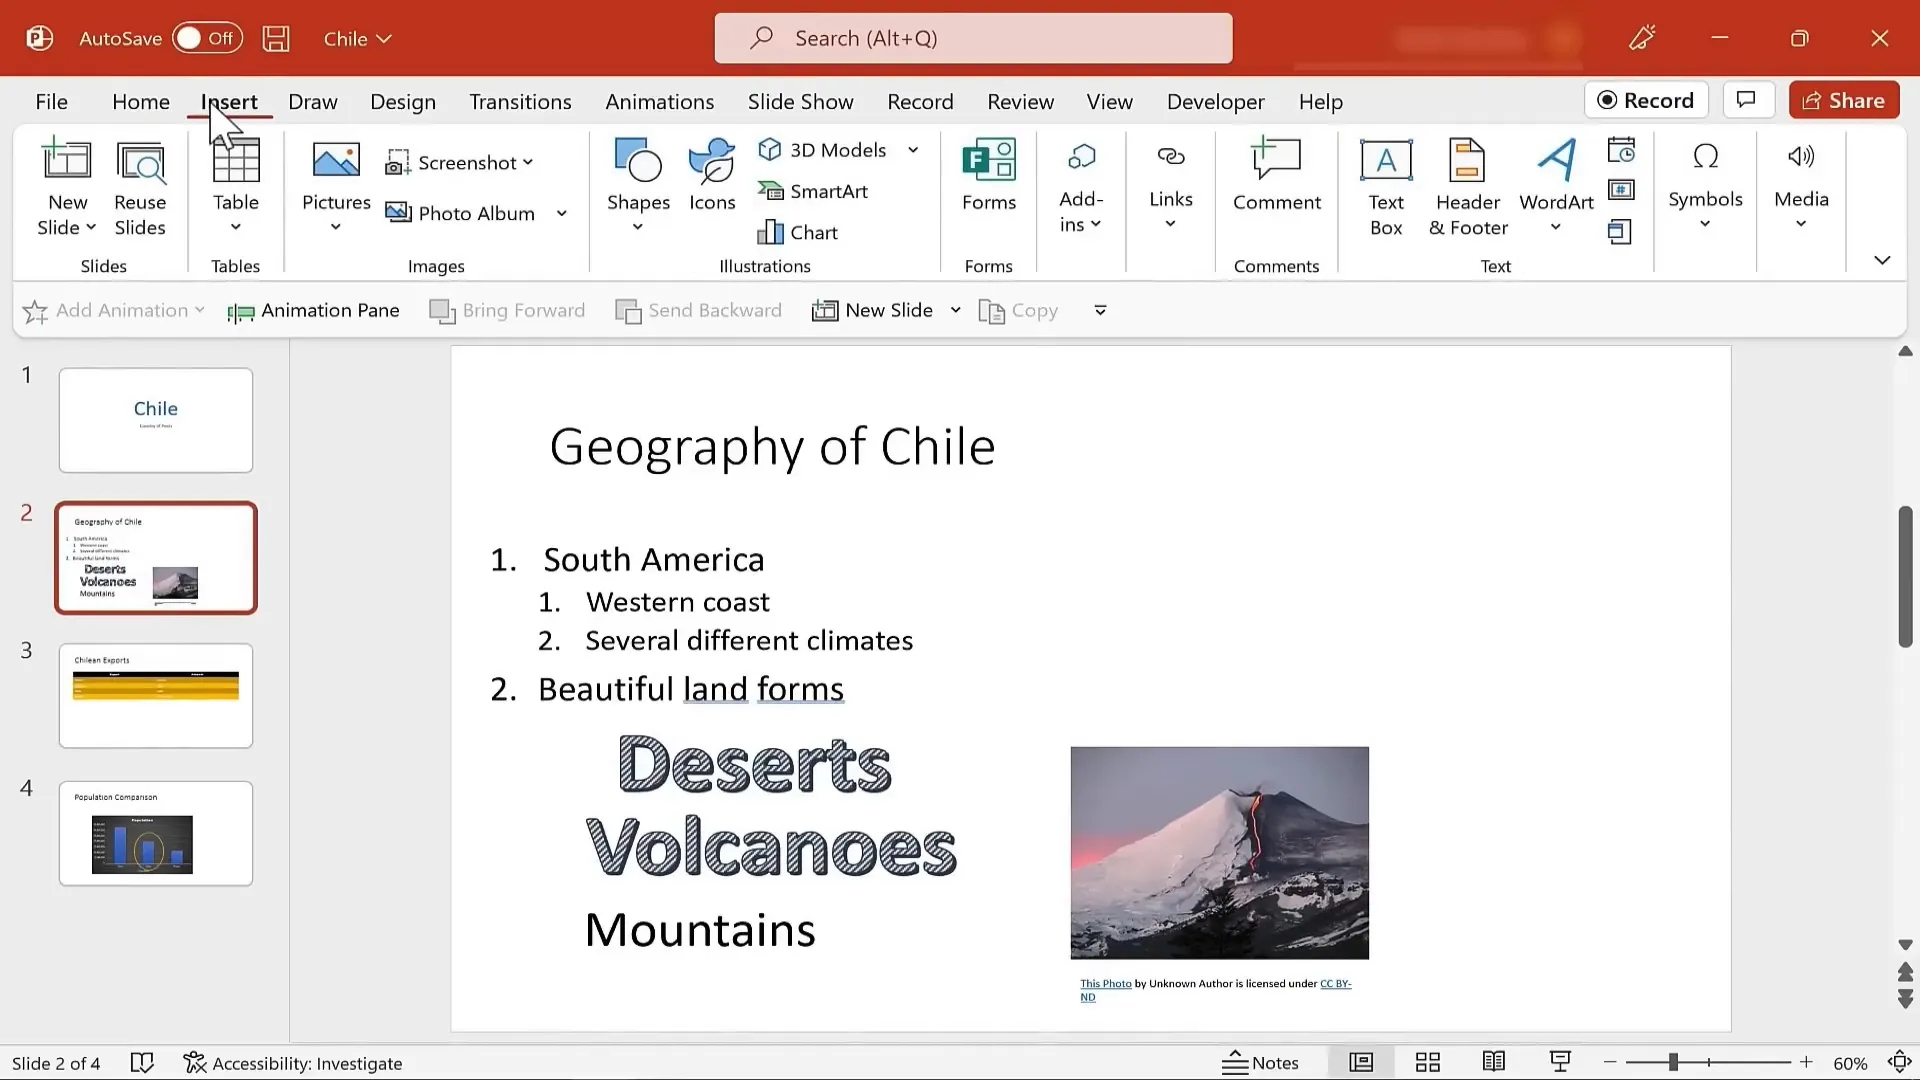
For our Chile presentation, the next slide might be titled Geography of Chile, where you can add bullet points or paragraphs describing the country’s location and features.
Saving Your Presentation
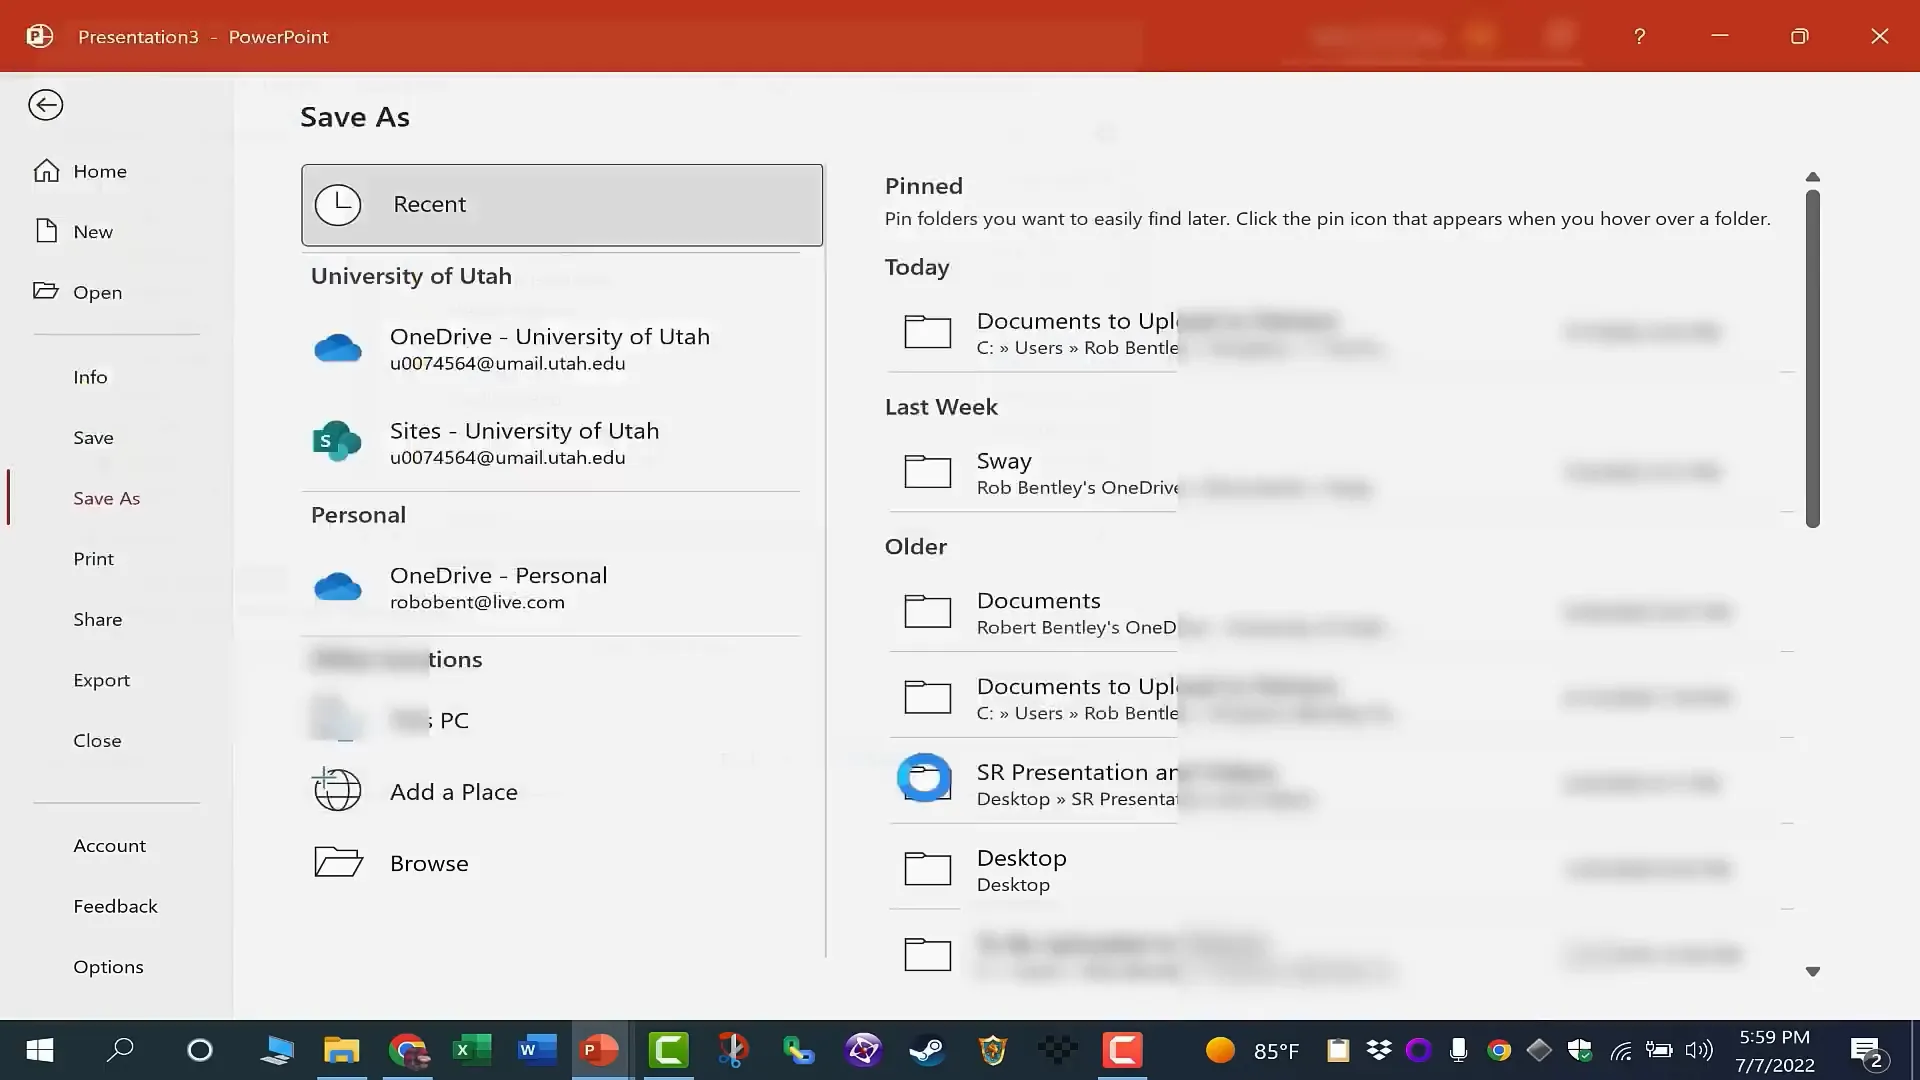
Saving your work regularly is essential. You can use the quick save button in the upper left corner, or the more detailed options found under the File tab, which takes you to the backstage view.
Here you will find two main save commands:
- Save: Updates your current file.
- Save As: Lets you specify a new name or location for your presentation.
When saving your presentation for the first time, PowerPoint will prompt you to choose a file name and location. For example, saving your Chile presentation to your Documents folder ensures easy access later. PowerPoint is smart enough to pull the file name from your title slide by default.
Remember, if you want to create a second version or a different copy, use Save As again to avoid overwriting your original file.
Opening and Editing Existing Presentations
To open an existing presentation, go to File > Open > Browse, then navigate to the folder where your file is stored. Once opened, click Enable Editing if prompted.
Navigation within a presentation is simple: click on any slide thumbnail on the left to view or edit it in the main window. You can easily add, delete, or modify text and other elements directly on the slide.
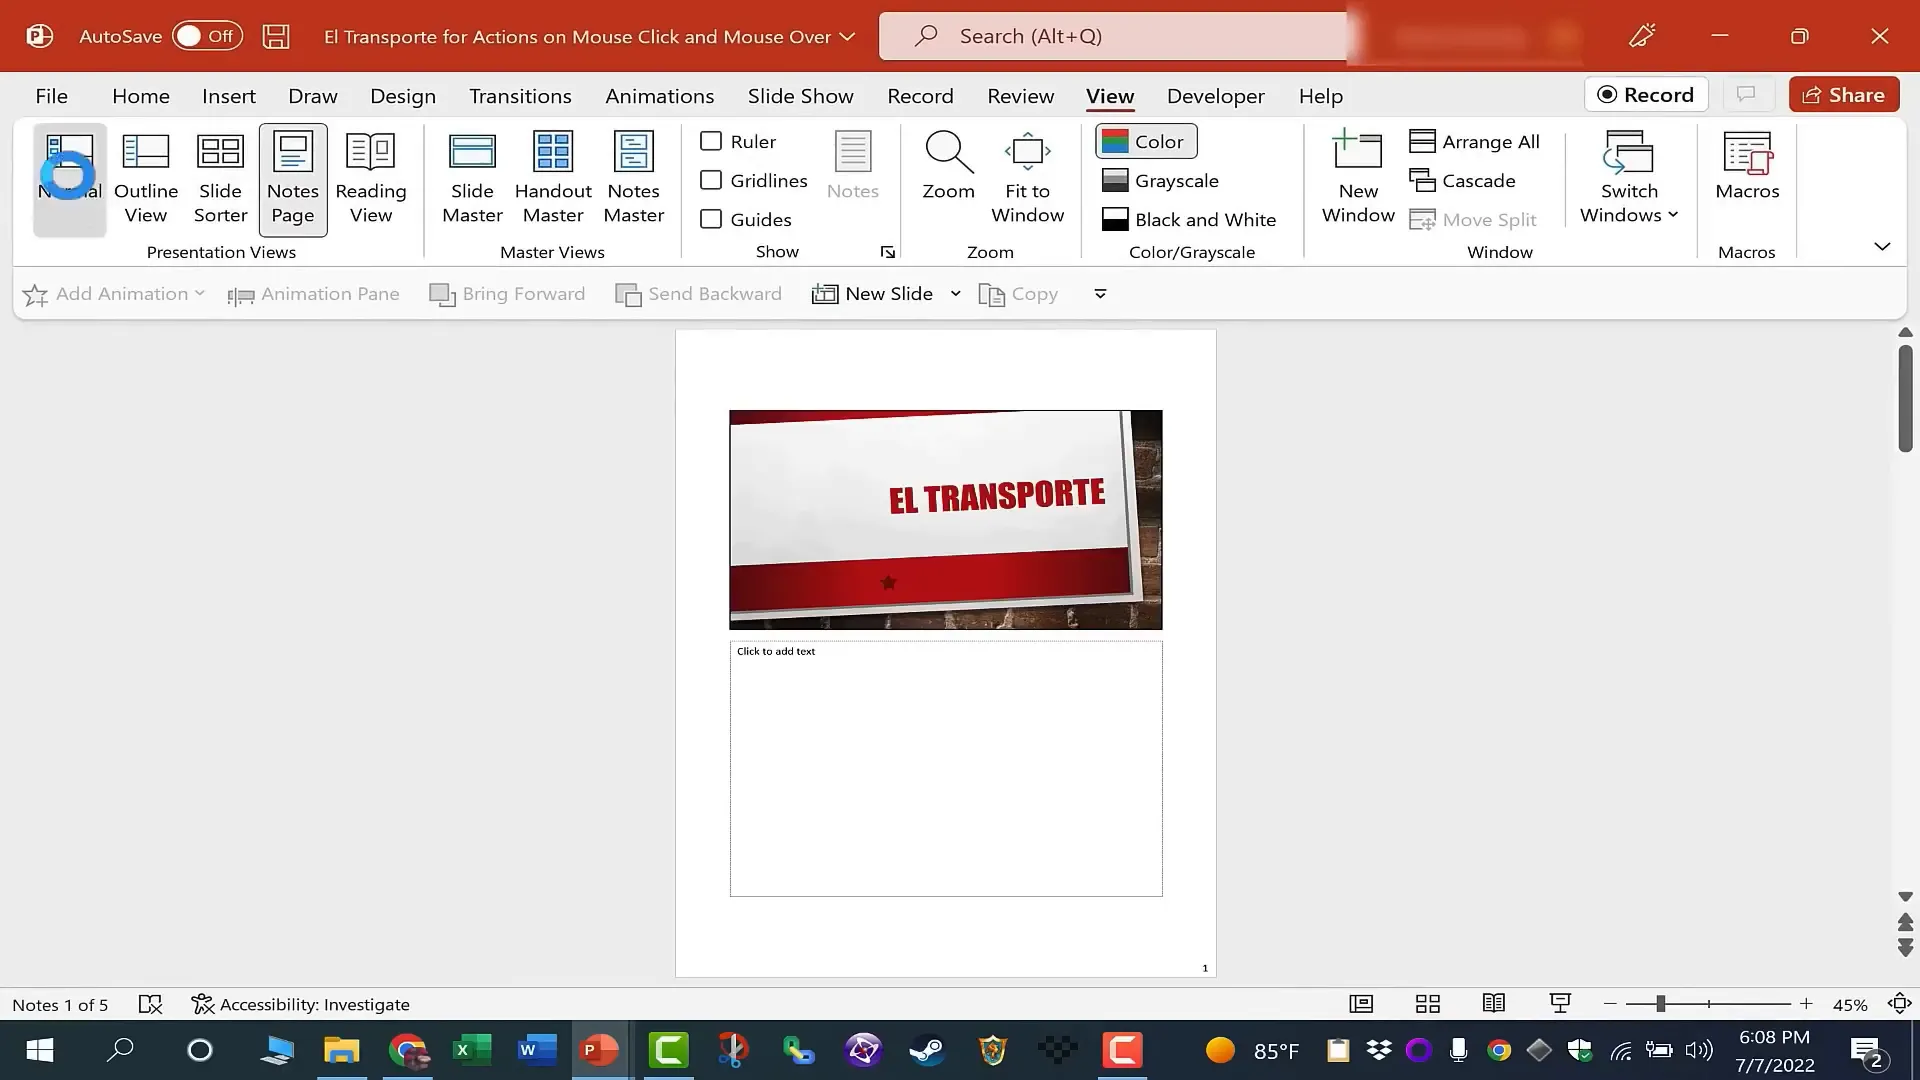
PowerPoint offers multiple views to work with your presentation:
- Normal View: The default editing mode.
- Outline View: Shows an outline of all slide text, useful for reorganizing content.
- Slide Sorter: Displays all slides as thumbnails, allowing you to reorder them by drag and drop.
- Reading View: Focuses on reading the slide content.
- Notes Page: Allows you to add presenter notes visible only to you during presentations.
You can insert new slides between existing ones by clicking the spot between two slides (indicated by a red line) and choosing New Slide. Alternatively, right-click a slide thumbnail and select New Slide to insert a slide below.
Duplicating slides is useful when you want to create similar content. Right-click the slide thumbnail and choose Duplicate Slide. This creates an exact copy that you can modify as needed.
If certain slides are not relevant for a particular audience, you can hide slides. Right-click the slide and select Hide Slide. Hidden slides will be skipped during the slideshow but remain in your presentation for future use.
Changing Slide Orientation and Size
By default, PowerPoint uses a widescreen (16:9) slide size, which is suitable for most modern displays and projectors. However, you can change this by navigating to the Design tab and clicking Slide Size on the far right.
Here, you can switch between:
- Widescreen (16:9): The modern standard.
- Standard (4:3): More square-shaped slides, useful for older projectors.
- Custom Slide Size: Allows you to set specific dimensions or choose portrait orientation for vertical slides.
Adjusting slide size and orientation can be important depending on how and where you plan to display your presentation.

Formatting Text in Your Presentation
Text is a core element of any presentation, and PowerPoint offers rich formatting tools to make your text look professional and clear.
To move text on a slide, click inside the text box until you see the box’s border, then hover over its edge until the cursor changes to a four-arrow icon. Click and drag the box to a new position.
You can copy, cut, and paste text or entire text boxes using the Home tab buttons or keyboard shortcuts:
- Ctrl + C: Copy
- Ctrl + X: Cut
- Ctrl + V: Paste
To format text, select the characters or words you want to change, then use options in the Font and Paragraph groups on the Home ribbon. You can:
- Change font type and size
- Adjust font color
- Apply bold, italic, or underline
- Change text alignment (left, center, right)
- Convert text to uppercase, lowercase, or sentence case
PowerPoint also includes helpful features like AutoCorrect, which automatically fixes common typos as you type. You can customize these settings under File > Options > Proofing > AutoCorrect Options. For example, you can create shortcuts for frequently typed phrases, such as automatically expanding “t4tas” to “Technology for Teachers and Students.”
When adding lists, PowerPoint defaults to bulleted lists, but you can switch between bullets and numbered lists using the buttons in the Paragraph group. Use the tab key to indent bullets or numbers, creating subpoints, and the “Decrease List Level” button to move items back to the left.
Constructing Tables in PowerPoint
Tables are an excellent way to organize and present data clearly. To insert a table, go to the Insert tab and click Table. You can either draw the table manually by dragging or select the number of rows and columns from a grid.
Alternatively, some slide layouts feature an Insert Table button within the content placeholder, which can be more user-friendly.
Once the table is inserted, click inside any cell to type. Use the tab key to move to the next cell horizontally, and pressing tab on the last cell moves to the first cell of the next row.
You can format your table to improve readability by aligning text, highlighting header rows, or applying predefined table styles available under the Table Design tab. Hovering over different styles previews them on your table, and you can click to apply your favorite.
Reordering rows and columns is easy: select the desired row or column, right-click, and choose Cut. Then select where you want to insert it and right-click to Paste. You can also use the Layout tab options like Insert Above or Insert Left to add new rows or columns.
Creating Charts in PowerPoint
Charts provide a visual representation of data that enhances your audience’s understanding. To add a chart, insert a new slide with a title only layout. Then, go to the Insert tab and click Chart.
PowerPoint offers a variety of chart types:
- Column
- Pie
- Bar
- Area
- XY (Scatter)
Select the chart type that fits your data best. For example, a stacked column chart is excellent for comparing categories.
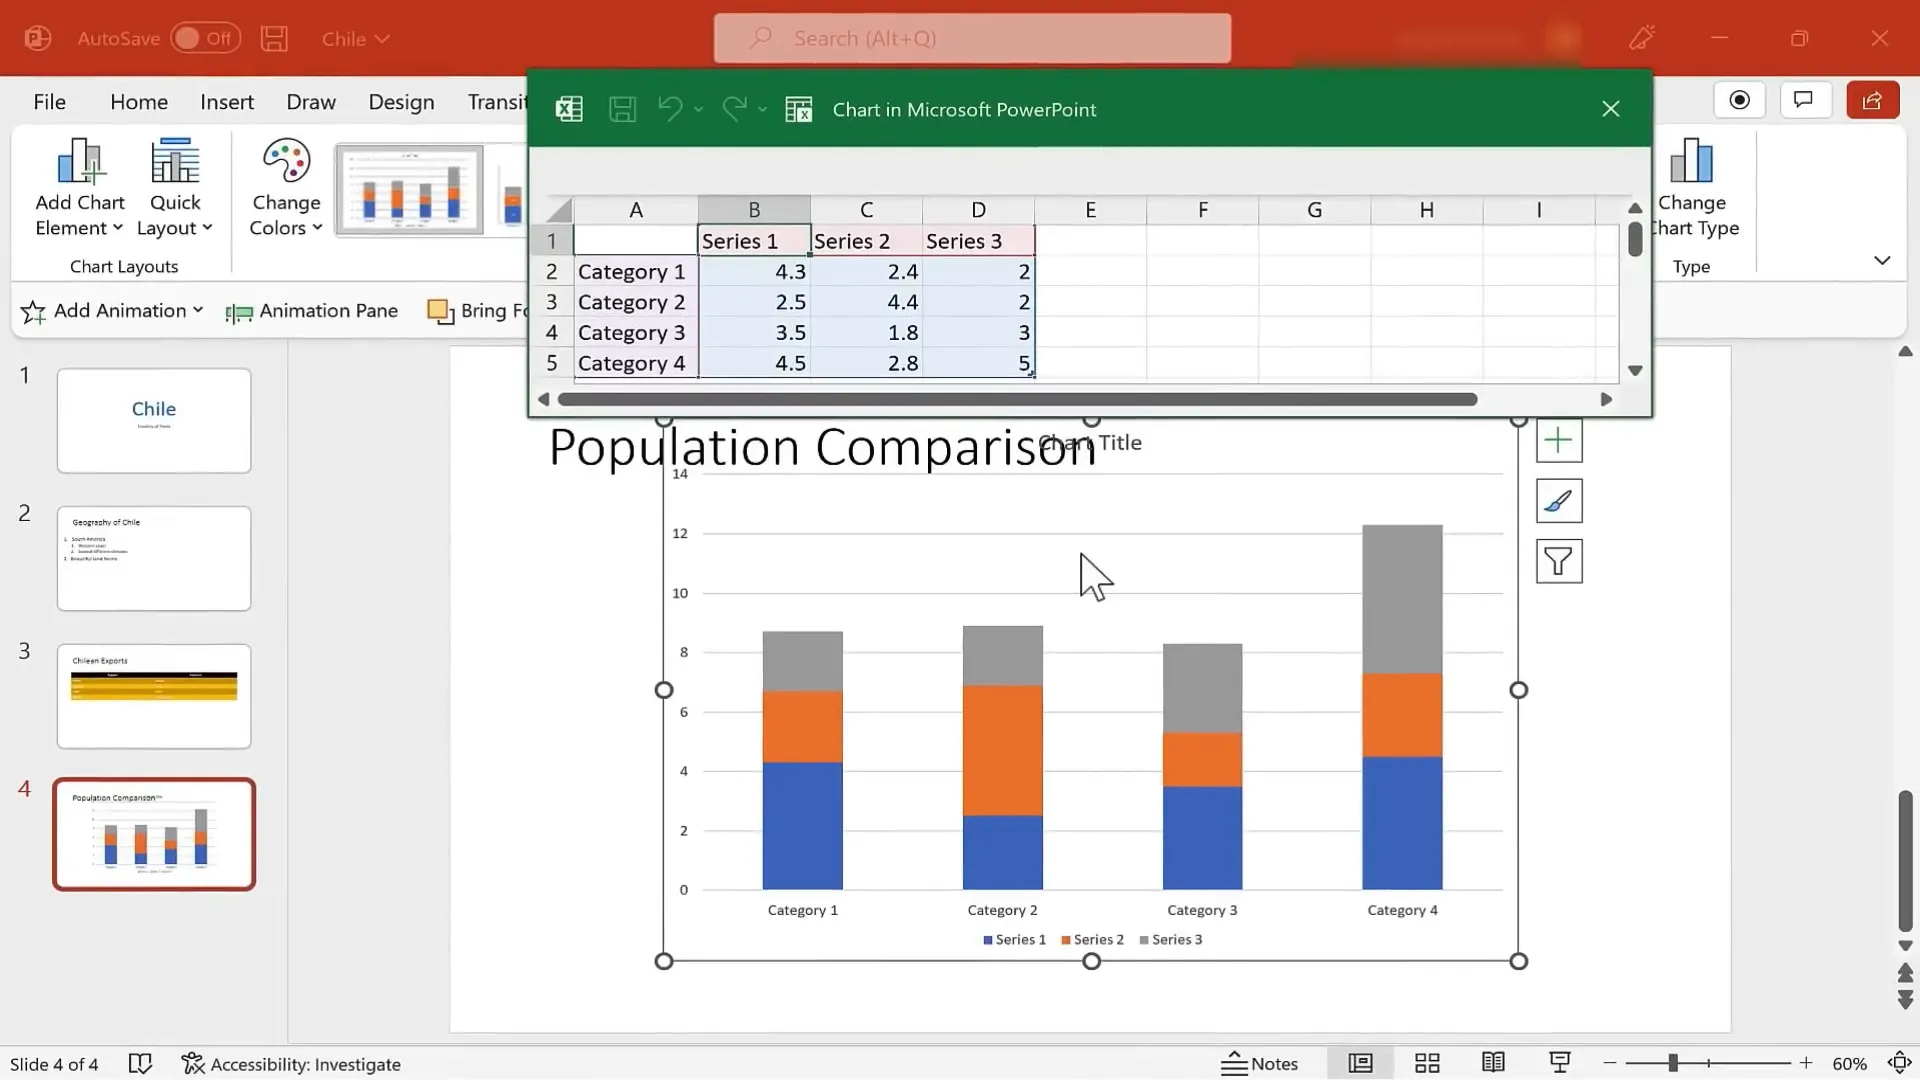
After inserting the chart, PowerPoint opens a mini Excel window where you can input your data. You can delete unnecessary columns and rows, add country names, population numbers, or any other data relevant to your presentation.
The chart updates live as you edit the data, making it easy to visualize changes. You can resize your chart and customize its appearance using the Chart Design and Format tabs, where you can add elements like titles, legends, and data labels, or change colors and styles.
Annotating charts is also possible by inserting shapes like ovals or arrows to highlight specific parts of your chart. Adjust shape fill and outline colors to make annotations clear and visually appealing.
Adding Objects: Word Art, Text Boxes, and Pictures
PowerPoint allows you to add various objects to slides to enhance your presentation:
Word Art and Text Boxes
Word Art lets you create stylized text with special effects like shadows, outlines, and colors. To add Word Art, go to the Insert tab, select Word Art, and choose a style. You can then edit the text and use the quick formatting pop-up to adjust font properties.
Regular text boxes are useful when you want to add text outside of predefined placeholders. Insert a text box from the Insert tab, click anywhere on the slide, and start typing. Multiple text boxes can overlap and be moved independently.
Pictures
Adding images can make your slides more engaging. PowerPoint offers several options for inserting pictures:
- From your device: Upload images saved on your computer.
- Online Pictures: Search Bing Images directly within PowerPoint.
- Stock Images: Access a library of professional images, icons, cutout people, stickers, videos, and illustrations.
When searching for images online, adding PNG to your search term often yields images with transparent backgrounds, which can integrate seamlessly into your slides.
After inserting images, you can resize, move, rotate, and reorder them. Use the Picture Format tab or right-click options to bring images forward or send them backward, ensuring the proper layering of slide elements.
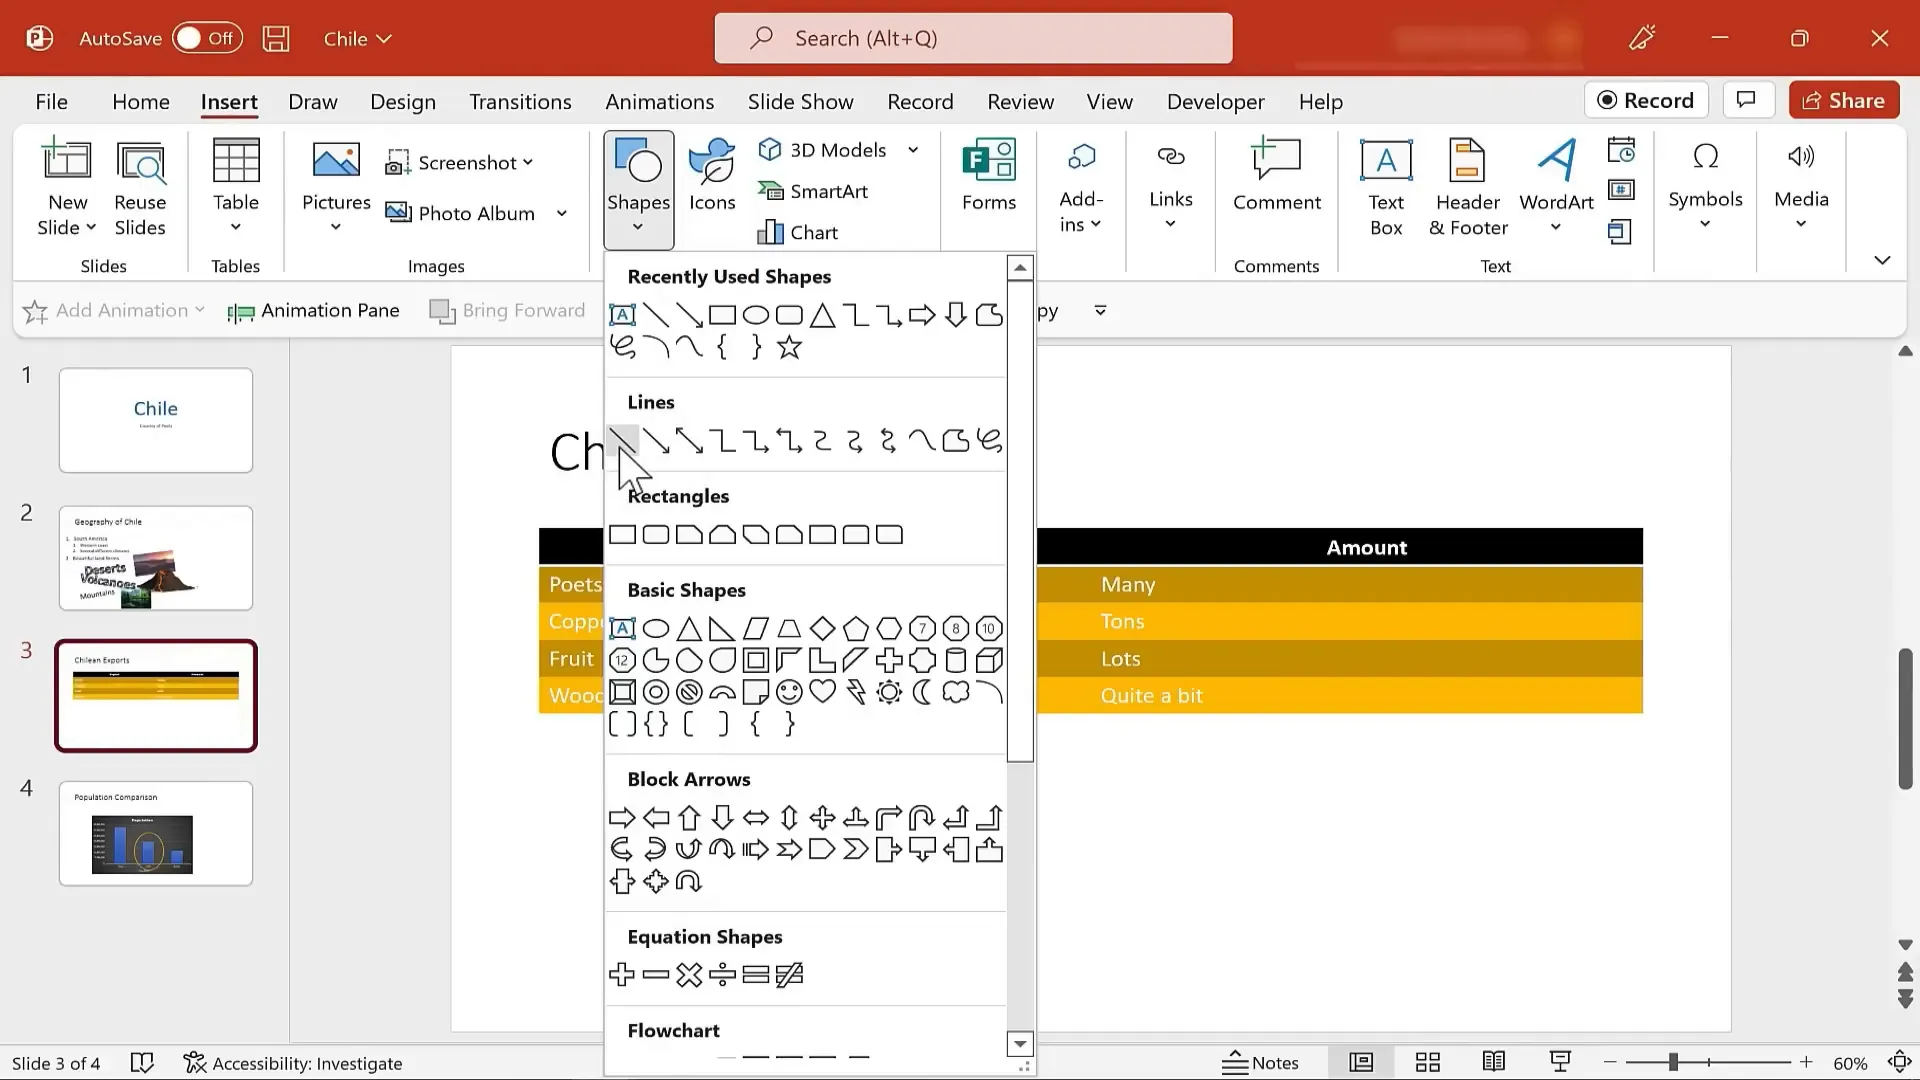
Drawing and Using Shapes in PowerPoint
Shapes are versatile tools for emphasizing content, creating diagrams, or decorating slides. To insert shapes, go to the Insert tab and select Shapes from the illustrations group. Common shapes include lines, arrows, rectangles, ovals, and more.
Holding the Shift key while drawing keeps lines perfectly horizontal, vertical, or creates perfect circles and squares.
After inserting a shape, use the Shape Format tab to customize its fill color, outline color, line thickness, and style. You can also add text inside shapes by double-clicking them, turning them into colorful text boxes.
Newer PowerPoint versions include a Draw tab with pens and highlighters, allowing you to add freehand drawings or annotations directly on your slides.
Refining Your Presentation with Backgrounds, Transitions, and Themes
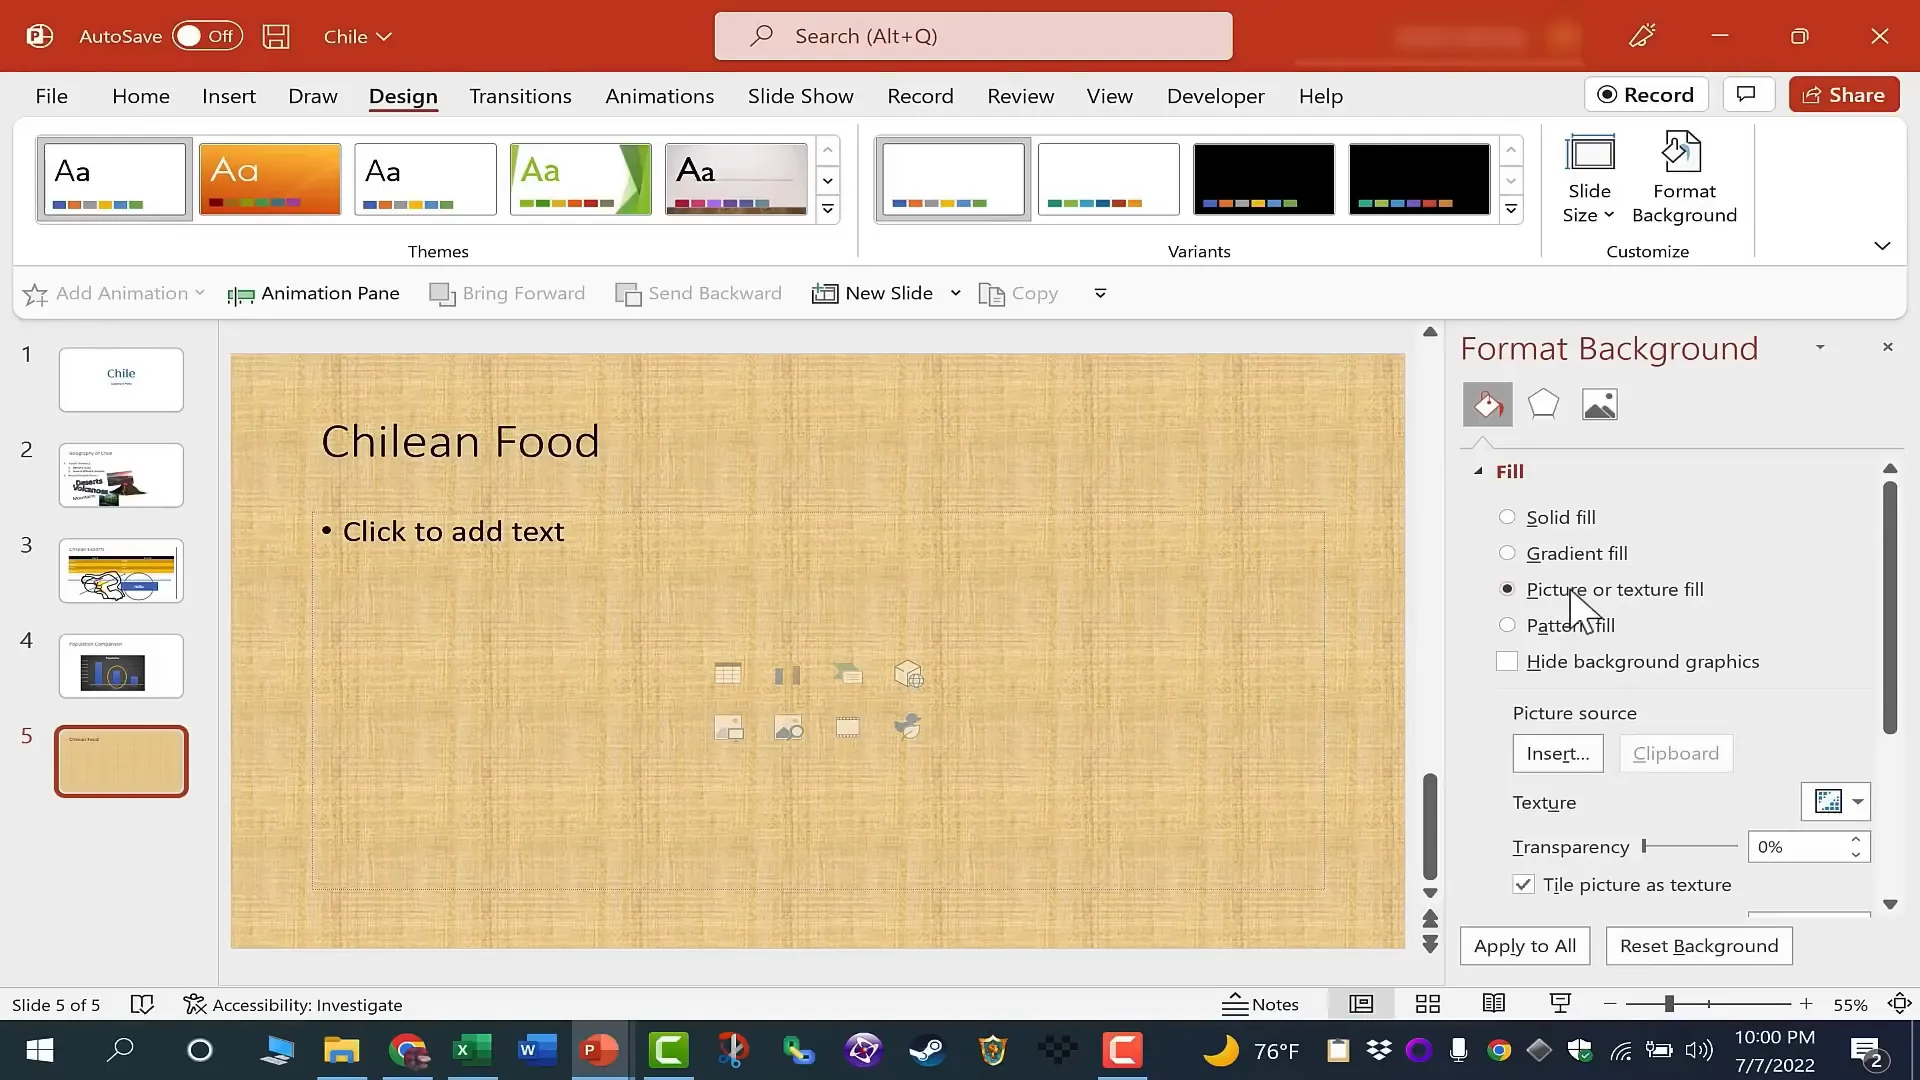
Background Images
You can enhance the visual appeal of slides by adding background images. Go to the Design tab and select Format Background. Choose Picture or texture fill and upload an image from your computer or select one online.
Because background images can make text hard to read, adjust the transparency slider to lighten the image and improve text visibility.
Slide Transitions and Timing
Transitions add effects when moving from one slide to the next. Access transitions from the Transitions tab and choose from options like fade, wipe, or vortex.
It’s best practice to use transitions sparingly for a professional presentation. Applying one consistent transition (e.g., fade) across all slides maintains a smooth flow without distracting viewers.
You can set slides to advance automatically after a set time or on mouse clicks. Automatic timing is useful for self-running presentations but requires careful rehearsal to ensure the audience has enough time to absorb each slide.
Themes
Themes control the overall design, including colors, fonts, and backgrounds. Explore themes under the Design tab by hovering over options to preview changes. Applying a theme adjusts your entire presentation’s look and feel, giving it a cohesive and polished appearance.
Printing and Exporting Your Presentation
Once your presentation is complete, you may want to print handouts or export your slides for sharing.
Under the File tab, use the Export option to create:
- Videos of your slideshow.
- Animated GIFs for easy sharing.
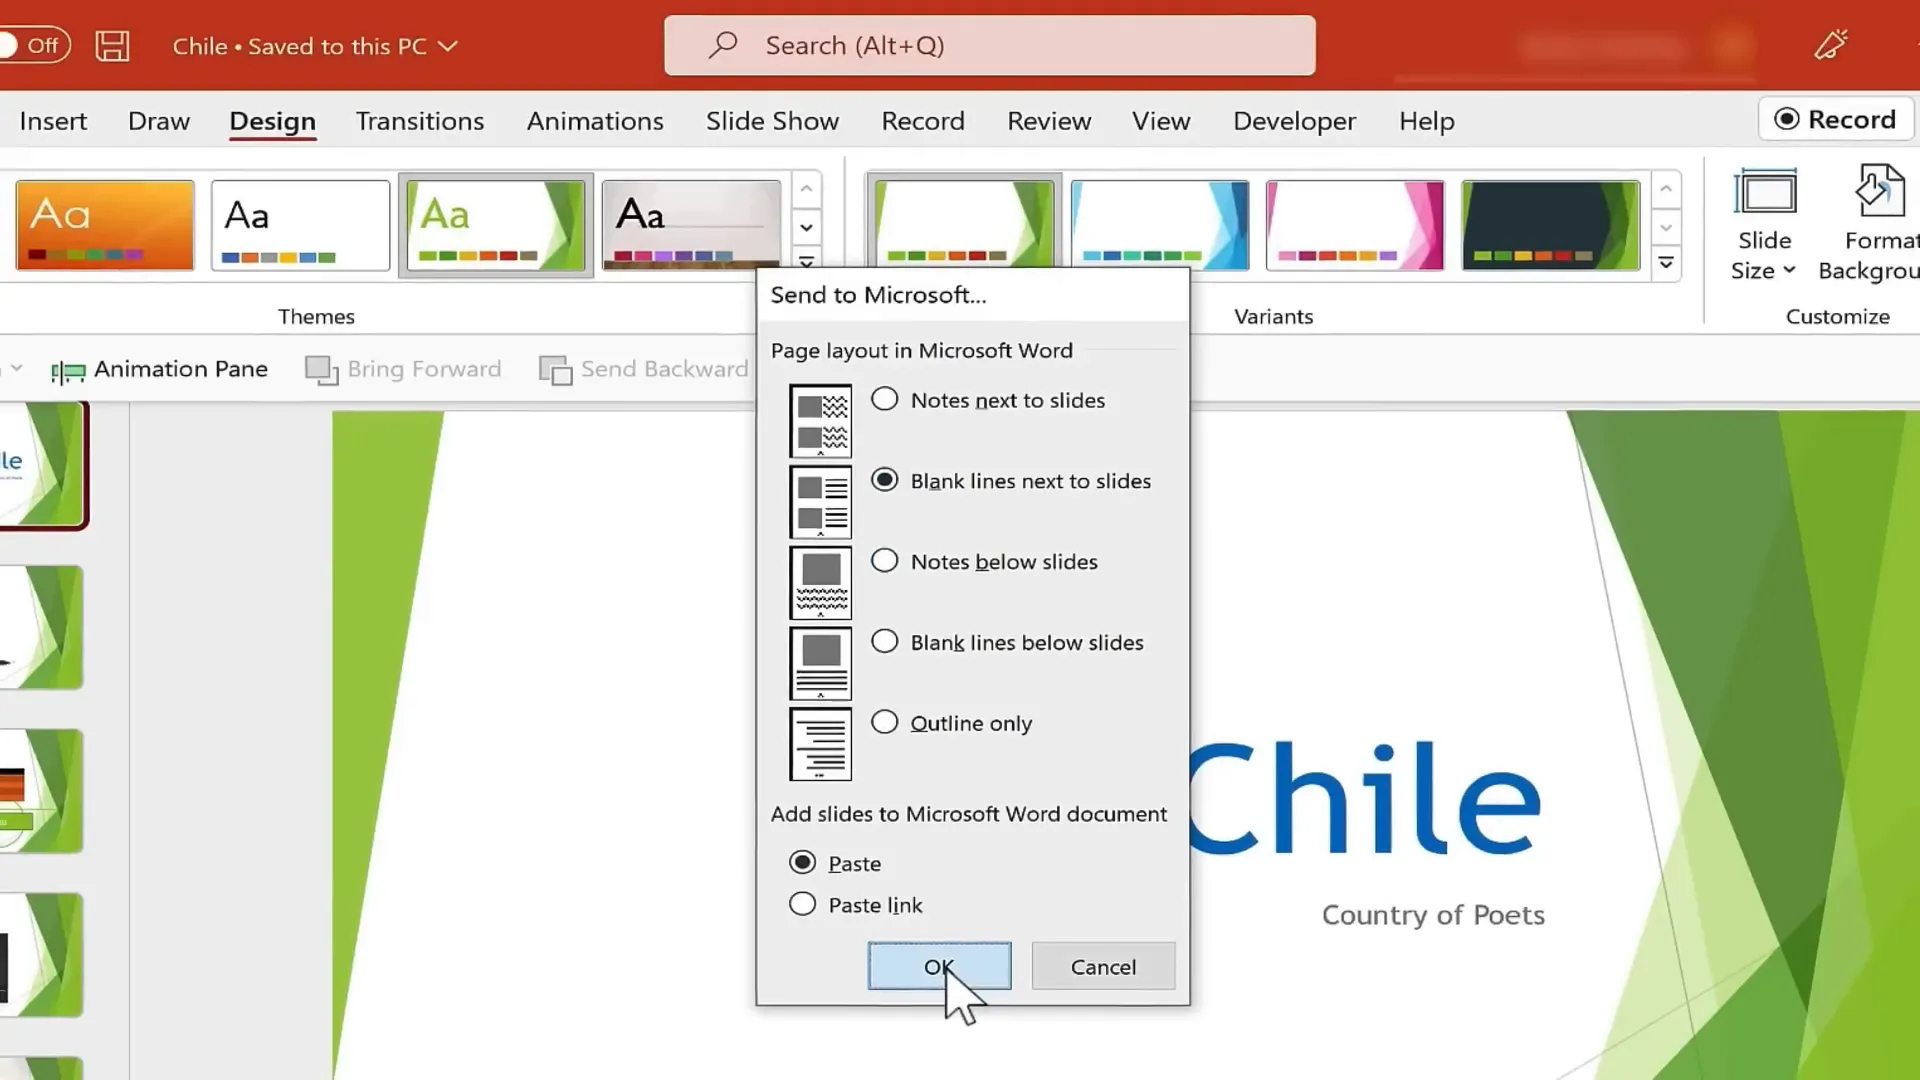
- Handouts by exporting slides with notes to Microsoft Word, allowing your audience to take notes.
You can also save your presentation in different file formats:
- PowerPoint Show (.ppsx): Opens directly in slideshow mode.
- Template (.potx): Save as a reusable design template.
- PDF: Ideal for sharing and printing without editing.
Sharing your presentation is easy via OneDrive integration or by sending it as an email attachment directly from PowerPoint.
Delivering Your Presentation
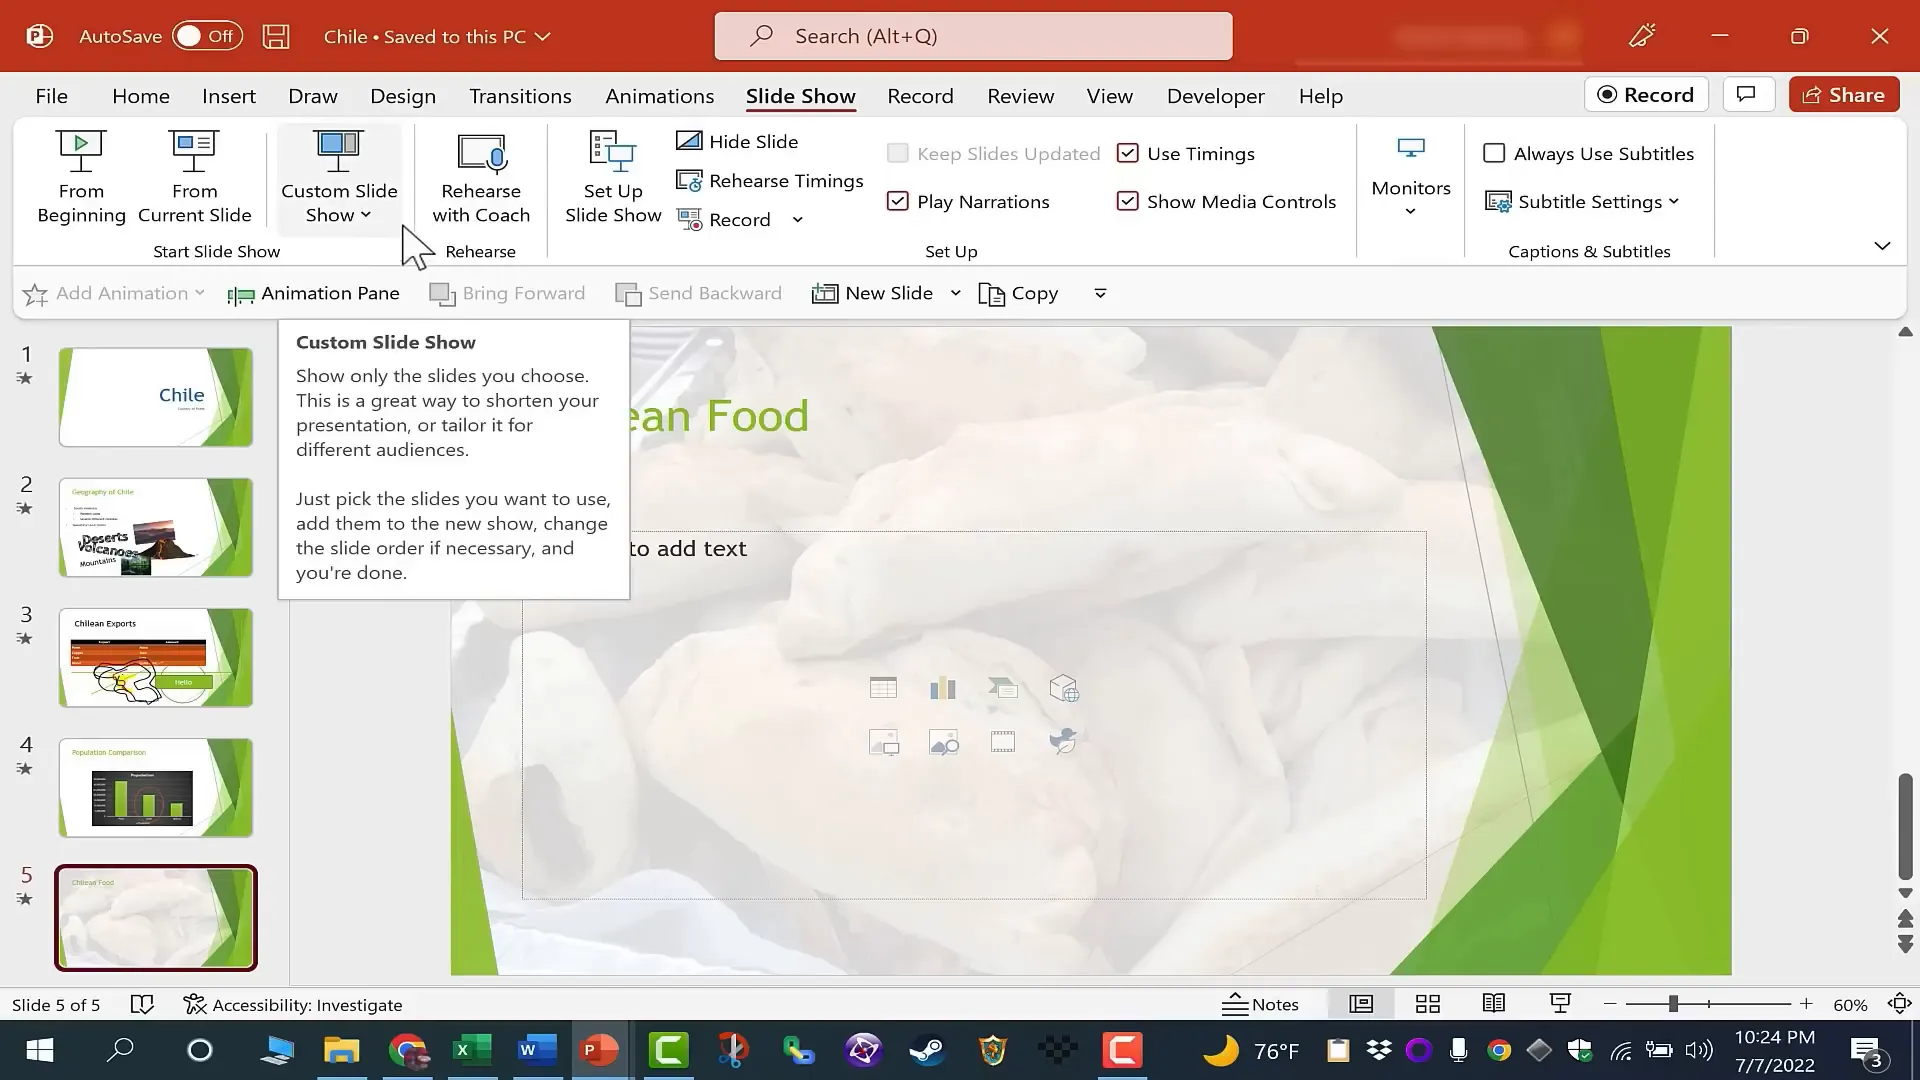
When it’s time to present, open your file and click the Slideshow button in the bottom right corner or use the Slideshow tab to start from the beginning or current slide.
During your presentation, use mouse clicks, keyboard arrows, or a remote to advance slides. PowerPoint also offers advanced features like custom shows, rehearsal with coach, and recording options to enhance your delivery.
Preparation is key. Practice your timings, transitions, and speaking points to ensure a smooth and confident presentation.
Frequently Asked Questions (FAQ)
What version of PowerPoint does this guide apply to?
This guide covers features applicable to most modern versions of Microsoft PowerPoint, including PowerPoint 365 and PowerPoint 2016 onwards.
Can I use PowerPoint on different devices?
Yes, PowerPoint is available on Windows, Mac, and mobile devices. The interface may vary slightly, but core features remain consistent.
How do I insert videos or animations into my presentation?
Go to the Insert tab, select Video or Animation options to embed multimedia. Animations can be added from the Animations tab to text or objects.
Is it better to use templates or create slides from scratch?
Templates save time and ensure design consistency, but creating slides from scratch gives you full control over layout and style. Use templates as a starting point if you prefer.
How do I make my presentation accessible?
Use clear fonts, sufficient contrast, descriptive alt text for images, and avoid excessive animations to make your presentation accessible to all audiences.
Can I collaborate with others on a PowerPoint presentation?
Yes, by saving your presentation to OneDrive or SharePoint, multiple users can edit simultaneously and leave comments.
How do I export my presentation as a PDF?
Under File > Save As, choose PDF from the file type dropdown menu. This creates a non-editable version suitable for sharing.
What are presenter notes and how do I use them?
Presenter notes are private notes visible only to you during the presentation, helping you remember key points. Add them in the Notes pane below each slide in Normal view.
How do I control slide transitions?
Use the Transitions tab to apply effects and set timing. Avoid overusing different transitions to keep your presentation professional.
Where can I find free images to use in my presentations?
PowerPoint provides access to online pictures and stock images within the Insert tab. You can also use royalty-free image sites like Unsplash or Pixabay.
Final Thoughts
Mastering Microsoft PowerPoint opens up a world of possibilities for creating engaging and effective presentations. This guide has covered every fundamental aspect you need to get started—from the interface layout to delivering your final slideshow confidently.
Remember, practice makes perfect. As you explore these features, experiment with different layouts, designs, and content types to find what works best for your style and audience. PowerPoint is a versatile tool that, once mastered, will serve you well in educational, professional, and personal projects.
Keep exploring, stay curious, and don’t hesitate to revisit this guide whenever you need a refresher or want to learn new tricks. Your journey to becoming a PowerPoint expert starts here!

Check out the full video: Microsoft PowerPoint for Beginners – Complete Course


