

Are you a teacher or educator with a ready-made PowerPoint presentation and wondering how to transform it into an interactive online course? You’re in luck! In this comprehensive guide, we’ll walk you through the entire process of converting your PowerPoint slides into a fully functional online course for free, complete with navigation sidebars, animations, quizzes, embedded videos, and even live websites.
Thanks to powerful free tools like the iSpring Free plugin, you can effortlessly enhance your existing presentations and publish them as engaging online courses. This article covers everything from slide design tips, interactive navigation creation, slide zoom animations, quiz integration, to publishing and previewing your course. By the end, you’ll have a deep understanding of how to create a professional-quality PowerPoint course that captivates and educates your students.
Table of Contents
- Presentation Overview: What Makes a Great PowerPoint Course
- Creating an Interactive Sidebar Navigation
- Animating the Sidebar for Seamless User Experience
- Mastering Slide Zoom Animations to Engage Learners
- Embedding YouTube Videos and Live Websites
- Creating Interactive Quizzes to Test Knowledge
- Publishing Your PowerPoint Course for Free
- Frequently Asked Questions (FAQ)
- Conclusion: Take Your PowerPoint Course to the Next Level
Presentation Overview: What Makes a Great PowerPoint Course
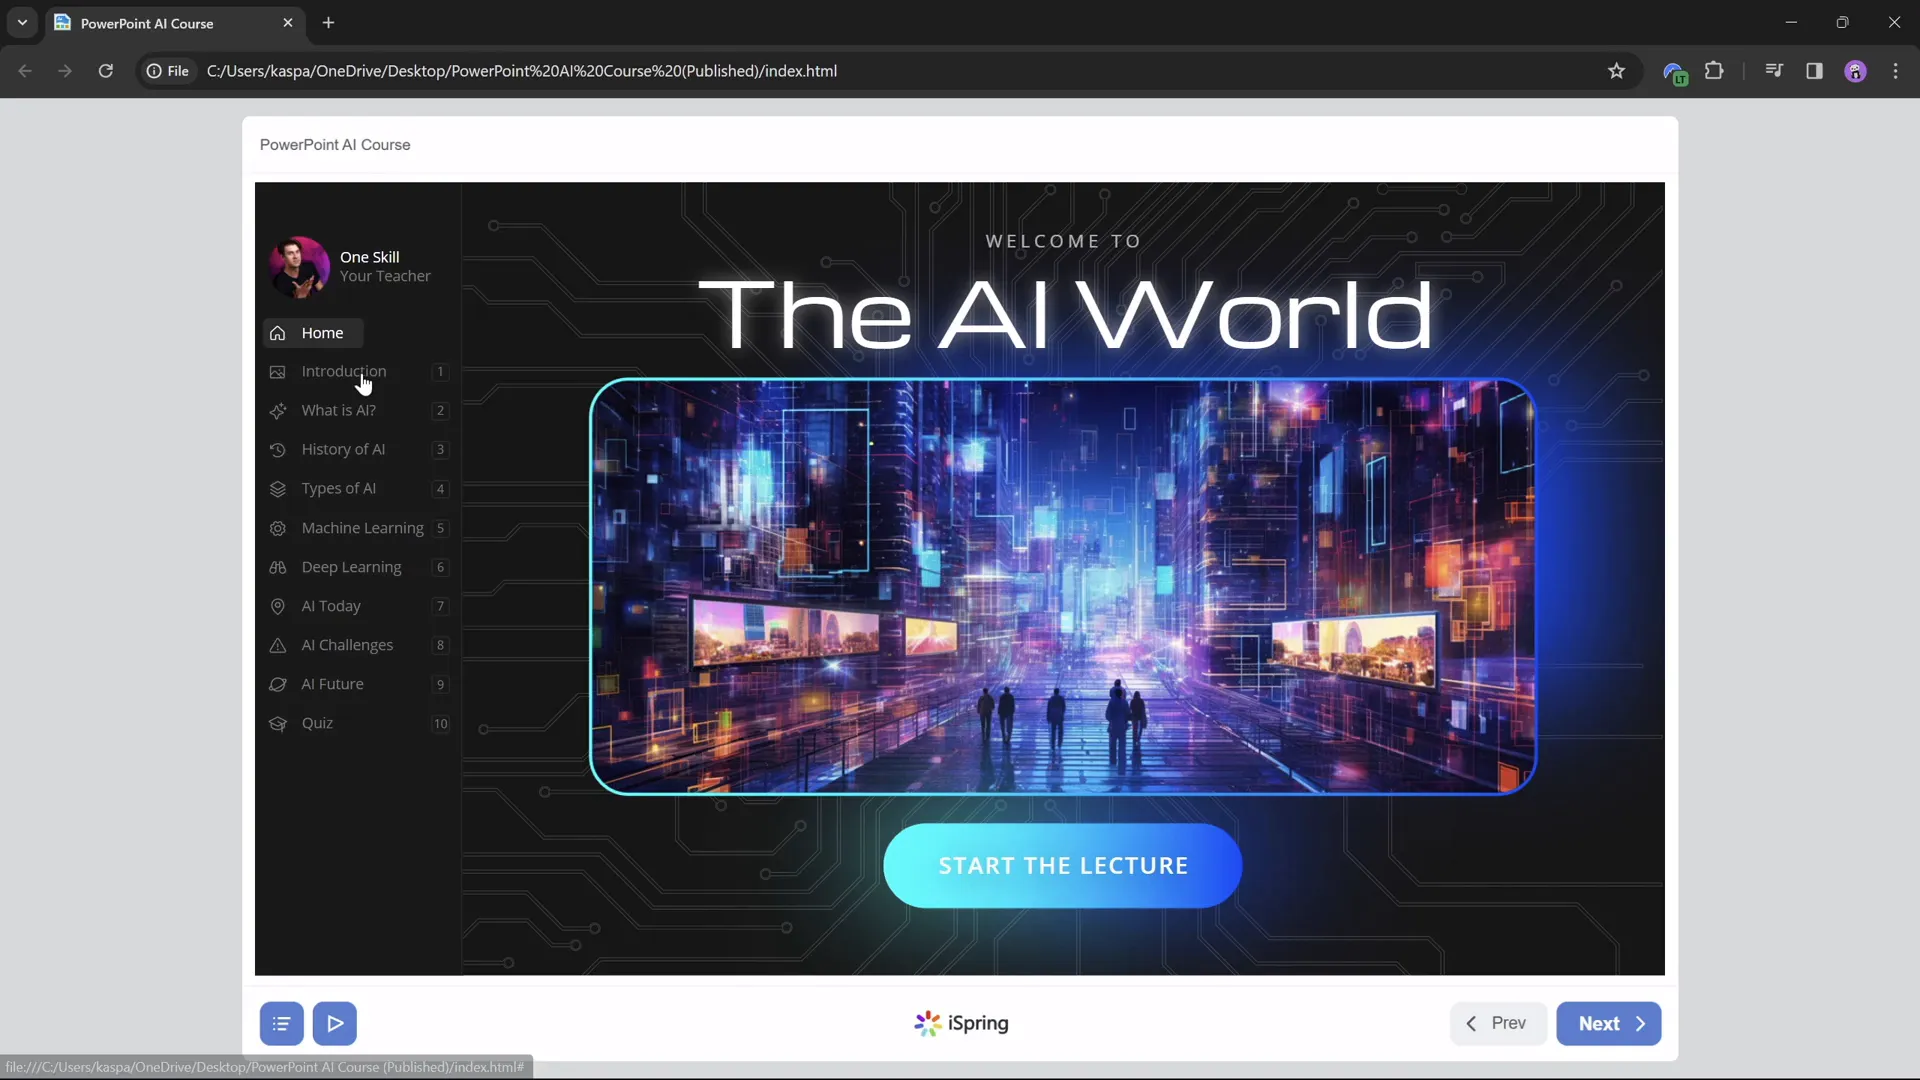
Imagine you’re a teacher preparing a course on Artificial Intelligence. You have a well-structured PowerPoint presentation ready to go, but you want to make it more interactive and accessible online. Here’s what a great PowerPoint course looks like, and what you can expect to create:
- Clear Navigation: A sidebar on the left lets users easily jump between sections or topics.
- Slide Zooms: Interactive zoom-ins on specific content areas for deeper exploration.
- Engaging Content Flow: Topics like AI basics, history, types, machine learning, deep learning, applications, challenges, and the future.
- Interactive Quizzes: To reinforce learning and assess student understanding.
- Multimedia Integration: Embedding YouTube videos and live websites for richer content.
- Smooth Animations: To enhance the user experience without overwhelming them.
This structure not only makes the course visually appealing but also highly functional for learners, providing them with a rich, interactive learning environment.

Creating an Interactive Sidebar Navigation
One of the standout features of a polished PowerPoint course is an intuitive sidebar navigation menu that stays consistent throughout the presentation. Here’s a step-by-step guide to creating one:
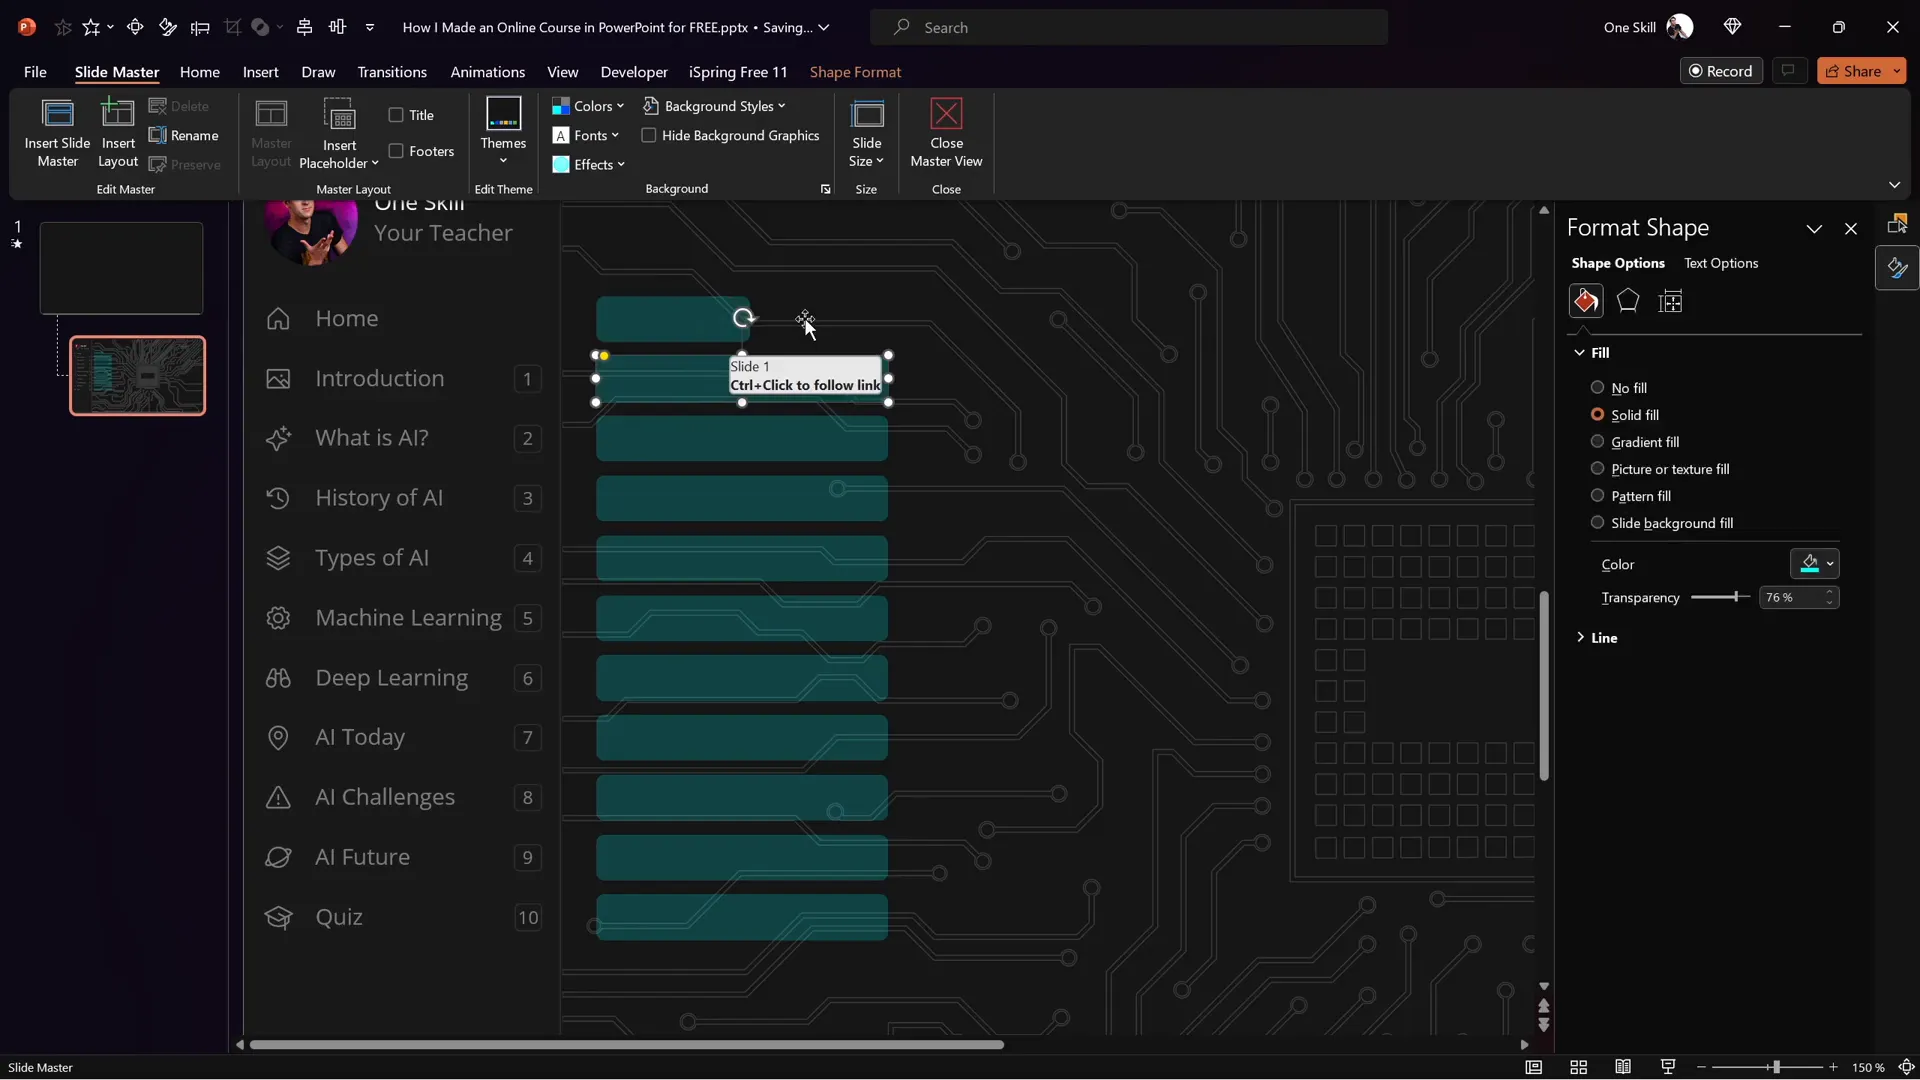
1. Use Slide Master to Design the Sidebar
The secret to an efficient sidebar is to create it in the Slide Master view. This ensures the sidebar appears on all slides that use the same layout, saving you the trouble of duplicating it manually on each slide.
- Go to View > Slide Master.
- Design your sidebar: add text boxes for section titles, icons on the left, and section numbers on the right.
- Add any background shapes or images, such as a microchip-themed background for a tech course.
By placing repeatable elements here, you ensure consistency and save significant time editing individual slides.
2. Make Sidebar Sections Clickable Using Invisible Hyperlinked Shapes
To make the sidebar interactive, insert transparent shapes over each section that act as clickable buttons:
- Insert rounded rectangles over each sidebar section.
- Set their fill transparency to 100% (fully invisible) but keep them selectable.
- Use the Selection Pane (found under Home > Select > Selection Pane) to manage these shapes easily.
- Add hyperlinks to these shapes linking to the respective slides in your presentation.
For example, the “Introduction” button links to slide 2, “What is AI?” links to slide 3, and so on.
This approach allows users to navigate freely between sections by clicking the sidebar.
3. Keep Sidebar Elements Editable
Since the sidebar is built in the Slide Master, you can update text, icons, or colors globally at any time by returning to the Slide Master view. This flexibility is key for maintaining and updating your course efficiently.
Animating the Sidebar for Seamless User Experience
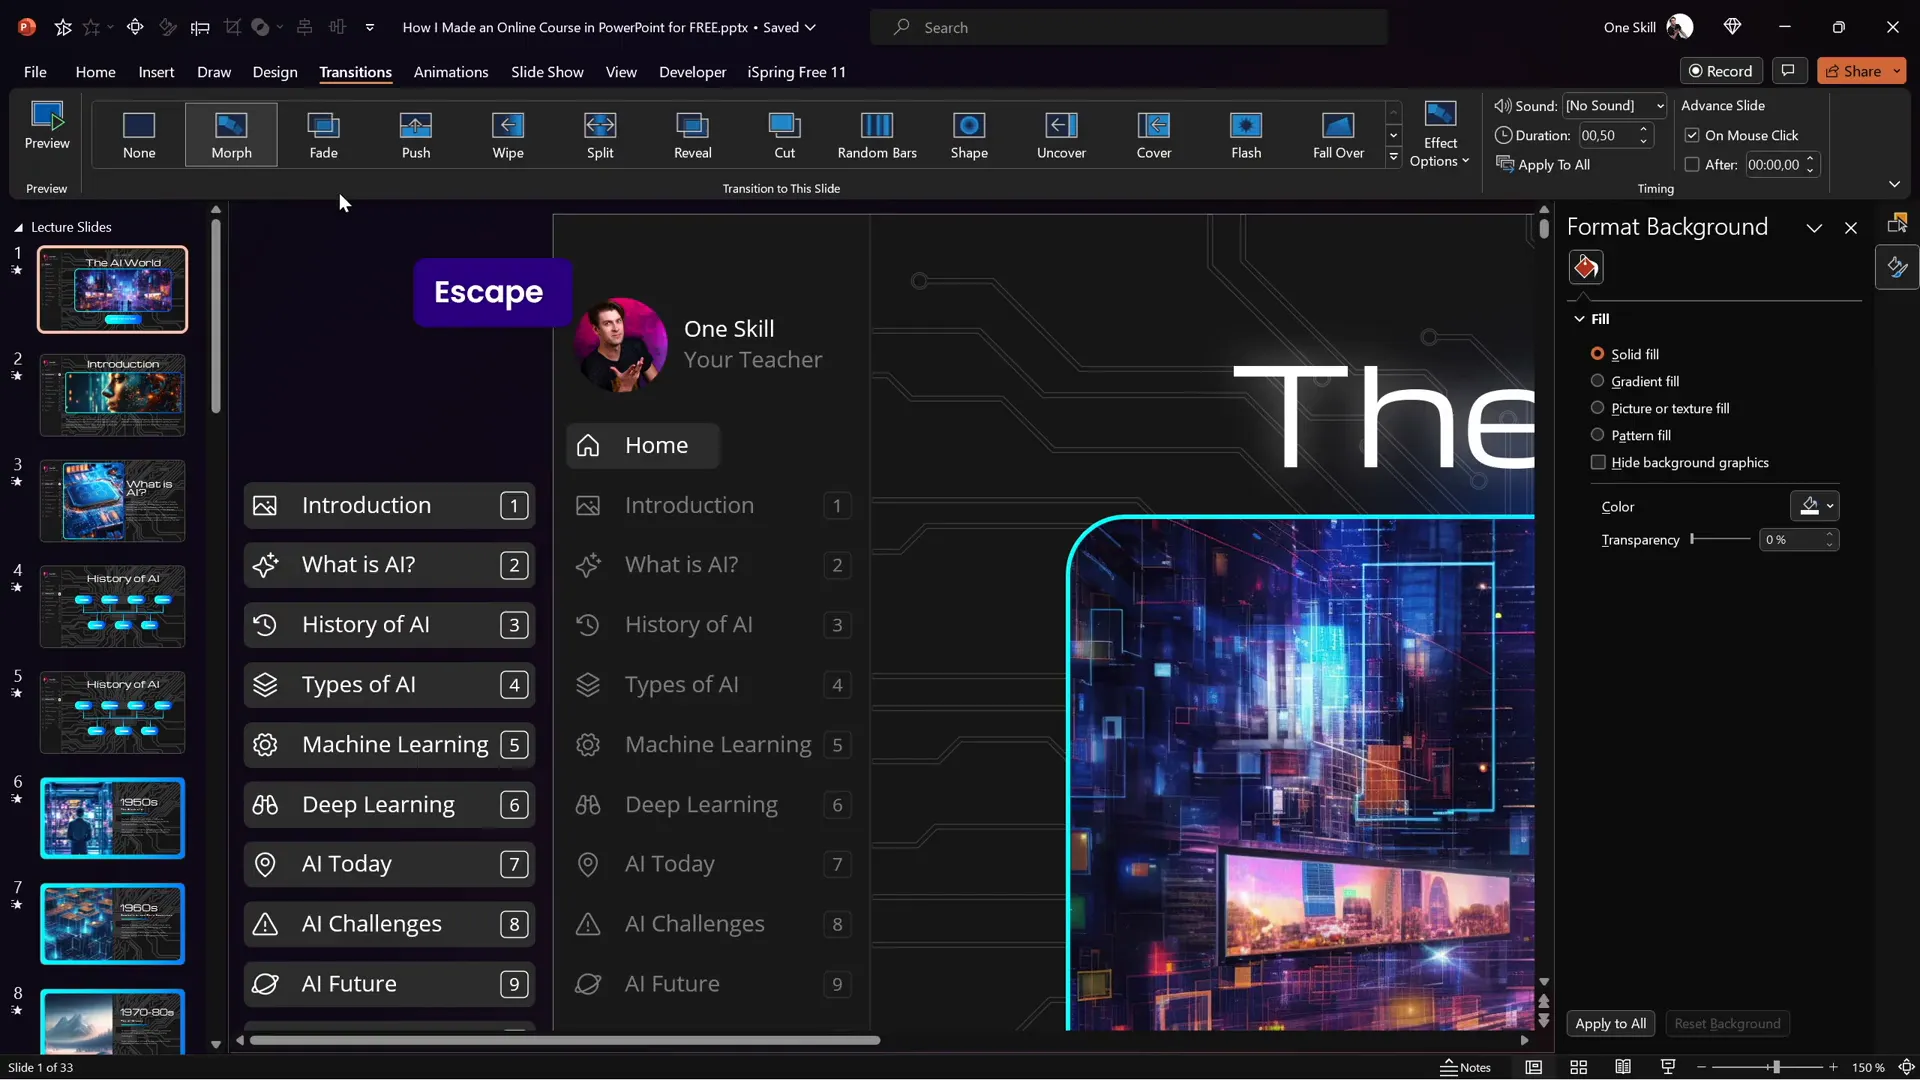
Static sidebars can feel dull. Adding subtle animations enhances user engagement and provides visual feedback about their current location in the course.
How to Create Animated Sidebar States
Unfortunately, animations in Slide Master view are limited. The workaround is to create multiple sidebar versions in normal view representing different “active” states for each section:
- Duplicate the sidebar group of elements (text, icons, numbers) for each slide.
- For each slide, highlight the section corresponding to that slide by changing the color or background of that sidebar item.
- Place the previous slide’s “active” sidebar off the slide area and the current slide’s active sidebar in place.
- Set the slide transition to Morph with a duration of about 0.5 seconds.
The Morph transition animates the movement and color changes between sidebar states, creating a smooth visual effect when navigating the course.
This approach also enables global editing by copying and pasting sidebar cards between slides.
Mastering Slide Zoom Animations to Engage Learners
Slide zoom animations are a powerful way to let learners dive deeper into specific content areas without cluttering your main slides. Here’s how to use them effectively:
1. Use Invisible Slide Zooms
To keep your design clean, use invisible slide zooms by applying a transparent image as the cover for the zoom link. This way, the zoom areas are clickable but don’t visually interfere with your slide design.
2. Manage Animations for a Smooth Experience
Slide zooms replay animations each time you zoom in and out by default, which might be distracting. To have animations play only once:
- Duplicate the slide with animations.
- On the first slide, keep all animations but remove slide zooms.
- Set the first slide to transition automatically after 0 seconds.
- On the second slide, keep slide zooms but remove animations.
This setup ensures animations play once, then the presentation automatically switches to the interactive slide zoom version without replaying animations on zoom out.
Embedding YouTube Videos and Live Websites
Adding multimedia elements like videos and live websites enriches your PowerPoint course and keeps learners engaged. The iSpring Free plugin makes this easy:
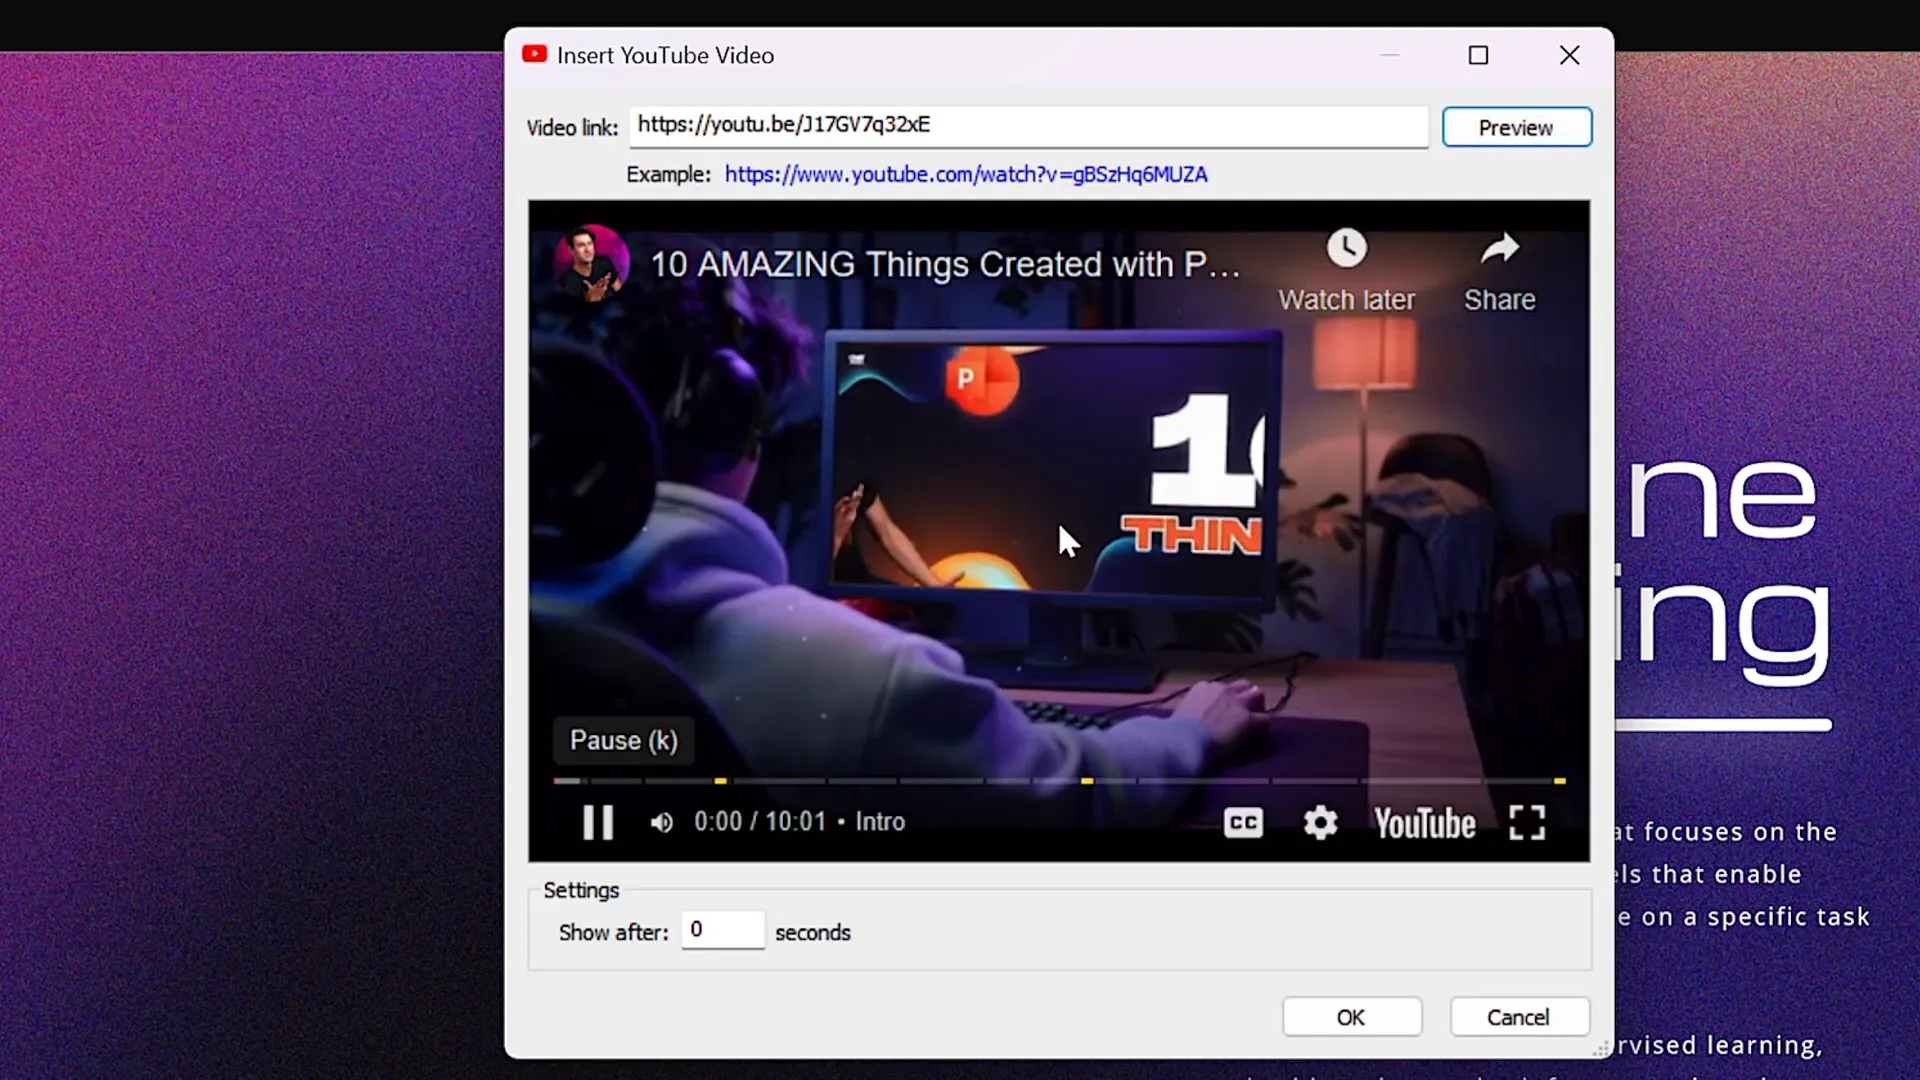
1. Inserting a YouTube Video
- Delete any placeholder image on your slide.
- Go to the iSpring Free tab in PowerPoint.
- Click the YouTube button and paste the URL of your desired video.
- Preview the video to check playback.
- Click OK and resize the video frame as needed on your slide.
Your embedded YouTube videos play smoothly within the course player, allowing users to watch without leaving the presentation.
2. Embedding a Live Website
- Select a slide to embed a website, preferably one with room for the web object.
- Delete any existing photos or placeholders.
- Copy the URL of the website you want to embed.
- In the iSpring Free tab, click Web Object and paste the URL.
- Resize and position the embedded website frame on your slide.
- Preview to confirm that the site is fully interactive—scrollable, clickable, and functional.
This feature opens up a new level of interactivity, allowing learners to explore related websites directly within your course.
Creating Interactive Quizzes to Test Knowledge
Quizzes are essential for assessing learner understanding and making your PowerPoint course more interactive. Here’s how to create quizzes using the iSpring Free plugin:
1. Setting Up Your Quiz
- Go to the slide where you want the quiz or create a new quiz slide.
- Click the Quiz button in the iSpring Free tab.
- Choose between a Graded Quiz or a Survey.
- Click Questions to add questions.
2. Types of Questions You Can Add
| Question Type | Description |
|---|---|
| Multiple Choice | One correct answer among multiple options. |
| Multiple Response | Select multiple correct answers from a list. |
| Short Answer | Students type in a text answer. |
With the full iSpring Suite, you can access even more question types like matching, drag-and-drop, and hotspot questions.
3. Adding Questions and Answers
- Paste your question text and answer options.
- Select the correct answer(s).
- Customize feedback messages for correct and incorrect responses.
- Optionally, add images to questions or answers to make them more engaging.
4. Quiz Options
- Name your quiz (e.g., “The World of AI”).
- Set passing percentage (e.g., 50%).
- Assign points per question.
- Enable answer shuffling for randomized quizzes.
- Configure email reports for quiz results.
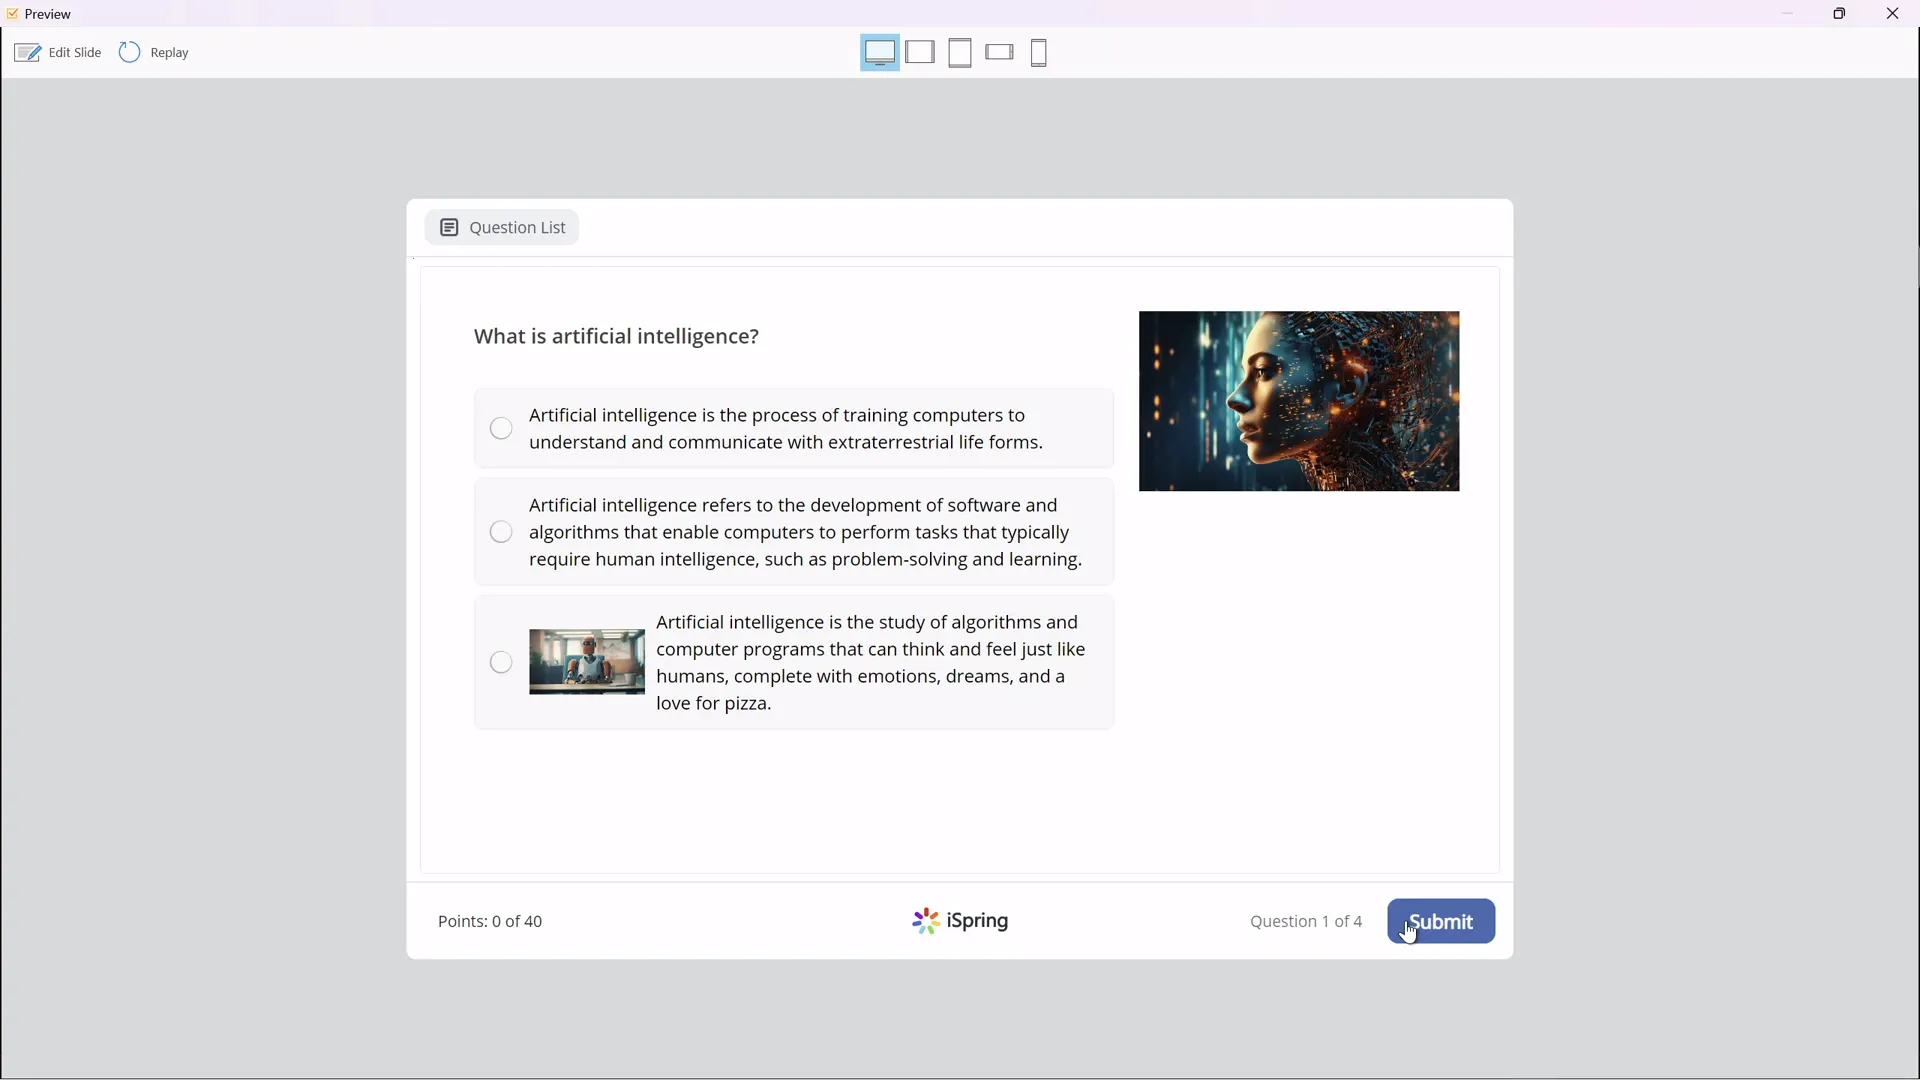
5. Previewing and Integrating the Quiz
Once your quiz is complete, preview it to experience the learner’s perspective. The quiz starts with a welcome slide, followed by questions with interactive answer choices and images.
After finishing, learners receive their score and feedback based on the passing criteria you set.
Insert a button on the previous slide linking to the quiz slide to smoothly integrate the quiz into your course flow.
Publishing Your PowerPoint Course for Free
After designing your course with navigation, animations, multimedia, and quizzes, it’s time to publish it for learners to access.
Publishing Options with iSpring Free
- Publish to Computer: Export your course as HTML5 files saved locally for upload to any website or LMS.
- Publish for LMS: Export as SCORM package compatible with LMS platforms like Moodle.
- Publish to iSpring Learn: Use iSpring’s cloud LMS for hosting and managing courses.
- Publish to YouTube, iSpring Page, or iSpring Market: Alternative publishing channels.
Publishing Steps
- Click the Publish button in the iSpring Free tab.
- Name your course and select the save location.
- Choose whether to publish all slides or selected slides.
- Set course size options (e.g., fit to browser window).
- Click Publish and wait for the process to complete.
- Click View Course to preview your published course in the iSpring course player.
The course player supports navigation, animations, embedded videos, live websites, and quizzes, providing a seamless learning experience.
Frequently Asked Questions (FAQ)
1. What is a PowerPoint course?
A PowerPoint course is an online learning module created by converting a PowerPoint presentation into an interactive course with features like navigation menus, quizzes, multimedia, and animations.
2. Can I create a PowerPoint course for free?
Yes! Using free tools like the iSpring Free plugin, you can convert your PowerPoint presentations into fully functional online courses without any cost.
3. How do I make my PowerPoint presentation interactive?
Add clickable navigation elements, slide zooms, embedded videos, live websites, and quizzes using tools like iSpring Free to enhance interactivity.
4. What are slide zooms, and how do they work?
Slide zooms are clickable areas on a slide that zoom into another slide for detailed information. They help keep the main slide uncluttered while allowing exploration of topics.
5. Can I embed YouTube videos and websites in my PowerPoint course?
Absolutely! The iSpring Free plugin allows you to embed YouTube videos and live websites directly into your slides, creating a richer learning experience.
6. How do I create quizzes in my PowerPoint course?
You can use the quiz feature in iSpring Free to add multiple choice, multiple response, and short answer questions to assess learner knowledge.
7. What file formats can I publish my course in?
Common formats include HTML5 for web publishing and SCORM for LMS compatibility. iSpring Free supports both.
8. Can I edit my course after publishing?
Yes, you can always update your PowerPoint presentation and republish the course to reflect changes.
Conclusion: Take Your PowerPoint Course to the Next Level
Transforming your PowerPoint presentation into a dynamic online course has never been easier or more accessible. With straightforward techniques for creating interactive sidebars, smooth animations, slide zooms, embedded multimedia, and engaging quizzes, you can provide a rich learning experience for your students — all without spending a dime.
The key is using powerful free tools like iSpring Free to bridge the gap between static slides and interactive online courses. Whether you’re teaching Artificial Intelligence or any other subject, these methods empower you to leverage your existing content into an effective digital learning format.
Ready to get started? Download the iSpring Free plugin today, and start building your own PowerPoint course that will captivate and educate your audience like never before.
For more detailed tutorials and free resources, check the links in the video description of the original creator, One Skill PPT. Happy teaching!


