Creating engaging and interactive presentations in PowerPoint can elevate your storytelling and impress your audience. In this comprehensive tutorial, we’ll dive deep into how to build an impressive interactive morph animated slide design using PowerPoint. Inspired by the sleek design of the Filmora 14 website, this tutorial will guide you step-by-step to create a futuristic and dynamic slide with clickable buttons, smooth morph transitions, and a visually appealing photo mask effect.
Whether you’re a PowerPoint enthusiast, a presenter aiming to improve your slides, or someone interested in interactive design, this walkthrough will provide you with the tools, tips, and a free template to get started right away.
Table of Contents
- Introduction: Exploring Filmora 14’s AI-Powered Video Editor
- How to Use Filmora’s AI Audio to Video Feature
- Gathering and Setting Up PowerPoint Slide Assets
- Designing the Interactive Morph Slide in PowerPoint
- Making Buttons Clickable and Setting Up Hyperlinks
- Animating with Morph Transition for Seamless Interaction
- Final Preview and Testing Your Interactive Slide
- Frequently Asked Questions
- Conclusion: Elevate Your Presentations with Interactive Morph Slides
Introduction: Exploring Filmora 14’s AI-Powered Video Editor
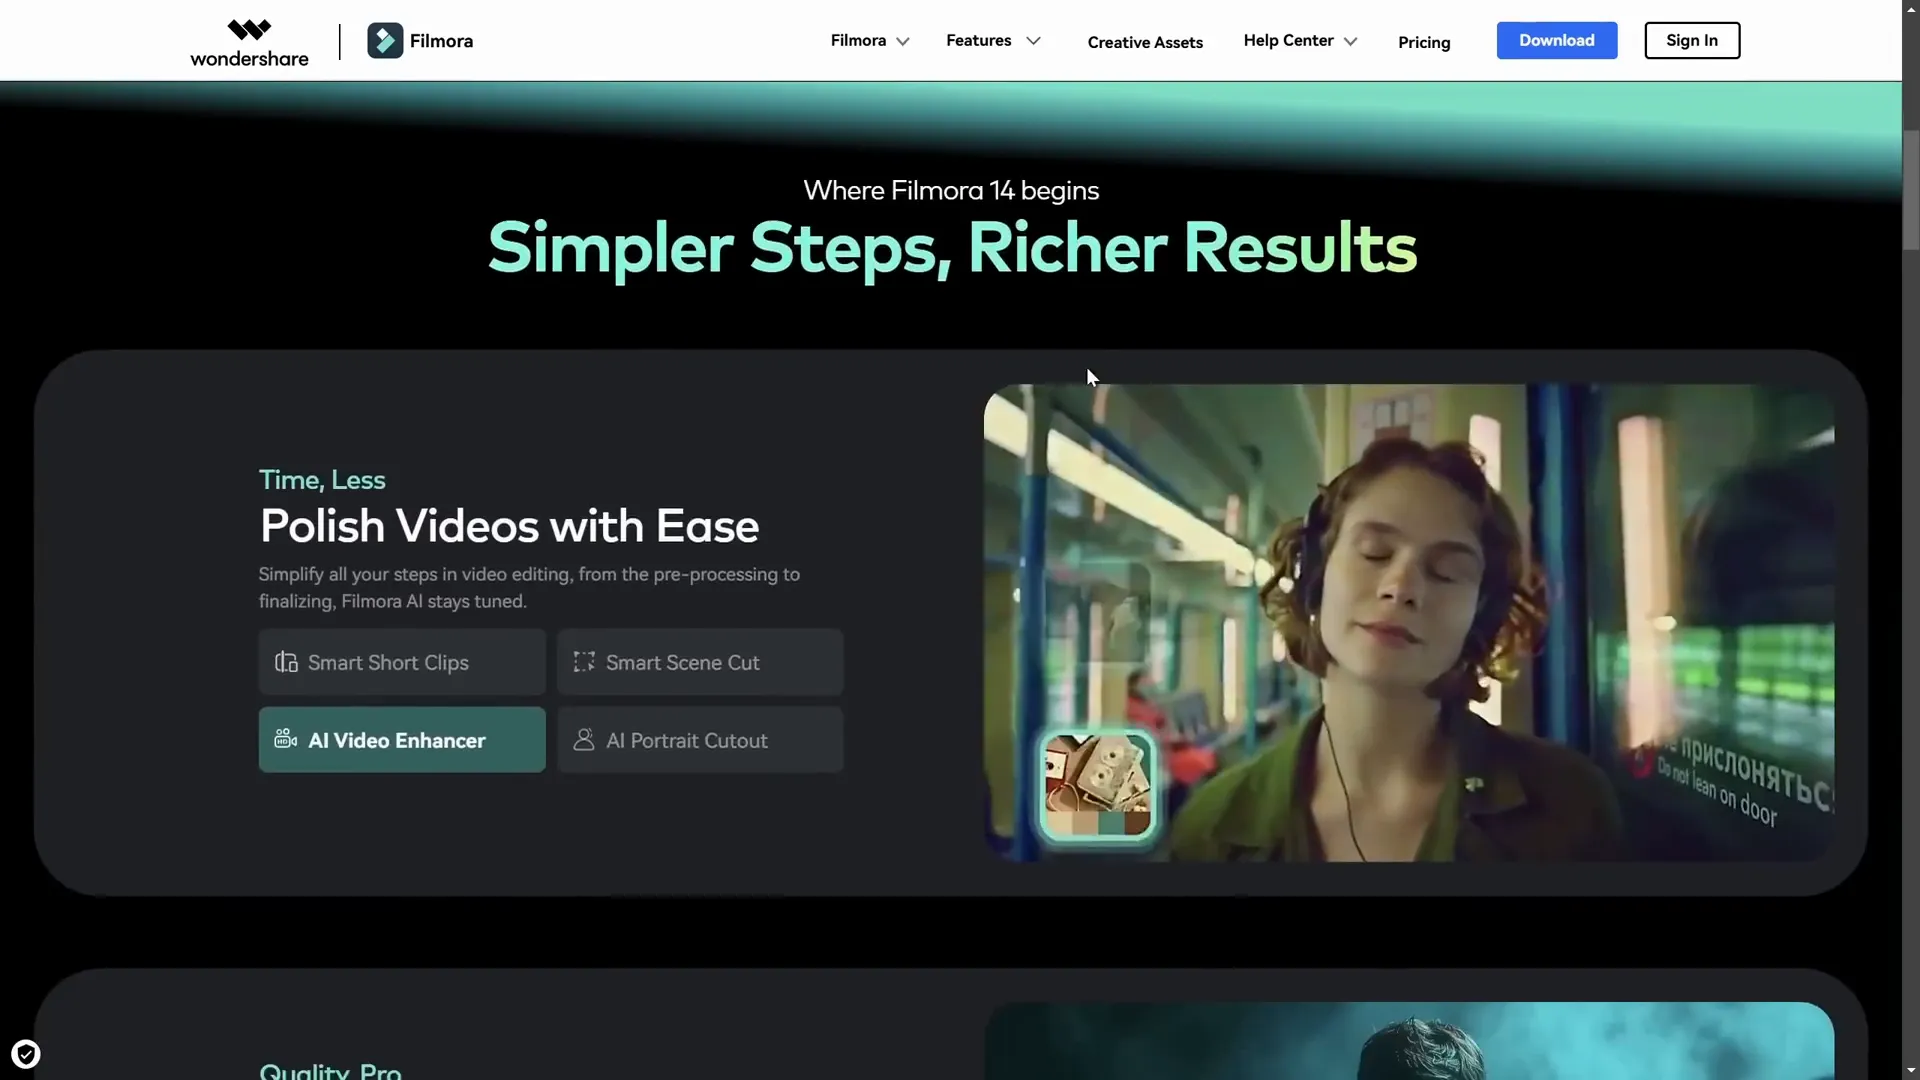
Before we jump into PowerPoint, let’s take a quick detour to explore Filmora 14, an AI-powered video editor that inspires the interactive slide design we’ll be creating. Filmora 14’s website features a sleek interactive menu that lets users click and scroll through different features effortlessly.
One of the standout new features of Filmora 14 is the AI Audio to Video tool. This tool is designed to convert audio files into engaging videos within minutes, making it ideal for podcasters, storytellers, or anyone who wants to add a video element to an audio clip.
This innovative feature sparked the idea for our PowerPoint slide, where you can interactively click buttons to reveal different content, mimicking the dynamic and smooth user experience found on Filmora’s website.
How to Use Filmora’s AI Audio to Video Feature
If you have an audio file and want to quickly create a video around it, Filmora’s AI Audio to Video is a fantastic solution. Here’s how to use it:
- Open Filmora 14 and locate the Audio to Video button. If it’s not visible, check under the Toolbox section.
- Upload your audio file. You can upload files ranging from 10 seconds up to 120 minutes. Alternatively, log into your YouTube account to upload audio directly from YouTube.
- Customize your video settings:
- Select the language of your audio (e.g., English, United States).
- Choose the content type (e.g., History).
- Set the aspect ratio (recommended 16:9 for widescreen).
- Choose the video style, such as flat illustration or watercolor sketch, or let Filmora auto-select.
- Pick a material template that defines how captions and transitions appear.
- Generate the video. Filmora analyzes your audio and creates the video with captions and visual elements.
- Preview and edit. You can watch the video, export it immediately, or continue editing clips and transitions within Filmora.
This smart tool saves you time and effort when turning audio into engaging visual content.
Gathering and Setting Up PowerPoint Slide Assets
Now, back to PowerPoint! To create our interactive morph slide, we’ll need to prepare and organize various assets:
1. Background Image
The futuristic slide background comes from Freepik. The slide background color is set to black to enhance contrast and make other elements pop.
- Right-click on your slide, select Format Background, and choose a solid black fill.
- Insert the background photo and place it centered on the slide.
2. Text Boxes
We have two main text boxes: the slide title and the subtitle.
- Both use the Vareno font, which you can download here.
- The subtitle font size is 14 pt, and the slide title is 48 pt.
- Letter spacing for the subtitle is loosened to create an airy feel.
- Text shadows are added for a glowing effect using a greenish color sampled from the background image.
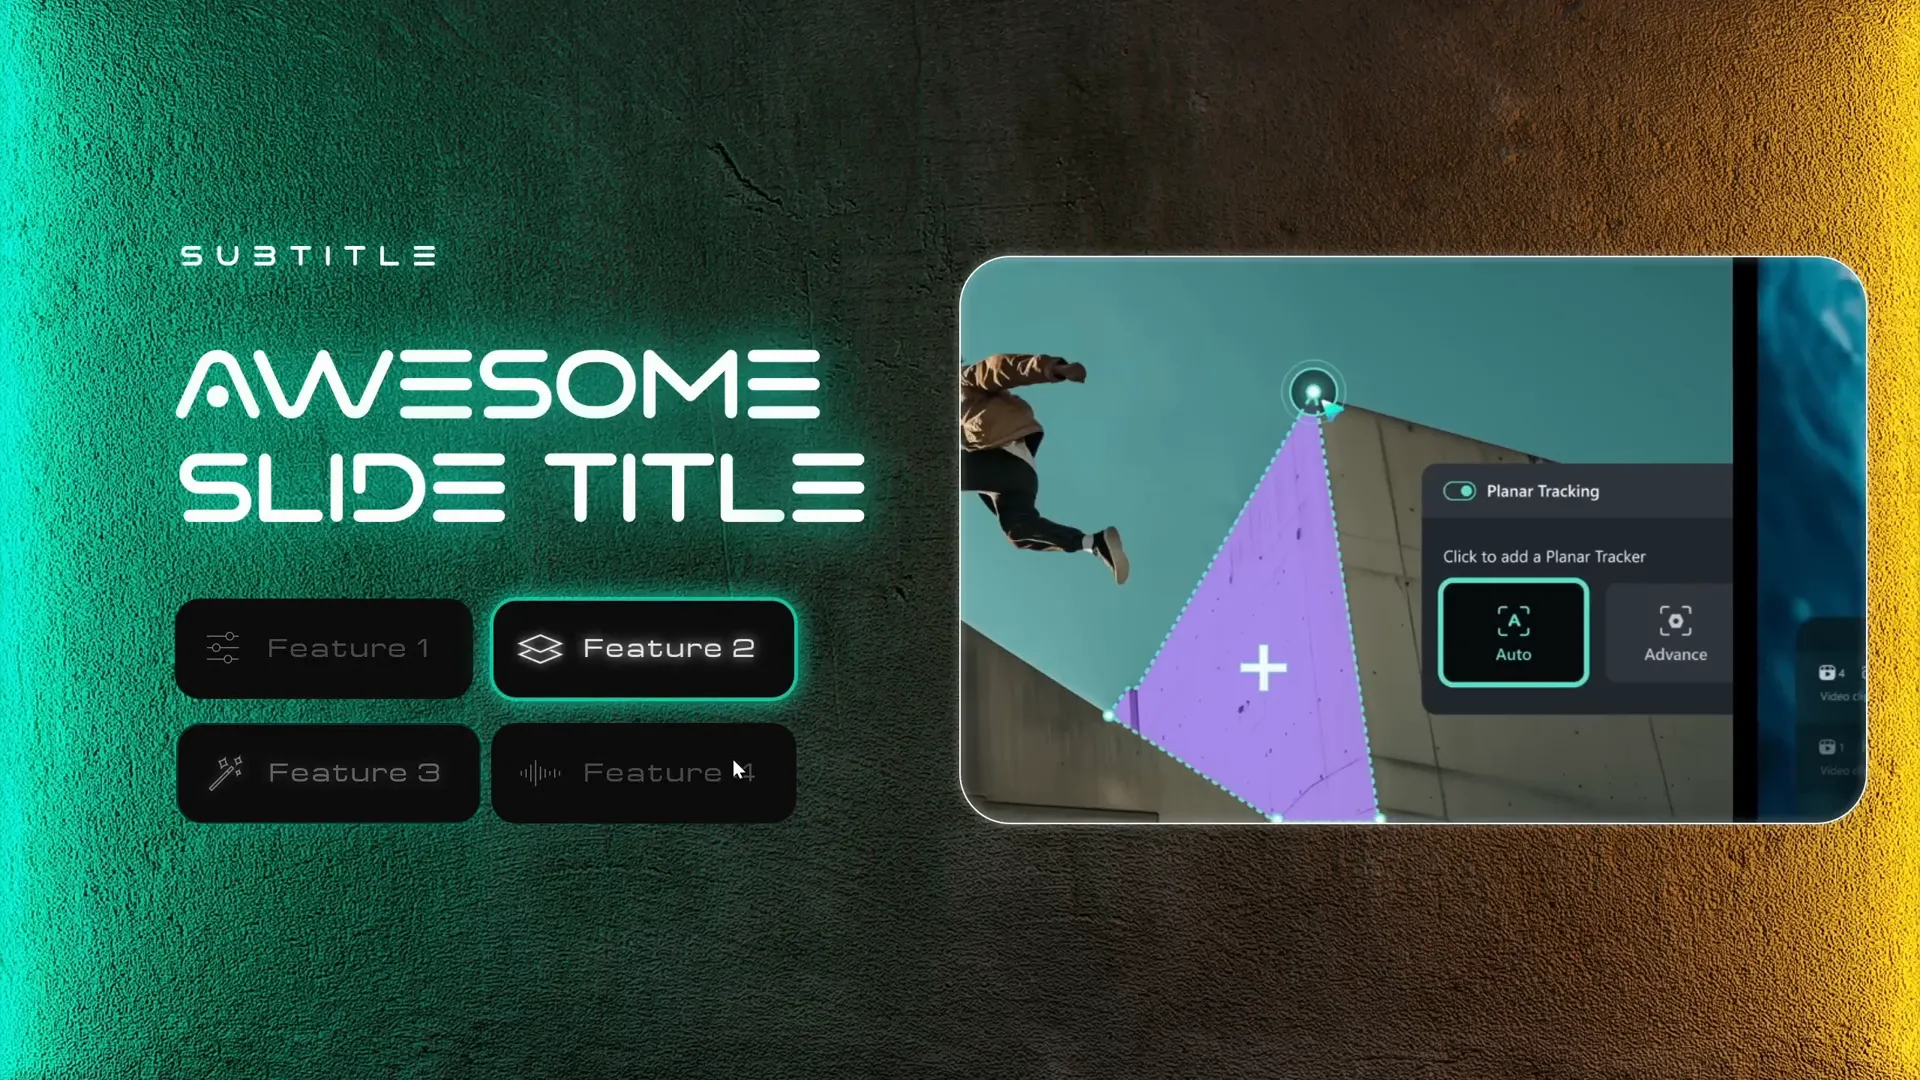
3. Interactive Buttons
Below the text boxes are four rounded rectangle buttons, each containing text and an icon.
- Icons are inserted from PowerPoint’s built-in icon library. If your version lacks this, you can download SVG icons from the web and import them.
- To create space for the icons inside the buttons, adjust the left text margin to 1.5 cm and other margins to 0.5 cm via Format Shape > Text Options.
- Inactive buttons have their font transparency set to 75% to visually indicate their state.
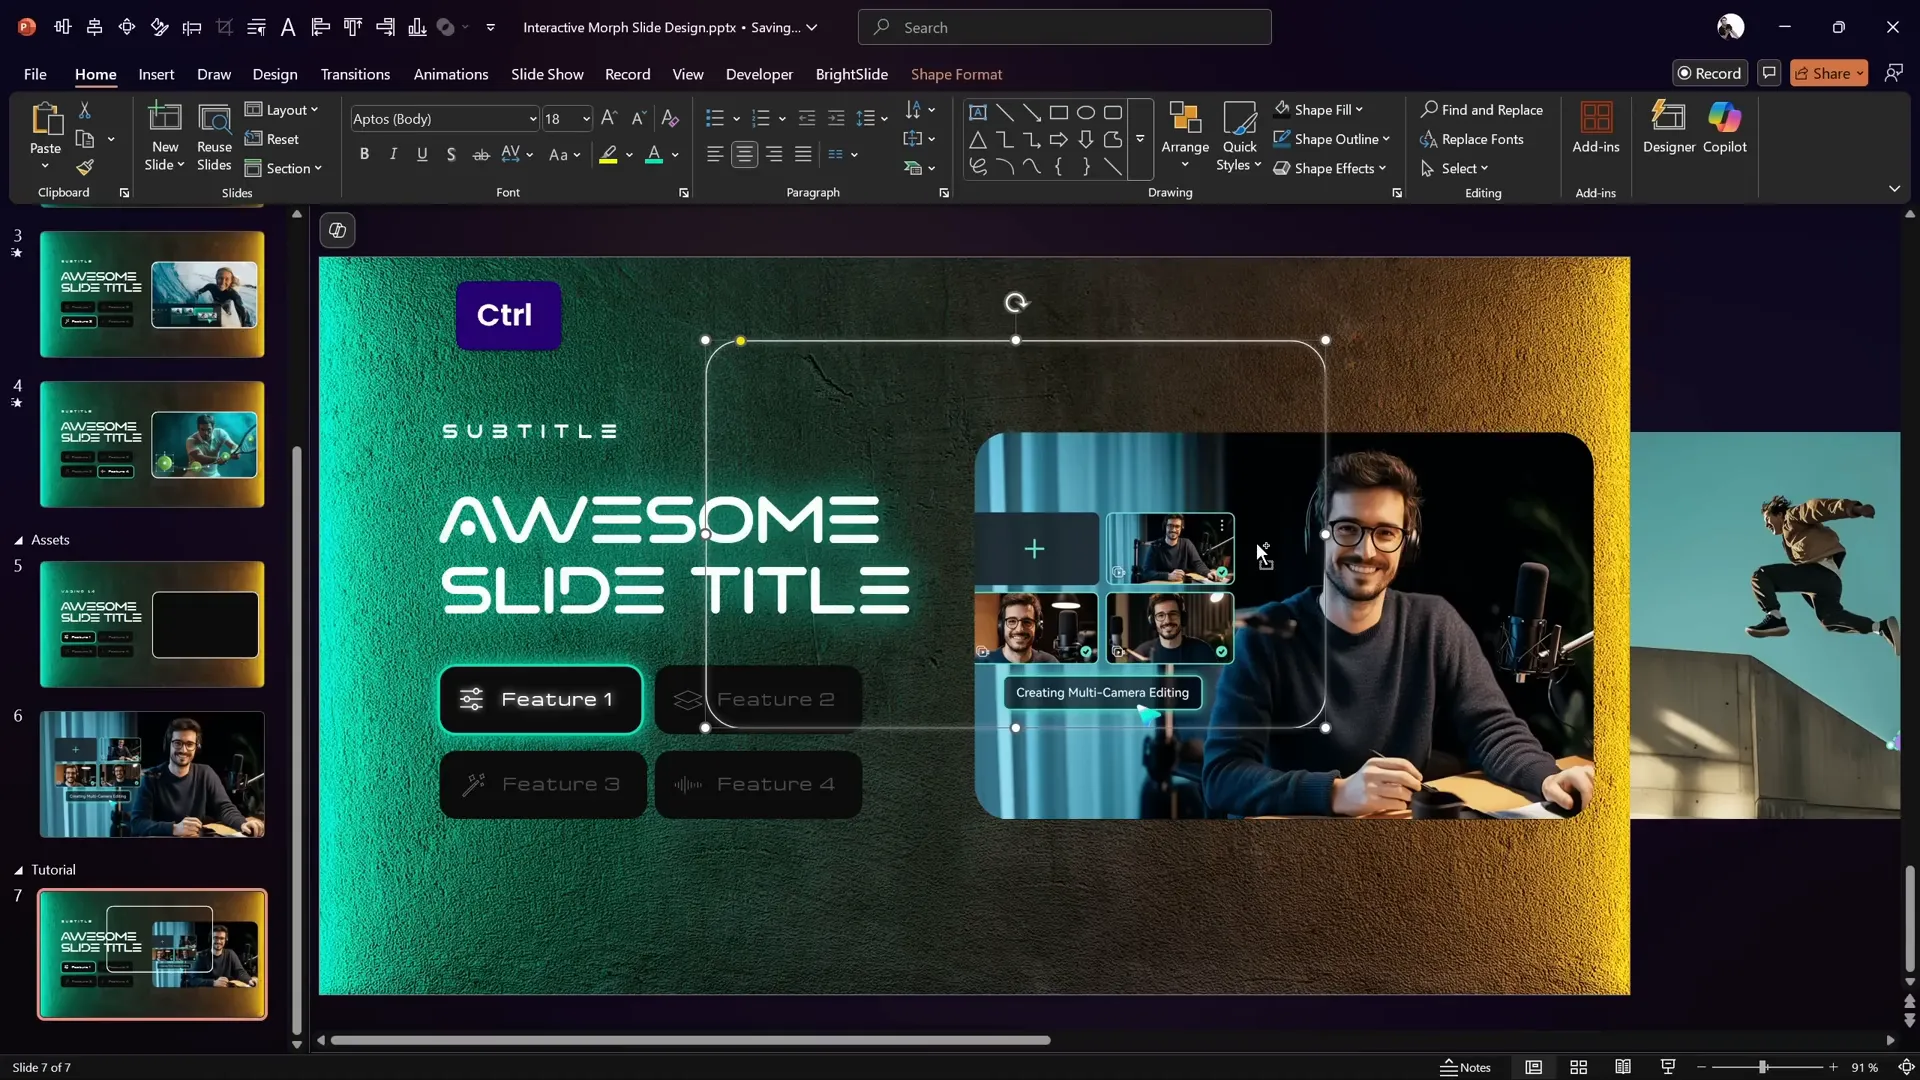
4. Photo Mask (Rounded Rectangle)
On the right side of the slide, a rounded rectangle shape will be used to “punch a hole” in the background image, creating a mask effect. Behind this mask, a row of photos will be placed and scrolled through interactively.
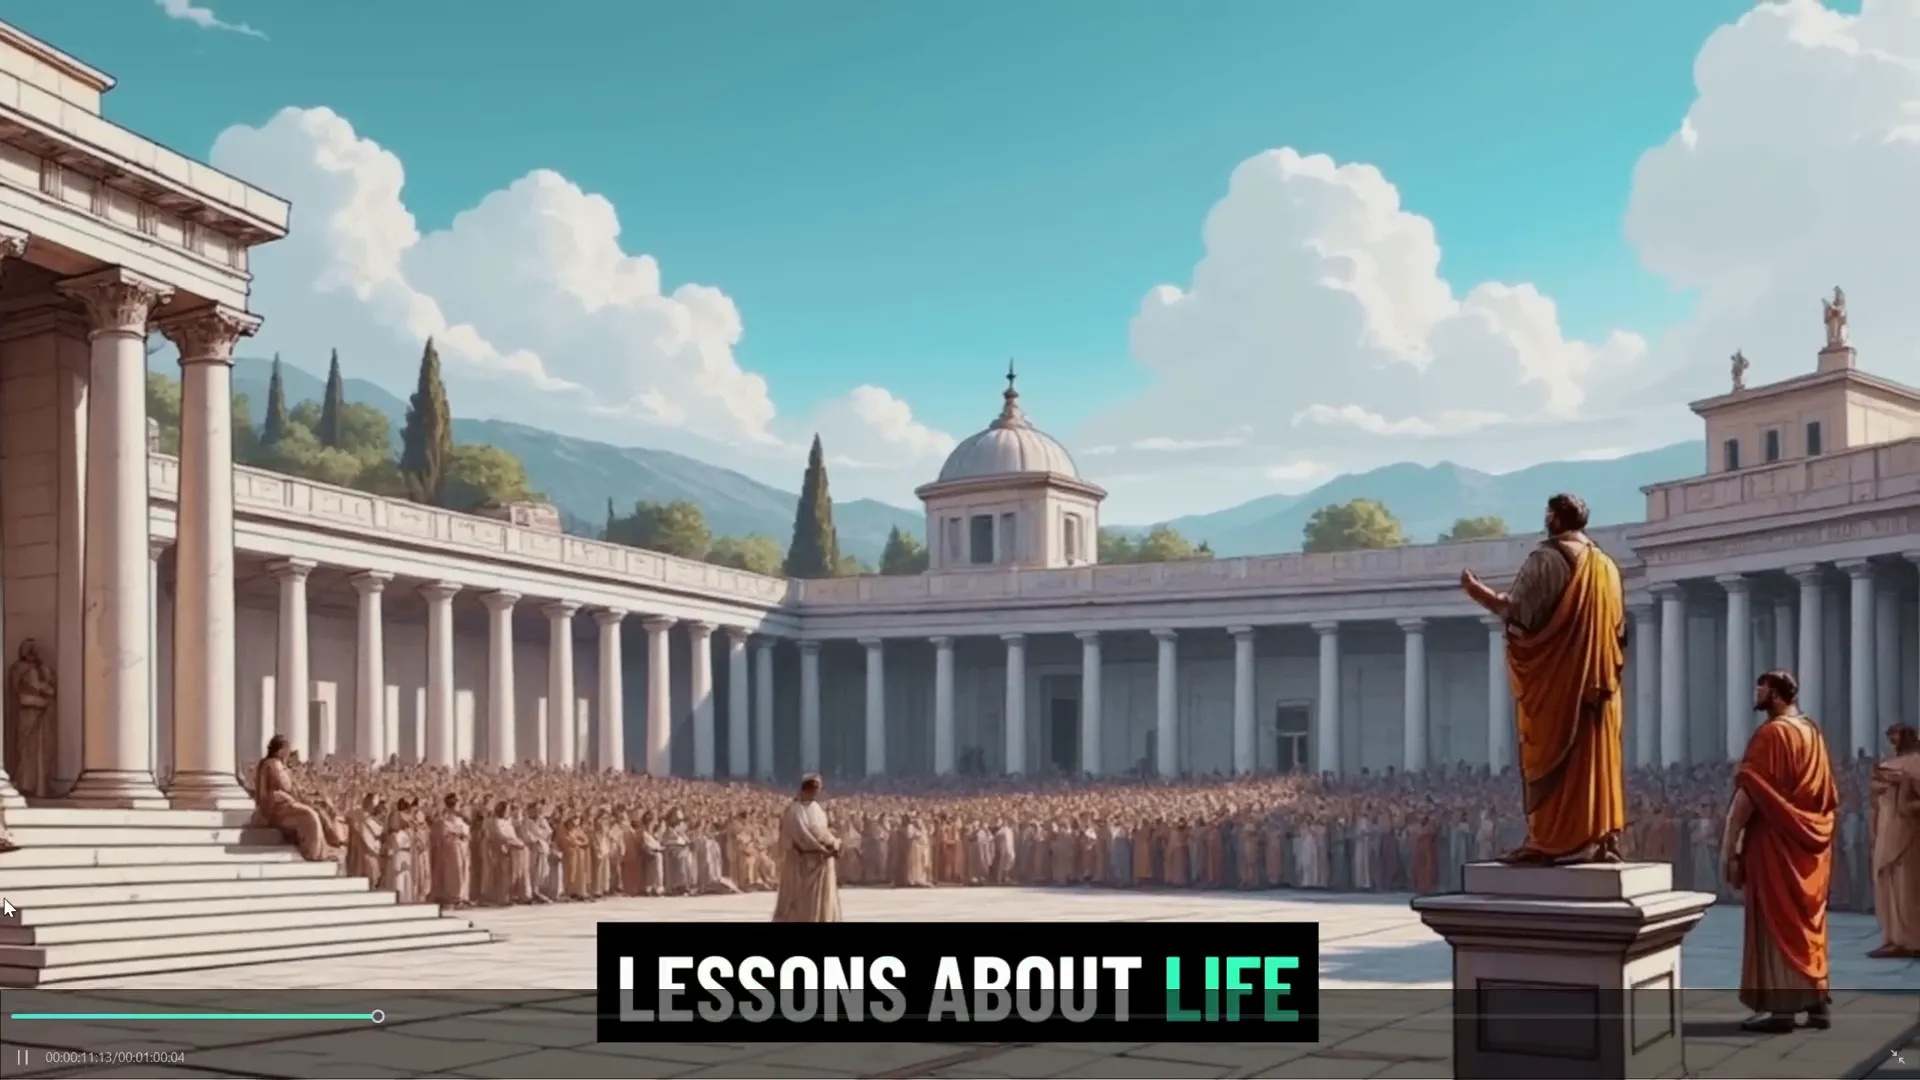
All photos used for this effect come courtesy of Filmora’s website and are sized to fit perfectly inside the mask.

Designing the Interactive Morph Slide in PowerPoint
Let’s walk through the process of building the slide step by step.
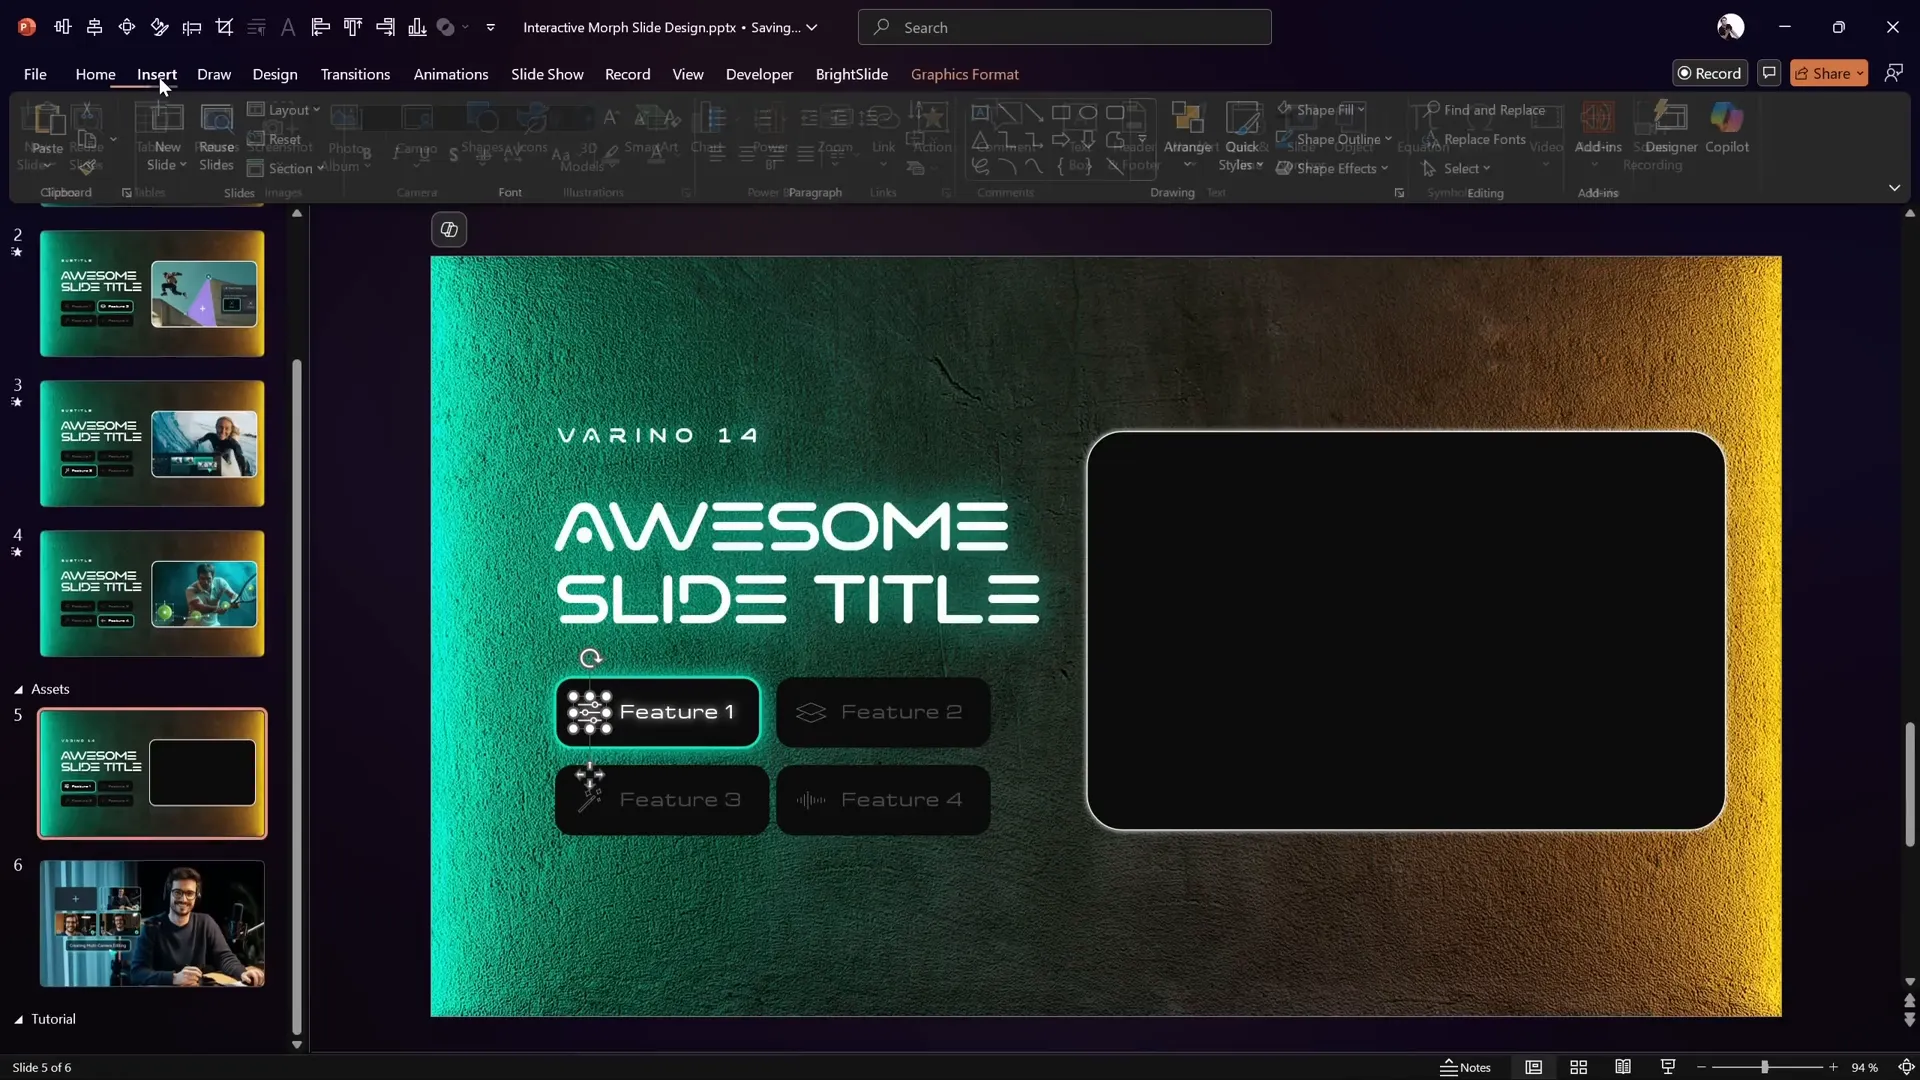
Step 1: Create a New Slide and Copy Assets
- Insert a new slide below your current one.
- Select all assets from your original slide (title, subtitle, buttons, background, mask) and copy-paste them onto the new slide.
- Change the subtitle text to something generic like “Subtitle” to keep track.
Step 2: Punch a Hole in the Background Image
- Select the background image, then hold Shift and select the rounded rectangle mask.
- Go to the Shape Format tab, select Merge Shapes, and choose Subtract.
- This cuts out the rounded rectangle area from the background image, creating a “window.”
- Center the resulting image back on the slide.
Step 3: Insert and Size Photos for Scrolling
- Copy all photos you want to scroll through and paste them onto the slide.
- Set the height of all photos to match the height of the rounded rectangle mask (e.g., 10 cm) while keeping the aspect ratio locked.
- Arrange photos horizontally in a row with small gaps between them for spacing.
- Select all photos, align them to the top, and distribute them evenly horizontally.
- Group all photos into one object for easy movement.
- Send the group behind the mask shape to ensure the photos only show through the punched-out area.
Step 4: Add a Glowing Edge Around the Mask
- Copy the rounded rectangle mask shape again and paste it on top of the masked background.
- Remove the fill, leaving only the outline visible.
- Add a white shadow or glow effect to this outline for a subtle glowing edge around the photo mask.
Making Buttons Clickable and Setting Up Hyperlinks
To make the slide interactive, each button needs to link to a different slide that shows the corresponding photo and activates the button visually.
Step 1: Prepare Slides for Each Button
- Before adding hyperlinks, insert three additional slides so you have one slide per button (assuming four buttons total).
- Slide 7 will correspond to the first button, slide 8 to the second, and so on.
Step 2: Add Hyperlinks to Buttons
- Select the first rounded rectangle button.
- Go to Insert > Link and choose the slide number that corresponds to that button (e.g., slide 7 for the first).
- Repeat for the remaining buttons, linking each to the appropriate slide.
Step 3: Group Buttons with Icons
- Since buttons and icons are separate objects, group each button with its icon to ensure the morph transition works smoothly without mixing objects.
- Select the icon and button together, then press Ctrl + G to group.
- The hyperlink remains active on the grouped object.

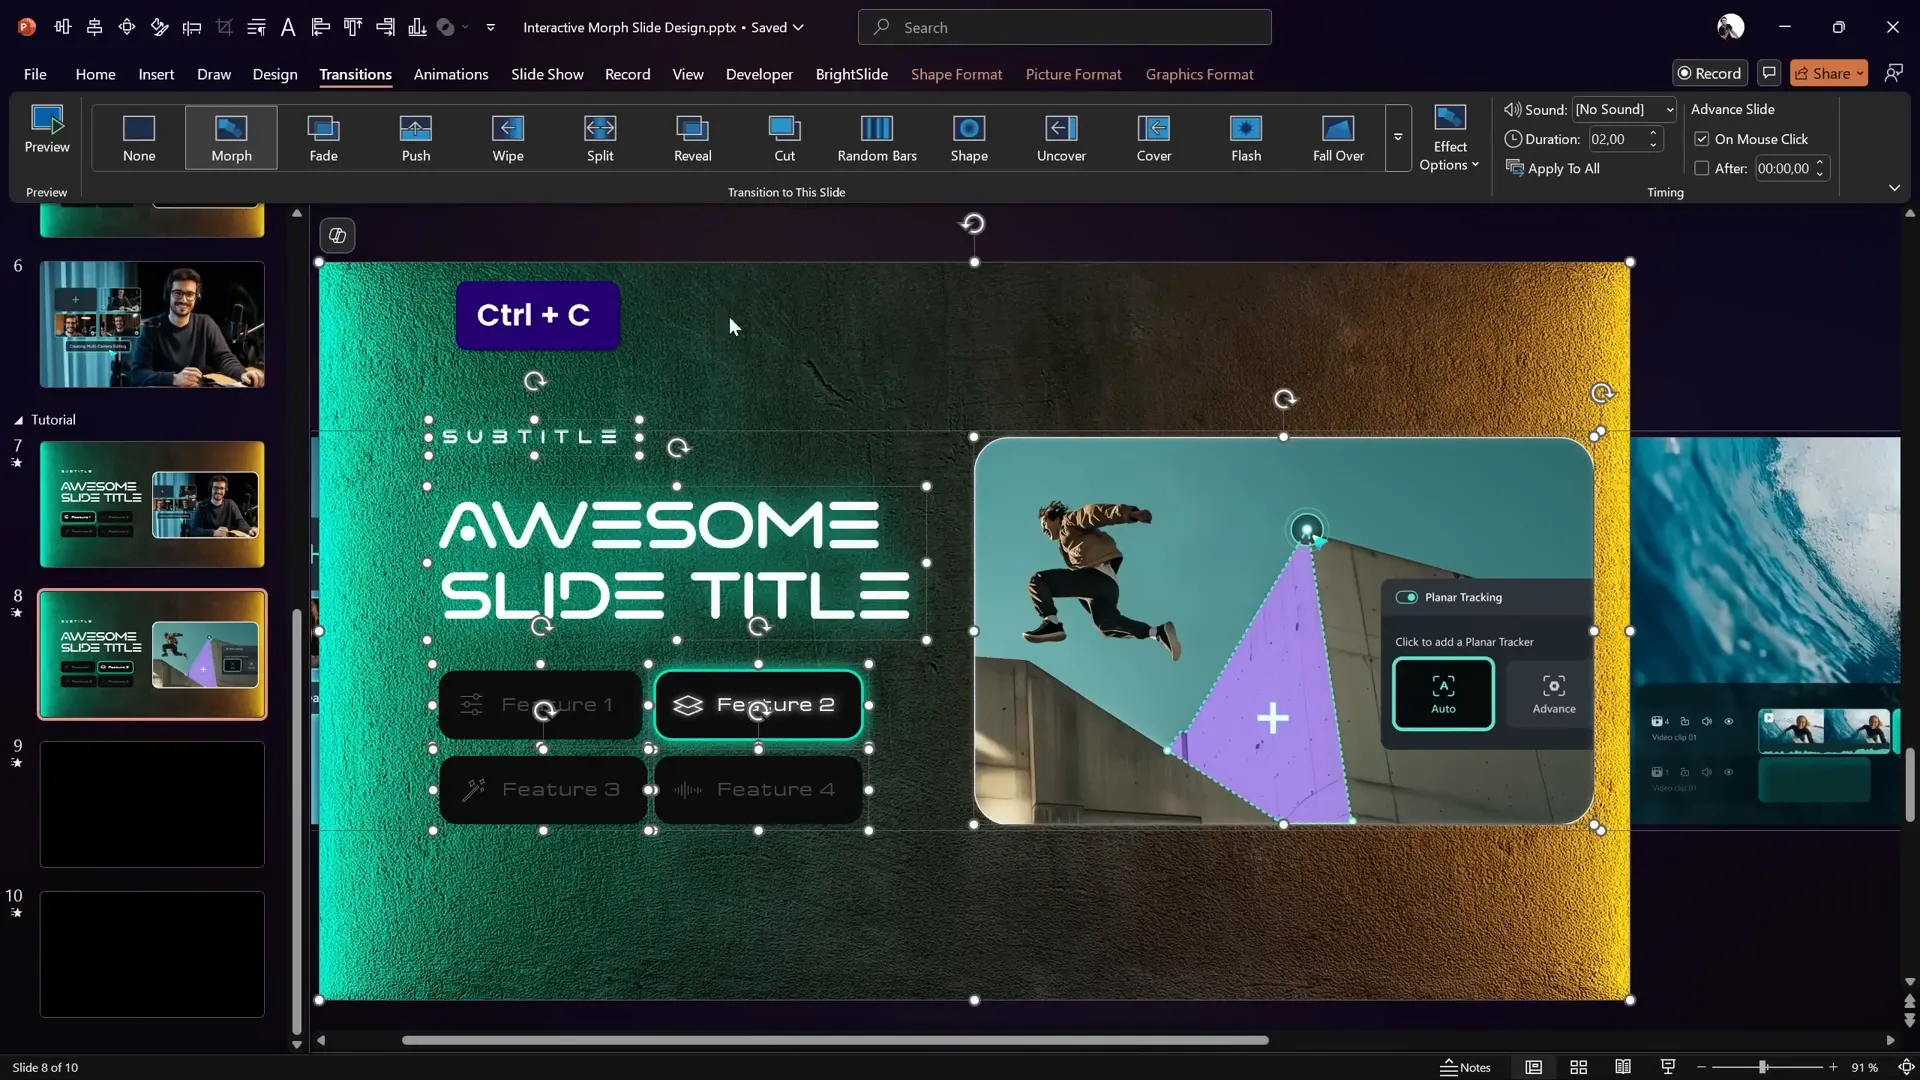
Animating with Morph Transition for Seamless Interaction
The Morph transition in PowerPoint creates smooth animations between slides by automatically moving, resizing, or changing objects that exist on both slides.
Step 1: Copy Assets to Each Button Slide
- Copy all assets (background, buttons, photos, mask) from the first interactive slide and paste them on each button’s dedicated slide.
- On each slide, adjust the photos’ horizontal position to correspond with the active button’s photo.
- Use the Shift key while dragging photos to keep movement strictly horizontal.
Step 2: Change Button Styles to Reflect Active and Inactive States
- Use the Format Painter tool (Ctrl + Shift + C to copy style and Ctrl + Shift + V to paste) to quickly switch button and icon styles between active and inactive states.
- For example, on slide 8, the second button is active (full brightness) while the first button becomes inactive (transparency dropped to 75%).
- Repeat this for all slides so each button lights up on its corresponding slide.
Step 3: Apply Morph Transition
- On each slide, set the transition to Morph with a duration of about 2 seconds.
- This will create a smooth scrolling effect of photos and button highlights when moving between slides.
Final Preview and Testing Your Interactive Slide
Once all slides are set up with hyperlinks and morph transitions, it’s time to test your interactive slide:
- Start the slideshow from the first interactive slide.
- Click each button and observe how the photos scroll smoothly and the button highlight changes accordingly.
- Ensure that the photo mask and glowing edge remain consistent throughout the transitions.
- If any elements don’t behave as expected, double-check grouping, hyperlink targets, and morph transition settings.
This interactive morph slide design can be adapted for various presentations, portfolios, or product feature showcases to impress your audience with professional-level animations and interactivity.
Frequently Asked Questions
What is the Morph transition in PowerPoint?
The Morph transition allows you to animate smooth movement, resizing, and changes of objects between slides without manually creating complex animations. It’s ideal for creating interactive and dynamic presentations.
Can I use this interactive morph slide design in older versions of PowerPoint?
The Morph transition is available in PowerPoint 2019, Office 365, and newer versions. If you have an older version, you might not have Morph, but you can simulate some effects using animations and hyperlinks.
Where can I get the free template used in this tutorial?
The tutorial creator offers the free template slides for download. You can find the link in the video description or visit their Patreon page for access.
What fonts and assets are used in the slide design?
- Font: Vareno (download at Dafont)
- Background Image: Neon light background from Freepik
- Icons: PowerPoint built-in icons or SVG icons imported from web resources
How can I add icons if my PowerPoint version lacks built-in ones?
You can download SVG icons from websites like Google’s icon library or other free SVG resources. Import them into PowerPoint by dragging and dropping or using the Insert > Pictures option.
Is this morph interactive slide design suitable for all presentation topics?
Yes! While inspired by a tech product site, this interactive morph slide design can be customized with your own images, text, and colors to fit any topic from business to education to creative portfolios.
Conclusion: Elevate Your Presentations with Interactive Morph Slides
Mastering interactive morph slides in PowerPoint unlocks a new level of presentation design that captivates your audience with smooth animations and clickable, dynamic content. This tutorial walked you through creating a futuristic slide inspired by Filmora 14’s website, combining photo masks, glowing effects, interactive buttons, and morph animations.
By following these steps, you can build your own interactive morph slide designs that are not only visually stunning but also easy to navigate and highly engaging.
Remember to take advantage of PowerPoint’s powerful tools like grouping, hyperlinks, and morph transitions to streamline your workflow and create professional-quality presentations.
Don’t forget to download the free template provided and experiment with it to learn these techniques hands-on.
Thank you for reading, and happy presenting!
Additional Resources:
- Download Filmora 14 – Get Started for Free
- Free Tutorial Slides from One Skill PPT
- Download Vareno Font
- Freepik Neon Light Background
Happy designing and see you in the next tutorial!