
Creating an engaging online course can sometimes feel like a daunting task, especially if you’re a teacher or educator with limited resources. Fortunately, with the right tools and techniques, you can easily transform your existing PowerPoint presentations into dynamic online courses—without spending a dime. In this comprehensive guide, I’ll walk you through my step-by-step process of designing beautiful PowerPoint slides and converting them into an interactive online course using a free plugin. Along the way, I’ll share valuable tips on navigation, animations, quizzes, and multimedia integration that will help you captivate your students and make your teaching more effective.
This article dives deep into PowerPoint online course creation, showing you how to leverage PowerPoint’s powerful features combined with the free iSpring Suite plugin to build a fully functional course. Whether your subject is artificial intelligence, history, or any other topic, by the end of this guide, you’ll be equipped to create interactive lessons, embed videos, insert quizzes, and publish your course for easy sharing.

Table of Contents
- Presentation Overview: From Slides to an Online Course
- Creating an Interactive Sidebar Navigation
- Animating the Sidebar for Engagement
- Mastering Slide Zoom Animations
- Inserting Multimedia: YouTube Videos and Web Objects
- Creating Quizzes to Test Knowledge
- Publishing Your PowerPoint as an Online Course
- Frequently Asked Questions
- Conclusion
Presentation Overview: From Slides to an Online Course
Imagine you’re a teacher ready to share your knowledge on artificial intelligence. You already have a well-crafted PowerPoint presentation filled with insightful content, but you want to take it a step further: convert it into an interactive online course that students can access anytime. This is entirely possible, and I’ll show you how.
My sample presentation on artificial intelligence includes several key sections:
- A welcoming introduction slide
- An explanation of what artificial intelligence is
- A detailed history of AI with interactive timelines
- An overview of different types of AI with clickable sections
- Insights into machine learning and deep learning
- Applications and challenges of AI today
- A glimpse into the future of AI
- A quiz to test students’ understanding
What makes this presentation special is how it uses interactive slide zooms to let learners dive deeper into specific topics, such as zooming into particular years in AI’s history or exploring types of AI by clicking on numbers embedded in the slides.
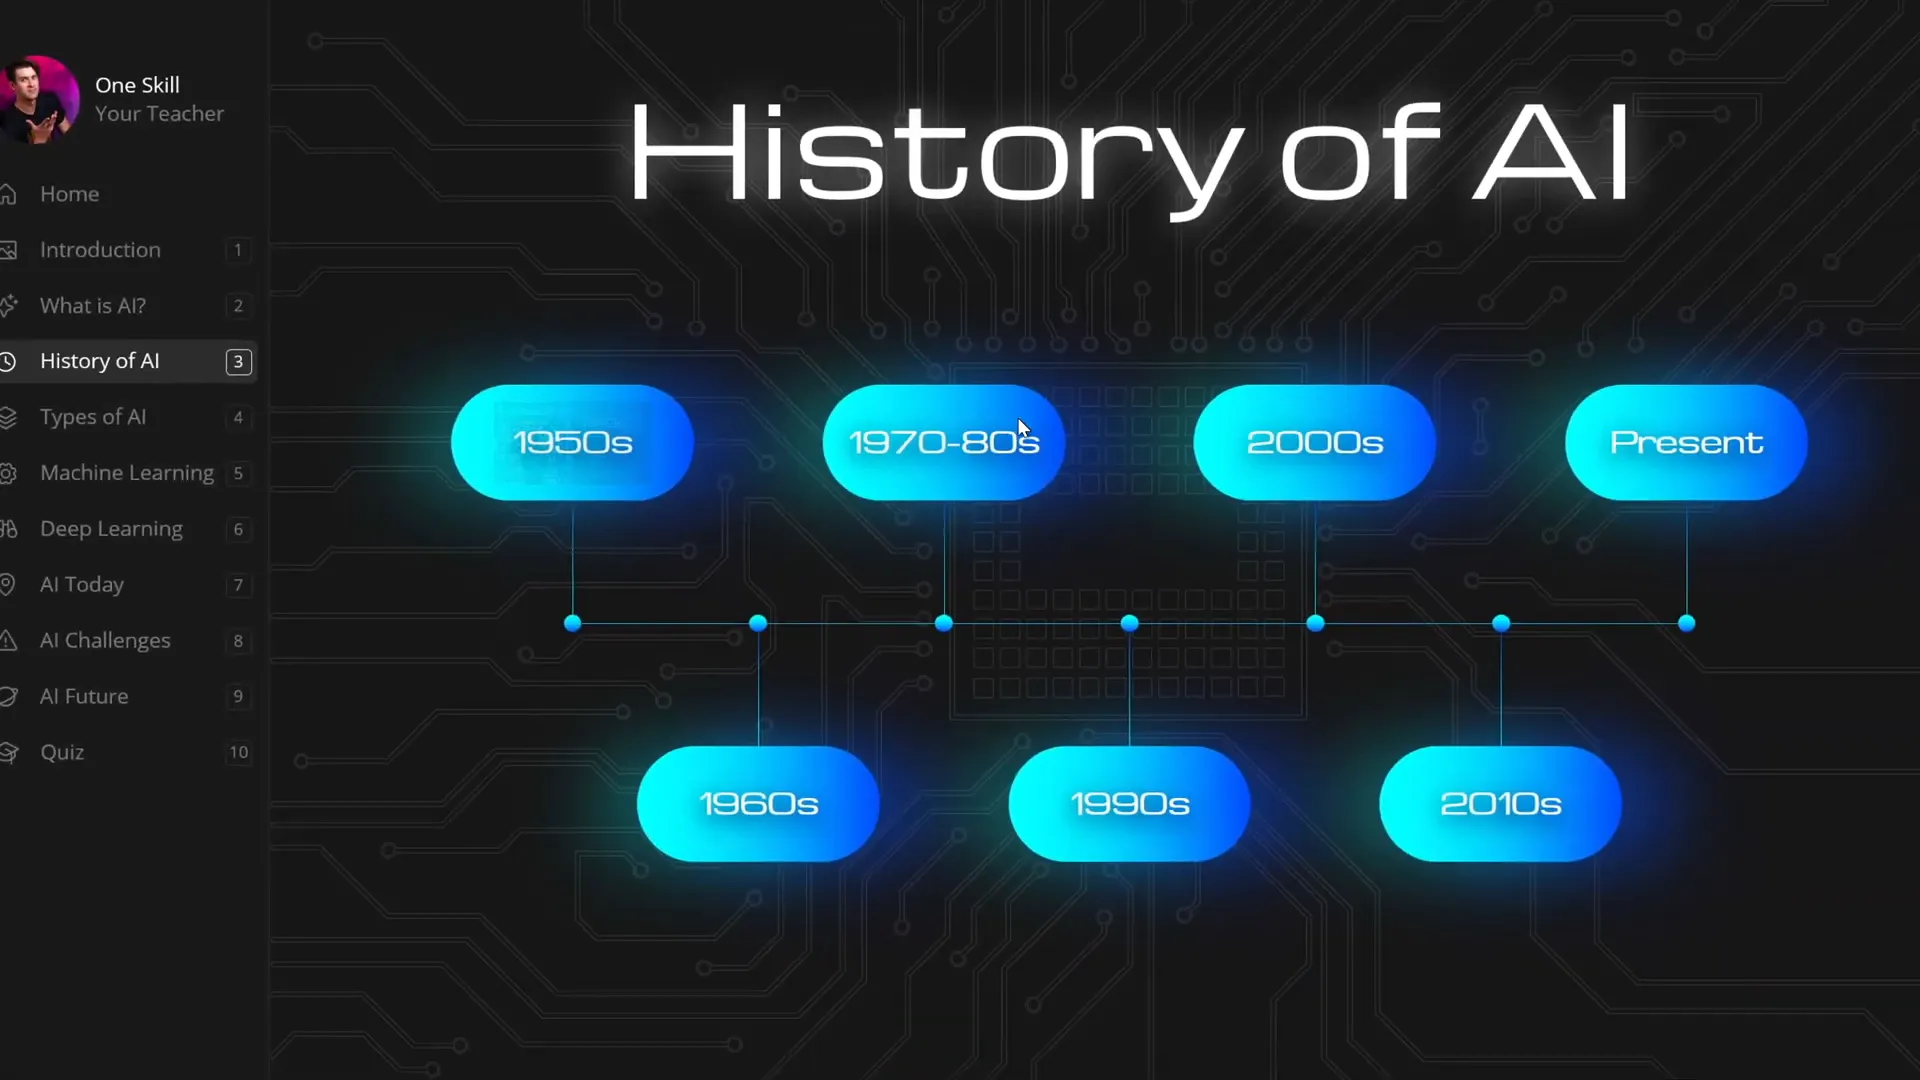
With a sidebar navigation on the left, users can easily jump between sections, making the learning experience smooth and intuitive.
Creating an Interactive Sidebar Navigation
One of the most user-friendly features of my course is the clickable sidebar on the left side of every slide. This sidebar acts as a navigation menu, allowing students to jump to any section with just a click. Here’s how you can create this for your own course:
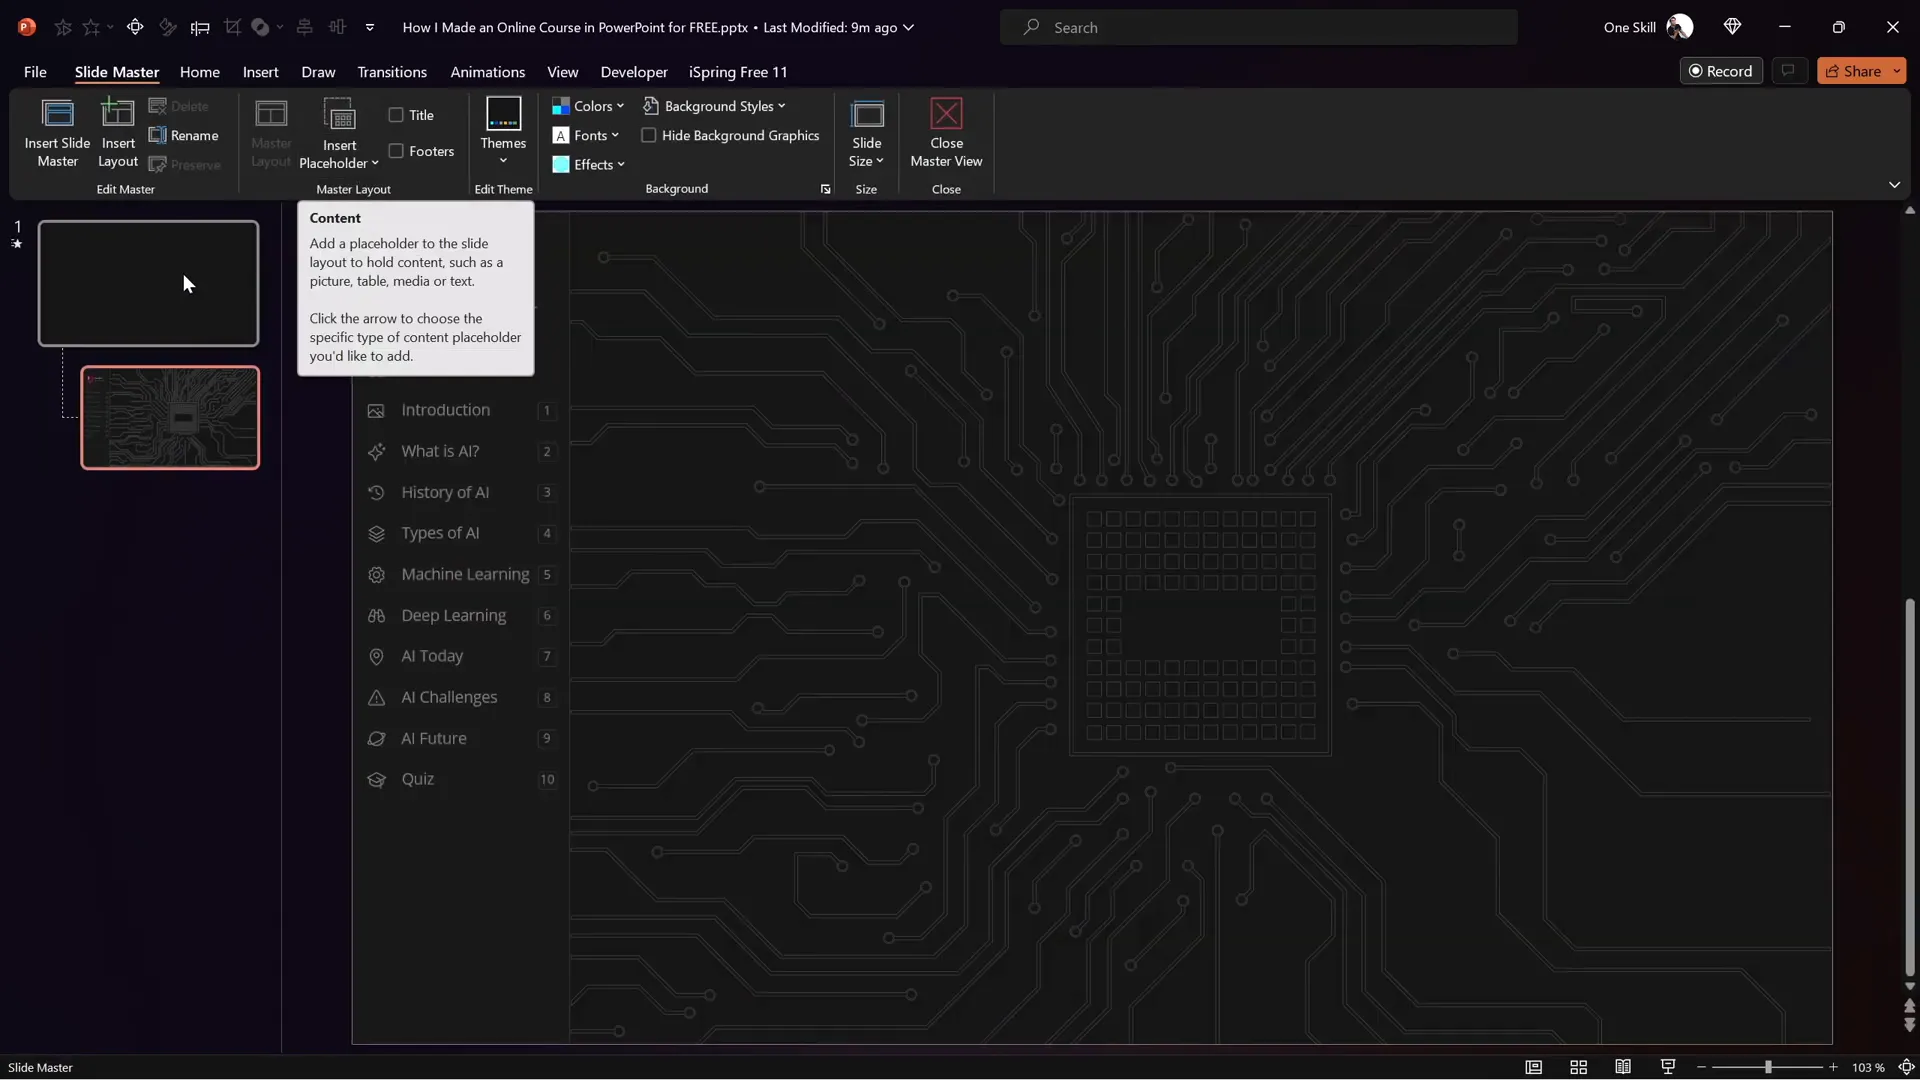
Using Slide Master View for Consistency and Efficiency
The secret to the sidebar’s consistency is designing it in PowerPoint’s Slide Master View. This means you only create it once, and it automatically appears on all slides that use that master layout. This approach saves you tons of time and ensures a uniform look throughout your presentation.
In Slide Master View, you can add repeatable elements like the sidebar’s background, icons, section numbers, and text boxes. For example, I included a microchip-themed background across all slides by placing it in the Slide Master.
Building the Sidebar Components
The sidebar is composed of several elements:
- Text Boxes: Labels for each section, such as “Introduction” or “What is AI?”
- Icons: Visual cues aligned with each section to enhance recognition
- Section Numbers: Numeric indicators to structure the course flow
- Clickable Invisible Rectangles: Transparent shapes layered over the text and icons to capture clicks
By inserting these invisible rectangles, you create clickable areas without cluttering the visual design. Here’s how to manage these shapes:
- Open the Selection Pane to see all shapes on the slide.
- Select the rounded rectangles used for clickable areas.
- Adjust their fill transparency to 100% to make them invisible but clickable.
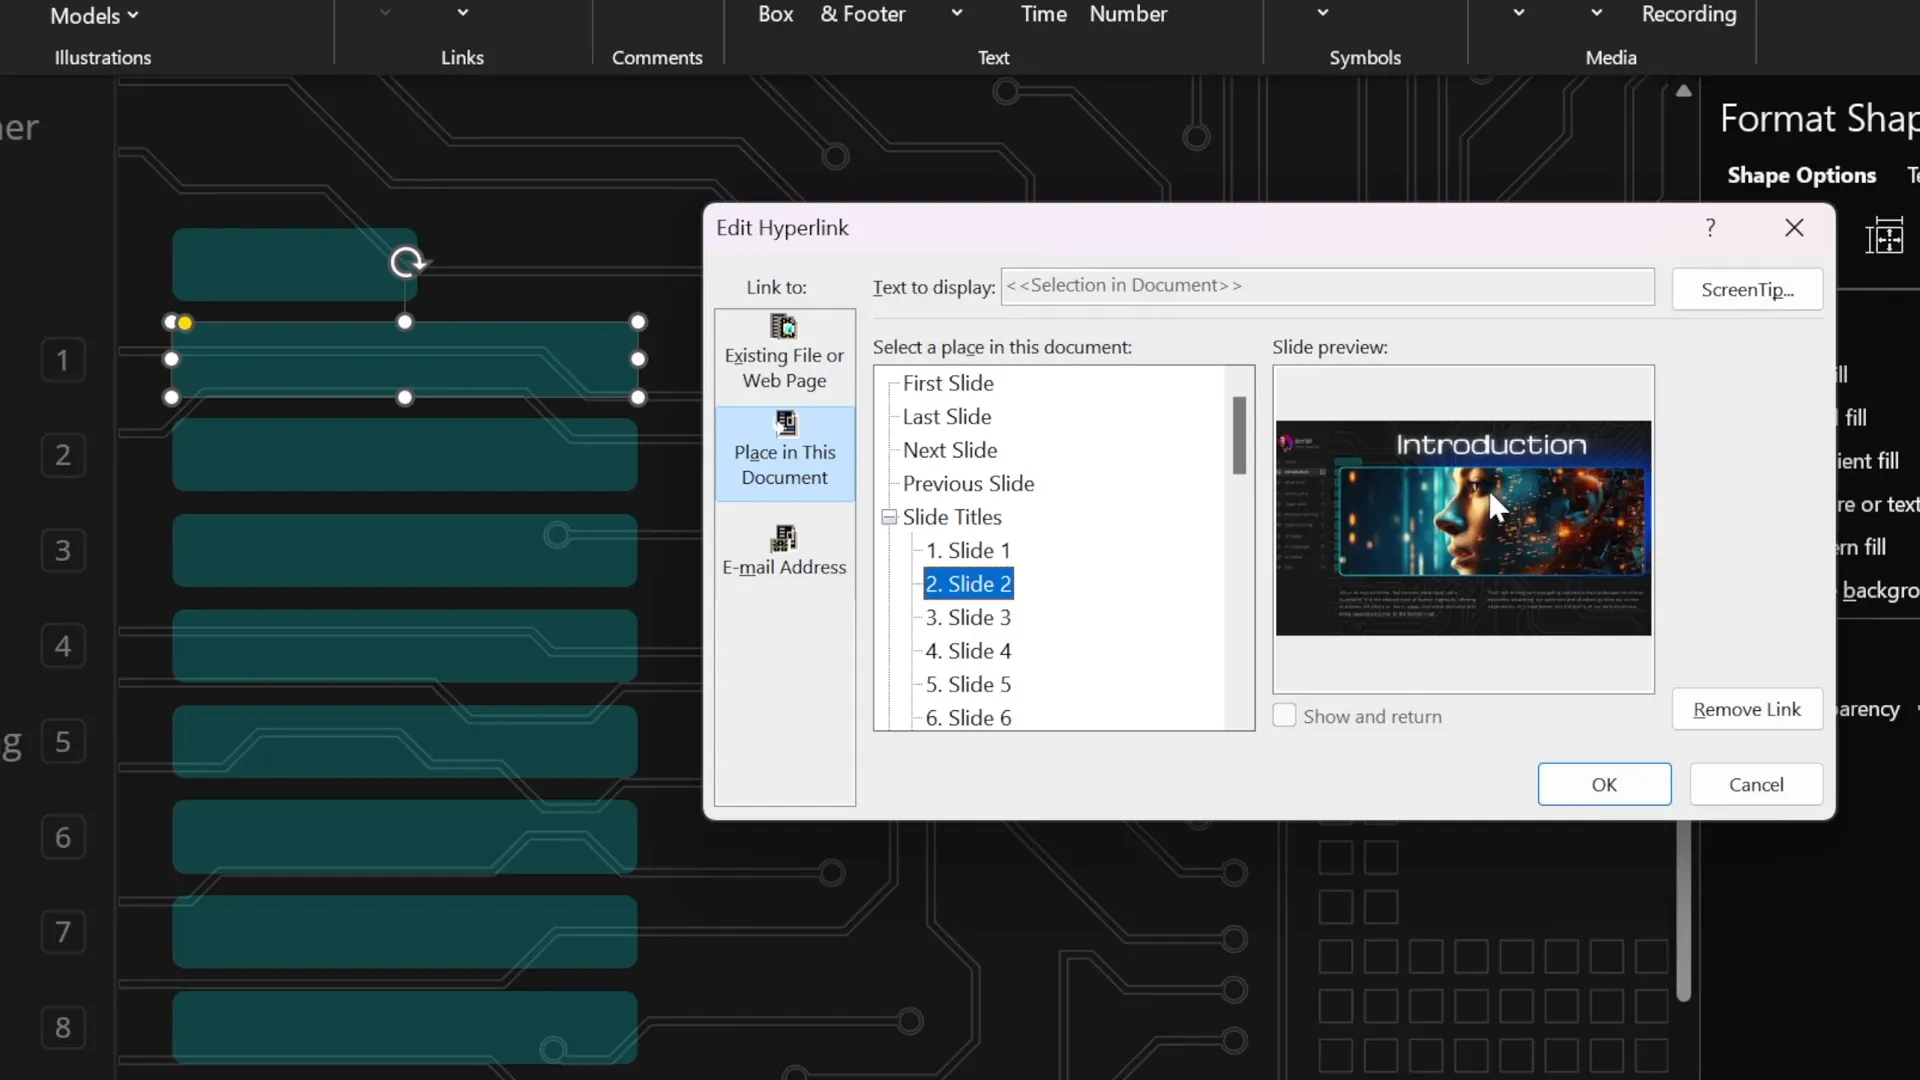
- Assign hyperlinks to each rectangle that point to the corresponding slides.
To add a hyperlink, select the shape, go to the Insert tab, click Link, and choose the target slide from the list.
After setting up the clickable sidebar, bring these rectangles to the front, make them fully transparent, and lock them in place. Any future edits to the sidebar can be done by returning to Slide Master View, where changes apply globally.
Animating the Sidebar for Engagement
Navigation is important, but adding subtle animations can greatly enhance the user experience. I wanted the sidebar to highlight the current section dynamically as learners move through the presentation. Although I couldn’t create this animation within Slide Master View, I found a workaround using normal slide editing.
Creating Active State Cards
For each section in the sidebar, I duplicated the entire sidebar and created “active state” cards that highlight the selected section. For example, when the user is on the “Introduction” slide, the “Introduction” card is visually distinct, signaling the current section.
Here’s how to implement this:
- Duplicate the sidebar for every slide.
- Create an active card for each section with a highlight effect.
- On each slide, position the active card to match the current section.
- Hide the other active cards by moving them outside the visible slide area.
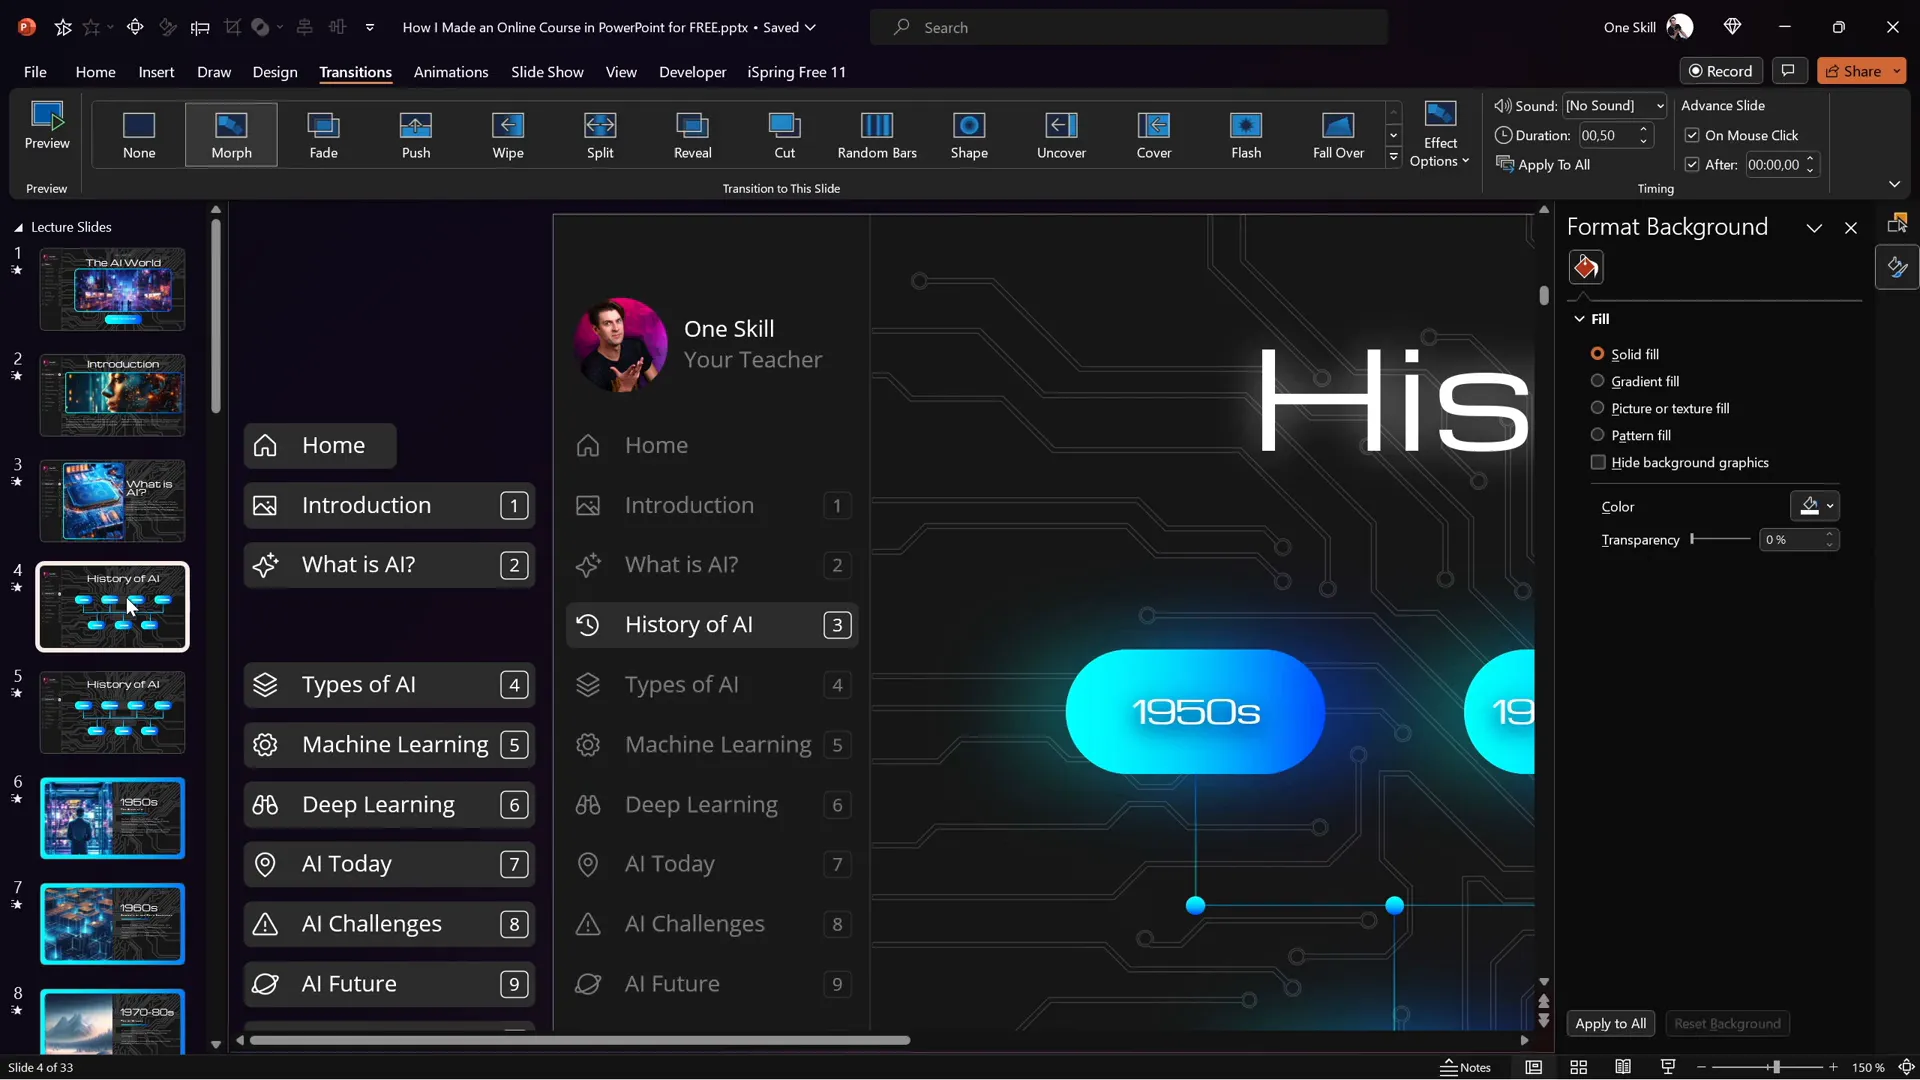
To ensure smooth animation transitions between slides, set the slide transition effect to Morph with a duration of 0.5 seconds or your preferred speed. Morph transition animates the active card’s movement, creating a polished navigation effect.
This technique provides a clear visual cue to learners about their current position in the course, improving usability and engagement.
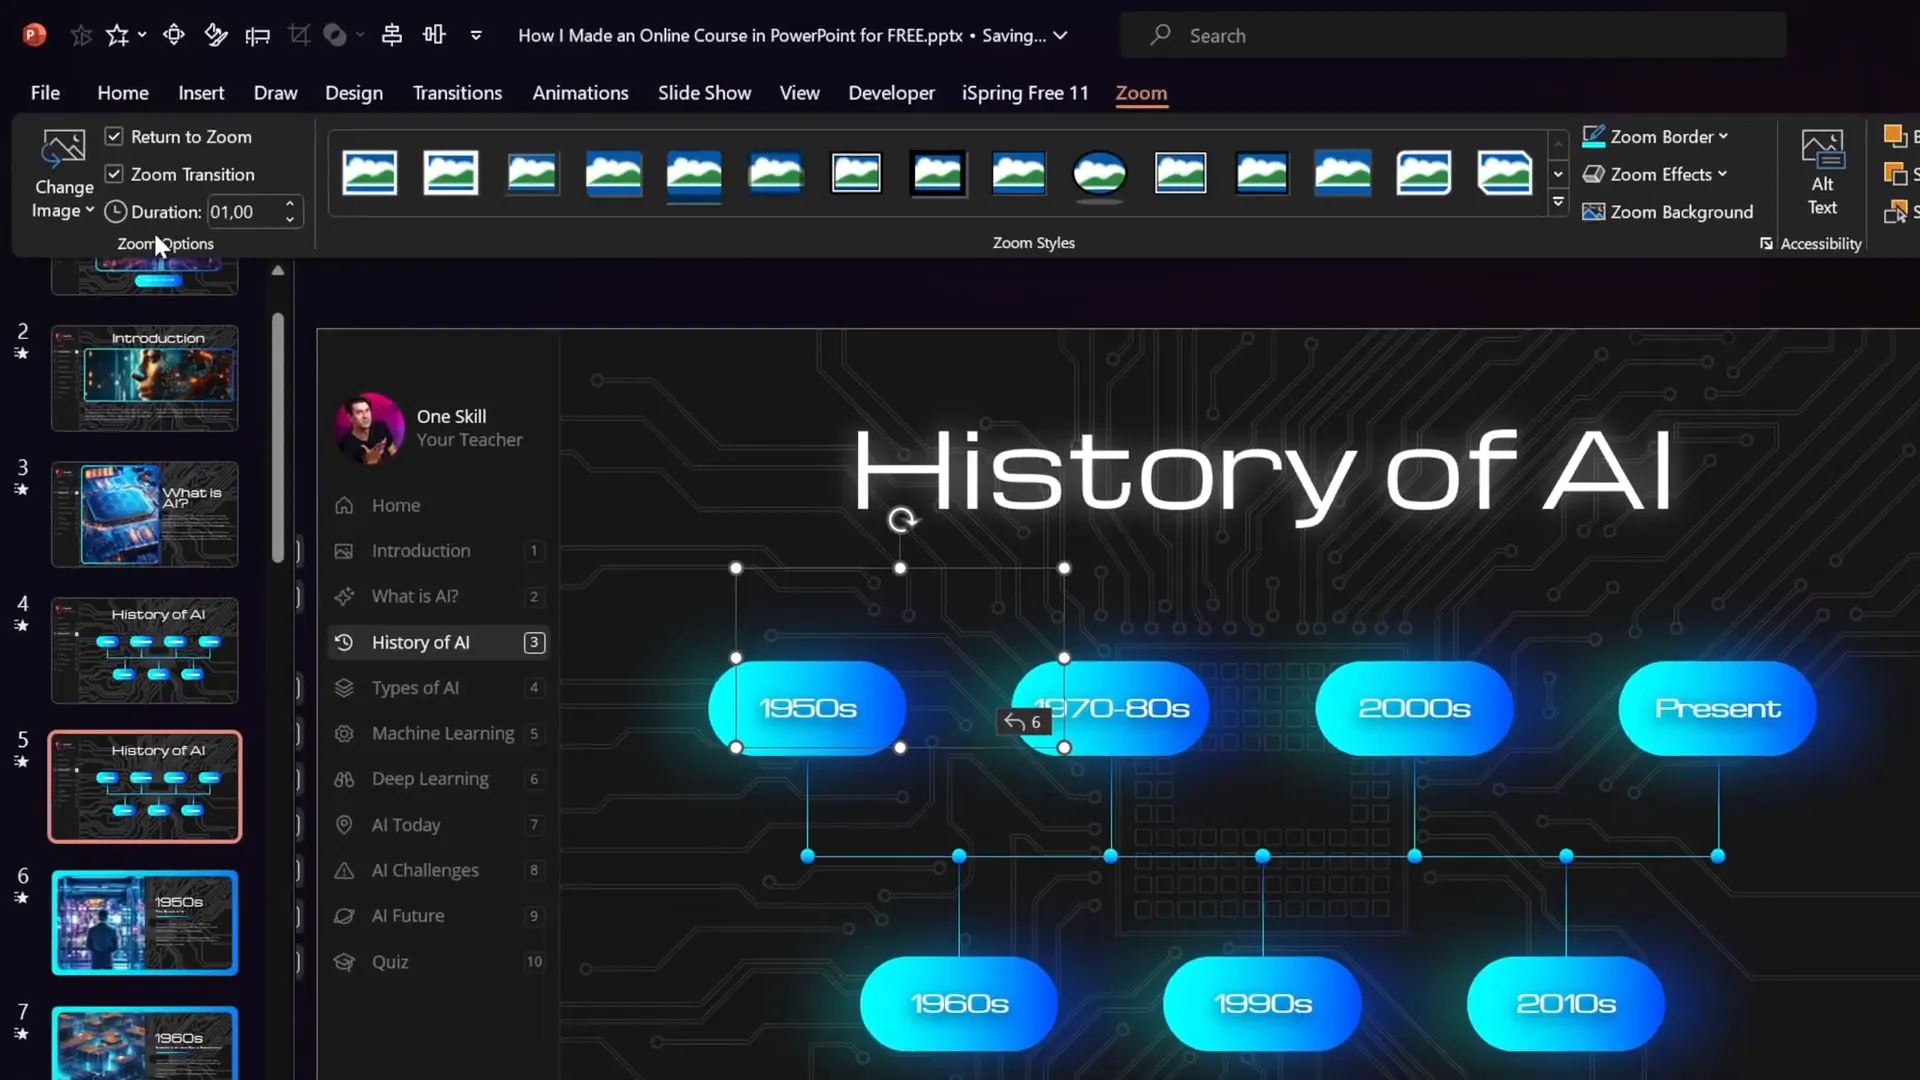
Mastering Slide Zoom Animations
Slide zooms are a powerful PowerPoint feature that allows you to jump to specific slides within your presentation, creating an interactive, non-linear experience. In my AI presentation, I used slide zooms extensively to enable learners to explore topics like AI history and types of AI in more depth.
Creating Invisible Slide Zooms
To maintain a clean design, I used invisible slide zooms by applying transparent images as the cover for the zoom links. This way, the zoom areas are clickable but visually unobtrusive.
If you’d like to learn more about invisible slide zooms, I recommend exploring tutorials focused on this feature to maximize their potential.
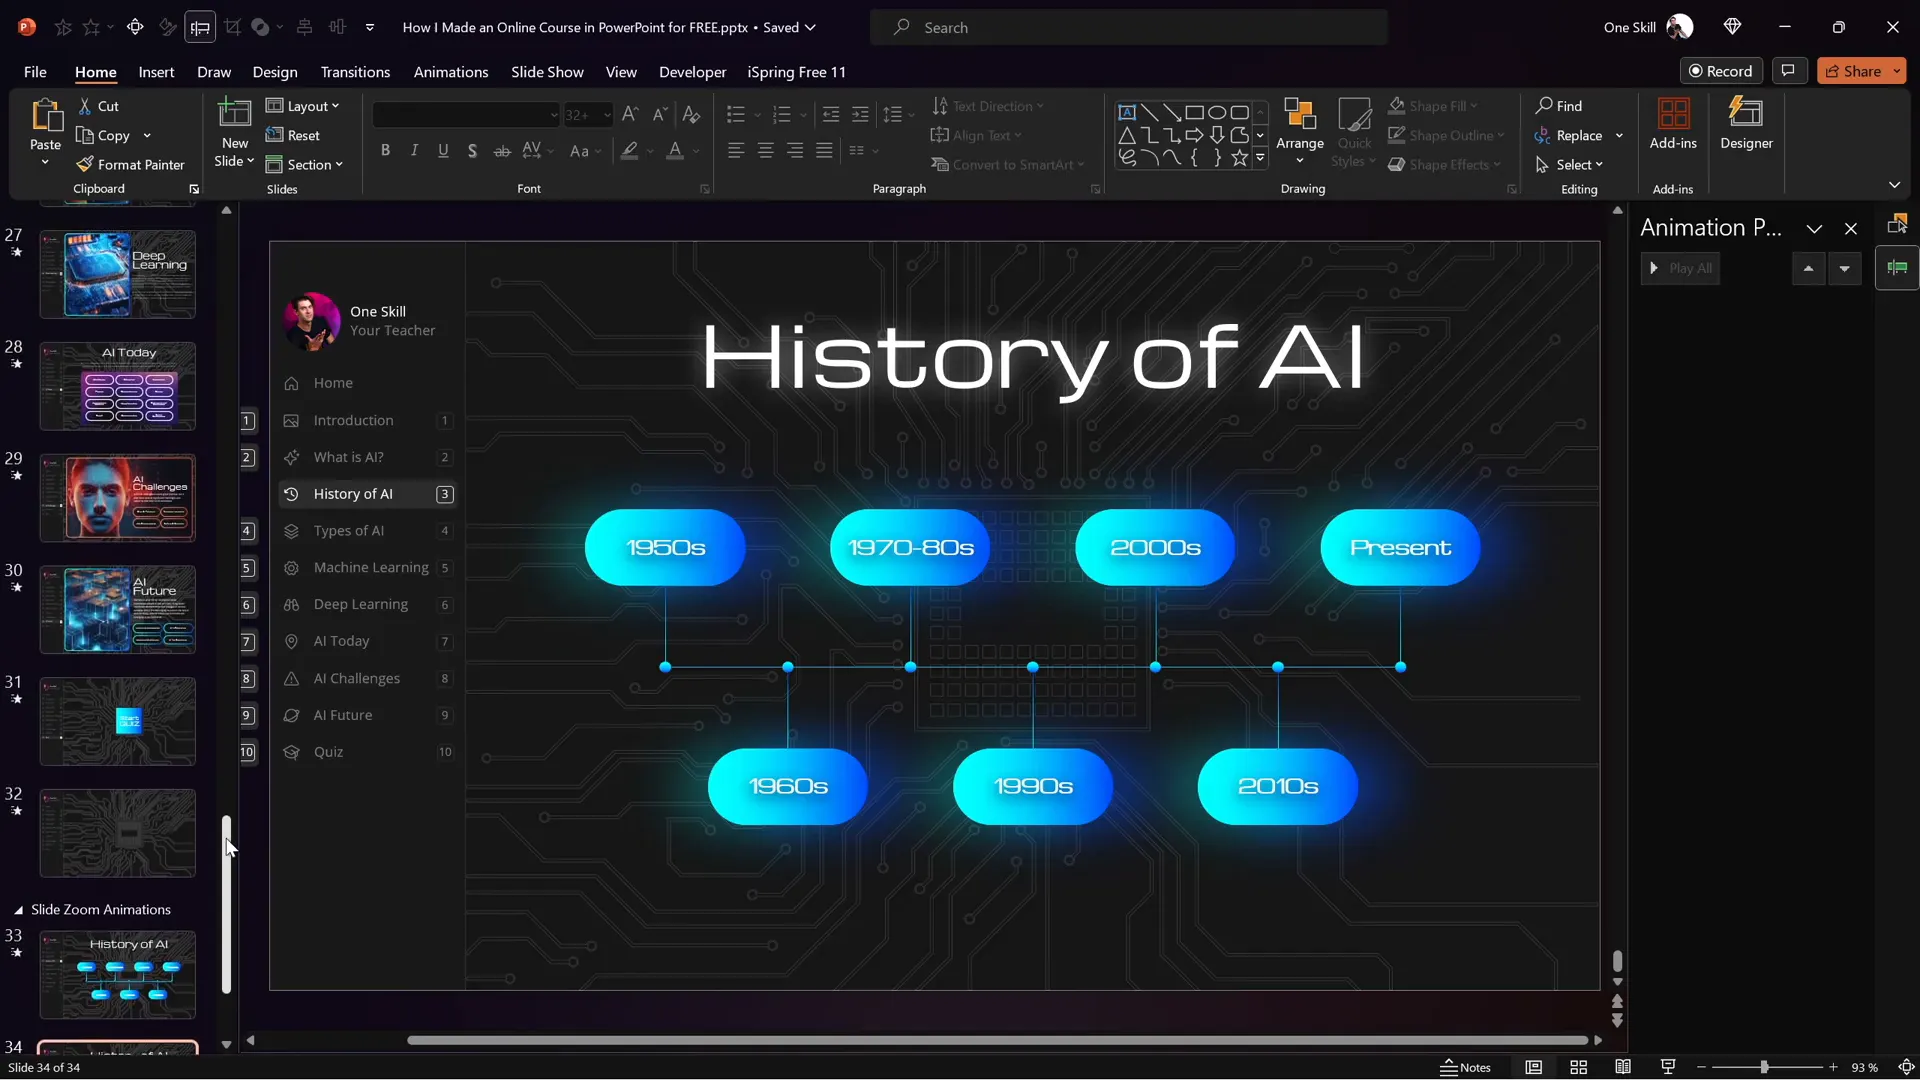
Controlling Animation Playback for Slide Zooms
A common challenge with slide zooms is that animations on zoomed slides can replay every time you return to them, which may not always be desirable. To solve this, I use a two-slide setup for each zoomed section:
| Slide | Features | Transition |
|---|---|---|
| First Slide | All entrance animations, no slide zooms | Automatic transition after 0 seconds |
| Second Slide | Slide zooms only, no animations | Manual transition |
This approach ensures animations play only once on the first slide. Afterward, the course automatically transitions to the second slide with interactive zooms but no replaying animations, providing a smoother user experience.
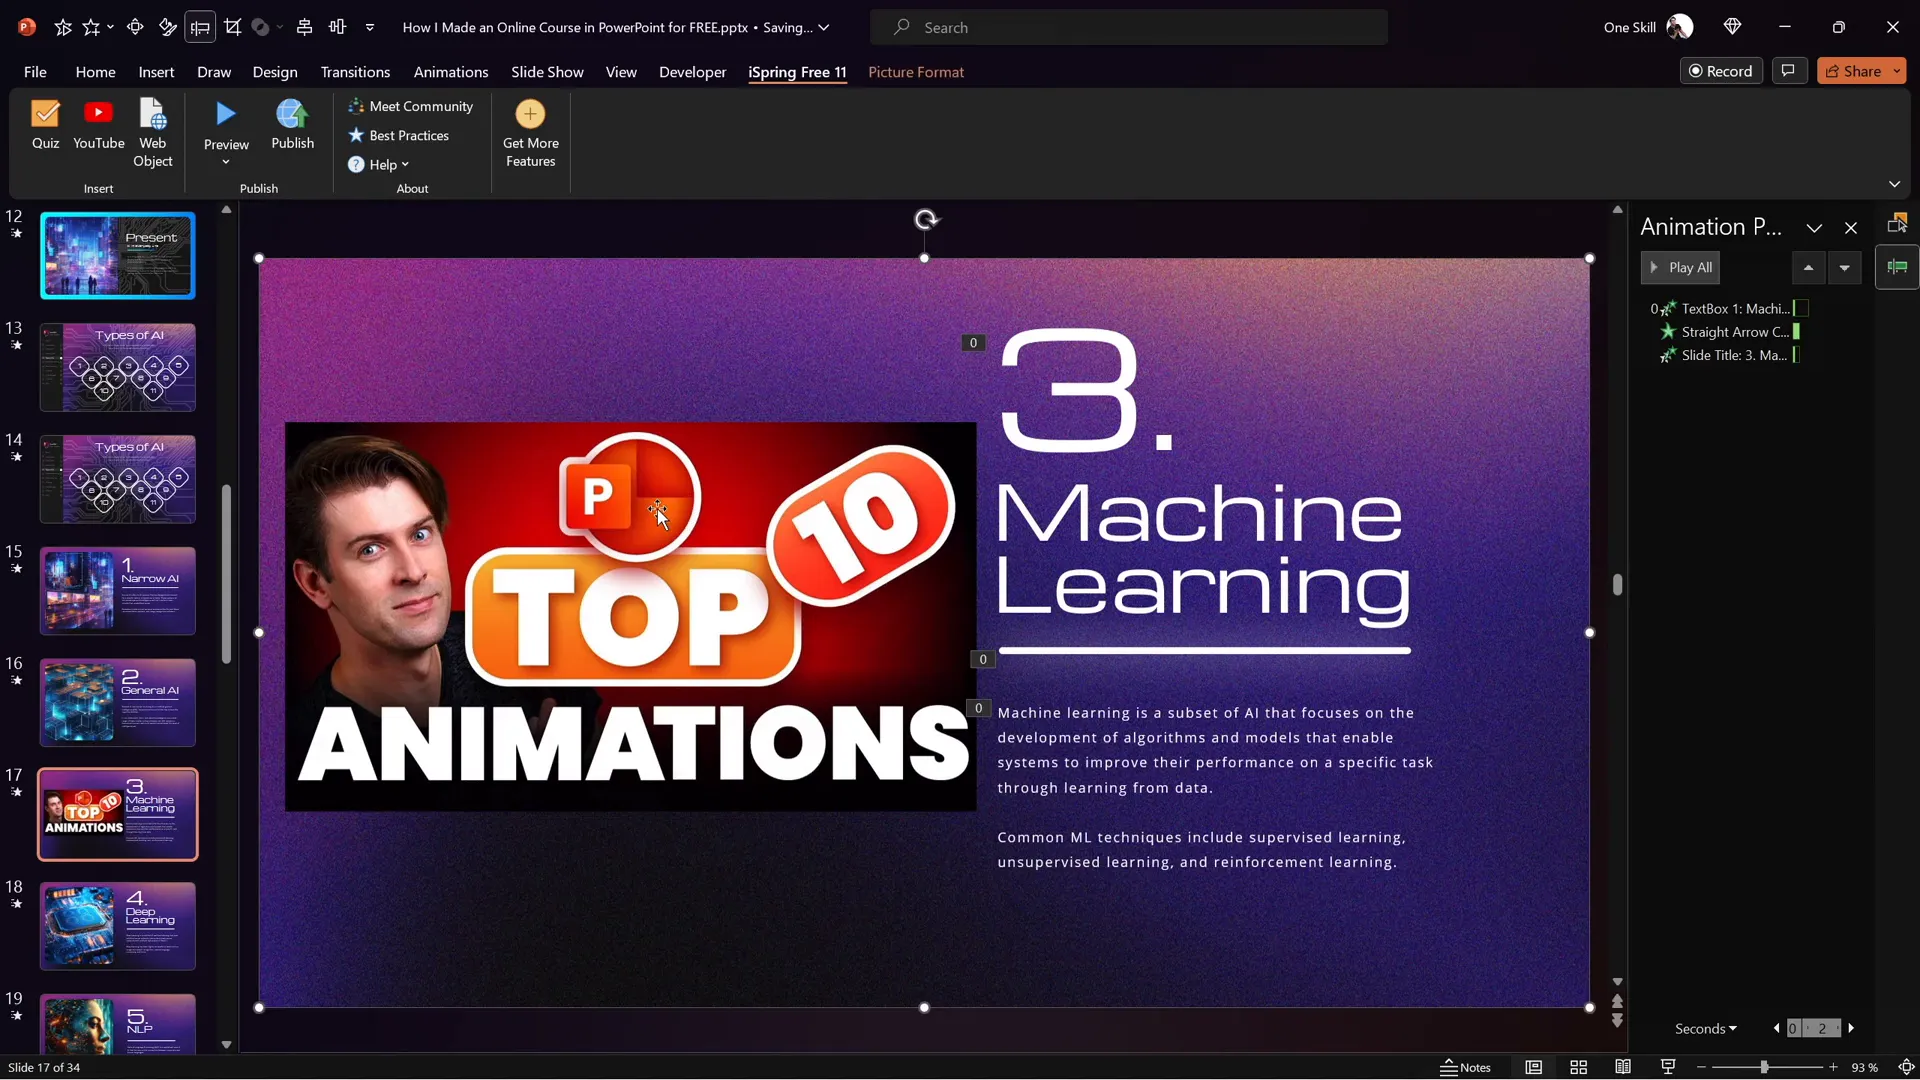
Inserting Multimedia: YouTube Videos and Web Objects
Embedding multimedia elements like videos and websites can significantly enrich your online course. Using the free iSpring Suite plugin, you can effortlessly add YouTube videos and live web objects directly into your PowerPoint slides.
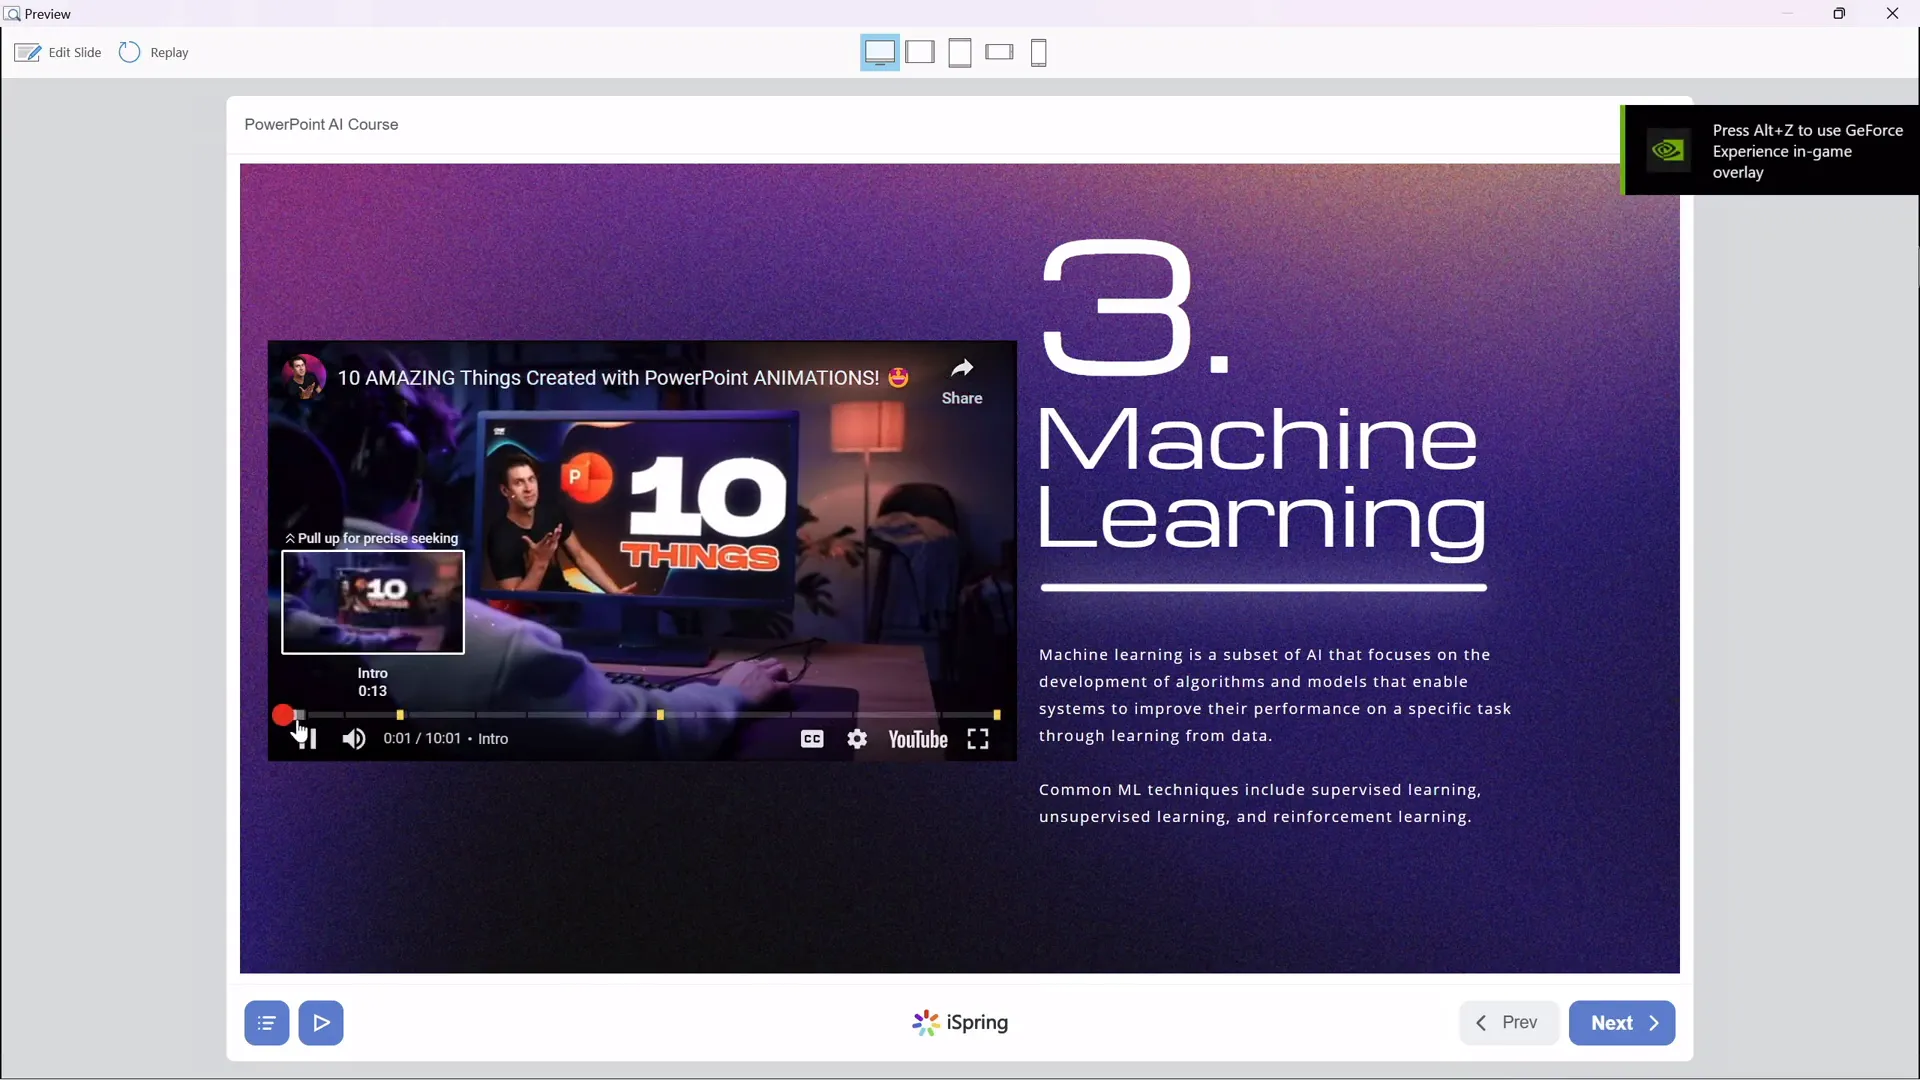
Embedding YouTube Videos
To insert a YouTube video:

- Delete any placeholder image or object on your slide.
- Copy the URL of the YouTube video you want to embed.
- Go to the iSpring Suite tab in PowerPoint.
- Click the YouTube button and paste the video URL.
- Preview the video to ensure it plays correctly.
- Adjust the video’s size and position on the slide.
The embedded video plays smoothly in the published course, and learners can control playback and navigate through the video timeline.
Embedding Live Websites (Web Objects)
Embedding a live website inside your course adds an interactive layer that can provide up-to-date information or external resources. Here’s how to do it:
- Choose the slide where you want to embed the website.
- Delete any existing images or objects that would interfere.
- Copy the URL of the website you want to embed.
- In the iSpring Suite tab, click the Web Object button.
- Paste the URL and insert the web object.
- Resize and position the embedded website on the slide.
When previewing or publishing the course, the embedded website is fully functional. Users can scroll, click links, and interact with the site as if they were browsing it live.
Creating Quizzes to Test Knowledge
Quizzes are a critical component of any effective online course. They help reinforce learning and provide feedback to both students and instructors. The iSpring Suite plugin makes quiz creation straightforward, offering various question types and customization options.
Adding a Quiz to Your Presentation
To insert a quiz:
- Navigate to the slide where you want the quiz.
- Click the Quiz button in the iSpring Suite tab.
- Choose between a graded quiz or a survey (graded quiz is recommended for testing knowledge).
- Start adding questions by selecting the question type.
Available Question Types
- Multiple Choice: One correct answer among several options.
- Multiple Response: More than one correct answer to select.
- Short Answer: Students type in their answer.
- Additional types available in iSpring Suite include matching, drag-and-drop, and hotspot questions.
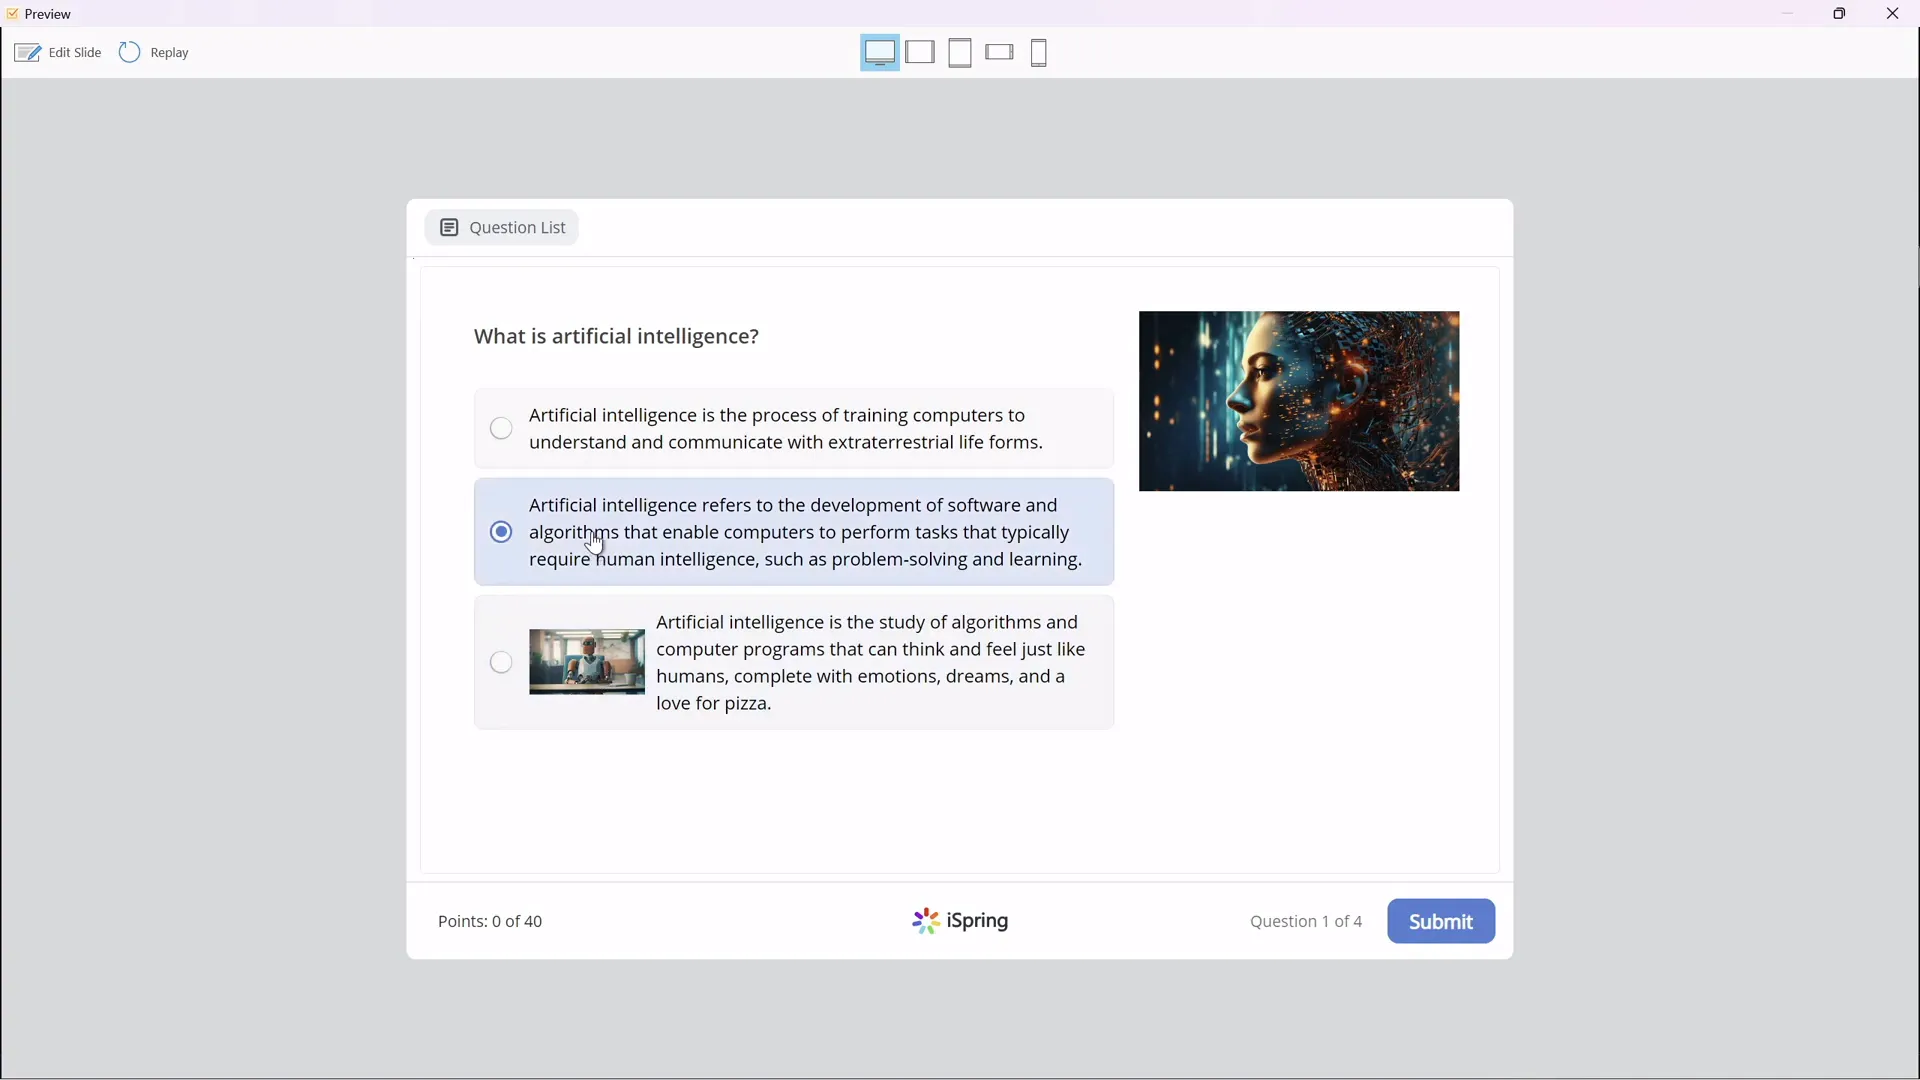
Customizing Questions and Feedback
Each question can include:
- Text prompts
- Multiple answers with one or more marked correct
- Custom feedback messages for correct or incorrect answers
- Optional photos attached to questions or answers for visual support
Quiz Settings and Scoring
In the quiz options, you can:
- Name your quiz (e.g., “The World of AI”)
- Set the passing score percentage (e.g., 50%)
- Determine points per question
- Shuffle answer order to maintain quiz integrity
- Send quiz reports to instructors or students automatically
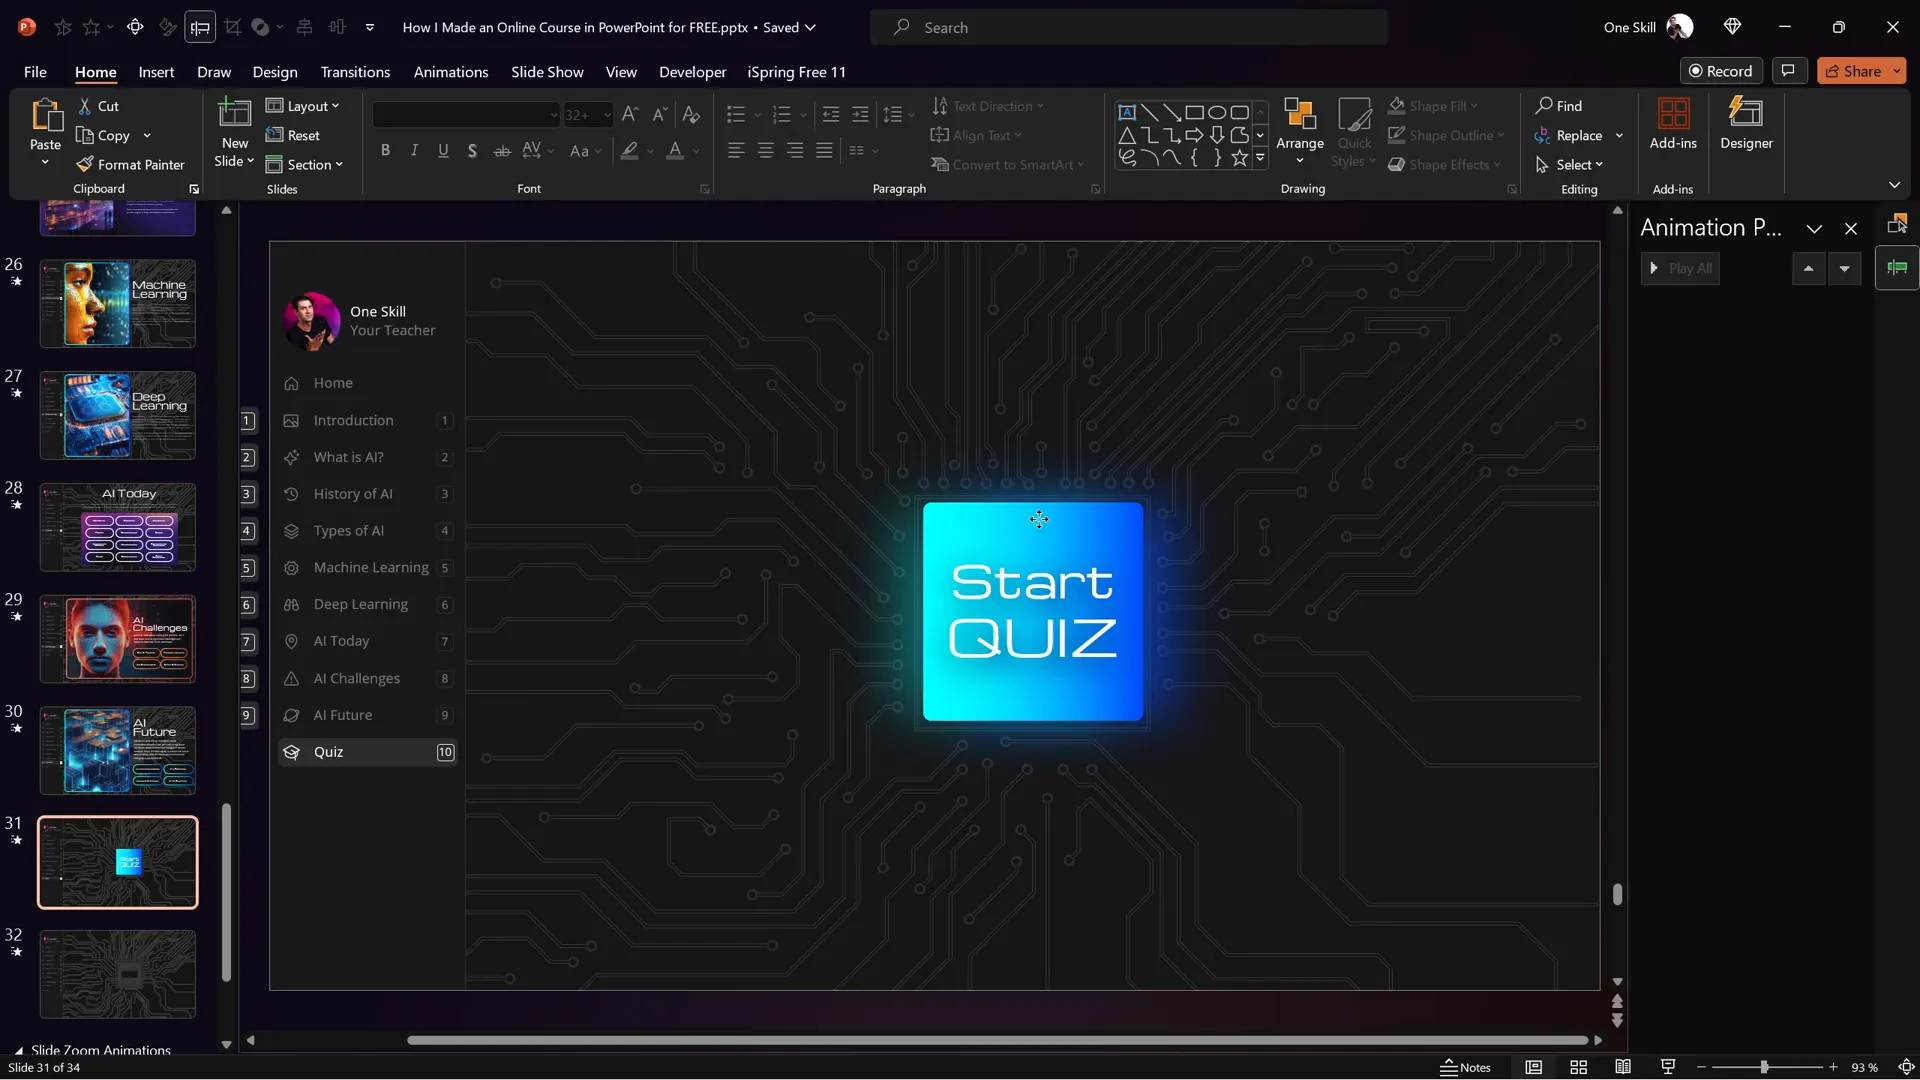
Integrating the Quiz into Your Course Flow
To make the quiz feel like a natural part of the course, I added a glowing “Start Quiz” button on the preceding slide. This button is a rounded rectangle with a glowing shadow effect and links directly to the quiz slide, inviting students to test their knowledge once they finish the content.
Publishing Your PowerPoint as an Online Course
Once your slides, multimedia, navigation, and quizzes are ready, it’s time to publish your work as a fully interactive online course. The iSpring Suite plugin offers multiple publishing options to suit your needs.
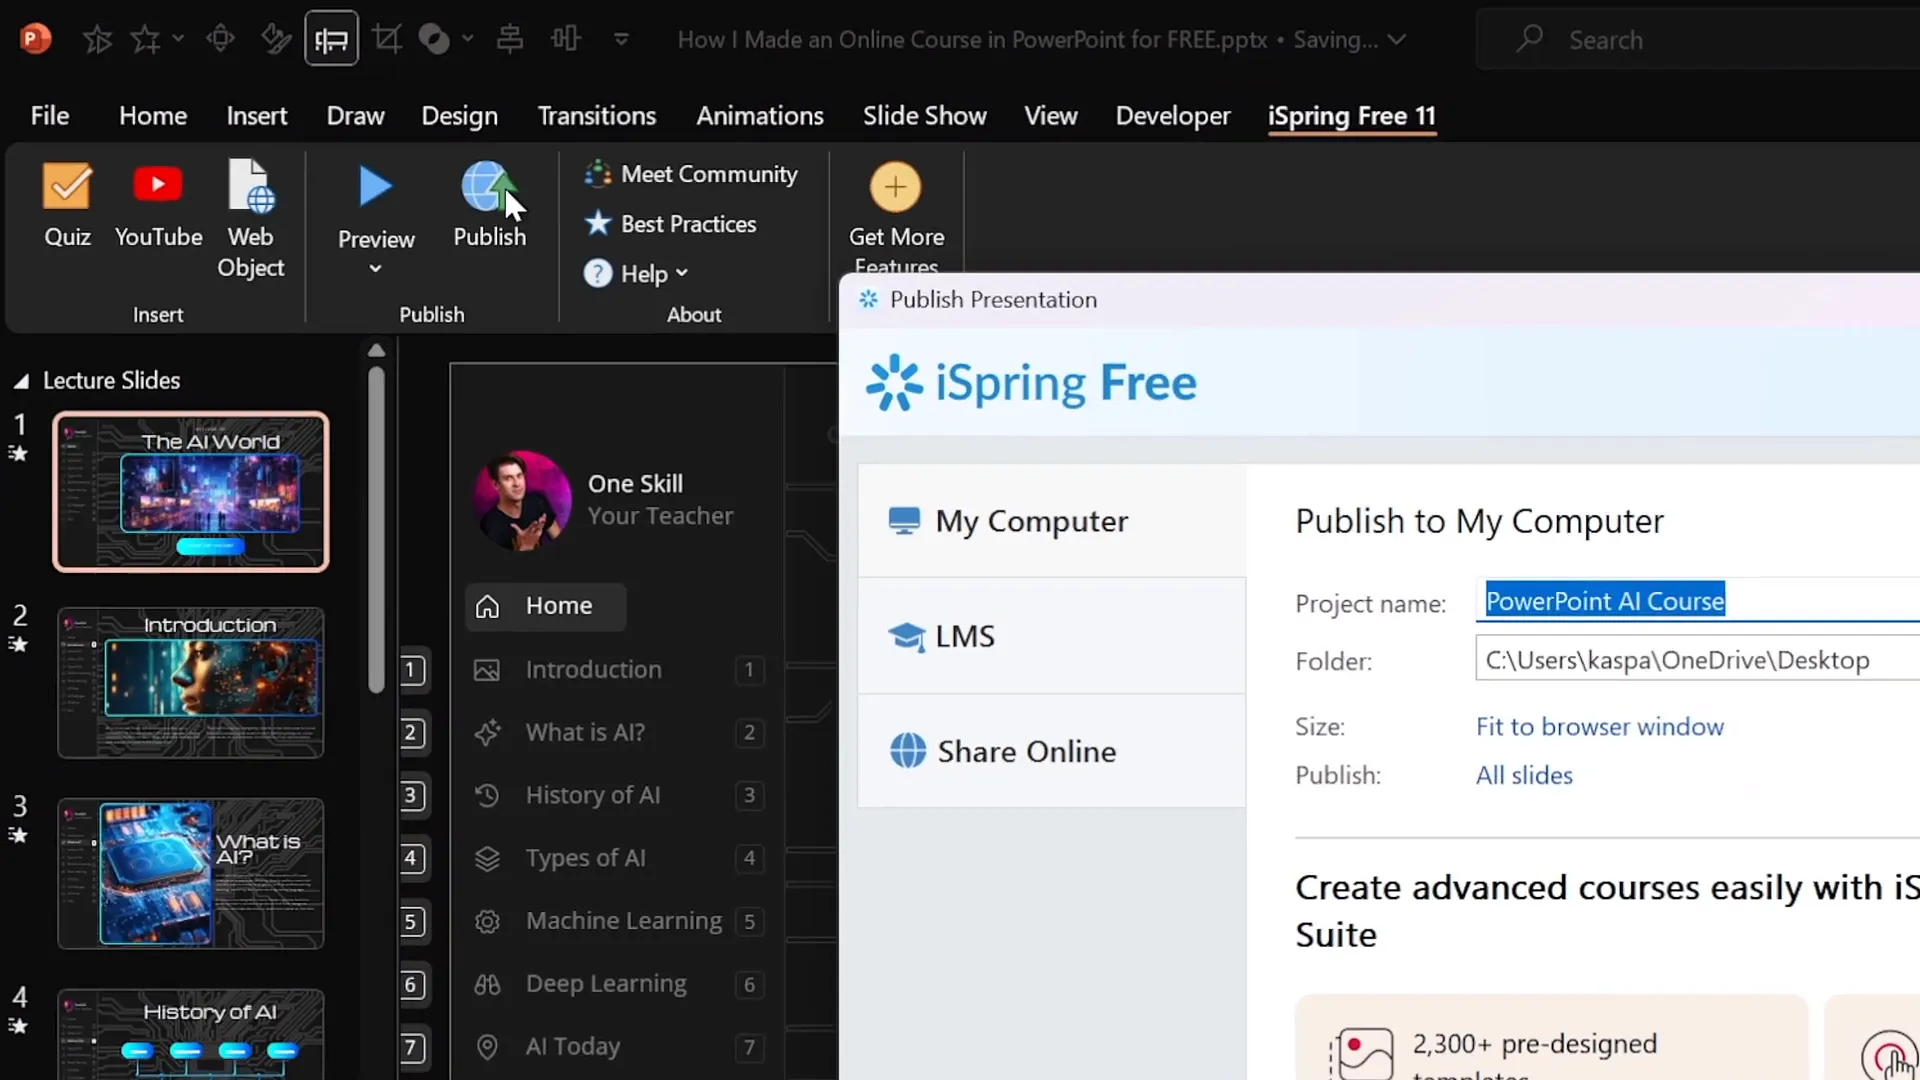
Publishing Options
| Option | Description | Use Case |
|---|---|---|
| Publish to Computer | Exports the course as HTML5 files saved locally | Share via website, USB, or internal network |
| Publish for LMS (SCORM) | Exports course in SCORM format compatible with LMS platforms like Moodle | Track learner progress and scores in LMS |
| Publish to iSpring Learn | Upload course directly to iSpring’s cloud-based LMS | Host and manage courses online with analytics |
| Publish to YouTube, iSpring Page, or Market | Share courses on popular platforms for public access | Public or marketing use of courses |
When publishing, you can decide whether to include all slides or select specific ones, as well as adjust the course size and scaling options to fit browser windows or device screens.
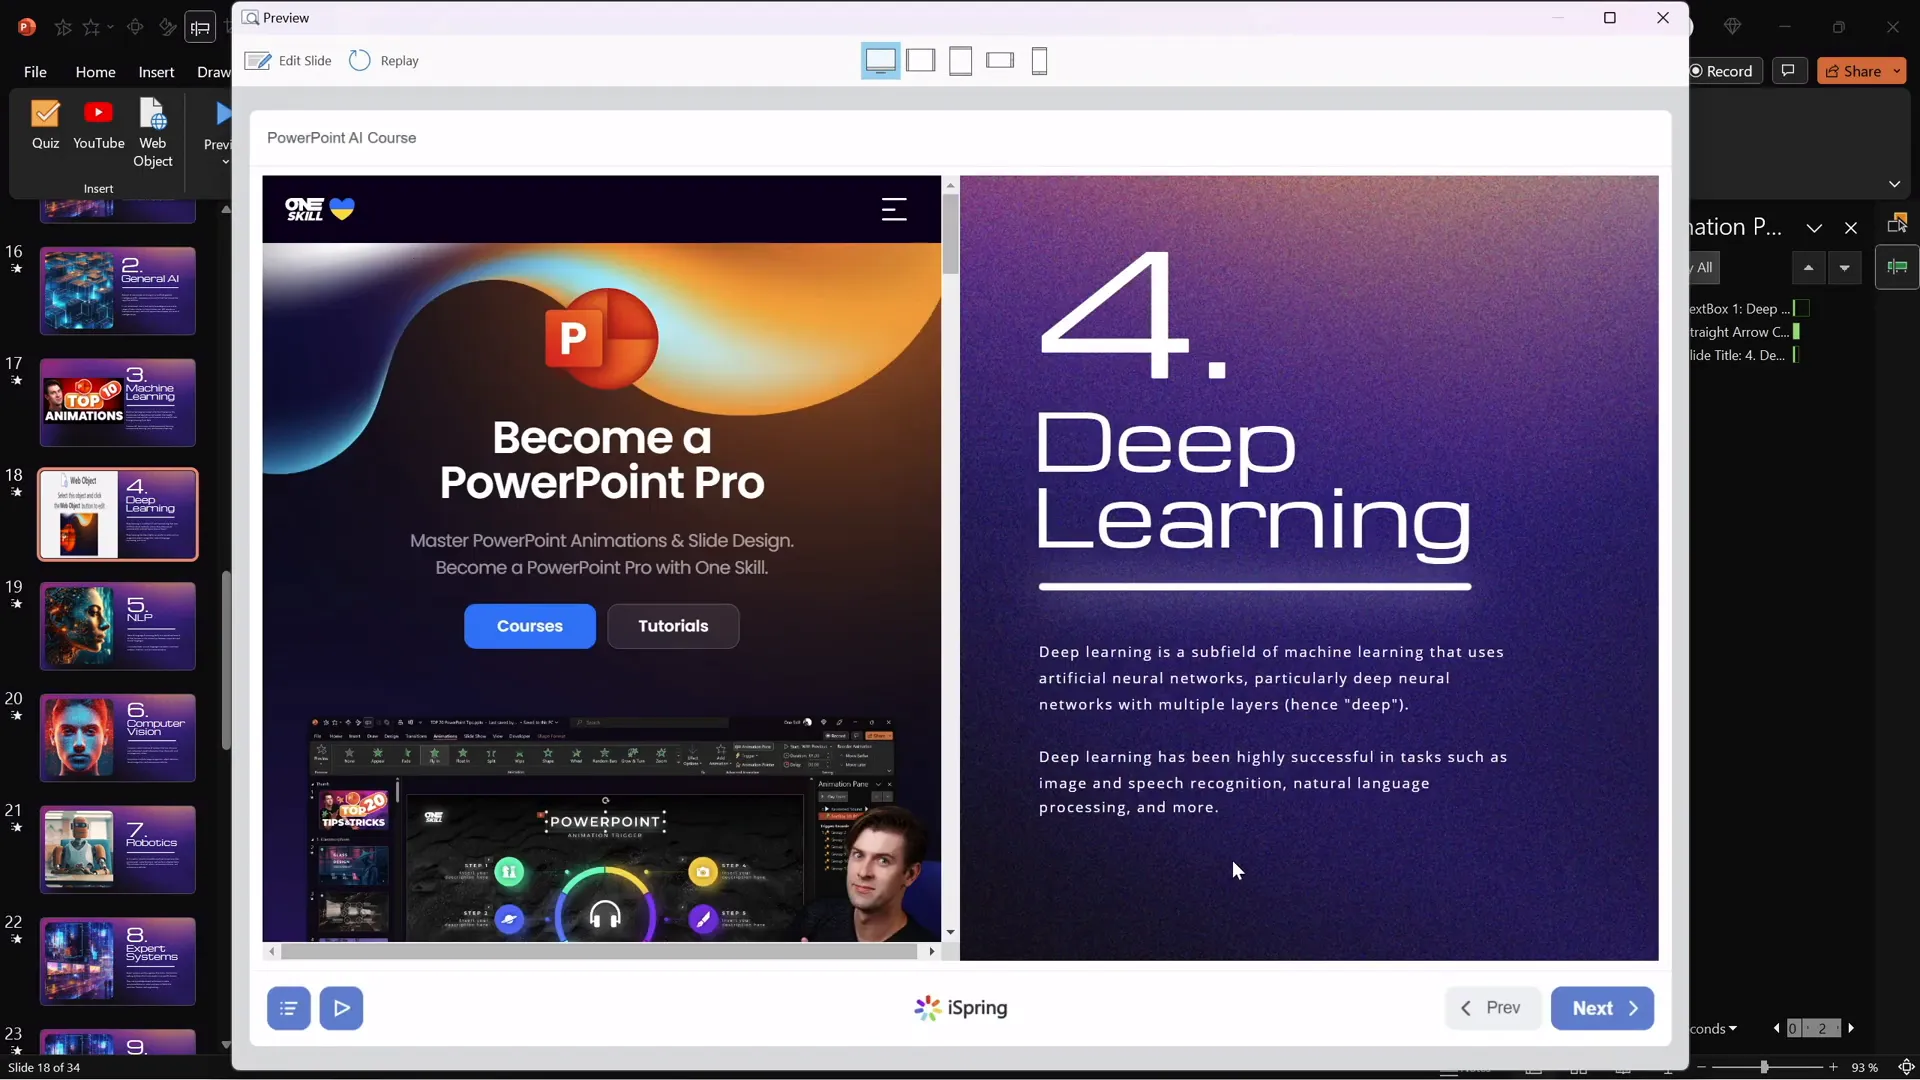
Previewing and Testing Your Course
Before sharing your course with students, preview it using the iSpring Course Player. This player simulates how the course will appear on various devices and lets you test navigation, video playback, web objects, and quizzes to ensure everything works flawlessly.
Frequently Asked Questions
Can I create an online course from PowerPoint for free?
Yes! By using the free iSpring Suite plugin (often referred to as iSpring 3.11), you can transform your PowerPoint presentations into interactive online courses without any cost.
Do I need to be an expert in PowerPoint to make an online course?
Not at all. Basic familiarity with PowerPoint is enough. The guide above shows how to use simple features like Slide Master, hyperlinks, and slide zooms to create engaging courses. The iSpring plugin handles the complex publishing and interactive elements.
Can I include quizzes and videos in my PowerPoint online course?
Absolutely. The iSpring Suite plugin lets you embed YouTube videos, live websites, and create multiple types of quizzes directly within your PowerPoint presentation.
Will my course work on mobile devices?
Yes. Courses published with iSpring are responsive and can be viewed on desktops, tablets, and smartphones, ensuring accessibility for all learners.
How do I share my published course with students?
You can publish your course as HTML files and upload them to your website or LMS. Alternatively, you can use iSpring Learn, a cloud LMS, or share via platforms like YouTube or iSpring Market.
Can I track student progress and quiz results?
Yes. If you publish your course in SCORM format and upload it to an LMS, you can track learner progress, quiz scores, and generate reports.
Is it possible to update my course after publishing?
Yes. You can update your PowerPoint slides and re-publish the course. If you use an LMS, simply upload the updated package to replace the old version.
Conclusion
Transforming your PowerPoint presentations into interactive online courses is now easier and more accessible than ever. By leveraging PowerPoint’s built-in features like Slide Master, hyperlinks, and slide zooms, combined with the powerful free iSpring Suite plugin, you can create engaging, multimedia-rich courses that captivate your students and enhance learning outcomes.
From creating a clickable sidebar navigation to embedding YouTube videos and live websites, from designing quizzes that provide instant feedback to publishing your course for any platform—the tools and techniques shared here empower educators to innovate without additional costs.
Whether you’re teaching artificial intelligence or any other subject, this approach to PowerPoint online course creation allows you to repurpose your existing materials into a modern, interactive format ready for the digital classroom.
Start creating your own online course today and experience firsthand how simple, free tools can elevate your teaching to the next level. Stay happy, stay healthy, and happy course creating!
Check out the full video: How I Made an Online Course in PowerPoint for FREE! 😁


