
If you’re a teacher or educator looking to elevate your existing PowerPoint presentations into engaging online courses, you’re in the right place. Transforming your lecture slides into a dynamic, interactive course is easier than you might think — and best of all, it can be done for free. This comprehensive guide will walk you through the entire process of creating a fully functional online course from your PowerPoint slides using powerful tools and smart design techniques.
Imagine having a beautifully designed course complete with interactive navigation, embedded videos, live websites, and quizzes to test your students’ knowledge — all created within PowerPoint and published online effortlessly. This article will show you exactly how to do that, including tips on slide design, animations, quizzes, and publishing.
Let’s dive into the step-by-step workflow for PowerPoint online course creation that can help you engage students, save time, and make your teaching more effective.
Table of Contents
- Course Presentation Overview: Navigating the AI Course
- Creating a Clickable Sidebar for Easy Navigation
- Animating the Sidebar for Visual Appeal
- Mastering Slide Zoom Animations
- Adding Multimedia: YouTube Videos and Web Objects
- Building Interactive Quizzes with iSpring
- Publishing Your PowerPoint as an Online Course
- Frequently Asked Questions
- Conclusion: Your Path to PowerPoint Online Course Creation
Course Presentation Overview: Navigating the AI Course
Before we get into the technical details, let’s explore a sample course presentation created on the topic of artificial intelligence (AI). This will give you a clear picture of the end goal and the features you can incorporate into your own course.
The presentation features a clean, intuitive sidebar on the left side, which provides easy navigation through different sections. The course starts with an introduction slide, followed by foundational topics like:
- What is Artificial Intelligence?
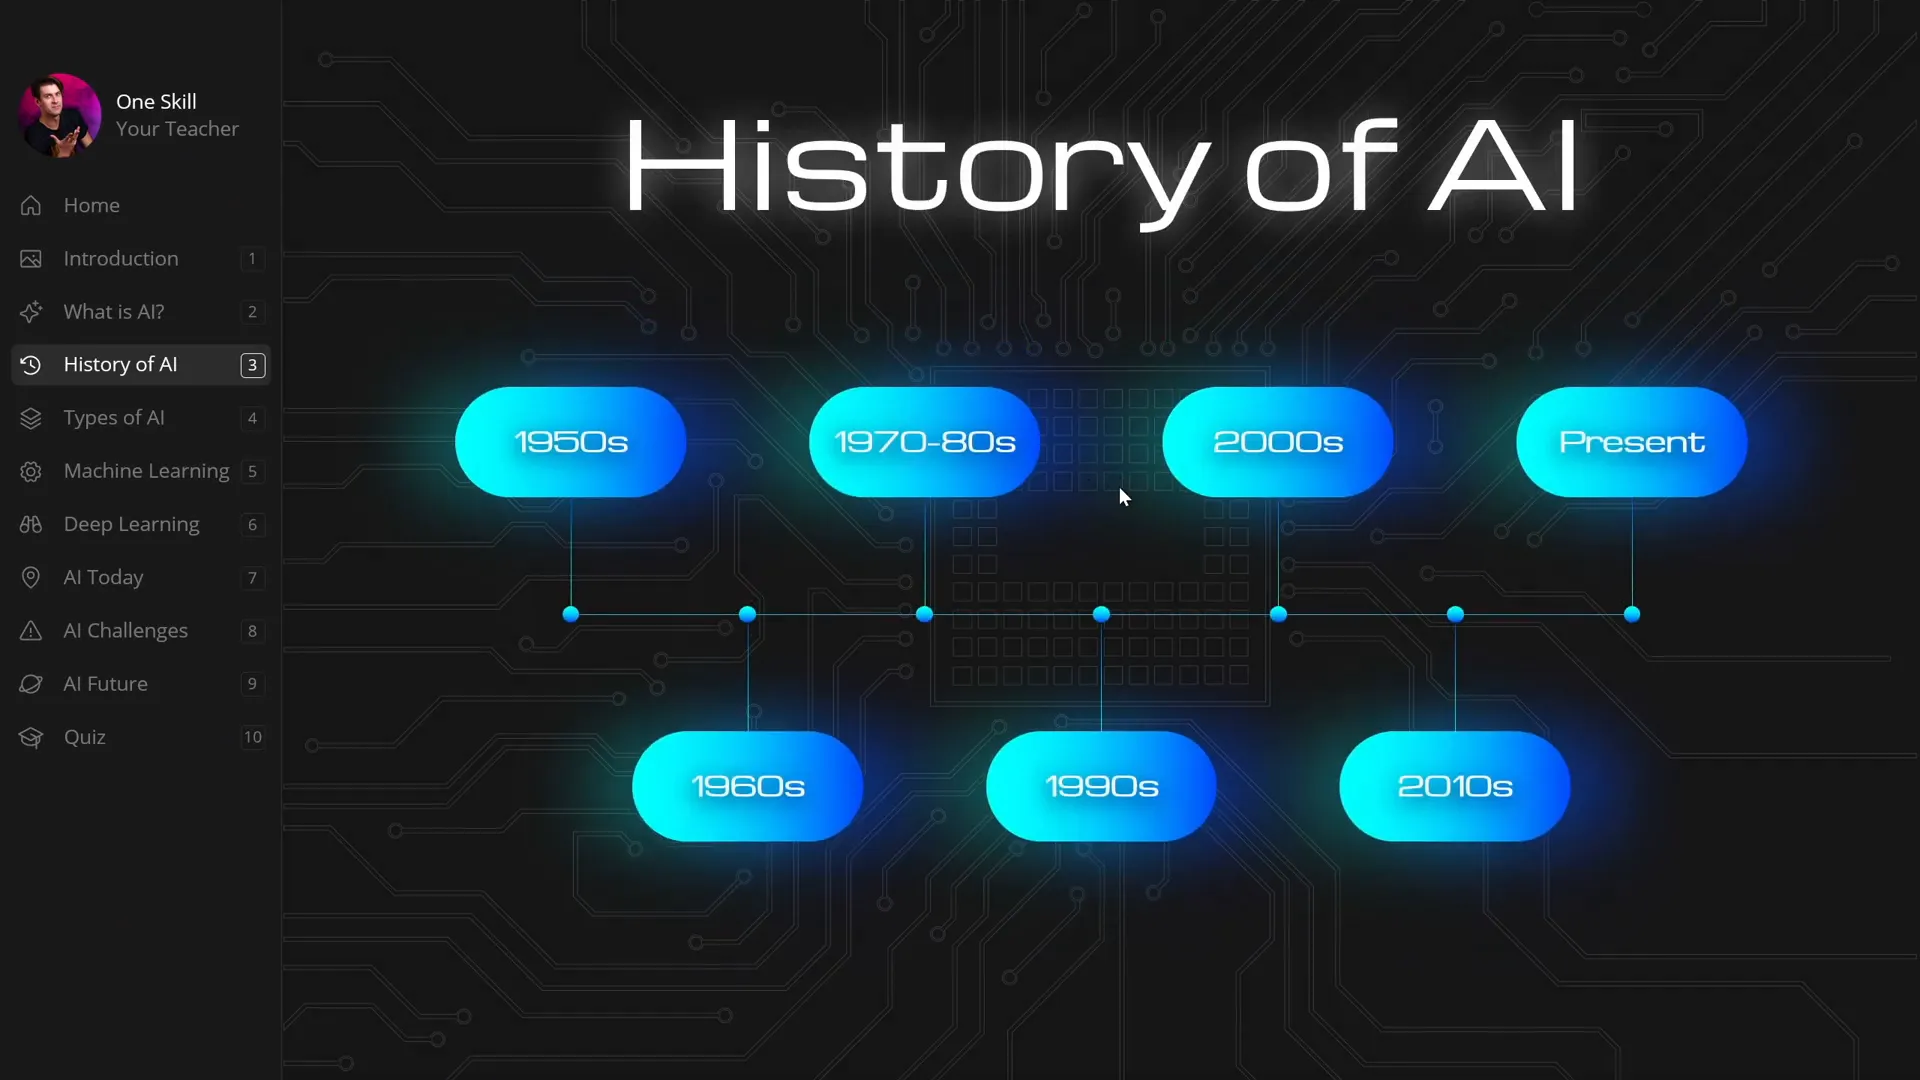
- History of AI with clickable years that zoom into detailed information
- Types of Artificial Intelligence with clickable numbers for deeper insights
- Machine Learning and Deep Learning explained
- Applications and challenges of AI today
- A look into the future of AI
- A final quiz to test knowledge
Each section uses smart slide zoom features to allow learners to dive deeper into specific topics without losing their place in the course. This interactive navigation keeps the learner engaged and in control of their learning path.

This structure not only helps students follow along smoothly but also gives educators a blueprint for organizing their content efficiently.
Creating a Clickable Sidebar for Easy Navigation
One of the standout features of this course is the sidebar navigation that stays consistent across all slides. This sidebar allows students to jump to any section instantly, making the course feel like a modern web experience rather than a linear slideshow.
How to create the sidebar:
- Use Slide Master View: The sidebar is designed in the Slide Master view, which means it appears on all slides using the same layout. This saves time — you don’t need to recreate the sidebar for each slide.
- Design the Sidebar Elements: The sidebar includes text boxes for section titles, icons on the left, and section numbers on the right. You can customize these with your own text, icons, and images to fit your course branding.
- Add Invisible Clickable Areas: To make the sidebar interactive, insert transparent rounded rectangles over each section. These rectangles act as clickable buttons but remain invisible during the presentation.
- Insert Hyperlinks to Slides: Each transparent rectangle is hyperlinked to a specific slide. For example, clicking “Introduction” takes the user to slide 2, and “What is AI?” takes them to slide 3.
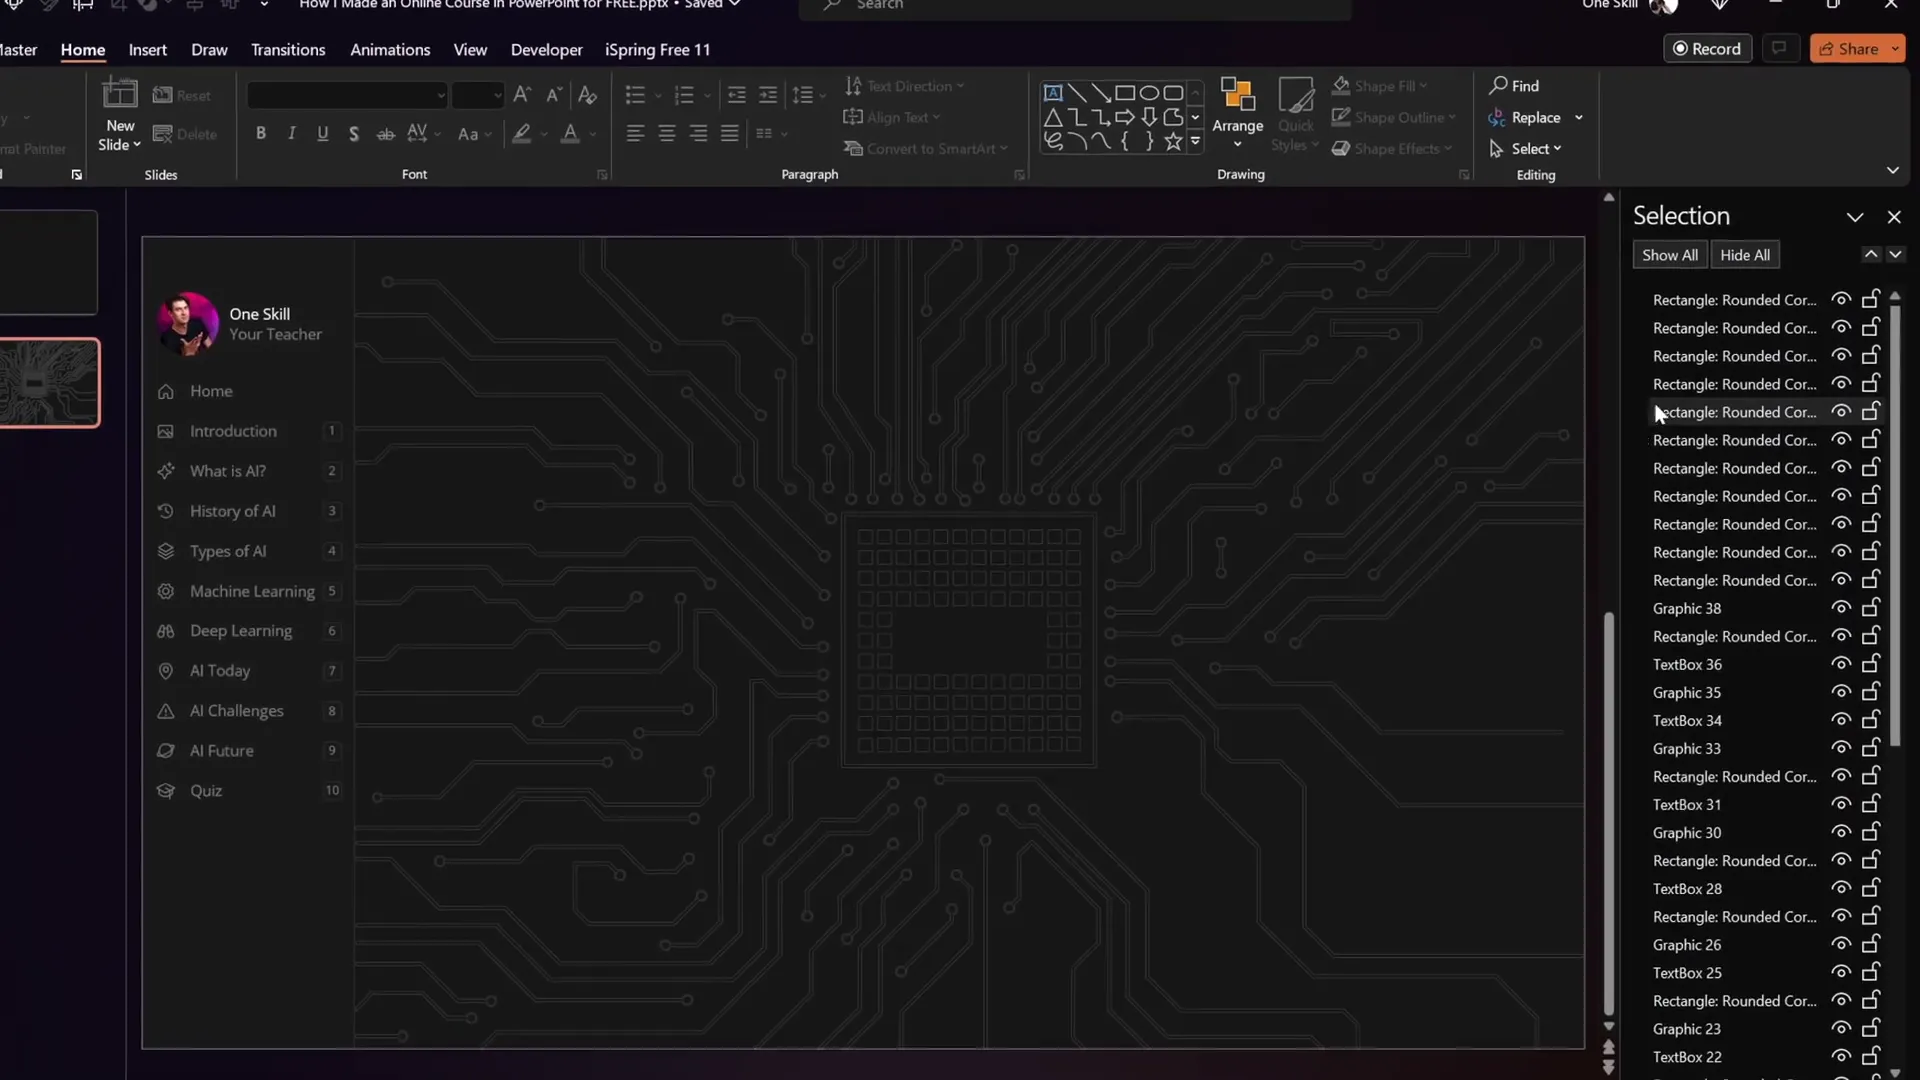
To adjust the transparency and make the rectangles invisible:
- Open the Selection Pane to select all the rounded rectangles.
- Go to the Format Shape pane and set the fill transparency to 100%.
- Ensure the rectangles are layered on top of other sidebar elements so they capture clicks.
This method is simple yet powerful, turning your sidebar into a fully functional navigation menu that works seamlessly in your course.
Animating the Sidebar for Visual Appeal
To take the sidebar navigation a step further, you can add subtle animations to highlight the active section, improving user experience and engagement.
How to animate the sidebar active state:
- Create Active State Cards: Duplicate the entire sidebar and create a version where each section is visually highlighted (e.g., a colored background or glow effect) to indicate it is active.
- Place Active Cards on Each Slide: On every slide, paste the active card that corresponds to the current section, and move the others off-slide.
- Use Morph Transition: Set the slide transition to Morph with a duration of around 0.5 seconds. Morph will animate the active card sliding in and out smoothly.
This workflow allows you to maintain global control of your sidebar while adding polish and interactivity to your course navigation.
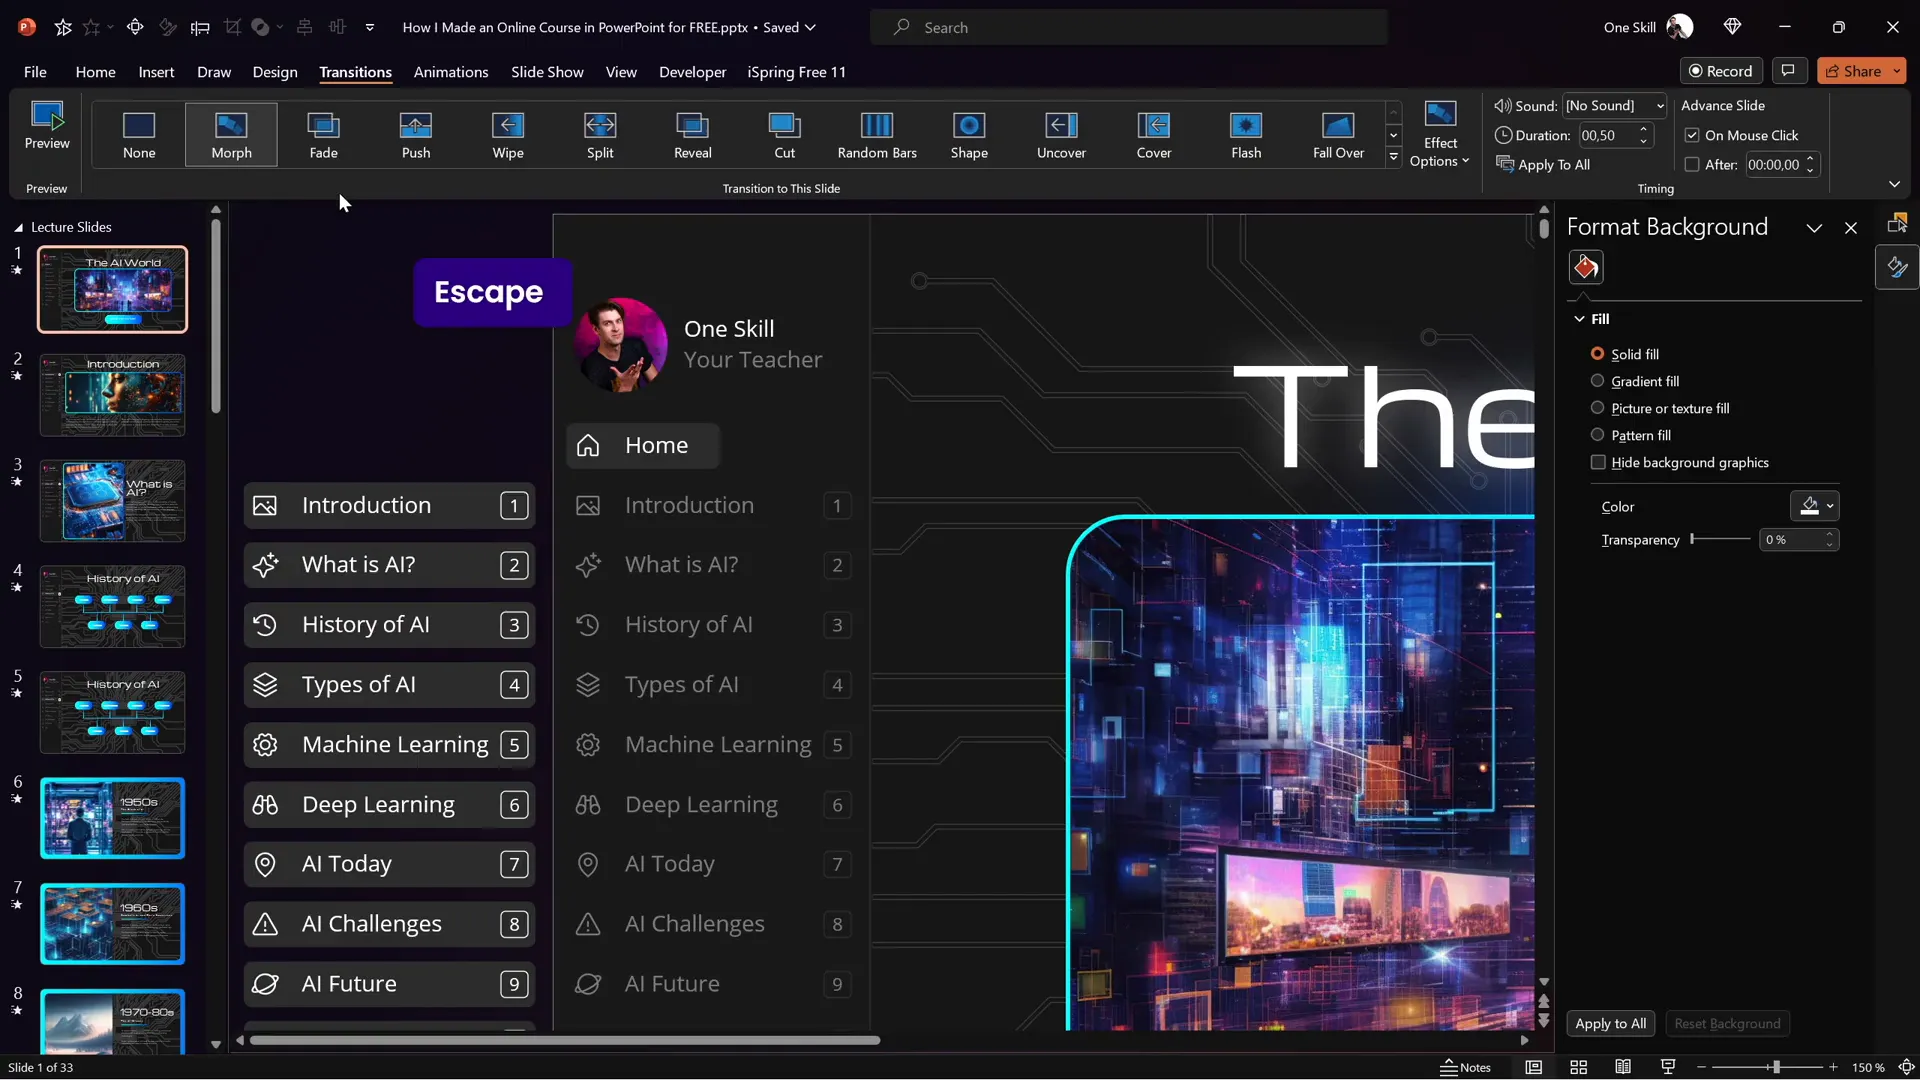
The Morph transition makes the sidebar feel alive and responsive, helping learners know exactly where they are in the course.
Mastering Slide Zoom Animations
Slide Zooms are a fantastic PowerPoint feature that lets you create interactive navigation within your slides. Instead of jumping linearly, students can click on zoom areas to dive into subtopics and then zoom back out to the main slide.
In the AI course, slide zooms are used to explore different years in AI history and types of AI by clicking on numbers or years.
Tips for using slide zooms effectively:
- Make Slide Zooms Invisible: Use a fully transparent image as the cover for your zooms so they don’t distract visually but remain clickable.
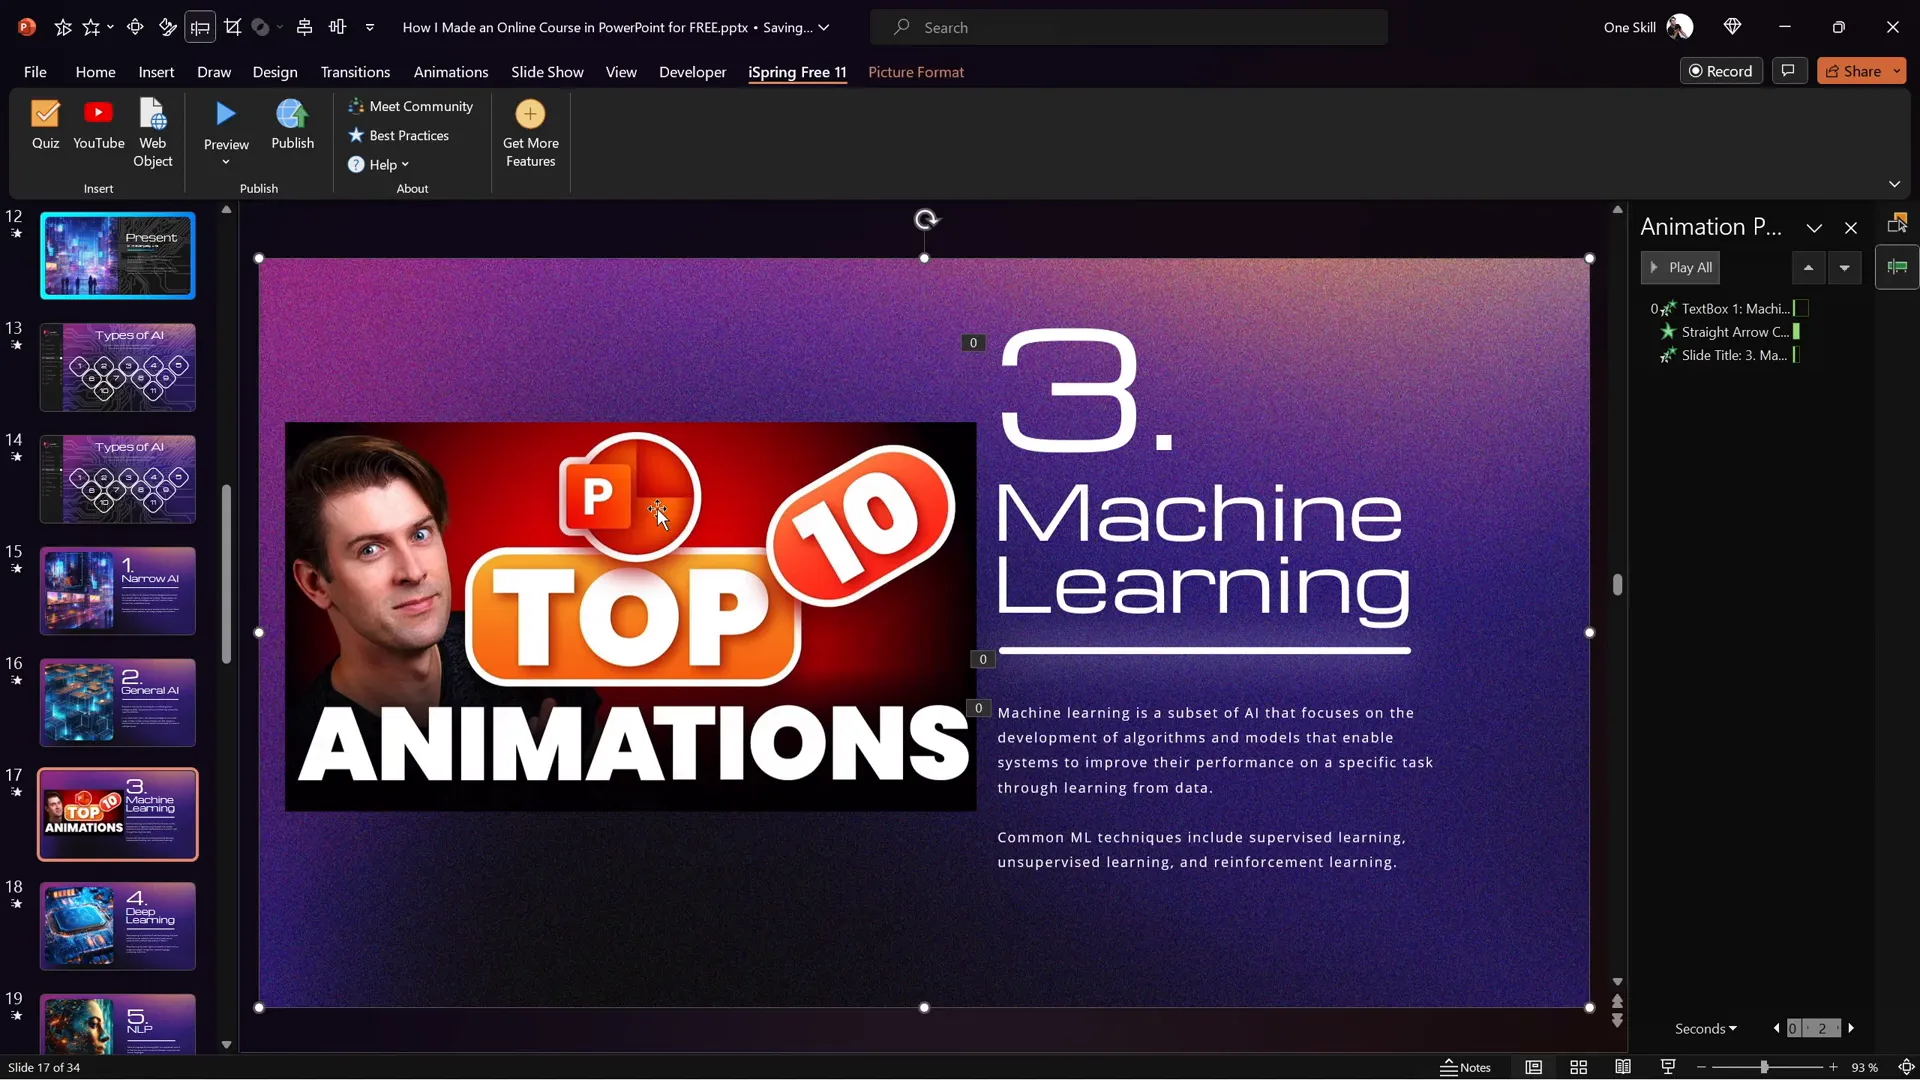
- Control Animation Replays: By default, slide zoom animations replay every time you zoom in and out. To make animations play only once, use a two-slide setup:
| Slide 1 | Slide 2 |
|---|---|
| Contains all animations but no slide zooms, set to transition automatically after 0 seconds. | Contains slide zooms but no animations. |
This method ensures animations play on the first visit and don’t replay when zooming back, creating a smoother learning experience.
Adding Multimedia: YouTube Videos and Web Objects
Embedding multimedia elements such as videos and websites can greatly enrich your online course, making it more engaging and interactive.
Inserting a YouTube Video
Using the free iSpring 3.11 plugin, you can insert YouTube videos directly into your PowerPoint slides:
- Delete any existing image or placeholder where you want the video.
- Go to the iSpring 3.11 tab and click the “YouTube” button.
- Paste the URL of your YouTube video and preview it to verify it works.
- Resize and position the video on your slide.
This video will play smoothly within your course player, allowing students to watch without leaving the presentation.
Embedding a Live Website (Web Object)
You can also embed a fully interactive website right into your slide:
- Delete the placeholder image on your slide.
- In the iSpring 3.11 tab, click “Web Object.”
- Paste the URL of the website you want to embed.
- Resize the embedded website frame to fit your slide layout.
When previewed or published, the embedded website is fully functional: students can scroll, click links, and interact as if they were browsing the site live.

This feature opens up a whole new level of interactivity, perfect for showcasing external resources, live data, or additional course materials.
Building Interactive Quizzes with iSpring
Quizzes are essential for reinforcing learning and assessing student understanding. With the iSpring 3.11 plugin, you can create quizzes directly inside PowerPoint and embed them into your course.
Steps to create a quiz:
- Navigate to the slide where you want the quiz to appear.
- Click the “Quiz” button in the iSpring 3.11 tab.
- Choose between a graded quiz or a survey.
- Add questions by selecting from multiple types:
- Multiple Choice (single correct answer)
- Multiple Response (multiple correct answers)
- Short Answer (text input)
- For each question, input the question text, answer options, and mark the correct answers.
- Customize feedback messages for correct and incorrect responses.
- Optionally, add photos to questions or answers to enhance visual appeal.
- Set quiz options such as:
- Quiz name
- Passing percentage (e.g., 50%)
- Points per question
- Shuffle answers
- Quiz report sending
- Insert an optional intro slide with a welcome message and description.
- Save and return to course to embed the quiz in your presentation.
This allows you to seamlessly integrate knowledge checks and keep learners engaged.
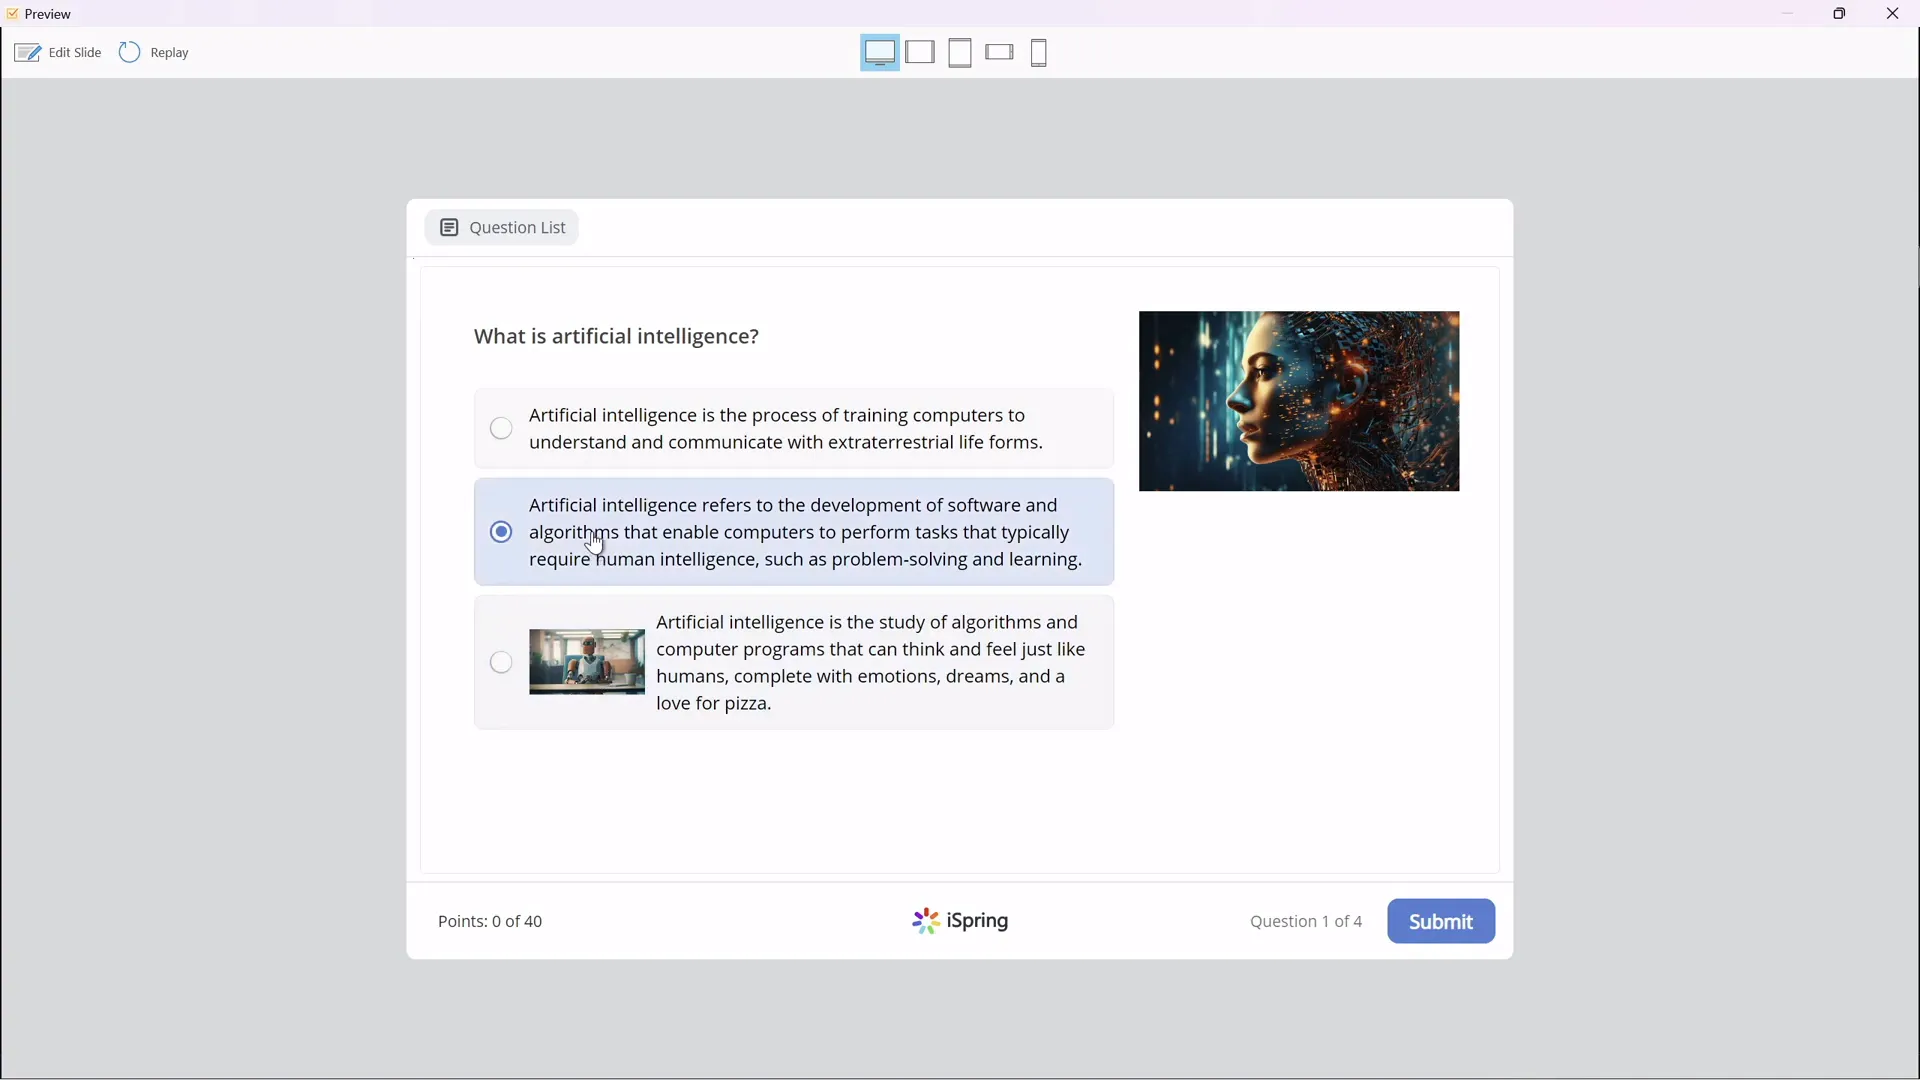
Once inserted, you can test the quiz in preview mode, submit answers, and view results. The plugin handles scoring and feedback automatically.
Publishing Your PowerPoint as an Online Course
After designing your slides, adding navigation, multimedia, and quizzes, the final step is publishing your PowerPoint presentation as an interactive online course.
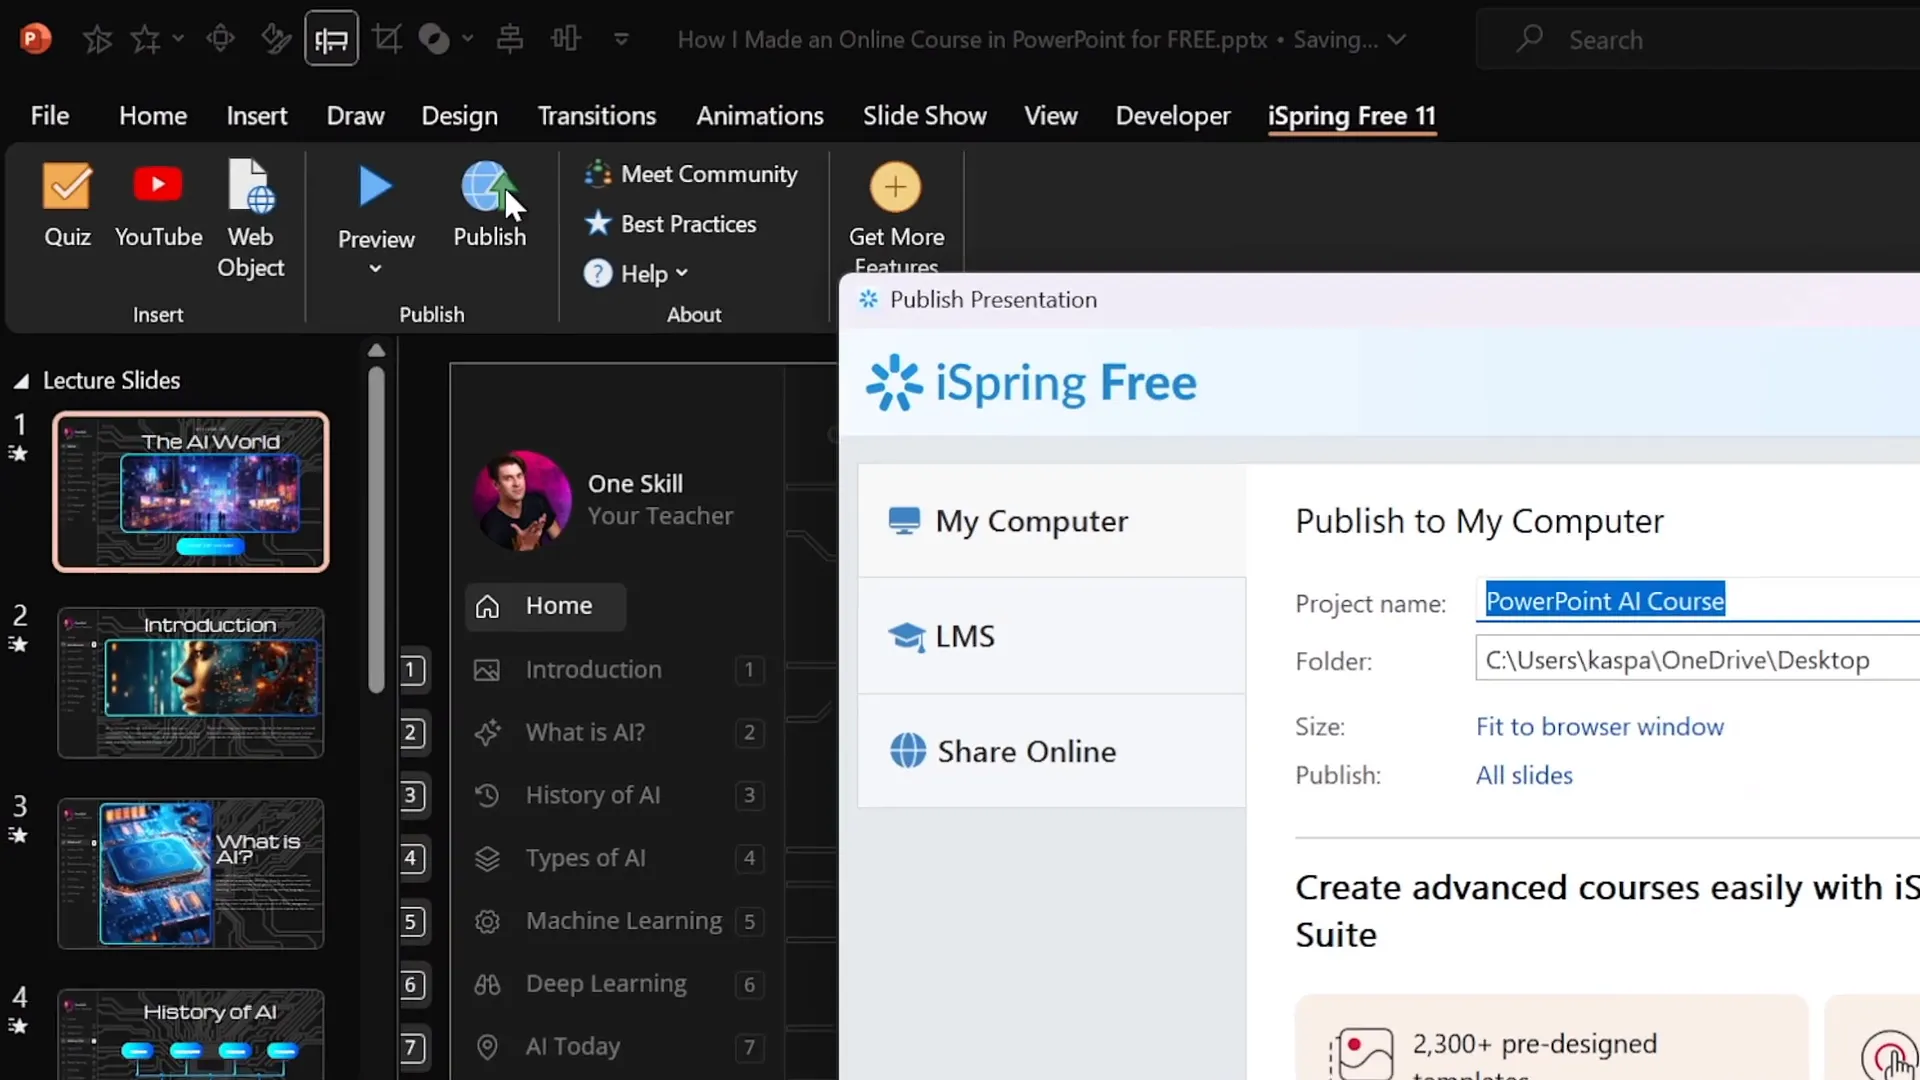
Using iSpring 3.11, you have several publishing options:
| Publishing Option | Description |
|---|---|
| Publish to Computer | Export your course as HTML5 files to your local drive. You can upload these files to your website or share them directly. |
| Publish for LMS (SCORM) | Export your course in SCORM format for integration with Learning Management Systems like Moodle or Blackboard. |
| Publish to iSpring Learn | Use iSpring’s cloud-based LMS platform to host and manage your courses. |
| Publish to YouTube, iSpring Page, or iSpring Market | Share your course as a video or interactive page on various platforms. |
When publishing, you can select which slides to include, adjust course size, and configure playback settings like fitting the course to the browser window.
Once published, preview your course in the iSpring course player. You’ll see the navigation sidebar, animations, slide zooms, embedded videos, live websites, and quizzes all functioning perfectly.
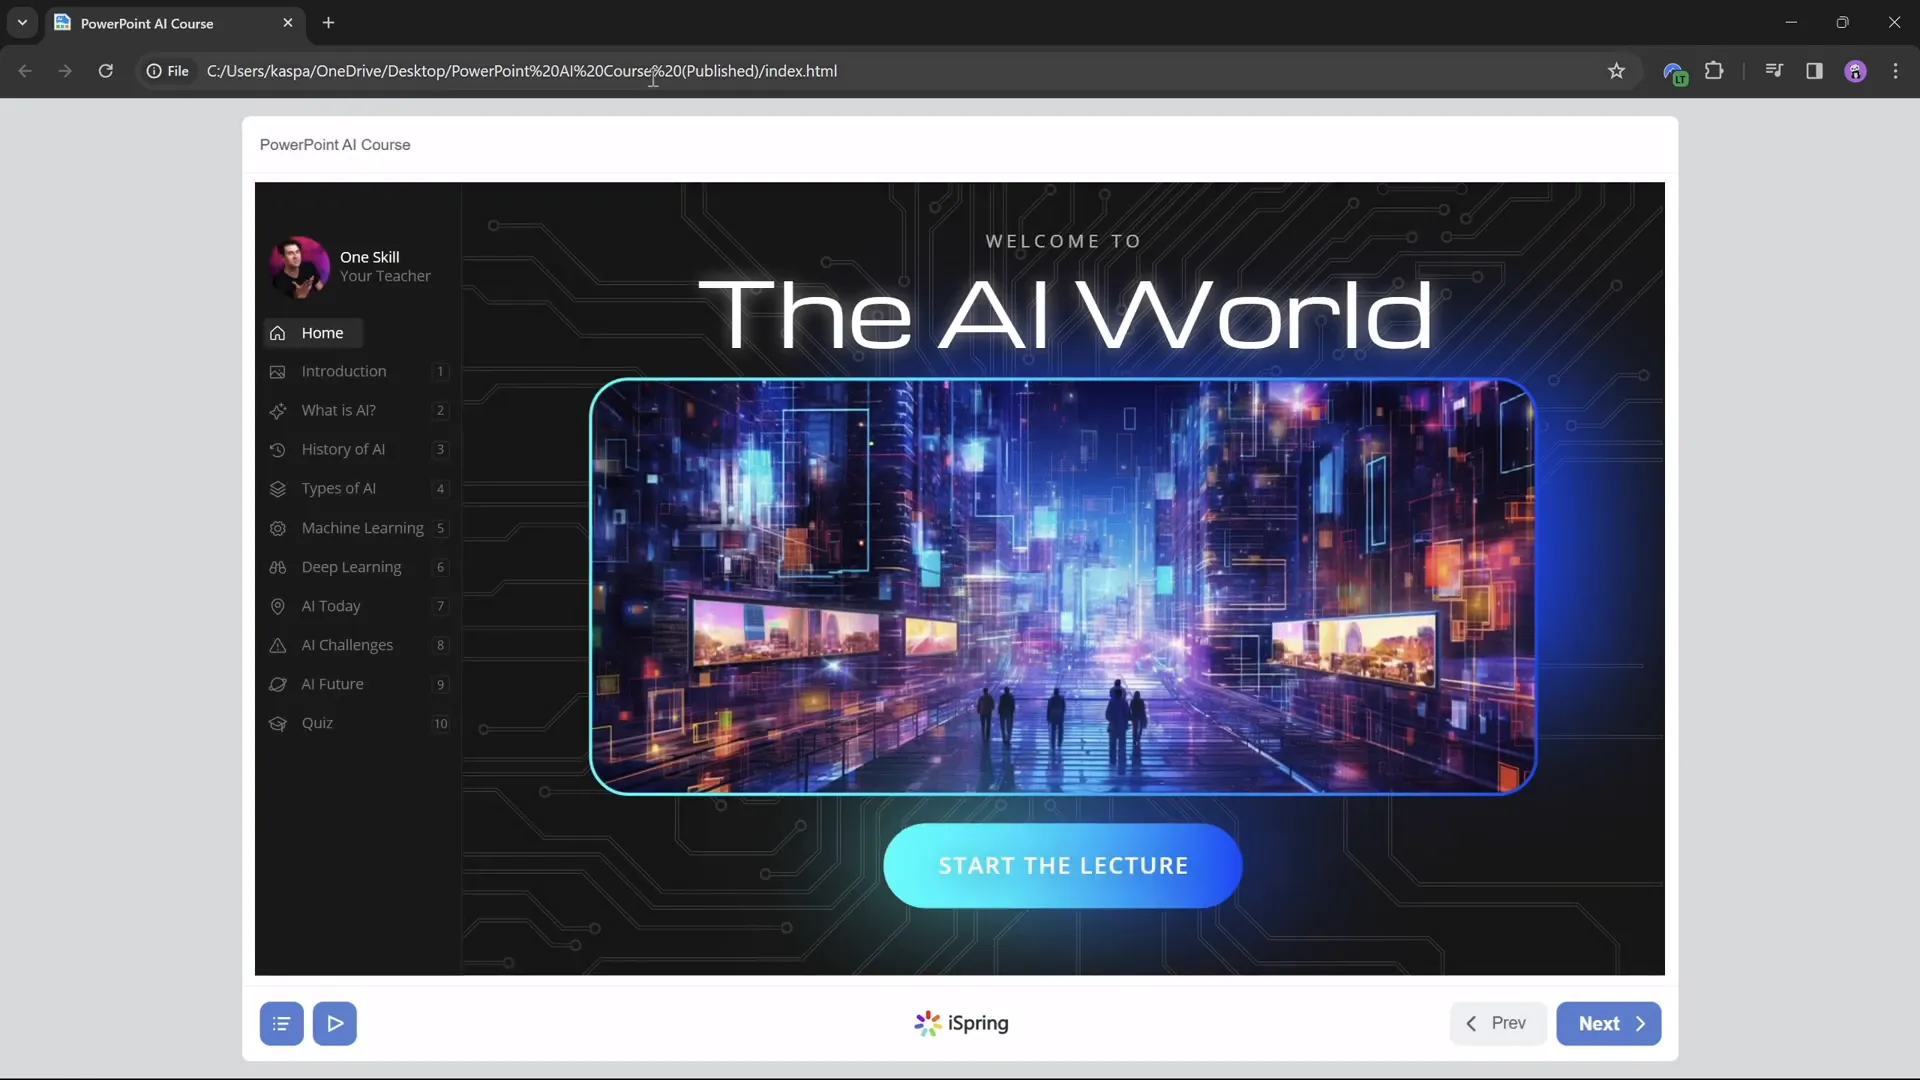
This comprehensive approach ensures your PowerPoint presentation is transformed into a polished, interactive online course that your students can access anytime, anywhere.
Frequently Asked Questions
Can I create an online course from any PowerPoint presentation?
Yes! As long as your presentation is complete and well-structured, you can convert it into an online course. Adding interactive elements like navigation, quizzes, and multimedia will enhance the course experience.
Is the iSpring 3.11 plugin really free to use?
Yes. iSpring offers a free version of their 3.11 plugin that allows you to create quizzes, insert YouTube videos, embed websites, and publish courses without cost. Additional advanced features are available in paid versions.
Do I need advanced PowerPoint skills to follow this process?
Basic familiarity with PowerPoint is sufficient. The guide covers how to use Slide Master, insert shapes, hyperlinks, and work with transitions like Morph. iSpring’s interface is user-friendly and integrates directly into PowerPoint’s ribbon.
Can I track student progress with these courses?
Yes, if you publish your course in SCORM format and upload it to an LMS like Moodle, you can track quiz results and course completion. iSpring Learn also provides built-in tracking if you choose their platform.
Can I customize the look and feel of the course player?
iSpring offers options to customize player colors, navigation buttons, and course layout so you can align the course appearance with your branding.
Will embedded YouTube videos work offline?
No, embedded YouTube videos require an internet connection to stream. If offline access is needed, consider embedding video files directly or using local media files.
Is it possible to add other types of quiz questions?
With the free iSpring 3.11 plugin, you get multiple choice, multiple response, and short answer questions. The paid iSpring Suite includes more question types like matching, drag-and-drop, and hotspots.
Conclusion: Your Path to PowerPoint Online Course Creation
Transforming your PowerPoint presentations into interactive, engaging online courses doesn’t have to be complicated or costly. With smart design using Slide Master, clickable sidebars, slide zooms, multimedia integration, and quizzes, you can create a professional online course experience right from PowerPoint.
The free iSpring 3.11 plugin is a powerful tool that bridges the gap between traditional slideshows and modern eLearning courses. It empowers educators to publish content that is accessible, interactive, and easy to navigate for students.
By following the step-by-step methods outlined here, including creating clickable navigation, animating your sidebar, embedding videos and websites, and designing quizzes, you’ll be well on your way to delivering a rich learning experience.
Whether you teach artificial intelligence like the example course or any other subject, these strategies for PowerPoint online course creation will help you maximize your teaching impact and keep learners engaged.
Start experimenting with these techniques today and watch your PowerPoint presentations come to life as full-fledged online courses — all for free!
Check out the full video: How I Made an Online Course in PowerPoint for FREE! 😁


