If you’re looking to elevate your PowerPoint presentation skills and impress your audience with dynamic, eye-catching animations, you’ve come to the right place. This comprehensive tutorial will guide you through creating an engaging PowerPoint slide featuring a looping video background, animated text, and hand-drawn summer-themed illustrations that loop smoothly across your slide. Whether you want to create a summer vibe or customize this animation for your favorite travel destination or any other theme, this step-by-step guide will help you achieve professional results.
Using Microsoft PowerPoint 365 and a few creative tricks, you’ll learn how to combine video playback, motion path animations, and text effects to bring your slides to life. Along the way, you’ll discover tips for making videos autoplay and loop, removing clickable video overlays, and adding smooth, continuous animations to your objects.
This article covers everything from setting up your video background to animating custom illustrations, ensuring you walk away with actionable skills to enhance your presentations.
Table of Contents
- Getting Started with Your PowerPoint Animation
- Creating a Looping Video Background
- Animating a Wavy Slide Title
- Adding and Animating Looping Illustrations
- Final Touches and Tips
- Frequently Asked Questions (FAQ)
- Conclusion
Getting Started with Your PowerPoint Animation
Before diving into animation magic, it’s important to gather your assets and set up your workspace properly. For this tutorial, you’ll need:
- Microsoft PowerPoint 365: The version used here supports advanced animation and video playback features.
- Video file: A looping video background that sets the tone for your slide. The example uses a summer beach video from Artlist.io.
- PNG illustrations with transparent backgrounds: Hand-drawn summer-themed stickers such as sunglasses, cocktail glasses, umbrellas, and more. These were created by digital artist Raminta and are available for purchase on her Etsy store.
- Font: A playful font called Sweet Purple is used for the animated wavy slide title.
Once you have these assets ready, open Microsoft PowerPoint and start with a fresh blank slide.
Creating a Looping Video Background
The first step to a captivating slide is setting a video as the background that loops seamlessly and plays automatically when the slide loads. Here’s how to do it:
- Insert your video: Copy your downloaded video file (e.g., the beach shore video) and paste it onto a new blank slide in PowerPoint.
- Set video playback: Select the video, then go to the Animations tab. Add a Play animation to the video.
- Configure the animation to start automatically: In the Animation Pane, set the Play animation to Start With Previous. This ensures the video starts playing as soon as the slide loads.
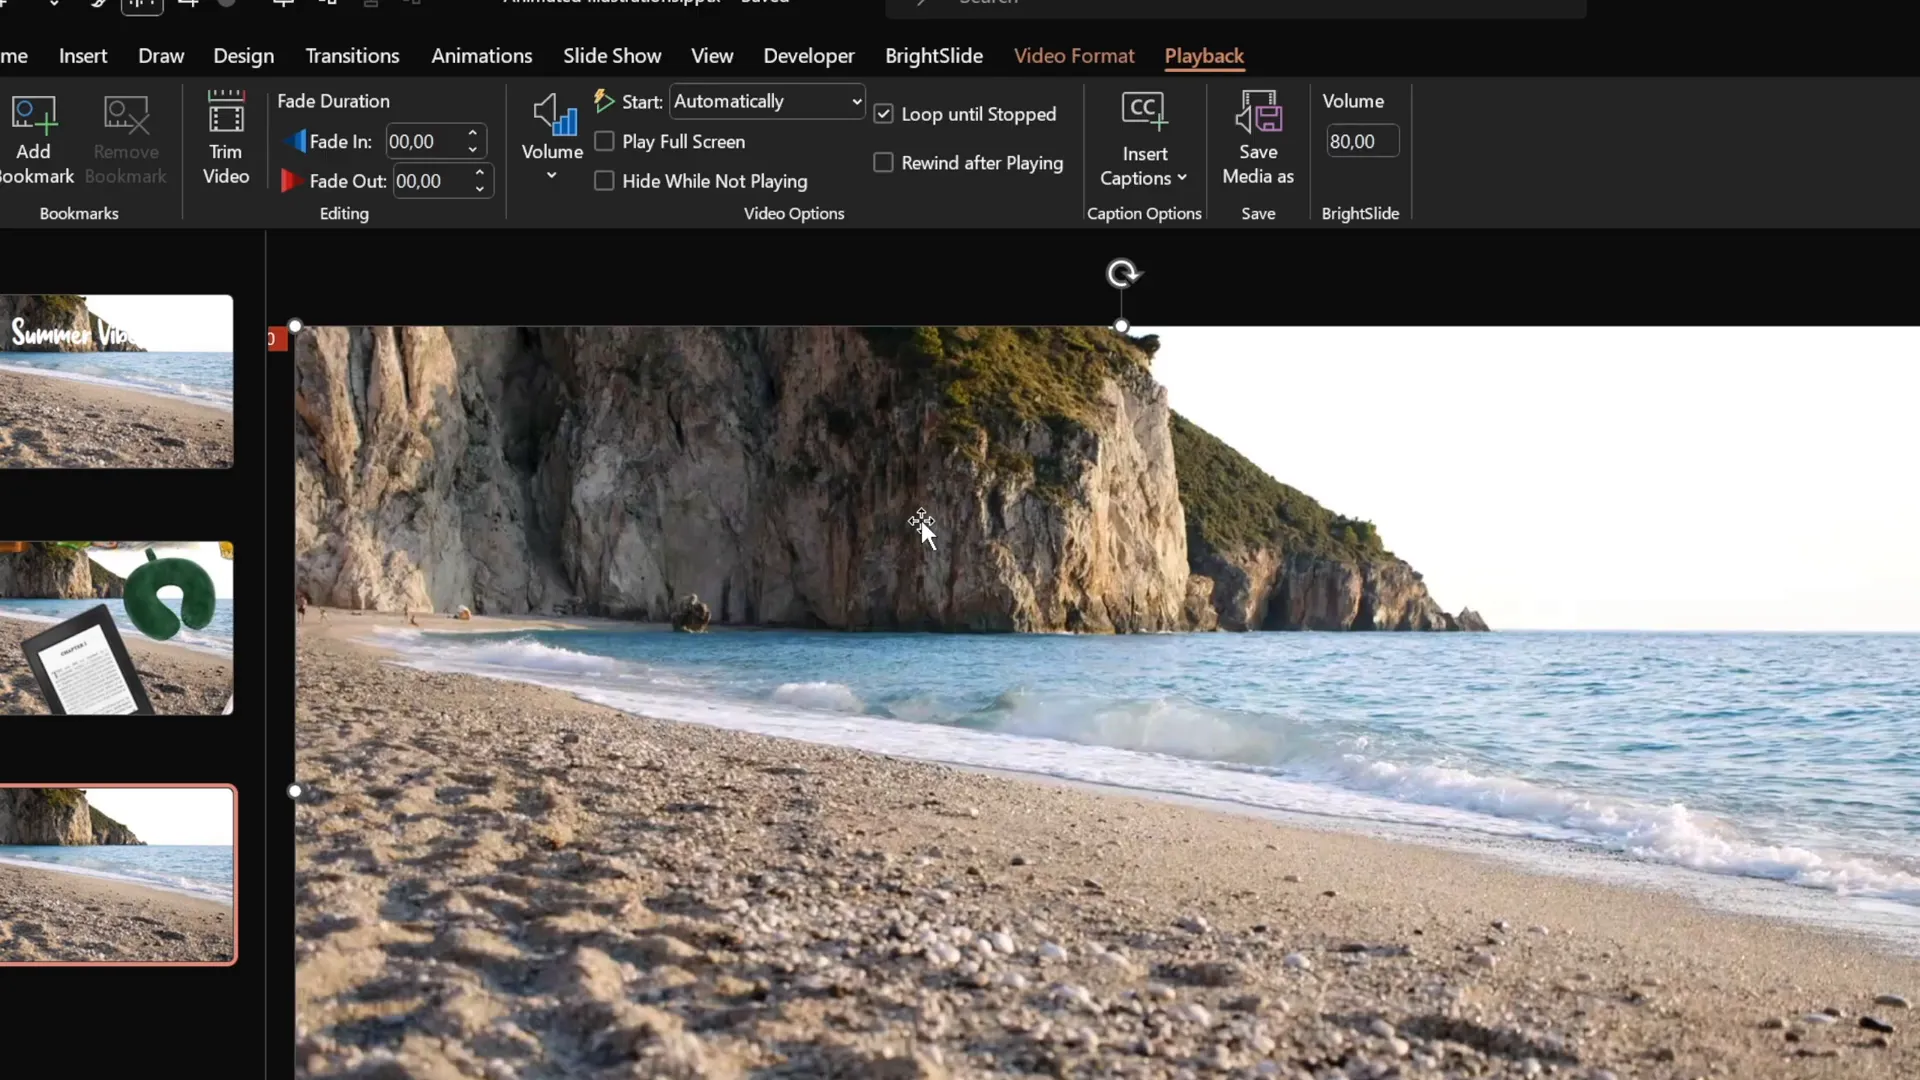
- Loop the video: Go to the Playback tab and check the box for Loop until Stopped. This makes the video repeat indefinitely.
- Hide video controls: To remove the video player controls that appear by default, go to the Slide Show tab and uncheck Show Media Controls.
At this point, the video will play automatically and loop continuously without showing any controls.
Preventing Click Reset on Video Playback
One challenge with videos in PowerPoint is that clicking on the video can reset its playback, which is often undesirable during a presentation. Here’s a neat trick to prevent this:
- Go to the Insert tab and select Shapes. Choose the Rectangle tool.
- Draw a rectangle that covers the entire slide, effectively creating an invisible overlay.
- Right-click the rectangle and choose Format Shape. Remove any line (border), and set the fill transparency to 100%, making it fully transparent.
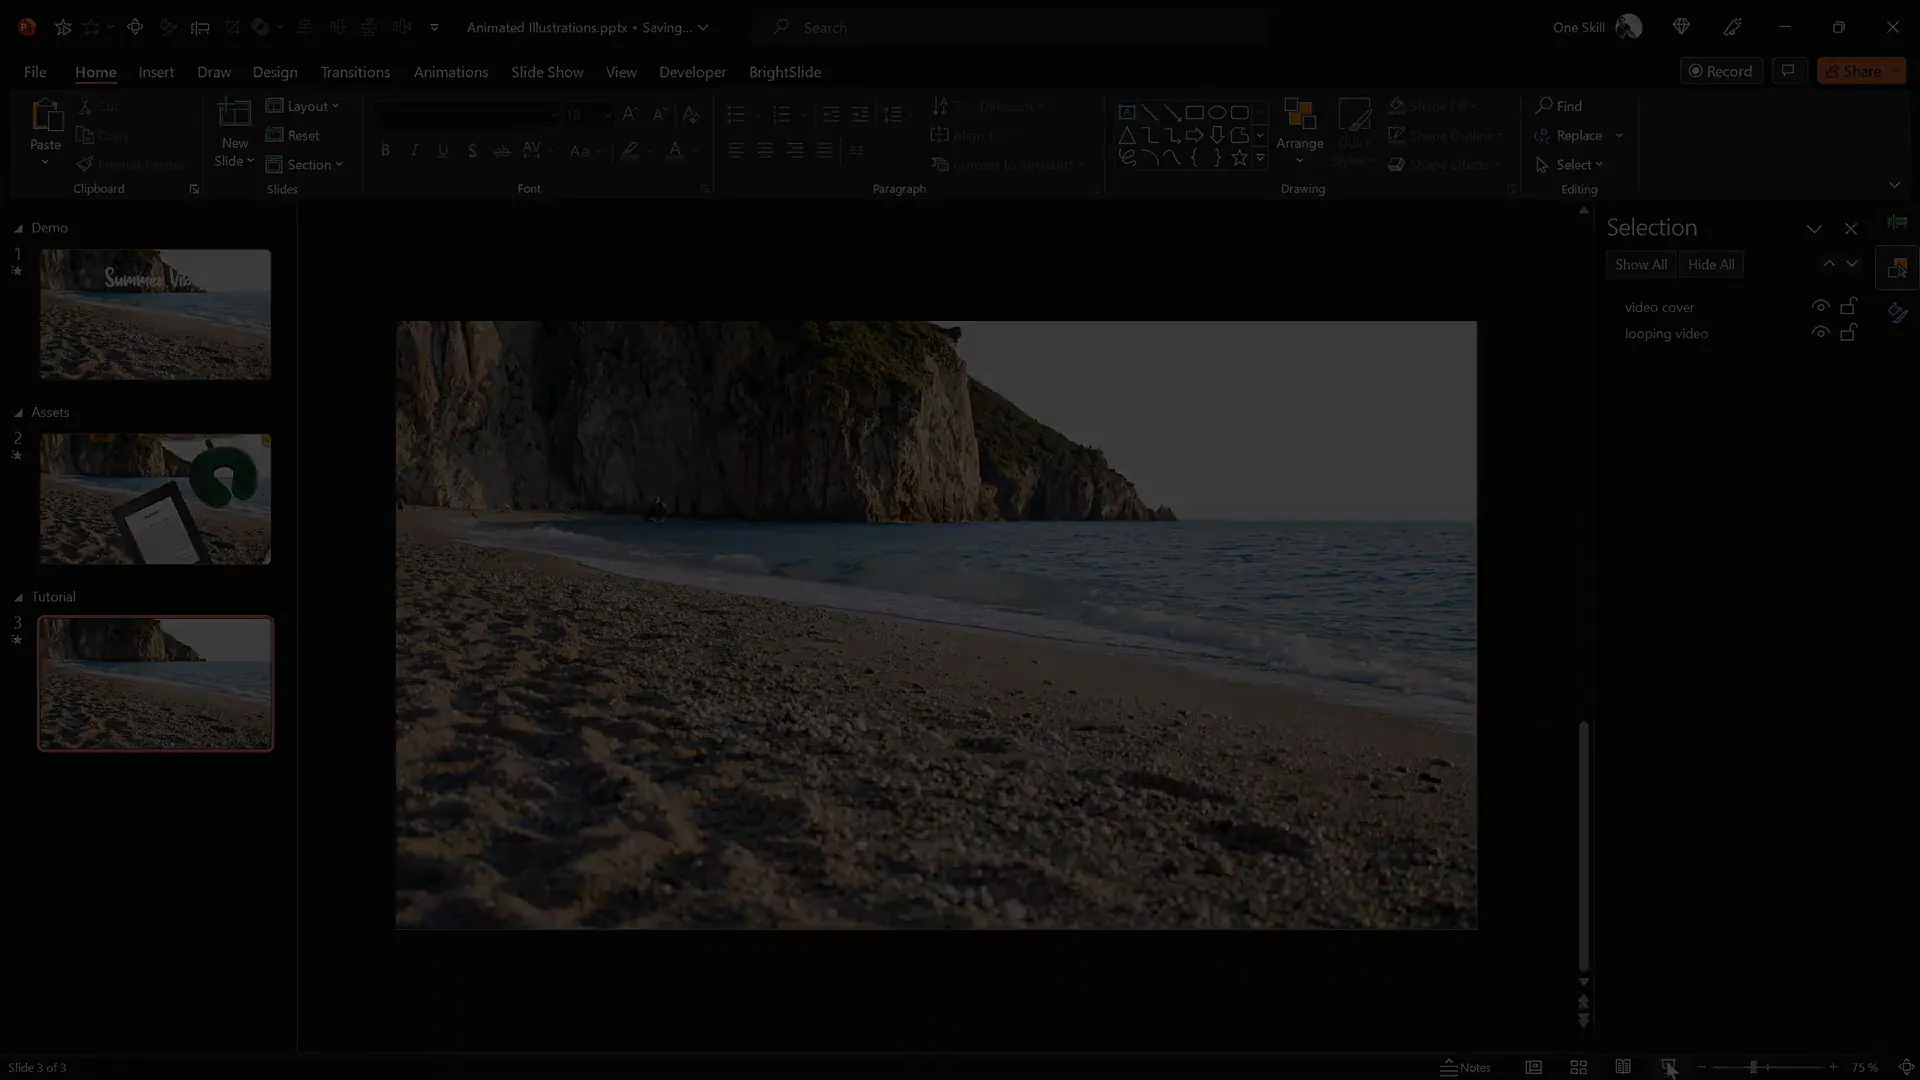
- Rename this shape in the Selection Pane for easy reference (optional).
This invisible rectangle blocks clicks from reaching the video, preventing it from resetting while still allowing other animations and interactions on the slide.
Animating a Wavy Slide Title
Now that the video background is set, let’s add a dynamic, animated title to the slide. The goal is to create a wavy text effect that loops smoothly, adding energy and style.
Here’s how to create this effect:
- Insert your text: Use the Sweet Purple font (or any font you prefer). Set the font size to around 115 pt for visibility.
- Position the text: Place the text box near the top center of the slide, just above the video background.
- Add the first animation – Basic Zoom: Select the text box, go to Animations > Add Animation, then choose Basic Zoom from More Entrance Animations.
- Customize zoom animation: Set the animation to start on click, duration 0.5 seconds, and animate by letter with a 10% delay between letters.
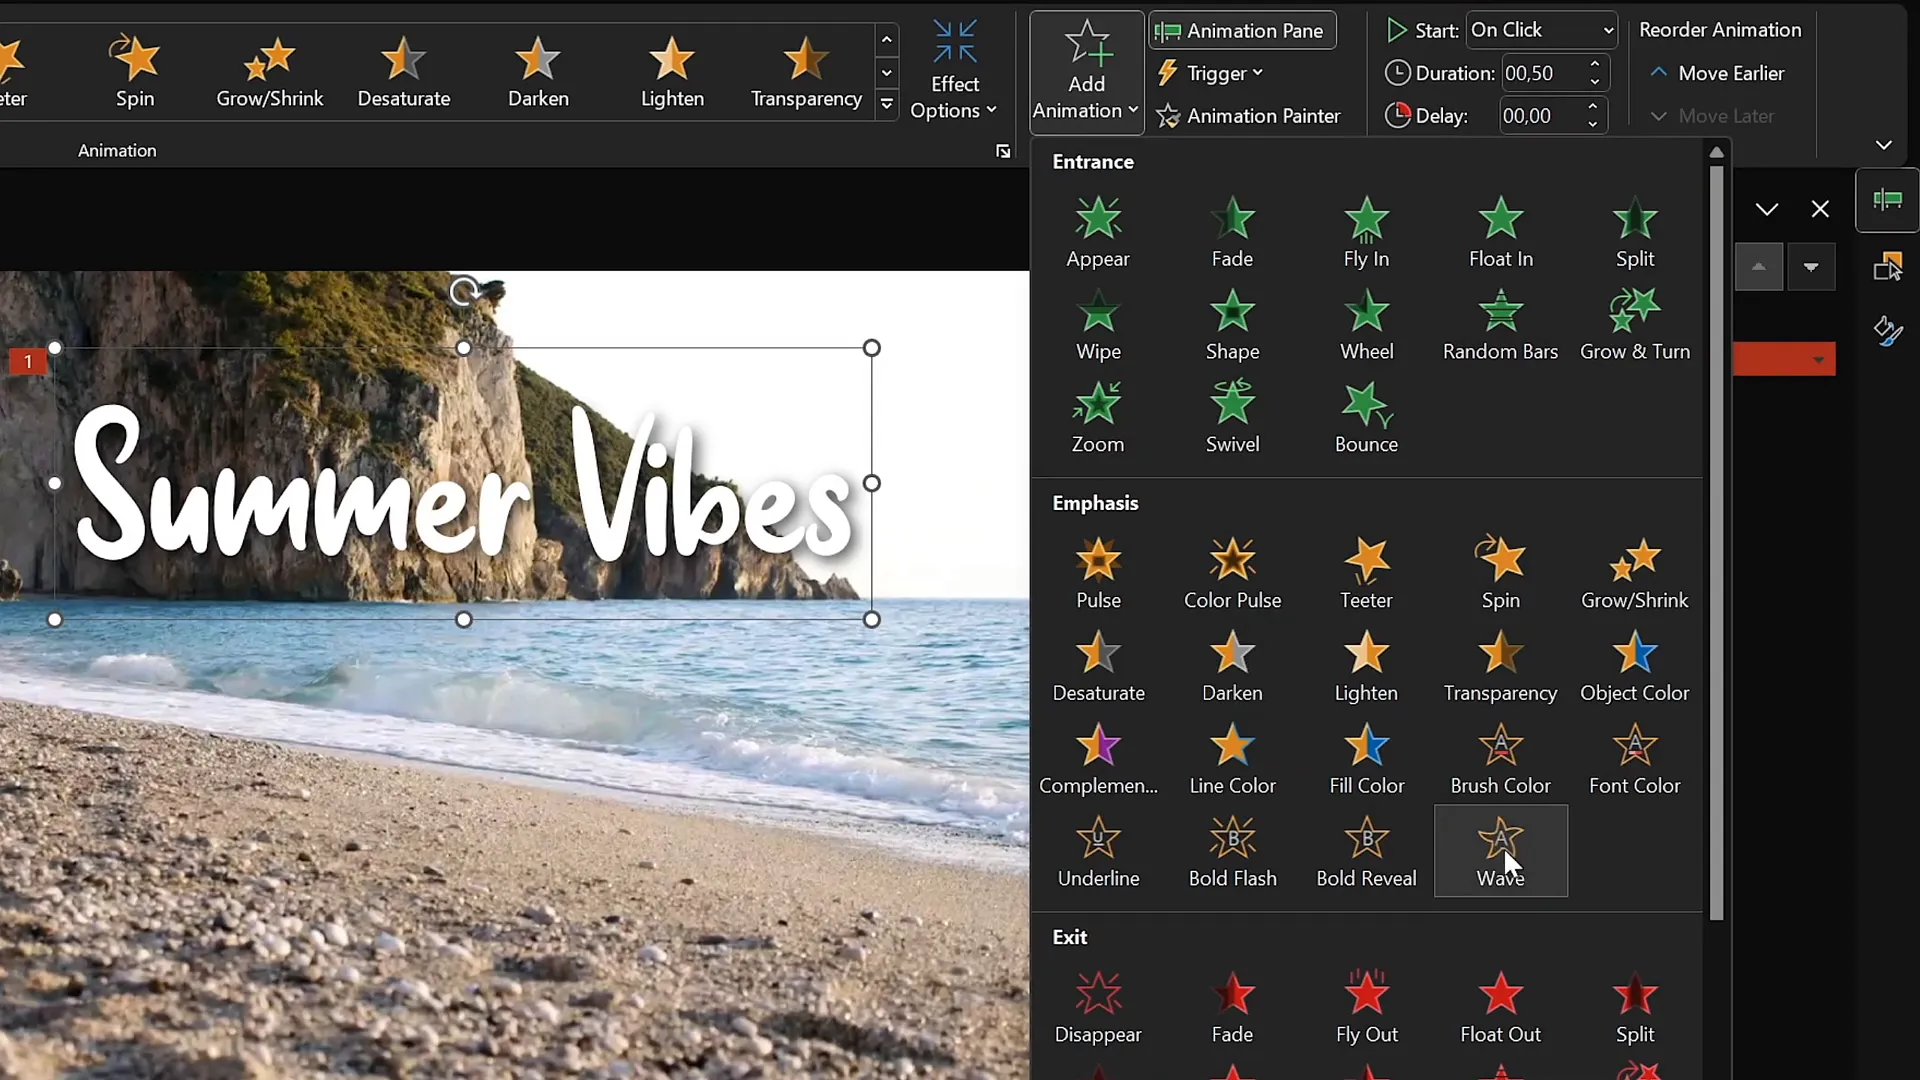
- Add the second animation – Wave: With the text box still selected, add a Wave animation.
- Configure wave animation: Set it to start With Previous, duration 2 seconds, animate by letter with a 5% delay, and set it to repeat until the end of the slide.
This combination creates a zoom-in effect letter by letter on click, followed by a continuous wavy motion of the text that lasts for the entire slide duration.
Tip: You can adjust the wave height and speed to fit your style by tweaking the animation properties.
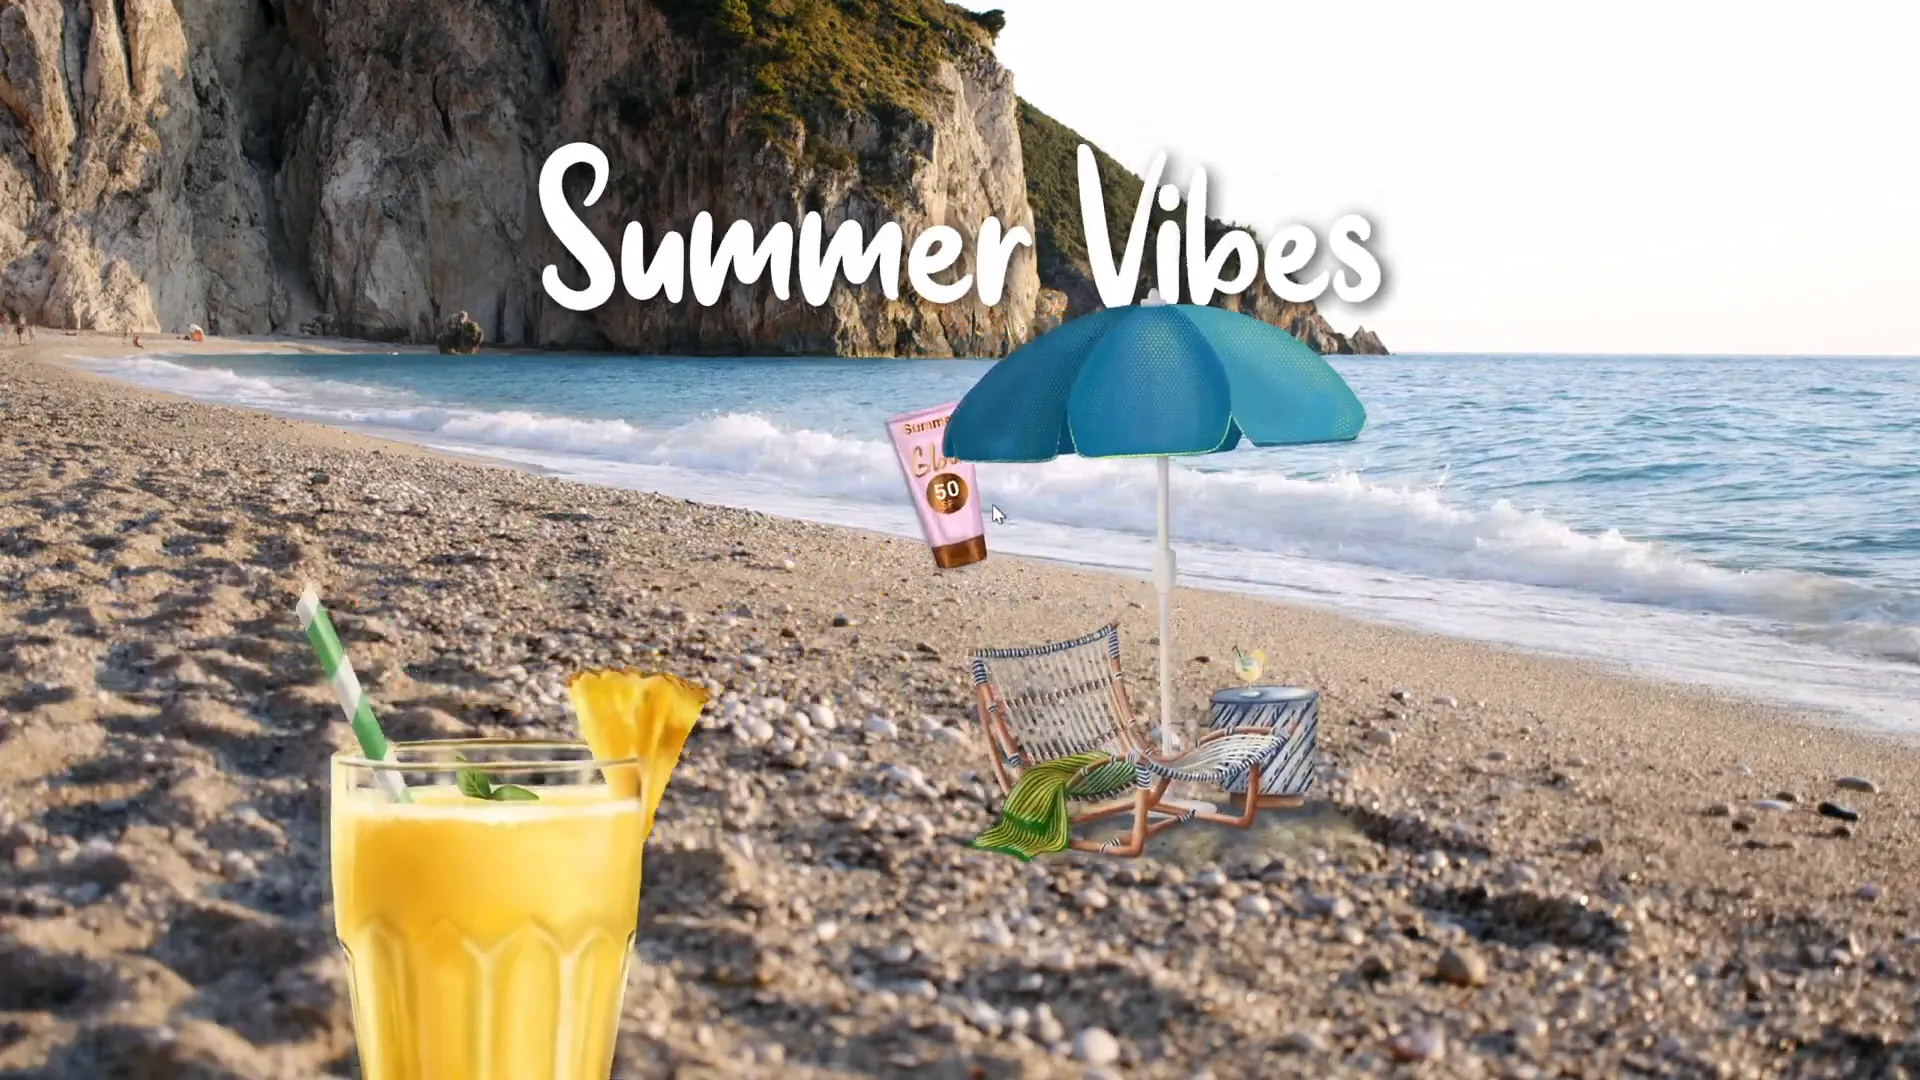
Adding and Animating Looping Illustrations
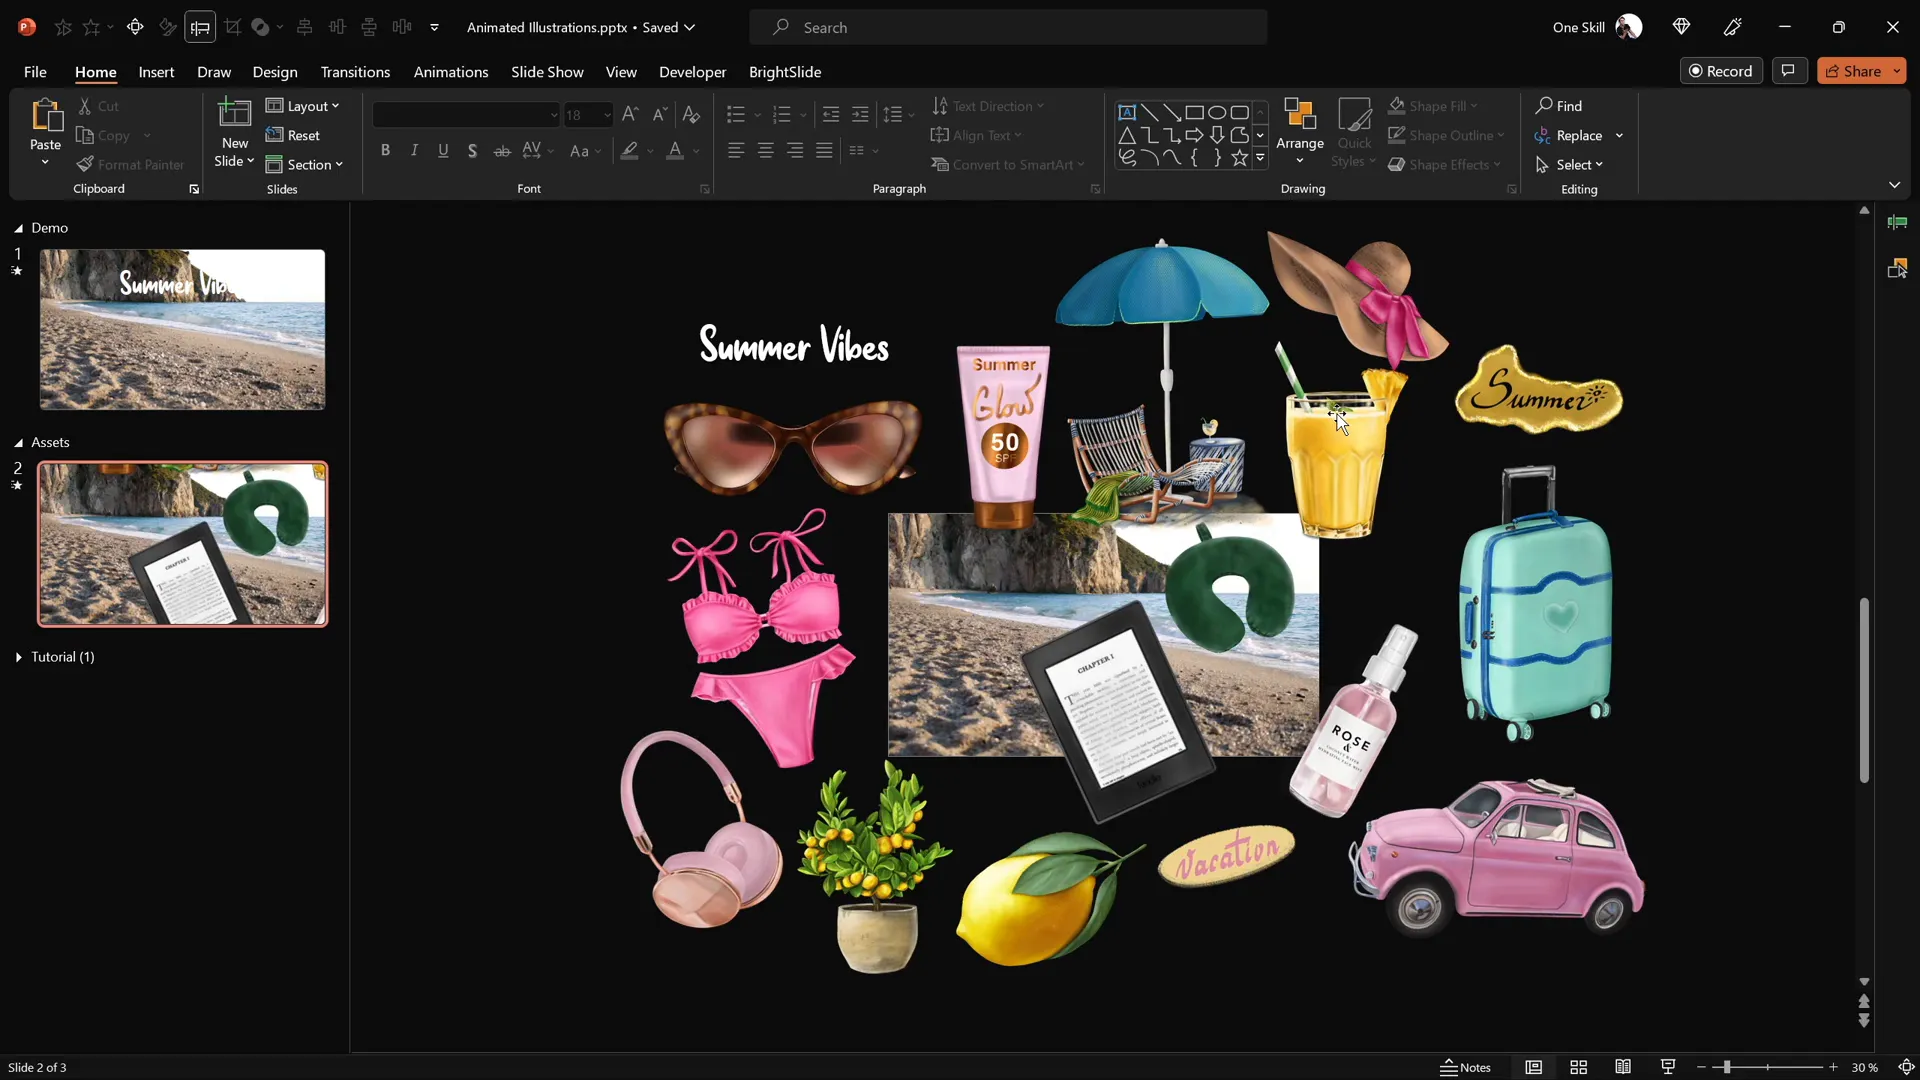
Next, let’s bring in some colorful, hand-drawn summer illustrations to float and loop across your slide, adding charm and visual interest. Here’s a detailed guide to animating these illustrations:
1. Choose Your Illustrations
Pick from a collection of PNG summer-themed stickers such as cocktail glasses, umbrellas, sunscreen bottles, hats, sunglasses, and more. Make sure these images have transparent backgrounds for easy layering.

2. Insert and Place Illustrations
Copy and paste your chosen illustration onto the slide. Position it near the bottom corner (left or right) where you want the animation to start visually.
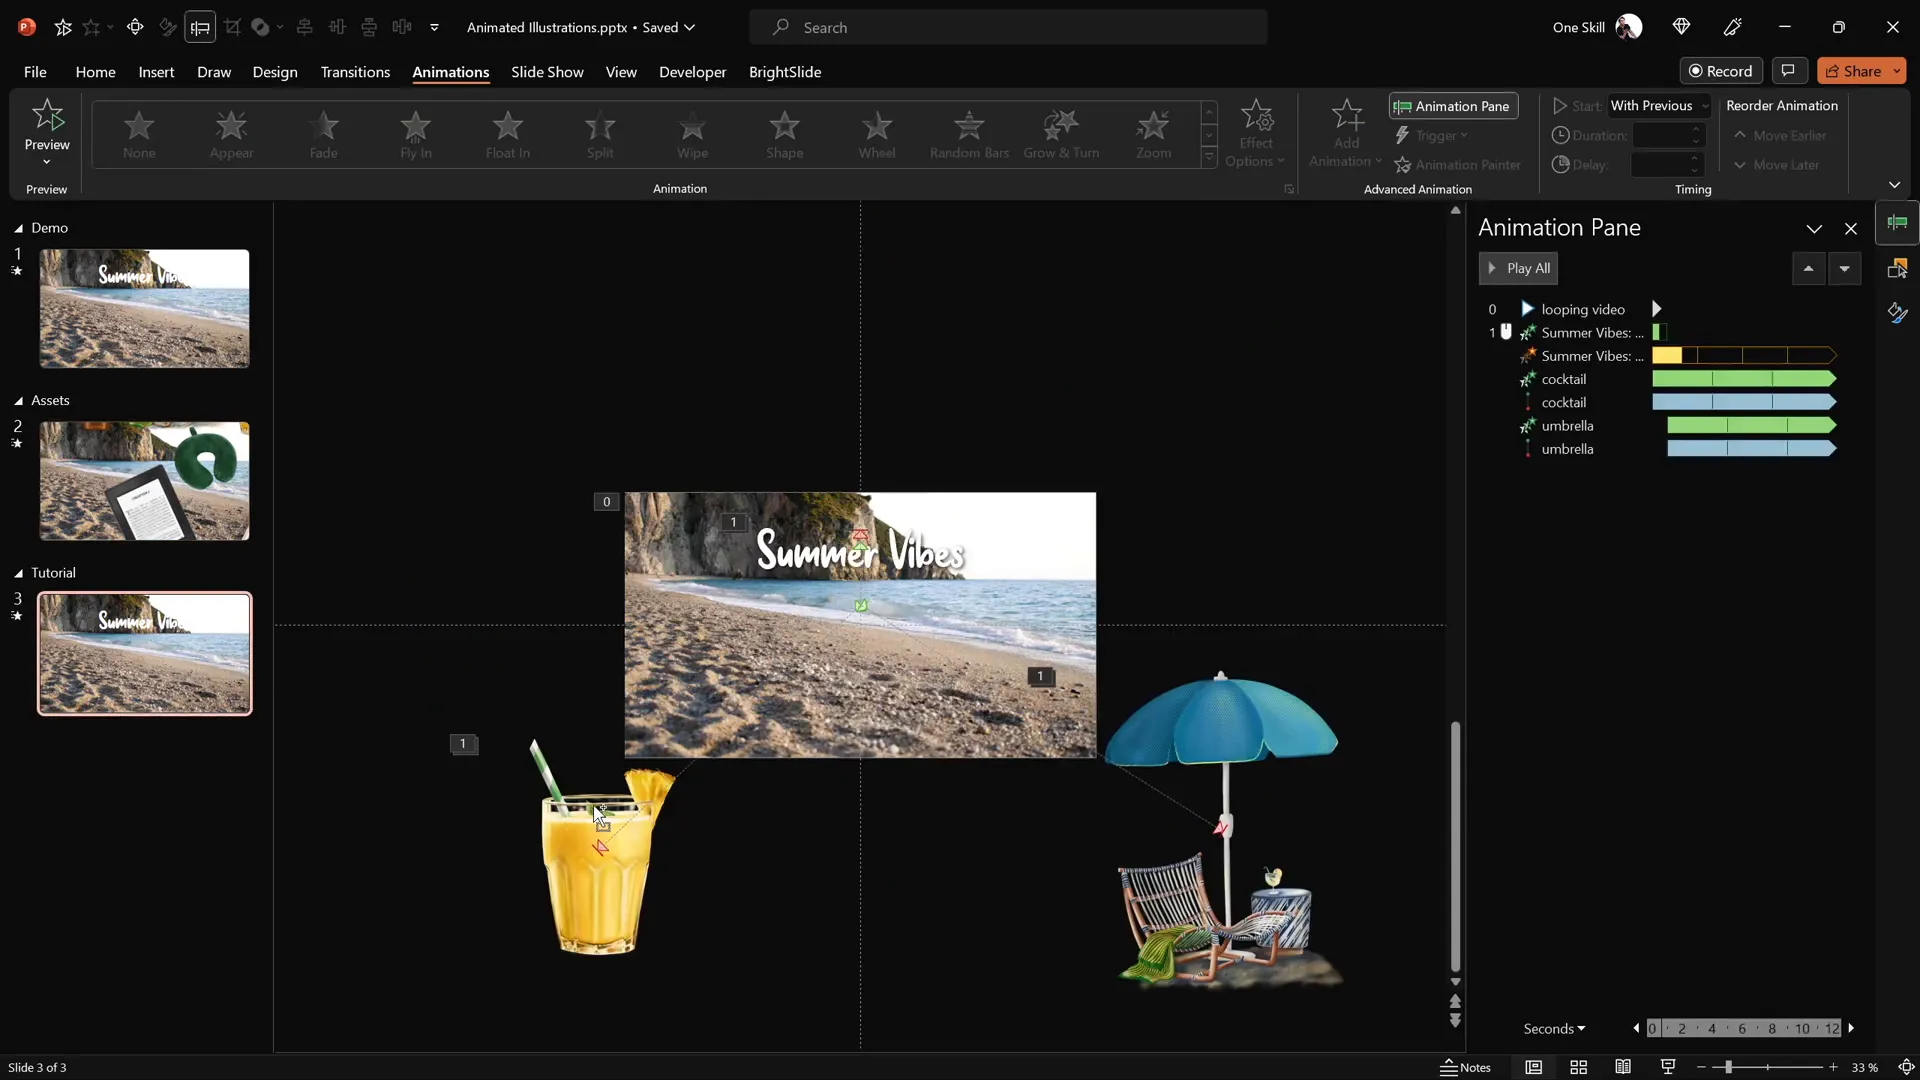
3. Add Motion Path Animation
- Select the illustration.
- Go to Animations and add a Motion Path – Line animation.
- Adjust the red endpoint of the motion path so that it ends near the center of the slide or wherever you want the illustration to move.
- Reverse the path if needed so the animation starts from the center and moves outward to the bottom corner.
- Set the motion path animation to start With Previous, duration 4 seconds.
- Apply a smooth start effect for a natural movement.
- Set the animation to repeat until the end of the slide for continuous looping.
4. Add Basic Zoom Entrance Animation
To create a gradual size increase as the illustration moves, add a Basic Zoom entrance animation to the same illustration. Configure it to start With Previous and match the same 4-second duration as the motion path. Also, set it to repeat until the end of the slide.
5. Use Animation Painter for Efficiency
Once you have the animations set for one illustration, use the Animation Painter tool to copy these animations to other illustrations. Remember to adjust the motion path start points and add delays to stagger the animations for variety and a smoother effect.
6. Stagger Animation Delays
To avoid all illustrations moving simultaneously, add incremental delays:
- First illustration: no delay
- Second illustration: 1-second delay
- Third illustration: 2-second delay
- Fourth illustration: 3-second delay
This staggering creates a natural, flowing motion of stickers appearing and moving across the slide in sequence, looping endlessly.
7. Layering and Ordering
Use the Selection Pane to arrange the order of your illustrations to prevent overlapping issues and maintain visual hierarchy—place smaller or background illustrations behind larger or foreground ones.
Final Touches and Tips
Congratulations! You’ve built a lively, animated PowerPoint slide combining video backgrounds, animated text, and looping illustrations. Here are some final tips to polish your presentation:
- Test your animations: Use the slideshow mode to preview the animations and ensure smooth playback and looping.
- Optimize file size: Videos and multiple PNGs can increase file size. Compress images and videos if necessary.
- Adjust animation timing: Fine-tune durations and delays to match your presentation pacing.
- Customize for your theme: Replace summer illustrations and video backgrounds with assets matching your presentation topic.
- Use transparent overlays: Prevent unwanted mouse clicks on videos or animations by adding transparent shapes as described earlier.
- Credit your assets: Always acknowledge creators like Raminta who provide beautiful illustrations.
With these techniques, your PowerPoint presentation skills will stand out, making your slides not just informative but also visually captivating and memorable.
Frequently Asked Questions (FAQ)
What version of PowerPoint do I need to create these animations?
You need Microsoft PowerPoint 365 or a recent version that supports advanced animations and video playback features.
Can I use my own videos and illustrations?
Absolutely! This tutorial uses summer-themed assets, but you can replace videos and illustrations with any content that fits your presentation theme.
How do I make sure my video plays automatically without showing controls?
Insert the video, add a Play animation set to start With Previous, enable Loop until Stopped in playback settings, and uncheck Show Media Controls under the Slide Show tab.
How do I prevent clicking the video from resetting playback?
Place a 100% transparent rectangle shape over the video to block mouse clicks from interacting with the video directly.
Can I animate other types of objects besides images?
Yes, PowerPoint allows you to animate text, shapes, charts, and other objects using motion paths, entrance animations, and more.
Is it possible to loop animations indefinitely?
Yes, set the animation timing to repeat until the end of the slide for seamless looping.
Where can I find the summer illustrations used in this tutorial?
The beautiful hand-drawn summer illustrations are by digital artist Raminta and are available on her Etsy store. The link is usually provided in the video description or tutorial notes.
How do I stagger animations to make them appear sequentially?
Use the Animation Pane to add delays (e.g., 1 second, 2 seconds) to each animation so they start one after another.
What font is used for the animated wavy text?
The font used is called Sweet Purple, which is playful and suitable for creative presentations.
Conclusion
Mastering PowerPoint presentation skills involves more than just putting text on slides. Incorporating dynamic elements like looping video backgrounds, animated text, and smoothly moving illustrations elevates your presentation’s impact and keeps your audience engaged.
This tutorial has shown you how to combine these elements using Microsoft PowerPoint 365, leveraging video playback settings, motion paths, zoom and wave animations, and layering techniques. With a bit of creativity and practice, you can customize these instructions to fit any theme or topic, making your presentations stand out.
Remember to gather quality assets, experiment with animation timing, and always preview your work to ensure a seamless experience. Also, credit the artists and sources of your media to respect creative work.
Now that you have the tools and knowledge, it’s time to unleash your creativity and create PowerPoint presentations that truly impress!
For those interested in exploring more PowerPoint techniques, templates, and tips, consider subscribing to channels like One Skill PPT or browsing professional template marketplaces.
Happy presenting!


