

If you’re looking to master PowerPoint slide design and create beautiful, professional slides quickly, you’re in the right place. Inspired by a popular challenge from Louis and fellow PowerPoint creators, this tutorial walks you through designing five eye-catching slides in just ten minutes. Whether you’re a beginner or an experienced presenter, this guide will help you speed up your workflow and elevate your slide design skills.
In this article, we’ll explore the step-by-step process to build five diverse slides using PowerPoint’s built-in tools, stock photos, 3D models, animations, and more. Plus, you’ll learn handy tips on customizing your workspace, aligning elements, and applying effective animations to make your presentation pop.
Table of Contents
- Preparing Your Workspace: Customize Quick Access Toolbar
- Slide 1: Gamer-Themed Slide with 3D Model and Animation
- Slide 2: Full-Screen Video with Quote and Portrait
- Slide 3: Glassmorphic Effect with Blurred Background
- Slide 4: Business Model Slide with Image Placeholder and KPIs
- Slide 5: Process Infographic with Icons and Circles
- Final Touches: Transitions and Animations
- Frequently Asked Questions
- Conclusion
Preparing Your Workspace: Customize Quick Access Toolbar
Before diving into slide creation, it’s essential to optimize your PowerPoint environment to speed up your workflow. One of the best ways to do this is by customizing the Quick Access Toolbar (QAT) with frequently used commands.
In this tutorial, the creator added several commands to the QAT, such as:
- Stock Photos
- Insert Shape
- Format Shape Pane
- Animation Pane
- Other useful tools for slide design
By assigning keyboard shortcuts to these commands (e.g., pressing Alt + 2 to open stock photos), you can quickly access them without navigating through the ribbon menus. This setup significantly reduces the time spent on repetitive tasks.
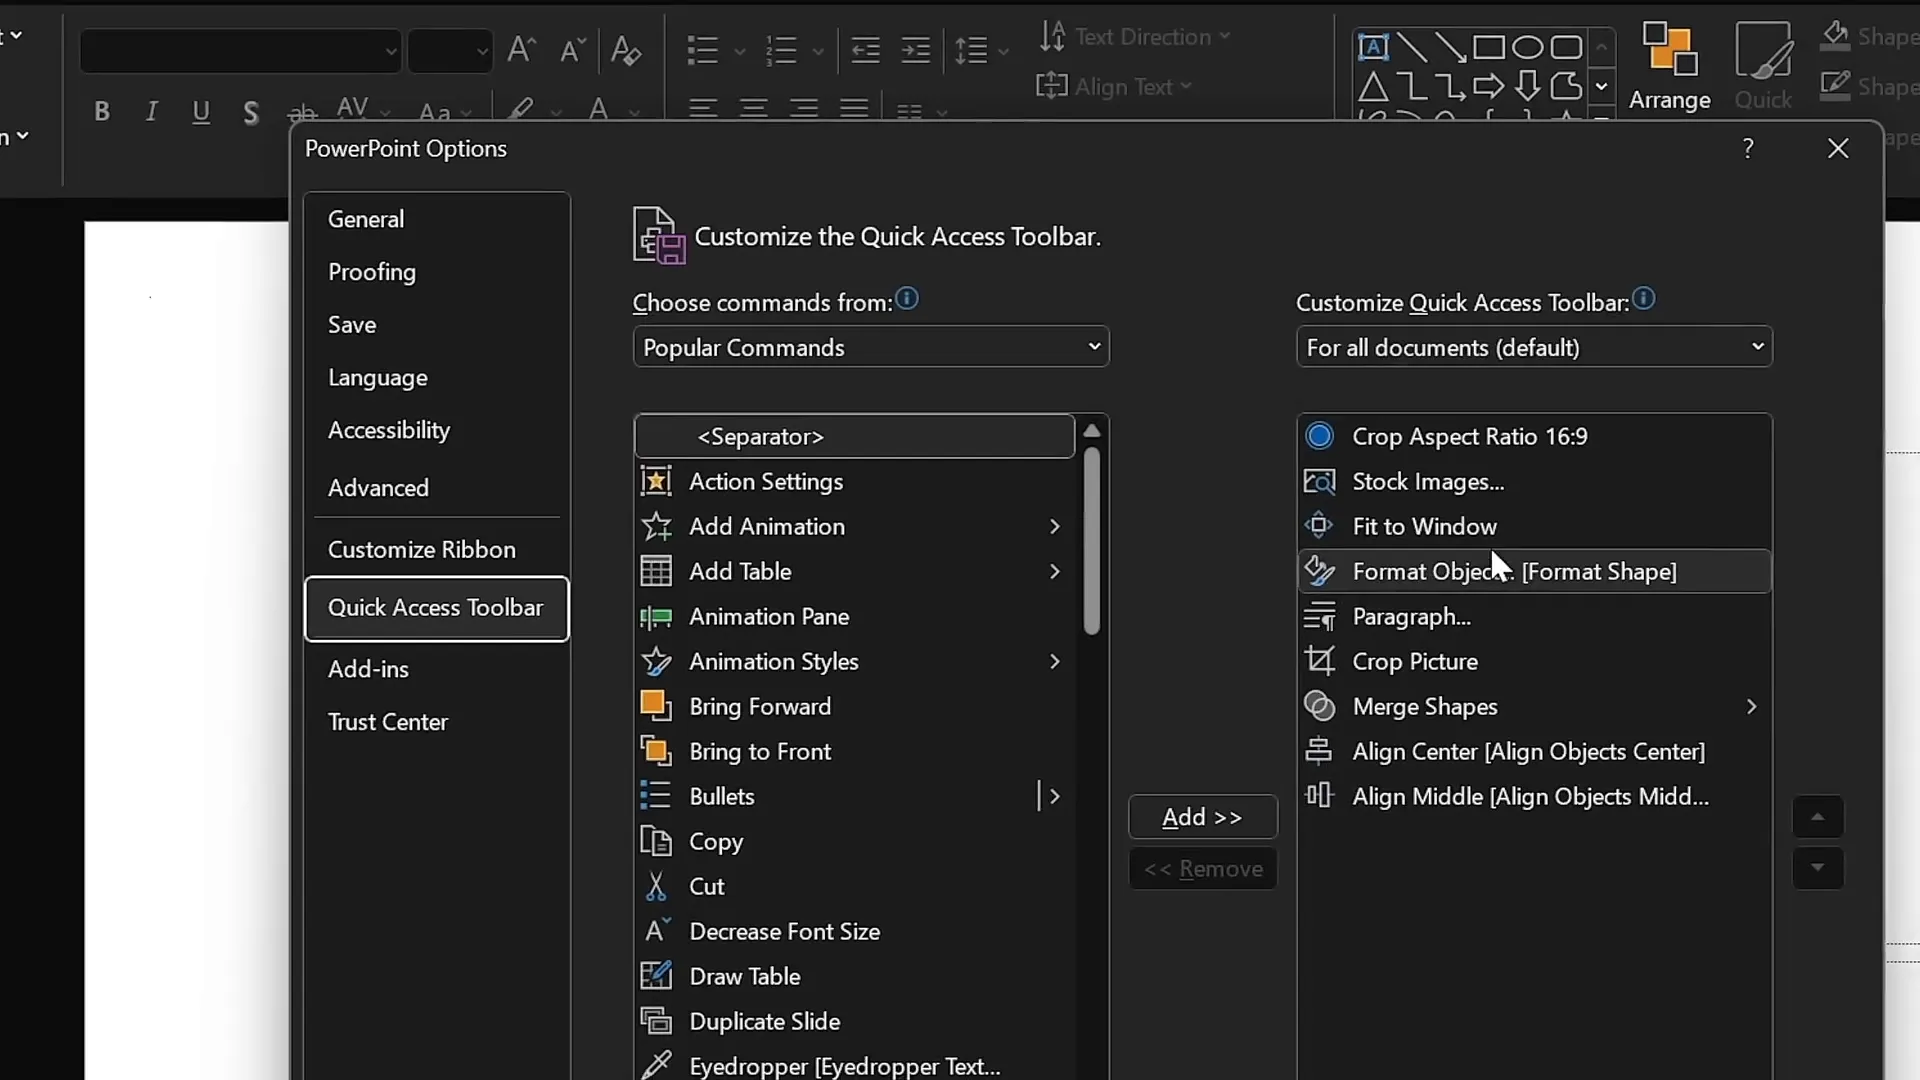
To customize your Quick Access Toolbar:
- Click the dropdown arrow on the QAT (usually at the top-left corner).
- Select “More Commands.”
- Add your most-used commands from the list.
- Assign keyboard shortcuts if needed.
This preparation is crucial for managing to create five slides in just ten minutes efficiently.
Slide 1: Gamer-Themed Slide with 3D Model and Animation
Let’s start with the first slide, which has a bold gamer aesthetic featuring a 3D model and dynamic animation. Here’s how to create it step-by-step:
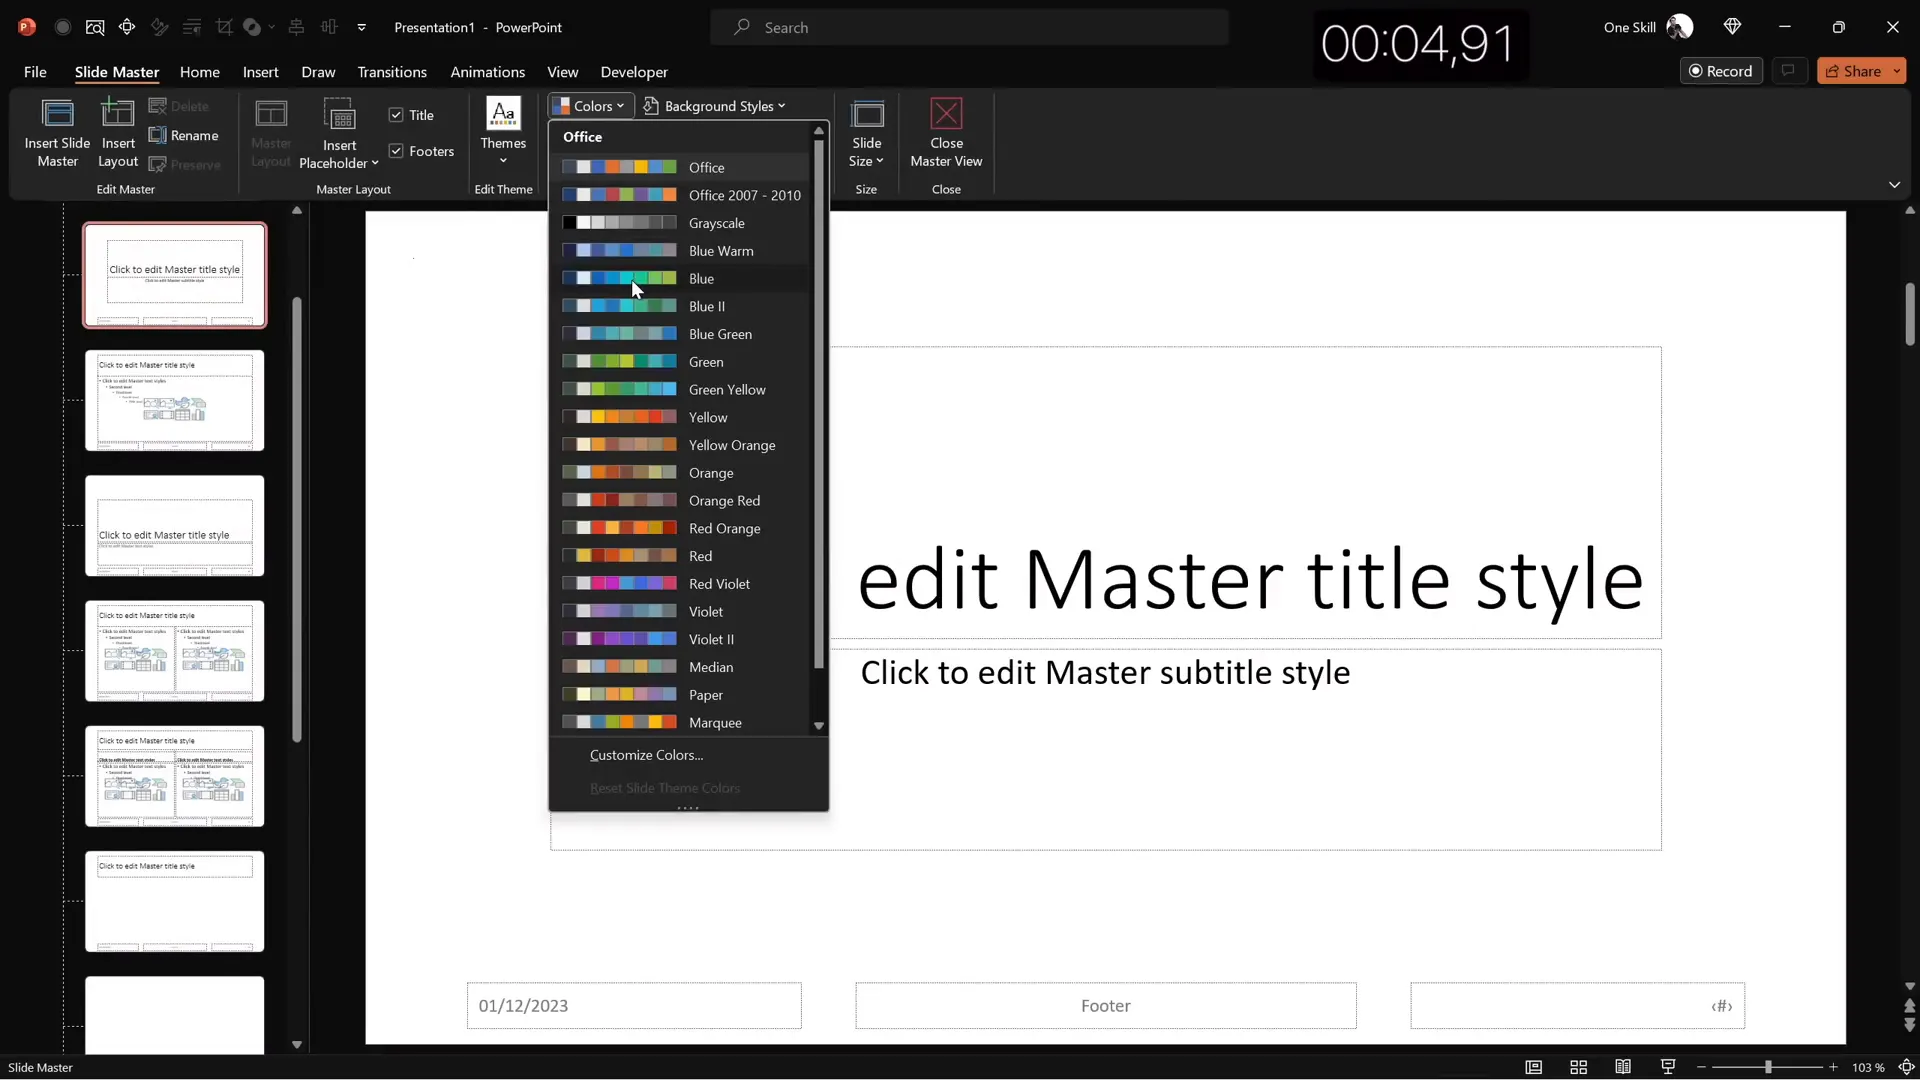
Step 1: Set Up Slide Master and Color Palette
- Open the Slide Master view (View > Slide Master).
- Select a new color palette that fits your theme — for this slide, a darker palette works well.
- Choose a modern font pair; the tutorial uses Darker Grotesque for a clean, semi-bold look.
- Pick a blank slide layout to start fresh.
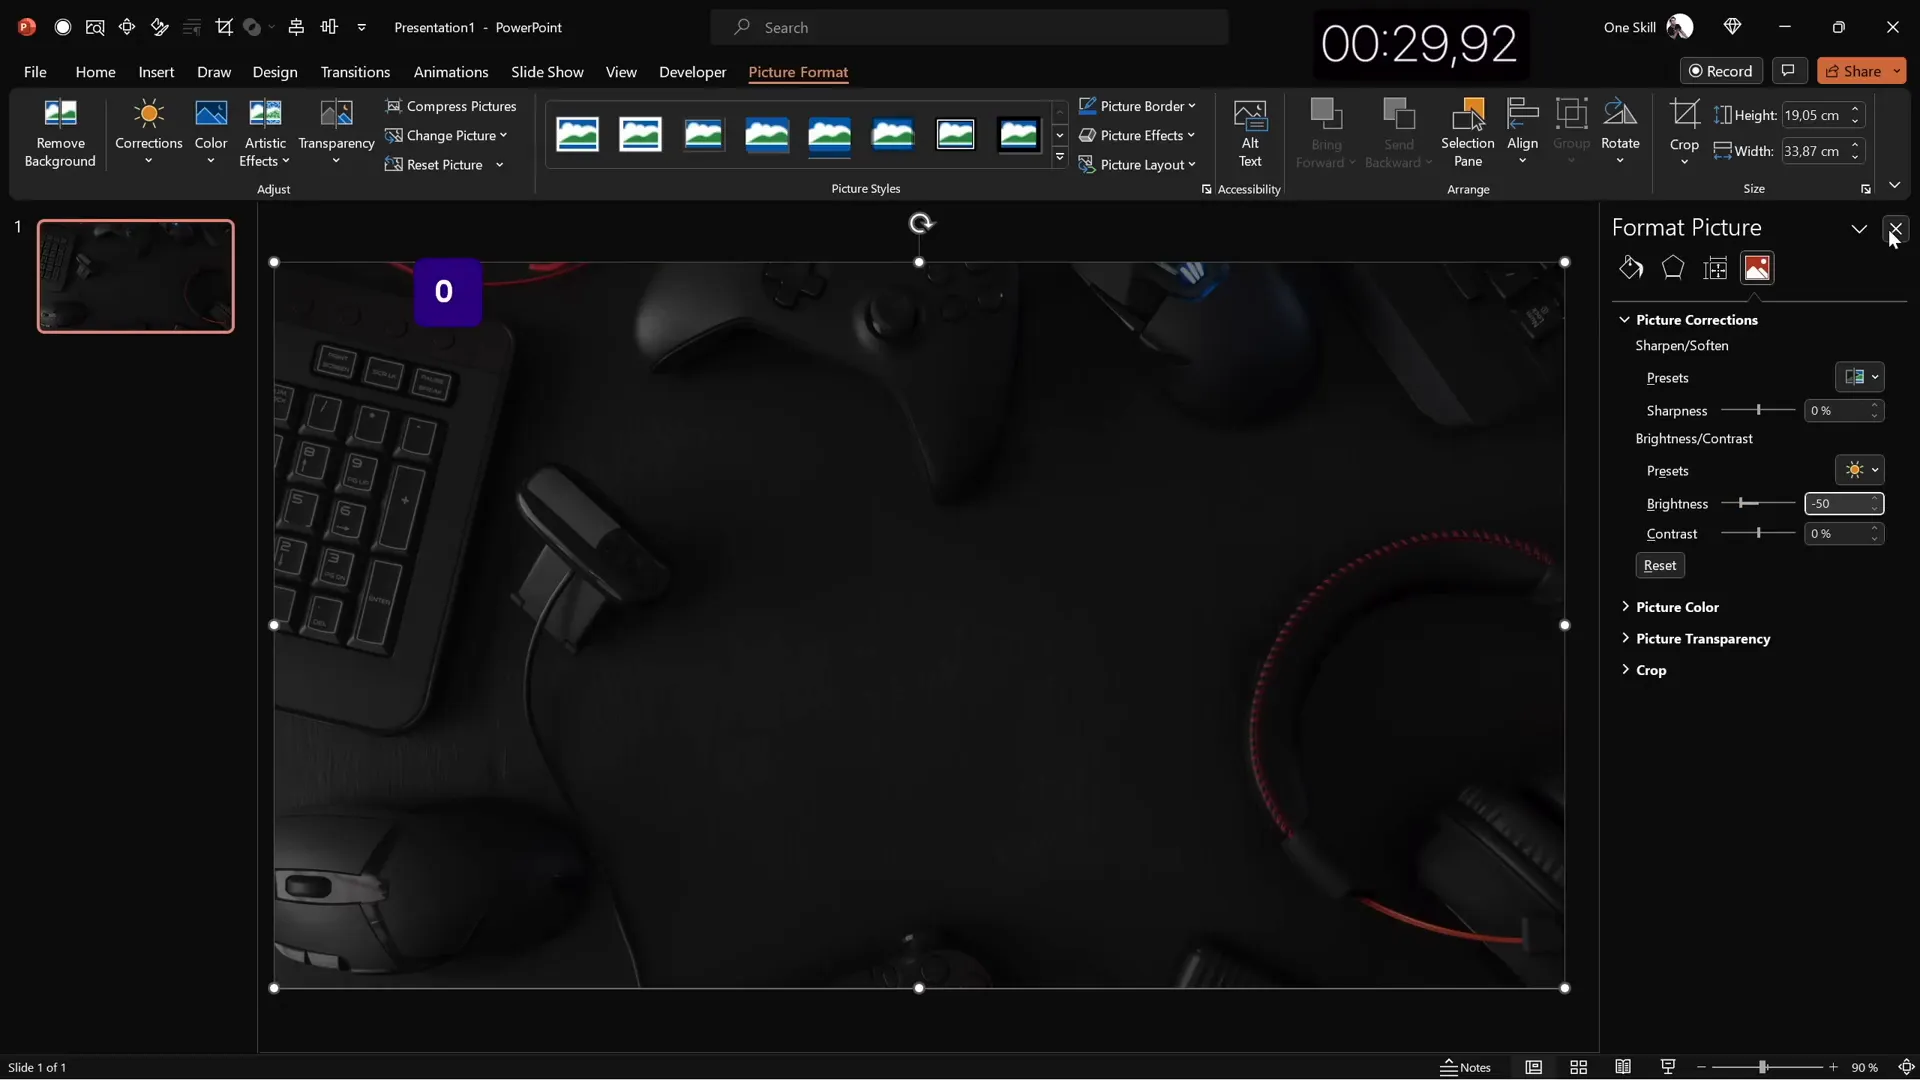
Step 2: Insert Background Image
- Insert a stock photo related to gaming (e.g., a dark, moody photo of a game controller or gaming setup).
- Crop the image to match the slide’s aspect ratio and resize it to fill the entire slide.
- Adjust the image brightness to about -50% to darken the background and make foreground elements pop.
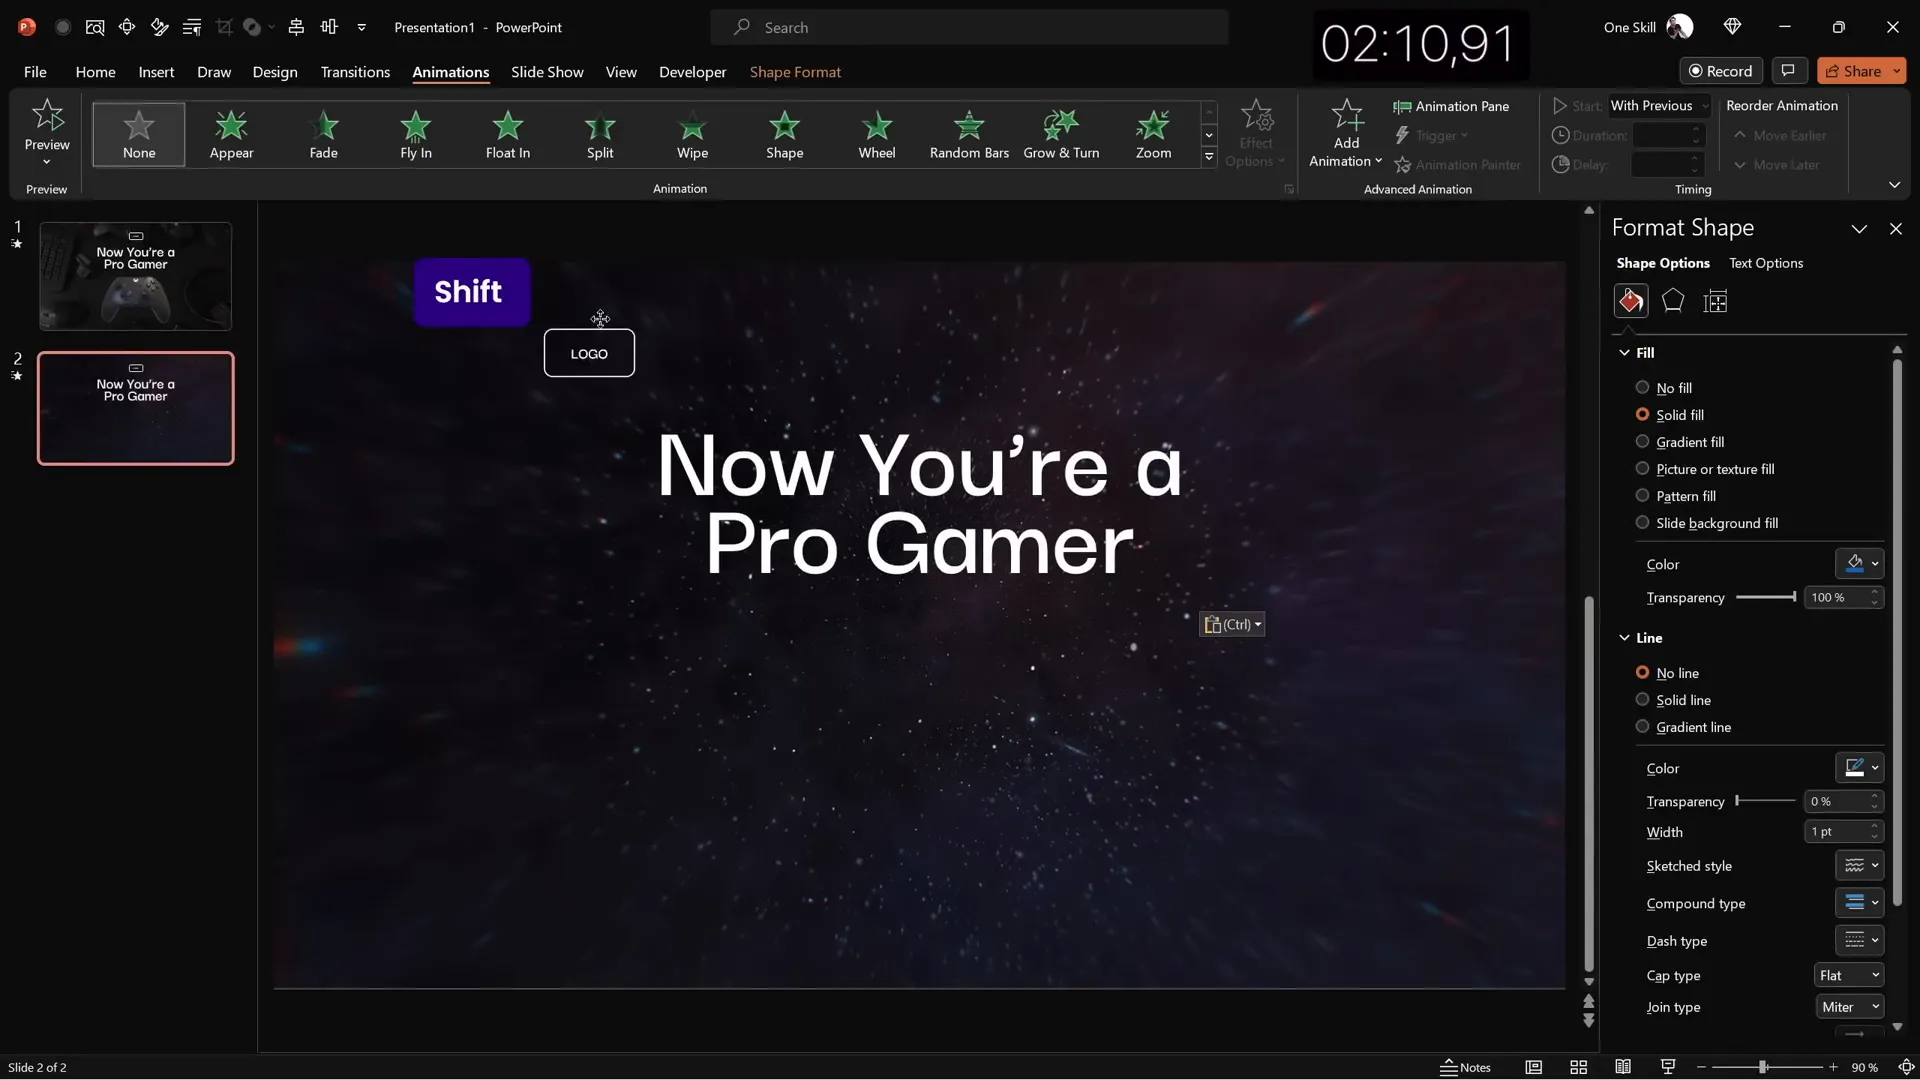
Step 3: Add Slide Title
- Insert a text box and type your slide title, e.g., Now You Are a Pro Gamer.
- Set the font to Darker Grotesque Semi Bold, size around 80 pt, and color white for contrast.
- Adjust line spacing to 0.6 for a compact but readable look.
- Position the title near the top of the slide for balance.
Step 4: Create a Simple Logo
- Draw a rounded rectangle shape.
- Type “Logo” inside and set the font to match the title.
- Make the shape transparent but add a white outline with 1 pt thickness.
Step 5: Insert 3D Model and Animate It
- Search for a 3D model of a game controller within PowerPoint’s 3D models.
- Choose a dark variant to match the slide’s mood.
- Position the model towards the bottom center of the slide.
- Add a “Swing” 3D animation with strong intensity, set to start “With Previous,” and duration of 3 seconds.
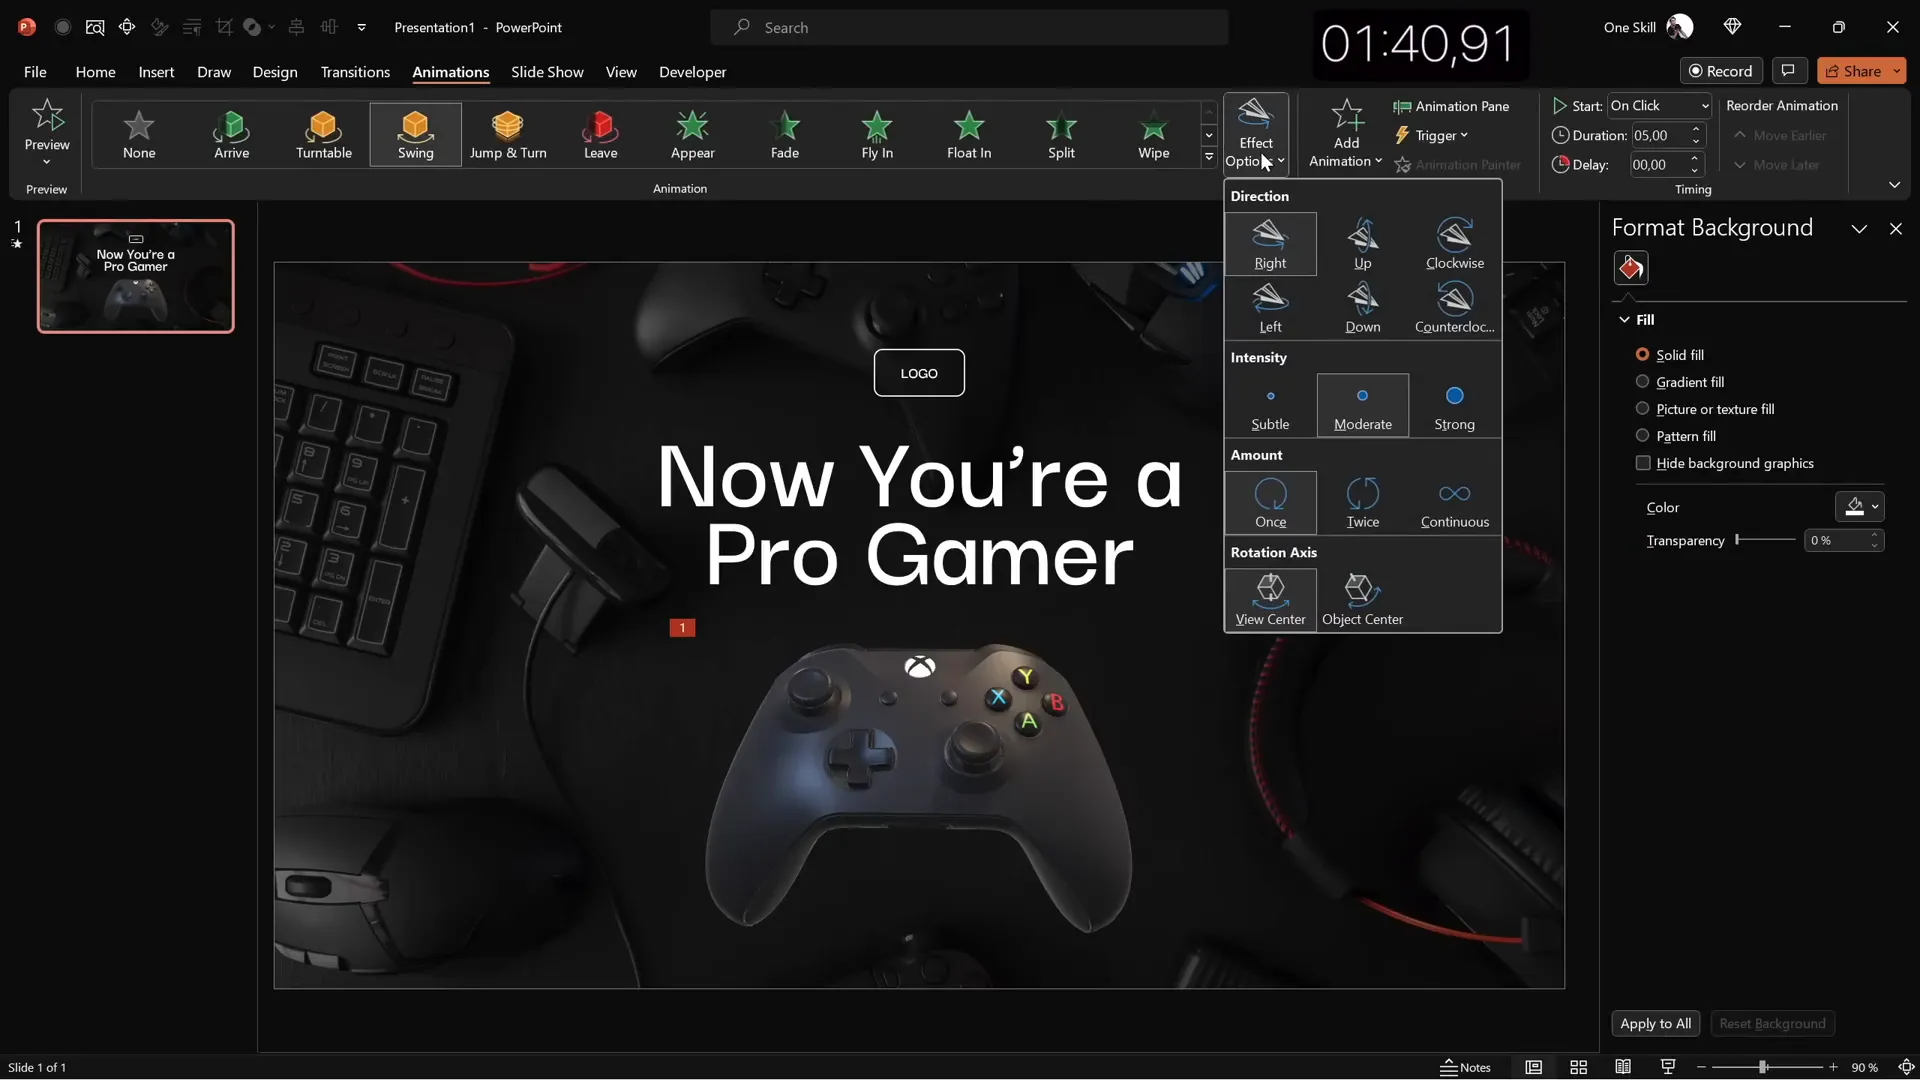
Once all elements are positioned, adjust spacing to ensure a balanced composition. This slide combines visual impact with dynamic animation, setting an exciting tone for your presentation.
Slide 2: Full-Screen Video with Quote and Portrait
The second slide leverages multimedia with a full-screen looping video background and a clean, centered quote. Here’s how to build it:
Step 1: Insert Full-Screen Video
- Search for and insert a looping, abstract dark video from the stock media in PowerPoint.
- Resize the video to cover the entire slide.
Step 2: Reuse Logo and Slide Title
- Copy the logo and slide title from Slide 1 to maintain consistency.
- Align the title to the left and reduce the font size to fit the new layout.
Step 3: Add Quote Text
- Open a pre-made PowerPoint template to copy a sample text passage or write your own quote.
- Paste the quote in the center of the slide, ensuring the formatting matches the title font style.
- Center-align the text box for visual harmony.
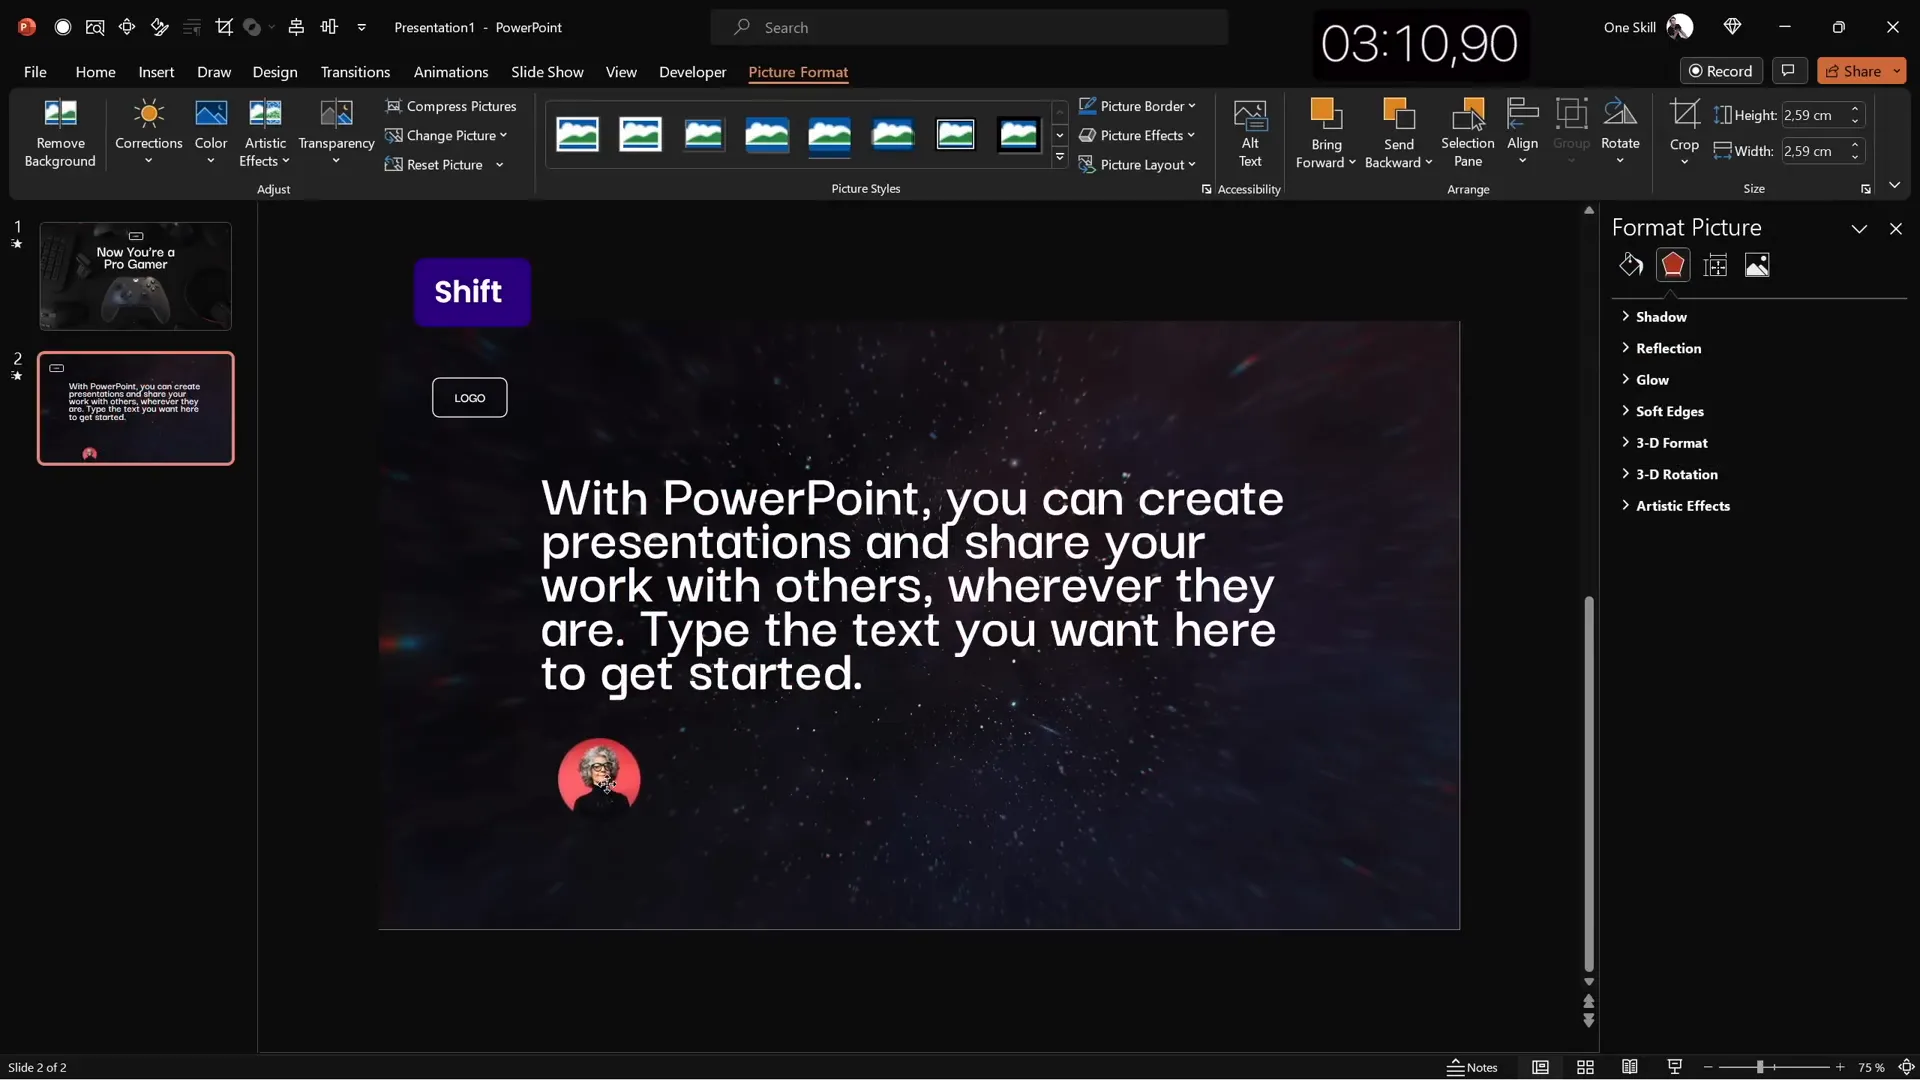
Step 4: Insert Portrait Photo and Author Information
- Add a small portrait photo below the quote.
- Crop the photo to a 1:1 aspect ratio, then crop it into a circle shape.
- Resize the photo proportionally with the Shift key held down.
- Create a text box beneath the photo for the name, surname, and job title (e.g., CEO).
- Use Darker Grotesque Medium font, size 14 pt, with 0.8 line spacing.
- Align the text box and photo centrally for a polished look.
This slide design works well for testimonials, important quotes, or highlighting key messages with a modern video backdrop.
Slide 3: Glassmorphic Effect with Blurred Background
Glassmorphism—a trendy design style—features translucent, frosted glass-like elements over blurred backgrounds. Here’s how to create this effect in PowerPoint:
Step 1: Select and Insert Background Photo
- Choose a high-quality photo, such as an office working scene, to serve as the background.
- Resize the image to cover the entire slide.

Step 2: Create a Blurred Background Copy
- Duplicate the background photo.
- Apply maximum blur effect to the duplicate.
- Copy the blurred image (Ctrl + C), delete the duplicate, and paste the blurred image as the slide background.
- Place the original photo centered over this blurred background.
Step 3: Add Frosted Glass Circle
- Insert a large circle on the left side of the slide.
- Fill the circle with “Slide Background Fill” to create transparency.
- Remove the outline for a clean look.
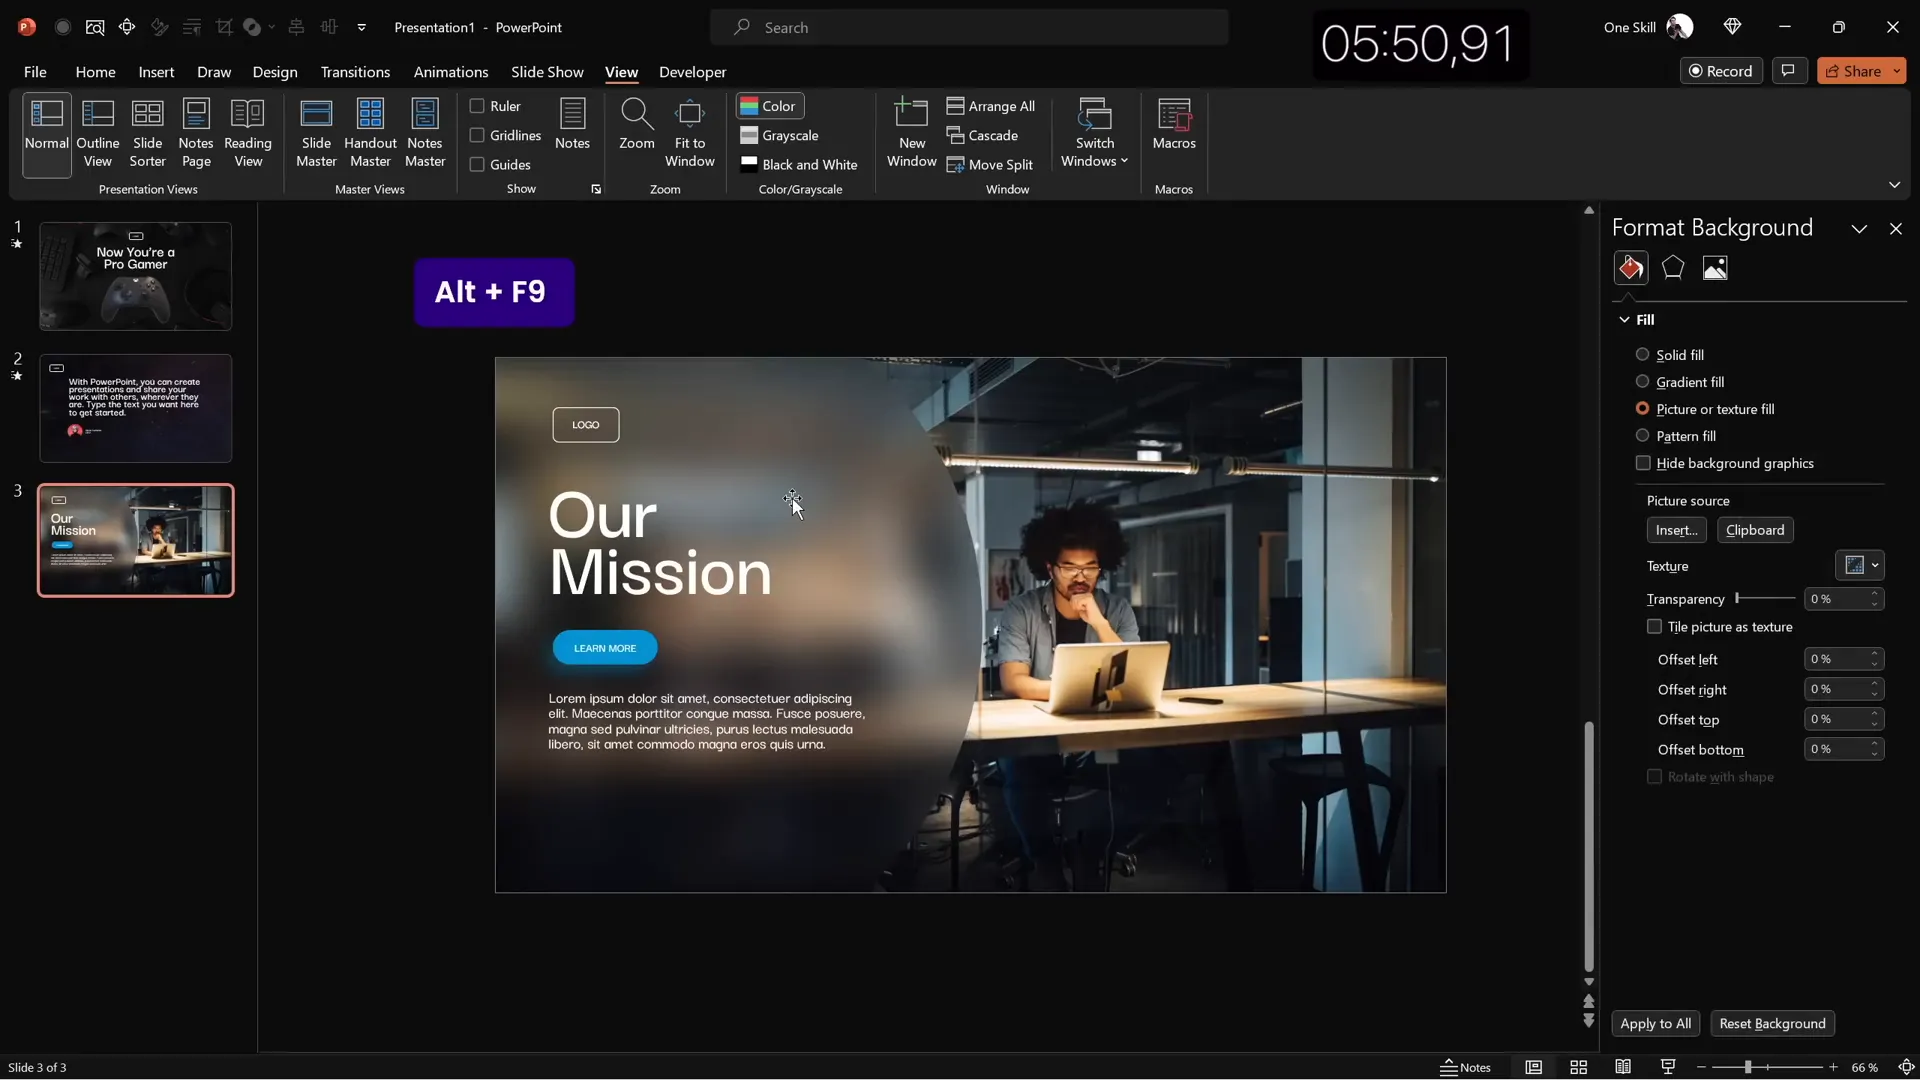
Step 4: Add Text Elements
- Copy the logo and slide title elements from previous slides.
- Align the title and logo to the left.
- Change the slide title to something relevant, e.g., Our Mission.
- Insert a text box for the mission statement or content using the
=lorem(1)formula to generate placeholder text. - Use a smaller font size (16 pt) and adjust line spacing to 0.8 for readability.
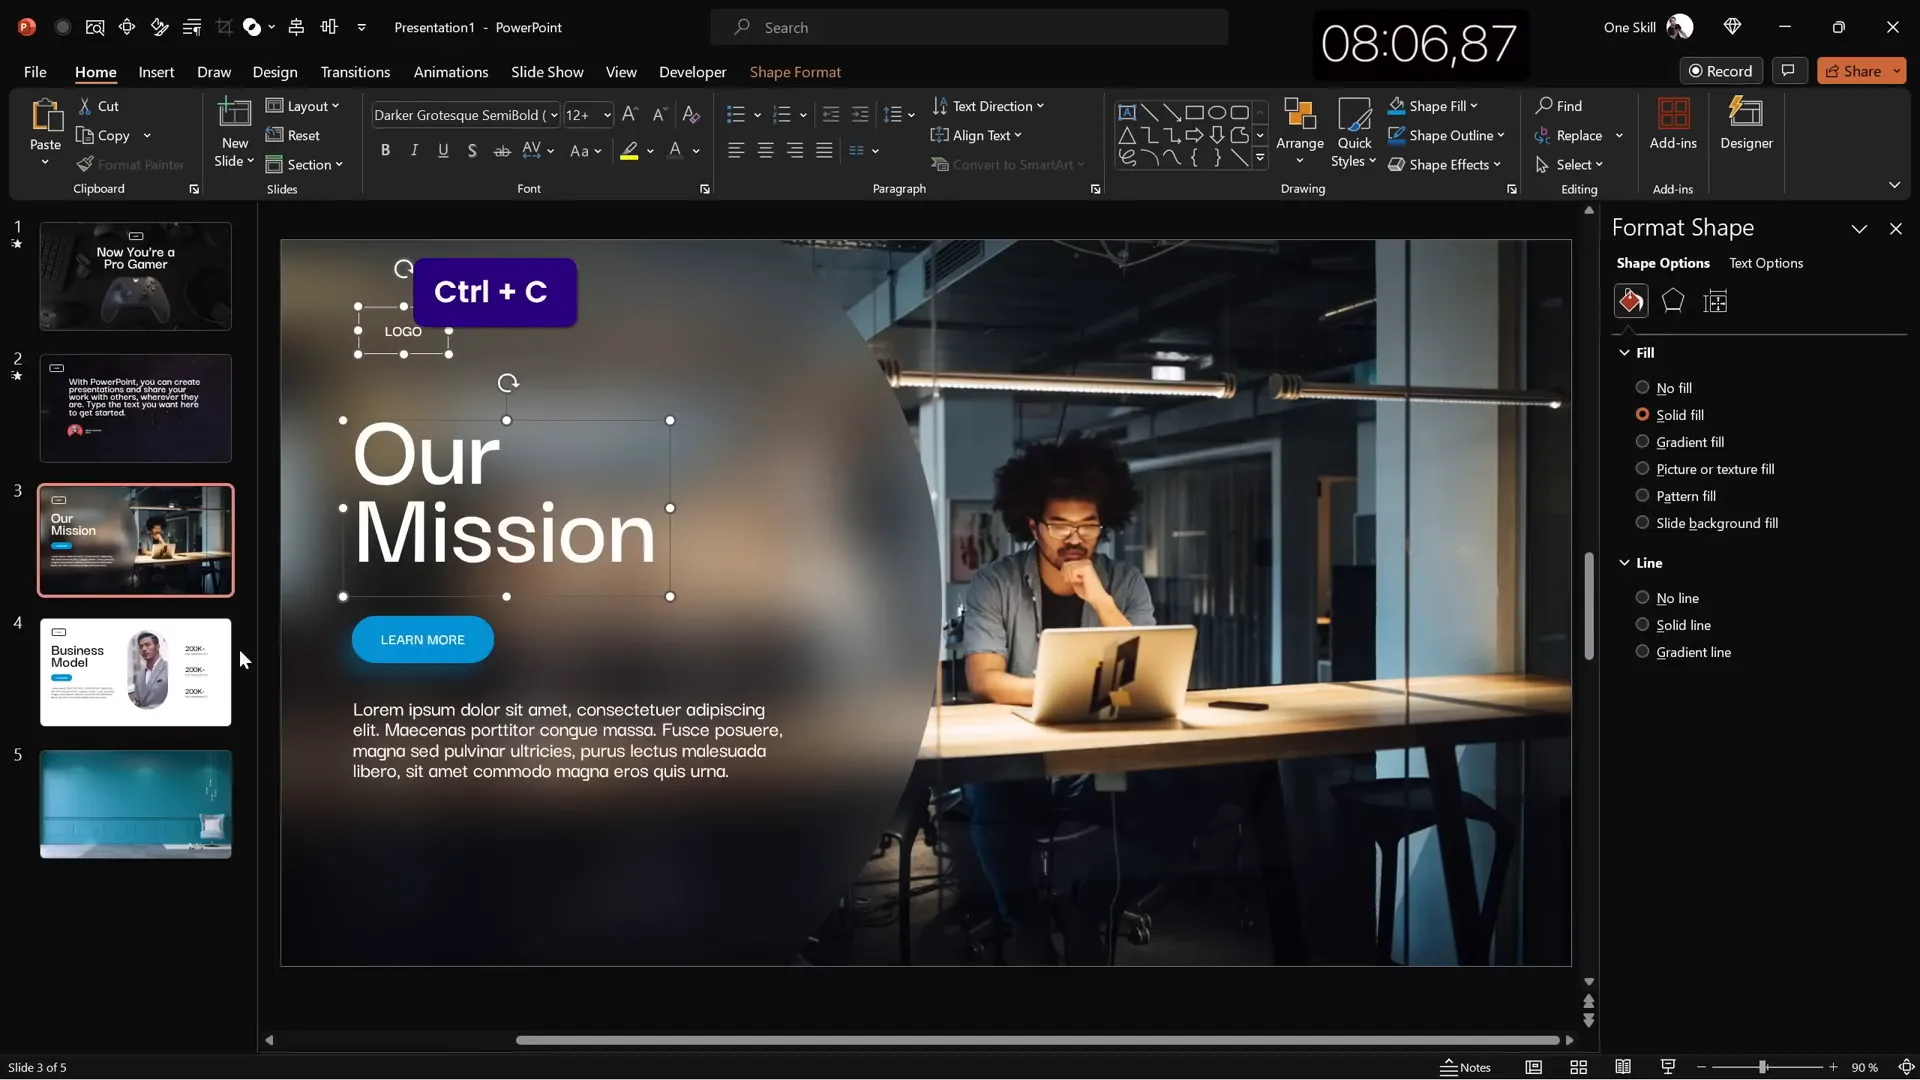
Step 5: Create a Vibrant Button
- Create a button shape (reuse the logo shape).
- Type “Learn More” inside the button.
- Apply a vibrant fill color with no transparency.
- Add a blurred shadow with the same color to give a glowing effect.
- Customize shadow angle, distance, and blur as desired.
The glassmorphic effect lends a modern, sophisticated look to your slide, ideal for mission statements, values, or spotlighting key content.
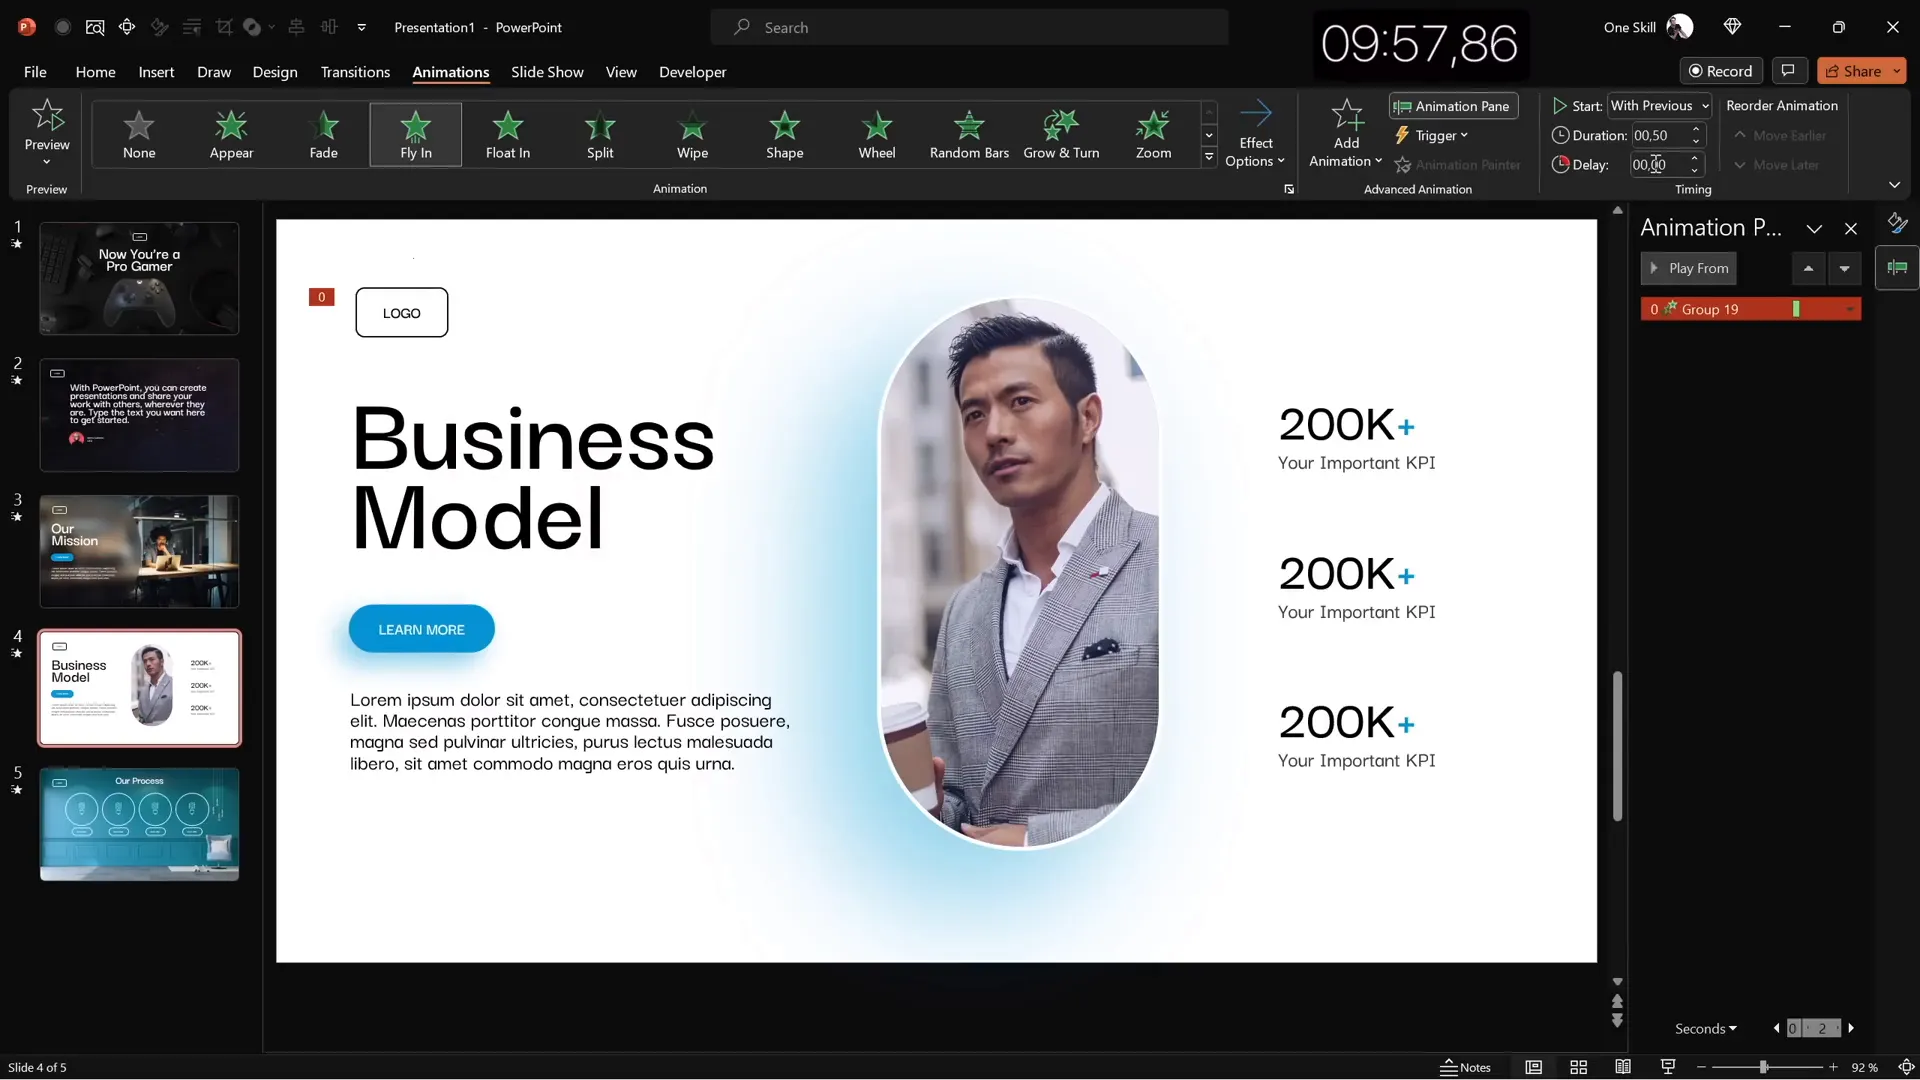
Slide 4: Business Model Slide with Image Placeholder and KPIs
This slide focuses on showcasing a business model with an image placeholder and key performance indicators (KPIs) to quantify success.
Step 1: Reuse Elements and Adjust Colors
- Copy elements from the glassmorphic slide: logo, title, button, and text.
- Change text and logo colors to black for contrast on a lighter background.
- Change the button text to white for readability.
- Update the slide title to Business Model.
Step 2: Insert Rounded Rectangle Image Placeholder
- Insert a large rounded rectangle in the center of the slide.
- Fill the shape with a stock photo, e.g., a man holding a coffee cup.
- Resize and send the photo to the back.
- Select both the photo and the rounded rectangle, then use Merge Shapes > Intersect to crop the photo within the shape.
- Add a subtle white outline (3 pt) to the photo for emphasis.
- Paste a blurred shadow from the button behind the photo for depth.

Step 3: Add KPIs
- Create text boxes for KPIs on the right side of the slide.
- For each KPI, add a bold metric and a lighter description below.
- Use a smaller font size (16 pt) with 0.8 line spacing for descriptions.
- Group each KPI pair into one object for easy duplication.
- Duplicate to create three KPIs, distribute them vertically with equal spacing.
- Align all KPIs and the image for a balanced layout.
This slide is excellent for presenting critical business data with a clean, professional look.
Slide 5: Process Infographic with Icons and Circles
The final slide is a process infographic featuring a series of steps illustrated by circles and icons. This layout is perfect for explaining workflows or stages.
Step 1: Full-Screen Background Photo
- Insert a stock photo with a textured wall or neutral background.
- Resize and crop the photo to fill the slide.
Step 2: Add Slide Title
- Copy elements from previous slides (logo, title).
- Change the slide title to Our Process.
- Center the title near the top of the slide.
- Adjust font size to around 50 pt for space.
Step 3: Create Circles with Icons
- Insert a simple circle shape and style it to match the logo (transparent fill with white outline).
- Search for an icon (e.g., a light bulb) and insert it inside the circle.
- Make sure the icon is white for contrast.
- Group the circle and icon together.
- Add a text box inside or near the circle with labels like “Step 1.”
- Widen the text box to fit the text comfortably.
Step 4: Duplicate and Arrange Steps
- Group the first step elements and duplicate them to create four steps.
- Distribute the steps horizontally with equal spacing.
- Align all elements centrally and adjust vertical position for balance.
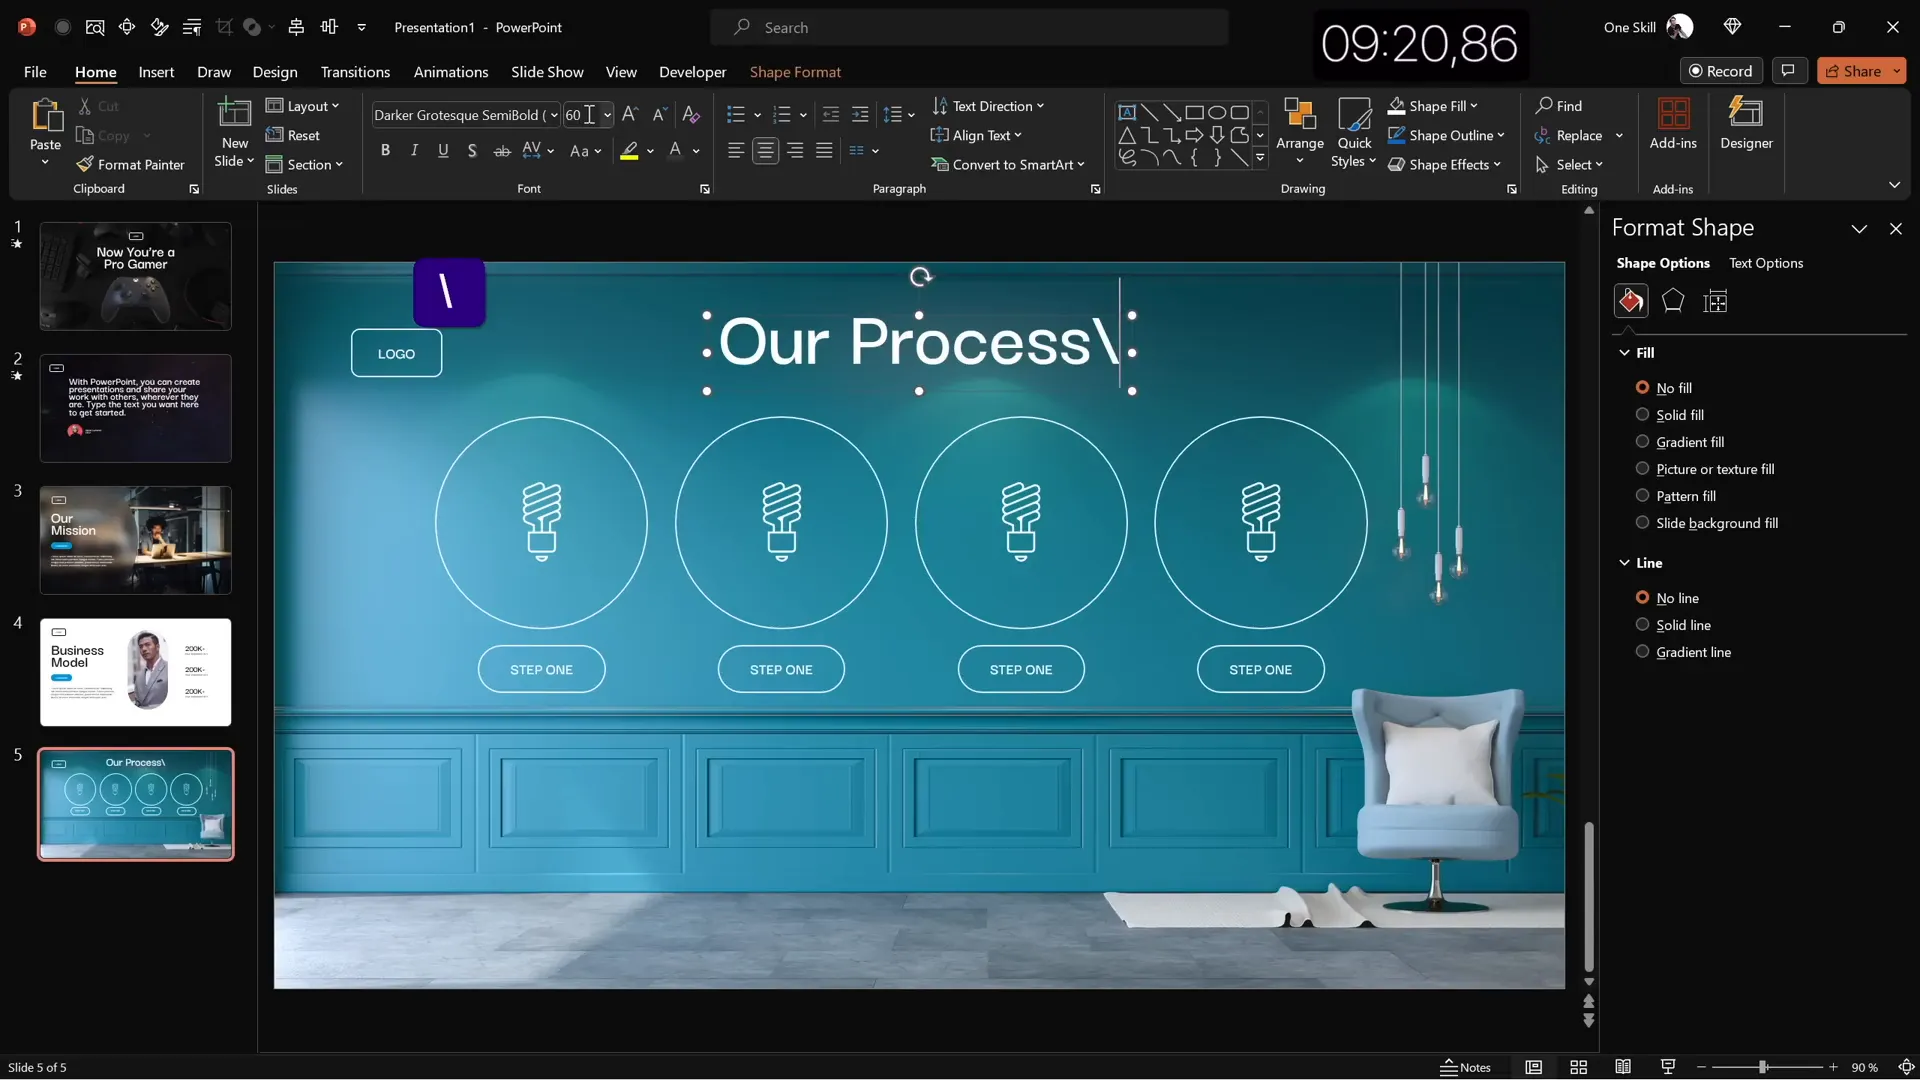
This slide provides a simple yet effective way to visualize a multi-step process in your presentation.
Final Touches: Transitions and Animations
Once all five slides are created, apply transitions and animations to enhance the presentation flow and engagement:
Transitions
- Apply the Fade transition to the first slide.
- Apply the Uncover transition to slides two through five for a smooth reveal effect.
Animations
- For the quote text on Slide 2, add an Appear animation set to start With Previous.
- Animate the quote letters individually by setting the animation to “By Letter” with a delay of 0.03 seconds per letter.
- Group other elements such as logos and text boxes and apply a Fly In animation for dynamic entrance.
These subtle animations add polish without overwhelming your audience.
Frequently Asked Questions
How can I customize the Quick Access Toolbar to speed up my PowerPoint slide design?
Go to the Quick Access Toolbar dropdown and select “More Commands.” Add your frequently used commands like stock photos, insert shapes, or format options. Assign keyboard shortcuts to access them quickly.
What is the glassmorphic effect and how do I create it in PowerPoint?
Glassmorphism involves a blurred background with translucent elements on top. To create it, duplicate your background image, apply maximum blur to the duplicate, set it as the slide background, and place the original image and a transparent shape filled with “Slide Background Fill” on top.
Can I insert 3D models and animations in PowerPoint?
Yes, PowerPoint supports 3D models that can be inserted via Insert > 3D Models. You can also add 3D animations like “Swing” and customize their intensity, duration, and start options to bring your slides to life.
How do I add looping videos as slide backgrounds?
Insert a stock video or your own video file and resize it to cover the entire slide. Set the video to loop by adjusting playback settings so it plays seamlessly during your presentation.
What fonts are recommended for professional PowerPoint slide design?
Darker Grotesque is a clean, modern sans-serif font used in this tutorial. Choose fonts that are legible and professional, avoiding overly decorative or script fonts. Consistency in font choice across slides is key.
How can I quickly generate placeholder text in PowerPoint?
Use the formula =lorem(1) in a text box to generate a paragraph of Lorem Ipsum placeholder text. This is useful for designing layouts before final content is ready.
Conclusion
Creating stunning PowerPoint slide design doesn’t have to be time-consuming or complicated. By customizing your workspace, using stock images and videos, incorporating 3D models, and applying thoughtful animations, you can build beautiful, engaging slides in minutes.
This tutorial demonstrated how to make five diverse slides in just ten minutes, covering themes from gaming to business and process infographics. With practice and the right tools, you can accelerate your design workflow and present like a pro.
For more inspiration, be sure to check out videos by Louis and Slide Skills, who inspired this challenge. You can also download these slides and many others from the creator’s Patreon page, and consider mastering PowerPoint animations through dedicated courses.
Try these techniques for your next presentation and watch your slides transform into impactful storytelling tools!
Stay happy, stay healthy, and happy designing!


